
Shock Absorber Replacement: Step-by-Step Guide

Shock Absorber Replacement: Step-by-Step Guide

Shock Absorber Replacement: A Complete DIY Guide to Choosing, Swapping, and Testing Your Struts

Shock absorbers are the unsung heroes of your vehicle’s suspension system—hydraulic or gas-charged cylinders that convert the kinetic energy of your springs’ bouncing motion into heat, damping oscillation and keeping your tires planted on the road. Without them, your car would pogo down the highway, losing traction in corners and extending braking distances. They are not the same as struts, though the terms are often used interchangeably: a strut is a structural load-bearing component that combines a shock absorber with a coil spring and a mounting assembly, while a shock absorber is a standalone damping unit. Understanding this distinction is the first step toward a successful replacement.

This guide covers the full lifecycle of shock absorber replacement—how to diagnose worn units, choose between OEM and aftermarket options, gather the right tools, swap them out in your driveway, and verify the installation with a proper test drive. We’ll dive into the key attributes that matter when you’re shopping: damping force ratings, gas vs. hydraulic design, price points from budget to premium, and the materials (steel, chrome-plated rods, and polyurethane bushings) that determine longevity. You’ll also learn which suspension components—like sway bar links and coil springs—you should inspect while you’re in there, because replacing shocks without addressing a broken spring is a half-done job.

What makes this guide different is the honest, data-driven approach. We’re not just going to tell you “replace your shocks every 50,000 miles”—we’ll show you how to measure wear with a bounce test, interpret the 50,000-mile rule in the context of your driving habits, and compare real-world cost breakdowns for a DIY swap versus a shop install. You’ll get a decision framework for choosing between twin-tube and monotube designs, and we’ll flag the limitations of DIY replacement—like why you should never compress a coil spring without the right tool. By the end, you’ll have the confidence to tackle this project yourself and know exactly when to call a professional.

What Is Shock Absorber Replacement and Why It Matters
What Is Shock Absorber Replacement and Why It Matters - shock absorber replacement

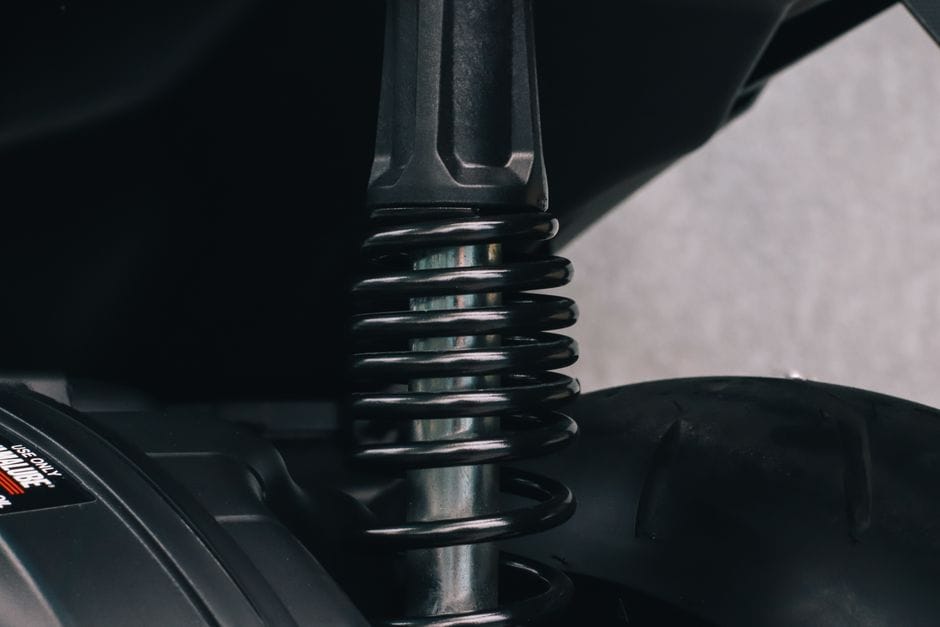
Shock absorber replacement means removing worn dampers and installing new ones. It is a core part of the suspension system. When you replace shocks, you restore the vehicle’s ride quality, handling, and braking stability. The job matters because worn shocks do not fail suddenly like a brake line. They degrade slowly, and drivers adapt without noticing the loss of control until a panic stop or emergency lane change exposes the danger. Replacing them proactively keeps the tires in contact with the pavement, reduces stopping distances, and prevents premature wear on tires, bushings, and other suspension parts.

Shock Absorbers vs. Struts: Know the Difference

Shock absorbers are standalone damping units that control spring oscillation. Struts, by contrast, are structural components that serve as a mounting point for the vehicle’s suspension and steering system, incorporating the shock, coil spring, and upper mount into a single assembly. Vehicles with struts (typically front-wheel-drive cars) require strut assembly replacement, while vehicles with a separate shock and spring setup (common on trucks and rear suspensions) allow you to replace just the shock. Knowing which system your vehicle uses determines the parts you buy and the complexity of the job.

How Shocks Work: Damping, Rebound, and Compression

Shocks work by forcing hydraulic fluid through small orifices as the piston moves inside the cylinder. On the compression stroke, the shock resists the spring compressing; on the rebound stroke, it controls the spring’s extension. This dual-action damping converts kinetic energy into heat, which dissipates through the shock body. The damping force is tuned by the size of the orifices and the viscosity of the fluid, and it’s what keeps your tires glued to the road over bumps and through corners. Gas-charged shocks use pressurized nitrogen to reduce fluid foaming and improve response, while hydraulic shocks rely solely on fluid dynamics.

7 Warning Signs You Need a Shock Absorber Replacement
7 Warning Signs You Need a Shock Absorber Replacement - shock absorber replacement

Visual Inspection: Leaks, Dents, and Mount Damage

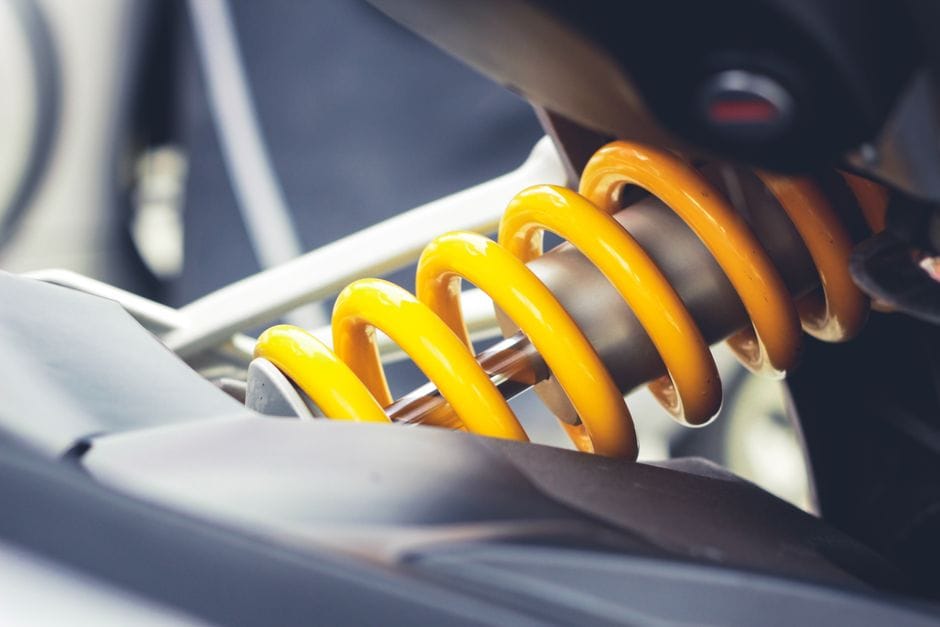
Start with a visual inspection. Look for fluid streaks running down the shock body—a sign the internal seals have failed and the damping fluid is leaking out. Check for dents, rust pitting, or bent piston rods. Inspect the mounting bushings and rubber grommets for cracks, dry rot, or excessive play. If the shock body is oily and coated with road grime, that’s a leak. If you see bare metal where the paint has worn off, the shock may have been bottoming out. Any of these signs means the shock is compromised and needs replacement.

The Bounce Test: How to Check Damping at Home

Park on a level surface, push down firmly on one corner of the vehicle, and release. A healthy shock should return the car to its resting position and stop within one and a half bounces. If the car continues to bounce two or three times before settling, the shock has lost its damping ability. Repeat the test on all four corners. Note that the bounce test is less reliable on vehicles with very stiff springs or heavy-duty suspension, but it’s a quick and effective first check for most passenger cars.

Tire Wear Patterns That Point to Worn Shocks

Worn shocks allow the tire to bounce and lose contact with the road, causing uneven wear patterns. Look for cupping or scalloping—a series of flat spots around the tire’s circumference—which indicates the tire is bouncing and slapping the pavement. Feathering (smooth on one side, sharp on the other) can also point to suspension issues. If you see these patterns, especially on both tires of the same axle, it’s a strong signal that the shocks on that axle are failing and need replacement before they destroy your new tires.

Excessive Body Roll and Nose Dive

If the vehicle leans heavily into corners, sways in crosswinds, or dives forward under hard braking, the shocks are not controlling body motion. This is both a comfort issue and a safety issue—excessive body roll reduces tire contact patch and can lead to loss of control in emergency maneuvers. Pay attention to how the car feels during highway lane changes and off-ramps. A well-damped vehicle stays flat and composed; a worn one feels floaty and unstable.

Noise: Clunking, Rattling, and Knocking

Listen for clunking, rattling, or knocking sounds coming from the suspension when driving over bumps or rough roads. These noises often indicate loose or worn mounting hardware, broken bushings, or internal shock damage. A shock with a loose piston rod or a broken mount will make a metallic clunk on every bump. If you hear these sounds, inspect the shock mounts and bushings immediately—driving with a loose shock can damage the mounting points on the vehicle body.

Increased Stopping Distance

Worn shocks allow the rear of the vehicle to lift under hard braking, transferring weight to the front axle and reducing rear tire traction. This increases stopping distance and can cause the rear end to feel unstable or even skid. If you notice the vehicle’s nose diving excessively under braking or the rear feeling light, the shocks are not controlling weight transfer. This is a critical safety concern that warrants immediate replacement.

Mileage and Age: The 50,000-Mile Rule

Most manufacturers recommend replacing shocks every 50,000 miles, but this is a guideline, not a hard rule. Driving habits, road conditions, and vehicle load all affect shock life. If you frequently drive on rough roads, carry heavy loads, or tow, your shocks will wear faster. Conversely, a highway commuter on smooth roads may get 80,000 miles or more. Use the 50,000-mile mark as a trigger to inspect your shocks thoroughly, not as an automatic replacement deadline.

Tools and Safety Equipment Required for the Job

Tools and Safety Equipment Required for the Job - shock absorber replacement

Essential Tools: Wrenches, Sockets, and Breaker Bars

You’ll need a socket set with both metric and standard sizes, a torque wrench for proper fastener tightening, a breaker bar for stubborn bolts, and a set of combination wrenches. Penetrating oil (like WD-40 or PB Blaster) is essential for loosening rusted fasteners
. A jack and jack stands are non-negotiable for safely lifting and supporting the vehicle. You’ll also need a spring compressor if you’re working with struts, as compressing a coil spring without the proper tool is extremely dangerous. A pry bar can help separate stubborn components, and a wire brush will clean corrosion off mounting points before reassembly.

Safety Gear: Gloves, Eye Protection, and Jack Stands

Never work under a vehicle supported only by a floor jack—always use jack stands rated for your vehicle’s weight. Wear heavy-duty work gloves to protect your hands from sharp edges and hot components, and safety glasses to shield your eyes from debris, rust, and penetrating oil spray. If you’re working with a spring compressor, exercise extreme caution: a compressed spring stores enormous energy and can cause severe injury or death if released unexpectedly. Work on a flat, level surface and chock the wheels that remain on the ground.

Step-by-Step Shock Absorber Replacement Procedure

Step-by-Step Shock Absorber Replacement Procedure - shock absorber replacement

Preparation: Lifting the Vehicle and Removing the Wheel

Loosen the lug nuts on the wheel you’re working on while the vehicle is still on the ground, then lift the vehicle with a floor jack and secure it on jack stands. Remove the wheel and set it aside. Clean the area around the shock mounts with a wire brush to remove dirt and corrosion that could interfere with the job. Spray penetrating oil on all fasteners and let it soak for 10-15 minutes before attempting to loosen anything.

Removing the Old Shock Absorber

For a standalone shock absorber, locate the upper and lower mounting bolts. Support the lower control arm or axle with a jack to relieve tension on the suspension, then remove the lower bolt first, followed by the upper mounting nuts. For struts, you’ll need to remove the strut assembly as a unit—this typically involves removing the upper mount nuts under the hood, the lower bolts connecting the strut to the steering knuckle, and possibly the brake line bracket. Use a spring compressor if you’re disassembling the strut, or replace the entire pre-assembled strut unit to avoid spring compression altogether.

Installing the New Shock Absorber

Compare the new shock to the old one to confirm it’s the correct part. Extend the new shock to its full length and allow it to self-bleed by pumping it slowly a few times while inverted. Install the new shock in the reverse order of removal, starting with the upper mount and then the lower bolt. Torque all fasteners to the manufacturer’s specifications—this is critical, as under-tightening leads to noise and premature wear, while over-tightening can strip threads or damage bushings. Reinstall the wheel, lower the vehicle, and repeat the process on the other side.

Torque Specifications and Fastener Types

Torque Specifications and Fastener Types

Torque specifications vary by vehicle make and model, so always consult your service manual. Common ranges include 15-25 ft-lbs for upper strut mount nuts, 40-60 ft-lbs for lower strut-to-knuckle bolts, and 80-120 ft-lbs for shock absorber mounting bolts on trucks and SUVs. Use new fasteners if the old ones are rusted or damaged, and apply thread-locking compound to any fastener that the manufacturer specifies. Never guess at torque—use a calibrated torque wrench for every critical fastener.

Shock vs. Strut: Which Replacement Do You Need?

Shock vs. Strut: Which Replacement Do You Need? - shock absorber replacement

Determining whether your vehicle uses shocks or struts is the first decision in the replacement process. Shocks are standalone components that only dampen spring motion—they’re common on trucks, SUVs with body-on-frame construction, and the rear axles of many sedans. Struts are structural components that support the vehicle’s weight and serve as a pivot point for the steering system—they’re standard on the front of most modern front-wheel-drive cars. If your vehicle has struts, you have two options: replace just the strut cartridge (if the spring and mount are in good condition) or replace the entire pre-assembled strut unit. The latter is more expensive but significantly faster and safer, as it eliminates the need to compress the coil spring.

Cost Breakdown: DIY vs. Professional Installation

Cost Breakdown: DIY vs. Professional Installation - shock absorber replacement

Parts Cost: OEM vs. Aftermarket Pricing

Shock absorber prices range from $30 to $150 per corner for aftermarket units, while OEM parts typically cost $80 to $250 per corner. Premium monotube shocks from brands like Bilstein or Koni can run $150 to $300 each. Pre-assembled strut units cost more—typically $150 to $400 per corner—but save labor time and eliminate the need for a spring compressor. Budget for new mounting hardware, bushings, and possibly sway bar links while you’re in there, adding $20 to $60 per corner.

Labor Cost: What a Shop Will Charge

Professional installation typically runs $150 to $400 per axle, depending on the vehicle and the complexity of the job. Labor rates average $100 to $150 per hour, and a standard shock replacement takes 1-2 hours per axle. Strut replacement takes longer—2-3 hours per axle—because of the additional disassembly and the need for a wheel alignment afterward. A full four-corner replacement at a shop can easily total $800 to $1,500 including parts and labor.

DIY Savings and Hidden Costs

Doing the job yourself saves the labor cost, typically $200 to $600 on a four-corner replacement. However, you’ll need to invest in tools if you don’t already own them—a torque wrench ($30-$80), spring compressor ($30-$50), and jack stands ($40-$80) are the main purchases. You’ll also need to budget for a wheel alignment after replacing struts, which runs $80-$120. Factor in your time and the risk of mistakes—a botched installation can damage the new parts or create safety hazards.

Choosing the Right Shocks: Twin-Tube vs. Monotube, Gas vs. Hydraulic

Choosing the Right Shocks: Twin-Tube vs. Monotube, Gas vs. Hydraulic - shock absorber replacement

Twin-Tube vs. Monotube Design

Twin-tube shocks feature an inner working cylinder and an outer reserve tube, making them more affordable and providing a smoother ride for daily driving. They’re well-suited for passenger cars and light trucks. Monotube shocks use a single cylinder with a floating piston separating the oil from pressurized gas, offering better heat dissipation and more consistent damping under hard use. They’re preferred for performance driving, towing, and off-road applications. For most drivers, twin-tube shocks offer the best value; for enthusiasts or heavy-duty users, monotube is worth the premium.

Gas-Charged vs. Hydraulic

Gas-charged shocks use pressurized nitrogen to prevent fluid foaming at high temperatures, which maintains consistent damping performance. They also provide a firmer, more responsive ride and can support slightly more vehicle weight. Hydraulic shocks are simpler and cheaper but are more prone to fading during sustained hard use. For daily driving, gas-charged shocks are the better choice—they offer improved control with minimal cost increase. If you’re on a tight budget and drive gently, hydraulic shocks will still provide adequate performance.

Brand Recommendations and Quality Indicators

Reputable brands include Monroe, KYB, Gabriel, Bilstein, and Koni. Monroe and Gabriel offer budget-friendly options with good reliability for daily drivers. KYB is a popular OEM supplier with a strong aftermarket presence. Bilstein and Koni are premium brands known for performance and durability—they cost more but often last longer and provide better damping control. Look for shocks with chrome-plated piston rods, polyurethane bushings, and a corrosion-resistant finish. Check the warranty—most quality shocks come with a limited lifetime warranty.

Post-Installation Testing and Break-In Procedure

Post-Installation Testing and Break-In Procedure - shock absorber replacement

Initial Inspection and Torque Check

After the installation, perform a thorough visual inspection of all fasteners and mounting points. Verify that every bolt is torqued to specification and that no tools or debris are left in the engine bay or suspension area. Check that the shock boots and bump stops are properly seated and that the brake lines and ABS sensor wires are routed clear of moving parts. If you replaced struts, confirm that the upper mount nuts are fully seated and that the strut piston rod is not contacting the body or tower.

Break-In Procedure: What to Expect

New shocks require a break-in period of 500 to 1,000 miles to reach their full damping performance. During this time, the internal seals and valving will settle, and the ride may feel slightly firmer or stiffer than expected. Avoid aggressive driving, hard cornering, and heavy loads during the first 100 miles. Some shocks may emit a slight odor or make a faint hissing sound as they purge air—this is normal. If you notice excessive noise, leaking fluid, or a harsh ride after the break-in period, have the installation inspected.

Test Drive: What to Listen and Feel For

Take the vehicle for a test drive on a variety of road surfaces. Start with smooth roads to confirm the ride is stable and composed. Then drive over rough pavement and speed bumps to check for clunking, rattling, or bottoming out. Pay attention to body roll in corners, nose dive under braking, and rear squat under acceleration. The vehicle should feel planted and controlled, with no excessive bouncing after bumps. Test the steering response—it should feel sharper and more direct than before. If anything feels off, re-check the installation and torque specifications.

Wheel Alignment After Replacement

If you replaced struts or any component that affects the steering knuckle or suspension geometry, a wheel alignment is mandatory. Replacing shocks alone does not typically require an alignment, but strut replacement changes the camber and caster angles. Drive to an alignment shop and have the front and rear alignment checked and adjusted to factory specifications. This ensures even tire wear, straight-line stability, and proper handling. Skipping the alignment can lead to premature tire wear and poor steering feel.

Related Suspension Components to Inspect While You’re In There

Related Suspension Components to Inspect While You're In There - shock absorber replacement

Sway Bar Links and Bushings

Sway bar links connect the anti-roll bar to the suspension arms and are common failure points. Inspect them for worn ball joints, cracked boots, and excessive play. If they’re loose or damaged, replace them while the suspension is apart—they’re inexpensive and easy to swap. Also check the sway bar bushings where the bar mounts to the frame; worn bushings cause clunking noises and reduced roll control.

Coil Springs and Mounts

Inspect the coil springs for cracks, rust, or broken coils. A broken spring will cause the vehicle to sit unevenly and can damage the new shock. Check the spring seats and isolators for wear. If you’re replacing struts, consider replacing the upper strut mounts and bearings at the same time—they wear out and can cause noise and misalignment. The cost is minimal compared to doing the job twice.

Control Arm Bushings and Ball Joints

While the suspension is disassembled, check the control arm bushings for cracks, tears, or excessive movement. Worn bushings cause vague steering and uneven tire wear. Ball joints should be checked for play by prying on the control arm—if there’s any movement, they need replacement. These components are critical to suspension geometry and safety, so address any issues before completing the job.

Brake Components and Lines

Inspect the brake pads, rotors, and calipers while the wheels are off. Check brake lines for cracks, bulges, or rubbing against suspension components. If the brake lines are routed near the shock or strut, ensure they’re properly secured and not pinched. This is also a good time to check the brake fluid level and condition. Addressing brake issues while the suspension is apart saves time and labor later.

Common Mistakes to Avoid During Shock Absorber Replacement

Common Mistakes to Avoid During Shock Absorber Replacement - shock absorber replacement

Not Torquing Fasteners to Specification

Guessing at torque is one of the most common DIY mistakes. Under-tightened bolts can loosen over time, causing noise and premature wear. Over-tightened bolts can strip threads, damage bushings, or break the fastener. Always use a calibrated torque wrench and consult your service manual for the correct specifications. If you don’t have the manual, many manufacturers publish torque specs online.

Replacing Shocks on Only One Side

Shocks wear at the same rate on both sides of an axle. Replacing only one side creates an imbalance—the new shock will damp differently than the worn one, causing uneven handling and potential safety issues. Always replace shocks in pairs (both front or both rear), and ideally all four at once if they’re all the same age and mileage.

Compressing Coil Springs Without Proper Tools

Attempting to compress a coil spring with improvised tools is extremely dangerous. A compressed spring stores enormous energy and can launch with lethal force if it slips. Use a proper spring compressor designed for automotive coil springs, or avoid the risk entirely by purchasing pre-assembled strut units. If you’re not confident using a spring compressor, take the assembly to a professional.

Ignoring the Need for a Wheel Alignment

Replacing struts changes the suspension geometry, and skipping the alignment will cause uneven tire wear and poor handling. Even if the vehicle seems to drive straight, the camber and toe angles may be off. Always schedule a wheel alignment after strut replacement. For shock-only replacements, an alignment is typically not required, but it’s worth checking if the vehicle pulled or drifted before the job.

Frequently Asked Questions About Shock Absorber Replacement

Frequently Asked Questions About Shock Absorber Replacement - shock absorber replacement

How Long Do Shock Absorbers Last?

Most shocks last between 50,000 and 100,000 miles, depending on driving conditions, vehicle load, and road quality. Aggressive driving, frequent off-road use, and heavy towing accelerate wear. Regular inspection every 20,000 miles can help you catch worn shocks before they cause damage to other suspension components.

Can I Replace Shocks Myself?

Yes, if you have basic mechanical skills, the right tools, and a safe workspace. Shock replacement on vehicles with separate springs is a straightforward DIY job. Strut replacement is more complex and requires a spring compressor or pre-assembled units. If you’re not comfortable working with suspension components or lack the proper tools, professional installation is a safer choice.

What Happens If I Don’t Replace Worn Shocks?

Driving with worn shocks compromises safety and accelerates wear on other components. You’ll experience longer braking distances, reduced traction in corners, and increased tire wear. The vehicle may become unstable at highway speeds, especially in crosswinds or during emergency maneuvers. Worn shocks also cause premature wear on bushings, ball joints, and tires, leading to more expensive repairs down the road.

Do I Need to Replace All Four Shocks at Once?

It’s recommended to replace shocks in axle pairs (both front or both rear) to maintain balanced handling. Replacing all four at once is ideal if they’re all the same age and mileage, but it’s not strictly necessary. If the front shocks are worn but the rear shocks are relatively new, you can replace just the front pair.

Are Premium Shocks Worth the Extra Cost?

Are Premium Shocks Worth the Extra Cost?

Premium shocks from brands like Bilstein and Koni offer better damping control, longer lifespan, and improved performance under hard use. They’re worth the investment if you drive aggressively, tow heavy loads, or want the best possible ride quality. For daily commuting on smooth roads, mid-range shocks from Monroe or KYB provide excellent value and reliability.

Conclusion: Final Checklist and When to Call a Professional

Conclusion: Final Checklist and When to Call a Professional - shock absorber replacement

Shock absorber replacement is a rewarding DIY project that restores your vehicle’s ride quality, handling, and safety. Before you start, confirm whether your vehicle uses shocks or struts, gather

Shock Absorber Replacement: A Complete DIY Guide to Choosing, Swapping, and Testing Your Struts

Shock absorbers are the unsung heroes of your vehicle’s suspension system—hydraulic or gas-charged cylinders that convert the kinetic energy of your springs’ bouncing motion into heat, damping oscillation and keeping your tires planted on the road. Without them, your car would pogo down the highway, losing traction in corners and extending braking distances. They are not the same as struts, though the terms are often used interchangeably: a strut is a structural load-bearing component that combines a shock absorber with a coil spring and a mounting assembly, while a shock absorber is a standalone damping unit. Understanding this distinction is the first step toward a successful replacement.

This guide covers the full lifecycle of shock absorber replacement—how to diagnose worn units, choose between OEM and aftermarket options, gather the right tools, swap them out in your driveway, and verify the installation with a proper test drive. We’ll dive into the key attributes that matter when you’re shopping: damping force ratings, gas vs. hydraulic design, price points from budget to premium, and the materials (steel, chrome-plated rods, and polyurethane bushings) that determine longevity. You’ll also learn which suspension components—like sway bar links and coil springs—you should inspect while you’re in there, because replacing shocks without addressing a broken spring is a half-done job.

What makes this guide different is the honest, data-driven approach. We’re not just going to tell you “replace your shocks every 50,000 miles”—we’ll show you how to measure wear with a bounce test, interpret the 50,000-mile rule in the context of your driving habits, and compare real-world cost breakdowns for a DIY swap versus a shop install. You’ll get a decision framework for choosing between twin-tube and monotube designs, and we’ll flag the limitations of DIY replacement—like why you should never compress a coil spring without the right tool. By the end, you’ll have the confidence to tackle this project yourself and know exactly when to call a professional.

What Is Shock Absorber Replacement and Why It Matters

What Is Shock Absorber Replacement and Why It Matters - shock absorber replacement

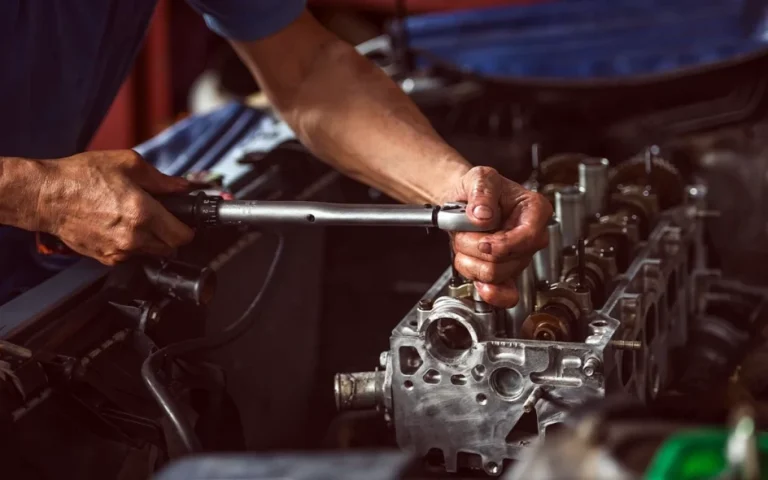
Shock absorber replacement means removing worn dampers and installing new ones. It is a core part of the suspension system. When you replace shocks, you restore the vehicle’s ride quality, handling, and braking stability. The job matters because worn shocks do not fail suddenly like a brake line. They degrade slowly, and drivers adapt without noticing the loss of control until a panic stop or emergency lane change exposes the danger. Replacing them proactively keeps the tires in contact with the pavement, reduces stopping distances, and prevents premature wear on tires, bushings, and other suspension parts.

Shock Absorbers vs. Struts: Know the Difference

Shock absorbers are standalone damping units that control spring oscillation. Struts, by contrast, are structural components that serve as a mounting point for the vehicle’s suspension and steering system, incorporating the shock, coil spring, and upper mount into a single assembly. Vehicles with struts (typically front-wheel-drive cars) require strut assembly replacement, while vehicles with a separate shock and spring setup (common on trucks and rear suspensions) allow you to replace just the shock. Knowing which system your vehicle uses determines the parts you buy and the complexity of the job.

How Shocks Work: Damping, Rebound, and Compression

Shocks work by forcing hydraulic fluid through small orifices as the piston moves inside the cylinder. On the compression stroke, the shock resists the spring compressing; on the rebound stroke, it controls the spring’s extension. This dual-action damping converts kinetic energy into heat, which dissipates through the shock body. The damping force is tuned by the size of the orifices and the viscosity of the fluid, and it’s what keeps your tires glued to the road over bumps and through corners. Gas-charged shocks use pressurized nitrogen to reduce fluid foaming and improve response, while hydraulic shocks rely solely on fluid dynamics.

7 Warning Signs You Need a Shock Absorber Replacement

7 Warning Signs You Need a Shock Absorber Replacement - shock absorber replacement

Visual Inspection: Leaks, Dents, and Mount Damage

Start with a visual inspection. Look for fluid streaks running down the shock body—a sign the internal seals have failed and the damping fluid is leaking out. Check for dents, rust pitting, or bent piston rods. Inspect the mounting bushings and rubber grommets for cracks, dry rot, or excessive play. If the shock body is oily and coated with road grime, that’s a leak. If you see bare metal where the paint has worn off, the shock may have been bottoming out. Any of these signs means the shock is compromised and needs replacement.

The Bounce Test: How to Check Damping at Home

Park on a level surface, push down firmly on one corner of the vehicle, and release. A healthy shock should return the car to its resting position and stop within one and a half bounces. If the car continues to bounce two or three times before settling, the shock has lost its damping ability. Repeat the test on all four corners. Note that the bounce test is less reliable on vehicles with very stiff springs or heavy-duty suspension, but it’s a quick and effective first check for most passenger cars.

Tire Wear Patterns That Point to Worn Shocks

Worn shocks allow the tire to bounce and lose contact with the road, causing uneven wear patterns. Look for cupping or scalloping—a series of flat spots around the tire’s circumference—which indicates the tire is bouncing and slapping the pavement. Feathering (smooth on one side, sharp on the other) can also point to suspension issues. If you see these patterns, especially on both tires of the same axle, it’s a strong signal that the shocks on that axle are failing and need replacement before they destroy your new tires.

Excessive Body Roll and Nose Dive

If the vehicle leans heavily into corners, sways in crosswinds, or dives forward under hard braking, the shocks are not controlling body motion. This is both a comfort issue and a safety issue—excessive body roll reduces tire contact patch and can lead to loss of control in emergency maneuvers. Pay attention to how the car feels during highway lane changes and off-ramps. A well-damped vehicle stays flat and composed; a worn one feels floaty and unstable.

Noise: Clunking, Rattling, and Knocking

Listen for clunking, rattling, or knocking sounds coming from the suspension when driving over bumps or rough roads. These noises often indicate loose or worn mounting hardware, broken bushings, or internal shock damage. A shock with a loose piston rod or a broken mount will make a metallic clunk on every bump. If you hear these sounds, inspect the shock mounts and bushings immediately—driving with a loose shock can damage the mounting points on the vehicle body.

Increased Stopping Distance

Worn shocks allow the rear of the vehicle to lift under hard braking, transferring weight to the front axle and reducing rear tire traction. This increases stopping distance and can cause the rear end to feel unstable or even skid. If you notice the vehicle’s nose diving excessively under braking or the rear feeling light, the shocks are not controlling weight transfer. This is a critical safety concern that warrants immediate replacement.

Mileage and Age: The 50,000-Mile Rule

Most manufacturers recommend replacing shocks every 50,000 miles, but this is a guideline, not a hard rule. Driving habits, road conditions, and vehicle load all affect shock life. If you frequently drive on rough roads, carry heavy loads, or tow, your shocks will wear faster. Conversely, a highway commuter on smooth roads may get 80,000 miles or more. Use the 50,000-mile mark as a trigger to inspect your shocks thoroughly, not as an automatic replacement deadline.

Tools and Safety Equipment Required for the Job

Tools and Safety Equipment Required for the Job - shock absorber replacement

Essential Tools: Wrenches, Sockets, and Breaker Bars

Essential Tools: Details

You’ll need a socket set with both metric and standard sizes, a torque wrench for proper fastener tightening, a breaker bar for stubborn bolts, and a set of combination wrenches. Penetrating oil (like WD-40 or PB Blaster) is essential for loosening rusted fasteners

Shock Absorber Replacement: A Complete DIY Guide to Choosing, Swapping, and Testing Your Struts

Shock absorbers are the unsung heroes of your vehicle’s suspension system—hydraulic or gas-charged cylinders that convert the kinetic energy of your springs’ bouncing motion into heat, damping oscillation and keeping your tires planted on the road. Without them, your car would pogo down the highway, losing traction in corners and extending braking distances. They are not the same as struts, though the terms are often used interchangeably: a strut is a structural load-bearing component that combines a shock absorber with a coil spring and a mounting assembly, while a shock absorber is a standalone damping unit. Understanding this distinction is the first step toward a successful replacement.

This guide covers the full lifecycle of shock absorber replacement—how to diagnose worn units, choose between OEM and aftermarket options, gather the right tools, swap them out in your driveway, and verify the installation with a proper test drive. We’ll dive into the key attributes that matter when you’re shopping: damping force ratings, gas vs. hydraulic design, price points from budget to premium, and the materials (steel, chrome-plated rods, and polyurethane bushings) that determine longevity. You’ll also learn which suspension components—like sway bar links and coil springs—you should inspect while you’re in there, because replacing shocks without addressing a broken spring is a half-done job.

What makes this guide different is the honest, data-driven approach. We’re not just going to tell you “replace your shocks every 50,000 miles”—we’ll show you how to measure wear with a bounce test, interpret the 50,000-mile rule in the context of your driving habits, and compare real-world cost breakdowns for a DIY swap versus a shop install. You’ll get a decision framework for choosing between twin-tube and monotube designs, and we’ll flag the limitations of DIY replacement—like why you should never compress a coil spring without the right tool. By the end, you’ll have the confidence to tackle this project yourself and know exactly when to call a professional.
What Is Shock Absorber Replacement and Why It Matters

What Is Shock Absorber Replacement and Why It Matters - shock absorber replacement

Shock absorber replacement means removing worn dampers and installing new ones. It is a core part of the suspension system. When you replace shocks, you restore the vehicle’s ride quality, handling, and braking stability. The job matters because worn shocks do not fail suddenly like a brake line. They degrade slowly, and drivers adapt without noticing the loss of control until a panic stop or emergency lane change exposes the danger. Replacing them proactively keeps the tires in contact with the pavement, reduces stopping distances, and prevents premature wear on tires, bushings, and other suspension parts.

Shock Absorbers vs. Struts: Know the Difference

Shock absorbers are standalone damping units that control spring oscillation. Struts, by contrast, are structural components that serve as a mounting point for the vehicle’s suspension and steering system, incorporating the shock, coil spring, and upper mount into a single assembly. Vehicles with struts (typically front-wheel-drive cars) require strut assembly replacement, while vehicles with a separate shock and spring setup (common on trucks and rear suspensions) allow you to replace just the shock. Knowing which system your vehicle uses determines the parts you buy and the complexity of the job.

How Shocks Work: Damping, Rebound, and Compression

Shocks work by forcing hydraulic fluid through small orifices as the piston moves inside the cylinder. On the compression stroke, the shock resists the spring compressing; on the rebound stroke, it controls the spring’s extension. This dual-action damping converts kinetic energy into heat, which dissipates through the shock body. The damping force is tuned by the size of the orifices and the viscosity of the fluid, and it’s what keeps your tires glued to the road over bumps and through corners. Gas-charged shocks use pressurized nitrogen to reduce fluid foaming and improve response, while hydraulic shocks rely solely on fluid dynamics.

7 Warning Signs You Need a Shock Absorber Replacement

7 Warning Signs You Need a Shock Absorber Replacement - shock absorber replacement

Visual Inspection: Leaks, Dents, and Mount Damage

Start with a visual inspection. Look for fluid streaks running down the shock body—a sign the internal seals have failed and the damping fluid is leaking out. Check for dents, rust pitting, or bent piston rods. Inspect the mounting bushings and rubber grommets for cracks, dry rot, or excessive play. If the shock body is oily and coated with road grime, that’s a leak. If you see bare metal where the paint has worn off, the shock may have been bottoming out. Any of these signs means the shock is compromised and needs replacement.

The Bounce Test: How to Check Damping at Home

Park on a level surface, push down firmly on one corner of the vehicle, and release. A healthy shock should return the car to its resting position and stop within one and a half bounces. If the car continues to bounce two or three times before settling, the shock has lost its damping ability. Repeat the test on all four corners. Note that the bounce test is less reliable on vehicles with very stiff springs or heavy-duty suspension, but it’s a quick and effective first check for most passenger cars.

Tire Wear Patterns That Point to Worn Shocks

Worn shocks allow the tire to bounce and lose contact with the road, causing uneven wear patterns. Look for cupping or scalloping—a series of flat spots around the tire’s circumference—which indicates the tire is bouncing and slapping the pavement. Feathering (smooth on one side, sharp on the other) can also point to suspension issues. If you see these patterns, especially on both tires of the same axle, it’s a strong signal that the shocks on that axle are failing and need replacement before they destroy your new tires.

Excessive Body Roll and Nose Dive

If the vehicle leans heavily into corners, sways in crosswinds, or dives forward under hard braking, the shocks are not controlling body motion. This is both a comfort issue and a safety issue—excessive body roll reduces tire contact patch and can lead to loss of control in emergency maneuvers. Pay attention to how the car feels during highway lane changes and off-ramps. A well-damped vehicle stays flat and composed; a worn one feels floaty and unstable.

Noise: Clunking, Rattling, and Knocking

Listen for clunking, rattling, or knocking sounds coming from the suspension when driving over bumps or rough roads. These noises often indicate loose or worn mounting hardware, broken bushings, or internal shock damage. A shock with a loose piston rod or a broken mount will make a metallic clunk on every bump. If you hear these sounds, inspect the shock mounts and bushings immediately—driving with a loose shock can damage the mounting points on the vehicle body.

Increased Stopping Distance

Worn shocks allow the rear of the vehicle to lift under hard braking, transferring weight to the front axle and reducing rear tire traction. This increases stopping distance and can cause the rear end to feel unstable or even skid. If you notice the vehicle’s nose diving excessively under braking or the rear feeling light, the shocks are not controlling weight transfer. This is a critical safety concern that warrants immediate replacement.

Mileage and Age: The 50,000-Mile Rule

Most manufacturers recommend replacing shocks every 50,000 miles, but this is a guideline, not a hard rule. Driving habits, road conditions, and vehicle load all affect shock life. If you frequently drive on rough roads, carry heavy loads, or tow, your shocks will wear faster. Conversely, a highway commuter on smooth roads may get 80,000 miles or more. Use the 50,000-mile mark as a trigger to inspect your shocks thoroughly, not as an automatic replacement deadline.

Tools and Safety Equipment Required for the Job

Tools and Safety Equipment Required for the Job - shock absorber replacement

Essential Tools: Wrenches, Sockets, and Breaker Bars

Essential Tools: Details

You’ll need a socket set with both metric and standard sizes, a torque wrench for proper fastener tightening, a breaker bar for stubborn bolts, and a set of combination wrenches. Penetrating oil (like WD-40 or PB Blaster) is essential for loosening rusted fasteners

Shock Absorber Replacement: A Complete DIY Guide to Choosing, Swapping, and Testing Your Struts

Shock absorbers are the unsung heroes of your vehicle’s suspension system—hydraulic or gas-charged cylinders that convert the kinetic energy of your springs’ bouncing motion into heat, damping oscillation and keeping your tires planted on the road. Without them, your car would pogo down the highway, losing traction in corners and extending braking distances. They are not the same as struts, though the terms are often used interchangeably: a strut is a structural load-bearing component that combines a shock absorber with a coil spring and a mounting assembly, while a shock absorber is a standalone damping unit. Understanding this distinction is the first step toward a successful replacement.

This guide covers the full lifecycle of shock absorber replacement—how to diagnose worn units, choose between OEM and aftermarket options, gather the right tools, swap them out in your driveway, and verify the installation with a proper test drive. We’ll dive into the key attributes that matter when you’re shopping: damping force ratings, gas vs. hydraulic design, price points from budget to premium, and the materials (steel, chrome-plated rods, and polyurethane bushings) that determine longevity. You’ll also learn which suspension components—like sway bar links and coil springs—you should inspect while you’re in there, because replacing shocks without addressing a broken spring is a half-done job.

What makes this guide different is the honest, data-driven approach. We’re not just going to tell you “replace your shocks every 50,000 miles”—we’ll show you how to measure wear with a bounce test, interpret the 50,000-mile rule in the context of your driving habits, and compare real-world cost breakdowns for a DIY swap versus a shop install. You’ll get a decision framework for choosing between twin-tube and monotube designs, and we’ll flag the limitations of DIY replacement—like why you should never compress a coil spring without the right tool. By the end, you’ll have the confidence to tackle this project yourself and know exactly when to call a professional.

What Is Shock Absorber Replacement and Why It Matters

What Is Shock Absorber Replacement and Why It Matters - shock absorber replacement

Shock absorber replacement means removing worn dampers and installing new ones. It is a core part of the suspension system. When you replace shocks, you restore the vehicle’s ride quality, handling, and braking stability. The job matters because worn shocks do not fail suddenly like a brake line. They degrade slowly, and drivers adapt without noticing the loss of control until a panic stop or emergency lane change exposes the danger. Replacing them proactively keeps the tires in contact with the pavement, reduces stopping distances, and prevents premature wear on tires, bushings, and other suspension parts.

Shock Absorbers vs. Struts: Know the Difference

Shock absorbers are standalone damping units that control spring oscillation. Struts, by contrast, are structural components that serve as a mounting point for the vehicle’s suspension and steering system, incorporating the shock, coil spring, and upper mount into a single assembly. Vehicles with struts (typically front-wheel-drive cars) require strut assembly replacement, while vehicles with a separate shock and spring setup (common on trucks and rear suspensions) allow you to replace just the shock. Knowing which system your vehicle uses determines the parts you buy and the complexity of the job.

How Shocks Work: Damping, Rebound, and Compression

Shocks work by forcing hydraulic fluid through small orifices as the piston moves inside the cylinder. On the compression stroke, the shock resists the spring compressing; on the rebound stroke, it controls the spring’s extension. This dual-action damping converts kinetic energy into heat, which dissipates through the shock body. The damping force is tuned by the size of the orifices and the viscosity of the fluid, and it’s what keeps your tires glued to the road over bumps and through corners. Gas-charged shocks use pressurized nitrogen to reduce fluid foaming and improve response, while hydraulic shocks rely solely on fluid dynamics.

7 Warning Signs You Need a Shock Absorber Replacement

7 Warning Signs You Need a Shock Absorber Replacement - shock absorber replacement

Visual Inspection: Leaks, Dents, and Mount Damage

Start with a visual inspection. Look for fluid streaks running down the shock body—a sign the internal seals have failed and the damping fluid is leaking out. Check for dents, rust pitting, or bent piston rods. Inspect the mounting bushings and rubber grommets for cracks, dry rot, or excessive play. If the shock body is oily and coated with road grime, that’s a leak. If you see bare metal where the paint has worn off, the shock may have been bottoming out. Any of these signs means the shock is compromised and needs replacement.

The Bounce Test: How to Check Damping at Home

Park on a level surface, push down firmly on one corner of the vehicle, and release. A healthy shock should return the car to its resting position and stop within one and a half bounces. If the car continues to bounce two or three times before settling, the shock has lost its damping ability. Repeat the test on all four corners. Note that the bounce test is less reliable on vehicles with very stiff springs or heavy-duty suspension, but it’s a quick and effective first check for most passenger cars.

Tire Wear Patterns That Point to Worn Shocks

Worn shocks allow the tire to bounce and lose contact with the road, causing uneven wear patterns. Look for cupping or scalloping—a series of flat spots around the tire’s circumference—which indicates the tire is bouncing and slapping the pavement. Feathering (smooth on one side, sharp on the other) can also point to suspension issues. If you see these patterns, especially on both tires of the same axle, it’s a strong signal that the shocks on that axle are failing and need replacement before they destroy your new tires.

Excessive Body Roll and Nose Dive

If the vehicle leans heavily into corners, sways in crosswinds, or dives forward under hard braking, the shocks are not controlling body motion. This is both a comfort issue and a safety issue—excessive body roll reduces tire contact patch and can lead to loss of control in emergency maneuvers. Pay attention to how the car feels during highway lane changes and off-ramps. A well-damped vehicle stays flat and composed; a worn one feels floaty and unstable.

Noise: Clunking, Rattling, and Knocking

Listen for clunking, rattling, or knocking sounds coming from the suspension when driving over bumps or rough roads. These noises often indicate loose or worn mounting hardware, broken bushings, or internal shock damage. A shock with a loose piston rod or a broken mount will make a metallic clunk on every bump. If you hear these sounds, inspect the shock mounts and bushings immediately—driving with a loose shock can damage the mounting points on the vehicle body.

Increased Stopping Distance

Worn shocks allow the rear of the vehicle to lift under hard braking, transferring weight to the front axle and reducing rear tire traction. This increases stopping distance and can cause the rear end to feel unstable or even skid. If you notice the vehicle’s nose diving excessively under braking or the rear feeling light, the shocks are not controlling weight transfer. This is a critical safety concern that warrants immediate replacement.

Mileage and Age: The 50,000-Mile Rule

Most manufacturers recommend replacing shocks every 50,000 miles, but this is a guideline, not a hard rule. Driving habits, road conditions, and vehicle load all affect shock life. If you frequently drive on rough roads, carry heavy loads, or tow, your shocks will wear faster. Conversely, a highway commuter on smooth roads may get 80,000 miles or more. Use the 50,000-mile mark as a trigger to inspect your shocks thoroughly, not as an automatic replacement deadline.

Tools and Safety Equipment Required for the Job

Tools and Safety Equipment Required for the Job - shock absorber replacement

Essential Tools: Wrenches, Sockets, and Breaker Bars

Essential Tools: Details

You’ll need a socket set with both metric and standard sizes, a torque wrench for proper fastener tightening, a breaker bar for stubborn bolts, and a set of combination wrenches. Penetrating oil (like WD-40 or PB Blaster) is essential for loosening rusted fasteners

Shock Absorber Replacement: A Complete DIY Guide to Choosing, Swapping, and Testing Your Struts

Shock absorbers are the unsung heroes of your vehicle’s suspension system—hydraulic or gas-charged cylinders that convert the kinetic energy of your springs’ bouncing motion into heat, damping oscillation and keeping your tires planted on the road. Without them, your car would pogo down the highway, losing traction in corners and extending braking distances. They are not the same as struts, though the terms are often used interchangeably: a strut is a structural load-bearing component that combines a shock absorber with a coil spring and a mounting assembly, while a shock absorber is a standalone damping unit. Understanding this distinction is the first step toward a successful replacement.

This guide covers the full lifecycle of shock absorber replacement—how to diagnose worn units, choose between OEM and aftermarket options, gather the right tools, swap them out in your driveway, and verify the installation with a proper test drive. We’ll dive into the key attributes that matter when you’re shopping: damping force ratings, gas vs. hydraulic design, price points from budget to premium, and the materials (steel, chrome-plated rods, and polyurethane bushings) that determine longevity. You’ll also learn which suspension components—like sway bar links and coil springs—you should inspect while you’re in there, because replacing shocks without addressing a broken spring is a half-done job.

What makes this guide different is the honest, data-driven approach. We’re not just going to tell you “replace your shocks every 50,000 miles”—we’ll show you how to measure wear with a bounce test, interpret the 50,000-mile rule in the context of your driving habits, and compare real-world cost breakdowns for a DIY swap versus a shop install. You’ll get a decision framework for choosing between twin-tube and monotube designs, and we’ll flag the limitations of DIY replacement—like why you should never compress a coil spring without the right tool. By the end, you’ll have the confidence to tackle this project yourself and know exactly when to call a professional.

What Is Shock Absorber Replacement and Why It Matters

What Is Shock Absorber Replacement and Why It Matters - shock absorber replacement

Shock absorber replacement means removing worn dampers and installing new ones. It is a core part of the suspension system. When you replace shocks, you restore the vehicle’s ride quality, handling, and braking stability. The job matters because worn shocks do not fail suddenly like a brake line. They degrade slowly, and drivers adapt without noticing the loss of control until a panic stop or emergency lane change exposes the danger. Replacing them proactively keeps the tires in contact with the pavement, reduces stopping distances, and prevents premature wear on tires, bushings, and other suspension parts.

Shock Absorbers vs. Struts: Know the Difference

Shock absorbers are standalone damping units that control spring oscillation. Struts, by contrast, are structural components that serve as a mounting point for the vehicle’s suspension and steering system, incorporating the shock, coil spring, and upper mount into a single assembly. Vehicles with struts (typically front-wheel-drive cars) require strut assembly replacement, while vehicles with a separate shock and spring setup (common on trucks and rear suspensions) allow you to replace just the shock. Knowing which system your vehicle uses determines the parts you buy and the complexity of the job.

How Shocks Work: Damping, Rebound, and Compression

Shocks work by forcing hydraulic fluid through small orifices as the piston moves inside the cylinder. On the compression stroke, the shock resists the spring compressing; on the rebound stroke, it controls the spring’s extension. This dual-action damping converts kinetic energy into heat, which dissipates through the shock body. The damping force is tuned by the size of the orifices and the viscosity of the fluid, and it’s what keeps your tires glued to the road over bumps and through corners. Gas-charged shocks use pressurized nitrogen to reduce fluid foaming and improve response, while hydraulic shocks rely solely on fluid dynamics.

7 Warning Signs You Need a Shock Absorber Replacement

7 Warning Signs You Need a Shock Absorber Replacement - shock absorber replacement

Visual Inspection: Leaks, Dents, and Mount Damage

Start with a visual inspection. Look for fluid streaks running down the shock body—a sign the internal seals have failed and the damping fluid is leaking out. Check for dents, rust pitting, or bent piston rods. Inspect the mounting bushings and rubber grommets for cracks, dry rot, or excessive play. If the shock body is oily and coated with road grime, that’s a leak. If you see bare metal where the paint has worn off, the shock may have been bottoming out. Any of these signs means the shock is compromised and needs replacement.

The Bounce Test: How to Check Damping at Home

Park on a level surface, push down firmly on one corner of the vehicle, and release. A healthy shock should return the car to its resting position and stop within one and a half bounces. If the car continues to bounce two or three times before settling, the shock has lost its damping ability. Repeat the test on all four corners. Note that the bounce test is less reliable on vehicles with very stiff springs or heavy-duty suspension, but it’s a quick and effective first check for most passenger cars.

Tire Wear Patterns That Point to Worn Shocks

Worn shocks allow the tire to bounce and lose contact with the road, causing uneven wear patterns. Look for cupping or scalloping—a series of flat spots around the tire’s circumference—which indicates the tire is bouncing and slapping the pavement. Feathering (smooth on one side, sharp on the other) can also point to suspension issues. If you see these patterns, especially on both tires of the same axle, it’s a strong signal that the shocks on that axle are failing and need replacement before they destroy your new tires.

Excessive Body Roll and Nose Dive

If the vehicle leans heavily into corners, sways in crosswinds, or dives forward under hard braking, the shocks are not controlling body motion. This is both a comfort issue and a safety issue—excessive body roll reduces tire contact patch and can lead to loss of control in emergency maneuvers. Pay attention to how the car feels during highway lane changes and off-ramps. A well-damped vehicle stays flat and composed; a worn one feels floaty and unstable.

Noise: Clunking, Rattling, and Knocking

Listen for clunking, rattling, or knocking sounds coming from the suspension when driving over bumps or rough roads. These noises often indicate loose or worn mounting hardware, broken bushings, or internal shock damage. A shock with a loose piston rod or a broken mount will make a metallic clunk on every bump. If you hear these sounds, inspect the shock mounts and bushings immediately—driving with a loose shock can damage the mounting points on the vehicle body.

Increased Stopping Distance

Worn shocks allow the rear of the vehicle to lift under hard braking, transferring weight to the front axle and reducing rear tire traction. This increases stopping distance and can cause the rear end to feel unstable or even skid. If you notice the vehicle’s nose diving excessively under braking or the rear feeling light, the shocks are not controlling weight transfer. This is a critical safety concern that warrants immediate replacement.

Mileage and Age: The 50,000-Mile Rule

Most manufacturers recommend replacing shocks every 50,000 miles, but this is a guideline, not a hard rule. Driving habits, road conditions, and vehicle load all affect shock life. If you frequently drive on rough roads, carry heavy loads, or tow, your shocks will wear faster. Conversely, a highway commuter on smooth roads may get 80,000 miles or more. Use the 50,000-mile mark as a trigger to inspect your shocks thoroughly, not as an automatic replacement deadline.

Tools and Safety Equipment Required for the Job

Tools and Safety Equipment Required for the Job - shock absorber replacement

Essential Tools: Wrenches, Sockets, and Breaker Bars

Essential Tools: Details

You’ll need a socket set with both metric and standard sizes, a torque wrench for proper fastener tightening, a breaker bar for stubborn bolts, and a set of combination wrenches. Penetrating oil (like WD-40 or PB Blaster) is essential for loosening rusted fasteners

Shock Absorber Replacement: A Complete DIY Guide to Choosing, Swapping, and Testing Your Struts

Shock absorbers are the unsung heroes of your vehicle’s suspension system—hydraulic or gas-charged cylinders that convert the kinetic energy of your springs’ bouncing motion into heat, damping oscillation and keeping your tires planted on the road. Without them, your car would pogo down the highway, losing traction in corners and extending braking distances. They are not the same as struts, though the terms are often used interchangeably: a strut is a structural load-bearing component that combines a shock absorber with a coil spring and a mounting assembly, while a shock absorber is a standalone damping unit. Understanding this distinction is the first step toward a successful replacement.

This guide covers the full lifecycle of shock absorber replacement—how to diagnose worn units, choose between OEM and aftermarket options, gather the right tools, swap them out in your driveway, and verify the installation with a proper test drive. We’ll dive into the key attributes that matter when you’re shopping: damping force ratings, gas vs. hydraulic design, price points from budget to premium, and the materials (steel, chrome-plated rods, and polyurethane bushings) that determine longevity. You’ll also learn which suspension components—like sway bar links and coil springs—you should inspect while you’re in there, because replacing shocks without addressing a broken spring is a half-done job.

What makes this guide different is the honest, data-driven approach. We’re not just going to tell you “replace your shocks every 50,000 miles”—we’ll show you how to measure wear with a bounce test, interpret the 50,000-mile rule in the context of your driving habits, and compare real-world cost breakdowns for a DIY swap versus a shop install. You’ll get a decision framework for choosing between twin-tube and monotube designs, and we’ll flag the limitations of DIY replacement—like why you should never compress a coil spring without the right tool. By the end, you’ll have the confidence to tackle this project yourself and know exactly when to call a professional.

What Is Shock Absorber Replacement and Why It Matters

What Is Shock Absorber Replacement and Why It Matters - shock absorber replacement

Shock absorber replacement means removing worn dampers and installing new ones. It is a core part of the suspension system. When you replace shocks, you restore the vehicle’s ride quality, handling, and braking stability. The job matters because worn shocks do not fail suddenly like a brake line. They degrade slowly, and drivers adapt without noticing the loss of control until a panic stop or emergency lane change exposes the danger. Replacing them proactively keeps the tires in contact with the pavement, reduces stopping distances, and prevents premature wear on tires, bushings, and other suspension parts.

Shock Absorbers vs. Struts: Know the Difference

Shock absorbers are standalone damping units that control spring oscillation. Struts, by contrast, are structural components that serve as a mounting point for the vehicle’s suspension and steering system, incorporating the shock, coil spring, and upper mount into a single assembly. Vehicles with struts (typically front-wheel-drive cars) require strut assembly replacement, while vehicles with a separate shock and spring setup (common on trucks and rear suspensions) allow you to replace just the shock. Knowing which system your vehicle uses determines the parts you buy and the complexity of the job.

How Shocks Work: Damping, Rebound, and Compression

Shocks work by forcing hydraulic fluid through small orifices as the piston moves inside the cylinder. On the compression stroke, the shock resists the spring compressing; on the rebound stroke, it controls the spring’s extension. This dual-action damping converts kinetic energy into heat, which dissipates through the shock body. The damping force is tuned by the size of the orifices and the viscosity of the fluid, and it’s what keeps your tires glued to the road over bumps and through corners. Gas-charged shocks use pressurized nitrogen to reduce fluid foaming and improve response, while hydraulic shocks rely solely on fluid dynamics.

7 Warning Signs You Need a Shock Absorber Replacement

7 Warning Signs You Need a Shock Absorber Replacement - shock absorber replacement

Visual Inspection: Leaks, Dents, and Mount Damage

Start with a visual inspection. Look for fluid streaks running down the shock body—a sign the internal seals have failed and the damping fluid is leaking out. Check for dents, rust pitting, or bent piston rods. Inspect the mounting bushings and rubber grommets for cracks, dry rot, or excessive play. If the shock body is oily and coated with road grime, that’s a leak. If you see bare metal where the paint has worn off, the shock may have been bottoming out. Any of these signs means the shock is compromised and needs replacement.

The Bounce Test: How to Check Damping at Home

Park on a level surface, push down firmly on one corner of the vehicle, and release. A healthy shock should return the car to its resting position and stop within one and a half bounces. If the car continues to bounce two or three times before settling, the shock has lost its damping ability. Repeat the test on all four corners. Note that the bounce test is less reliable on vehicles with very stiff springs or heavy-duty suspension, but it’s a quick and effective first check for most passenger cars.

Tire Wear Patterns That Point to Worn Shocks

Worn shocks allow the tire to bounce and lose contact with the road, causing uneven wear patterns. Look for cupping or scalloping—a series of flat spots around the tire’s circumference—which indicates the tire is bouncing and slapping the pavement. Feathering (smooth on one side, sharp on the other) can also point to suspension issues. If you see these patterns, especially on both tires of the same axle, it’s a strong signal that the shocks on that axle are failing and need replacement before they destroy your new tires.

Excessive Body Roll and Nose Dive

If the vehicle leans heavily into corners, sways in crosswinds, or dives forward under hard braking, the shocks are not controlling body motion. This is both a comfort issue and a safety issue—excessive body roll reduces tire contact patch and can lead to loss of control in emergency maneuvers. Pay attention to how the car feels during highway lane changes and off-ramps. A well-damped vehicle stays flat and composed; a worn one feels floaty and unstable.

Noise: Clunking, Rattling, and Knocking

Listen for clunking, rattling, or knocking sounds coming from the suspension when driving over bumps or rough roads. These noises often indicate loose or worn mounting hardware, broken bushings, or internal shock damage. A shock with a loose piston rod or a broken mount will make a metallic clunk on every bump. If you hear these sounds, inspect the shock mounts and bushings immediately—driving with a loose shock can damage the mounting points on the vehicle body.

Increased Stopping Distance

Worn shocks allow the rear of the vehicle to lift under hard braking, transferring weight to the front axle and reducing rear tire traction. This increases stopping distance and can cause the rear end to feel unstable or even skid. If you notice the vehicle’s nose diving excessively under braking or the rear feeling light, the shocks are not controlling weight transfer. This is a critical safety concern that warrants immediate replacement.

Mileage and Age: The 50,000-Mile Rule

Most manufacturers recommend replacing shocks every 50,000 miles, but this is a guideline, not a hard rule. Driving habits, road conditions, and vehicle load all affect shock life. If you frequently drive on rough roads, carry heavy loads, or tow, your shocks will wear faster. Conversely, a highway commuter on smooth roads may get 80,000 miles or more. Use the 50,000-mile mark as a trigger to inspect your shocks thoroughly, not as an automatic replacement deadline.

Tools and Safety Equipment Required for the Job

Tools and Safety Equipment Required for the Job - shock absorber replacement

Essential Tools: Wrenches, Sockets, and Breaker Bars

Essential Tools: Details

You’ll need a socket set with both metric and standard sizes, a torque wrench for proper fastener tightening, a breaker bar for stubborn bolts, and a set of combination wrenches. Penetrating oil (like WD-40 or PB Blaster) is essential for loosening rusted fasteners

Shock Absorber Replacement: A Complete DIY Guide to Choosing, Swapping, and Testing Your Struts

Shock absorbers are the unsung heroes of your vehicle’s suspension system—hydraulic or gas-charged cylinders that convert the kinetic energy of your springs’ bouncing motion into heat, damping oscillation and keeping your tires planted on the road. Without them, your car would pogo down the highway, losing traction in corners and extending braking distances. They are not the same as struts, though the terms are often used interchangeably: a strut is a structural load-bearing component that combines a shock absorber with a coil spring and a mounting assembly, while a shock absorber is a standalone damping unit. Understanding this distinction is the first step toward a successful replacement.

This guide covers the full lifecycle of shock absorber replacement—how to diagnose worn units, choose between OEM and aftermarket options, gather the right tools, swap them out in your driveway, and verify the installation with a proper test drive. We’ll dive into the key attributes that matter when you’re shopping: damping force ratings, gas vs. hydraulic design, price points from budget to premium, and the materials (steel, chrome-plated rods, and polyurethane bushings) that determine longevity. You’ll also learn which suspension components—like sway bar links and coil springs—you should inspect while you’re in there, because replacing shocks without addressing a broken spring is a half-done job.

What makes this guide different is the honest, data-driven approach. We’re not just going to tell you “replace your shocks every 50,000 miles”—we’ll show you how to measure wear with a bounce test, interpret the 50,000-mile rule in the context of your driving habits, and compare real-world cost breakdowns for a DIY swap versus a shop install. You’ll get a decision framework for choosing between twin-tube and monotube designs, and we’ll flag the limitations of DIY replacement—like why you should never compress a coil spring without the right tool. By the end, you’ll have the confidence to tackle this project yourself and know exactly when to call a professional.

What Is Shock Absorber Replacement and Why It Matters

What Is Shock Absorber Replacement and Why It Matters - shock absorber replacement

Shock absorber replacement means removing worn dampers and installing new ones. It is a core part of the suspension system. When you replace shocks, you restore the vehicle’s ride quality, handling, and braking stability. The job matters because worn shocks do not fail suddenly like a brake line. They degrade slowly, and drivers adapt without noticing the loss of control until a panic stop or emergency lane change exposes the danger. Replacing them proactively keeps the tires in contact with the pavement, reduces stopping distances, and prevents premature wear on tires, bushings, and other suspension parts.

Shock Absorbers vs. Struts: Know the Difference

Shock absorbers are standalone damping units that control spring oscillation. Struts, by contrast, are structural components that serve as a mounting point for the vehicle’s suspension and steering system, incorporating the shock, coil spring, and upper mount into a single assembly. Vehicles with struts (typically front-wheel-drive cars) require strut assembly replacement, while vehicles with a separate shock and spring setup (common on trucks and rear suspensions) allow you to replace just the shock. Knowing which system your vehicle uses determines the parts you buy and the complexity of the job.

How Shocks Work: Damping, Rebound, and Compression

Shocks work by forcing hydraulic fluid through small orifices as the piston moves inside the cylinder. On the compression stroke, the shock resists the spring compressing; on the rebound stroke, it controls the spring’s extension. This dual-action damping converts kinetic energy into heat, which dissipates through the shock body. The damping force is tuned by the size of the orifices and the viscosity of the fluid, and it’s what keeps your tires glued to the road over bumps and through corners. Gas-charged shocks use pressurized nitrogen to reduce fluid foaming and improve response, while hydraulic shocks rely solely on fluid dynamics.

7 Warning Signs You Need a Shock Absorber Replacement

7 Warning Signs You Need a Shock Absorber Replacement - shock absorber replacement

Visual Inspection: Leaks, Dents, and Mount Damage

Start with a visual inspection. Look for fluid streaks running down the shock body—a sign the internal seals have failed and the damping fluid is leaking out. Check for dents, rust pitting, or bent piston rods. Inspect the mounting bushings and rubber grommets for cracks, dry rot, or excessive play. If the shock body is oily and coated with road grime, that’s a leak. If you see bare metal where the paint has worn off, the shock may have been bottoming out. Any of these signs means the shock is compromised and needs replacement.

The Bounce Test: How to Check Damping at Home

Park on a level surface, push down firmly on one corner of the vehicle, and release. A healthy shock should return the car to its resting position and stop within one and a half bounces. If the car continues to bounce two or three times before settling, the shock has lost its damping ability. Repeat the test on all four corners. Note that the bounce test is less reliable on vehicles with very stiff springs or heavy-duty suspension, but it’s a quick and effective first check for most passenger cars.

Tire Wear Patterns That Point to Worn Shocks

Worn shocks allow the tire to bounce and lose contact with the road, causing uneven wear patterns. Look for cupping or scalloping—a series of flat spots around the tire’s circumference—which indicates the tire is bouncing and slapping the pavement. Feathering (smooth on one side, sharp on the other) can also point to suspension issues. If you see these patterns, especially on both tires of the same axle, it’s a strong signal that the shocks on that axle are failing and need replacement before they destroy your new tires.

Excessive Body Roll and Nose Dive

If the vehicle leans heavily into corners, sways in crosswinds, or dives forward under hard braking, the shocks are not controlling body motion. This is both a comfort issue and a safety issue—excessive body roll reduces tire contact patch and can lead to loss of control in emergency maneuvers. Pay attention to how the car feels during highway lane changes and off-ramps. A well-damped vehicle stays flat and composed; a worn one feels floaty and unstable.

Noise: Clunking, Rattling, and Knocking

Listen for clunking, rattling, or knocking sounds coming from the suspension when driving over bumps or rough roads. These noises often indicate loose or worn mounting hardware, broken bushings, or internal shock damage. A shock with a loose piston rod or a broken mount will make a metallic clunk on every bump. If you hear these sounds, inspect the shock mounts and bushings immediately—driving with a loose shock can damage the mounting points on the vehicle body.

Increased Stopping Distance

Worn shocks allow the rear of the vehicle to lift under hard braking, transferring weight to the front axle and reducing rear tire traction. This increases stopping distance and can cause the rear end to feel unstable or even skid. If you notice the vehicle’s nose diving excessively under braking or the rear feeling light, the shocks are not controlling weight transfer. This is a critical safety concern that warrants immediate replacement.

Mileage and Age: The 50,000-Mile Rule

Most manufacturers recommend replacing shocks every 50,000 miles, but this is a guideline, not a hard rule. Driving habits, road conditions, and vehicle load all affect shock life. If you frequently drive on rough roads, carry heavy loads, or tow, your shocks will wear faster. Conversely, a highway commuter on smooth roads may get 80,000 miles or more. Use the 50,000-mile mark as a trigger to inspect your shocks thoroughly, not as an automatic replacement deadline.

Tools and Safety Equipment Required for the Job

Tools and Safety Equipment Required for the Job - shock absorber replacement

Essential Tools: Wrenches, Sockets, and Breaker Bars

Essential Tools: Details

You’ll need a socket set with both metric and standard sizes, a torque wrench for proper fastener tightening, a breaker bar for stubborn bolts, and a set of combination wrenches. Penetrating oil (like WD-40 or PB Blaster) is essential for loosening rusted fasteners

Shock Absorber Replacement: A Complete DIY Guide to Choosing, Swapping, and Testing Your Struts

Shock absorbers are the unsung heroes of your vehicle’s suspension system—hydraulic or gas-charged cylinders that convert the kinetic energy of your springs’ bouncing motion into heat, damping oscillation and keeping your tires planted on the road. Without them, your car would pogo down the highway, losing traction in corners and extending braking distances. They are not the same as struts, though the terms are often used interchangeably: a strut is a structural load-bearing component that combines a shock absorber with a coil spring and a mounting assembly, while a shock absorber is a standalone damping unit. Understanding this distinction is the first step toward a successful replacement.

This guide covers the full lifecycle of shock absorber replacement—how to diagnose worn units, choose between OEM and aftermarket options, gather the right tools, swap them out in your driveway, and verify the installation with a proper test drive. We’ll dive into the key attributes that matter when you’re shopping: damping force ratings, gas vs. hydraulic design, price points from budget to premium, and the materials (steel, chrome-plated rods, and polyurethane bushings) that determine longevity. You’ll also learn which suspension components—like sway bar links and coil springs—you should inspect while you’re in there, because replacing shocks without addressing a broken spring is a half-done job.

What makes this guide different is the honest, data-driven approach. We’re not just going to tell you “replace your shocks every 50,000 miles”—we’ll show you how to measure wear with a bounce test, interpret the 50,000-mile rule in the context of your driving habits, and compare real-world cost breakdowns for a DIY swap versus a shop install. You’ll get a decision framework for choosing between twin-tube and monotube designs, and we’ll flag the limitations of DIY replacement—like why you should never compress a coil spring without the right tool. By the end, you’ll have the confidence to tackle this project yourself and know exactly when to call a professional.

What Is Shock Absorber Replacement and Why It Matters

What Is Shock Absorber Replacement and Why It Matters - shock absorber replacement

Shock absorber replacement means removing worn dampers and installing new ones. It is a core part of the suspension system. When you replace shocks, you restore the vehicle’s ride quality, handling, and braking stability. The job matters because worn shocks do not fail suddenly like a brake line. They degrade slowly, and drivers adapt without noticing the loss of control until a panic stop or emergency lane change exposes the danger. Replacing them proactively keeps the tires in contact with the pavement, reduces stopping distances, and prevents premature wear on tires, bushings, and other suspension parts.

Shock Absorbers vs. Struts: Know the Difference

Shock absorbers are standalone damping units that control spring oscillation. Struts, by contrast, are structural components that serve as a mounting point for the vehicle’s suspension and steering system, incorporating the shock, coil spring, and upper mount into a single assembly. Vehicles with struts (typically front-wheel-drive cars) require strut assembly replacement, while vehicles with a separate shock and spring setup (common on trucks and rear suspensions) allow you to replace just the shock. Knowing which system your vehicle uses determines the parts you buy and the complexity of the job.

How Shocks Work: Damping, Rebound, and Compression

Shocks work by forcing hydraulic fluid through small orifices as the piston moves inside the cylinder. On the compression stroke, the shock resists the spring compressing; on the rebound stroke, it controls the spring’s extension. This dual-action damping converts kinetic energy into heat, which dissipates through the shock body. The damping force is tuned by the size of the orifices and the viscosity of the fluid, and it’s what keeps your tires glued to the road over bumps and through corners. Gas-charged shocks use pressurized nitrogen to reduce fluid foaming and improve response, while hydraulic shocks rely solely on fluid dynamics.

7 Warning Signs You Need a Shock Absorber Replacement

7 Warning Signs You Need a Shock Absorber Replacement - shock absorber replacement

Visual Inspection: Leaks, Dents, and Mount Damage

Start with a visual inspection. Look for fluid streaks running down the shock body—a sign the internal seals have failed and the damping fluid is leaking out. Check for dents, rust pitting, or bent piston rods. Inspect the mounting bushings and rubber grommets for cracks, dry rot, or excessive play. If the shock body is oily and coated with road grime, that’s a leak. If you see bare metal where the paint has worn off, the shock may have been bottoming out. Any of these signs means the shock is compromised and needs replacement.

The Bounce Test: How to Check Damping at Home

Park on a level surface, push down firmly on one corner of the vehicle, and release. A healthy shock should return the car to its resting position and stop within one and a half bounces. If the car continues to bounce two or three times before settling, the shock has lost its damping ability. Repeat the test on all four corners. Note that the bounce test is less reliable on vehicles with very stiff springs or heavy-duty suspension, but it’s a quick and effective first check for most passenger cars.

Tire Wear Patterns That Point to Worn Shocks

Worn shocks allow the tire to bounce and lose contact with the road, causing uneven wear patterns. Look for cupping or scalloping—a series of flat spots around the tire’s circumference—which indicates the tire is bouncing and slapping the pavement. Feathering (smooth on one side, sharp on the other) can also point to suspension issues. If you see these patterns, especially on both tires of the same axle, it’s a strong signal that the shocks on that axle are failing and need replacement before they destroy your new tires.

Excessive Body Roll and Nose Dive

If the vehicle leans heavily into corners, sways in crosswinds, or dives forward under hard braking, the shocks are not controlling body motion. This is both a comfort issue and a safety issue—excessive body roll reduces tire contact patch and can lead to loss of control in emergency maneuvers. Pay attention to how the car feels during highway lane changes and off-ramps. A well-damped vehicle stays flat and composed; a worn one feels floaty and unstable.

Noise: Clunking, Rattling, and Knocking

Listen for clunking, rattling, or knocking sounds coming from the suspension when driving over bumps or rough roads. These noises often indicate loose or worn mounting hardware, broken bushings, or internal shock damage. A shock with a loose piston rod or a broken mount will make a metallic clunk on every bump. If you hear these sounds, inspect the shock mounts and bushings immediately—driving with a loose shock can damage the mounting points on the vehicle body.

Increased Stopping Distance

Worn shocks allow the rear of the vehicle to lift under hard braking, transferring weight to the front axle and reducing rear tire traction. This increases stopping distance and can cause the rear end to feel unstable or even skid. If you notice the vehicle’s nose diving excessively under braking or the rear feeling light, the shocks are not controlling weight transfer. This is a critical safety concern that warrants immediate replacement.

Mileage and Age: The 50,000-Mile Rule

Most manufacturers recommend replacing shocks every 50,000 miles, but this is a guideline, not a hard rule. Driving habits, road conditions, and vehicle load all affect shock life. If you frequently drive on rough roads, carry heavy loads, or tow, your shocks will wear faster. Conversely, a highway commuter on smooth roads may get 80,000 miles or more. Use the 50,000-mile mark as a trigger to inspect your shocks thoroughly, not as an automatic replacement deadline.

Tools and Safety Equipment Required for the Job

Tools and Safety Equipment Required for the Job - shock absorber replacement

Essential Tools: Wrenches, Sockets, and Breaker Bars

Essential Tools: Details

You’ll need a socket set with both metric and standard sizes, a torque wrench for proper fastener tightening, a breaker bar for stubborn bolts, and a set of combination wrenches. Penetrating oil (like WD-40 or PB Blaster) is essential for loosening rusted fasteners

Shock Absorber Replacement: A Complete DIY Guide to Choosing, Swapping, and Testing Your Struts

Shock absorbers are the unsung heroes of your vehicle’s suspension system—hydraulic or gas-charged cylinders that convert the kinetic energy of your springs’ bouncing motion into heat, damping oscillation and keeping your tires planted on the road. Without them, your car would pogo down the highway, losing traction in corners and extending braking distances. They are not the same as struts, though the terms are often used interchangeably: a strut is a structural load-bearing component that combines a shock absorber with a coil spring and a mounting assembly, while a shock absorber is a standalone damping unit. Understanding this distinction is the first step toward a successful replacement.

This guide covers the full lifecycle of shock absorber replacement—how to diagnose worn units, choose between OEM and aftermarket options, gather the right tools, swap them out in your driveway, and verify the installation with a proper test drive. We’ll dive into the key attributes that matter when you’re shopping: damping force ratings, gas vs. hydraulic design, price points from budget to premium, and the materials (steel, chrome-plated rods, and polyurethane bushings) that determine longevity. You’ll also learn which suspension components—like sway bar links and coil springs—you should inspect while you’re in there, because replacing shocks without addressing a broken spring is a half-done job.

What makes this guide different is the honest, data-driven approach. We’re not just going to tell you “replace your shocks every 50,000 miles”—we’ll show you how to measure wear with a bounce test, interpret the 50,000-mile rule in the context of your driving habits, and compare real-world cost breakdowns for a DIY swap versus a shop install. You’ll get a decision framework for choosing between twin-tube and monotube designs, and we’ll flag the limitations of DIY replacement—like why you should never compress a coil spring without the right tool. By the end, you’ll have the confidence to tackle this project yourself and know exactly when to call a professional.

What Is Shock Absorber Replacement and Why It Matters

What Is Shock Absorber Replacement and Why It Matters - shock absorber replacement

Shock absorber replacement means removing worn dampers and installing new ones. It is a core part of the suspension system. When you replace shocks, you restore the vehicle’s ride quality, handling, and braking stability. The job matters because worn shocks do not fail suddenly like a brake line. They degrade slowly, and drivers adapt without noticing the loss of control until a panic stop or emergency lane change exposes the danger. Replacing them proactively keeps the tires in contact with the pavement, reduces stopping distances, and prevents premature wear on tires, bushings, and other suspension parts.

Shock Absorbers vs. Struts: Know the Difference

Shock absorbers are standalone damping units that control spring oscillation. Struts, by contrast, are structural components that serve as a mounting point for the vehicle’s suspension and steering system, incorporating the shock, coil spring, and upper mount into a single assembly. Vehicles with struts (typically front-wheel-drive cars) require strut assembly replacement, while vehicles with a separate shock and spring setup (common on trucks and rear suspensions) allow you to replace just the shock. Knowing which system your vehicle uses determines the parts you buy and the complexity of the job.

How Shocks Work: Damping, Rebound, and Compression

Shocks work by forcing hydraulic fluid through small orifices as the piston moves inside the cylinder. On the compression stroke, the shock resists the spring compressing; on the rebound stroke, it controls the spring’s extension. This dual-action damping converts kinetic energy into heat, which dissipates through the shock body. The damping force is tuned by the size of the orifices and the viscosity of the fluid, and it’s what keeps your tires glued to the road over bumps and through corners. Gas-charged shocks use pressurized nitrogen to reduce fluid foaming and improve response, while hydraulic shocks rely solely on fluid dynamics.

7 Warning Signs You Need a Shock Absorber Replacement

7 Warning Signs You Need a Shock Absorber Replacement - shock absorber replacement

Visual Inspection: Leaks, Dents, and Mount Damage

Start with a visual inspection. Look for fluid streaks running down the shock body—a sign the internal seals have failed and the damping fluid is leaking out. Check for dents, rust pitting, or bent piston rods. Inspect the mounting bushings and rubber grommets for cracks, dry rot, or excessive play. If the shock body is oily and coated with road grime, that’s a leak. If you see bare metal where the paint has worn off, the shock may have been bottoming out. Any of these signs means the shock is compromised and needs replacement.

The Bounce Test: How to Check Damping at Home

Park on a level surface, push down firmly on one corner of the vehicle, and release. A healthy shock should return the car to its resting position and stop within one and a half bounces. If the car continues to bounce two or three times before settling, the shock has lost its damping ability. Repeat the test on all four corners. Note that the bounce test is less reliable on vehicles with very stiff springs or heavy-duty suspension, but it’s a quick and effective first check for most passenger cars.

Tire Wear Patterns That Point to Worn Shocks

Worn shocks allow the tire to bounce and lose contact with the road, causing uneven wear patterns. Look for cupping or scalloping—a series of flat spots around the tire’s circumference—which indicates the tire is bouncing and slapping the pavement. Feathering (smooth on one side, sharp on the other) can also point to suspension issues. If you see these patterns, especially on both tires of the same axle, it’s a strong signal that the shocks on that axle are failing and need replacement before they destroy your new tires.

Excessive Body Roll and Nose Dive

If the vehicle leans heavily into corners, sways in crosswinds, or dives forward under hard braking, the shocks are not controlling body motion. This is both a comfort issue and a safety issue—excessive body roll reduces tire contact patch and can lead to loss of control in emergency maneuvers. Pay attention to how the car feels during highway lane changes and off-ramps. A well-damped vehicle stays flat and composed; a worn one feels floaty and unstable.

Noise: Clunking, Rattling, and Knocking

Listen for clunking, rattling, or knocking sounds coming from the suspension when driving over bumps or rough roads. These noises often indicate loose or worn mounting hardware, broken bushings, or internal shock damage. A shock with a loose piston rod or a broken mount will make a metallic clunk on every bump. If you hear these sounds, inspect the shock mounts and bushings immediately—driving with a loose shock can damage the mounting points on the vehicle body.

Increased Stopping Distance

Worn shocks allow the rear of the vehicle to lift under hard braking, transferring weight to the front axle and reducing rear tire traction. This increases stopping distance and can cause the rear end to feel unstable or even skid. If you notice the vehicle’s nose diving excessively under braking or the rear feeling light, the shocks are not controlling weight transfer. This is a critical safety concern that warrants immediate replacement.

Mileage and Age: The 50,000-Mile Rule

Most manufacturers recommend replacing shocks every 50,000 miles, but this is a guideline, not a hard rule. Driving habits, road conditions, and vehicle load all affect shock life. If you frequently drive on rough roads, carry heavy loads, or tow, your shocks will wear faster. Conversely, a highway commuter on smooth roads may get 80,000 miles or more. Use the 50,000-mile mark as a trigger to inspect your shocks thoroughly, not as an automatic replacement deadline.

Tools and Safety Equipment Required for the Job

Tools and Safety Equipment Required for the Job - shock absorber replacement

Essential Tools: Wrenches, Sockets, and Breaker Bars

You’ll need a socket set with both metric and standard sizes, a torque wrench for proper fastener tightening, a breaker bar for stubborn bolts, and a set of combination wrenches. Penetrating oil (like WD-40 or PB Blaster) is essential for loosening rusted fasteners

Similar Posts