
It was 7:45 AM on a cold February morning when Sarah rushed into my shop, panic written all over her face. Her 2011 Honda Civic was steaming like a teapot on the highway, and she’d barely made it to my parking lot. The temperature gauge was pegged at hot, and a distinct sweet smell of coolant filled the air.
“I was on my way to a job interview,” she explained, “and suddenly my car started making this horrible grinding noise, then steam everywhere!”
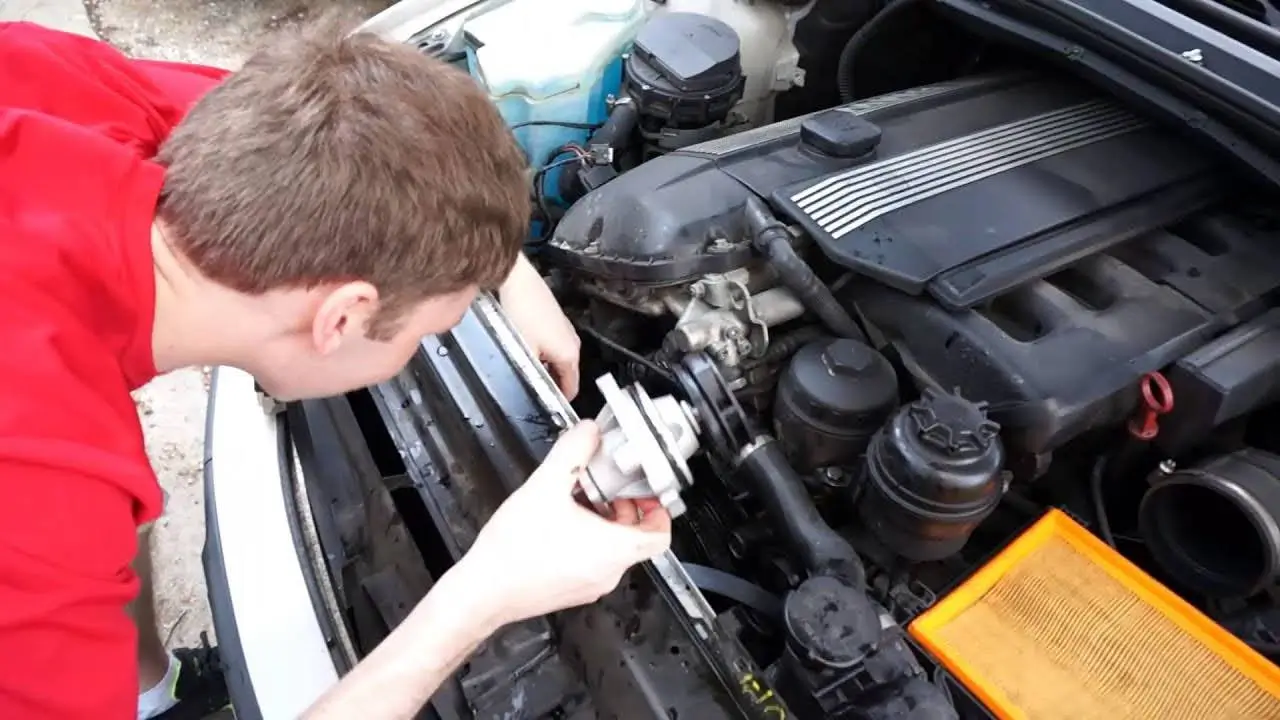
After letting the engine cool, I popped the hood and immediately spotted the issue – a [failing water pump, water pump symptoms, water pump diagnosis](engine-overheating-causes, coolant-system-problems, radiator-problems) with coolant dripping from the weep hole. The bearing had completely failed, and the impeller wasn’t circulating coolant anymore. Sarah was lucky – she caught it before catastrophic engine damage occurred.
This scenario plays out in shops across America every day. Water pump failure is one of the most common cooling system issues I see, and recognizing the early warning signs can save you thousands in engine repairs. Let me walk you through everything you need to know about water pump failure from my 15+ years behind the wrench.

Understanding Your Water Pump’s Role
Before we dive into failure symptoms, let’s establish what your water pump actually does. The water pump is the heart of your cooling system, circulating coolant through the engine and radiator to maintain optimal operating temperature (typically 195-220°F for most vehicles).
Think of the water pump as needing a motor to spin it. In most cars, that ‘motor’ is either the timing belt or the serpentine belt at the front of your engine. On engines where the pistons and valves would crash if the timing went off (we call those interference engines), the water pump is usually run by the timing belt. On other designs, it’s the serpentine belt you can see. The pump itself is made up of four main pieces that can go bad and lead to water pump failure: the outer shell, or housing; the fan-like impeller inside that pushes the coolant; the bearing and shaft that lets it spin freely; and the seal that keeps all that coolant from leaking out. Over time, any of these parts can wear down.
When functioning properly, your water pump circulates approximately 4-6 gallons of coolant per minute at idle, increasing to 15-20+ gallons per minute at highway speeds. This constant circulation prevents hot spots in the engine and transfers heat to the radiator where it dissipates into the atmosphere.
Early Warning Signs of Water Pump Failure
Coolant Leak
The most obvious sign of a bad water pump is coolant leakage. Most water pumps have a small weep hole between the bearing and seal assembly. When the seal begins to fail, you’ll notice:
- Drips or puddles of coolant (typically green, orange, or pink) under the front of your engine
- Coolant residue stains around the pump housing
- A sweet smell of coolant coming from the engine bay
warning: Never ignore a coolant leak. Even a small leak can quickly escalate, leaving you stranded with an overheated engine. Check your coolant level immediately if you notice any leakage.
Unusual Noises
A failing water pump bearing will often make distinctive sounds before complete failure occurs:
- A high-pitched whining or grinding noise that increases with engine RPM
- A squealing or chirping sound from the front of the engine
- Rumbling or rattling from the pump area
success Pro tip: Use a mechanic’s stethoscope or a long screwdriver to pinpoint the noise. Place the tip against the water pump housing while the engine is running – if the noise is loudest there, you’ve likely found your culprit.
Engine Overheating
Since the water pump’s job is to circulate coolant, any reduction in efficiency will cause engine overheating:
- Temperature gauge reading higher than normal
- Heater not blowing hot air (especially at idle)
- Temperature warning light illuminating
- Steam coming from the engine bay
Visible Wobble or Play
With the engine off, try to wiggle the water pump pulley. Any noticeable movement indicates bearing wear:
- Side-to-side movement in the pulley
- In-and-out play of the shaft
- Visible wobble when the engine is running
Comprehensive Water Pump Diagnosis
Before replacing your water pump, it’s crucial to confirm it’s actually the problem. Here’s my systematic diagnostic approach:
Visual Inspection Steps for Water Pump
-
Let the engine cool completely. Never open a hot cooling system – pressurized coolant can cause severe burns.
-
Remove any components blocking access to the water pump (underhood plastic covers, splash shields, etc.).
-
Check for coolant residue around the pump housing, weep hole, and mounting surface. Use a flashlight to inspect thoroughly.
-
Look for corrosion or pitting on the pump housing and mounting surface. This can indicate long-term slow leakage.
Pressure Testing
To pressure test your cooling system, follow these steps:
- First, make absolutely sure the engine is completely cool. This is a critical safety step to prevent burns from pressurized, hot coolant.
- Once the engine is cool, remove the radiator cap and connect a cooling system pressure tester. You can typically buy one at an auto parts store for around $25 to $45.
- Pump the tester until the pressure reaches the level specified on your radiator cap, which is usually in the range of 13 to 16 PSI.
- Watch the pressure gauge for any drops and carefully inspect the area around the water pump for leaks. A failing seal inside the pump will often only leak when the system is under this kind of pressure, so this test can reveal a problem that isn’t visible otherwise.
Mechanical Testing
Here are the steps for the mechanical test of the water pump:
- With the engine off, try to wiggle the water pump pulley. Any movement indicates bearing wear.
- Start the engine and listen for the characteristic grinding or whining noise that increases with RPM.
- Watch the pulley for any wobble while the engine is running.
Water Pump Replacement: Step-by-Step Guide
Replacing a water pump varies significantly by vehicle, but I’ll walk you through the general process. For this example, we’ll use a 2010-2015 Toyota Camry with the 2.5L 4-cylinder engine – one of the most common vehicles I see in my shop.
Required Tools and Materials
Before you get started, you’ll need to gather a few essential tools. At the top of your list are the basic hand tools: a set of metric sockets and wrenches, specifically in the 10mm, 12mm, and 14mm sizes, along with a ratchet and some extensions to reach into the tighter areas of the engine bay. One tool you absolutely cannot skip is a torque wrench capable of handling low torque values, specifically in the 5 to 25 ft-lb range—overtightening the pump bolts can cause expensive damage. To catch the old coolant, you’ll need a drain pan with a minimum capacity of two gallons. Finally, make sure you have a standard flathead screwdriver, a pair of pliers, and a funnel on hand for a clean refill.
Nice-to-have tools:
- Mechanics stethoscope ($15-25)
- Cooling system pressure tester ($25-45)
- Hose pick tool ($8-15)
- Magnetic parts tray ($10-20)
- LED work light ($15-30)
Materials:
- New water pump (OEM Toyota part # 16100-0F070 or aftermarket equivalent)
- New coolant (Toyota Super Long Life Coolant or equivalent)
- New water pump gasket (if not included with pump)
- New radiator hoses (if showing signs of wear)
- Thread sealant (if specified by manufacturer)</div>
Step-by-Step Replacement Process
Before you begin any work on the cooling system, it is absolutely critical to heed this safety warning: Never open a hot cooling system. Pressurized coolant can cause severe burns. You must allow the engine to cool completely for at least 2-3 hours before you begin., always wear safety glasses and gloves when working with coolant to protect yourself from spills and splashes.
Once the engine is completely cool, you can begin the replacement process. First, cool the engine and disconnect the battery. This means allowing at least 2-3 hours for complete cooling. Once cool, disconnect the negative battery terminal to prevent any accidental starter engagement. The next step is to drain the cooling system. Position a drain pan under the radiator drain plug, which is typically located on the driver’s side bottom of the radiator. Open the radiator cap first, then carefully loosen the drain plug and allow the coolant to drain completely; this should take about 10-15 minutes.
With the coolant drained, you need to remove any components that are blocking access to the water pump. On a Camry, for example, this typically includes the engine cover, the upper radiator hose, and the alternator. It’s a very good idea to take photos as you go to help you remember where everything connects when it’s time to reassemble. Now, you can remove the serpentine belt. You’ll need a 14mm wrench or socket to place on the tensioner pulley bolt. Rotate the tensioner clockwise to release the belt tension, and then slide the belt off the water pump pulley.
The next component to remove is the water pump pulley itself. This pulley is typically held on by four 10mm bolts. As you remove these bolts, make sure to support the pulley with your other hand to prevent it from falling. After that, disconnect the lower radiator hose. Use a pair of pliers to slide the hose clamp back down the hose, then twist the hose gently to break the seal before pulling it off. You are now ready to remove the water pump mounting bolts. On a Camry, there are usually six bolts of varying lengths. It is crucial to note which bolt goes where, as they are often different lengths for a specific reason. You should remove them in a crisscross pattern to relieve the pressure evenly.
Now you can remove the old water pump. Gently pry the pump away from the engine block, being extremely careful not to damage the mounting surface on the engine. Before you can install the new pump, you must thoroughly clean the mounting surface. Use a plastic scraper or a dedicated gasket remover to clean all the old gasket material from the engine block. The surface must be completely clean and dry for the new gasket to seal properly. You are now ready to install the new water pump. Apply a thin layer of thread sealant to the bolts if the manufacturer specifies it. Install the new gasket, or apply gasket maker if that’s what your pump requires. Position the new pump on the engine block and hand-tighten all the bolts.
Once the pump is in place, you need to torque the bolts to the manufacturer’s specification. On a Camry, the bolts should be torqued to 89 inch-pounds, which is equivalent to 7.4 ft-lbs, and you should do this in a crisscross pattern just like you did when removing them. It is critical that you do not overtighten the bolts, as this can crack the new pump housing. With the new pump secured, you can now reinstall all the other components in the reverse order of removal. Reconnect the lower radiator hose, install the water pump pulley, reinstall the serpentine belt, and reconnect any other components you had to remove.
Now it’s time to refill the cooling system. Using a 50/50 mix of the correct type of coolant and distilled water, slowly refill the radiator until it is full. Then, fill the coolant reservoir to the “MAX” line. One of the most critical and often-missed steps is to bleed the air from the system. Start the engine with the radiator cap still off and let it warm up. As the thermostat opens, you will see the coolant level drop – continue to add more coolant to maintain the proper level. Turn on the heater to its hottest setting to ensure coolant is flowing through the heater core. Continue this process until you see no more air bubbles appearing in the radiator.
Finally, with the engine fully warmed up, carefully inspect all your connections for any signs of leaks, paying special attention to the water pump area. If everything looks good, reinstall the radiator cap. Take the car for a short test drive, and afterward, recheck the coolant level in both the radiator and the reservoir. Keep a close eye on the temperature gauge during the drive to ensure the cooling system is operating properly.
Technical Specifications by Vehicle
Water pump specifications vary significantly by manufacturer. Here are some common examples from my experience:
Toyota/Lexus Water Pumps
Honda/Acura Water Pumps
Ford Water Pumps
info:These specifications are for reference only. Always verify the correct part number and torque specifications for your specific vehicle using the manufacturer’s service information or a reliable repair database.
OEM vs. Aftermarket Water Pumps: What’s Really Worth Your Money?
After replacing hundreds of water pumps over the years, I’ve developed strong opinions on which brands deliver value and which ones create headaches. Here’s my honest assessment:
OEM Water Pumps
Pros:
- Exact fitment with no modifications needed
- Proven reliability (often 100,000+ miles)
- Includes all necessary components (gaskets, bolts)
- Full warranty coverage
- Peace of mind
Cons:
- Higher initial cost (typically 30-50% more than aftermarket)
- May only be available at dealerships
My take:For daily drivers and vehicles you plan to keep long-term, OEM is almost always worth the extra money. I’ve seen too many premature failures with cheap aftermarket pumps.
Premium Aftermarket Water Pumps
Recommended Brands:
- Aisin (often OEM supplier)
- GMB
- Gates
- NPW (Nippon Pump)
- Bosch
Pros:
- Good balance of cost and quality
- Often identical to OEM (Aisin makes many Toyota pumps)
- Widely available
- Good warranty (typically 1-2 years)
Cons:
- Quality can vary between production runs
- May require separate purchase of gaskets
My take:These are excellent options for most vehicles. I personally use Aisin pumps on many Toyota applications with great results.
Budget Aftermarket Water Pumps
Brands to Approach with Caution:
- Most store brands (unless they’re rebranded premium options)
- Unknown online brands with suspiciously low prices
- Used pumps from salvage yards
Pros:
- Lowest initial cost
- Widely available
Cons:
- Significantly higher failure rate
- May fail within 10,000-20,000 miles
- Poor warranty coverage
- Can cause expensive engine damage if they fail suddenly
My take:I avoid these unless the customer absolutely cannot afford better and understands the risks. In my experience, they’re false economy – you’ll pay more in the long run when they fail prematurely.
Cost Analysis: Water Pump Replacement
DIY Cost Breakdown
Let’s break down the costs you can expect when tackling a water pump replacement yourself, using our 2010-2015 Toyota Camry example.
First, for the parts, you have a few options. If you stick with the OEM water pump from Toyota, you’ll be looking at a cost between $85 and $120. A fantastic aftermarket choice, like an Aisin (which is often the actual original equipment manufacturer for Toyota), is more budget-friendly at $55 to $75. Other premium aftermarket brands typically fall in the middle, around $65 to $85. You’ll also need coolant, and for this job, you’ll want two gallons of Toyota’s Super Long Life Coolant (SLLC), which runs about $25 to $30 per gallon. Don’t forget the gasket, which is another $8 to $15 if it isn’t already included with your new pump. When you add it all up, your total cost for parts alone will land somewhere between $85 and $185.
Next, you have to consider the tools, but only if you don’t already own them. A basic metric socket set with the necessary sizes will cost between $40 and $80. A torque wrench is essential for this job and will set you back another $30 to $60. A simple drain pan is cheap at $10 to $15, and a cooling system pressure tester, which is incredibly useful for diagnosing leaks, costs about $25 to $45. If you were to buy all these tools, you’d be looking at an investment of $40 to $120, though this assumes you might already have some basic items.
So, what’s the final tally for doing it yourself? If you already have a well-stocked toolbox, your total out-of-pocket cost is just for the parts, putting you in the $85 to $185 range. However, if you’re starting from scratch and need to purchase all the necessary tools, your total cost for this one job will be higher, somewhere in the ballpark of $125 to $305. The upside is that tool investment will pay for itself over many future DIY repairs.
Professional Service Pricing
Independent Shop Pricing:
- – Parts (OEM): $85-120
- – Labor (2.1 hours × $95-125/hour): $200-263
- – Shop supplies and disposal fees: $15-25
- – Coolant replacement: $25-40
- – Total Range: $325-448
Dealership Pricing:
- Parts (OEM): $95-135
- Labor (2.1 hours × $150-185/hour): $315-389
- Shop supplies and disposal fees: $20-30
- Coolant replacement: $30-45
- Total Range: $460-599
When to Replace Additional Components
I’ve learned over the years that replacing certain components during a water pump job saves money in the long run:
Always Replace:
- Water pump gasket (never reuse)
- Coolant (old coolant loses its protective properties)
- Any hoses that feel soft, swollen, or show cracking
Consider Replacing:
- Radiator hoses (if over 5 years old)
- Thermostat (especially if access is difficult)
- Serpentine belt (if showing any wear)
- Timing belt (if your engine uses a timing belt-driven water pump)
Here’s a pro tip from the shop that can save you a lot of money down the road. If your car has a water pump that’s driven by the timing belt—which you’ll find on many Hondas and some Toyotas—you should always replace the timing belt, its tensioner, and the idler pulleys at the same time you’re doing the water pump. The reason is simple: the bulk of the labor is already being done just to get to the water pump. Since the timing belt and all its related parts have a similar lifespan, they’re likely due for replacement soon anyway. By replacing everything at once, you avoid paying for that same expensive labor all over again a year or two later. This one smart move can easily save you between $500 and $800 in future labor costs.
Troubleshooting Common Water Pump Issues
Even after a perfect installation, problems can arise. Here are the most common issues I see and how to resolve them:
Persistent Overheating After Replacement
Possible Causes:
- Air trapped in the cooling system
- Faulty thermostat
- Clogged radiator
- Incorrect coolant mixture
- Defective new water pump
Diagnostic Steps:
- Verify proper coolant level (check when cold)
- Bleed air from the system using the manufacturer’s procedure
- Check for heat at the heater core (feel both heater hoses)
- Monitor temperature gauge during warm-up – it should rise to normal and then stabilize
- If still overheating, test the thermostat by removing it and boiling it in water
Coolant Leak After Replacement
Possible Causes:
- Improperly torqued bolts
- Damaged or incorrect gasket
- Cracked pump housing (from overtightening)
- Loose hose connections
- Defective pump casting
Diagnostic Steps:
- Pressure test the cooling system
- Check all bolt torques
- Inspect the weep hole for active leakage
- Verify hose clamps are properly positioned
- If the leak is from the pump housing itself, replacement is necessary
Noisy Operation After Replacement
Possible Causes:
- Improperly tensioned belt
- Defective new pump bearing
- Misaligned pulley
- Incorrect bolt installation (different lengths)
Diagnostic Steps:
- Verify belt tension (typically ½” deflection at midpoint)
- Use a stethoscope to pinpoint the noise source
- Check for pulley wobble with engine running
- Verify correct bolt installation in proper locations
Water Pump Failure Prevention
While water pumps eventually wear out, proper maintenance can significantly extend their life:
Regular Coolant Maintenance
info: Coolant does more than just transfer heat – it contains corrosion inhibitors that protect the water pump’s internal components. Over time, these inhibitors break down, allowing corrosion to attack the pump impeller and bearing. </div>
- Change coolant according to manufacturer specifications (typically every 60,000-100,000 miles)
- Use the correct type of coolant for your vehicle (mixing types can cause problems)
- Maintain proper coolant concentration (typically 50/50 coolant to distilled water)
- Never use plain water in your cooling system
Belt System Maintenance
- Replace serpentine belts before they crack or fray
- Check belt tension regularly
- Replace any noisy idler pulleys immediately
- Ensure proper belt alignment
Temperature Monitoring
- Address any overheating immediately
- Don’t ignore temperature gauge fluctuations
- Fix small coolant leaks before they become major problems
Frequently Asked Questions
A common question I get is, “How long does a water pump typically last?” Most water pumps will last between 60,000-100,000 miles, but this really varies depending on your vehicle and the manufacturer. I’ve seen premium OEM pumps on some vehicles last 150,000+ miles, while some aftermarket pumps might fail before 50,000 miles. The most important thing is to address any symptoms immediately rather than waiting for complete failure.
Another frequent question is whether you can drive with a failing water pump. I strongly advise against it. A failing water pump can go from a minor leak to complete failure in just minutes, potentially causing catastrophic engine damage. When you consider that a tow costs $75-150 compared to engine replacement which can run $3,000-7,000+, it’s just not worth the risk. If you notice any water pump failure symptoms, park the vehicle and arrange for repairs.
Many customers ask why their mechanic recommends replacing the timing belt along with the water pump. On many vehicles, particularly Hondas and some Toyotas, the water pump is driven by the timing belt. Since both components have similar service intervals and require significant labor to access, replacing them together makes economic sense. The additional cost of the timing belt parts ($50-150) is minimal compared to the labor you’d pay twice if done separately.
People often wonder if water pump replacement is a DIY job. It really depends on your mechanical experience and the specific vehicle. On simple front-wheel-drive vehicles with externally mounted pumps (like our Camry example), it’s a moderate DIY job requiring basic tools. On vehicles with timing belt-driven pumps or transverse-mounted V6 engines, it can be quite challenging. Be honest about your skills – a mistake can lead to expensive engine damage.
A common diagnostic question is how to tell if your water pump or thermostat is causing overheating. Both can cause similar symptoms, but there are key differences. A failing thermostat typically causes rapid temperature fluctuations and may result in poor heater performance. A failing water pump usually causes gradual overheating that worsens with RPM, and you might hear bearing noise or see leakage. The definitive test is to monitor the upper radiator hose – if it doesn’t get hot as the engine warms up, the thermostat isn’t opening. If the hose gets hot but the engine still overheats, suspect the water pump.
Finally, I often get asked if it’s okay to use stop-leak products for a minor water pump leak. I never recommend them. While stop-leak products might temporarily seal a small leak, they can clog your radiator, heater core, and coolant passages. The water pump will continue to deteriorate internally, and when it fails completely, it often does so catastrophically. It’s always better to fix it right the first time.
Conclusion: Your Water Pump’s Health is Your Engine’s Health
Water pump failure is one of the most serious cooling system problems you can face, but with the knowledge I’ve shared, you’re now equipped to recognize the early warning signs and make informed decisions about repairs.
For most DIY mechanics with moderate experience, water pump replacement on simpler vehicles is a 2-3 hour job with basic tools. The parts cost typically ranges from $85-185, making it a cost-effective DIY project compared to shop pricing of $325-600.
The I want to leave you with:
- Never ignore water pump failure symptoms– the cost of inaction is always higher than the cost of repair
- Use quality parts (OEM or premium aftermarket) – cheap pumps create expensive problems
- Take your time during installation, especially with bleeding air from the system
- When in doubt, consult a professional – the cost of a second opinion is minimal compared to engine damage
From my perspective behind the wrench, I’ve seen too many engines destroyed by ignored water pump problems. But I’ve also seen countless DIYers successfully tackle this job with the right knowledge and patience. Your cooling system is your engine’s best friend – treat it well, and it will return the favor with years of reliable service.
Now get out there and show that water pump who’s boss. Your engine will thank you for it.