Leakdown Test Guide: Complete Guide
Leakdown Test Guide: How to Diagnose Engine Health Like a Pro
A leakdown test is the definitive diagnostic procedure for quantifying internal engine wear and sealing efficiency. Unlike a compression test, which measures a cylinder’s ability to build pressure during cranking, a leakdown test isolates the engine’s mechanical condition by introducing a controlled volume of compressed air into a cylinder at top dead center and measuring the percentage of leakage. This percentage—expressed as a leakdown percentage—directly reveals the health of the piston rings, cylinder walls, intake and exhaust valves, head gasket, and even the valve seats, making it the most granular assessment available to a professional technician or a serious DIY mechanic.
This guide will walk you through the entire process, from understanding the physics of a leakdown tester and the meaning of its two gauges, to executing a precise test and interpreting the results through the telltale hiss of escaping air. You will learn the critical distinction between acceptable wear (typically 5–10% leakage) and a failing engine (20% or higher), how to pinpoint the exact source of leakage—whether it’s past the rings into the crankcase, through a burnt exhaust valve, or into the cooling system—and how to compare leakdown results against compression test data for a complete diagnostic picture. We will also cover the practical tool attributes: the gauge accuracy, the required air pressure (typically 80–100 PSI), and the essential adapters for different spark plug thread sizes.
What sets this guide apart is its focus on actionable interpretation. Most articles tell you what a leakdown test is; this one tells you exactly what to do when you find 40% leakage in cylinder three. You will get a decision tree for common failure modes, a comparison of budget versus professional-grade testers, and honest limitations of the method—including why a leakdown test cannot detect worn camshaft lobes or timing chain stretch. By the end, you will have the confidence to diagnose an engine’s true condition in under an hour, armed with data rather than guesswork.
What Is a Leakdown Test and How Does It Differ from a Compression Test?
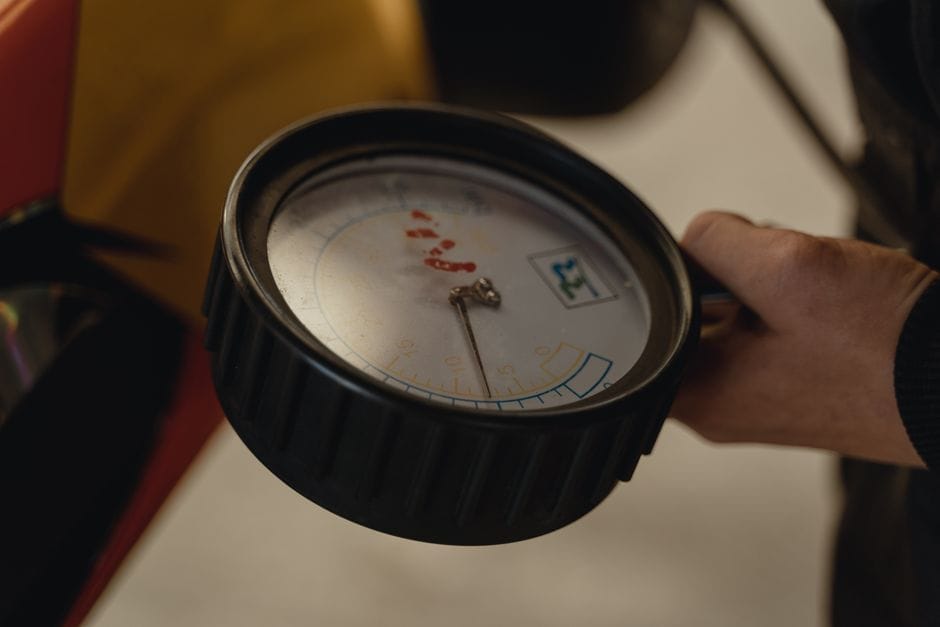
A leakdown test is a diagnostic procedure that measures how well your engine’s cylinders hold compressed air. It tells you exactly where pressure escapes, whether past the piston rings, through the valves, or into the cooling system. This makes it one of the most precise tools for assessing engine health without tearing the motor apart.
The Core Principle: Regulated Air vs. Captured Pressure
The fundamental physics behind a leakdown test is simple: you supply a regulated, constant air pressure (typically 80–100 PSI) into the cylinder through the spark plug hole, and then measure how much of that pressure the cylinder can retain. The tester uses two gauges—one reading the regulated input pressure and the other reading the actual pressure held in the cylinder. The difference between these two readings, expressed as a percentage, is your leakdown percentage. A cylinder in excellent condition will show less than 10% leakage, while a worn or damaged cylinder may show 20%, 30%, or even higher.
This is fundamentally different from a compression test, which captures the maximum pressure generated during cranking and holds it momentarily. A compression test is a dynamic measurement—it depends on cranking speed, battery condition, starter motor health, and throttle position. A leakdown test is static; it doesn’t rely on engine rotation or speed, making it far more repeatable and less affected by external variables.
Leakdown Test vs. Compression Test: The Critical Difference
The most important distinction is diagnostic capability. A compression test tells you that a cylinder is weak—it gives you a number, but not a reason. If cylinder three reads 60 PSI while the others read 150 PSI, you know there’s a problem, but you don’t know whether it’s rings, valves, or a head gasket. A leakdown test answers that question definitively. By listening for where the air escapes, you can pinpoint the exact source:
- Air escaping from the oil filler cap or dipstick tube: Leakage past the piston rings into the crankcase.
- Air hissing from the intake or throttle body: Leakage past the intake valve.
- Air bubbling in the radiator or coolant overflow: Leakage through the head gasket into the cooling system.
- Air escaping from the exhaust pipe: Leakage past the exhaust valve.
This source identification is the single greatest advantage of a leakdown test over a compression test. It turns a vague “low compression” diagnosis into a specific, actionable repair plan.
What a Leakdown Test Can Tell You That a Compression Test Cannot
Beyond just identifying the leak source, a leakdown test can reveal subtle issues that a compression test might miss entirely. For example, a compression test can show normal readings even when there’s a slightly burnt valve seat, because the dynamic nature of the test can mask small leaks. A leakdown test, however, will catch even a 5% leak and help you locate it precisely. It can also differentiate between a worn ring that seals better at high RPM (which a compression test might miss) and a consistently leaking ring that fails at all speeds. Also, a leakdown test can detect a cracked cylinder head or a porous block—conditions that a compression test cannot reliably identify. For any serious engine diagnosis, the leakdown test is the gold standard.
Top Picks


The Complete Leakdown Test Procedure: Step-by-Step
Required Equipment and Setup
Before you begin, you need the right tools. A professional leakdown tester kit typically includes a regulated air supply (your shop compressor), a dual-gauge tester, a quick-disconnect fitting, and a set of spark plug thread adapters. You’ll also need a breaker bar and socket to rotate the engine, a torque wrench for re-installing spark plugs, and a piston stop or a helper to hold the crankshaft at TDC. Some testers come with a threaded hose that screws directly into the spark plug hole, while others use a rubber cone that you press into the hole—the threaded type is far more reliable and safer.
Your air compressor must be capable of delivering a steady 80–100 PSI. The tester’s regulator gauge will let you set the input pressure precisely. It’s critical that the air supply is clean and dry; moisture or debris in the air line can contaminate the cylinder and cause inaccurate readings or engine damage.
Step 1: Bring the Engine to Top Dead Center (TDC)
The piston must be at TDC on the compression stroke for the test to be valid. At TDC, both valves are closed, and the piston is at the top of its travel, sealing the cylinder. If the piston is anywhere else, air will simply escape past the rings or valves, and your reading will be meaningless. To find TDC, remove the spark plug from the cylinder you’re testing, install a piston stop or use a compression gauge hose, and rotate the crankshaft by hand using a breaker bar on the crank bolt. Watch the piston stop or feel for compression buildup. When the piston reaches the top and starts to come back down, you’ve found TDC. Mark the harmonic balancer or use a timing light to confirm the position.
For multi-cylinder engines, you must test each cylinder individually, rotating the crankshaft to TDC for each one. This is time-consuming but essential for accurate results. Some technicians use a helper to hold the crankshaft in place while the air pressure is applied, as the pressure can push the piston down if it’s not perfectly at TDC.
Step 2: Apply Regulated Air Pressure
Once the piston is at TDC, thread the leakdown tester’s adapter into the spark plug hole. Connect the tester to your air supply and slowly open the regulator valve. Bring the input pressure up to your target—typically 80 PSI for most engines, though some manufacturers specify 100 PSI. Watch the second gauge (the cylinder pressure gauge) as you do this. The cylinder pressure should rise and stabilize. If it doesn’t rise at all, you may not be at TDC, or there’s a massive leak (such as a stuck open valve).
It’s important to apply the air gradually. A sudden blast of 100 PSI into a cylinder with a piston not perfectly at TDC can violently rotate the crankshaft, potentially causing injury or damaging the engine. Always use a regulated supply and open the valve slowly.
Step 3: Read the Leakage Percentage
and Interpret the Gauges
Once the input pressure is stabilized at your target (80–100 PSI), read the cylinder pressure gauge. The difference between the two gauges is your leakdown percentage. For example, if the input gauge reads 100 PSI and the cylinder gauge reads 90 PSI, you have a 10% leakdown rate. Most testers have a color-coded scale on the cylinder gauge—green for 0–10% (good), yellow for 10–20% (worn), and red for 20%+ (rebuild). Record the percentage for each cylinder in a log for comparison.
While the air is applied, listen carefully for escaping air. Place your ear near the oil filler cap (remove it to hear better), the intake throttle body, the exhaust tailpipe, and the radiator neck. Each location tells you exactly where the leak is occurring. You can also use a mechanic’s stethoscope or a length of hose to pinpoint the sound more precisely. If you hear air in the crankcase, the rings are worn. If you hear it in the intake or exhaust, the respective valve is leaking. Bubbles in the radiator indicate a head gasket failure.
Step 4: Repeat for All Cylinders and Compare
Step 4: Details
After testing the first cylinder, release the air pressure, remove the tester, and rotate the engine to TDC for the next cylinder. Repeat the process for each cylinder. Once you have all readings, compare them. A healthy engine will show consistent leakdown percentages across all cylinders, typically within 2–3% of each other. A single cylinder with a significantly higher leakdown percentage points to a localized issue—a burnt valve, a broken ring, or a head gasket failure on that cylinder. If all cylinders show high leakage, the engine is likely worn out overall and may need a full rebuild.
It’s also valuable to compare your leakdown results with a compression test. If a cylinder shows low compression but low leakdown, the issue may be with the valve timing or a collapsed lifter, not the sealing surfaces. If it shows low compression and high leakdown, the sealing surfaces are definitely compromised. This combined analysis gives you the most complete picture of engine health.
Interpreting Leakdown Test Results: What the Numbers Mean

Acceptable Ranges: 0–10% Good, 10–20% Worn, 20%+ Rebuild
The industry-standard interpretation of leakdown percentages is straightforward. A reading of 0–10% indicates a cylinder in excellent condition—new or freshly rebuilt engines typically fall in this range. A reading of 10–20% indicates normal wear; the engine is still serviceable but may be approaching the need for attention. A reading of 20% or higher is a clear sign that the cylinder needs repair. At this level, fuel efficiency drops, oil consumption increases, and performance suffers noticeably. Many professional shops use 20% as the threshold for recommending a rebuild or replacement.
However, context matters. A high-performance engine with forged pistons and tight clearances may show 2–3% leakdown, while a high-mileage daily driver with 150,000 miles may show 15% and still run perfectly fine. Always compare readings across cylinders and consider the engine’s age, mileage, and intended use. A consistent 15% across all cylinders on an older engine is less concerning than a single cylinder at 15% while the others read 5%.
Pinpointing the Leak Source: Listening for the Hiss
The location of the escaping air is just as important as the percentage. Here’s a detailed breakdown of what each sound indicates:
- Air from the oil filler cap (crankcase): This is leakage past the piston rings. The air is escaping from the combustion chamber into the crankcase. This indicates worn rings, scored cylinder walls, or a broken ring land.
- Air from the throttle body or intake manifold: This is leakage past the intake valve. The valve is not seating properly, often due to carbon buildup, a burnt valve, or a worn valve guide.
- Air from the exhaust tailpipe: This is leakage past the exhaust valve. Similar to the intake valve, this indicates a sealing problem with the exhaust valve or seat.
- Bubbles in the radiator or coolant overflow: This is leakage through the head gasket into the cooling system. This is a critical failure that requires immediate attention, as it can lead to overheating and catastrophic engine damage.
- Air from the adjacent cylinder (via the head gasket): If you hear air escaping from the spark plug hole of a neighboring cylinder, the head gasket has failed between the two cylinders.
By combining the leakdown percentage with the leak location, you can make a definitive diagnosis without disassembling the engine.
Common Failure Modes and Their Signatures
Different engine problems produce characteristic leakdown signatures. A worn ring set typically shows 15–25% leakage with air escaping into the crankcase. A burnt exhaust valve shows 20–40% leakage with air hissing from the exhaust pipe. A cracked head or blown head gasket shows 30–50% leakage with bubbles in the coolant. A stuck or bent intake valve shows high leakage with air escaping from the intake. Recognizing these patterns allows you to plan the correct repair before you even remove the cylinder head.
Leakdown Test vs. Compression Test: A Detailed Comparison

Static vs. Dynamic Measurement
The core difference between the two tests is the nature of the measurement. A compression test is dynamic—it measures the pressure generated by the piston moving up the cylinder during cranking. This depends on cranking speed, which is affected by battery voltage, starter motor condition, and engine oil viscosity. A leakdown test is static—it applies a fixed, regulated pressure and measures the steady-state leakage. This eliminates all dynamic variables, making the leakdown test more repeatable and accurate for assessing sealing integrity.
Because of this difference, a compression test can sometimes miss a leak that only appears under steady pressure. For example, a slightly warped valve that seals under the brief, high-pressure spike of a compression stroke might leak significantly under a sustained 80 PSI from a leakdown tester. Conversely, a compression test can catch issues with valve timing or camshaft wear that a leakdown test cannot, because the compression test relies on the actual movement of the valves.
Source Identification: The Leakdown Advantage
As discussed, the leakdown test’s ability to identify the exact leak source is its primary advantage. A compression test gives you a single number per cylinder, which is useful for identifying weak cylinders but useless for determining why they’re weak. The leakdown test turns that single number into a detailed diagnostic map of the cylinder’s sealing surfaces. This saves significant time and money by eliminating guesswork and unnecessary disassembly.
When to Use Each Test
Both tests have their place in a diagnostic workflow. Use a compression test first as a quick screening tool—it’s faster and requires less setup. If all cylinders show acceptable and consistent compression, the engine’s basic sealing is likely fine. If you find a low cylinder, or if you suspect a specific issue like a head gasket leak or burnt valve, follow up with a leakdown test to pinpoint the cause. Many professional technicians use both tests together for a comprehensive evaluation, especially before purchasing a used vehicle or before a major engine repair.
Choosing the Right Leakdown Tester: Features and Recommendations

Budget vs. Professional-Grade Testers
Leakdown testers range from inexpensive DIY kits (around $50–$100) to professional-grade units (over $300). Budget testers typically have less precise gauges, cheaper fittings, and may not include a full set of adapters. Professional testers feature higher-quality gauges with finer resolution, more durable construction, and a comprehensive adapter kit for various spark plug thread sizes. For a serious DIY mechanic, a mid-range tester (around $150–$200) is often the sweet spot, offering good accuracy without the professional price tag.
Key features to look for include dual gauges with clear color-coded scales, a precision regulator for accurate input pressure control, quick-disconnect fittings for ease of use, and a solid carrying case. Also, check that the adapter kit includes the thread sizes for your specific vehicle
‘s spark plugs (commonly 10mm, 12mm, 14mm, and 18mm). Some kits also include a threaded hose extension for hard-to-reach plug holes, which is invaluable on modern engines with deep plug wells or angled cylinder heads.
Gauge Accuracy and Calibration
The accuracy of your leakdown tester is only as good as its gauges. Look for testers with gauges rated at ±1% or better. Cheaper units may have ±3% or even ±5% accuracy, which can lead to misdiagnosis—especially when you’re trying to distinguish between a 12% and an 18% leak. Professional-grade testers often come with a calibration certificate, and some allow you to zero the cylinder gauge before each test. If you’re using a budget tester, you can verify its accuracy by connecting it to a known-good cylinder or by comparing readings against a calibrated master gauge.
Also, pay attention to the pressure range of the gauges. Most testers are designed for 80–100 PSI input, but some high-end units can handle up to 150 PSI for heavy-duty diesel engines. If you plan to test diesel engines, ensure your tester is rated for the higher pressures they require.
Adapter Kits and Compatibility
Spark plug thread sizes vary widely between manufacturers and engine types. A good adapter kit should include the most common sizes: 10mm, 12mm, 14mm, and 18mm, as well as a 14mm tapered seat adapter for certain European vehicles. Some kits also include a universal rubber cone adapter for use on engines with unusual thread sizes, though these are less reliable than threaded adapters. Before purchasing, verify that the kit covers the engines you plan to test. If you’re unsure, buy a kit with a wider range of adapters—it’s better to have extras than to be stuck without the right fitting.
Also, consider the length of the adapter. On engines with deep spark plug wells, a short adapter may not reach the threads. Look for kits that include both short and long adapters, or a flexible extension hose. This is a common oversight that can turn a 10-minute test into a frustrating hour of wrestling with fittings.
Limitations of the Leakdown Test: What It Cannot Detect

Valve Timing and Camshaft Wear
A leakdown test is purely a measure of static sealing. It cannot detect issues with valve timing, such as a stretched timing chain, a jumped timing belt, or worn camshaft lobes. These problems affect when the valves open and close, not how well they seal when closed. If your engine has a valve timing issue, a leakdown test will show normal or near-normal readings because the valves are still sealing properly when closed—they’re just opening and closing at the wrong times. To diagnose timing issues, you need a compression test (which will show low readings due to improper valve events) or a visual inspection of the timing components.
Worn Camshaft Lobes and Lifters
Similarly, a leakdown test cannot detect a worn camshaft lobe or a collapsed hydraulic lifter. These components control valve lift and duration, not sealing. A worn lobe will reduce valve lift, which affects airflow and performance, but the valve will still seal when closed. A leakdown test will show a healthy cylinder because the sealing surfaces are intact. To diagnose camshaft or lifter wear, you need to measure valve lift with a dial indicator or listen for a characteristic ticking noise from the valvetrain.
Fuel and Ignition System Issues
A leakdown test is purely mechanical. It cannot detect problems with fuel delivery, such as a clogged injector or a weak fuel pump, nor can it identify ignition issues like a faulty spark plug or coil. These systems affect combustion, not sealing. If your engine is running poorly but the leakdown test shows healthy cylinders, the problem lies elsewhere—in the fuel, ignition, or engine management systems. Always use a leakdown test as part of a broader diagnostic approach, not as a standalone tool.
Piston Ring Sticking vs. Wear
One subtle limitation is that a leakdown test cannot always distinguish between worn piston rings and rings that are stuck in their grooves due to carbon buildup. Both conditions will show leakage into the crankcase. However, a stuck ring may free itself with a chemical treatment or an engine flush, while a worn ring requires replacement. If you suspect stuck rings, you can try a decarbonizing treatment and re-test before committing to a rebuild.
Practical Tips and Common Mistakes to Avoid

Warm Up the Engine Before Testing
For the most accurate results, perform the leakdown test on a warm engine. Heat causes the piston rings, cylinder walls, and valves to expand, which changes the sealing characteristics. A cold engine will typically show higher leakdown percentages than a warm one, which can lead to false “worn engine” diagnoses. Run the engine until it reaches normal operating temperature, then shut it off and proceed with the test. Be careful—the engine and exhaust components will be hot, so use gloves and caution.
Remove the Oil Filler Cap and Dipstick
When testing, remove the oil filler cap and the dipstick. This allows air escaping past the rings to vent freely from the crankcase, making it easier to hear and also preventing pressure buildup that could force oil out of seals. It also gives you a clear listening point to confirm ring leakage. If you leave the cap on, you might miss the hiss of ring leakage or, worse, create enough crankcase pressure to damage a seal.
Use a Piston Stop for Safety
Always use a piston stop or have a helper hold the crankshaft when applying air pressure. Even at TDC, the air pressure can push the piston down slightly if there’s any play in the connecting rod or crankshaft. A piston stop threaded into the spark plug hole (in place of the tester) can hold the piston firmly in place. Alternatively, have a helper hold a breaker bar on the crankshaft bolt to prevent rotation. This is a critical safety step that many DIY mechanics overlook.
Don’t Confuse Leakdown with Compression
Remember that a leakdown test and a compression test measure different things. A low compression reading with a low leakdown percentage suggests a valve timing issue or a collapsed lifter, not a sealing problem. A low compression reading with a high leakdown percentage confirms a sealing problem. Always interpret the two tests together for a complete picture. Never rely on a single test to make a major repair decision.
Document Your Results
Keep a log of your leakdown test results for each cylinder, including the input pressure, the cylinder pressure, the calculated leakdown percentage, and the location of any escaping air. This documentation is invaluable for tracking engine wear over time, comparing before-and-after repair results, and providing evidence when selling a vehicle or diagnosing an intermittent issue. A simple spreadsheet or notebook entry takes minutes but saves hours of re-testing later.
Leakdown Test Decision Tree: What to Do with Your Results

Scenario 1: All Cylinders Under 10% Leakage
If all cylinders show less than 10% leakage with no audible air escaping from any location, your engine’s sealing surfaces are in excellent condition. This is typical of a low-mileage engine or one that has been well-maintained. You can confidently rule out ring, valve, and head gasket issues. If the engine is still running poorly, focus your diagnostic efforts on fuel delivery, ignition, or engine management systems.
Scenario 2: One Cylinder at 15–20% with Air in the Crankcase
This indicates worn piston rings on that specific cylinder. The engine is still drivable, but you may notice increased oil consumption and slightly reduced performance. If the vehicle is a daily driver and you’re not experiencing major issues, you can continue to drive it while monitoring oil levels. If you’re planning a rebuild or the engine has high mileage, this may be the time to address it. A wet compression test (adding oil to the cylinder) can confirm ring wear—if the compression improves with oil, the rings are the culprit.
Scenario 3: One Cylinder at 20–30% with Air from the Exhaust
This is a classic burnt exhaust valve. The valve is not seating properly, allowing air to escape into the
exhaust system. This is a common failure on high-mileage engines, especially those that have been run lean or with incorrect valve clearances. The fix typically involves removing the cylinder head and replacing or re-seating the exhaust valve. If caught early, a valve job may be sufficient; if the valve is severely burnt, replacement is necessary. Continuing to drive with a burnt exhaust valve will cause further damage to the valve seat and potentially the piston.
Scenario 4: One Cylinder at 30–50% with Bubbles in the Radiator
This is a blown head gasket or a cracked cylinder head. The air is escaping from the combustion chamber into the cooling system. This is a critical failure that requires immediate attention. Driving with this condition will lead to overheating, coolant loss, and potentially catastrophic engine damage. The repair involves removing the cylinder head, inspecting both the head and block for warping or cracks, and replacing the head gasket. In severe cases, the cylinder head may need to be machined or replaced.
Scenario 5: All Cylinders at 20% or Higher
If every cylinder shows 20% or higher leakage, the engine is worn out across the board. This is typical of an engine with very high mileage or one that has been severely neglected. The rings, cylinder walls, and valves are all likely worn. At this point, a full engine rebuild or replacement is the most cost-effective solution. Continuing to drive with this level of wear will result in poor performance, high oil consumption, and eventual failure.
Scenario 6: Low Compression but Low Leakdown
If a cylinder shows low compression on a compression test but low leakdown on a leakdown test, the problem is not with the sealing surfaces. This points to a valve timing issue—the valves are opening and closing at the wrong times, preventing the cylinder from building pressure. Possible causes include a stretched timing chain, a jumped timing belt, or a worn camshaft lobe. You’ll need to inspect the timing components and the valvetrain to diagnose the root cause.
Frequently Asked Questions About Leakdown Tests

How Often Should I Perform a Leakdown Test?
There’s no set interval for leakdown testing. It’s typically performed when you suspect an engine problem, before purchasing a used vehicle, or as part of a pre-purchase inspection. Some enthusiasts perform a leakdown test annually or every 20,000–30,000 miles to track engine health over time. If you’re experiencing symptoms like rough idle, misfires, excessive oil consumption, or coolant loss, a leakdown test is one of the first diagnostic steps you should take.
Can I Perform a Leakdown Test on a Diesel Engine?
Yes, but you’ll need a tester rated for higher pressures. Diesel engines have much higher compression ratios than gasoline engines, so they require input pressures of 150 PSI or more. Standard gasoline leakdown testers are not designed for these pressures and may be damaged. Look for a tester specifically rated for diesel applications, and ensure your air compressor can deliver the required pressure.
What Is the Difference Between a Leakdown Test and a Cylinder Leak Test?
They are the same thing. “Cylinder leak test” and “leakdown test” are interchangeable terms for the same diagnostic procedure. Some manufacturers and tool companies use one term or the other, but the procedure and equipment are identical. You may also hear it referred to as a “cylinder leakage test” or simply a “leak test.”
Can a Leakdown Test Damage My Engine?
When performed correctly, a leakdown test is completely safe. The main risk is applying air pressure when the piston is not at TDC, which can cause the crankshaft to rotate suddenly. This can be dangerous if your hand or tools are near moving parts. Always use a piston stop or have a helper hold the crankshaft, and apply the air pressure gradually. Also, ensure the air supply is clean and dry to avoid contaminating the cylinder.
How Long Does a Leakdown Test Take?
For a single cylinder, the test takes about 5–10 minutes, including finding TDC and setting up the equipment. For a full engine (all cylinders), expect to spend 30–60 minutes, depending on the accessibility of the spark plugs and the ease of rotating the crankshaft. The process is slower than a compression test but provides far more diagnostic information.
Do I Need to Remove All Spark Plugs for a Leakdown Test?
No, you only need to remove the spark plug from the cylinder you’re testing. However, removing all spark plugs makes it easier to rotate the engine by hand, as you won’t be fighting compression from the other cylinders. Many technicians remove all plugs for convenience, then test each cylinder one at a time. This also reduces the load on the starter motor if you’re using it to rotate the engine.
Conclusion: Master the Leakdown Test for Confident Engine Diagnosis

The leakdown test is the most powerful diagnostic tool in an engine builder’s or technician’s arsenal. Unlike a compression test, which only tells you that a cylinder is weak, a leakdown test tells you exactly why it’s weak—whether it’s worn rings, a burnt valve, or a blown head gasket. This precision saves time, money, and guesswork, allowing you to plan repairs with confidence.
By mastering the procedure—finding TDC, applying regulated air pressure, reading the gauges, and listening for the telltale hiss of escaping air—you can accurately assess the health of any internal combustion engine in under an hour. You’ll be able to distinguish between acceptable wear and imminent failure, make informed decisions about repairs or rebuilds, and avoid costly misdiagnoses.
Remember the key thresholds: 0–10% leakage is excellent, 10–20% indicates normal wear, and 20% or higher signals the need for repair. Always compare readings across cylinders, listen carefully for the location of escaping air, and combine your leakdown results with compression test data for a complete diagnostic picture. And don’t forget the limitations—a leakdown test cannot detect valve timing issues, camshaft wear, or fuel and ignition problems.
Whether you’re a professional technician or a dedicated DIY mechanic, the leakdown test is a skill worth mastering. It transforms engine diagnosis from guesswork into science, giving you the data you need to make confident, informed decisions about your engine’s health. Armed with this guide, you’re now ready to perform a leakdown test like a pro.