
Parking Brake Adjustment: Expert Guide
Parking Brake Adjustment: The Complete DIY Guide to Cable, Drum, and Electronic Systems
The parking brake — also called the emergency brake, handbrake, or e-brake — is a mechanical or electromechanical system designed to hold a vehicle stationary when parked, and to serve as a backup stopping mechanism if the primary hydraulic brakes fail. Unlike the service brakes, which are applied via a hydraulic pedal, the parking brake typically operates through a cable-and-lever arrangement, a drum-in-hat mechanism, or an electronic actuator that clamps the rear calipers. Because it is a separate, redundant system, its adjustment is governed by different tolerances and wear patterns than your regular brakes — and getting it wrong has consequences that range from a rolling car on a hill to a failed safety inspection.
This guide covers the three main parking brake configurations you will encounter: cable-operated systems with a hand lever or foot pedal, drum-style parking brakes integrated into the rear rotor, and modern electronic parking brakes (EPB) that require diagnostic tooling rather than a wrench. For each type, we break down the adjustment procedure, the tools required, the torque specifications, and the common failure points — including stretched cables, seized adjuster stars, and worn drum linings. We also address the cost side of the equation: a DIY adjustment typically runs $0 to $50 in parts, while a professional adjustment or EPB reset can cost $80 to $250 depending on the vehicle and labor rates.
What sets this article apart is the honest data. Most guides tell you to “tighten until snug” and stop there — we provide the actual clearance specs (typically 0.010 to 0.030 inches of drum-to-lining gap), the click-count method for self-adjusting mechanisms, and the diagnostic trouble codes (DTCs) that indicate an EPB calibration failure. We also cover what a parking brake adjustment cannot fix: a hydraulic leak, a seized caliper slide pin, or a broken cable that requires replacement, not tightening. By the end, you will know exactly which adjustment applies to your vehicle, whether you can safely DIY it, and when to hand the job to a professional.
What Is Parking Brake Adjustment and Why Does It Matter?
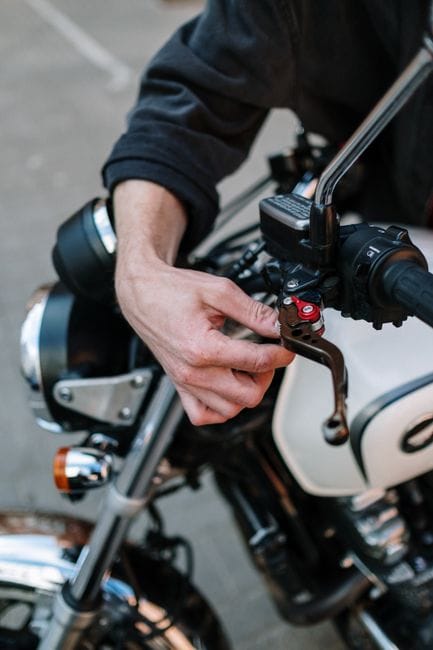
Parking brake adjustment is the process of restoring proper tension and contact within your vehicle’s secondary braking system. This system—often called the emergency brake or handbrake—holds your car stationary when parked. Unlike your main brakes, which use hydraulic pressure, the parking brake uses a mechanical connection: a steel parking brake cable that pulls a lever or actuator at the rear wheels. Over time, this cable stretches, the brake shoes wear down, or the electronic actuator loses its calibration, and the result is a brake that engages too late, too loosely, or not at all.
Why does this matter? Three reasons. First, safety: a poorly adjusted parking brake can allow your vehicle to roll on an incline, potentially causing an accident or property damage. Second, compliance: many states and countries require a functional parking brake for annual safety inspections — a failed adjustment is a common reason for a “reject” sticker. Third, cost prevention: catching a minor adjustment issue early prevents accelerated wear on the rear brake components, saving you from a more expensive drum or rotor replacement down the road.
Defining the Parking Brake System: Cable, Drum, and Electronic Types
There are three primary configurations you will encounter. The first is the cable-operated system, found on older vehicles and many light trucks. A hand lever or foot pedal pulls a steel cable that runs to a balance bar or equalizer, which splits the force to both rear wheels. The cable then actuates a mechanical lever inside the drum brake or behind the caliper. The second is the drum-in-hat system, common on vehicles with rear disc brakes. A small drum is cast into the center of the rear rotor, and a set of dedicated parking brake shoes expands against this drum when the cable is pulled. The third is the electronic parking brake (EPB), which replaces the mechanical cable with an electric motor mounted on the rear caliper or a central actuator. The EPB is controlled by a button or switch, and it requires a scan tool to retract, adjust, and calibrate.
How Parking Brake Adjustment Differs from Brake Pad or Rotor Service
Brake pad replacement and rotor resurfacing address the service braking system — the hydraulic system you use to slow the car while driving. Parking brake adjustment is a separate procedure that targets the secondary mechanical system. While the two are related (worn rear pads can affect the parking brake’s effective travel in some designs), adjusting the parking brake does not involve replacing friction material or machining rotors. It is a tensioning and clearance-setting procedure. You are not removing calipers or bleeding fluid; you are turning an adjuster, pulling a cable, or running a calibration routine. This distinction is critical because many DIYers mistakenly attempt to “adjust” the parking brake by replacing pads, which does not solve a stretched cable or a seized adjuster star.
Signs You Need an Adjustment (Sagging Handle, Rolling on Hills, Warning Light)
Several symptoms indicate your parking brake needs attention. The most obvious is a sagging handle — if the lever pulls up more than 7 to 10 clicks before engaging, the cable has stretched or the shoes have worn. Another is the vehicle rolling on hills even when the brake is fully engaged. You may also hear a grinding or clicking noise from the rear when the brake is applied, which suggests the shoes are contacting the drum unevenly. On vehicles with an EPB, a warning light on the dashboard — often accompanied by a message like “Parking Brake Malfunction” — indicates a calibration fault or a mechanical issue that requires diagnostic attention. If you experience any of these, it is time to perform an adjustment or have the system inspected.
Tools and Preparation: What You Need Before You Start
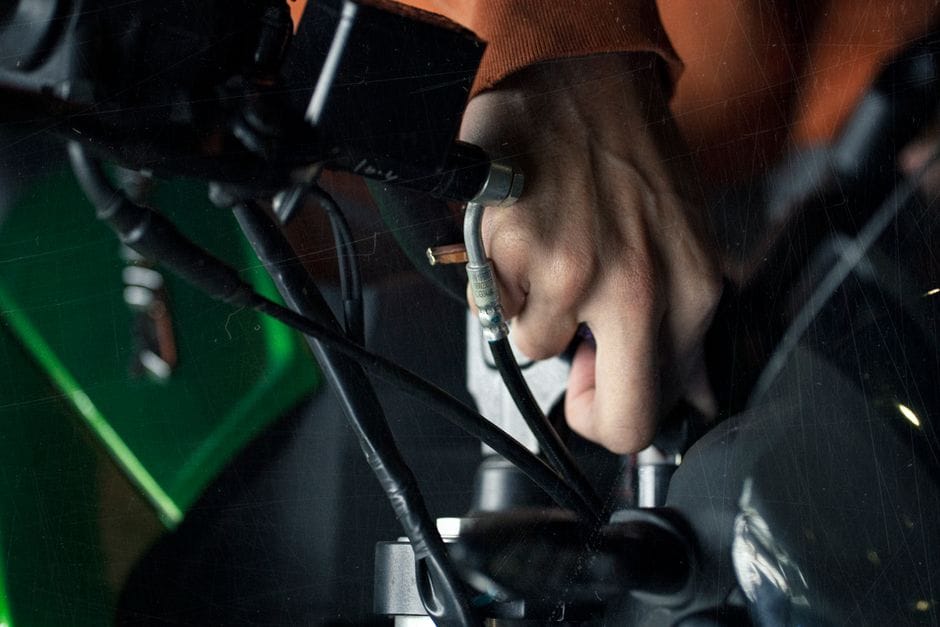
Before you begin, gather the correct tools. For a cable-operated system, you will need a set of combination wrenches (typically 10mm to 14mm), a screwdriver for the adjuster access hole, and possibly a cable adjuster tool or a pair of pliers. For a drum-in-hat system, you will need a brake spoon or adjuster tool to turn the star wheel, a wire brush to clean the adjuster, and a torque wrench for the caliper bracket bolts if you need to remove the caliper to access the drum. For an EPB, you will need an OBD-II scan tool with EPB calibration capability — this is not optional; you cannot properly adjust an electronic parking brake without it. You will also need jack stands, a lug wrench, and wheel chocks for safety.
Preparation is just as important as the tools. Park on a level surface, chock the front wheels, and loosen the lug nuts before jacking up the rear of the vehicle. Always support the vehicle on jack stands — never work under a car supported only by a jack. For drum-in-hat systems, you will need to remove the rear wheels and possibly the caliper and rotor to access the adjuster. For cable systems, you may need to access the equalizer under the vehicle, which means you will need to safely raise and support the car. Finally, consult your vehicle’s service manual for the specific adjustment procedure and torque specs — these vary significantly between makes and models.
Cable-Operated Parking Brake Adjustment: Step-by-Step

Cable-operated systems are the most straightforward to adjust, but they require attention to detail. The goal is to set the cable tension so that the brake engages fully within the manufacturer’s specified click count — typically 5 to 10 clicks on the handle or pedal travel. Here is the general procedure:
Step 1: Access the equalizer. The equalizer is a metal bracket or bar located under the vehicle, usually near the rear axle or just behind the front seats, where the single cable from the handle splits into two cables going to each rear wheel. You will need to crawl under the vehicle to access it.
Step 2: Loosen the locknut. On the equalizer, you will find an adjusting nut and a locknut
. Loosen the locknut with a wrench, but do not remove it — just back it off enough to allow the adjusting nut to turn freely.
Step 3: Tighten the adjusting nut. Turn the adjusting nut to take up slack in the cable. The goal is to remove the free play so that the handle or pedal has minimal travel before the brakes begin to engage. Tighten the nut in small increments — a quarter turn at a time — and check the handle feel after each adjustment. You want the brake to engage firmly at around 5 to 7 clicks on a hand lever, or about 3 to 4 inches of travel on a foot pedal.
Step 4: Check for drag. After tightening, spin the rear wheels by hand. They should rotate freely with no dragging or grinding. If you feel resistance, you have over-tightened the cable — back off the adjusting nut slightly until the wheels spin freely.
Step 5: Lock the adjustment. Once the correct tension is achieved, hold the adjusting nut in place with one wrench and tighten the locknut against it with another. Torque the locknut to the manufacturer’s specification, typically 15 to 25 ft-lbs.
Step 6: Test the brake. Lower the vehicle, release the parking brake, and drive slowly in a safe area. Apply the parking brake at low speed to confirm it engages smoothly and holds the vehicle. On an incline, the brake should hold the car stationary without the handle reaching the end of its travel.
Common issues with cable systems include a seized adjuster nut (apply penetrating oil and let it soak), a corroded cable that needs replacement rather than adjustment, and an equalizer that is bent or damaged. If the cable is frayed or kinked, do not attempt to adjust it — replace the cable first.
Drum-in-Hat Parking Brake Adjustment: Step-by-Step

Drum-in-hat systems combine rear disc brakes with a small drum brake inside the rotor. The parking brake shoes press against this inner drum when the cable is pulled. Adjusting these systems requires setting the shoe-to-drum clearance, which is typically 0.010 to 0.030 inches. Here is the procedure:
Step 1: Remove the rear wheels. Loosen the lug nuts, jack up the vehicle, support it on jack stands, and remove the wheels to access the brake assembly.
Step 2: Remove the caliper and rotor. Depending on your vehicle, you may need to remove the caliper (hang it with a wire — never let it dangle by the brake hose) and slide the rotor off the hub. Some vehicles have a small access hole in the rotor or backing plate that allows you to reach the adjuster without removing the rotor. If your vehicle has this access hole, you can skip the caliper removal.
Step 3: Locate the adjuster star wheel. The star wheel is a toothed adjuster mechanism at the bottom of the parking brake shoe assembly. It is accessed through the backing plate or the rotor access hole. Clean any rust or debris from the adjuster with a wire brush and apply a small amount of anti-seize compound.
Step 4: Turn the star wheel. Using a brake spoon or flat-blade screwdriver, turn the star wheel to expand the shoes outward. Turn it until the shoes just contact the drum, then back off the adjuster by a specific number of clicks — usually 10 to 15 clicks, or until the rotor spins freely with a slight drag. The exact specification varies by vehicle, so consult your service manual.
Step 5: Reinstall the rotor and caliper. If you removed them, reinstall the rotor, torque the caliper bracket bolts to spec, and reinstall the caliper. Torque the caliper slide pins to the manufacturer’s specification.
Step 6: Adjust the cable tension. With the shoes set, the cable tension may still need adjustment. Follow the cable adjustment procedure from the previous section to set the handle or pedal travel to the correct click count.
Step 7: Test. Reinstall the wheels, lower the vehicle, and test the parking brake on an incline. The brake should hold the vehicle firmly, and the handle should not exceed the specified click count.
Common issues with drum-in-hat systems include a seized star wheel (use penetrating oil and patience), worn shoe linings that require replacement, and a rusted drum surface that needs cleaning or resurfacing. If the shoes are worn below the minimum thickness, adjustment will not help — replace the shoes.
Electronic Parking Brake (EPB) Adjustment and Calibration

Electronic parking brakes are fundamentally different from cable or drum systems. There is no cable to tighten and no star wheel to turn. Instead, an electric motor on the rear caliper or a central actuator applies and releases the brake. Adjustment is performed through the vehicle’s diagnostic system, and it requires a scan tool with EPB functionality. Here is what you need to know:
When is EPB adjustment needed? The EPB system self-calibrates during normal operation, but it may require a manual calibration reset after rear brake pad replacement, rotor replacement, or if the system detects a fault. Symptoms of an out-of-calibration EPB include a warning light on the dashboard, the brake not holding on an incline, or the brake releasing unexpectedly.
Step 1: Connect the scan tool. Plug an OBD-II scan tool with EPB calibration capability into the vehicle’s diagnostic port. Turn the ignition to the “ON” position but do not start the engine.
Step 2: Enter the EPB service mode. Navigate to the EPB menu on the scan tool and select “Service Mode” or “Retract.” This command retracts the parking brake pistons, allowing you to service the rear brakes. The scan tool will guide you through the process.
Step 3: Perform the brake service. With the EPB retracted, you can now replace brake pads, rotors, or perform other rear brake work. If you are only adjusting the parking brake, you may not need to remove anything — but the service mode is required to reset the system.
Step 4: Run the calibration routine. After the service work is complete, select “Calibrate” or “Reset” on the scan tool. The system will automatically extend the pistons, set the correct clearance, and store the new calibration data in the vehicle’s computer. This process takes a few minutes and should not be interrupted.
Step 5: Verify the operation. Disconnect the scan tool, start the engine, and test the EPB by engaging and releasing it several times. The warning light should be off, and the brake should hold the vehicle firmly on an incline.
Common issues with EPB systems include a failed actuator motor (requires replacement), a corroded connector, and software glitches that require a dealer-level scan tool. If your scan tool cannot communicate with the EPB module, you may need a more advanced diagnostic tool or a trip to a professional shop. Never attempt to manually force an EPB caliper piston back without using the service mode — this can damage the actuator.
Torque Specifications, Clearance Specs, and Click Counts

Precision matters when adjusting a parking brake. Here are the key specifications you need to know, though always verify against your vehicle’s service manual:
Click count: Most manufacturers specify that the parking brake handle should engage fully between 5 and 10 clicks. Some performance vehicles may specify fewer clicks (3 to 5), while trucks and SUVs may allow up to 12. If your handle exceeds the specified count, the cable is too loose. If it engages in fewer than the minimum, it is too tight and may cause drag.
Drum-to-lining clearance: For drum-in-hat systems, the clearance between the parking brake shoes and the drum surface should be 0.010 to 0.030 inches. This is typically set by turning the star wheel until the shoes just touch the drum, then backing off 10 to 15 clicks. Some vehicles specify a feeler gauge measurement — insert a 0.020-inch feeler gauge between the shoe and drum; it should slide in with
a slight drag, but not be forced. If it slides in too easily, the clearance is too large; if it will not fit, the clearance is too small.
Cable tension: For cable-operated systems, the correct tension is achieved when the equalizer nut is tightened to remove slack, but the rear wheels still spin freely with the brake released. A common mistake is over-tightening the cable, which causes the brake shoes to drag and leads to premature wear and overheating.
Torque specifications: Torque values vary by vehicle, but common specs include: caliper bracket bolts (80 to 120 ft-lbs), caliper slide pins (25 to 35 ft-lbs), and the equalizer locknut (15 to 25 ft-lbs). Always use a torque wrench and consult your service manual for exact values. Over-torquing can strip threads or warp components; under-torquing can lead to loosening and failure.
EPB calibration parameters: For electronic systems, the calibration routine sets the actuator position and clamping force. There are no user-adjustable specs — the scan tool handles everything. However, you should verify that the rear brake pads are within specification before running the calibration, as worn pads will cause the system to set an incorrect baseline.
Common Mistakes and How to Avoid Them

Even experienced DIYers make mistakes when adjusting parking brakes. Here are the most common pitfalls and how to avoid them:
Mistake 1: Over-tightening the cable. The most frequent error is cranking down on the adjusting nut until the handle feels “tight.” This causes the brake shoes to drag against the drum, leading to premature wear, heat buildup, and reduced fuel economy. Always check that the rear wheels spin freely after adjustment.
Mistake 2: Ignoring the star wheel. On drum-in-hat systems, many DIYers only adjust the cable and skip the star wheel. This is backwards — the shoe-to-drum clearance must be set first, then the cable tension. If you only tighten the cable, you will mask a worn shoe problem and get inconsistent brake performance.
Mistake 3: Forgetting to clean the adjuster. A seized or corroded star wheel will not turn smoothly, and forcing it can break the adjuster. Always clean the adjuster with a wire brush and apply anti-seize compound before turning it.
Mistake 4: Using the wrong scan tool for EPB. Not all OBD-II scan tools can communicate with the EPB module. A generic code reader will not work. You need a scan tool with specific EPB service and calibration functions, or you risk leaving the system in an incomplete state.
Mistake 5: Not testing on an incline. A parking brake that works on flat ground may still fail on a hill. Always test the brake on a safe incline after adjustment to verify it holds the vehicle stationary.
Mistake 6: Skipping the service manual. Every vehicle has specific procedures and specs. Guessing or using a “one-size-fits-all” approach can lead to incorrect adjustments. Spend the time to look up your vehicle’s exact requirements.
When to Call a Professional vs. DIY

Parking brake adjustment is a DIY-friendly task for cable and drum-in-hat systems, provided you have basic mechanical skills and the right tools. The job typically takes 1 to 2 hours and costs only a few dollars in parts (if any). However, there are situations where professional help is the better choice:
You should DIY if: You have experience with brake work, you have the correct tools, and your vehicle uses a cable or drum-in-hat system. The procedures are straightforward, and the risk of serious damage is low if you follow the steps carefully.
You should call a professional if: Your vehicle has an EPB and you do not own a compatible scan tool — the tool alone can cost $200 to $500, which may exceed the cost of a professional adjustment. You should also seek professional help if you encounter seized components, broken cables, or worn shoes that require replacement, or if you are uncomfortable working under a raised vehicle.
Cost comparison: A DIY cable or drum adjustment costs $0 to $50 in parts (mainly anti-seize compound and penetrating oil). A professional cable or drum adjustment typically runs $80 to $150. An EPB calibration at a shop costs $100 to $250, depending on labor rates and whether any parts are needed. If you already own a compatible scan tool, DIY EPB calibration is free.
Cost Breakdown and Parts Needed

Understanding the cost of a parking brake adjustment helps you budget and decide between DIY and professional service. Here is a detailed breakdown:
DIY costs: For a cable or drum-in-hat adjustment, the parts you may need are minimal: anti-seize compound ($5 to $10), penetrating oil ($5 to $10), and possibly a new adjuster star wheel if yours is damaged ($10 to $20). If you need to replace the parking brake shoes, expect to pay $30 to $80 for a set. A brake spoon or adjuster tool costs $10 to $20. Total DIY cost: $0 to $100, depending on what you already own and what needs replacing.
Professional costs: A shop will charge labor at $80 to $150 per hour. A cable or drum adjustment typically takes 1 to 1.5 hours, so expect $80 to $225. An EPB calibration takes 0.5 to 1 hour, so expect $50 to $150. If parts are needed (cables, shoes, actuators), add the cost of those parts plus markup.
EPB scan tool cost: If you plan to DIY EPB calibration, a compatible scan tool costs $200 to $500 for a mid-range unit. High-end professional tools can cost $1,000 or more. If you only need to calibrate one vehicle, it is often more economical to pay a shop.
Hidden costs: If your parking brake issue is caused by a stretched or broken cable, a seized caliper, or worn shoes, adjustment alone will not fix it. Cable replacement costs $50 to $150 per cable plus labor. Shoe replacement costs $30 to $80 for parts plus labor. These are separate from the adjustment cost.
Frequently Asked Questions

Q: How often should I adjust my parking brake?
A: There is no fixed interval. Adjust the parking brake when you notice symptoms like a sagging handle, rolling on hills, or a warning light. Many drivers adjust it every 2 to 3 years or whenever rear brake work is performed.
Q: Can I adjust my parking brake without removing the wheels?
A: For cable-operated systems, yes — you can access the equalizer from under the vehicle. For drum-in-hat systems, you may be able to reach the star wheel through an access hole in the rotor or backing plate, but you will likely need to remove the wheels for proper access. EPB systems require a scan tool, not wheel removal.
Q: What happens if I over-tighten my parking brake?
A: Over-tightening causes the brake shoes to drag against the drum, leading to premature wear, heat buildup, and reduced fuel economy. In severe cases, it can cause the rear brakes to lock up or overheat, damaging the hub or bearings.
Q: Why does my parking brake work but my car still rolls?
A: This usually indicates that the brake is not holding with enough force. Possible causes include worn shoes, a stretched cable, or a seized adjuster. It can also be caused by a hydraulic leak in the service brake system that affects the parking brake’s ability to hold.
Q: Can a parking brake adjustment fix a warning light?
A: For EPB systems, yes — a calibration reset often clears the warning light if the issue is a calibration fault. For cable or drum systems, there is no warning light for adjustment issues, but a light may
appear if the brake is dragging and causing the ABS or brake system to detect a fault. In that case, correcting the adjustment may resolve the light.
Q: Do I need to adjust the parking brake after replacing rear brake pads?
A: Yes, in most cases. On drum-in-hat systems, new pads do not affect the parking brake shoes, but the rotor may be slightly thicker, which changes the clearance. On EPB systems, the calibration must be reset after pad replacement. On cable systems, the cable tension may need adjustment if the caliper position changes.
Q: What is the difference between a parking brake and an emergency brake?
A: They are the same physical system. The term “parking brake” emphasizes its primary function of holding the vehicle stationary, while “emergency brake” refers to its secondary function as a backup if the hydraulic brakes fail. Both terms describe the same mechanism.
Q: Can I drive with a loose parking brake?
A: Yes, you can drive, but it is unsafe. A loose parking brake will not hold the vehicle on an incline, and it will not function as an emergency brake if your hydraulic brakes fail. Have it adjusted as soon as possible.
Q: How do I know if my parking brake cable needs replacement instead of adjustment?
A: If the cable is frayed, kinked, rusted, or stretched beyond its adjustment range, it needs replacement. A cable that cannot be tightened to the correct click count, or that has visible damage, should be replaced. Also, if the cable is seized and will not move freely, replacement is necessary.
Safety Tips and Best Practices

Working on your parking brake involves lifting the vehicle and handling brake components. Follow these safety tips to avoid injury and damage:
Always use jack stands. Never work under a vehicle supported only by a hydraulic jack. Jack stands are rated for specific weights — ensure they are rated for your vehicle’s weight and are placed on solid, level ground.
Chock the wheels. Place wheel chocks in front of and behind the front wheels to prevent the vehicle from rolling while the rear is raised.
Wear safety glasses and gloves. Brake dust can contain asbestos or other harmful materials. Wear a dust mask and safety glasses when working on brakes. Gloves protect your hands from sharp edges and chemicals.
Never force a seized component. If a nut, bolt, or adjuster will not turn, apply penetrating oil and let it soak. Forcing it can break the component or damage the surrounding assembly.
Use the correct tools. Using the wrong size wrench or a worn-out tool can strip nuts and bolts. Use metric or SAE tools as appropriate for your vehicle, and replace any damaged tools.
Torque everything to spec. Under-torqued bolts can loosen and cause failure. Over-torqued bolts can strip threads or warp components. Always use a torque wrench for critical fasteners.
Test the brake before driving. After any adjustment, test the parking brake on a flat surface first, then on a gentle incline, before driving on public roads.
Dispose of old parts properly. Brake shoes, pads, and fluids are hazardous waste. Take them to a recycling center or auto parts store that accepts them.
Conclusion: Master Your Parking Brake Adjustment

Parking brake adjustment is a critical maintenance task that ensures your vehicle stays put when parked and provides a reliable backup braking system. Whether you drive a vehicle with a cable-operated handbrake, a drum-in-hat system, or a modern electronic parking brake, the principles are the same: set the correct clearance, tension, or calibration, and verify the brake holds properly.
For cable and drum systems, the DIY process is accessible to most home mechanics with basic tools and a service manual. The key is to follow the steps in order — set the shoe clearance first, then the cable tension — and to avoid over-tightening. For EPB systems, the process requires a compatible scan tool, but the procedure is largely automated once you enter service mode.
Remember the critical specifications: 5 to 10 clicks on the handle, 0.010 to 0.030 inches of drum-to-lining clearance, and proper torque on all fasteners. If you encounter seized components, broken cables, or worn shoes, address those issues before attempting an adjustment. And when in doubt, consult a professional — the cost of a shop adjustment is far less than the cost of a rolling car or a failed brake system.
With the knowledge from this guide, you can confidently diagnose, adjust, and maintain your parking brake, keeping your vehicle safe and compliant for years to come.
You might also like: emergency brake problems, best drilled and slotted rotors, brake rotor buying guide
![K&N Air Filter Review: Worth the Investment? [2025]](https://vehiclebar.com/wp-content/uploads/2026/01/PWCAI02_1024x1024.webp)