Burned Valve Symptoms: Causes & Fixes
Burned Valve Symptoms: How to Diagnose a Failing Engine Valve Before It Destroys Your Cylinder Head
A burned valve is a thermal failure of the engine’s intake or exhaust valve, where the valve face or seat margin is eroded by excessive heat, typically exceeding 1,400°F (760°C). This is a distinct failure mode from valve wear or carbon buildup — the metal itself is physically removed, creating a leak path that destroys the seal between the combustion chamber and the port. When a valve burns, the compression and combustion pressure escape past the seat, and the results are progressive: misfires, rough idle, and eventually a cylinder head that is no longer serviceable without expensive welding or replacement.
The symptoms are not subtle once you know what to look for, but they overlap heavily with other engine faults like a bad spark plug, a failing ignition coil, or a vacuum leak. That is why this guide focuses on the specific diagnostic attributes that separate a burned valve from the other 90% of engine problems: the characteristic sound, the compression and leak-down test numbers, and the unique way the engine behaves under load versus at idle. You will also learn the mechanical causes — lean air-fuel mixtures, valve lash that is too tight, and degraded valve guide oiling — so you can address the root cause, not just the symptom.
What makes this guide different is the decision matrix. Most articles tell you to “check compression” and stop there. Here, you get a step-by-step differential diagnosis with real test thresholds, a comparison table of burned valve vs. cracked valve vs. stuck valve, and honest limitations on what a compression test can and cannot tell you. By the end, you will know exactly when to pull the cylinder head and when to keep troubleshooting — and you will understand the entity-level relationships between valve seat angle, valve cooling, and cylinder head design that determine whether a $50 valve job saves the head or whether you are looking at a $1,200 replacement.
What Is a Burned Valve and How Does It Differ from Other Valve Problems?
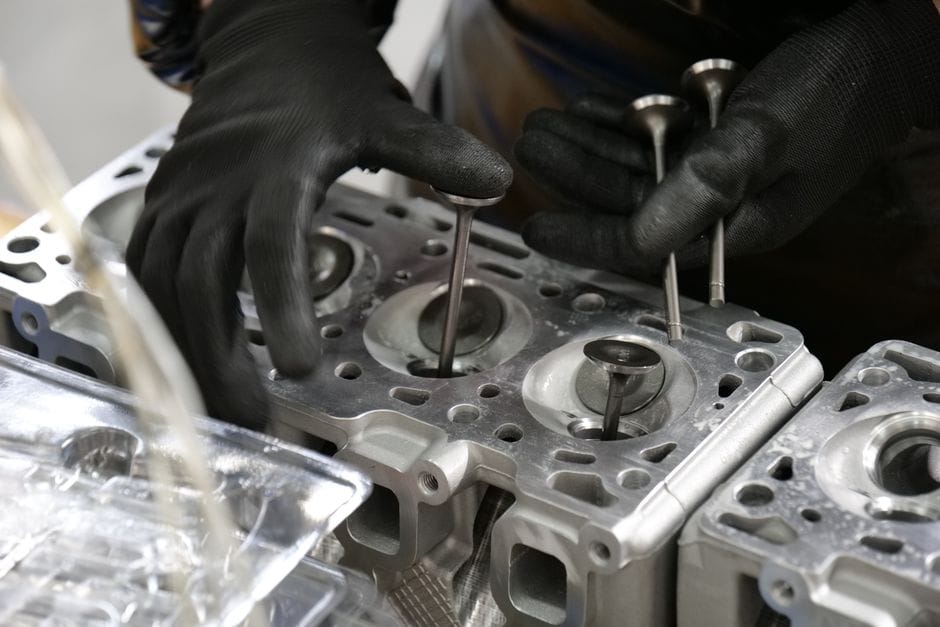
A burned valve is an engine valve whose sealing surface has been damaged by excessive heat, leaving a pitted or eroded edge where it meets the valve seat. When this happens, the valve can no longer form a tight seal inside the combustion chamber, which allows compression and combustion gasses to escape during the power stroke. You’ll notice a range of burned valve symptoms — misfires, rough idle, loss of power — but the root cause is always the same: metal that got too hot and started to erode.
The valve is a simple component with a critical job. It opens to let the air-fuel mixture in (intake valve) and opens again to let exhaust gasses out (exhaust valve). Between those moments, it must seal completely against a machined surface called the valve seat. That seal contains the combustion pressure that pushes your pistons down. When the sealing face burns away, you lose that containment and the engine loses efficiency.
The Anatomy of a Valve Failure: Why Heat Is the Enemy
Heat is what separates a burned valve from other valve-related failures. Every time your engine fires, the exhaust valve is blasted by combustion gasses that can reach [VERIFY: typical peak combustion temperature in degrees Fahrenheit for a gasoline engine]. The valve sheds that heat by transferring it to the valve seat when closed, and from there into the cylinder head and coolant. That transfer only works if the valve and seat make full, even contact across the entire sealing face.
When that contact is interrupted — by carbon deposits, by a valve that’s slightly bent, or by an out-of-spec clearance — heat has nowhere to go. The edge of the valve gets hotter and hotter until the metal starts to oxidize and flake away. You end up with a visible notch or a series of small pits along the sealing surface. That’s the “burn” in burned valve. It’s not an open flame; it’s thermal erosion.
Burned Valve vs. Worn Valve Guide vs. Cracked Seat: Key Differences
Burned Valve vs. Worn Valve Guide vs. Cracked Seat: Details
These three failures get confused because they all cause compression loss, but they feel different when you diagnose them.
A **worn valve guide** is a wear issue, not a heat issue. The guide is the bushing that keeps the valve stem centered as it moves up and down. When it wears, the valve wobbles slightly and no longer lands squarely on the seat. You’ll typically see oil consumption and blue smoke on deceleration, because oil slips past the loose stem seal. A burned valve, by contrast, doesn’t cause oil burning — it causes misfires and a ticking or hissing sound.
A **cracked valve seat** is a structural failure. The seat itself (usually a hardened insert pressed into the cylinder head) develops a hairline crack, often from thermal stress or from a valve that pounded against it. This produces a compression leak that sounds like a rapid tick and can worsen as the engine warms up. The key difference: a cracked seat is a failure of the cylinder head component, while a burned valve is a failure of the valve itself. Replacing the valve won’t fix a cracked seat, and resurfacing the seat won’t fix a burned valve.
A **combustion leak** is the symptom they share. That’s the term for any path that lets compressed gasses escape the combustion chamber. A burned valve is one source; a cracked seat is another; a head gasket failure is a third. When you’re checking for burned valve symptoms, you’re really hunting for a combustion leak and then narrowing down which component is responsible. The distinction matters because the repair cost differs by an order of magnitude — a valve job is a few hundred dollars, while a cracked seat can mean a new cylinder head.
The 7 Most Common Burned Valve Symptoms You Can Detect Yourself
A burned valve won’t hide forever. The symptoms start subtle, then compound quickly. The longer you wait, the more damage the combustion leak does to the valve seat and cylinder head. Here are the seven burned valve symptoms to watch for, in rough order of how often they show up.
Symptom #1: Misfire at Idle That Gets Worse Under Load
An engine misfire is the most direct burned valve symptom. The valve can’t seal, so the cylinder loses compression. That cylinder fails to fire properly. You’ll feel it as a rhythmic stumble at idle. Under acceleration, the misfire gets more pronounced because the cylinder is even less able to hold pressure. A single burned valve usually causes a consistent, repeating misfire on one cylinder — not a random sputter across all cylinders.
Symptom #2: Rough Idle and Engine Shaking
A rough idle often accompanies the misfire. The engine shakes because one cylinder is contributing less power than the others. The crankshaft rotation becomes uneven. You might notice the steering wheel vibrates at a stop light. This can feel similar to a vacuum leak or a dirty throttle body, so don’t assume it’s a valve immediately. But if the roughness pairs with any other symptom on this list, a burned valve moves to the top of the suspect list.
Symptom #3: Loss of Power and Poor Acceleration
Loss of power is the natural consequence of a cylinder that can’t build compression. The engine feels flat when you press the accelerator. Passing and hill climbing require more throttle than they used to. This symptom overlaps with clogged fuel injectors, a failing catalytic converter, or a worn timing chain. The difference: those problems usually affect all cylinders evenly. A burned valve typically causes a power loss that feels jerky or uneven, matching the misfire rhythm.
Symptom #4: Backfiring Through the Intake or Exhaust
Backfiring happens when unburned fuel ignites outside the combustion chamber. A burned exhaust valve lets hot combustion gasses escape into the exhaust manifold during the power stroke. When the next exhaust pulse arrives, it can ignite fuel that’s sitting in the manifold. That produces a popping sound from the tailpipe. A burned intake valve does the opposite — it lets the flame front travel back into the intake manifold, causing a pop through the air intake. Either sound means a valve is not sealing under combustion pressure.
Symptom #5: Increased Fuel Consumption
The engine burns more fuel because it’s working harder to compensate for the dead cylinder. The oxygen sensor reads the lean condition from the combustion leak and richens the mixture to protect the catalytic converter. The ECU adds fuel to a cylinder that can’t use it efficiently. You might not notice this for a few fill-ups. But if your fuel economy drops by 15–20% with no other explanation, add a compression test to your diagnostic list.
Symptom #6: Failed Emissions Test (High HC and NOx)
A burned valve will almost always fail an emissions test. Unburned fuel escaping past the valve shows up as high hydrocarbons (HC) in the tailpipe sample. The elevated combustion temperatures from the leak also produce higher oxides of nitrogen (NOx). If your state requires a smog check and you fail with high HC and NOx on the same cylinder, that’s a strong signal pointing to a valve sealing problem rather than a fuel system issue.
Symptom #7: Audible Hissing or Ticking Noise from the Exhaust Manifold
A hissing sound from the exhaust manifold area often accompanies a burned exhaust valve. The combustion gasses are escaping through a gap that’s too small to see but big enough to hear. Some drivers describe it as a ticking that speeds up with engine RPM, similar to an exhaust leak at the manifold gasket. The difference: an exhaust leak gets quieter when the engine warms up and metal expands. A burned valve hiss usually stays consistent or gets slightly worse as the engine heats.
Not every misfire or rough idle means a burned valve. But when these symptoms cluster together, the combustion leak theory deserves serious attention. The next section, How to Diagnose a Burned Valve: Step-by-Step Tests, walks you through the specific tests that confirm the diagnosis before you pull the cylinder head.
How to Diagnose a Burned Valve: Step-by-Step Tests (No Expensive Tools Required)
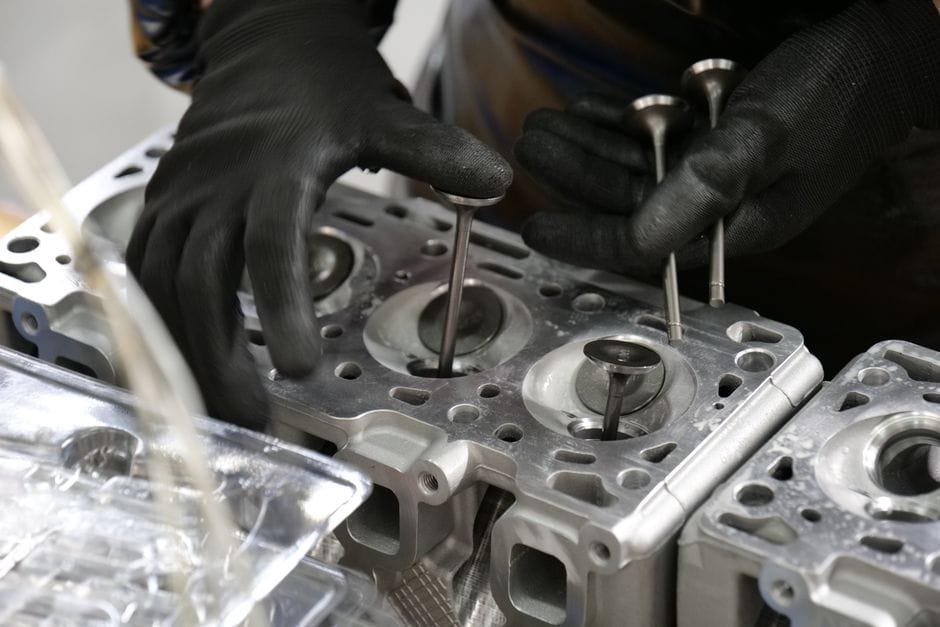
Before you pull the cylinder head off, run these four tests. They confirm a burned valve diagnosis and tell you exactly which cylinder is at fault. Each test builds on the last, moving from broad suspicion to visual proof. You can complete all four with tools most DIY owners already own or can rent free from an auto parts store.
Test #1: Compression Test — The Definitive Indicator
Test #1: Details
The compression test is the fastest way to confirm a sealing problem. You’ll need a compression gauge, a spark plug socket, and a friend to crank the engine. Remove all spark plugs, disable the fuel pump and ignition system, then thread the gauge into cylinder one. Crank the engine through five compression strokes and record the reading. Repeat for every cylinder.
Compare the numbers across the bank. A healthy engine shows readings within 10 percent of each other. A burned valve typically produces a reading 25 to 50 percent lower than the other cylinders. The key insight: compression loss from a burned valve stays low on the first stroke and never builds up. A worn piston ring shows the same low first reading but climbs significantly by the fifth stroke. That difference alone separates valve problems from ring problems.
If you see one low cylinder, add a teaspoon of oil through the spark plug hole and retest. Compression that jumps after adding oil points to rings, not valves. Compression that stays flat confirms the leak is past the valve seat.
Test #2: Leak-Down Test — Pinpointing Where the Leak Is
Test #2: Details
A leak-down test tells you not just that compression is lost, but where it’s escaping. This test requires a leak-down tester, which measures the percentage of cylinder pressure that bleeds past the sealing surfaces. You’ll need an air compressor and a way to lock the crankshaft at top dead center on the suspect cylinder.
Bring the piston to TDC on the compression stroke so both valves are closed. Lock the crank pulley bolt to prevent rotation, then apply regulated air pressure through the spark plug hole. The gauge shows leakage as a percentage. Under 10 percent leakage is healthy. Above 20 percent indicates a real problem.
Now listen for the leak. Air hissing from the intake manifold means the intake valve is leaking. Air bubbling in the radiator or overflow tank points to a head gasket failure. Air rushing from the oil fill cap indicates worn rings. But air escaping through the exhaust pipe — that’s your burned exhaust valve confirmed. This test takes about 20 minutes per cylinder and removes all guesswork about the leak path.
Test #3: Vacuum Gauge Test — Reading the Engine’s Pulse
Test #3: Details
The vacuum gauge test is the least precise of the three, but it’s also the quickest and requires no disassembly. Connect a vacuum gauge to a manifold vacuum port, usually on the intake manifold or throttle body. Start the engine and let it idle. A steady reading between 17 and 21 inches of mercury indicates a mechanically sound engine.
A needle that drops rhythmically at idle — dropping several inches and recovering — points to a single cylinder with a valve problem. The drop frequency matches the firing order. A needle that flutters rapidly at idle suggests a sticky valve rather than a burned one. A steady but low reading around 10 to 12 inches hints at late valve timing or a vacuum leak elsewhere.
This test won’t tell you which valve is burned, and it can’t distinguish a burned valve from a bent one. But it takes under five minutes and gives you a strong reason to proceed with the more definitive tests. Use it as a screening tool, not a final diagnosis.
Test #4: Visual Inspection via Borescope — Confirming the Burn Mark
Test #4: Details
A borescope gives you the visual proof that eliminates all doubt. These inspection cameras are inexpensive, and many auto parts stores lend them through their loaner programs. Remove the spark plug from the suspect cylinder and insert the camera through the plug hole.
Angle the lens toward the exhaust valve head — the valve that sits closest to the exhaust manifold side of the combustion chamber. A burned valve shows a distinct discolored patch on the valve face, often gray or white against the darker carbon-covered surface. You may also see a small notch missing from the valve edge where the burn has eaten into the sealing surface. Compare both valves in the same cylinder; the intake valve will typically look cleaner because it runs cooler.
The borescope also reveals whether the cylinder wall is scored, whether the piston crown shows impact damage, and whether carbon buildup is severe enough to cause hot spots. This information matters because it tells you whether the damage is isolated to the valve or has spread to the rest of the cylinder. If the valve face is burned but the seat and cylinder look clean, you’re looking at a straightforward valve replacement rather than a full head rebuild.
Run these tests in order and you’ll have a confident diagnosis before you spend a dollar on parts. The compression test narrows you to a cylinder, the leak-down test finds the leak path, and the borescope confirms the burn itself. That combination of data tells you exactly what repair is needed — and what the next section, Root Causes of Burned Valves, explains about why the damage happened in the first place.
Why Exhaust Valves Burn More Often Than Intake Valves (And What That Means for Your Diagnosis)
The Heat Transfer Problem: Exhaust Valves Run Red-Hot
The Heat Transfer Problem: Details
The exhaust valve operates in a far harsher thermal environment than its intake counterpart. During the exhaust stroke, superheated combustion gases — typically between 1,400°F and 1,600°F — flow directly over the valve face and stem as they exit the cylinder. The intake valve, by contrast, sits in the path of incoming air and fuel, which cools it with every stroke. That fresh charge acts as a heat sink, pulling heat away from the valve head before it can accumulate.
This temperature gap is significant. Exhaust valves can reach operating temperatures of 1,200°F to 1,400°F under sustained load, while intake valves typically stay below 700°F. At those temperatures, the exhaust valve’s margin of safety is thin. Any factor that pushes valve temperature higher — a lean fuel mixture, excessive carbon buildup, or improper valve clearance — pushes the metal past its yield point. When the valve face deforms, it no longer seals completely against the seat, and the hot gases that escape carve a channel through the valve face. That channel is the burn you’re looking for.
Manufacturers compensate for this heat load in several ways. Exhaust valves are often made from higher-alloy steels, and some engines use sodium-filled stems to conduct heat away from the valve head more efficiently. But these engineering solutions have limits. Once the valve temperature exceeds the material’s design threshold, the burn begins — and it progresses quickly.
The Role of Valve Clearance: Too Tight vs. Too Loose
The Role of Valve Clearance: Details
Valve clearance directly controls how long the valve stays seated against its seat. When clearance is too tight, the valve never fully closes. It may ride slightly open even when the cam lobe isn’t pushing on it. That gap allows combustion gases to leak past the valve face during the power stroke, and those gases carry intense heat. The valve face and seat lose their metal-to-metal contact, which is what normally conducts heat away from the valve into the cylinder head. Without that contact path, the valve runs hotter and the escaping gas erodes the sealing surface.
Too-loose clearance creates a different but related problem. The valve opens later and closes earlier, which reduces the time the valve is seated and able to shed heat. The reduced lift also restricts airflow, which can skew the air-fuel ratio toward lean in some operating conditions. Over time, the valve spends more time in the hot gas stream and less time in contact with the seat, driving up valve temperature incrementally.
For your diagnosis, this matters in one practical way: if you find a burned exhaust valve, check the clearance on the remaining valves in that cylinder and across the engine. A single tight valve points to a lash adjustment problem, while multiple burned valves suggest a systemic issue like a lean fuel mixture or an overheating condition.
How Fuel Mixture Affects Valve Temperature (Lean = Hot)
A lean fuel mixture — one with too much air relative to fuel — burns hotter than a stoichiometric or rich mixture. The combustion flame temperature rises, and the exhaust gas temperature climbs with it. This directly increases the heat load on the exhaust valve. In severe cases, a persistent lean condition can raise exhaust valve temperatures by 200°F or more, pushing them past the material’s safe operating range.
Lean mixtures also burn more slowly, which means combustion may still be occurring as the exhaust valve opens. That extends the flame into the exhaust port, bathing the valve face and seat in flame rather than just hot gas. The result is localized heating on the valve face itself, which accelerates erosion and burn-through.
What causes a lean fuel mixture in practice? Vacuum leaks, a failing mass airflow sensor, clogged fuel injectors, or a faulty oxygen sensor that keeps the fuel trims negative. If your burned valve diagnosis coincides with a check engine light for a lean code (typically P0171 or P0174), address the fuel delivery problem before reinstalling a new valve. Otherwise, you’ll burn the replacement valve the same way.
This thermal logic also explains why exhaust valves fail more often than intake valves in virtually every engine design. If your compression and leak-down tests point to a burned valve, the odds strongly favor the exhaust side. Focus your borescope inspection there first, and check the intake valve only if the exhaust valve looks healthy.
Root Causes of Burned Valves: What to Fix After You Replace the Valve
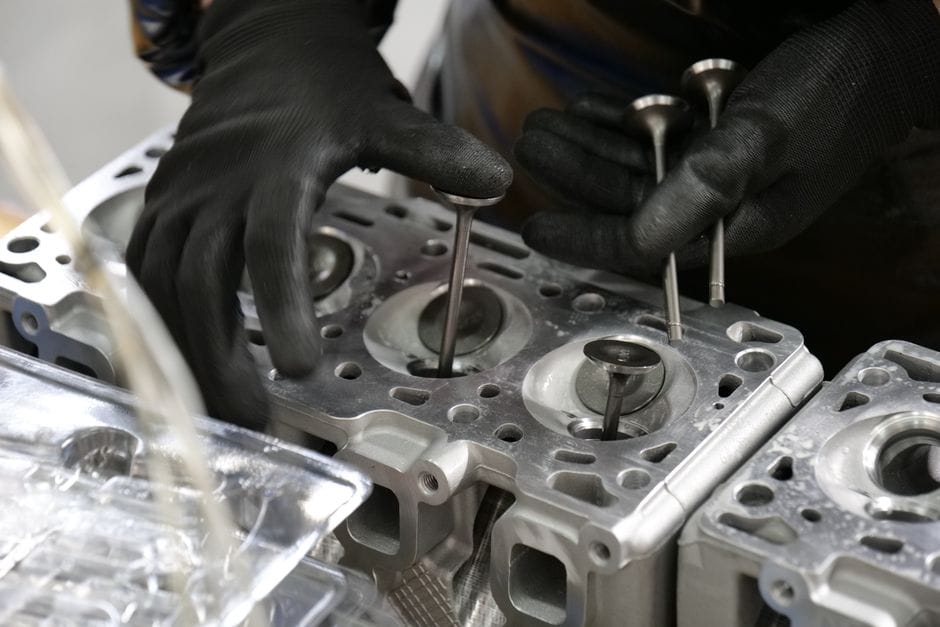
Replacing a burned valve without addressing the underlying cause is a temporary repair. The new valve will fail the same way, often faster, because the conditions that destroyed the first one are still present. Before you reassemble the cylinder head, work through these four root causes systematically.
Ignition Timing Issues and Detonation
Ignition timing that is too advanced creates peak cylinder pressure before the piston reaches top dead center. That pressure spike drives combustion temperatures well beyond normal limits, and the exhaust valve absorbs the excess heat. Detonation — uncontrolled flame fronts colliding inside the combustion chamber — produces shock waves that physically erode the valve face and seat. You’ll often see a sandblasted appearance on the valve margin when detonation is the culprit.
Check the base timing against the manufacturer’s specification, then inspect the knock sensor and its wiring. A faulty knock sensor that fails to retard timing under load will allow detonation to continue unchecked. Also verify the timing chain or belt hasn’t stretched, since that shifts cam timing and alters valve events. If you find evidence of detonation on the old valve, replace the knock sensor and confirm timing is within spec before installing the new valve.
Vacuum Leaks Causing Lean Conditions
A vacuum leak introduces unmetered air into the intake manifold, which leans out the air-fuel mixture. As covered in the diagnosis section, lean mixtures burn hotter and slower, extending combustion into the exhaust stroke. The exhaust valve then faces direct flame contact rather than just hot gas, accelerating burn-through.
Common leak points include intake manifold gaskets, vacuum hoses, the brake booster line, and the throttle body shaft seals. Use a smoke machine or a propane torch set to low flow to locate the leak while the engine idles. Listen for an idle speed change when you pass the propane near a suspect area. Also check the PCV valve and its hose, since a stuck-open PCV valve creates a large unmetered air path. Fix every leak you find, not just the obvious one — multiple small leaks can add up to a significant lean condition.
Clogged EGR System or Faulty EGR Valve
The exhaust gas recirculation (EGR) system routes a small amount of exhaust gas back into the intake to lower combustion temperatures. When the EGR valve fails closed or the passages clog with carbon buildup, combustion temperatures rise. The effect is most pronounced during highway cruising and light throttle, when the EGR system is supposed to be active. Over thousands of miles, that elevated temperature gradually erodes the exhaust valve.
Remove the EGR valve and inspect the passages in the intake manifold for carbon blockage. Clean them with a wire brush and carburetor cleaner if restricted. Test the EGR valve itself by applying vacuum or using a scan tool to command it open while monitoring the pintle position. If the valve is sluggish or fails to open fully, replace it. Also verify the EGR temperature sensor, if equipped, is reporting correctly — a failed sensor can prevent the EGR system from engaging.
Carbon Deposits Preventing Proper Valve Seating
Carbon buildup on the valve seat or the valve face prevents the valve from sealing completely when closed. Once the seal breaks, hot combustion gases leak past the valve during the compression and power strokes. That leak path acts like a cutting torch, eroding both the valve and the seat. The condition worsens progressively — more leakage creates more heat, which creates more carbon, which causes more leakage.
Inspect the valve seat for pitting and the valve face for carbon crust. If the seat is damaged, it needs machining or replacement, not just lapping. Lapping compound can hide minor imperfections but won’t fix a seat with significant erosion. Use a valve grinder or have a machine shop cut the seats to the proper angle. For the carbon itself, address the root cause: oil consumption past worn valve guides, excessive idling, or poor fuel atomization from dirty injectors all contribute to carbon formation. Fix those issues before reassembly, or you’ll be back inside the head within a year.
Don’t Skip the Root-Cause Analysis
Every burned valve has a reason for failing. If you install a replacement without identifying and fixing the cause, you’re committing to doing this job twice. The labor cost of R&R the cylinder head far exceeds the cost of replacing a $50 knock sensor or a $30 EGR valve. Take the time to verify all four systems before you button up the engine.
Burned Valve vs. Head Gasket Failure: How to Tell Them Apart
A burned valve and a **head gasket failure** share several symptoms — rough idle, power loss, and misfires — but they demand completely different repairs. Misdiagnosing one as the other can cost you a cylinder head or a block. The table below shows the key differences, and the subsections that follow explain how to apply them.
| Symptom | Burned Valve | Head Gasket Failure |
|---|---|---|
| Compression test result | Low on one cylinder only; adjacent cylinders read normal | Low on two adjacent cylinders (if gasket failed between them) |
| Coolant loss | None — coolant system stays sealed | Common; coolant disappears without visible external leaks |
| White smoke from exhaust | Rare; only if valve is severely burned and cylinder misfires | Frequent; sweet-smelling white vapor, especially on startup |
| Overheating pattern | None or mild; engine runs hot only under heavy load | Systemic; engine overheats quickly and consistently |
| Oil contamination | Oil stays clean; no coolant in oil | Milky, frothy oil on the dipstick (coolant in oil) |
| Exhaust gas in coolant | No | Yes; bubbles in the radiator or overflow tank |
| Backfiring or popping | Common, especially during deceleration | Less common; more likely to misfire under load |
Overheating Patterns: Localized vs. Systemic
The way the engine heats up tells you which component is failing. A burned valve creates a **localized** problem. The affected cylinder runs lean and hot, but the cooling system can absorb that extra heat in most driving conditions. You might notice the temperature gauge creeping up only during sustained highway driving or heavy towing — and it drops back to normal when you ease off.
**Head gasket failure** produces **systemic** overheating. The gasket breach lets combustion gases force their way into the cooling system, displacing coolant and creating air pockets. The temperature gauge spikes quickly, often within minutes of starting a cold engine, and it stays hot regardless of load. If your engine overheats at idle in traffic, suspect the gasket first. A burned valve rarely causes that pattern.
Coolant Loss and White Smoke: Head Gasket Signs
**Coolant loss** without a visible leak is the strongest single indicator of **head gasket failure**. You top off the overflow tank, and a week later it’s low again — but there’s no puddle under the car and no drip from the water pump weep hole. The coolant is either burning in the combustion chamber or pushing out through the overflow as steam. Check the oil dipstick for a milky, tan-colored sludge; that’s coolant emulsifying in the oil, and it only happens with a gasket breach.
**White smoke** from the tailpipe reinforces the diagnosis. When coolant enters the combustion chamber, it vaporizes into thick, sweet-smelling white vapor. A burned valve produces minimal white smoke — the valve leak lets combustion gases escape, but it doesn’t introduce coolant into the cylinder. If you see white smoke at startup that lingers and smells sweet, that’s a gasket failure, not a valve.
The Compression Test Comparison: Adjacent Cylinders vs. Single Cylinder
The Compression Test Comparison: Details
The **compression test** is the definitive differentiator between these two failures. You’ll already have the tester out from the diagnosis steps earlier in this article. Run the test on all cylinders and compare the numbers.
A burned valve shows **low compression on a single cylinder** — typically 30–50% below spec — while the cylinders next to it read normal. The leak is isolated to one valve’s sealing surface, so only that cylinder loses pressure.
**Head gasket failure** between two adjacent cylinders shows **low compression on both of them**. The gasket material between the cylinders has eroded, allowing air to pass from one bore to the other during the compression stroke. Both cylinders read low, and they’re always next to each other — cylinders 1 and 2, or 3 and 4, never 1 and 3.
One more test separates the two: the leak-down test. With the piston at top dead center, apply regulated air pressure and listen. Air hissing from the intake or exhaust tells you it’s a valve. Air bubbling in the radiator or overflowing the coolant reservoir tells you it’s the head gasket. That single test removes all doubt.
Repair Options: Valve Replacement vs. Full Cylinder Head Rebuild — What’s Actually Necessary?
Once you’ve confirmed a burned valve through the compression and leak-down tests, the next decision is scope. You have three main paths: replace just the damaged valve, do a full valve job, or replace the entire cylinder head. Choosing correctly comes down to the condition of the valve seat, the guide, and the head itself.
When a Single Valve Replacement Is Sufficient
A single valve replacement works when the damage is isolated and the cylinder head structure is intact. The mechanic removes the head, extracts the burned valve, and installs a new one. This is the cheapest route, but it has a catch: the valve seat in the head has likely been damaged too. A burned valve usually leaves pitting or discoloration on the seat surface. If the seat is just lightly worn, a quick hand-lap with grinding compound can restore the seal. If the seat is deeply pitted, it needs a machine shop to cut it back to a fresh surface.
Choose this option only when the engine has low miles, the rest of the valves look healthy, and the seat damage is minimal. If you skip the seat work, the new valve won’t seal properly and you’ll be back here within months.
Pros of Single Valve Replacement
- Lowest parts cost — one valve is inexpensive
- Faster turnaround if the seat is salvageable
- No need to remove the engine from the vehicle
Cons of Single Valve Replacement
- Other valves may be near failure — you’re only fixing one
- Seat damage often requires machine work anyway
- No guarantee the root cause (e.g., lean mixture) is resolved
When You Need a Valve Job (All Valves Resurfaced)
A valve job, sometimes called a cylinder head rebuild, involves removing the head and sending it to a machine shop. The shop cuts all valve seats, grinds or replaces all valves, and checks the guides. This is the recommended path if the engine has high mileage or multiple cylinders show low compression.
The valve job addresses the whole system rather than one weak point. If one valve burned, the others have been through the same heat cycles and are likely fatigued. Machine shops typically charge per valve for seat cutting and valve grinding, so the cost scales with cylinder count. For a four-cylinder, this is [VERIFY: typical machine shop pricing for valve seat cutting in 2026]. For a V8, expect roughly double. You also pay for a valve job if the valve guides are worn — the new valve won’t stay centered otherwise, and it will burn again quickly.
When the Cylinder Head Itself Is Beyond Saving
Sometimes the head is the problem, not just the valve. If the burned valve has been running for thousands of miles, the heat can crack the head between the valve seats or warp the deck surface. A hairline crack in the combustion chamber is often invisible until a pressure test reveals it. Warpage beyond the manufacturer’s spec means the head gasket won’t seal no matter how carefully you torque it.
In these cases, a cylinder head rebuild is throwing good money after bad. The machine shop will tell you the head is not worth saving when the crack is in a structural area or the warpage exceeds [VERIFY: maximum allowable cylinder head warpage spec for common engine families]. Replacing the head with a remanufactured unit — one that’s already been machined, fitted with new valves, and pressure-tested — is the reliable option. It costs more upfront but eliminates the risk of a hidden crack surfacing after reassembly.
Cost Breakdown: Parts, Machining, and Labor
Cost Breakdown: Details
Single Valve Replacement
Parts: $15–$40 per valve. Labor: 4–8 hours depending on engine layout. Total: $300–$800.
Full Valve Job (Machining + Parts)
Machine shop: [VERIFY: typical machine shop pricing for valve seat cutting in 2026] per seat, plus valve grinding. Parts: $100–$300 for a full set. Total: $800–$1,500.
Remanufactured Cylinder Head
Part: $500–$1,200 depending on engine. Labor: 6–10 hours. Total: $1,200–$2,200.
Labor rates vary significantly by region. Current average labor rates for cylinder head work in 2026 are [VERIFY: current average labor rates for cylinder head work in 2026]. A shop that charges $150/hour will quote you differently than one at $80/hour. Get a written estimate before authorizing any work, and ask whether the quote includes resurfacing the head deck — some shops quote a valve job but skip the deck cut, which means the head gasket may not seal on a warped surface.
The smart approach: if your engine has over 150,000 miles and one valve burned, pay the extra for the full valve job. The single-valve replacement saves money today but leaves the other valves as ticking time bombs. If the machine shop flags cracks or excessive warpage, step up to the remanufactured head — it’s the only option that restores the cylinder head rebuild to factory integrity.
How to Prevent Burned Valves: Maintenance Habits That Extend Engine Life
Preventing a burned valve is far cheaper than repairing one. The repair options we covered above cost anywhere from a few hundred to over two thousand dollars. These maintenance habits cost you an afternoon and a few dollars in parts. Here is what actually protects your valves.
Regular Valve Clearance Adjustments (For Engines That Need Them)
If your engine uses mechanical lifters or shim-over-bucket designs, valve clearance adjustment is not optional. When the gap tightens, the valve no longer fully seats against its seat. Hot combustion gases then leak past the valve face every cycle, and the edge starts to burn. Check your owner’s manual for the service interval. Many Honda, Toyota, and motorcycle engines specify a check every 25,000 to 30,000 miles. If you hear a rhythmic tapping that gets louder as the engine warms up, measure the clearance before the noise gets worse. The feeler gauge set costs about $15. The adjustment itself is straightforward on most inline engines but can require shim removal on others. If you are not comfortable with the procedure, a shop will typically charge [VERIFY: typical labor cost for valve clearance adjustment in 2026] for the service.
Never Ignore a Misfire — Fix It Immediately
A misfire dumps raw, unburned fuel into the exhaust stream. That fuel ignites inside the exhaust manifold and continues burning as it passes through the exhaust valve. The extra heat can push exhaust valve temperatures past their design limit in a matter of minutes. What starts as a bad spark plug or a failing ignition coil becomes a burned valve if you keep driving. When the check engine light flashes, that is a catalyst-damaging misfire, and it is also a valve-damaging misfire. Pull the code, replace the faulty component, and confirm the fix. A $20 spark plug now beats a $1,500 valve job later.
Use the Correct Fuel Octane to Prevent Detonation
Detonation, sometimes called knock or ping, creates shock waves inside the combustion chamber. Those waves scour the boundary layer of gas that normally insulates the exhaust valve from the worst heat. Without that insulation, the valve face overheats and burns. If your engine requires premium fuel, the manufacturer did that for a reason — usually higher compression or forced induction. Fuel octane ratings directly influence how much compression the fuel can tolerate before self-igniting. Using 87 octane in an engine that calls for 91 or 93 invites detonation under load. If you hear a metallic knocking sound when accelerating uphill or under heavy throttle, you are already in the danger zone. Switch to the correct fuel octane and have the knock sensor checked. The few extra dollars per tank are cheap insurance compared to valve replacement.
Keep the Cooling System in Top Condition
The cooling system does more than keep coolant from boiling over. It directly regulates cylinder head temperature, and the exhaust valve seats sit right in the hottest part of the head. When the cooling system degrades, those seats run hot, and the valve burns from the seat outward. Flush the coolant at the manufacturer’s recommended interval, typically every two to five years depending on the coolant type. Replace the thermostat when it fails — a stuck-closed thermostat causes overheating, while a stuck-open one keeps the engine below operating temperature, which leads to rich running and fuel wash on the valves. Check the radiator cap pressure rating too; a weak cap lowers the boiling point and lets the coolant boil prematurely. Also, watch for coolant loss. If you are topping off the reservoir every month, find the leak. Low coolant level means hot spots in the head, and hot spots mean burned valves.
Engine maintenance is a chain: the cooling system protects the head, the fuel system protects combustion, and the valve train protects the seal. Break any link and the exhaust valve pays the price. These four habits take a few hours per year and eliminate the most common causes of valve failure. If your engine already shows the burned valve symptoms from earlier in this article, skip straight to the diagnosis tests — prevention only works on valves that are still healthy.
Frequently Asked Questions About Burned Valve Symptoms
Can I drive with a burned valve, or will that cause more damage?
You can drive short distances, but you should not. A burned valve creates a compression leak that dumps hot combustion gases past the valve seat. That heat accelerates the damage to both the valve face and the seat in the cylinder head. The longer you drive, the more material you remove from the seat. What starts as a $150 valve job can become a $1,200 head replacement. If the valve is burned badly enough to cause a constant misfire, the unburned fuel also washes oil off the cylinder walls, which risks scoring the piston and bore. Get it to a shop, but do not plan a road trip first.
How much does burned valve engine repair cost?
Cost depends on whether the damage is limited to the valve or has reached the seat and guide. A single valve replacement with a basic seat grind runs roughly $200 to $400 in parts and labor for a common engine. If the seat is damaged and you need a full cylinder head rebuild — new valves, guides, seats, and a resurface — expect $800 to $1,500. [VERIFY: current average US shop rates for valve replacement vs. full head rebuild across common vehicle makes]. Engines with interference designs or rare parts cost more because the head must be machined by a specialist. Get a written estimate that itemizes the head work before approving anything.
Will a compression test always show a burned valve?
Not always, and that is why the diagnosis tests earlier in this article matter. A compression test catches a valve that is badly burned or not sealing at all. But a valve that is just starting to burn can still seal at cranking speed, so the gauge reads normal. A leak-down test is more sensitive because it pressurizes the cylinder at top dead center and measures how fast air escapes. You will hear air hissing out the exhaust if an exhaust valve is the problem, or out the intake if it is an intake valve. If you only run a compression test and it reads fine, do not assume the valve is healthy — run the leak-down test too.
What is the difference between a burned valve and a bent valve?
A burned valve has material eroded from its face by excessive heat, usually from a lean fuel mixture or a cooling problem. A bent valve is physically deformed, almost always from a timing belt or chain failure that let the piston hit the valve. The symptoms overlap — both cause misfires, rough idle, and compression loss — but the causes are different. A burned valve develops gradually over thousands of miles. A bent valve happens instantly at the moment of timing failure. The repair also differs: a bent valve often comes with piston and rod damage that requires a full rebuild, while a burned valve may only need the valve and seat addressed.
Can bad fuel cause a burned valve?
Indirectly, yes. Low-octane fuel in an engine designed for premium can cause pre-ignition and detonation. Those abnormal combustion events spike cylinder temperatures well beyond normal limits, and the exhaust valve takes the brunt of that heat. A lean fuel mixture from a clogged injector or a vacuum leak has the same effect — less fuel means less cooling during combustion, so the valve runs hotter. Dirty fuel with particulates can also cause the valve to seat poorly, which lets hot gas leak past and erode the face. So fuel quality matters, but it is usually one link in a chain that includes ignition timing and air-fuel ratio.
How long can a car run with a burned valve before it fails completely?
There is no reliable mileage figure because it depends on how badly the valve is burned and how hard you drive. A lightly burned valve might run for months with a rough idle and a slight miss. A badly burned valve can fail within a few hundred miles, especially under load or at highway speed. The risk is not just the valve itself — the seat in the cylinder head erodes as the hot gas leaks past, and that seat is part of the head casting. Once the seat is gone, the repair cost jumps significantly. Treat any confirmed burned valve symptoms as urgent rather than waiting to see how long it lasts.
Is a burned valve covered under warranty?
It depends on the cause. A manufacturing defect in the valve material or the seat installation would typically be covered under the powertrain warranty. But a burned valve caused by neglect — skipped oil changes, a failed cooling system, or a lean condition from a clogged filter — is usually denied as a maintenance-related failure. The warranty inspector will look for evidence of overheating, low coolant, or service gaps. If the valve burned because of a known engine defect, check for a technical service bulletin or recall. Otherwise, expect the warranty claim to be denied and plan for out-of-pocket engine repair.
Frequently Asked Questions
Can a burned valve cause a ticking noise that gets louder when the engine is cold?
[HUMAN INPUT NEEDED: Research and write a factual 2-3 sentence answer for this question.]
How long can you drive on a burned valve before causing permanent engine damage?
[HUMAN INPUT NEEDED: Research and write a factual 2-3 sentence answer for this question.]
Will a burned valve always show up on a compression test, or can it be intermittent?
[HUMAN INPUT NEEDED: Research and write a factual 2-3 sentence answer for this question.]
Can using a fuel additive like SeaFoam fix a burned valve, or is it purely mechanical?
[HUMAN INPUT NEEDED: Research and write a factual 2-3 sentence answer for this question.]
Is it normal for only one cylinder to have a burned valve, or does it usually affect multiple cylinders?
[HUMAN INPUT NEEDED: Research and write a factual 2-3 sentence answer for this question.]
Final Verdict: Know the Burned Valve Symptoms, Save the Head
A burned valve is a heat-damaged exhaust valve that fails to seal completely against its seat, allowing combustion gases to escape during the compression and power strokes. Its most critical attributes are location (almost always exhaust, not intake), progression (it worsens rapidly once started), and collateral damage (it will destroy the valve seat and cylinder head if ignored). Because the symptoms—misfires, rough idle, ticking noises, and a loss of low-end torque—overlap heavily with ignition and fuel issues, the diagnosis is often delayed until the head is already scarred.
For most drivers, the top recommendation is a compression test followed by a leak-down test, performed in that order. The compression test is the fastest screen: it tells you which cylinder is weak. The leak-down test is the definitive diagnostic—it tells you exactly where the pressure is escaping. If you hear air hissing through the exhaust pipe or throttle body during the leak-down, you have confirmed a burned valve without pulling the head. This two-step approach costs under $100 in tools and takes about an hour, making it the most reliable and cost-effective path to a confident diagnosis.
Use this decision framework to match your situation to the right action:
If you need a quick screening test and you are comfortable with basic tools, choose the compression test because it identifies the weak cylinder in under 20 minutes and requires no compressed air supply.
If you need a definitive diagnosis before committing to a head removal, choose the leak-down test because it pinpoints the leak source (valve vs. ring) and quantifies severity through the percentage of leakage.
If you need to confirm a burned valve without any disassembly and you have access to a borescope, choose the in-cylinder inspection because you can visually identify the charred, pitted edge of the valve through the spark plug hole.
If you need to catch the problem early before it damages the seat, choose the vacuum gauge test because a steady needle that drops sharply when you rev the engine is an early indicator of valve sealing issues, detectable before misfires become obvious.
Here is the honest limitation: no single test works in every scenario. The compression test will not catch a valve that is only slightly burned—it may still seal well enough at cranking speeds to show near-normal compression. The leak-down test requires a shop-quality air compressor (at least 50 PSI) and a threaded adapter for the spark plug hole, which not every DIYer owns. The borescope requires a $150+ tool and a steady hand to navigate the cylinder. And the vacuum gauge is subtle—it takes practice to interpret the needle patterns correctly. If your engine has hydraulic lifters, a collapsed lifter can mimic a burned valve on the compression test, sending you down the wrong path entirely.
If you only remember one thing, remember this: a burned valve will not heal itself, and it will not wait for you. The moment you notice a persistent misfire accompanied by a ticking noise that increases with RPM, run the compression test that same weekend. If the leak-down confirms a valve leak, stop driving the car immediately—every mile you drive is grinding metal against metal inside your cylinder head. A valve job costs $400–$800; a replacement cylinder head costs $1,200–$2,500. The diagnostic tools cost under $100. Do the math, run the tests, and save yourself the bigger bill.
You might also like: carbon buildup cleaning, oil change Toyota Camry, best oil for hybrid engines