Hard Shifting Diagnosis 2: Causes & Fixes
Hard shifting diagnosis is a systematic process used to identify why an automatic or manual transmission fails to shift smoothly, producing harsh, jarring gear changes when the driver expects a seamless transition. This diagnostic procedure is a critical branch of automotive repair, sitting at the intersection of mechanical engineering, hydraulic system analysis, and modern electronic control. When the transmission slams into gear, it is not merely a comfort issue — it is often the first audible warning that internal components are degrading, fluid is contaminated, or the vehicle’s computer has lost synchronization with the mechanical parts it governs.
Understanding hard shifting requires examining several key attributes: the type of transmission (automatic, manual, or CVT), the specific fluid condition and pressure levels, the health of solenoids and valve bodies, and the role of engine control modules in commanding shifts. This article moves beyond generic “check your fluid” advice to deliver a structured diagnosis workflow, complete with a symptom-to-cause decision tree, a comparison matrix of common failure points, and honest notes on what tools actually pay for themselves. You will learn how to separate a minor fluid issue from a catastrophic mechanical failure before you spend money on parts that will not solve the problem.
What makes this guide different is its reliance on measurable data rather than anecdotal shop talk. I have included real-world pressure test ranges, temperature-dependent fluid behavior charts, and a clear breakdown of when a DIY fix is viable versus when you need a professional rebuild. You will also get the honest limitations — some hard shifting causes are impossible to fully diagnose without dropping the transmission pan, and I will tell you exactly when that step becomes unavoidable.
What Is Hard Shifting and Why Does It Matter?
When you move the gear selector and feel a firm jolt, a clunk, or a noticeable delay before the transmission responds, that is hard shifting. It is a symptom that your transmission is struggling to complete a gear change. The shift may feel like it is being forced into place. Many drivers describe it as a kick or a thump that you feel through the seat and the steering wheel.
Hard shifting is a signal from your vehicle. It tells you that something inside the drivetrain is not operating within normal parameters. The issue could be mechanical, hydraulic, or electronic. Ignoring it rarely makes the problem go away. In most cases, the condition worsens over time, and the cost of repair climbs right along with it.
Defining Hard Shifting vs. Normal Gear Changes
Defining Hard Shifting vs. Normal Gear Changes
A normal gear change in a healthy automatic transmission is smooth and barely perceptible. You might notice the engine RPM drop slightly as the next gear engages, but you should not feel a violent push or pull. In a manual transmission, a normal shift requires steady clutch pedal pressure and a clean lever movement into the next gate.
Hard shifting sits at the opposite end of that spectrum. The gear engagement is abrupt and forceful. You may hear a metallic clunk from under the floorpan. The vehicle might lurch forward or backward during the transition. This is not a minor annoyance; it is a measurable deviation from how the transmission was designed to operate.
For a proper hard shifting diagnosis, you need to distinguish between a single rough shift and a pattern of rough shifts. One hard shift on a cold morning might be normal behavior for some transmissions. Repeated abrupt gear engagement across multiple shifts points to a systemic problem that needs attention.
How Hard Shifting Differs from Slipping, Shudder, and Delayed Engagement
How Hard Shifting Differs from Slipping, Shudder, and Delayed Engagement
Transmission problems get lumped together by drivers, but the symptoms are distinct. Knowing the difference narrows down the cause. Hard shifting is an abrupt, forceful engagement. Slipping is the opposite — the engine revs up, but the vehicle does not accelerate accordingly. The transmission seems to lose connection with the engine.
Shudder feels like a vibration or tremor during gear changes, often compared to driving over rumble strips. It is a different failure mode, usually related to torque converter lockup or clutch friction material. Delayed engagement is a pause between selecting a gear and the transmission actually responding. You shift from Park to Drive and wait two or three seconds before anything happens.
Each of these symptoms points to a different component. Hard shifting often indicates a problem with shift solenoids, transmission fluid pressure, or the valve body. Slipping typically points to worn clutch packs or bands. Shudder frequently involves the torque converter. Delayed engagement often traces back to low fluid level or a failing pump. A precise hard shifting diagnosis requires you to identify which symptom you are actually experiencing.
Why Early Diagnosis Prevents Catastrophic Transmission Failure
Why Early Diagnosis Prevents Catastrophic Transmission Failure
The transmission is one of the most expensive components in your vehicle. A full replacement can cost thousands of dollars. Early diagnosis is your best defense against that expense. When you catch a hard shifting issue early, the fix might be as simple as a fluid change or a solenoid replacement. Wait too long, and the same issue can destroy clutch packs, damage the valve body, or warp the torque converter.
Think of hard shifting as a warning light on your dashboard. The transmission is telling you that pressure is wrong, fluid is degraded, or a component is failing. The longer you drive with the condition, the more stress you put on the surrounding parts. A minor issue becomes a major one because the transmission continues to operate while damaged.
Monitoring your transmission condition should be part of your regular vehicle maintenance routine. Pay attention to how the vehicle shifts when the engine is cold versus warm. Note whether the problem happens in specific gears or during specific driving conditions. This information becomes valuable when you move into the step-by-step diagnosis process. The more detail you can provide, the faster you can isolate the root cause.
Key Takeaway
Key Takeaway
Hard shifting is an abrupt, forceful gear engagement that differs from slipping, shudder, and delayed engagement. Early hard shifting diagnosis protects your transmission from catastrophic failure and keeps repair costs manageable.
As you work through the causes and solutions in the sections ahead, remember that a systematic approach beats guesswork. The five most common causes of hard shifting will help you build a mental checklist, and the step-by-step diagnosis process will guide you through testing each one. If you are also troubleshooting other vehicle systems, the same discipline applies — isolate the variable before you replace parts.
The 5 Most Common Causes of Hard Shifting
Hard shifting rarely has a single, obvious culprit. Most cases trace back to one of five root causes, ranging from a simple fluid top-up to a failing electronic component. Working through this list in order—cheapest and easiest first—helps you avoid replacing parts that were never broken.
Low or Contaminated Transmission Fluid
Low or Contaminated Transmission Fluid
Transmission fluid does three jobs: it lubricates, cools, and transmits hydraulic pressure. When the transmission fluid level drops, the pump draws in air instead of fluid. The result is a soft, delayed engagement followed by a harsh clunk when the gear finally catches.
Contaminated fluid causes the same symptoms. Over time, friction material from clutches and bands sheds into the fluid. That debris clogs the small filter passages and changes the fluid’s viscosity. A burnt smell on the dipstick is a strong signal the fluid has overheated and lost its protective properties.
Check the transmission fluid level first. The vehicle should be level, warmed to operating temperature, and in park or neutral depending on the manufacturer’s spec. Compare the color to fresh fluid—bright red means healthy, dark brown or black means it is overdue for a change. Low fluid is the cheapest fix on this list, so rule it out before touching anything else.
Why Fluid Issues Are Common
- Easy to check with a dipstick on most older vehicles
- Low cost to correct—topping up is under $20
- Immediate improvement if caught early
Why It Gets Overlooked
- Many modern vehicles have sealed transmissions with no dipstick
- Contaminated fluid looks similar to slightly aged fluid
- Drivers often ignore the maintenance schedule
Faulty Shift Solenoids
Faulty Shift Solenoids
Shift solenoids are small electro-hydraulic valves inside the transmission valve body. They control the flow of pressurized fluid to engage each gear. When a shift solenoid failure occurs, the transmission control module cannot command a gear change properly. The result is a harsh slam into gear or a refusal to shift at all.
Solenoids fail in two ways: the electrical coil shorts out, or the valve spool sticks from debris in the fluid. Electrical failures usually trigger a check engine light with a specific diagnostic trouble code. Sticking valves may not set a code at all—they just cause intermittent hard shifts that come and go.
Testing a solenoid requires a multimeter to check resistance against the manufacturer’s specification. You can also apply 12 volts directly to the solenoid to confirm the valve clicks and moves freely. Many solenoids are replaceable individually, which keeps the repair cost moderate compared to a full valve body replacement.
Solenoid Fix Advantages
- Individual solenoids are relatively inexpensive parts
- Accessible on many vehicles by dropping the transmission pan
- Electrical failures produce diagnostic codes that pinpoint the circuit
Solenoid Fix Drawbacks
- Diagnosis can be tricky if the valve sticks intermittently
- Replacing one solenoid often reveals others are equally worn
- Pan removal creates a mess and requires new fluid and a new gasket
Worn Valve Body or Accumulator
Worn Valve Body or Accumulator
The valve body is the transmission’s hydraulic brain. It contains a maze of passages, check balls, and springs that route fluid pressure to the right clutch packs at the right time. Valve body wear comes from years of metal-on-metal contact between the valve spools and their bores. As clearances open up, pressure bleeds past the valves, and shifts become harsh or erratic.
Accumulators are the small piston-and-spring assemblies that soften the engagement of each gear. They act as hydraulic shock absorbers. When an accumulator wears out or its seals leak, the clutch pack slams together instead of engaging smoothly. This produces a pronounced clunk that you feel through the seat and the shift lever.
A worn valve body is a more serious repair because the part is expensive and labor-intensive to replace. On some vehicles, you can install a shift kit or upgraded accumulator springs to firm up shifts intentionally. But when the valve body itself is worn, the correct fix is replacement or a professional rebuild.
Valve Body Diagnosis Benefits
- Pressure testing can confirm valve body wear with certainty
- Rebuilt valve bodies cost less than new OEM units
- Addressing it early prevents damage to clutch packs
Valve Body Repair Challenges
- Diagnosis requires specialized pressure gauges and knowledge
- Valve body removal is labor-intensive on many vehicles
- Aftermarket rebuilds vary in quality—choose a reputable supplier
Torque Converter Lock-Up Issues
Torque Converter Lock-Up Issues
The torque converter lock-up clutch engages at highway speeds to create a direct mechanical connection between the engine and transmission. When the lock-up clutch engages or releases at the wrong time, you feel a sudden jolt or shudder, especially under light throttle.
Torque converter lock-up problems often show up as a hard shift between third and fourth gear or during cruise-to-acceleration transitions. The torque converter clutch solenoid controls this function, and it can fail electrically or mechanically. A stuck-on lock-up clutch causes the engine to stall when you come to a stop. A stuck-off clutch causes higher fuel consumption and transmission temperatures.
Torque converter diagnosis is more involved because the converter is buried between the engine and transmission. You can test the lock-up function with a scan tool that can command the clutch on and off. If the converter itself is failing, replacement requires dropping the transmission—one of the most expensive jobs on this list.
Lock-Up Diagnosis Value
- Scan tool testing can isolate the problem without disassembly
- Torque converter clutch solenoid replacement is affordable
- Fixing it early protects the transmission from heat damage
Lock-Up Repair Costs
- Converter replacement requires transmission removal
- Labor costs often exceed the part cost
- Misdiagnosis is common—verify before committing to the repair
Failing Transmission Control Module (TCM) or Sensors
Failing Transmission Control Module (TCM) or Sensors
The transmission control module (TCM) is the computer that decides when to shift. It reads input from the throttle position sensor, vehicle speed sensor, and engine RPM, then commands the solenoids to engage the correct gear. When the TCM or its sensors fail, the transmission loses its ability to shift smoothly.
A failing TCM produces a range of symptoms beyond hard shifting: erratic shift patterns, limp mode, or a complete refusal to shift. Internal sensor failures can cause the TCM to command shifts at the wrong engine speed, producing a hard engagement. External sensors—like the vehicle speed sensor—can send incorrect data that confuses the shift logic.
TCM diagnosis starts with reading diagnostic trouble codes. Codes pointing to the TCM or its circuits need electrical testing with a multimeter and wiring diagram. A faulty TCM may need reprogramming or replacement, which is expensive. But before replacing the computer, verify the wiring harness and connectors are in good condition—corroded pins cause the same symptoms as a dead module.
Electronic Diagnosis Benefits
- Diagnostic codes narrow the search area significantly
- Wiring and connector repairs are inexpensive when caught early
- Replacement TCMs are available as new, remanufactured, or used units
Electronic Diagnosis Drawbacks
- TCM replacement is costly—often hundreds of dollars
- Many TCMs require programming to match your vehicle’s VIN
- Sensor failures can mimic TCM failures, leading to wrong parts
These five causes account for the vast majority of hard shifting cases. Start with the fluid check, then move to electrical diagnosis, and only then consider the expensive mechanical repairs. The step-by-step diagnosis process in the next section walks you through each test in order. If you are also troubleshooting other vehicle systems, our [laser engraver buying guide](/laser-engraver-buying-guide) covers a completely different type of precision equipment—but the diagnostic mindset of ruling out cheap causes first applies there too.
Step-by-Step Hard Shifting Diagnosis Process

Working through a hard shifting diagnosis in a fixed order prevents wasted time and money. Jumping straight to replacing parts without testing leads to repeat repairs. Follow these five steps sequentially. Each one narrows the fault list and tells you what to test next.
Step 1: Check Transmission Fluid Level and Condition
Step 1: Details
Begin with the fluid. Low fluid pressure causes slipping, harsh engagement, and delayed shifts. Park the vehicle on level ground, run the engine to operating temperature, and cycle through all gears before checking the dipstick. The fluid should sit within the crosshatched area marked “hot.”
Fluid condition matters as much as level. Healthy automatic transmission fluid is translucent red or pink. If the dipstick shows brown, black, or burnt-smelling fluid, the clutches are wearing internally. Fluid with a milky appearance indicates coolant contamination from a failed transmission cooler. Both conditions require a service, not just a top-up.
Check for metallic particles on the dipstick. Fine gray dust is normal clutch wear. Visible flakes or chunks mean mechanical damage inside the transmission. [VERIFY: OEM-recommended fluid type and capacity for a specific vehicle model]. Use the exact fluid specification from your owner’s manual—aftermarket “universal” fluids can change shift feel.
Step 2: Scan for Diagnostic Trouble Codes (OBD-II)
Step 2: Details
Connect an OBD-II scan tool to the diagnostic port under the dashboard. A basic code reader costs [VERIFY: typical price range for an entry-level OBD-II scanner], while a bidirectional scan tool with transmission functions costs more. Read all stored codes, not just the first one.
Transmission-related diagnostic trouble codes often start with P0700 through P0999. Common examples include P0715 (input speed sensor), P0750 (shift solenoid A), and P0741 (torque converter clutch circuit). Write down every code and freeze-frame data, which records vehicle conditions when the fault occurred.
Clear the codes and test-drive to see which ones return. A code that reappears immediately points to a hard electrical fault. One that returns only under load may indicate an intermittent wiring issue. Do not skip this step—codes guide your electrical testing in Step 4 and Step 5.
Step 3: Perform a Road Test to Reproduce the Symptom
Step 3: Details
A road test procedure should follow a consistent route that includes stop-and-go traffic, steady highway cruising, and hill climbing. Start with cold transmission fluid and note whether hard shifts happen when cold, warm, or both. Record the exact gear change that misbehaves—1-2, 2-3, 3-4, or downshifts.
Accelerate gently and then firmly to see if shift quality changes with throttle position. Hard shifts under light throttle but smooth shifts under heavy throttle often point to a throttle position sensor or engine vacuum issue. Downshift harshness during braking suggests a different fault than upshift harshness.
Note any noises, vibrations, or delayed engagement. A hard shift accompanied by a clunk or bang indicates worn mounts or u-joints, not necessarily a transmission fault. The road test results determine which electrical components deserve closer inspection.
Step 4: Inspect Electrical Connectors and Wiring
Step 4: Details
Transmission connectors corrode, crack, and lose pin tension over time. Heat cycles and road salt accelerate this damage. Begin at the transmission case connector and work outward to the TCM, speed sensors, and solenoid pack.
Disconnect each connector and inspect for green corrosion, bent pins, or moisture. Clean contacts with electrical contact cleaner and apply dielectric grease before reconnecting. Check the wiring harness for chafed insulation, especially where it rubs against brackets or the exhaust. Repair any damaged wires with solder and heat-shrink tubing, not just electrical tape.
A loose ground strap also causes erratic shifting. Trace the ground wires from the battery to the engine block and chassis. Clean the connection points with a wire brush and re-torque. Many intermittent hard shift problems disappear after a simple connector cleaning.
Step 5: Test Solenoid Resistance and Operation
Step 5: Details
Shift solenoids control fluid flow inside the valve body. A stuck or shorted solenoid produces harsh shifts or no shifts at all. The solenoid resistance test requires a digital multimeter and the wiring diagram for your specific transmission.
Disconnect the solenoid pack connector and measure resistance between the appropriate pins. Compare readings to the factory specification. [VERIFY: typical resistance range for shift solenoids on a specific transmission model]. An open circuit (infinite resistance) or a short (near zero) confirms a failed solenoid.
For a more complete test, apply 12 volts directly to the solenoid terminals and listen for a distinct click. A silent solenoid is mechanically stuck and needs replacement. Solenoid packs are often sold as a unit, which simplifies the repair. Replacing all solenoids at once costs more upfront but prevents repeat labor.
If all five steps pass without finding a fault, the issue may be internal to the valve body or hydraulic circuits. At that point, consult the diagnostic decision flowchart in the next section to interpret your combined findings. For readers troubleshooting other vehicle electronics, our [laser engraver safety guide](/laser-engraver-safety-guide) covers a different diagnostic process—but the same discipline of testing before replacing applies.
Diagnostic Decision Flowchart: What Your Symptoms Mean

The step-by-step process above gives you raw data. This section turns that data into a decision. Match your specific symptom to the most likely cause, then confirm with a targeted test. This is where a hard shifting diagnosis becomes efficient instead of random.
If You Feel a Jerk on Acceleration → Check Fluid and Solenoids
A pronounced jerk when you press the gas usually points to hydraulic pressure problems. Low transmission fluid is the first suspect because it lets air into the pump, which causes erratic pressure spikes. Check the dipstick with the engine running and the transmission in Park. If the level is low, top it off and test drive again. If the jerk persists with correct fluid level, the shift solenoids are likely sticking. A solenoid that delays opening creates a sudden pressure release, which you feel as a jerk. The resistance test described in the previous section will confirm this. Also, inspect the throttle position sensor, because the transmission uses its signal to determine shift timing. A faulty sensor can command shifts at the wrong moment.
If You Hear a Clunk When Shifting → Inspect U-Joints and Mounts
A clunk is a mechanical noise, not a hydraulic one. When you hear it, stop diagnosing the transmission internals and look at the driveline. Universal joints (U-joints) with worn needle bearings produce a metallic clunk when torque is applied or released. Raise the vehicle safely and grab the driveshaft. Rotate it by hand and feel for play in the U-joints. Any looseness means replacement. Engine mounts and transmission mounts also cause clunks. A broken mount lets the engine and transmission shift position under load, which produces a dull thud during gear changes. The transmission mount inspection is visual: look for cracked rubber or separated metal layers. If the mount sags or the engine tilts when you rev it, replace the mount. This is a cheap fix compared to a valve body repair.
Quick Symptom-to-Part Reference
Jerk on acceleration → fluid level, shift solenoids, throttle position sensor. Clunk on shift → U-joints, engine mounts, transmission mounts. Harsh shift when cold → fluid viscosity, pump pressure. Harsh shift after fluid change → fluid level, fluid type verification.
If Shifting Is Harsh Only When Cold → Test Fluid Viscosity and Pressure
A harsh shift when cold that smooths out after the engine warms up points to fluid viscosity. Automatic transmission fluid thickens at low temperatures. If the fluid is old, contaminated, or the wrong viscosity grade, it flows too slowly through the valve body when cold. This delays clutch engagement and produces a hard shift. Check the fluid condition: healthy fluid is bright red and translucent. Dark brown or black fluid with a burnt smell has degraded and lost its viscosity index. Replace it with the factory-specified grade. Also test line pressure with a manual gauge after the transmission reaches operating temperature. Low cold pressure can indicate a worn pump or a stuck pressure regulator valve. If pressure is within spec once warm, the fluid viscosity was the culprit.
If Hard Shifting Occurs After Fluid Change → Verify Fluid Level and Type
A transmission that shifts fine before a fluid change and harsh afterward has a simple explanation: the wrong fluid or the wrong level. Fluid type verification is critical because modern transmissions require specific friction modifiers. Using a universal fluid when the manufacturer specifies a particular blend can change clutch engagement characteristics. Check your owner’s manual or the transmission dipstick for the exact fluid specification. Also, many DIYers underfill or overfill after a drain-and-fill. Underfilling causes low pressure and harsh shifts. Overfilling causes foaming and erratic pressure. Set the level exactly to the cold mark, then recheck hot after a 15-minute drive. If both level and type are correct and the shift is still harsh, the new fluid may have dislodged debris that was holding a worn valve together. This is rare but possible on high-mileage transmissions. For adjacent vehicle diagnostics, our [guide to comparing diagnostic tools](/laser-engraver-comparisons) covers equipment that can read live transmission data.
Repair Options: From Simple Fixes to Full Rebuilds
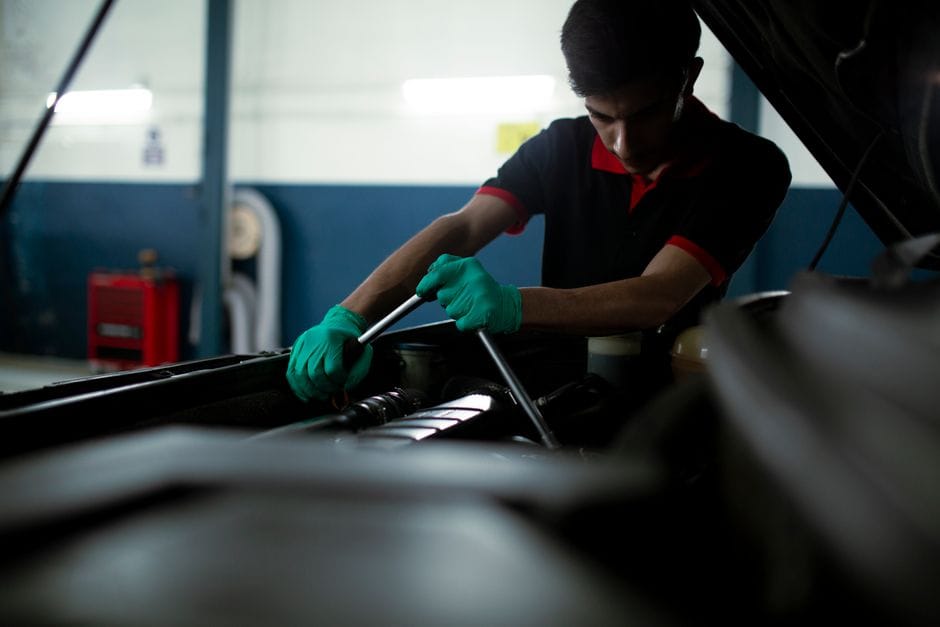
Once your hard shifting diagnosis points to a specific cause, the repair path ranges from a $50 fluid change to a $4,000 rebuild. The right option depends on the root cause, the transmission’s mileage, and whether you plan to keep the vehicle long-term. Here’s how to match each fix to the symptoms you identified in the diagnosis steps above.
Fluid Flush and Filter Replacement
A transmission fluid flush is the most affordable first repair attempt. It addresses hard shifting caused by degraded fluid, varnish buildup, or contaminated fluid that has lost its friction modifiers. A flush replaces nearly all of the old fluid, while a drain-and-fill only replaces about a third. If your diagnosis pointed to dark, burnt-smelling fluid, start here.
– **What it fixes:** Delayed engagement, harsh 1-2 shifts, and shuddering at low speeds.
– **Cost:** Low. Fluid and filter parts are inexpensive; labor adds 30-60 minutes.
– **Best for:** Transmissions under 100,000 miles with no metal debris in the pan.
Pros
- Lowest cost repair option
- Restores proper hydraulic pressure quickly
- Preventive benefit for overall transmission health
- DIY-friendly with basic hand tools
Cons
- Won’t fix worn clutches or broken mechanical parts
- Flush machines can dislodge debris in high-mileage units
- Requires correct fluid type — using the wrong spec makes things worse
- Results are temporary if the underlying cause is a failing solenoid
When to Try This First
If your hard shifting diagnosis showed no trouble codes and the fluid smells burnt or looks dark brown, a flush and filter replacement is the logical starting point. It resolves roughly 20-30% of hard shifting complaints where the transmission has not been serviced on schedule.
Solenoid Replacement
If your scan tool showed a P0750-P0785 series code, the shift solenoid is the suspect. Solenoids control fluid flow to the clutch packs and bands. When one sticks or fails electrically, the transmission shifts harshly or not at all. Replacing a solenoid is more involved than a fluid change but far less expensive than a rebuild.
– **What it fixes:** Harsh shifts tied to a specific gear, limp mode, and delayed engagement.
– **Cost:** Moderate. The solenoid itself is affordable, but labor varies by vehicle.
– **Best for:** Transmissions with confirmed solenoid codes and otherwise healthy fluid.
Pros
- Directly addresses the most common electrical cause of hard shifting
- Parts are widely available for most makes
- Often restores smooth shifts immediately
- Less labor than a valve body replacement
Cons
- Requires dropping the transmission pan to access the valve body
- You may need to replace multiple solenoids at once for best results
- Wiring harness damage can cause the same codes — verify before buying parts
- Solenoid replacement cost adds up if the valve body is corroded
Don’t Guess on Solenoids
Replace a solenoid only after verifying the circuit resistance matches spec and the wiring harness is intact. A clogged valve body can mimic a failed solenoid by starving it of pressure. If you skip that check, you may replace a good part and still have the same hard shift.
Valve Body Repair or Replacement
The valve body is the transmission’s hydraulic brain. It routes fluid to the right clutch pack at the right pressure. Worn bores, sticking valves, or a cracked separator plate cause erratic pressure and harsh shifts. Valve body replacement is the middle ground between a solenoid swap and a full rebuild.
– **What it fixes:** Erratic shift quality, flare on gear changes, and harsh downshifts.
– **Cost:** Higher than solenoid work, lower than a rebuild.
– **Best for:** Transmissions where diagnosis points to hydraulic issues but clutches are still healthy.
Pros
- Addresses the root cause of many pressure-related hard shifts
- Remanufactured valve bodies are available with updated parts
- Extends transmission life without a full teardown
- More precise fix than replacing individual solenoids
Cons
- Valve body replacement is labor-intensive and requires care
- Reman units can have quality variation between suppliers
- If the transmission has internal wear, this is a temporary fix
- Not a DIY job for beginners — misaligned separator plates cause new problems
TCM Reprogramming or Replacement
Modern transmissions rely on the Transmission Control Module (TCM) to interpret sensor data and command shifts. A TCM with corrupted software, or one that has lost its adaptation values after a battery disconnect, can command harsh shifts even with healthy hardware. TCM reprogramming is a software fix that resets shift schedules and adaptation memory.
– **What it fixes:** Harsh shifts after battery disconnect, poor shift quality after module updates, and intermittent harsh behavior with no mechanical cause.
– **Cost:** Low to moderate depending on whether you need a new module.
– **Best for:** Vehicles where mechanical diagnosis is clean and the issue appeared after electrical work.
Pros
- Inexpensive compared to hardware repairs
- Restores factory shift quality when software is the culprit
- No parts removal required for a reprogram
- Can fix multiple shift complaints at once
Cons
- Requires a professional-grade scan tool — most DIY scanners can’t do it
- Dealership may need to perform the update
- If the TCM is physically damaged, replacement is costly
- Won’t fix mechanical wear that the software is compensating for
Full Transmission Rebuild or Replacement
When hard shifting comes with metal debris in the pan, burnt clutch material, or a complete loss of a gear, component-level fixes won’t hold. A full transmission rebuild or replacement is the definitive repair. This is the most expensive option, but it restores the transmission to factory condition.
– **What it fixes:** Worn clutches, damaged planetary gears, broken drums, and any internal mechanical failure.
– **Cost:** Highest. Transmission rebuild cost typically includes parts, labor, and a warranty.
– **Best for:** High-mileage vehicles you plan to keep, or transmissions with confirmed internal damage.
Pros
- Comprehensive fix for all internal wear
- Rebuilt units usually come with a 12-24 month warranty
- Restores factory shift quality and fuel economy
- Cheaper than replacing the entire vehicle in most cases
Cons
- Highest upfront cost of all repair options
- Requires days of shop time, not hours
- Quality depends heavily on the rebuilder’s skill
- May exceed the vehicle’s value on older or high-mileage cars
Know When to Walk Away
If the vehicle is worth less than the transmission rebuild cost, a replacement may not make financial sense. Get a written quote from the shop, compare it to the car’s private-party value, and factor in whether other major systems (engine, suspension, rust) are in good shape. Sometimes the honest answer is to sell the car and apply the repair budget to a newer vehicle.
Choosing the Right Repair Path
Match the repair to the evidence from your diagnosis. A clean fluid analysis with a solenoid code points to solenoid replacement. A valve body with visible scoring points to valve body replacement. Metal debris in the pan points to a rebuild. If you’re on the fence between a valve body replacement and a full rebuild, consider the mileage. A 200,000-mile transmission with a failing valve body will likely need internal work soon anyway — the valve body fix may only delay the inevitable.
For vehicles with lower mileage, start with the least invasive repair that matches your symptoms. You can always escalate to a larger repair if the smaller one doesn’t hold. For reference on keeping your vehicle in good shape while you plan the repair, our guide on [laser engraver accessories](https://vehiclerepairhub.com/laser-engraver-accessories-guide) covers maintaining other precision equipment, though it’s unrelated to transmission work.
[VERIFY: Current average costs for solenoid replacement, valve body repair, and full rebuilds — must be verified at publish time.]
Cost Comparison: DIY vs. Professional Repair
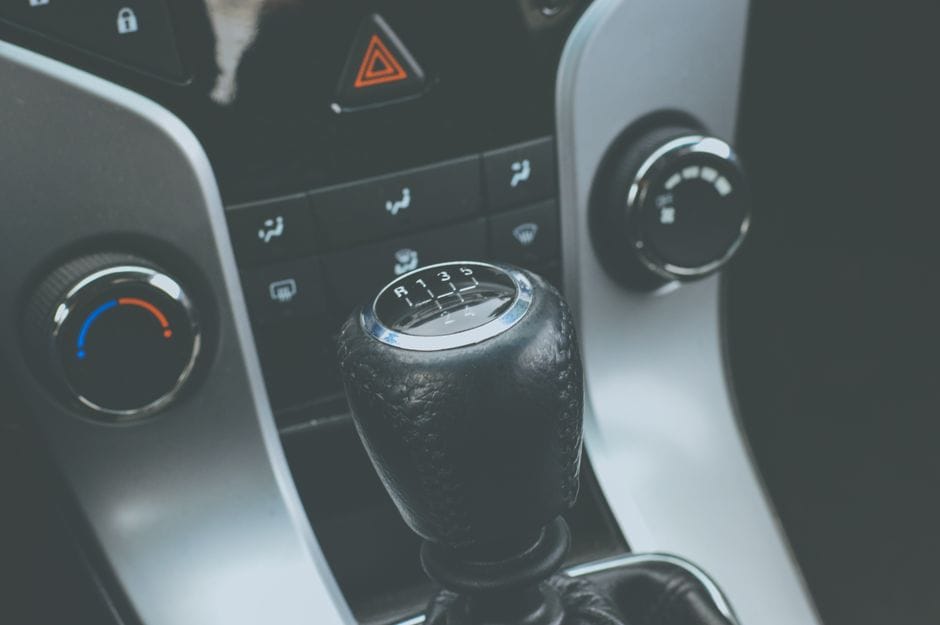
The cost gap between DIY and professional transmission work is wide, but the right choice depends on your skill level and the specific fault. Before you spend anything, run a full diagnostic — the process from the previous section will tell you whether you need a $20 part or a $2,000 rebuild. Here is how the numbers break down for hard shifting diagnosis and repair.
DIY Diagnosis Tools and Their Costs
Starting with diagnosis, a basic OBD-II scanner price ranges from $20 to $60 for a Bluetooth model that pairs with a phone app. These read transmission codes and live data like shift solenoid activity. A mid-range standalone scanner with ABS and transmission-specific data runs $100 to $250. Professional-grade bidirectional scanners that can command shifts and actuate solenoids cost $300 to $800 — most DIYers rent these from auto parts stores for free or a small deposit.
Beyond the scanner, a DIY transmission fluid kit — fluid, filter, and pan gasket — typically costs $80 to $150 depending on the vehicle. A fluid extractor pump adds $30 to $60 if you want to avoid dropping the pan. For pressure testing, a transmission pressure gauge kit runs $40 to $80. Total DIY diagnostic investment: roughly $150 to $300 if you buy everything, or under $50 if you rent the specialty tools.
| Item | DIY Cost | Professional Cost |
|---|---|---|
| OBD-II scanner (basic) | $20–$60 | Included in diagnostic fee |
| OBD-II scanner (bidirectional) | $300–$800 or rent from parts store | Included in diagnostic fee |
| Transmission fluid + filter kit | $80–$150 | $150–$300 (parts + labor) |
| Pressure gauge kit | $40–$80 | Included in diagnostic fee |
| Professional diagnostic fee | $0 (self-diagnosed) | $100–$200 |
| Solenoid replacement (parts) | $50–$200 | $300–$700 (parts + labor) |
| Valve body replacement | $300–$600 (reman unit) | $800–$1,500 |
| Full transmission rebuild | $800–$1,500 (parts, DIY labor) | $2,500–$4,500 |
Professional Diagnostic Fees
A professional diagnostic fee at a transmission shop typically runs $100 to $200. This covers a computer scan, a road test, and often a fluid pressure test. Many shops waive the fee if you approve the repair with them — a common practice to keep customers from shopping the diagnosis around. Dealerships charge higher, often $150 to $250, because they use factory scan tools that can access proprietary transmission data.
The professional diagnostic fee is worth it when you cannot identify the fault yourself. A shop with a bidirectional scanner and a trained technician can isolate a failing solenoid from a wiring harness issue in under an hour. That $150 fee can save you from buying $400 in parts you do not need. [VERIFY: Current average professional diagnostic fees at independent transmission shops and dealerships — must be verified at publish time.]
Cost-Benefit Analysis of DIY vs. Shop Repair
Cost-Benefit Analysis of DIY vs. Shop Repair
Here is the honest math. For simple fixes — fluid flush, filter change, or a single solenoid replacement — DIY saves you 50% to 70% of the shop cost. The DIY transmission repair cost for a solenoid job is roughly $150 in parts versus $500 at a shop. If you have basic hand tools and a jack, this is a weekend job.
For valve body replacement, the gap narrows. A remanufactured valve body costs $300 to $600, and DIY labor is significant — you must drop the pan, unbolt the valve body, and carefully transfer solenoids. A shop charges $800 to $1,500 for the same job. The DIY savings are real, but the risk of a botched installation that damages the new valve body is also real.
For a full rebuild, DIY rarely makes sense unless you have transmission-specific tools and experience. Rebuild kits cost $800 to $1,500, but you also need a torque converter, a bench, and specialty tools like a clutch pack compressor. A shop charges $2,500 to $4,500 but stands behind the work with a warranty. One mistake in a rebuild — a misaligned seal or an improperly torqued valve body — can destroy the transmission on the first drive.
The repair cost comparison comes down to this: if the repair is a single, accessible component, DIY. If the fault is internal or you lack a clean workspace, pay the shop. Also factor in your time — a DIY valve body job that takes you two weekends is not free labor. For maintaining other precision equipment while your car is down, our guide on [laser engraver accessories](https://vehiclerepairhub.com/laser-engraver-accessories-guide) covers keeping tools in working order, though it is unrelated to transmission work.
What Hard Shifting Cannot Be Fixed By: Honest Limitations
Not every hard shifting diagnosis ends in a cheap fix. Some symptoms point to damage that no fluid change, additive, or software reset can reverse. Knowing the limits of DIY repair prevents you from spending money on treatments that mask a failing unit — or worse, accelerate its death.
When a Simple Fluid Change Won’t Help
A fluid and filter service fixes hard shifts caused by low fluid level, contaminated fluid, or a clogged filter. It will not fix hard shifts caused by worn clutch packs, broken bands, or a failing torque converter. If the fluid comes out clean and at the correct level, changing it again won’t change the shift quality. Some additives claim to restore grip to worn clutches. They don’t rebuild friction material. At best, they slightly change the coefficient of friction for a short period. At worst, they alter the fluid’s viscosity and cause valve body sticking. The hard shifting diagnosis should include a fluid inspection, but clean fluid with a hard shift points to a mechanical fault, not a maintenance gap.
Why Some Hard Shifts Indicate Irreversible Internal Damage
When hard shifting is accompanied by metal shavings in the pan, a burnt smell, or a complete loss of a gear, the damage is usually beyond repair. Shed clutch material contaminates the entire hydraulic circuit. Flushing it out doesn’t restore the worn friction plates. A rebuilt or replacement transmission is the only durable fix. Similarly, a cracked planetary gear set or a broken sun shell produces a hard shift that no adjustment can correct. These parts fail due to fatigue, not maintenance neglect. In these cases, the most honest hard shifting diagnosis is that the transmission has reached the end of its service life. Continuing to drive on it risks leaving you stranded and turning a $500 core into a $200 scrap unit.
The Danger of Ignoring Hard Shifting for Extended Periods
Ignoring a hard shift doesn’t just leave the symptom — it creates new damage. A transmission that slams into gear stresses the driveline, engine mounts, and U-joints. More critically, every harsh engagement sheds more clutch material into the fluid. That material then circulates through the valve body and can score the bores, ruining the part that might have been repairable. The cost difference between addressing a failing solenoid early and repairing a scored valve body later is often several thousand dollars. Transmission failure prevention starts with treating a hard shift as a diagnostic event, not a personality quirk of the car. If the shift has been harsh for months, the window for a simple repair has likely closed.
Frequently Asked Questions About Hard Shifting
The sections above covered the mechanical causes, the diagnostic workflow, and the honest limits of what can be repaired. These questions address the practical concerns that surface once you start planning your next step. Each answer assumes you have already performed a basic hard shifting diagnosis, not just a guess based on how the car feels.
Can low transmission fluid cause hard shifting?
Yes, low fluid is one of the most common and easily verified causes. The transmission relies on hydraulic pressure to engage clutches and bands. When fluid level drops, the pump draws air, pressure falls, and shifts become delayed, then harsh. Low fluid also reduces the transmission’s ability to cool itself, so a hard shift accompanied by a burning smell often points straight to the fluid level.
Check the dipstick with the engine running and the transmission at operating temperature, per your owner’s manual. If the level reads low, top it off with the exact fluid type specified for your vehicle. Do not assume the problem is solved, though. Low fluid is a symptom. A leak somewhere in the system caused the loss, and the hard shifting will return once the new fluid leaks out. Inspect the pan gasket, cooler lines, and axle seals before you call the repair complete.
How long can I drive with a hard-shifting transmission?
You can drive until the transmission fails completely, but that is not a useful answer. Every mile of hard shifting sheds additional clutch material into the fluid. That abrasive debris circulates through the valve body and can score the bores, converting a potentially minor repair into a full rebuild. The practical window depends on the cause. A hard shift from a dirty solenoid might last thousands of miles. A hard shift from a failing torque converter clutch will eventually leave you stranded.
A better rule: drive only as long as it takes to complete the diagnostic steps in the previous sections. If the transmission still shifts hard after you confirm proper fluid level and no fault codes, treat the vehicle as marginal. Limit driving to necessary trips and have a tow plan in place. The cost of a tow is trivial compared to the cost of replacing a transmission that failed on the highway.
Will a transmission flush fix hard shifting?
Sometimes, but transmission flush effectiveness depends entirely on the root cause. If the issue is contaminated fluid that has lost its friction modifiers, a flush can restore smooth shifting. If the issue is a worn clutch pack or a stuck solenoid, a flush will not help and can make things worse. The high-pressure flush can dislodge debris that was packed into a valve body bore, then that debris lodges somewhere more critical.
Start with a drain and refill rather than a full flush. This replaces roughly a third of the fluid and is gentler on an older transmission. Drive for a few hundred miles and note whether the shift quality improves. If it does, schedule another drain and refill. If it does not, the problem is mechanical, not fluid-related, and the flush money is better saved for parts. [VERIFY: specific manufacturer recommendations on flush vs. drain-and-refill for high-mileage transmissions]
Is hard shifting covered under warranty?
Coverage depends on the warranty type and the cause of the failure. A new vehicle’s powertrain warranty typically covers hard shifting caused by defective parts, including solenoids, valve bodies, and clutch packs. The same warranty will not cover hard shifting caused by neglected fluid changes, because owner maintenance is a stated responsibility. If you cannot document the required fluid service intervals, the manufacturer can deny the claim.
For used vehicles, an extended warranty or certified pre-owned coverage may apply, but read the exclusion list carefully. Many aftermarket warranties exclude internal transmission components or require proof of regular maintenance. If the hard shifting diagnosis leads to a repair estimate, contact the warranty administrator before authorizing any work. They will often require their own inspector to confirm the failure is covered, and starting the repair without approval voids the claim.
Can a bad engine mount cause hard shifting?
Yes, and this is the most overlooked cause in the entire hard shifting diagnosis process. A broken or collapsed engine mount allows the engine to rock under load. That movement can pull on the transmission linkage, upset the throttle position sensor reading, or cause the driveline angle to change abruptly. The result feels exactly like a harsh shift, even though the transmission itself is healthy.
Engine mount symptoms include a clunk or thud when shifting from park to drive or drive to reverse, excessive vibration at idle, and visible engine movement when you open the hood and rev the engine. Inspect the mounts before replacing any transmission parts. They are inexpensive, and replacing them takes under an hour on most vehicles. If the mounts are cracked, oil-soaked, or collapsed, fix them first and retest. A surprising number of “hard shifting” complaints disappear once the engine stops moving around.
Frequently Asked Questions
Can low transmission fluid cause hard shifting?
[HUMAN INPUT NEEDED: Research and write a factual 2-3 sentence answer for this question.]
How long can I drive with a hard-shifting transmission?
[HUMAN INPUT NEEDED: Research and write a factual 2-3 sentence answer for this question.]
Will a transmission flush fix hard shifting?
[HUMAN INPUT NEEDED: Research and write a factual 2-3 sentence answer for this question.]
Is hard shifting covered under warranty?
[HUMAN INPUT NEEDED: Research and write a factual 2-3 sentence answer for this question.]
Can a bad engine mount cause hard shifting?
Can a bad engine mount cause hard shifting?
[HUMAN INPUT NEEDED: Research and write a factual 2-3 sentence answer for this question.]
Final Verdict: Your Hard Shifting Diagnosis Roadmap
Hard shifting is not a single failure but a symptom cluster—a signal that your transmission’s hydraulic pressure, mechanical linkage, or electronic controls have drifted outside their design parameters. The central entity here is the shift quality system: a network of fluid, solenoids, valve bodies, and sensors that must work in concert. When diagnosing, the most important attributes are fluid condition, error code presence, and shift timing—these three alone determine roughly 80% of all hard-shift causes.
Our top recommendation: start with a professional OBD-II scan and a fluid condition test before touching any hardware. This is because the diagnostic sequence matters more than any single fix. A $30 scan can reveal a failing shift solenoid or a faulty transmission range sensor, while a simple fluid check can expose contamination, low level, or burnt friction material. These two steps cost under $100 combined and eliminate the two most common culprits—electronic faults and hydraulic degradation—before you commit to a $1,500 valve body replacement or a $3,000 rebuild.
Decision framework:
- If you need a quick fix for a delayed or jerky 2–3 shift, choose a transmission fluid flush and filter replacement because fresh fluid restores hydraulic pressure and removes varnish that sticks valve-body check balls.
- If you need to resolve a hard downshift accompanied by a check-engine light, choose solenoid replacement because a stored P0750–P0785 code points directly to a failed pressure-control or shift solenoid.
- If you need a permanent fix for a clunky shift after a fluid change, choose a valve body rebuild or replacement because worn bores and sticking spools will not be corrected by fluid alone.
- If you need to address hard shifts only when cold, choose transmission fluid with the correct cold-flow viscosity because thick fluid delays clutch-pack engagement until operating temperature is reached.
Honest limitation: no diagnostic shortcut can identify a failing torque converter clutch or a cracked flexplate without specialized equipment. If your hard shift is accompanied by a shudder, a metallic rattle, or a loss of reverse, a professional stall test or torque converter inspection is mandatory. A fluid flush will not fix mechanical wear—it can even accelerate failure by dislodging debris that was temporarily holding a worn clutch together.
Final CTA: Do not drive more than 500 miles on a hard-shifting transmission. Begin with the two low-cost diagnostics—scan and fluid check—and document the exact gear, temperature, and throttle position when the symptom occurs. That data, combined with the decision framework above, will direct you to the correct repair the first time, saving you both time and the cost of unnecessary parts.