
I walked him through the bay, showed him a 2020 Accord 2.0T we had on the lift, and pointed out the drain plug. “See that? 17mm socket, 29 ft-lbs when you’re done. You’ll spend $45 on oil and a filter, save yourself forty bucks, and you’ll know it was done right.” Twenty minutes later, he was taking pictures of the oil filter location with his phone, already planning to tackle it in his driveway.
That conversation happens twice a week in my shop. The Honda Accord oil change is one of the easiest maintenance jobs you can do at home, but there are some model-specific quirks—especially between the 1.5T and 2.0T engines—that can trip up first-timers. I’ve been working on Hondas for fifteen years, and I’ve seen every mistake you can make with an oil change. Most of them are easily avoidable if you know what you’re doing.
This guide covers every generation of the modern Accord, from the 2013 ninth-generation models through the current eleventh-generation 2023-2025 Accords. Whether you’ve got the turbocharged 1.5-liter four-cylinder or the 2.0-liter turbo in the Sport and Touring trims, I’ll walk you through the exact procedure, the right specifications, and the common mistakes I see people make.
Time Required: 30-45 minutes for first-timers, 20 minutes once you’ve done it a few times
Oil Capacity: 1.5T engine takes 3.7 quarts, 2.0T engine takes 5.7 quarts (with filter)
Recommended Oil: 0W-20 synthetic for all models (Honda Genuine or equivalent)
Filter: OEM Honda filter (part #15400-RTA-003) or equivalent Purolator L15436
Cost: $35-50 DIY vs. $70-95 at dealer
Difficulty: Beginner-friendly—no special tools beyond basic hand tools
Why I Trust Honda Accord Owners to Do This Themselves
Here’s something most mechanics won’t tell you: the Honda Accord is engineered for easy owner maintenance. Honda actually designs these cars with the assumption that some owners will do their own work. The drain plug is accessible, the filter is in a logical location, and there’s no plastic undertray labyrinth to navigate like you’d find on a German car.
I’ve watched dozens of first-time DIYers successfully complete their first Honda Accord oil change in my shop’s parking lot. The one person I told to bring it inside? She showed up with a crescent wrench and no jack stands. That’s not a Honda problem—that’s a safety problem. If you have basic tools and follow the procedure, you’ll be fine.
The main reason I encourage Accord owners to learn this skill is quality control. I’ve seen quick-lube shops strip drain plugs, forget to fill the oil, and install the wrong filter. When you do it yourself, you know it was done correctly. Plus, you’ll save $400-600 over the course of typical ownership, and that’s assuming you’re getting budget oil changes, not dealer pricing.
Tools and Materials You Actually Need
One of my customers showed up last month with $200 worth of tools from Harbor Freight for his first oil change. I sent him back with a refund list. Here’s what you actually need—nothing more, nothing less.
For the drain plug. A 6-point socket is better than 12-point—less chance of rounding. $8 at AutoZone
For the 1.5T filter. The 2.0T uses a 74mm cartridge. Get the right size. $12-18
Not the emergency jack from your trunk. A real floor jack. $60-100 or borrow one
CRITICAL SAFETY ITEM. Never work under a car on a jack alone. $40-60
Bigger than you think you need. Oil splashes. $15-20
Dedicated oil funnel, not the one from your kitchen. $5
Optional but recommended. Prevents overtightening. $30-50
Protects your hands from hot oil. Buy a box of 100. $12
For cleanup. Old t-shirts work fine. $5
Block the rear wheels. Bricks work if you don’t want to buy chocks. $10
Materials (Every Oil Change)
Per Oil Change Cost
$25-35
$8-12
$2-3
$6
$35-50
Compare that to $75-95 at a dealer or $45-60 at a quick-lube place. Over ten oil changes, you’ll save $250-450 even after buying the tools.
Understanding Your Accord’s Engine: 1.5T vs 2.0T Differences
This is where people get confused, so let me break it down clearly. Honda uses two different turbocharged engines in the modern Accord, and while the oil change procedure is similar, the specifications are different.
1.5-Liter Turbocharged Engine (1.5T)
Found in: LX, Sport, EX, EX-L trims (2018-2025), Hybrid models use a different procedure
Oil Capacity: 3.7 quarts with filter change
Oil Type: 0W-20 full synthetic
Oil Filter: Cartridge-style, 64mm, Part #15400-RTA-003
Drain Plug Torque: 29 ft-lbs (39 Nm)
Filter Torque: 20 ft-lbs (27 Nm) for the cap, hand-tight plus 3/4 turn
Oil Change Interval: 7,500 miles or 12 months under normal conditions
The 1.5T has had some oil dilution issues in cold climates with lots of short trips. Honda issued a software update (TSB 18-086) for 2018-2019 models. If you’re in Minnesota and your commute is three miles, consider [how often you should change your oil](how-often-change-engine-oil) more frequently—maybe every 5,000 miles instead of 7,500.
2.0-Liter Turbocharged Engine (2.0T)
Found in: Sport 2.0T, Touring trims (2018-2025)
Oil Capacity: 5.7 quarts with filter change
Oil Type: 0W-20 full synthetic (same as 1.5T)
Oil Filter: Cartridge-style, 74mm, Part #15400-RLF-004
Drain Plug Torque: 29 ft-lbs (39 Nm) – same as 1.5T
Filter Torque: 20 ft-lbs (27 Nm) for the cap
Oil Change Interval: 7,500 miles or 12 months
The 2.0T doesn’t have the oil dilution concerns of the 1.5T. It’s a different engine architecture—larger displacement, less stress on the components. I’ve seen 2.0T engines with 120,000 miles running perfect oil pressure on 7,500-mile intervals.
The 1.5T takes a 64mm filter wrench, the 2.0T takes 74mm. If you buy the wrong wrench, you’ll strip the filter cap trying to force it. Double-check your engine size before ordering parts.
Choosing the Right Oil: What Actually Matters
Every week someone asks me if they can save money using conventional oil or a different weight. The short answer: don’t mess with Honda’s specifications. Here’s why.
Honda specifies 0W-20 synthetic for both the 1.5T and 2.0T engines. That’s not a suggestion—it’s engineered for tight clearances in turbocharged engines that run hot. I’ve torn down engines that used 5W-30 conventional oil because the owner wanted to save $10 per change. The turbo seals were cooked, the piston rings showed accelerated wear, and the timing chain was stretched beyond spec at 80,000 miles.
The [best oil for your Honda Accord](best-engine-oil-honda-accord) debate comes down to a few quality brands:
- Honda Genuine 0W-20 Synthetic: The safe choice. Costs about $35 for 5 quarts at the dealer parts counter. Meets all Honda specifications by definition.
- Mobil 1 0W-20 Advanced Fuel Economy: My personal choice. Slightly cheaper ($28-32), excellent detergent package, widely available. I’ve used it in my own Accord for 90,000 miles.
- Pennzoil Platinum 0W-20: Good alternative. Gas-to-liquid base oil technology provides excellent protection. About $26-30 for 5 quarts.
- Castrol Edge 0W-20: Solid performer. Meets Honda specifications. Around $30 for 5 quarts.
What about the [synthetic versus conventional oil debate](synthetic-vs-conventional-oil-guide)? In turbocharged engines, it’s not a debate anymore. Use synthetic. Conventional oil breaks down faster under the heat stress from the turbocharger. I’ve seen oil analysis reports showing conventional 0W-20 degrading significantly by 5,000 miles in these engines. Synthetic holds up to 7,500+ miles without issues.
I buy Mobil 1 0W-20 by the case (6 five-quart jugs) from Walmart during their oil sale events. Works out to about $23 per change instead of $32. The oil doesn’t go bad if stored properly—I’ve used oil that sat on a shelf for three years with zero issues.
The Complete Step-by-Step Oil Change Procedure
Alright, let’s get into the actual work. I’m writing this assuming you’ve never changed oil before. If you have, feel free to skip ahead, but there are some Honda-specific details worth reading even if you’re experienced.
Preparation (5 minutes)
Warm Up the Engine
Start the car and let it idle for 2-3 minutes, or drive it around the block. Warm oil flows faster and carries more contaminants with it. Don’t get it so hot you can’t work with it—just warm to the touch on the oil pan.
Gather Materials and Tools
Lay everything out where you can reach it. Open the oil bottles but leave the caps sitting on top. Have the filter and crush washer ready. This prevents you from crawling out from under the car three times because you forgot something.
Position the Vehicle
Park on a level surface. Put the car in Park (automatic) or 1st gear (manual). Set the parking brake. Chock the rear wheels—use wheel chocks, bricks, or blocks of wood. This prevents the car from rolling if something goes wrong with the jack.
NEVER work under a car supported only by a jack. Jacks fail. I’ve seen it happen twice in my career—once with a guy underneath. He got lucky and only broke his collarbone. Use jack stands rated for at least 3 tons, and position them on the vehicle’s jacking points (check your owner’s manual for exact locations).
If you don’t have jack stands, drive the car onto a set of Rhino Ramps ($40 at AutoZone). They’re safer than jacks for oil changes.
Draining the Oil (10 minutes)
Lift and Secure the Vehicle
Use the floor jack to lift the front of the car. Honda Accords have a reinforced jacking point just behind the front wheels on each side—look for a notch in the pinch weld. Lift one side at a time, place a jack stand, then repeat on the other side. The car should be level front-to-back and stable side-to-side. Shake it aggressively to test stability before getting underneath.
Locate the Drain Plug
The drain plug is on the passenger side of the oil pan, facing toward the rear of the car. On 10th and 11th generation Accords (2018+), you’ll see it immediately—it’s a 17mm hex head bolt with a washer. No plastic undertray to remove, no hidden access panels. This is why I love working on Hondas.
Position the Drain Pan
Place your drain pan slightly offset toward the rear. When you crack the drain plug, oil will arc out about 8-10 inches before dropping straight down. I’ve seen people position the pan directly under the plug, then watch oil spray all over their driveway. Learn from their mistakes.
Remove the Drain Plug
Put on your gloves. Use the 17mm socket or wrench to loosen the drain plug. Turn counterclockwise (lefty-loosey). Once it’s loose, finish unscrewing it by hand. When you feel it’s about to come free, press up slightly on the plug while unscrewing the last few threads—this lets you whip the plug away quickly as oil starts flowing and keeps oil off your hand.
The oil will come out fast initially, then slow to a drip over 3-5 minutes. Let it drain completely. While it’s draining, inspect the drain plug.
Drain Plug Inspection: Look at the threads. Are they damaged or stripped? Check the magnet tip (yes, Honda drain plugs are magnetic). You should see a small amount of fine metallic dust—that’s normal wear particles. If you see chunks of metal or glitter, that’s a potential engine problem. Take a picture and save it for reference.
Replace the Crush Washer
The crush washer (also called a drain plug gasket) is the aluminum washer on the drain plug. Remove the old one and slide on the new one. Honda crush washers are single-use—they deform when torqued and won’t seal properly if reused. Yes, I know people reuse them. Those are the same people who show up at my shop with oil spots on their driveway wondering why.
Honda part number for the crush washer: 94109-14000. They’re about $2 each at the dealer. Buy five at a time.
Replacing the Oil Filter (5 minutes)
Locate the Oil Filter
On 10th and 11th gen Accords (2018+), the oil filter is on the front of the engine, passenger side, right behind the wheel well. You’re looking for a black plastic cap—64mm on 1.5T engines, 74mm on 2.0T engines. On 9th gen Accords (2013-2017), it’s in a similar location but accessed from above in some cases.
Remove the Old Filter
Use your filter wrench to turn the cap counterclockwise. It should break free without much force—if you’re straining, you might have the wrong size wrench. Once loose, unscrew it by hand. Have a rag ready—about half a cup of oil will spill out when you pull the cap free.
The filter itself is a cartridge that pulls straight out. It’s held by a plastic housing that stays in the engine. Pull the old cartridge filter out, being careful not to damage the housing.
Clean and Inspect the Filter Housing
Wipe out the inside of the filter housing with a clean rag. Check the old filter’s O-ring—there should be one rubber O-ring on the base of the filter. If it’s not on the filter, it’s stuck in the housing. Fish it out. If you leave the old O-ring in and install the new filter, you’ll have a leak. I’ve made this mistake exactly once in my career.
Install the New Filter
Take the new filter cartridge. It comes with a new O-ring—lube the O-ring with a bit of fresh oil before installing. This helps it seat properly and prevents it from pinching during installation. Slide the new filter into the housing, making sure it seats completely.
Thread the cap back on by hand first. Once it’s hand-tight, use the filter wrench to snug it down. Torque spec is 20 ft-lbs if you have a torque wrench. If not, hand-tight plus about 3/4 of a turn. Don’t go Hulk on it—the cap is plastic and you can crack the housing if you overtighten.
I’ve seen people install the filter cartridge upside down. The rubber O-ring goes on the bottom (toward the engine), not the top. If it’s upside down, you’ll have no oil pressure and you’ll know within 5 seconds of starting the engine. Don’t ask me how I know this is a common mistake.
Reinstalling the Drain Plug and Adding New Oil (10 minutes)
Reinstall the Drain Plug
Thread the drain plug in by hand first. This prevents cross-threading. Once it’s hand-tight, use your socket or wrench to tighten it. The torque specification is 29 ft-lbs for both 1.5T and 2.0T engines. That’s not very tight—about the same torque as a lug nut on a bicycle wheel.
If you don’t have a torque wrench, hand-tight plus about 1/4 turn with the socket is close enough. The goal is to compress the crush washer without stripping threads or cracking the pan. I’ve seen people overtighten to 50+ ft-lbs and crack the oil pan. That’s a $300 repair.
When using a torque wrench, pull smoothly. Don’t jerk it. The click you hear is the wrench reaching the set torque. Stop pulling immediately when you hear the click. Some people keep pulling after the click, which defeats the purpose of using a torque wrench.
Lower the Vehicle
Remove the jack stands and lower the car back to the ground. Give the drain plug one more visual check to make sure it’s not dripping. If you see oil forming at the threads, you either didn’t torque it enough or the crush washer isn’t seated properly.
Add the New Oil
Pop the hood. The oil filler cap is on top of the engine, passenger side, marked with an oil can icon. Remove the cap. Place your funnel in the opening—I like the ones with a long flexible spout because they prevent spills.
Add oil based on your engine:
- 1.5T engine: Add 3.5 quarts initially
- 2.0T engine: Add 5.5 quarts initially
Why not the full amount? Because we’re going to check the level and top off as needed. Overfilling is worse than underfilling—it causes oil foaming and can damage seals.
Check the Oil Level
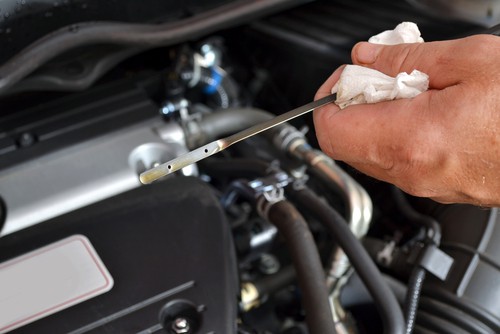
Wait 2-3 minutes for the oil to settle into the pan. Pull out the dipstick (it’s marked with a yellow or orange handle), wipe it clean with a rag, reinsert it fully, and pull it out again. The oil level should be between the two dots or holes on the dipstick—that’s the “safe” range.
If it’s below the lower mark, add 1/4 quart at a time and recheck. If it’s above the upper mark, you need to drain some out. Most people land right in the middle after adding the initial amount I mentioned.
Start the Engine and Check for Leaks
Replace the oil filler cap. Start the engine and let it idle for 30 seconds. Watch the oil pressure light—it should go out within 2-3 seconds. If it stays on longer than 5 seconds, shut off the engine immediately and check that you installed the filter correctly and added enough oil.
While it’s idling, get out and look under the car. Check the drain plug and the oil filter for leaks. A small drip right after installation is normal—it’s residual oil. If you see a steady stream or puddle forming, shut it off and investigate.
Reset the Maintenance Minder
Honda’s Maintenance Minder system tracks oil life based on driving conditions. After an oil change, you need to reset it. Here’s the procedure for 10th and 11th gen Accords (2018+):
- Turn the ignition to ON (don’t start the engine)
- Press the Home button on the infotainment screen
- Go to Settings → Vehicle → Maintenance Info
- Select “Oil Life” and press Reset
- Confirm the reset
On older Accords without the touchscreen: Turn ignition to ON, press and hold the Select/Reset button until the oil life indicator starts flashing, then hold it again until it resets to 100%.
Final Check and Documentation
Let the car sit for 5 minutes after shutting it off. Check the oil level one more time with the dipstick—it should still be in the safe range. Check underneath for leaks again. If everything looks good, write down the date and mileage in your maintenance log. I use a small notebook in the glovebox.
What to Do With the Used Oil and Filter
Don’t pour used oil down the storm drain, in your yard, or in the trash. It’s illegal and you can get fined. Here’s what to do instead:
Used Oil: Most auto parts stores (AutoZone, O’Reilly, Advance Auto) accept used oil for free. Some Walmart locations with automotive departments do too. Pour it into a sealed container—empty milk jugs work but I prefer the drain pans with built-in pour spouts. Most stores have a 5-gallon per day limit.
Oil Filter: Let it drain into the oil pan for 12-24 hours—seriously, it holds a surprising amount of oil. Once drained, wrap it in a plastic bag and throw it in the trash, or bring it to the parts store with your used oil. Some recycling centers take them.
Environmental Note: One quart of motor oil can contaminate 250,000 gallons of water. I’ve been in this industry long enough to see the damage improper disposal causes. Do the right thing and recycle your used oil.
Troubleshooting: When Things Don’t Go As Planned
Let me walk you through the common issues I see when people do their first Honda Accord oil change.
Problem: Oil Pressure Light Stays On After Starting
Symptom: You start the engine and the red oil pressure light doesn’t go out within 5 seconds.
Diagnosis: Either you didn’t add enough oil, you installed the filter incorrectly, or there’s an air pocket in the oil system.
Fix: Shut off the engine immediately. Check the dipstick—is the oil level in the safe range? If not, add oil. If the level is correct, remove the oil filter and inspect the O-ring. Is it seated properly? Did you forget to lube it? Reinstall correctly and try again. I’ve seen this happen when people install the old O-ring and the new one together—double-check you removed the old one.
Problem: Oil Leak at the Drain Plug
Symptom: You see oil dripping or seeping from around the drain plug after installation.
Diagnosis: Either the drain plug isn’t torqued properly, the crush washer is damaged or missing, or you cross-threaded the plug.
Fix: If it’s a slow seep, try torquing the drain plug an additional 1/8 turn. If it’s a steady drip, you need to remove the plug and inspect. Check the crush washer—is it crushed evenly? Is it there at all? Replace if needed. If you cross-threaded the plug (you’ll feel crunchy resistance when threading it in), you may need a thread chaser or, in severe cases, an oversized drain plug kit. That’s a $15 fix from AutoZone.
Problem: Oil Leak at the Filter
Symptom: Oil is dripping from the oil filter housing area.
Diagnosis: The filter O-ring isn’t seated properly, you left the old O-ring in, or you cracked the housing by overtightening.
Fix: Remove the filter cap and inspect the O-ring. Make sure it’s in the correct groove and lubed with fresh oil. Check inside the housing for a second O-ring—if you find one, remove it. Reinstall the filter and hand-tighten the cap, then snug it with the wrench. If you cracked the housing, you’ll see oil weeping from cracks in the plastic. That requires a new filter housing assembly—about $80 in parts and an hour of labor.
Problem: Stripped Drain Plug
Symptom: The drain plug spins without tightening, or it’s extremely difficult to remove.
Diagnosis: You or a previous owner cross-threaded or over-torqued the drain plug and damaged the oil pan threads.
Fix: First attempt: use a thread chaser to clean up the threads ($12 tool). If that doesn’t work, install an oversized drain plug—companies like Dorman make them (part #65314). If the threads are completely destroyed, you need either a HeliCoil thread repair ($25 kit if you DIY) or a new oil pan ($150-200 part, 2-3 hours labor). This is why I’m adamant about proper torque on the drain plug.
Problem: Engine Runs Rough After Oil Change
Symptom: The engine idles rough, misfires, or the check engine light comes on immediately after the oil change.
Diagnosis: This usually isn’t related to the oil change itself. Most common causes: you bumped an electrical connector, knocked a vacuum line loose, or got oil on an oxygen sensor.
Fix: Open the hood and inspect all connectors near where you were working. Look for any vacuum lines that came loose—they’re small black rubber hoses about 1/4″ in diameter. If you spilled oil on the engine, check if any dripped onto the O2 sensors (they’re in the exhaust manifold). Clean with brake cleaner if needed. If the check engine light is on, have it scanned—most auto parts stores do this for free.
If you experience any of these situations, stop and take the car to a professional:
- Oil pressure light stays on even after adding oil and checking the filter
- You see metal shavings or chunks on the drain plug magnet (indicates internal engine damage)
- The oil pan is dented or damaged and won’t seal even with a new crush washer
- You completely stripped the drain plug threads and can’t get the plug to tighten
- The engine makes unusual noises (knocking, ticking) after starting
Don’t try to save $100 on a repair by forcing something that’s broken. I’ve seen $200 DIY mistakes turn into $2,000 repairs because people kept trying to “fix” it themselves.
Cost Comparison: DIY vs Professional Oil Change
Let’s talk real numbers. When customers ask me if DIY oil changes are worth it, I show them this breakdown.
Professional Oil Change Costs (2025 Pricing)
$85-110
$65-85
$55-75
DIY Oil Change Costs
$28-32
$8-10
$2
$38-44
Savings per oil change: $30-65 depending on where you would have gone
Initial tool investment: About $150-200 if you don’t have anything (jack, stands, wrenches, pan)
Break-even point: After 3-4 oil changes, you’ve recovered your tool costs
Savings over 100,000 miles: Assuming one oil change every 7,500 miles (13 changes), you’ll save $400-850 over the life of typical ownership. If you keep the car for 200,000 miles, that’s $800-1,700 in savings.
That’s real money. But beyond the financial savings, there’s a bigger benefit: you know the job was done right. I’ve seen quick-lube shops forget to add oil, install the wrong filter, strip drain plugs, and use conventional oil when synthetic was required. When you do it yourself, you control the quality.
Common Mistakes Even Experienced DIYers Make
I’ve been doing this long enough to see patterns in how people mess up oil changes. Here are the ones that surprise me the most.
Mistake #1: Not Checking for the Second O-Ring
This is the #1 cause of post-oil-change leaks on Hondas. When you remove the old filter cartridge, the O-ring sometimes stays stuck in the housing instead of coming out with the filter. If you don’t remove it and install the new filter with its new O-ring, you now have two O-rings stacked up. They won’t seal properly and you’ll leak oil. Every single time I teach someone to change their oil, I emphasize this point three times.
Mistake #2: Forgetting to Reset the Maintenance Minder
The Maintenance Minder system doesn’t know you changed the oil unless you tell it. If you forget to reset it, you’ll be getting “oil change due” reminders at 5,000 miles when you just changed it at 52,000 miles. Then you might change it too early, wasting money and oil. Reset it every time, immediately after the oil change while you’re thinking about it.
Mistake #3: Reusing the Crush Washer
Honda specifies a new crush washer every oil change. They cost $2. People try to save $2 and end up with a leak that drips oil all over their driveway. The crush washer is aluminum and deforms when torqued—it’s designed to be single-use. Just buy a five-pack and keep them in the garage.
Mistake #4: Overfilling the Oil
More is not better with engine oil. Overfilling causes the crankshaft to slap the oil surface, creating foam. Foam doesn’t lubricate. It also increases crankcase pressure, which can blow out seals. I’ve seen people add a full quart over the max line because “extra protection.” What they got was a [valve cover gasket leak](valve-cover-gasket-leak-repair) and an $800 repair bill.
Mistake #5: Not Warming Up the Oil First
Cold oil flows like molasses. If you drain your oil cold, you’ll leave a quart of old, contaminated oil sitting in the pan and galleries. Warm the engine for a few minutes before draining—the oil will flow faster and carry more contaminants out. The difference is noticeable: cold drain takes 10-15 minutes to finish dripping, warm drain takes 5 minutes.
Mistake #6: Using the Wrong Oil Filter Size
The 1.5T and 2.0T use different filter sizes (64mm vs 74mm cap). Buying the wrong filter means you either can’t get the cap off or you strip it trying. Double-check your engine size before ordering parts. The part number is printed on the old filter—take a picture of it before removing.
I keep a laminated checklist taped to my garage wall with every step of the oil change procedure. Even after thousands of oil changes in my career, I still glance at it to make sure I didn’t forget something stupid like replacing the oil filler cap. Pride goeth before a fall, as they say. The checklist has saved me more than once.
Frequently Asked Questions
Honda dealers typically charge $85-110 for a full synthetic oil change on an Accord. That includes 0W-20 synthetic oil, a genuine Honda filter, and the multi-point inspection they do with every service. Some dealers run specials or coupons bringing it down to $65-75, but that’s the exception, not the rule.
For comparison, doing it yourself costs $38-44 in parts. You save $40-70 per change, which adds up to $500-900 over 100,000 miles of ownership.
Technically yes, mechanically no. Honda specifies 0W-20 for a reason—it’s engineered for the tight clearances in modern turbocharged engines. Using 5W-30 won’t immediately destroy your engine, but you’ll see slightly reduced fuel economy (about 1-2 mpg) and potentially accelerated wear on high-mileage engines.
I’ve torn down engines with 5W-30 run in them for extended periods. The timing chain shows more stretch, turbo seals wear faster, and piston rings don’t seal as well. Is it worth saving $3 per oil change? In my professional opinion, no. Stick with 0W-20 synthetic.
Honda’s official recommendation is 7,500 miles or 12 months for normal driving conditions. “Normal” means highway driving, moderate temperatures, and trips longer than 10 miles. If you drive in extreme conditions—short trips under 5 miles, lots of idling, extreme heat or cold, dusty conditions, or towing—Honda recommends 5,000 mile intervals.
My personal recommendation based on oil analysis and 15 years of experience: 7,500 miles is fine for 2.0T engines. For 1.5T engines, especially 2018-2019 models in cold climates, I’d go 5,000-6,000 miles due to the oil dilution concerns. It’s cheap insurance against expensive repairs.
For a deeper dive on this topic, read my article on [how often you should change your oil](how-often-change-engine-oil) for different driving conditions.
Overfilling by a quart or more causes the crankshaft to contact the oil surface during rotation. This whips the oil into foam, and foam doesn’t lubricate—it’s mostly air. You’ll see higher oil temperatures, increased oil consumption, and potentially blown seals from excessive crankcase pressure.
If you accidentally overfill, don’t drive the car. Use a fluid extractor pump (about $25 at Harbor Freight) to remove the excess through the dipstick tube. Or, if you don’t have one, carefully loosen the drain plug just enough to let out small amounts of oil while checking the level. I’ve fixed overfill issues this way dozens of times in my shop.
How do you know it’s overfilled? The dipstick will show oil above the upper mark, and you might notice rough idle or oil smell from the exhaust (the PCV system is ingesting foamy oil).
On 10th and 11th generation Accords (2018+), you might be able to reach the drain plug without lifting the car if you have low-profile ramps or if you’re skinny and flexible. I’m 6’1″ and 190 lbs—I can’t do it without lifting the car. The filter location definitely requires lifting the car or removing the passenger front wheel to access from the side.
My recommendation: invest $40 in a set of Rhino Ramps. Drive the front wheels up on them and you’ll have enough clearance to work comfortably and safely. They’re much safer than jacks for oil changes because there’s no risk of the car falling—it’s solidly supported on four wheels.
The procedures are nearly identical—same drain plug location, same process, same oil type (0W-20 synthetic). The only differences are:
- Oil capacity: 1.5T takes 3.7 quarts, 2.0T takes 5.7 quarts
- Filter size: 1.5T uses a 64mm filter cap, 2.0T uses 74mm
- Filter part number: Different part numbers for each engine
Everything else—torque specs, drain plug location, procedure—is identical. Just make sure you buy the correct filter for your specific engine.
I’ve used both extensively. Honda OEM filters (part #15400-RTA-003 for 1.5T, #15400-RLF-004 for 2.0T) are excellent quality and my first choice. They’re about $10 at the dealer parts counter.
Aftermarket alternatives that I trust based on cut-open analysis and real-world use:
- Purolator L15436 (1.5T) – Good filter media, proper bypass valve, $8-10
- WIX 57061 (1.5T) – Excellent quality, slightly more expensive at $12
- Fram Ultra Synthetic XG10575A (1.5T) – Premium synthetic media, $10-12
What I avoid: No-name Amazon filters, Fram Extra Guard (orange can), and any filter under $5. The filter is critical for engine longevity. Don’t cheap out on a $3 savings.
For 10th and 11th generation Accords (2018-2025) with the touchscreen:
- Turn ignition to ON (don’t start engine)
- Press HOME button on touchscreen
- Go to Settings → Vehicle → Maintenance Info
- Select “Oil Life” and press Reset
- Confirm by selecting “Yes”
- Oil life should now show 100%
For 9th generation Accords (2013-2017) without touchscreen:
- Turn ignition to ON
- Press and hold the Select/Reset button on the instrument cluster
- Hold until oil life indicator starts blinking
- Release and press the button again until it resets to 100%
If you forget to reset it, nothing bad happens mechanically—you’ll just get maintenance reminders at the wrong mileage.
Related Maintenance You Should Know About
While you’re under the hood doing an oil change, it’s worth checking a few other things that take 30 seconds but can prevent bigger problems.
Check the Air Filter
The engine air filter housing is on the driver’s side of the engine bay. Pop the clips, lift the lid, and look at the filter. If it’s black or loaded with debris, replace it. A clean air filter improves fuel economy by 1-2 mpg and prevents dirt from entering the engine. Honda filters cost $20 at the dealer, aftermarket ones are $12-15. It’s a 2-minute job.
Inspect Fluid Levels
While the hood is open, check the coolant reservoir (should be between MIN and MAX lines), brake fluid reservoir (should be at MAX), and power steering fluid if your model has hydraulic steering (2017 and earlier). Top off as needed. If any fluid is significantly low, investigate why—it shouldn’t drop between oil changes.
Look for Oil Leaks
With the engine clean after an oil change, it’s easier to spot new leaks. Common leak points on Accords: valve cover gasket (top of engine), oil pan gasket (bottom), front and rear main seals (ends of engine). A small seep is normal on high-mileage engines. A puddle under the car is not. If you see fresh oil accumulating anywhere other than the drain plug area, investigate or take it to a shop.
Consider Learning More Maintenance Tasks
If you can change oil, you can do other basic maintenance too. The next logical skill to learn is the [oil change procedure for the Honda CR-V](honda-crv-oil-change-instructions)—almost identical to the Accord. Then move on to air filter replacement, cabin air filter, wiper blades, and brake pad inspection. Every skill you learn saves money and gives you more control over your vehicle’s condition.
Final Thoughts From the Shop
I started this article talking about the customer who saved himself $40 by learning to change his own oil. He’s been back to my shop three times since then—not for oil changes, but for repairs that actually required professional tools and experience. That’s the relationship I want with customers: you handle the simple stuff, I handle the complex stuff, and together we keep your car running for 200,000+ miles.
The Honda Accord oil change is legitimately one of the easiest maintenance tasks you can learn. If you can follow instructions, use basic hand tools, and take your time, you’ll save money and gain confidence working on your own car. The first one might take you 45 minutes. By the third oil change, you’ll be done in 20 minutes and wondering why you ever paid someone else to do it.
Is it worth it? From a purely financial perspective, you’ll save $400-850 over 100,000 miles. But there’s a bigger benefit: you’ll know the job was done right, with quality parts, and proper torque specifications. You won’t wonder if the quick-lube tech actually changed your oil or just reset the sticker. You’ll have complete control and peace of mind.
The difficulty level is truly beginner-friendly—I’ve taught 70-year-olds and 16-year-olds to do this in the same afternoon. If you’re reading this article and still hesitating, just try it once. Have a backup plan (money for a tow truck if something goes catastrophically wrong, though it won’t), and give it a shot. Worst case, you learn something. Best case, you save thousands of dollars over your years of car ownership.
Now get out there and change that oil. Your wallet will thank you.