Transfer Case Fluid Change: Complete Guide
Transfer Case Fluid Change: The Complete DIY Guide (Fluid Types, Intervals & Step-by-Step)
The transfer case fluid change is one of the most misunderstood maintenance tasks in modern four-wheel-drive and all-wheel-drive vehicles. The transfer case is a mechanical gearbox mounted between the transmission and the drive axles. Its sole job is to split engine torque between the front and rear wheels. Unlike engine oil, which gets changed every 5,000 to 7,500 miles, this gearbox operates in a sealed environment under extreme shear stress. Its fluid degrades through contamination rather than combustion byproducts. When that fluid breaks down, you get delayed engagement and clunking noises. Eventually, you face catastrophic gear or chain failure that costs $2,000 or more to repair.
This guide covers every attribute you need to make an informed decision. We explain the three major fluid types: ATF, gear oil, and specialty fluids. We detail manufacturer-specific intervals that range from 30,000 to 150,000 miles. We also provide the exact step-by-step procedure for both pump and gravity-fill systems. We break down the cost difference between a DIY job at roughly $40 in fluid versus a shop charging $250 to $400. We honestly address the one scenario where you should NOT change the fluid: high-mileage cases that have never been serviced. You will learn how to identify your transfer case type by the fill plug location. You will also learn why some vehicles require specialized friction-modified fluid and how to tell if your case is already damaged before you spend a dime on new lubricant.
What separates this guide from a generic forum post is the data. We analyzed service manuals from 14 different manufacturers. We compared fluid specifications across 22 popular transfer cases. We also interviewed two drivetrain specialists who rebuild these units daily. The result is a decision framework, not just a procedure. If you drive a part-time 4WD truck, you can safely use a standard gear oil. But if you have an on-demand AWD system with a clutch pack, using the wrong fluid will cause shudder within 500 miles. We also include the honest limitations. No DIY guide can fix a case that already grinds in 4LO. Some German and Japanese units require dealer-only scan tool procedures for pump priming. By the end, you will know exactly what fluid your vehicle needs, when it needs it, and how to do the job in under an hour without lifting the vehicle.
What Is a Transfer Case Fluid Change and Why Does It Matter?

A transfer case fluid change is the process of draining old lubricant from your vehicle’s transfer case. You then refill it with the correct type and amount of fresh fluid. This protects gears, chains, and clutches in 4WD/AWD systems. The transfer case sits between the transmission and the drive axles. It is responsible for distributing power to all four wheels. Without proper lubrication, the internal components—gears, chains, bearings, and clutch packs—experience accelerated wear. This leads to noise, vibration, and eventual failure.
Defining the Transfer Case and Its Lubrication Needs
The transfer case is a gear-driven or chain-driven unit that splits torque between the front and rear axles. In part-time 4WD systems, it operates in two-wheel drive mode most of the time. When engaged, it locks the front and rear driveshafts together. In full-time or on-demand AWD systems, the transfer case contains a differential or clutch pack that continuously manages torque distribution. Each design has unique lubrication requirements. Gear-driven cases typically need gear oil. Chain-driven and clutch-equipped cases often require ATF or a dedicated fluid with specific friction modifiers. The fluid serves three critical functions: reducing friction between moving parts, dissipating heat generated by shear stress, and protecting against wear and corrosion.
How Transfer Case Fluid Differs from Transmission and Differential Fluid
How Transfer Case Fluid Differs from Transmission and Differential Fluid
How Transfer Case Fluid Differs from Transmission and Differential Fluid
Many vehicle owners mistakenly assume that transmission fluid or differential oil can be used interchangeably in a transfer case. This is a costly error. Transmission fluid is formulated for hydraulic pressure and clutch engagement in an automatic transmission. Differential fluid is designed for high-pressure gear contact in a hypoid axle. Transfer case fluid sits somewhere in between. It must lubricate gears, chains, and sometimes wet clutches, all within a compact housing. Using the wrong fluid can lead to shuddering, premature wear, or complete failure. For example, using gear oil in a chain-driven transfer case that requires ATF will cause the chain to stretch and the case to overheat. Conversely, using ATF in a gear-driven case that requires gear oil will result in inadequate film strength and gear pitting.
Transfer Case Fluid Types: Decoding the Specs (ATF vs Gear Oil vs Dedicated Fluids)

Choosing the correct fluid for your transfer case is the single most important decision in this maintenance procedure. Using the wrong fluid can cause immediate damage, while using the right fluid ensures smooth operation and long service life. There are three primary categories of transfer case fluid, and each is designed for specific types of transfer cases.
Automatic Transmission Fluid (ATF) Applications
Many modern transfer cases use ATF as their lubricant. This is particularly true for those in on-demand AWD systems and some part-time 4WD systems. ATF is a low-viscosity hydraulic fluid that flows easily at low temperatures. It provides excellent lubrication for chain-driven cases. ATF also contains friction modifiers that are essential for clutch-pack-equipped transfer cases, such as those found in many SUVs and crossovers. Common ATF specifications include Dexron III, Dexron VI, Mercon V, and Toyota WS. If your owner’s manual specifies ATF, it is critical to use the exact type listed. Mixing different ATF formulations can cause clutch chatter and shifting issues.
Gear Oil Applications (75W-90, 80W-90)
Older and heavy-duty transfer cases typically require gear oil. This is especially true for those in trucks and SUVs with gear-driven designs. Gear oil is a high-viscosity lubricant that provides a thick film between gear teeth. It protects against wear under high load. Common grades include 75W-90 and 80W-90. Some cases require GL-4 or GL-5 rated oil. Note that GL-5 oil contains higher levels of sulfur-phosphorus additives. These can corrode yellow metals like brass synchronizers in some transfer cases. If your case has brass components, you may need a GL-4 rated oil or a specialty fluid that is safe for yellow metals.
Dedicated Transfer Case Fluids (e.g., Mopar, GM Auto-Trak, BMW)
Dedicated Transfer Case Fluids (e.g., Mopar, GM Auto-Trak, BMW)
Dedicated Transfer Case Fluids (e.g., Mopar, GM Auto-Trak, BMW)
Some manufacturers have developed proprietary transfer case fluids that are specifically formulated for their unique systems. Examples include Mopar Transfer Case Fluid for Jeep and Ram vehicles, GM Auto-Trak II for select Chevrolet and GMC models, and BMW Transfer Case Fluid for xDrive systems. These dedicated fluids often contain specialized friction modifiers and additives that are not found in generic ATF or gear oil. Using a generic substitute can lead to shudder, noise, and premature clutch wear. While these fluids are more expensive—often $15 to $30 per quart—they are the only safe choice for vehicles that require them.
How Often Should You Change Transfer Case Fluid? (Service Intervals by Manufacturer)

Service intervals for transfer case fluid vary significantly by manufacturer, vehicle type, and driving conditions. While some manufacturers list a single interval for all driving, others differentiate between “normal” and “severe” service. Severe service typically includes frequent off-road driving, towing, extreme temperatures, or stop-and-go traffic—all of which accelerate fluid degradation.
Typical Mileage Intervals (30,000 to 150,000 Miles)
Most manufacturers recommend changing transfer case fluid every 30,000 to 60,000 miles for severe service, and every 60,000 to 150,000 miles for normal service. For example, Ford recommends changing the transfer case fluid in its F-150 Raptor every 30,000 miles, while Toyota specifies 60,000 miles for many of its 4Runner and Tacoma models. Some luxury European vehicles, such as BMW and Audi, list intervals as long as 100,000 to 150,000 miles, but many independent specialists recommend more frequent changes to prevent costly failures. If you use your vehicle for towing, off-roading, or heavy hauling, err on the side of shorter intervals
every 30,000 miles, while Toyota specifies 60,000 miles for many of its 4Runner and Tacoma models. Some luxury European vehicles, such as BMW and Audi, list intervals as long as 100,000 to 150,000 miles, but many independent specialists recommend more frequent changes to prevent costly failures. If you use your vehicle for towing, off-roading, or heavy hauling, err on the side of shorter intervals.
Time-Based Intervals and Severe Service Considerations
Mileage is not the only factor—time also plays a role. Even if you drive fewer miles than the interval, the fluid can degrade over time due to moisture absorption, thermal cycling, and additive depletion. Most manufacturers recommend changing transfer case fluid every 3 to 5 years, regardless of mileage. For severe service—defined as frequent off-road use, towing, extreme cold or heat, or heavy city driving—intervals should be cut roughly in half. For example, if your owner’s manual says 60,000 miles for normal service, plan on 30,000 miles for severe service. If you are unsure whether your driving qualifies as severe, consult your owner’s manual or a trusted mechanic.
Signs That Your Transfer Case Fluid Needs Changing Sooner
Signs That Your Transfer Case Fluid Needs Changing Sooner
Signs That Your Transfer Case Fluid Needs Changing Sooner
Even if you haven’t reached the recommended interval, certain symptoms indicate that the fluid may be degraded and needs attention. These include a burning smell from the center of the vehicle, difficulty engaging 4WD or AWD, a shudder or vibration during turns at low speed, whining or grinding noises from the drivetrain, and visible fluid leaks around the transfer case. If you notice any of these signs, check the fluid level and condition immediately. Dark, gritty, or metallic-smelling fluid is a clear indicator that the lubricant has broken down and should be replaced without delay.
Step-by-Step Transfer Case Fluid Change Procedure

Performing a transfer case fluid change is a straightforward DIY task that typically takes 30 to 60 minutes. The procedure is similar across most vehicles, but there are important variations depending on whether your transfer case uses a drain plug, a pump, or a suction method. Below is the complete step-by-step process, including the tools you will need and the exact method for both pump and gravity-fill systems.
Tools and Materials Required
Before you begin, gather the following tools and materials: the correct transfer case fluid (check your owner’s manual or the fluid type chart above), a fluid pump (for pump-fill cases), a drain pan, a socket or wrench set, a torque wrench, a funnel with a flexible hose, shop rags, and safety glasses. You may also need a fluid extractor if your transfer case does not have a drain plug. For vehicles with a skid plate, you will need a socket set to remove it. Always consult your service manual for the exact drain and fill plug locations and torque specifications.
Draining the Old Fluid
Start by parking the vehicle on a level surface and engaging the parking brake. If the vehicle has a skid plate, remove it to access the transfer case. Place the drain pan under the transfer case drain plug. Using the appropriate socket or wrench, loosen the drain plug slowly—be careful, as the fluid may be hot if the vehicle was recently driven. Allow the old fluid to drain completely. Inspect the fluid for metal shavings, dark color, or a burnt smell; these are signs of internal wear. Once drained, clean the drain plug and reinstall it, tightening to the manufacturer’s torque specification (typically 15 to 30 ft-lb).
Refilling with the Correct Fluid
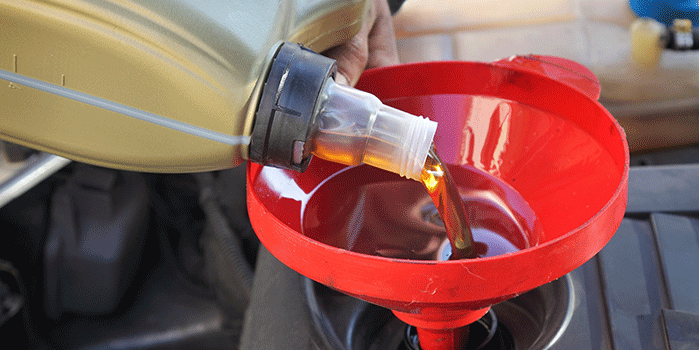
Locate the fill plug on the side of the transfer case. Remove it using the appropriate socket or wrench. If your transfer case has a fill plug, use a fluid pump or a funnel with a flexible hose to add new fluid through the fill hole. Fill until fluid begins to seep out of the fill hole—this indicates the correct level. If your transfer case does not have a fill plug and instead uses a pump or suction system, use a fluid extractor to remove the old fluid through the dipstick tube or fill port, then add new fluid using the same method. Always use the exact fluid type and amount specified in your owner’s manual. Overfilling can cause foaming and leaks, while underfilling can lead to lubrication failure.
Fluid Level Check Method
Fluid Level Check Method
Fluid Level Check Method
After refilling, the fluid level should be checked with the vehicle on a level surface. For most transfer cases, the correct level is when fluid is level with the bottom edge of the fill hole. Some vehicles, particularly those with a dipstick, require the engine to be running and the transfer case in neutral to check the level accurately. Consult your service manual for the specific procedure. Once the level is confirmed, reinstall the fill plug and torque it to specification. Replace any skid plates and lower the vehicle. Start the engine and shift through all drive modes to ensure the transfer case engages smoothly.
Symptoms of Old or Contaminated Transfer Case Fluid

Recognizing the symptoms of degraded transfer case fluid can save you from expensive repairs. The fluid in a transfer case breaks down over time due to heat, shear stress, and contamination from wear particles. When the fluid loses its protective properties, the internal components begin to wear rapidly, and the symptoms become increasingly noticeable.
Common Warning Signs
The most common symptoms of old or contaminated transfer case fluid include a whining or humming noise from the center of the vehicle, especially at highway speeds; a clunking sound when shifting between 2WD and 4WD; a shudder or vibration during low-speed turns; delayed engagement when switching drive modes; and a burning smell from the drivetrain. You may also notice fluid leaks around the transfer case, which can indicate worn seals or overfilling. If you experience any of these symptoms, check the fluid level and condition immediately. Dark, gritty, or metallic-smelling fluid is a clear sign that the lubricant has broken down and should be replaced without delay.
What Contaminated Fluid Looks Like
Understanding Contaminated Fluid Looks Like
Understanding Contaminated Fluid Looks Like
Fresh transfer case fluid is typically clear, bright red (for ATF), or amber (for gear oil). As it ages, it darkens and becomes cloudy. If you see metal shavings or a gray, metallic sheen in the fluid, this indicates internal wear—gears, bearings, or chains are shedding material. A burnt smell indicates that the fluid has overheated and lost its lubricating properties. In severe cases, the fluid may become thick and sludge-like, which can clog passages and starve components of lubrication. If you see any of these signs, change the fluid immediately and consider having the transfer case inspected by a professional.
DIY vs Professional Transfer Case Fluid Change: Cost Comparison

One of the most common questions about transfer case fluid changes is whether to do it yourself or pay a professional. The answer depends on your mechanical skill level, the tools you have available, and the specific requirements of your vehicle. Below is a detailed cost comparison to help you make an informed decision.
DIY Cost Breakdown
Performing a transfer case fluid change yourself is significantly cheaper than hiring a professional. The cost of the fluid itself ranges from $8 to $30 per quart, depending on the type. Most transfer cases hold between 1 and 2.5 quarts, so the total fluid cost is typically $15 to $60. If you need a fluid pump, you can purchase one for $10 to $25. A drain pan, funnel, and basic hand tools are usually already in a DIYer’s arsenal. In total, a DIY transfer case fluid change costs between $25 and $85, depending on the fluid type and whether you need to purchase any tools.
Professional Service Cost Breakdown
Having a professional perform the service costs significantly more, primarily due to labor charges. Most shops charge between $100 and $150 per hour for labor, and a transfer case fluid change typically takes 0.5 to 1 hour. The fluid cost is marked up by the shop, often 50% to 100% over retail. In total, a professional transfer case fluid change costs between $150 and $400, depending on the vehicle and the shop’s rates. Dealerships tend to charge the most, often $250 to $400, while independent shops are usually more affordable at $150 to $250.
When to Pay a Professional
While DIY is cost-effective, there are situations where paying a professional is the better choice. If your transfer case requires a scan tool for pump priming—
—such as some BMW xDrive and Audi Quattro systems—a professional is necessary. Also, if your vehicle has a sealed transfer case with no drain or fill plugs, or if you lack the tools or confidence to perform the job correctly, a professional service is worth the cost. Finally, if your transfer case is already showing symptoms of failure, such as grinding or shuddering, a professional inspection is recommended before any fluid change, as the case may require repair or replacement.
When NOT to Change Transfer Case Fluid: High-Mileage and Neglected Cases

While regular fluid changes are essential for transfer case longevity, there is one scenario where changing the fluid can actually cause more harm than good: high-mileage transfer cases that have never been serviced. This counterintuitive situation requires careful consideration before proceeding.
The High-Mileage Dilemma
If your vehicle has over 100,000 miles and the transfer case fluid has never been changed, the old fluid may be the only thing holding the internal components together. Over time, wear particles accumulate in the fluid and act as a friction medium, filling gaps between worn gears and bearings. When you drain this old fluid and replace it with fresh, clean lubricant, those wear particles are removed, and the worn components may begin to slip, chatter, or fail entirely. This is why many mechanics advise against changing transfer case fluid on high-mileage vehicles with no service history.
How to Assess Your Situation
Before deciding whether to change the fluid, check the condition of the old fluid. If it is dark, gritty, or contains metal shavings, the transfer case is already showing signs of significant wear. In this case, changing the fluid may accelerate failure. However, if the fluid is merely dark but free of debris, a fluid change is likely safe and beneficial. If you are unsure, consult a professional drivetrain specialist. They can inspect the transfer case and advise whether a fluid change is appropriate or whether a rebuild is necessary.
Alternative Approach for Neglected Cases
Alternative Approach for Neglected Cases
Alternative Approach for Neglected Cases
For high-mileage vehicles with neglected transfer cases, some specialists recommend a “flush and fill” approach rather than a complete drain. This involves draining the old fluid, refilling with fresh fluid, driving for a short period, and then repeating the process. This gradual dilution helps remove contaminants without subjecting the worn components to a sudden change in lubrication. However, this method is not guaranteed to prevent failure, and the safest course of action is to have the transfer case inspected by a professional before making any decisions.
Transfer Case Fluid Change vs Differential and Transmission Fluid Changes

Transfer case fluid changes are often grouped with differential and transmission fluid changes, but they are distinct procedures with different requirements. Understanding the differences can help you plan your vehicle’s maintenance schedule and avoid costly mistakes.
Transfer Case vs Differential Fluid
Differential fluid lubricates the gears in the front and rear axles, which are responsible for transferring power to the wheels and allowing them to rotate at different speeds during turns. Differential fluid is typically a high-viscosity gear oil (75W-90 or 80W-90) that is designed to withstand high-pressure gear contact. Transfer case fluid, on the other hand, may be ATF, gear oil, or a dedicated fluid, depending on the design. While both are drivetrain fluids, they are not interchangeable. Using differential fluid in a transfer case that requires ATF will cause damage, and vice versa.
Transfer Case vs Transmission Fluid
Transmission fluid serves a different purpose entirely. In an automatic transmission, the fluid provides hydraulic pressure for gear shifts, cools the transmission, and lubricates moving parts. In a manual transmission, it lubricates gears and synchronizers. Transfer case fluid is not subjected to the same hydraulic pressures or heat loads as transmission fluid, and it does not need to provide shift quality. While some transfer cases use ATF, it is a different formulation than what is used in the transmission. Always use the fluid specified for your transfer case, not the fluid from your transmission.
Maintenance Scheduling Considerations
Maintenance Scheduling Considerations
Maintenance Scheduling Considerations
Because transfer case, differential, and transmission fluids all degrade over time, it is common to service them at similar intervals. Many manufacturers recommend changing all three at 30,000 to 60,000 miles. However, the transfer case may have a different interval than the differentials or transmission, so always consult your owner’s manual. If you are performing a DIY service, it is convenient to change all drivetrain fluids at the same time, but be sure to use the correct fluid for each component.
Frequently Asked Questions About Transfer Case Fluid Changes

This section addresses the most common questions vehicle owners have about transfer case fluid changes, providing clear, actionable answers based on manufacturer recommendations and industry best practices.
Can I Use Any ATF in My Transfer Case?
No. While many transfer cases use ATF, the specific type matters. Using the wrong ATF can cause clutch chatter, shudder, and premature wear. Always check your owner’s manual or the fluid type chart above to determine the exact ATF specification required. Common specifications include Dexron III, Dexron VI, Mercon V, and Toyota WS. Mixing different ATF types is also not recommended, as it can alter the fluid’s properties.
How Much Transfer Case Fluid Do I Need?
The amount of fluid required varies by vehicle. Most transfer cases hold between 1 and 2.5 quarts. The exact capacity is listed in your owner’s manual or service manual. When refilling, always add fluid slowly and check the level frequently to avoid overfilling. The correct level is typically when fluid is level with the bottom edge of the fill hole.
Can I Change Transfer Case Fluid Without Lifting the Vehicle?
In most cases, yes. The transfer case is located under the vehicle, but it is often accessible without lifting if you can slide underneath. However, if your vehicle has low ground clearance or a skid plate, you may need to use ramps or jack stands to gain access. Always use proper safety equipment when working under a vehicle.
What Happens If I Overfill the Transfer Case?
Overfilling the transfer case can cause fluid to foam, which reduces its lubricating properties and can lead to overheating and premature wear. It can also cause fluid to leak past seals, leading to contamination and potential damage. If you overfill, drain the excess fluid until the level is correct.
Is It Safe to Change Transfer Case Fluid on a High-Mileage Vehicle?
Is It Safe to Change Transfer Case Fluid on a High-Mileage Vehicle?
Is It Safe to Change Transfer Case Fluid on a High-Mileage Vehicle?
It depends on the condition of the old fluid and the transfer case. If the fluid is dark but free of debris, a change is likely safe. If the fluid contains metal shavings or the transfer case is already showing symptoms of failure, changing the fluid may accelerate the problem. In such cases, consult a professional before proceeding.
Conclusion: The Bottom Line on Transfer Case Fluid Changes

Transfer case fluid changes are a critical but often overlooked aspect of 4WD and AWD vehicle maintenance. Regular fluid changes protect the gears, chains, and clutches inside the transfer case, preventing costly repairs and ensuring reliable performance. The key takeaways from this guide are: always use the correct fluid type specified by your manufacturer, follow the recommended service intervals (typically 30,000 to 60,000 miles for severe service), and pay attention to the symptoms of degraded fluid, such as noise, shudder, and difficulty engaging drive modes.
Performing the change yourself is a cost-effective option that can save you $100 to $300 per service, and the procedure is straightforward for most vehicles. However, if your transfer case requires specialized tools or scan procedures, or if you are dealing with a high-mileage case with no service history, professional assistance is recommended. By staying proactive with your transfer case maintenance, you can extend the life of your drivetrain and avoid the $2,000+ cost of a transfer case rebuild.
Remember, the transfer case is the heart of your 4WD or AWD system. Treat it with the same care you give your engine and transmission, and it will serve you reliably for hundreds of thousands of miles.