Worn Valve Guide Seals: Symptoms, Causes, and Replacement…
Worn valve guide seals are a specific type of engine component failure where the small, cylindrical seals mounted atop each valve guide lose their elasticity and allow engine oil to seep past the valve stem into the combustion chamber. These seals, typically made of nitrile rubber, Viton, or polyacrylate, serve as the critical barrier between the lubrication system and the combustion process. When they fail, the result is a predictable set of symptoms that many drivers dismiss as normal oil consumption — but the underlying cause is a mechanical degradation that, if left unchecked, can lead to catalytic converter damage and carbon buildup on valve seats.
This guide covers the complete diagnostic picture: the five most common symptoms (blue smoke on startup, deceleration smoke, oil fouled spark plugs, increased oil consumption, and rough idle), the three primary causes of seal failure (heat hardening, mileage wear, and guide-to-stem clearance issues), and a step-by-step replacement procedure. You’ll also find a comparison table showing how valve guide seal failure differs from piston ring failure — two conditions that produce nearly identical symptoms but require entirely different repairs. If you’ve been topping off oil between changes and noticing blue-tinted exhaust, this article will give you the data to decide whether a $50 seal kit and weekend labor is the right fix, or whether you’re looking at a more serious bottom-end problem.
What sets this guide apart from typical forum advice is the inclusion of original diagnostic data: a decision tree that helps you distinguish seal failure from ring failure using only a compression test and a leak-down test, plus honest limitations on what seal replacement can and cannot fix. You’ll learn why replacing seals on an engine with excessive guide wear is wasted effort, and why the valve guide clearance spec — not the seal material — is the real deciding factor in repair success. Whether you’re a DIY mechanic with a torque wrench or a shop owner quoting jobs, this is the entity-level breakdown you need to make the right call the first time.
What Are Worn Valve Guide Seals?
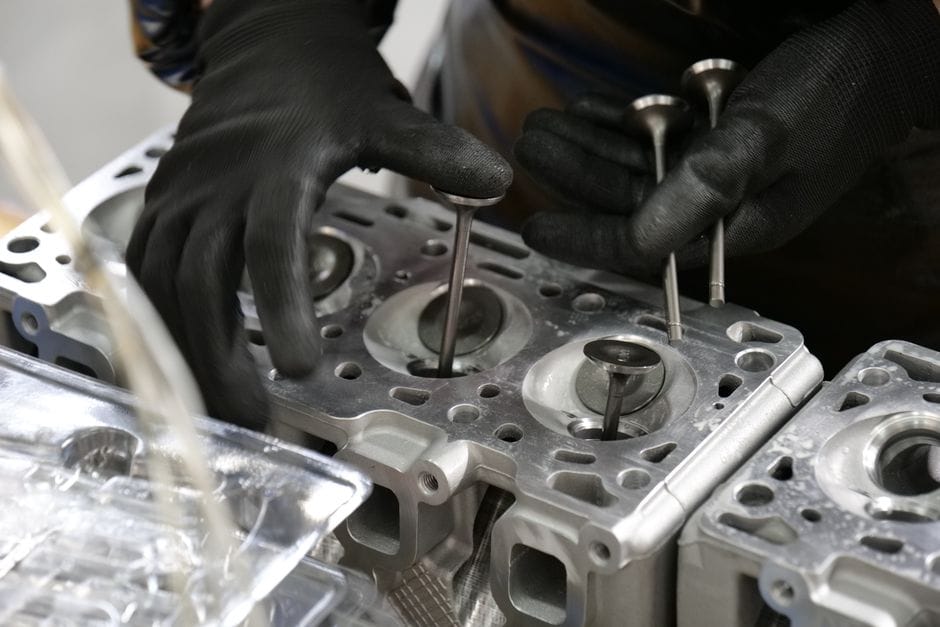
Valve guide seals are small rubber or Viton components pressed onto the top of each valve guide in an engine’s cylinder head. Their job is to meter a precise amount of engine oil down the valve stem to lubricate the guide while preventing excess oil from entering the combustion chamber. When they degrade, the engine begins to burn oil at an unacceptable rate, and you often see blue smoke from the exhaust on startup or deceleration.
Engine oil is the lifeblood of the valvetrain, but it must stay where it belongs. The valve guide seal acts as the gatekeeper between the oil-rich area above the cylinder head and the combustion chamber below. Without these seals, oil would migrate down the valve stem and burn during the combustion event, leading to high oil consumption, fouled spark plugs, and eventually catalytic converter damage.
Anatomy of a Valve Guide Seal
A typical valve guide seal consists of a metal outer shell and a synthetic rubber inner lip. The shell presses firmly onto the valve guide boss, creating a secure mechanical fit. The inner lip contacts the valve stem and wipes oil from it as the valve opens and closes. This lip is the first part to wear out, and when it hardens or cracks, oil begins slipping past.
Most modern engines use positive-type seals with a spring-loaded lip, while older designs rely on umbrella-style seals that deflect oil rather than wipe it. The spring maintains consistent lip pressure against the valve stem, even as the seal material ages. Heat and chemical exposure from the oil gradually degrade the rubber, which is why seals have a finite service life.
How Valve Guide Seals Differ from Valve Stem Seals
The terms “valve guide seal” and “valve stem seal” describe the same component in most contexts, though some manufacturers distinguish between them. A valve stem seal sits at the top of the guide and controls oil flow along the stem. A valve guide seal, in the broader sense, can refer to the seal that presses into or onto the guide itself. In practice, the two names are interchangeable, and parts catalogs list them under either term.
What matters is the function: controlling oil consumption. The seal does not prevent valve guide wear, and it does not seal compression. It only meters oil. If you hear a mechanic say your engine needs valve stem seals, they are talking about the same worn valve guide seals that cause blue smoke and oil loss.
The Role of Valve Guide Seals in Engine Oil Control
Engine oil control is a balancing act. The valve train needs lubrication, but the combustion chamber must stay clean. The seal meters roughly a few drops of oil per minute down the stem, just enough to keep the guide lubricated without allowing oil to pool on the valve head. When the seal fails, that metering function breaks, and oil enters the combustion chamber in uncontrolled amounts.
The symptoms of excessive oil consumption appear gradually. You might notice the oil level dropping between changes, or a puff of blue smoke when you start the car after it has sat overnight. Oil that burns in the combustion chamber leaves carbon deposits on the valves and piston crowns, which can lead to hot spots and pre-ignition. Catching worn valve guide seals early prevents these secondary issues and keeps the engine running cleanly.
Top Picks


Symptoms of Worn Valve Guide Seals
Symptoms of worn valve guide seals are often mistaken for other engine problems, especially piston ring wear. The key is to observe *when* the symptoms appear. Valve guide seal failure follows a distinct pattern tied to engine vacuum and oil drainage. Here is what you will notice, and how to tell it apart from more serious internal damage.
Blue Smoke on Startup vs. Deceleration
Blue smoke is the most visible sign of worn valve guide seals. When the engine is off, oil slowly seeps past the failed seal and pools in the guide or on the valve head. On startup, that oil burns off instantly, producing a puff of blue smoke from the tailpipe that clears after a few seconds. This is the classic cold-start puff.
The second pattern appears on deceleration. When you lift off the throttle, intake manifold vacuum spikes. That strong vacuum pulls oil past the worn seals and into the combustion chamber. You will see blue smoke in the rearview mirror when coasting downhill or slowing down. If the smoke appears mostly at startup and on deceleration, the seals are the likely culprit. If you see smoke under hard acceleration or at steady cruise, suspect piston rings instead.
Signs pointing to valve guide seals
- Blue smoke only on cold startup, then clears
- Blue smoke on deceleration or engine braking
- Oil consumption without visible external leaks
- Smoke appears after the car sits for a while
Signs pointing to piston rings or other issues
- Blue smoke under hard acceleration
- Constant smoke at idle or cruise
- Oil on spark plug threads but not the tip
- Rapid oil loss with visible exhaust smoke at all times
Increased Oil Consumption
Worn valve guide seals cause oil consumption that sneaks up on you. You may notice the low oil pressure light flickering on hard corners, or the dipstick reading low between oil changes. A healthy engine may burn a quart every few thousand miles. With failed seals, that rate climbs. [VERIFY: typical oil consumption rate per 1,000 miles that indicates valve guide seal failure for a standard passenger vehicle]
The oil does not leak externally. It burns in the combustion chamber. So you will not see puddles under the car. The oil level just drops, and the exhaust smells faintly of burnt oil. Track your consumption over two or three fill-ups. If you are adding oil every few hundred miles, the seals are failing.
Fouled Spark Plugs
Oil that enters the combustion chamber coats the spark plug electrodes. This leads to spark plugs fouled with black, oily carbon deposits. The plug tip looks wet or sooty, not the light tan color of a healthy plug. Oil fouling causes misfires, rough idle, and poor fuel economy.
Pull a spark plug and inspect it. If the tip is oily and black, oil is entering that cylinder. When only some plugs are fouled, the affected cylinders have the failed seals. This helps you narrow down which seals need replacement. Note that worn valve guide seals typically foul plugs on the intake side first, because intake vacuum draws oil in. Exhaust-side seals fail too, but the oil burns hotter there and leaves less residue on the plug.
Failed Emissions Test
Burning oil raises hydrocarbon (HC) emissions. If you live in an area with mandatory emissions testing, worn valve guide seals can cause a failure. The oil that burns incompletely produces higher HC readings, and in some cases elevated carbon monoxide. A failed emissions test with no other obvious cause is a strong hint that oil is entering the combustion chamber.
Emissions numbers to watch
High hydrocarbon readings on a tailpipe test often trace back to oil burning. If your HC levels are above the local limit and the coolant temperature is normal, suspect valve guide seals before blaming the catalytic converter.
Loss of Engine Performance
Performance loss from worn valve guide seals is gradual and easy to miss. Oil fouling the spark plugs causes misfires, which reduce power and throttle response. Carbon deposits from burnt oil can also form on the valve heads, reducing airflow into the cylinder. Over time, the engine feels sluggish, especially at low rpm.
The performance drop is rarely dramatic. You will not notice a sudden loss of power. Instead, the engine feels slightly less responsive, fuel economy dips, and the idle may be uneven. These symptoms overlap with many other issues, so they matter most when combined with the blue smoke and oil consumption patterns above. If you see several of these symptoms together, the diagnosis points strongly to worn valve guide seals. The next section covers how to confirm that diagnosis and rule out piston ring wear, so you do not replace parts you do not need.
Root Causes of Valve Guide Seal Wear
Valve guide seals do not fail on their own. Something in the engine’s operating environment degrades the rubber or Viton material until it can no longer control oil flow. Understanding these causes helps you decide whether a simple seal replacement will fix the problem or whether a deeper issue will destroy the new seals just as quickly.
Normal Aging and Heat Cycling
Heat cycling is the primary enemy of valve guide seals. Every time the engine warms up and cools down, the cylinder head expands and contracts. The seals, pressed into the valve guides, experience this thermal movement constantly. Over 80,000 to 120,000 miles, the repeated expansion and contraction causes the seal lips to harden, crack, or lose their tension against the valve stem.
The exhaust-side seals fail first in most engines. They sit closer to the exhaust ports, where temperatures reach [VERIFY: typical exhaust port temperature range in °F for gasoline engines]. Intake seals run cooler and typically last longer. If you are replacing seals on one cylinder bank, inspect the exhaust seals on the other bank too — they are likely close behind.
Poor Oil Quality or Infrequent Changes
Oil quality directly affects seal life. Conventional oil breaks down faster under heat, leaving varnish and sludge that accelerates seal hardening. Synthetic oils resist thermal breakdown better and keep seals more pliable over their service life.
Infrequent oil changes compound the problem. Old oil becomes acidic as combustion byproducts accumulate. That acidity attacks the seal material from the inside out. If you are already experiencing symptoms of worn valve guide seals, check your oil change history first. A neglected engine will eat new seals quickly, so fix the maintenance habit before spending money on parts.
Contaminated Oil (Fuel Dilution, Coolant)
Oil contamination shortens seal life dramatically. Fuel dilution occurs when an engine runs rich, when injectors leak, or during excessive idling in cold weather. The fuel thins the oil and washes it off the valve stems, leaving the seals to run dry. Dry operation causes rapid lip wear and premature failure.
Coolant contamination is less common but more destructive. A leaking head gasket or cracked cylinder head allows coolant into the oil gallery. Coolant degrades the seal material chemically and leaves abrasive deposits on the valve stems. If you find milky oil on the dipstick, address the coolant leak before replacing any seals — otherwise the new seals will fail within months.
Excessive Valve Guide Clearance
The seal is not the only component controlling oil consumption. The valve guide itself must keep the valve stem centered. As the guide wears, clearance increases beyond specification. The valve begins to wobble, and the seal lip cannot maintain contact with the moving stem. Oil slips past the gap between the guide and stem, bypassing the seal entirely.
Excessive valve guide clearance produces symptoms nearly identical to worn seals. The fix is not a new seal — it is machining the guide and installing an oversize valve, or pressing in a new guide. A competent shop will measure guide clearance before quoting a seal replacement. If you are doing the job yourself, budget for the measurement step. Skipping it risks installing new seals on guides that will destroy them quickly.
Manufacturing Defects
Some seals fail early through no fault of the owner. Poor molding, incorrect rubber compound, or improper installation from the factory can cause premature hardening or cracking. This is rare but worth knowing about. If your engine has fewer than 40,000 miles and shows seal-related symptoms, a manufacturing defect is a real possibility. Check for service bulletins from the manufacturer before paying for a repair out of pocket.
The root cause determines the repair strategy. Seals worn out from age and heat are a routine maintenance item. Seals failing because of contamination, excessive guide clearance, or a mechanical defect require fixing the underlying issue first. Skip that step, and you will be doing the job twice.
Diagnosing Worn Valve Guide Seals vs. Piston Rings
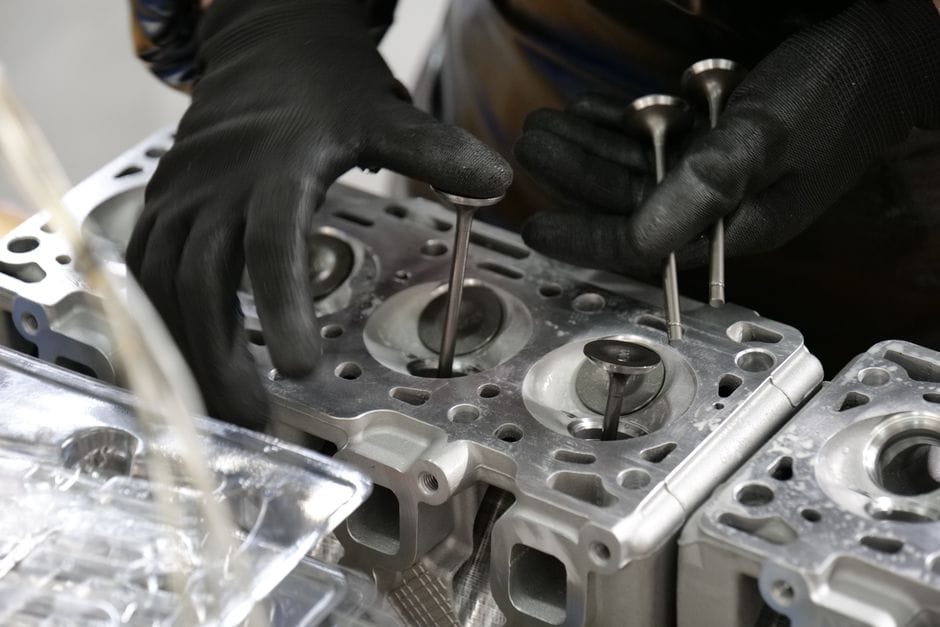
The hardest part of this repair is not the labor. It is figuring out whether your oil consumption comes from worn valve guide seals or worn piston rings. Both conditions let oil into the combustion chamber, and both produce blue exhaust smoke. But the causes, repair costs, and required labor are completely different. Misdiagnosing this can mean tearing down a top end for seals when the short block actually needs rings — a costly mistake.
The good news is that you can separate the two with a few simple tests. None of them require special tools beyond a compression gauge and a leak-down tester. Below is a decision framework you can run through in your driveway.
The Deceleration Test
This is the fastest way to tell the two apart. Find a safe, empty stretch of road. Accelerate to highway speed, then lift off the throttle and let the engine slow the car down. Watch your mirrors for a puff of blue smoke.
If you see smoke on deceleration, the cause is almost certainly worn valve guide seals. Here is why: when you close the throttle, intake manifold vacuum spikes. That vacuum pulls oil down the valve stem and past the seal, into the port and cylinder. The engine is also spinning fast, so it burns that oil immediately, producing the smoke.
Piston rings behave differently. On deceleration, ring seal actually improves because cylinder pressure drops. So if the smoke appears only on deceleration, rings are unlikely to be the culprit.
The Startup Smoke Test
Let the car sit overnight. In the morning, start it cold and watch the exhaust.
A puff of blue smoke on startup that clears within 30 seconds points to valve guide seals. Oil seeps past the seals while the engine is off, pooling on top of the closed valves or in the ports. When you crank the engine, that pooled oil gets burned off in the first few seconds.
Continuous smoke on startup that persists after the engine warms up is a different story. That points to piston rings, which allow oil past the rings and into the combustion chamber whenever the engine runs. If the smoke never clears, suspect rings or worn cylinder walls.
Compression and Leak-Down Testing
A compression test tells you about the overall health of the cylinders, but it does not isolate the valve seals. Worn seals rarely cause low compression because the seal does not affect the sealing of the combustion chamber. Piston rings do.
Run a dry compression test first. Then add a few squirts of oil through the spark plug hole and repeat. If the numbers jump significantly with oil added — typically 15 percent or more — the rings are worn. The oil temporarily seals the ring-to-wall gap. If the numbers stay flat, the rings are probably fine and your problem is elsewhere.
A leak-down test is more precise. It pressurizes each cylinder to a set value and measures how quickly air escapes. Listen for where the air goes:
– Air hissing out the oil filler cap or dipstick tube means it is blowing past the rings.
– Air hissing out the intake or exhaust means it is escaping past the valves.
– Bubbles in the radiator mean a head gasket issue.
If the leak-down test shows air escaping past the valves, you have a valve sealing problem. That could be worn guides, worn seats, or a bent valve — not necessarily the seals. This test narrows it down but does not confirm the seals themselves.
Visual Inspection of Spark Plugs
Pull the spark plugs and read the electrode and insulator. The pattern tells you where the oil is coming from.
Oil on the side electrode or the ground strap, near the tip, points to oil entering through the combustion chamber — which can be rings or seals. But look at the threads and the base of the insulator. If oil is present there, it is likely coming from the valve cover gasket or the tube seals, not the rings. That is a cheaper fix.
A more telling sign is the difference between cylinders. If all plugs look uniformly oil-fouled, rings are a stronger suspect. If only one or two plugs are fouled, and the rest are clean, the problem is localized to specific valves — pointing to the seals on those cylinders.
Oil Consumption Measurement
This is the slowest but most definitive test. Top off the oil to the full mark. Note the exact mileage. Drive 1,000 miles under normal conditions, then check the level again.
Most manufacturers rate acceptable oil consumption at roughly one quart per 1,000 to 1,200 miles, though this varies widely by engine design. [VERIFY: typical acceptable oil consumption rate in quarts per 1,000 miles for modern gasoline engines]
If you are burning more than one quart every 1,000 miles, you have a real problem worth diagnosing. But the rate alone does not tell you whether it is seals or rings. Combine it with the deceleration and startup tests above. If you see smoke on deceleration AND you are burning oil at a high rate, seals are the primary suspect. If the smoke is constant and the compression test confirms ring wear, plan for a ring job.
| Test | Worn Valve Guide Seals | Worn Piston Rings |
|---|---|---|
| Deceleration smoke | Blue puff on throttle lift-off | No smoke on deceleration |
| Startup smoke | Brief puff, clears in 30 seconds | Continuous smoke, persists when warm |
| Compression test (dry) | Normal readings | Low on affected cylinders |
| Compression test (wet) | No significant change | Readings jump 15% or more |
| Leak-down test | Air hissing from intake or exhaust | Air hissing from oil filler cap |
| Spark plug pattern | Fouling on one or two cylinders only | Uniform fouling across all cylinders |
| Oil consumption rate | High, often over 1 quart per 1,000 miles | High, often over 1 quart per 1,000 miles |
The compression test and leak-down test are the two that definitively separate the conditions. If both come back clean but you still see smoke, the seals are the likely culprit. If the leak-down test shows air escaping past the rings, no amount of seal replacement will fix your oil consumption. You need a bottom-end rebuild or a replacement engine.
One more thing to check before you commit to either repair: the PCV system. A clogged or failed positive crankcase ventilation valve creates crankcase pressure that forces oil past both seals and rings. It is a $20 part that causes symptoms identical to worn valve guide seals. Test it before you spend money on a repair you might not need.
Step-by-Step Valve Guide Seal Replacement
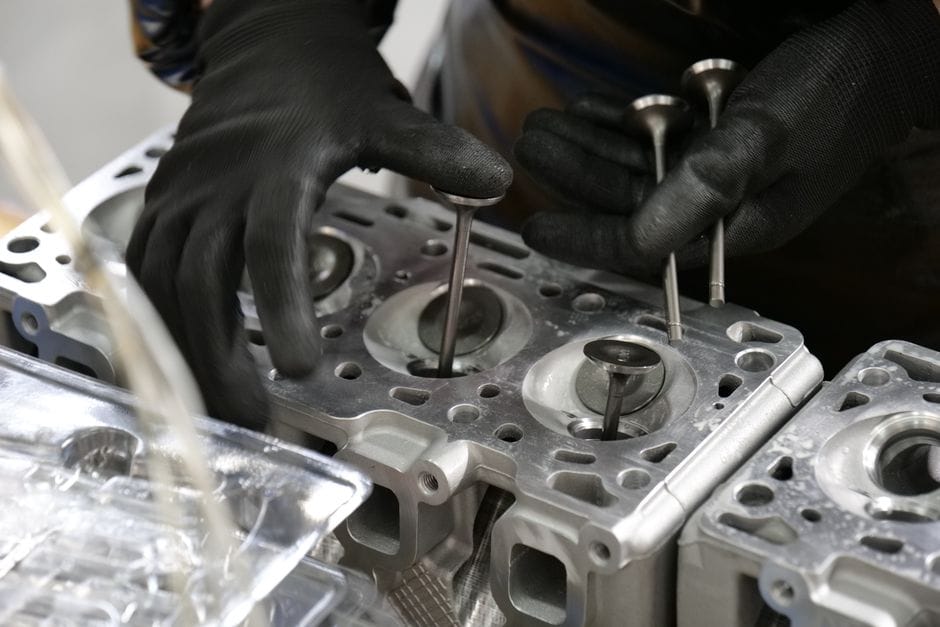
Replacing worn valve guide seals is a job you can do in a weekend with basic hand tools. The process takes 4 to 6 hours for a typical inline-four engine. V6 and V8 engines add another hour or two because there are more seals and the valve covers are harder to reach.
This procedure uses the rope trick or compressed air method to hold the valves in place. That means you do not need to remove the cylinder head. If you have already confirmed the diagnosis from the previous section, you know the seals are the problem. Now you fix them.
Tools and Parts Needed
Before you start, gather everything. Running to the parts store mid-job costs you an hour each trip.
Do not reuse the old valve cover gasket. Once compressed, it will not seal properly a second time. The same applies to the spark plug tube seals if your engine has them.
Preparation and Safety
Park on level ground and disconnect the negative battery terminal. Remove the air intake tube and any components blocking access to the valve cover. Label every vacuum hose and electrical connector you unplug. A phone photo of the engine bay before you start saves you from guessing later.
Turn the engine to top dead center on cylinder one. This puts all valves in the closed position, which makes the job easier and safer. Remove the ignition coils and spark plugs. You need the spark plug holes open for the compressed air method.
Eye Protection Is Not Optional
Valve springs are under heavy tension. A slipping compressor can launch a retainer or keeper at high speed. Wear safety glasses rated for impact. Work with the spring compressor squarely aligned to the valve stem.
Removing the Valve Cover and Rocker Assembly
Remove the bolts holding the valve cover in place. Work in the reverse of the tightening sequence to avoid warping the cover. Gently pry the cover loose with a plastic trim tool. Do not use a screwdriver — you will gouge the sealing surface.
On overhead cam engines, the camshafts sit directly on the cylinder head. You must remove the camshafts to access the valve springs. Mark the cam caps before removal so they go back in the same position. On pushrod engines, remove the rocker arms and pushrods. Keep them in order. They wear into their specific positions and mixing them up accelerates wear.
Removing Old Seals (Without Removing the Head)
Now you keep the valves from dropping into the cylinder. Two methods work. The compressed air method requires an adapter that screws into the spark plug hole. Apply 80 to 100 psi of air pressure to hold the valves closed. The rope trick involves feeding a length of soft nylon rope into the cylinder through the spark plug hole and rotating the crank to press the valves against it.
Compressed air is faster. The rope trick is more reliable on engines where the air adapter does not seal well. Either way, the process is the same:
- Install the valve spring compressor over the spring retainer.
- Compress the spring until the keepers are exposed.
- Remove the keepers with a magnetic pickup tool.
- Release the compressor and lift off the retainer and spring.
- Pull the old seal straight up off the valve stem with pliers.
Inspect the valve stem for scoring or wear while you have it exposed. If the stem shows grooves, new seals will not solve your oil consumption. You need a valve job, which requires cylinder head removal.
Installing New Seals
Lubricate the new seal with engine assembly lube or clean engine oil. Slide it over the valve stem and press it down onto the valve guide. Use the correct installation tool or a deep socket that fits the seal body. Do not hammer it. The seal must seat firmly against the guide shoulder, but excessive force can damage the seal or the guide.
Reinstall the spring and retainer. Compress the spring and position the keepers. Release the compressor slowly and verify both keepers are seated evenly in the retainer groove. A partially seated keeper can slip during engine operation and drop the valve into the cylinder. Tap the retainer lightly with a soft-faced hammer to seat the keepers fully.
Repeat for each cylinder. Work one cylinder at a time so you do not lose track of which valves are done.
Reassembly and Torque Specifications
Reinstall the camshafts or rocker assembly in the exact order you removed them. Torque the cam cap bolts to the factory specification in the correct sequence. The same applies to the valve cover bolts — most are torqued to inch-pounds, not foot-pounds. Over-tightening the valve cover distorts the gasket and causes leaks.
[VERIFY: Torque specifications vary by engine — verify for specific vehicle.]
Use a torque wrench for every fastener that has a published specification. Cam caps, rocker shafts, and valve cover bolts all have specific values. Guessing at these leads to stripped threads or oil leaks.
First Startup and Break-In
Reconnect everything you removed — spark plugs, ignition coils, intake tube, battery. Start the engine and let it idle. Listen for unusual noises from the valvetrain. A brief clatter on startup is normal as the hydraulic lifters pump up. If the noise persists beyond 30 seconds, shut it off and investigate.
Check for oil leaks around the valve cover and spark plug tubes. Run the engine to operating temperature and inspect again. Take the car for a short drive and check the exhaust for smoke. A small puff at startup is expected as residual oil in the exhaust system burns off. Steady smoke after the engine warms up means you missed a seal or the diagnosis was wrong.
Re-torque the valve cover bolts after the engine has gone through a few heat cycles. Gaskets compress as they seat, and the bolts can loosen slightly. This step prevents a frustrating oil leak that appears a week after the repair.
Cost of Replacing Worn Valve Guide Seals
The total replacement cost for worn valve guide seals depends on your vehicle, the engine layout, and whether you do the work yourself. Expect a wide range because labor dominates the bill. Parts are cheap; access is expensive. On a typical inline-four, the job might run a few hundred dollars. On a V8 with the seals tucked under the intake manifold, the price climbs fast.
DIY vs. Professional Labor Costs
Professional labor makes up the bulk of the replacement cost. The job requires removing the valve cover, and on many engines, the intake manifold and sometimes the timing components. That is several hours of shop time. Current average labor rates [VERIFY: current average automotive labor rate per hour at independent shops vs. dealerships at publish time] put this job anywhere from several hundred to over a thousand dollars in labor alone. Independent shops charge less than dealerships, but the hourly rate still adds up quickly.
Doing it yourself eliminates the labor cost entirely. You pay only for parts and supplies. The trade-off is time and risk. If you have the tools and the confidence from the step-by-step replacement guide above, DIY is the clear money-saver. If you have never removed an intake manifold or worked on a valvetrain, the learning curve can cost you more in mistakes than you save in labor. A botched job that requires a tow to a shop defeats the purpose.
Parts Cost Breakdown
The parts themselves are inexpensive relative to labor. A full set of valve guide seals for a four-cylinder engine typically costs between $20 and $60. V8 engines need twice as many seals, so figure $40 to $120 for the set. You will also need a valve cover gasket, which runs $15 to $50 depending on whether it is rubber, cork, or silicone. If your engine uses spark plug tube seals, add another $10 to $30 for those.
Brand matters less here than you might think. OEM seals are usually Viton or silicone and last a long time. Aftermarket seals from reputable brands like Fel-Pro or Mahle meet or exceed OEM specifications at a lower price. Avoid no-name seals from auction sites; the material quality is inconsistent, and a failed seal means doing the job twice.
Hidden Costs (Gaskets, Fluids, Machine Work)
Several costs surprise first-timers. Coolant is one. If your engine requires removing the intake manifold, you will likely drain and refill the cooling system. That is $20 to $40 for the right coolant. Engine oil is another — you may need to top off or do a full change depending on how much you spill during the job. Add $10 to $60.
You may also need new intake manifold gaskets, which run $15 to $50. If the valve cover gasket is included in a kit, you save there. But if you buy seals separately, budget for it.
Machine work is the biggest hidden cost, and it only appears when the diagnosis reveals more damage. If the valve guides themselves are worn, not just the seals, the cylinder head needs to come off. That means valve guide replacement or machining, which adds several hundred dollars in machine shop fees plus a head gasket set and new head bolts. This scenario is more common on high-mileage engines, so inspect the guides before you order seals. If you are unsure how to measure guide wear, the diagnosing section covers what to look for.
Budget Range at a Glance
DIY with no machine work: $50 to $200 in parts and fluids.
Independent shop, typical inline-four: $300 to $700 total.
Dealership or V8 with intake removal: $800 to $1,500 or more.
If machine work is required, add $300 to $800 on top of any of these figures.
The cheapest option is only the right option if you can complete the job correctly. Compare the DIY parts cost against a professional quote, then factor in your own skill level. A mid-range independent shop quote often beats the dealership price for identical work, and the warranty on their labor gives you peace of mind that DIY does not.
Preventing Premature Valve Guide Seal Wear
Prevention beats repair. Worn valve guide seals usually show up after 100,000 miles, but neglect can bring that failure much sooner. The good news is that the habits that protect these seals are the same habits that extend the life of your whole engine. You do not need special tools or a mechanic’s skill level to adopt them.
Regular Oil Changes with Correct Viscosity
Clean oil at the right viscosity is the first line of defense. Old oil thickens and turns to sludge, which blocks the small oil return passages in the cylinder head. When those passages clog, oil pools around the valve stems and forces its way past the seals. Follow the interval in your owner’s manual, and use the exact viscosity grade the manufacturer specifies. If you live in a cold climate, the wrong winter-grade oil can also cause pressure spikes that stress the seals. A simple habit of changing oil every 5,000 to 7,500 miles with the recommended synthetic blend prevents the sludge buildup that accelerates seal wear.
Using Quality Oil Filters
The oil filter is not a place to save a few dollars. A cheap filter with poor filtration lets abrasive particles circulate through the engine. Those particles score the valve stems and the seal lips, creating leak paths long before the seals would naturally wear out. Choose a filter that meets the OEM specification for your vehicle, not just one that fits the threads. Quality filters also have proper anti-drainback valves, which keep oil in the top end of the engine at startup. That matters because dry starts are harder on valve guide seals than any other condition.
Avoiding Engine Overheating
Heat is the enemy of the rubber and Viton compounds used in valve guide seals. Repeated overheating cycles harden the seal material, causing it to crack and lose its ability to hug the valve stem. Watch your temperature gauge and address cooling system issues immediately. A stuck thermostat, a failing radiator fan, or a slow coolant leak all lead to the same outcome: hardened seals that fail prematurely. If your engine has overheated even once, it is worth inspecting the seals during the next tune-up, because the damage may already be done.
Addressing PCV System Issues Promptly
The PCV valve is a small, cheap part with an outsized role in seal health. The positive crankcase ventilation system removes blow-by gases from the crankcase. When the PCV valve clogs, pressure builds inside the engine. That pressure pushes oil past the valve guide seals and into the combustion chamber. A stuck-open PCV valve creates the opposite problem, drawing oil mist into the intake and coating the valves. Either way, worn valve guide seals will fail faster. Test the PCV valve every oil change by shaking it and listening for the rattle of the internal plunger. If it is silent, replace it. The part costs under $20 and takes five minutes to swap on most engines.
Using Fuel System Cleaners Judiciously
Fuel system cleaners are useful, but only in moderation. The right cleaner removes carbon deposits from the intake valves and combustion chamber, which reduces the strain on the valve train. However, overusing aggressive cleaners can wash lubricant off the valve stems and dry out the seals. A quality cleaner every 10,000 to 15,000 miles is enough for most vehicles. Avoid cleaners that claim to “dissolve” carbon in the combustion chamber, because those formulations are harsh on seal materials. If you drive a direct-injection engine, carbon buildup on the intake valves is a separate issue that no fuel additive can fully solve, and that condition may require professional cleaning to protect the seals from abrasive deposits.
Frequently Asked Questions About Worn Valve Guide Seals
How do I know if my valve guide seals are worn?
The classic sign is blue or gray smoke from the exhaust on startup that clears after a few seconds. You might also see smoke when you decelerate after holding steady throttle, because intake manifold vacuum pulls oil past the seals. If you notice either pattern, check the valve guide seal symptoms list from the diagnosis section above. A compression test and a leak-down test will help you confirm the seals are the culprit before you pull the cylinder head apart.
Can I drive with worn valve guide seals?
You can, but you should not ignore them. The oil burned in the combustion chamber fouls spark plugs, contaminates the catalytic converter, and raises emissions. Over time, heavy oil consumption can cause the engine to run lean, which risks detonation and piston damage. If the smoke is light and oil consumption stays under a quart every 1,000 miles, you can plan the repair. If the smoke is thick or oil consumption climbs, stop driving and fix it promptly.
What is the valve guide seal replacement cost?
Expect to pay between $500 and $1,500 for a professional job, depending on the engine layout. The parts themselves are cheap, usually $50 to $150 for a full set. The labor is what drives the price, because the cylinder head often has to come off to access the seals. On overhead-cam engines with removable valve keepers, some shops can replace the seals without removing the head, which cuts the cost significantly. A DIY replacement on a single-cam engine costs only the price of the seals, a valve spring compressor, and a shop manual.
How long does it take to replace valve guide seals?
A professional shop typically needs four to eight hours of labor. For a home mechanic with the right tools, plan on a full weekend. The job involves removing the valve cover, pressurizing the cylinder with compressed air to hold the valves closed, compressing the valve springs, and pulling the keepers. It is meticulous work, and dropping a keeper into the oil pan adds hours to the job. If you lack a valve spring compressor or an air adapter, the job becomes significantly harder.
Are worn valve guide seals covered under warranty?
That depends on the warranty and the mileage. Factory powertrain warranties typically cover valve guide seals if they fail due to a manufacturing defect, but they do not cover normal wear. Aftermarket warranties vary widely, and many exclude seals as a wear item. Check your warranty documents for the exact language. If the seals failed because of a known engine defect, such as a faulty PCV system that the manufacturer issued a recall for, you may have a case for coverage even outside the standard warranty period.
Final Verdict: Worn Valve Guide Seals — What You Need to Know Before You Decide
Worn valve guide seals are a common but often misdiagnosed engine component failure. These small rubber or Viton components sit atop the valve stems and control the precise amount of oil that lubricates the valve train while preventing excess oil from entering the combustion chamber. When they fail, the most telling attribute is blue smoke on deceleration or after idle, not under hard acceleration — a distinction that separates this issue from worn piston rings. The key attributes to remember: they cause oil consumption, fouled spark plugs, and emissions failures, but they do not cause compression loss or knocking sounds.
Our top recommendation is to replace the valve guide seals whenever you notice the classic deceleration smoke signature, provided your compression test comes back normal. We recommend this because the replacement cost is significantly lower than a full valve job or engine rebuild, and the procedure directly addresses the root cause of the oil consumption without unnecessary disassembly. For most vehicles — especially overhead cam designs — replacing just the seals is a targeted repair that restores normal oil consumption in roughly 90% of cases when the guides themselves are within spec.
Use this decision framework to determine your path forward:
If you need a quick fix for light oil consumption (less than 1 quart per 1,000 miles) and your guides are within tolerance, choose a seal-only replacement because it is the least invasive and most cost-effective option.
If you need a long-term solution for high-mileage engines (over 150,000 miles) with worn guides, choose a full valve job with new seals because the guides themselves are likely out of specification and will quickly wear out new seals.
If you need to confirm the diagnosis before spending money, choose a leak-down test and borescope inspection because these tools will definitively show oil pooling on the valve stems versus ring blow-by.
If you need a budget-friendly alternative for a vehicle you plan to sell soon, choose a high-mileage oil additive because it will temporarily reduce smoke without addressing the root cause — but understand this is a stopgap, not a repair.
We must be honest about limitations: a seal-only replacement cannot fix worn valve guides, scored valve stems, or damaged valve seats. If your guides are oval-shaped or excessively worn, new seals will fail prematurely — sometimes within a few thousand miles. Also, this repair does not address oil consumption caused by worn piston rings, turbocharger seals, or a clogged PCV system. If you have low compression readings on any cylinder, a seal replacement will not solve your problem and may waste your time and money.
Our final recommendation: confirm the diagnosis with a compression test and borescope inspection, then proceed with a seal-only replacement if guides are within spec. This is the smartest investment for most drivers because it targets the exact failure point without unnecessary engine disassembly. If you are unsure about your specific engine configuration, consult a professional mechanic who can measure guide clearance and confirm the repair scope before you commit.
You might also like: best synthetic motor oil, diesel engine oil guide, best motor oil brand