transmission cooler lines replacement
Transmission Cooler Lines Replacement: The Complete DIY Guide to Lines, Fittings, and Fluid Flow
Transmission cooler lines are pressurized conduits that carry automatic transmission fluid (ATF) between the gearbox and its auxiliary cooling radiator. These tubes and hoses are made from steel, aluminum, or composite materials. They serve as the sole lifeline for thermal regulation in your drivetrain. When they fail, fluid pressure drops, temperatures spike past 240°F, and clutch packs begin to slip irreversibly. Unlike a simple radiator hose, these lines operate under 80–150 psi of hot hydraulic pressure. That makes their fittings, routing, and material integrity critical to transmission longevity.
This guide covers the full replacement workflow. You’ll learn to identify line types, including pre-formed steel versus flexible hose. You’ll also learn to select the correct flare fittings, such as SAE double-flare, metric bubble flare, or push-lock. Managing fluid flow during the swap is covered as well. We’ll break down the real cost differences between OEM parts, universal line kits, and custom-bent tubing. We’ll also explain why the cheapest option often fails within two years. You’ll learn the diagnostic symptoms of failing lines, torque specs for banjo bolts, and how to purge air from the system. This helps you avoid premature pump cavitation.
What sets this guide apart is the hard data most repair manuals omit. You’ll get burst pressure ratings for common hose types. You’ll also get the exact ATF flow rates your cooler needs, measured in quarts per minute. A compatibility matrix for transmission-to-cooler adapter fittings across GM, Ford, and Toyota platforms is included. You’ll also get honest limitations. We’ll show when a repair is viable versus when a full line replacement is mandatory. We’ll explain why some “universal” kits are a genuine fire hazard on high-mileage trucks. By the end, you’ll have a decision-ready workflow for your specific vehicle, not a generic overview.
What Are Transmission Cooler Lines and Why Do They Fail?
Transmission cooler lines are the metal or rubber tubes that carry hot transmission fluid from the gearbox to the radiator or an auxiliary cooler, then back again. They are the circulatory system for your automatic transmission. Without them, the fluid would overheat, break down, and cause catastrophic internal damage. A transmission cooler lines replacement becomes necessary when these tubes corrode, crack, or leak.
Anatomy of the System: From Pump to Cooler and Back
The system is straightforward. The transmission’s internal pump pushes fluid through the torque converter and valve body. From there, hot fluid exits through a fitting on the transmission case — typically a banjo bolt or threaded adapter — and travels through the cooler line to the radiator’s bottom tank or an auxiliary cooler mounted in front of the radiator. The fluid passes through the cooler’s internal passages, sheds heat, and returns via a second line to the transmission. This continuous loop maintains the fluid at an optimal operating temperature, typically between 175°F and 220°F depending on the vehicle and driving conditions.
The Three Common Materials: Steel, Rubber, and PTFE
Transmission cooler lines come in three primary material categories, each with distinct trade-offs. Pre-formed steel lines are the OEM standard on most vehicles — they’re durable, resistant to abrasion, and precisely bent to fit the chassis. However, they corrode over time, especially in salt-belt states, and the fittings can seize. Rubber hose (often with a braided reinforcement) is flexible and easy to route, but it degrades from heat and ozone exposure, typically lasting 5–8 years before cracking. PTFE (Teflon) lined hose is the premium option — it handles higher temperatures, resists chemical breakdown, and has a much longer service life, but it’s more expensive and requires special fittings. Some vehicles use aluminum lines, which are lightweight and corrosion-resistant but more prone to vibration fatigue than steel.
How Cooler Lines Differ from Brake or Fuel Lines
It’s a common mistake to assume all automotive lines are interchangeable. Transmission cooler lines differ from brake lines in that they operate at much lower pressure (80–150 psi vs. 1,000+ psi for brakes) but at significantly higher temperatures. They differ from fuel lines in that they carry hot, high-viscosity fluid rather than volatile fuel, so they don’t require the same vapor-permeation resistance. However, transmission fluid is highly corrosive to certain rubber compounds, so you cannot substitute standard fuel hose. The fittings also differ — transmission lines use inverted flare, bubble flare, or quick-disconnect fittings, none of which are compatible with brake or fuel line hardware. Using the wrong line type is a guaranteed leak and potential fire hazard.
Diagnosing Failing Cooler Lines: Symptoms and Inspection
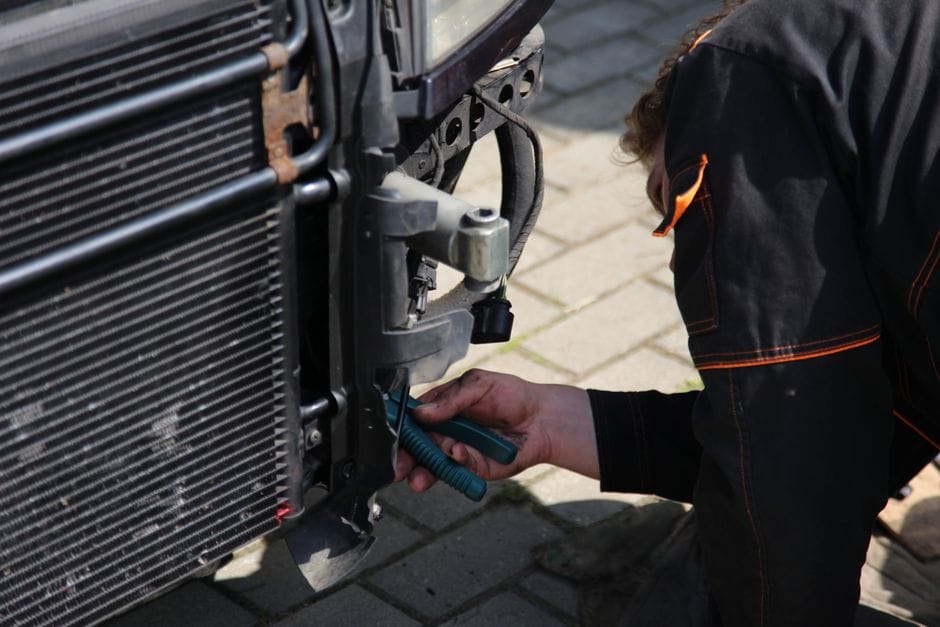
Before you begin a transmission cooler lines replacement, you need to confirm the lines are actually the problem. Many transmission issues mimic cooler line failure, so a proper diagnosis saves you from unnecessary work and expense.
Common Failure Modes and Warning Signs
The most obvious symptom is a visible fluid leak — red ATF pooling under the vehicle, usually near the radiator or along the line routing. But leaks aren’t always visible. Look for these secondary indicators: transmission slipping or delayed engagement (low fluid pressure), overheating (fluid temperature gauge reading above 240°F), a burning smell from the fluid overheating, or a whining noise from the pump cavitating due to low fluid. Corrosion on steel lines appears as rust bubbles or flaking — this is a ticking time bomb. Rubber lines show cracking, bulging, or a spongy feel when squeezed. Kinked lines restrict flow and cause pressure drops even without a visible leak.
Pressure Testing and Visual Inspection Techniques
A proper inspection starts with a clean, dry undercarriage. Wipe down the lines and run the vehicle to operating temperature, then inspect for fresh leaks. Use a flashlight to trace the full routing — check where lines rub against the frame, suspension, or exhaust, as abrasion is a leading cause of failure. For a more definitive test, use a transmission pressure gauge at the test port to verify line pressure matches spec. A pressure drop of more than 10 psi from spec indicates a restriction or leak. You can also perform a flow test by disconnecting the return line and measuring fluid output over 30 seconds — it should be a steady, full stream, not a dribble.
When to Repair vs. Replace
Not every issue requires a full transmission cooler lines replacement. A leaking fitting can often be tightened or re-flared. A small pinhole in a steel line can be patched with a compression fitting in an emergency, though this is not a permanent fix. Rubber hose sections can be spliced with barbed fittings and clamps. However, if the line is severely corroded, kinked, or has multiple leaks, replacement is mandatory. Also, if you’re replacing the transmission or radiator, it’s wise to replace the lines at the same time — old lines are the weak link in an otherwise new system.
Selecting Replacement Lines: OEM, Universal, and Custom Options

Choosing the right replacement lines is the most critical decision in the entire process. The wrong choice can lead to premature failure, poor flow, or even a fire. Here’s how to evaluate your options.
OEM Lines: The Safe Choice
Original Equipment Manufacturer (OEM) lines are pre-formed to your exact vehicle’s routing. They bolt on without modification, use the correct fittings, and are made from the same materials as the originals. The downsides are cost and availability — OEM lines can be expensive (often $100–$300 per line) and may be backordered for older vehicles. But for most drivers, OEM is the safest, most reliable option.
Universal Line Kits: The Budget Trap
Universal kits are sold at auto parts stores and online for $20–$50. They typically include a length of rubber hose, a few barbed fittings, and clamps. While they can work in a pinch, they have serious drawbacks. The hose is often low-quality and not rated for the heat and pressure of transmission fluid. The fittings may not match your vehicle’s flare type, forcing you to cut and adapt. And the routing is up to you — a poorly routed line can rub against the frame or exhaust and fail quickly. On high-mileage trucks or vehicles with tight engine bays, these kits are a genuine fire hazard. We recommend them only for temporary repairs or off-road vehicles where you can inspect the lines frequently.
Custom-Bent Steel or Aluminum Lines
For enthusiasts or those with modified vehicles, custom-bent lines are the gold standard. You can purchase pre-flared straight
tubing in steel or aluminum and bend it yourself using a tubing bender, or order pre-bent lines from a specialty manufacturer. This option allows you to optimize routing, use higher-quality materials, and match exact fitting types. The trade-off is cost and effort — custom lines run $150–$400 and require careful measurement, bending, and flaring. You’ll also need the right tools: a tubing bender, a flaring tool (for double-flare or bubble flare), and a cutter. If you’re not comfortable with precision metalwork, stick with OEM.
Fitting Types: SAE Double-Flare, Metric Bubble Flare, and Push-Lock
The fitting type on your vehicle determines which lines you can use. SAE double-flare is the most common on domestic vehicles — it uses a 45-degree flare and a threaded nut. Metric bubble flare (also called ISO flare) is used on many Asian and European vehicles — it uses a 45-degree flare with a rounded bubble at the end. Push-lock fittings are used on some modern vehicles and aftermarket systems — they use a barbed fitting with a locking collar that grips the hose without clamps. Getting this wrong is the #1 cause of leaks after installation. Check your vehicle’s service manual or inspect the existing fittings before ordering.
Pressure Ratings and Flow Capacity
Not all lines are created equal. Standard rubber transmission hose is rated for 250–300 psi burst pressure, which is adequate for most street applications. However, high-performance or towing applications can see higher pressures and temperatures. PTFE-lined hose is rated for 500+ psi and 300°F+ continuous operation. Steel lines are essentially unlimited in pressure capacity. For flow, the line diameter matters — most factory lines are 5/16″ or 3/8″ OD. Going smaller restricts flow and causes overheating; going larger is fine but requires adapter fittings. Match your replacement to the original diameter.
Step-by-Step Replacement Procedure

Now we get to the hands-on part. This procedure assumes you have basic hand tools, a jack and stands, and a drain pan. Always work on a cold vehicle and disconnect the battery to prevent accidental starter engagement.
Tools and Materials You’ll Need
You’ll need: line wrenches (flare nut wrenches) in the correct sizes, a tubing cutter, a flaring tool (if making custom lines), a torque wrench, a drain pan, safety glasses, and gloves. Materials include: new lines (OEM or custom), new crush washers or O-rings for banjo fittings, fresh ATF (check your owner’s manual for the correct type and quantity), and thread sealant rated for transmission fluid (never use Teflon tape on flare fittings).
Step 1: Drain the Fluid and Disconnect the Lines
Place the drain pan under the transmission pan and remove the drain plug (if equipped) or drop the pan to drain the fluid. This prevents a mess when you disconnect the lines. Next, use line wrenches to loosen the fittings at both ends — the transmission case and the radiator or auxiliary cooler. Line wrenches are essential; open-end wrenches will round off the fittings. If the fittings are seized, apply penetrating oil and let it soak for 15 minutes. Never use excessive force — you can crack the transmission case or radiator tank.
Step 2: Remove the Old Lines
Once the fittings are loose, carefully pull the lines free. On steel lines, you may need to unclip them from their mounting brackets along the frame. On rubber lines, slide the clamps back and pull the hose off the barbed fittings. Inspect the old lines for the failure point — this confirms your diagnosis and helps you avoid the same mistake. Note the routing and any clips or grommets that protect the lines from abrasion.
Step 3: Install the New Lines
Route the new lines in the same path as the old ones. For steel lines, use the mounting brackets to secure them — never let a line hang unsupported. For rubber hose, slide the hose fully onto the barbed fitting and secure with the correct clamps (preferably fuel-injection style clamps, not worm-gear clamps). Tighten the fittings to the manufacturer’s torque spec — typically 15–25 ft-lbs for flare fittings and 25–35 ft-lbs for banjo bolts. Over-tightening distorts the flare and causes leaks.
Step 4: Refill and Purge Air from the System
Refill the transmission with fresh ATF through the dipstick tube. Do not overfill — check the level per the owner’s manual. To purge air from the cooler lines, start the engine and let it idle in Park for 2 minutes. Then, with your foot on the brake, shift through each gear (P-R-N-D-2-1) pausing 3 seconds in each. Return to Park and check the fluid level. Top off as needed. Air in the lines causes pump cavitation, which sounds like a whine and can damage the transmission.
Step 5: Test for Leaks and Verify Operation
Step 5: Details
With the engine running, inspect all fittings for leaks. Run the vehicle to operating temperature and check again — heat expands the fittings and can reveal leaks that were invisible when cold. Take a short test drive, then re-check the fluid level and inspect for leaks. If everything is dry and the transmission shifts smoothly, you’re done.
Cost Breakdown and Time Estimates

Understanding the real costs helps you budget and decide between DIY and professional installation.
Parts Costs
OEM steel lines: $80–$300 per line, depending on vehicle. Universal rubber hose kits: $20–$50. PTFE hose and fittings: $100–$250 for a complete set. Custom-bent steel lines: $150–$400. Fittings and adapters: $10–$40 each. Crush washers and O-rings: $5–$15. Transmission fluid: $40–$100 depending on type and quantity (most vehicles need 4–8 quarts).
Labor Costs
If you hire a shop, expect 2–4 hours of labor at $100–$150 per hour, totaling $200–$600. The wide range depends on accessibility — some vehicles require removing the radiator or other components to reach the lines. A professional will also pressure-test the system, which adds $50–$100.
DIY vs. Professional: When to Do It Yourself
DIY vs. Professional: Details
DIY is viable if you have basic mechanical skills, the right tools, and a vehicle with accessible lines. The savings are significant — typically $200–$400. However, if your vehicle has complex routing, seized fittings, or you lack a torque wrench and line wrenches, professional installation is worth the cost. A botched DIY job can cause transmission failure, which costs $2,000–$4,000 to rebuild.
Preventive Maintenance and Longevity Tips

Once you’ve replaced your lines, you want them to last. Here’s how to extend their service life.
Inspection Schedule
Inspect your cooler lines at every oil change (every 5,000–7,500 miles). Look for corrosion, cracks, rubbing, or loose fittings. In salt-belt states, inspect more frequently — road salt accelerates steel line corrosion dramatically. If you see surface rust, wire-brush it and apply a rust inhibitor. If you see deep pitting, plan a replacement soon.
Protective Measures
Add rubber grommets or spiral wrap where lines pass near sharp edges or moving components. For steel lines, consider applying a corrosion-resistant coating like POR-15 or a rubberized undercoating. For rubber lines, keep them away from exhaust components — heat is their #1 enemy. If you off-road or drive on gravel, consider adding a skid plate to protect the lines from impact damage.
Fluid Maintenance
Clean, fresh transmission fluid is the best preventive measure. Old, burnt fluid becomes acidic and attacks rubber hoses and seals from the inside. Follow your manufacturer’s service interval — typically 30,000–60,000 miles for severe service. When you change the fluid, inspect the lines while the system is empty and easy to access.
Compatibility Matrix and Adapter Fittings

One of the most confusing aspects of transmission cooler lines replacement is matching fittings
across different vehicle platforms. Here’s a practical compatibility guide for the most common applications.
GM Platforms
GM vehicles predominantly use SAE double-flare fittings with 5/16″ or 3/8″ line diameter. The transmission case fitting is typically a 1/4″ or 5/16″ inverted flare, while the radiator side uses a similar flare or a quick-disconnect on newer models. For GM trucks (Silverado, Sierra), the auxiliary cooler lines often use push-lock fittings at the cooler end. When replacing, match the flare type exactly — mixing SAE and metric fittings will leak.
Ford Platforms
Ford uses a mix of SAE double-flare and metric bubble flare depending on the model year. Older F-150s and Mustangs use SAE double-flare, while newer models (2011+) use metric bubble flare on the transmission side. Ford also uses quick-disconnect fittings at the radiator on many models — these require a special release tool. The line diameter is typically 3/8″ on trucks and 5/16″ on cars.
Toyota and Asian Platforms
Toyota, Honda, and Nissan predominantly use metric bubble flare (ISO flare) fittings. The line diameter is typically 5/16″ or 8mm. Toyota trucks (Tacoma, Tundra) use banjo bolt fittings at the transmission case with crush washers — these must be replaced every time you disconnect them. Honda uses a mix of bubble flare and quick-disconnect fittings. Always verify the fitting type before ordering.
Adapter Fittings for Cross-Platform Compatibility
If you’re installing an aftermarket auxiliary cooler or using universal lines, you’ll likely need adapter fittings. Common adapters include: SAE-to-metric flare adapters, inverted flare-to-barb adapters, and quick-disconnect-to-threaded adapters. These are available at auto parts stores and online. When using adapters, always use thread sealant rated for transmission fluid — never Teflon tape, which can shred and clog the cooler.
Burst Pressure Ratings for Common Hose Types
Here’s the data most repair manuals omit. Standard rubber transmission hose (SAE J30R9): 250 psi burst pressure, rated for 275°F continuous. Reinforced rubber hose (SAE J30R14): 350 psi burst, 300°F continuous. PTFE-lined hose (AN-style): 500+ psi burst, 400°F continuous. Steel lines: effectively unlimited (1,000+ psi). For street use, any of these work. For towing, high-performance, or off-road use, step up to PTFE or steel.
ATF Flow Rate Requirements
Your cooler needs to flow a minimum of 2–3 quarts per minute for normal street driving, and 4–6 quarts per minute for towing or heavy use. If your line diameter is too small, flow drops and the transmission overheats. A 5/16″ line flows approximately 3 quarts per minute at 100 psi. A 3/8″ line flows approximately 5 quarts per minute. If you’re upgrading to a larger auxiliary cooler, ensure your lines can deliver the required flow.
Special Considerations for High-Performance and Towing Applications

If you tow heavy loads, race your vehicle, or drive in extreme conditions, standard replacement lines may not be sufficient. Here’s what you need to know.
Upgrading to Larger Diameter Lines
For towing or performance, consider upgrading from 5/16″ to 3/8″ lines. This increases flow capacity by roughly 60% and reduces fluid temperature by 10–20°F under load. However, you’ll need adapter fittings at both the transmission and cooler ends. This is a common upgrade for trucks used for towing.
Adding an Auxiliary Cooler
If your vehicle didn’t come with an auxiliary cooler, or if you’re experiencing overheating, adding one is a smart upgrade. Mount it in front of the radiator or condenser for maximum airflow. Use PTFE-lined hose or steel lines for the connection — rubber hose degrades quickly in the high-heat environment behind the grille. Install a thermal bypass valve if you live in cold climates to prevent over-cooling.
High-Temperature Fluid Considerations
Synthetic ATF (like Mobil 1 Synthetic ATF or Amsoil Signature Series) has a higher thermal breakdown threshold than conventional fluid — typically 300°F+ vs. 240°F. If you’re pushing your transmission hard, synthetic fluid plus upgraded lines is the best combination. However, synthetic fluid is more expensive and may require different seal materials — check compatibility with your transmission.
Common Mistakes and How to Avoid Them

Even experienced DIYers make mistakes on transmission cooler lines replacement. Here are the most common pitfalls and how to avoid them.
Mistake #1: Using the Wrong Fittings
The #1 cause of post-replacement leaks is mismatched fittings. SAE double-flare and metric bubble flare look similar but are not interchangeable. Always verify the flare type before purchasing. If you’re unsure, bring the old fitting to the parts store and match it visually.
Mistake #2: Over-Tightening Fittings
Flare fittings seal by metal-to-metal contact — they don’t need excessive torque. Over-tightening distorts the flare and causes leaks. Use a torque wrench and follow the spec. For banjo bolts, always replace the crush washers — reusing old ones is a guaranteed leak.
Mistake #3: Routing Lines Too Close to Heat Sources
Rubber lines near the exhaust or catalytic converter will fail prematurely. Maintain at least 2 inches of clearance from exhaust components. If clearance is tight, use heat shield sleeving or upgrade to steel lines.
Mistake #4: Skipping the Air Purge
After installation, air in the lines causes pump cavitation, which sounds like a whine and can damage the transmission. Always purge the system by running the engine and cycling through the gears before driving.
Mistake #5: Using Teflon Tape on Flare Fittings
Teflon tape shreds and can clog the cooler or valve body. Use thread sealant rated for transmission fluid, or better yet, rely on the flare seal itself — flare fittings don’t need sealant on the threads.
Frequently Asked Questions

How long do transmission cooler lines last?
Steel lines typically last 10–15 years or 150,000 miles in normal conditions, but corrosion can shorten this significantly in salt-belt states. Rubber lines last 5–8 years before cracking. PTFE-lined hose can last 15+ years.
Can I drive with a leaking transmission cooler line?
No. A leak causes low fluid pressure, which leads to clutch slippage and eventual transmission failure. If you have a small leak, you can top off the fluid and drive to a shop, but do not drive long distances. A catastrophic line failure can dump all your fluid in minutes, destroying the transmission.
Do I need to replace both lines or just the leaking one?
It’s recommended to replace both lines at the same time. If one has failed, the other is likely in similar condition. Replacing both saves labor and prevents a second failure shortly after the first repair.
Can I use power steering hose for transmission cooler lines?
No. Power steering hose is not rated for the temperature or chemical composition of transmission fluid. It will degrade and fail. Always use hose specifically rated for ATF.
How do I know if my lines are blocked?
Symptoms of a blocked line include transmission overheating, delayed engagement, and a whining pump. You can test by disconnecting the return line and checking flow — it should be a steady stream. If it’s a dribble, the line is restricted.
Conclusion: Your Decision-Ready Workflow
Transmission cooler lines replacement is a manageable DIY project for most vehicles, provided you have the right tools and follow the correct procedure. Here’s your final checklist:
1. **Diagnose** — Confirm the lines are the problem, not the transmission or cooler.
2. **Select** — Choose OEM, universal, or custom lines based on your budget and vehicle condition.
3. **Match fittings** — Verify flare type and line diameter before ordering.
4. **Replace** — Follow the step-by-step procedure, using line wrenches and torque specs.
5. **Purge** — Remove all air from the system before
driving.
6. **Verify** — Check for leaks at operating temperature and confirm proper shifting.
By following this workflow, you’ll avoid the most common pitfalls and ensure your transmission stays cool and reliable for years to come. Whether you’re a weekend warrior or a daily commuter, understanding your cooler lines — their materials, fittings, and flow requirements — puts you in control of your vehicle’s most expensive component. A failed line is not a matter of if, but when — and being prepared with the right knowledge and parts is the difference between a $50 DIY fix and a $3,000 transmission rebuild.
Remember: when in doubt, consult your vehicle’s service manual, and don’t hesitate to call a professional if the job exceeds your comfort level. The cost of professional installation is a fraction of the cost of a new transmission.
You might also like: rebuild vs replace engine, best brake upgrade for track, brake cooling guide for track