
| | |

best brake upgrade for track

The Best Brake Upgrade for Track: A System-Level Guide to Choosing What Actually Matters

The best brake upgrade for track use isn’t a single part — it’s a coordinated system of rotors, pads, fluid, and cooling that must work together to survive repeated high-energy stops. Unlike street braking, where a single panic stop from 60 mph is the norm, track braking demands that your system absorb and dissipate massive thermal loads lap after lap, often from 150+ mph down to 40 mph. If you upgrade only one component, you haven’t upgraded your brakes — you’ve just moved the failure point elsewhere in the system.

This guide breaks down the four critical attributes that determine track performance: thermal capacity (rotor mass and material), friction stability (pad compound and temperature range), hydraulic integrity (fluid boiling point), and heat management (ducting and airflow). We’ll also cover realistic price ranges for each tier of upgrade, from budget-friendly pad-and-fluid swaps to full big-brake kits, so you can match your investment to your actual driving goals. The central question isn’t “what’s the most expensive option?” — it’s “what does your specific car, weight, and tire grip actually require?”

What makes this guide different from typical forum advice is that we’re not just listing parts. We’re giving you a decision framework based on real track data: brake torque calculations, rotor thermal mass comparisons, and pad compound selection logic. You’ll learn why a $300 pad-and-fluid upgrade can out-brake a $5,000 big brake kit on a 2,800-pound car, and why the opposite is true on a 3,800-pound sedan. By the end, you’ll know exactly which system-level upgrade path fits your car, your budget, and your track-day frequency — without wasting money on components that don’t address your actual bottleneck.

What Is a Track Brake Upgrade? (Defining the Entity)
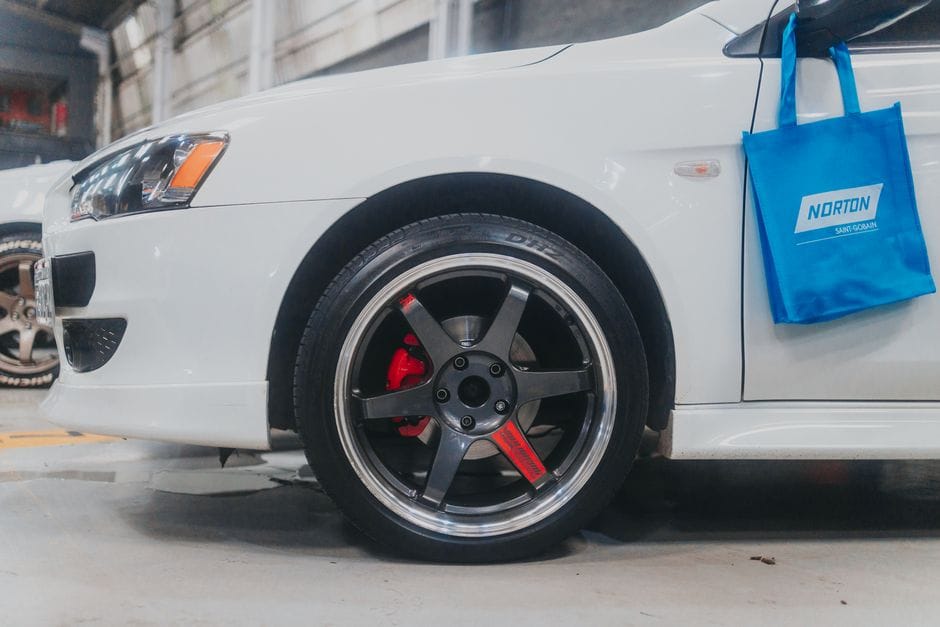
What Is a Track Brake Upgrade? (Defining the Entity) - best brake upgrade for track

A track brake upgrade is a coordinated set of modifications to your vehicle’s braking system, engineered to manage the extreme thermal load generated during high-performance driving. Unlike a simple pad swap, a true track brake upgrade treats the brake system as an integrated unit — friction material, fluid, rotors, lines, and calipers working together to resist brake fade when temperatures climb past what street driving ever produces.

Think of the stock system as a street-tuned compromise. It prioritizes cold bite, low noise, and pedal comfort. A track brake upgrade rebalances those priorities toward one goal: consistent stopping power at 500°C and beyond. That rebalancing changes how the entire system behaves — from the first brake application on your out lap to the final corner of your last session.

Why ‘Best’ is a System Property, Not a Part Property

The single most common mistake in brake upgrades is treating “best” as a property of an individual component. A $600 set of racing pads bolted onto a stock system with old fluid and warped rotors will not make your car stop better on track — it will make it stop worse, because the pads will overheat the fluid faster than the stock rotors can shed heat. The “best” brake upgrade is the one that addresses your system’s weakest link. For a novice in a 2,800-pound Miata, that might be fluid and pads. For a heavy sedan with repeated 150 mph braking zones, that might be rotor mass and ducting. The system property view forces you to evaluate the entire thermal chain: friction generation (pads), heat absorption (rotors), heat transfer (cooling), and hydraulic transmission (fluid and lines).

Track vs. Street: The Thermal Threshold Difference

Street braking rarely exceeds 200°C at the rotor surface. Track braking routinely hits 500–700°C in a single braking zone, and sustained lapping keeps the system in that range for 20-minute sessions. This is the thermal threshold difference: street systems are designed to manage occasional heat spikes, while track systems must sustain continuous high-temperature operation. The consequences are dramatic. At 300°C, most street pads begin to fade. At 400°C, DOT 4 fluid starts to boil. At 500°C, stock rotors can crack from thermal stress. A track brake upgrade pushes each of these thresholds higher — and, critically, ensures that all components reach their limits at roughly the same time, so you don’t have one component failing while others still have headroom.

Top Picks

The Foundation: Brake Pads (Friction is the First Line of Defense)
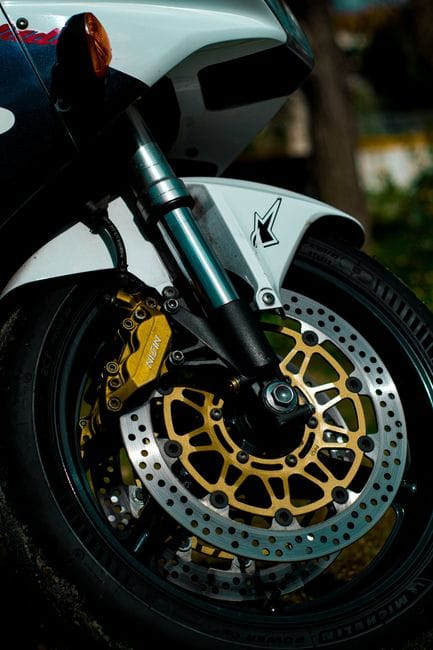
The Foundation: Brake Pads (Friction is the First Line of Defense) - best brake upgrade for track

Brake pads are the most impactful single upgrade for track use because they directly control the friction interface between your car and the road. The right pad compound can transform a car that fades after three laps into one that stops consistently for a full session. The wrong pad — even an expensive one — can ruin your day with poor cold performance, excessive dust, or rotor damage. Understanding pad compounds is the first step in building a track-ready system.

Track Pads vs. Street Pads: The Temperature Window

Every brake pad has a temperature window — the range where it generates consistent, predictable friction. Street pads are engineered for a window of roughly 0–300°C, with strong cold bite and low noise. Track pads are engineered for 200–700°C, sacrificing cold performance for high-temperature stability. The critical insight is that a track pad used on the street will feel weak and grabby when cold, while a street pad used on track will fade catastrophically when hot. The best approach for dual-use cars is a hybrid pad that spans both windows, or a dedicated track pad that you swap in for track days. The temperature window also determines pad wear: running a track pad below its operating range causes accelerated wear, just as running a street pad above its range causes fade and glazing.

Compound Types: Metallic, Ceramic, and Hybrid

Track pad compounds fall into three broad categories. Metallic pads (often called sintered or semi-metallic) use metal fibers and particles bonded together. They offer excellent high-temperature friction, long life, and consistent performance, but they are hard on rotors and noisy. Ceramic pads use ceramic fibers and fillers; they run quieter and produce less dust, but they typically have a lower maximum temperature and can fade earlier than metallics. Hybrid compounds blend both approaches, aiming for a wider temperature window with acceptable trade-offs. For track use, metallic compounds are the most common choice because their thermal ceiling is highest. However, the specific compound within each category matters more than the category itself — a high-end ceramic can outperform a cheap metallic at the same temperature. The key is matching the compound’s temperature window to your car’s actual braking demands.

Honest Limitations: Cold-Bite and Daily-Driving Trade-offs

No pad is perfect for both street and track. Track pads have poor cold bite — they require heat before they generate full friction. This means your first brake application on a cold morning will feel weak, and the pads will wear quickly if you never get them up to temperature. They also produce significant dust, often corrosive to wheels, and they can be extremely noisy, squealing and groaning at low speeds. For a dedicated track car, these trade-offs are irrelevant. For a daily driver that sees occasional track days, they are deal-breakers. The honest answer is that most drivers should run a street pad for daily use and swap to a track pad for events — or choose a high-performance hybrid that compromises on both ends. Understanding these limitations prevents the common mistake of installing a full race pad and hating the car on the street.

Brake Fluid: The Hydraulic Backbone (Often Overlooked, Always Critical)

Brake Fluid: The Hydraulic Backbone (Often Overlooked, Always Critical) - best brake upgrade for track

Brake fluid is the most underrated component in a track brake system. It’s cheap, easy to replace, and yet it’s the single most common cause of track-day brake failure. When fluid boils, it compresses, and your pedal goes to the floor. No pad, rotor, or caliper upgrade can fix a fluid problem. Understanding dry and wet boiling points is essential to choosing the right fluid for your track use.

Dry vs. Wet Boiling Point: What the Numbers Actually Mean

Brake fluid absorbs moisture from the air over time. The dry boiling point is the temperature at which fresh, sealed fluid boils. The wet boiling point is the temperature at which fluid with 3.7% water content boils — a realistic condition
after just a few months of service. DOT 3 fluid has a dry boiling point around 205°C and a wet boiling point around 140°C. DOT 4 improves on this with dry/wet ratings of roughly 230°C/155°C. DOT 5.1 (not to be confused with DOT 5 silicone) pushes further to about 260°C/180°C. For track use, the wet boiling point matters more than the dry number, because your fluid will absorb moisture over time — and a fluid that boils at 180°C when wet will fail long before a fresh fluid rated at 260°C dry. The practical rule: flush your brake fluid before every track event, and use the highest wet boiling point fluid you can find.

DOT 4 vs. DOT 5.1 vs. Racing Fluids: Real-World Choices

For track use, the realistic choices are high-performance DOT 4, DOT 5.1, and dedicated racing fluids like Motul RBF 660 or Castrol SRF. Standard DOT 4 is adequate for light track use in lightweight cars, but it will boil in heavy cars or long sessions. DOT 5.1 offers a higher wet boiling point and is a good middle ground for dual-use cars. Racing fluids like RBF 660 (dry 325°C / wet 204°C) or SRF (dry 310°C / wet 270°C) are the gold standard — they resist moisture absorption better and maintain high boiling points even when aged. The trade-off is cost: racing fluids are significantly more expensive and still require regular flushing. The key insight is that fluid is cheap insurance. A $30 bottle of racing fluid can save you from a $2,000 off-track excursion caused by a soft pedal at the end of a session.

Flushing Frequency and Technique for Track Reliability

Brake fluid should be flushed before every track event — not every other event, not “when it looks dark.” The moisture absorption happens continuously, and even a sealed system pulls water through the brake lines and caliper seals over time. The flush procedure is straightforward: bleed each caliper until fresh fluid appears, starting from the caliper farthest from the master cylinder and working closer. Use a pressure bleeder or vacuum bleeder for consistent results, and never let the reservoir run dry during the process. For track-only cars, some drivers flush after every event to keep the fluid fresh. For dual-use cars, a flush before each track day is the minimum. The technique matters as much as the fluid: trapped air bubbles in the lines will cause a spongy pedal, which is just as dangerous as boiling fluid.

Rotors: Thermal Mass and Heat Shedding (The Heat Sink)

Rotors: Thermal Mass and Heat Shedding (The Heat Sink) - best brake upgrade for track

Rotors are the heat sink of your brake system. They absorb the thermal energy generated by the pads and dissipate it to the atmosphere. The rotor’s mass, metallurgy, and design determine how much heat it can absorb before reaching critical temperatures — and how quickly it can shed that heat between braking zones. Upgrading rotors is often the difference between a system that survives a 20-minute session and one that fades or cracks halfway through.

Rotor Metallurgy: Cast Iron vs. Carbon Ceramic vs. High-Carbon Alloys

Most production cars use gray cast iron rotors, which offer a good balance of cost, thermal capacity, and wear characteristics. High-carbon alloy rotors — often found in OEM performance packages — add carbon content to improve heat resistance and reduce cracking under thermal stress. Carbon ceramic rotors, found on high-end performance cars, offer dramatically lower unsprung weight and excellent high-temperature performance, but they are expensive and require specific pad compounds. For track use, the choice between cast iron and high-carbon alloys is usually about durability: high-carbon rotors resist thermal cracking better and last longer under repeated hard use. Carbon ceramic is a premium option that only makes sense if your car came with it or you have a very high budget — the cost per track day is significantly higher, and they don’t stop better than a well-designed iron rotor at the same temperature.

Rotor Mass and Thickness: Why Bigger Isn’t Always Better

Rotor mass is the primary determinant of thermal capacity. A heavier rotor absorbs more heat before reaching a given temperature, which delays fade and reduces the risk of boiling fluid. However, bigger rotors also add unsprung weight, which hurts handling and acceleration. The optimal rotor size depends on your car’s weight, tire grip, and braking frequency. A 2,800-pound car with 200 treadwear tires may only need 300mm rotors, while a 3,800-pound sedan on race slicks may need 355mm or larger. The key metric is thermal mass per unit of vehicle weight — a rough rule of thumb is 0.5 kg of rotor mass per 100 kg of vehicle weight for moderate track use, and more for heavy cars or high-grip tires. Thicker rotors also help: they provide more mass and better heat distribution, but they require larger calipers to accommodate them.

Drilled vs. Slotted vs. Blank: Which Pattern Works on Track

Rotor surface patterns affect heat dissipation, pad cleaning, and structural integrity. Blank rotors are the most durable — they have no stress risers and provide maximum surface area for pad contact. Slotted rotors have shallow grooves that wipe pad material off the surface, keeping the pad face fresh and improving bite, but they wear pads faster. Drilled rotors have holes that aid in gas and heat escape, but they are prone to cracking under track temperatures because the holes create stress concentration points. For track use, the consensus is clear: blank or slotted rotors are the safe choice. Drilled rotors are a street aesthetic that fails on track. If you want the benefits of both, choose a slotted rotor with a high-carbon alloy — it will shed heat well, keep pads clean, and survive the thermal cycling of a track day.

Brake Lines and Calipers: Pedal Feel and Clamping Force

Brake Lines and Calipers: Pedal Feel and Clamping Force - best brake upgrade for track

Brake lines and calipers are the final mechanical links in the system. They determine how precisely you can modulate braking force and how much clamping force is applied to the rotor. While they don’t directly manage heat, they affect your ability to control the thermal load — a mushy pedal makes it harder to brake consistently, which leads to overheating the system.

Stainless Steel Braided Lines: Eliminating Expansion

Stock rubber brake lines expand under pressure, absorbing some of the pedal travel and reducing the precision of your braking inputs. Stainless steel braided lines replace the rubber with a steel-reinforced outer layer that doesn’t expand, delivering a firmer, more consistent pedal. This is one of the cheapest and most effective upgrades for track use — it improves modulation and reduces the risk of a soft pedal under sustained braking. The installation is straightforward, and the cost is typically under $150 for a full set. The only downside is that braided lines can transmit more vibration and noise into the cabin, but for track use, the improved feel is worth it. They also have a longer service life than rubber lines, which degrade from heat and UV exposure over time.

Fixed vs. Floating Calipers: Rigidity and Heat Transfer

Stock calipers on most production cars are floating calipers — they slide on pins to apply pressure from one side. Fixed calipers, found on performance packages and big brake kits, have pistons on both sides of the rotor and are bolted rigidly to the hub. Fixed calipers offer several advantages for track use: they are more rigid, providing consistent clamping force; they distribute heat more evenly across the rotor; and they allow for larger pad areas. The trade-off is cost and complexity — fixed calipers require specific rotors, brackets, and sometimes different wheels to clear them. For most drivers, upgrading to a fixed caliper from an OEM performance package (like Brembo or M-Sport) is a better value than an aftermarket big brake kit, because the OEM parts are designed to work with your car’s ABS and bias systems.

Piston Count and Sizing: Matching Clamping Force to Vehicle Weight

The number and size of caliper pistons determine the clamping force applied to the rotor. More pistons generally mean more even pad wear and better heat distribution, but they don’t automatically mean more stopping power — the master cylinder and brake booster must be matched to the caliper’s total piston area. A common mistake is installing a 6-piston caliper on a car designed for a 2-piston unit, resulting in a long, soft pedal because the master cylinder can’t move enough fluid. The correct approach is to match the caliper’s total piston area to the vehicle’s weight and the master cylinder’s output. For most track cars, a 4-piston fixed caliper is
the sweet spot — it provides ample clamping force, even pad wear, and predictable modulation without overwhelming the master cylinder. Six-piston calipers are beneficial for very heavy cars or those with extremely high grip levels, but they require careful master cylinder sizing to avoid a spongy pedal. The key is to view calipers as part of the hydraulic system, not as standalone upgrades — a caliper that’s too large for your master cylinder will actually reduce braking performance, not improve it.

Brake Cooling: The Overlooked Performance Multiplier

Brake Cooling: The Overlooked Performance Multiplier - best brake upgrade for track

Brake cooling is the most underappreciated aspect of a track brake system. You can have the best pads, fluid, and rotors in the world, but if you can’t get heat out of the system, you’ll still hit thermal limits. Cooling ducts, backing plates, and airflow management are the difference between a system that survives a 20-minute session and one that fades in the last five minutes. The good news: cooling upgrades are often the cheapest and most effective modifications you can make.

Ducting: Directing Air to the Rotor Center

The most effective cooling upgrade is a set of brake ducts that channel air from the front of the car directly to the rotor center. This airflow removes heat from the rotor’s internal vanes, dramatically lowering operating temperatures. Factory brake ducts, if your car has them, are a good starting point — but they’re often undersized or poorly positioned. Aftermarket duct kits use larger hoses and better-positioned inlets to maximize airflow. The key is to direct air at the rotor’s center, where the vanes can pump it outward through the disc. A well-designed duct system can reduce rotor temperatures by 50–100°C, which translates to less fade, longer pad life, and reduced risk of fluid boiling. For cars without factory ducts, aftermarket kits are available for most popular track cars, or you can fabricate your own using hose and backing plates.

Backing Plates and Heat Shields: Protecting Components

Backing plates serve two purposes: they protect the rotor from debris and they help direct airflow. On track, they also protect the wheel bearing and suspension components from radiant heat. Stock backing plates are often solid metal that blocks airflow — replacing them with perforated or ducted versions allows air to reach the rotor while still protecting the hub. Heat shields on the caliper and brake lines prevent radiant heat from boiling fluid or degrading rubber components. These are inexpensive upgrades that extend the life of your entire brake system. For cars that run very high rotor temperatures, ceramic or titanium heat shields on the caliper pistons can reduce fluid temperature by 20–30°C, which is often enough to prevent boiling.

Managing Heat Soak Between Sessions

Heat management isn’t just about what happens during a session — it’s also about what happens between sessions. After a hard 20-minute session, your rotors, calipers, and fluid are all at elevated temperatures. If you park immediately, the heat soaks into the caliper and fluid, potentially causing boiling even after you’ve stopped. The solution is a cool-down lap: one or two slow laps without hard braking to allow airflow to remove heat gradually. Some track cars also use electric cooling fans or forced-air systems that run after the car is parked. For dual-use cars, simply leaving the car in gear and rolling to a stop without using the brakes can help. The goal is to reduce the peak temperature before the car sits still, preventing heat from migrating into components that can’t shed it quickly.

Big Brake Kits (BBK): When Do You Actually Need One?

Big Brake Kits (BBK): When Do You Actually Need One? - best brake upgrade for track

Big Brake Kits (BBKs) are the most expensive and visually dramatic brake upgrade available. They replace your stock calipers, rotors, and sometimes pads with larger, higher-performance components. But they’re also the most frequently unnecessary upgrade — many drivers install a BBK when a pad-and-fluid upgrade would have solved their problem at a fraction of the cost. Understanding when a BBK is actually needed — and when it’s a waste of money — is critical to making the right decision.

What a BBK Actually Changes: Rotor Diameter, Caliper Rigidity, and Pad Area

A BBK typically increases rotor diameter by 20–60mm, adds a fixed caliper with more pistons, and increases pad area. The larger rotor provides more thermal mass and a longer lever arm, which reduces the force required to generate the same braking torque. The fixed caliper improves rigidity and heat distribution. The larger pad area spreads the friction over more surface, reducing pad temperature for a given stopping force. These changes collectively raise the system’s thermal ceiling — the point at which fade begins. For a car that consistently overheats its brakes despite proper pads, fluid, and cooling, a BBK is the logical next step. For a car that fades because the driver is using street pads and old fluid, a BBK is a $5,000 solution to a $200 problem.

OEM Performance Packages vs. Aftermarket BBKs

Many manufacturers offer OEM performance brake packages — Brembo calipers on Mustangs, M-Sport brakes on BMWs, or the Track Package on various cars. These are often the best value in brake upgrades because they’re engineered to work with the car’s ABS, bias, and master cylinder. They’re also typically cheaper than aftermarket kits because they benefit from OEM economies of scale. Aftermarket BBKs from companies like StopTech, AP Racing, or Wilwood offer more customization and sometimes higher performance, but they require careful matching to your car’s hydraulic system. The practical advice: if your car has an OEM performance brake option, start there. It’s the safest, most reliable upgrade path. Aftermarket BBKs are for cars without a factory option, or for drivers who have already maxed out the OEM system.

Cost-Benefit Analysis: When a BBK Makes Financial Sense

A quality BBK costs between $2,500 and $8,000 installed. For that money, you could buy dozens of track-day pad sets and hundreds of bottles of racing fluid. The financial case for a BBK only makes sense if you’re tracking the car frequently enough that pad and rotor wear costs exceed the BBK’s price over time. For a driver doing 5–10 track days per year, a BBK might pay for itself in reduced pad and rotor replacement costs within 2–3 years — especially if the BBK’s larger rotors and pads last significantly longer. For a driver doing 2–3 track days per year, the math rarely works. The other consideration is resale value: a well-installed BBK can add value to a track-focused car, but it can also make the car harder to sell to a street-oriented buyer.

System Balance: Bias, ABS Interaction, and Real-World Testing

System Balance: Bias, ABS Interaction, and Real-World Testing - best brake upgrade for track

The final piece of a track brake upgrade is system balance — how the front and rear brakes work together, and how the system interacts with your car’s ABS. An unbalanced system can cause premature rear lockup, long stopping distances, or ABS intervention at the wrong times. Getting the balance right requires understanding brake bias and testing your system under real track conditions.

Brake Bias: Front vs. Rear Distribution

Brake bias is the proportion of braking force applied to the front versus the rear wheels. Under hard braking, weight transfers to the front, so the front brakes do more work — typically 60–70% of the total braking force. Stock systems are biased for street driving, which means they may not be optimal for track conditions where higher speeds and higher deceleration rates shift more weight forward. Upgrading only the front brakes can upset this balance, causing the rear brakes to lock up prematurely. The solution is either a proportioning valve to adjust bias, or upgrading front and rear components together. For most drivers, keeping the stock bias and upgrading both axles with matching pads is the safest approach. Adjustable bias is for advanced drivers who understand the trade-offs.

ABS Interaction: How Upgrades Affect Traction Control

Modern ABS systems are calibrated to the stock brake hardware. When you change rotor size, caliper piston area, or pad friction coefficient, you change the hydraulic characteristics that the ABS expects. In most cases, the ABS will still function, but it may intervene earlier or later than optimal. For example, a high-friction track pad can cause the ABS to cycle more aggressively, increasing stopping distances. The fix is to choose components that stay within the ABS’s calibration range — which is another reason OEM performance packages are attractive: they’re designed to work with the car’s existing ABS.

The Best Brake Upgrade for Track: A System-Level Guide to Choosing What Actually Matters

The best brake upgrade for track use isn’t a single part — it’s a coordinated system of rotors, pads, fluid, and cooling that must work together to survive repeated high-energy stops. Unlike street braking, where a single panic stop from 60 mph is the norm, track braking demands that your system absorb and dissipate massive thermal loads lap after lap, often from 150+ mph down to 40 mph. If you upgrade only one component, you haven’t upgraded your brakes — you’ve just moved the failure point elsewhere in the system.

This guide breaks down the four critical attributes that determine track performance: thermal capacity (rotor mass and material), friction stability (pad compound and temperature range), hydraulic integrity (fluid boiling point), and heat management (ducting and airflow). We’ll also cover realistic price ranges for each tier of upgrade, from budget-friendly pad-and-fluid swaps to full big-brake kits, so you can match your investment to your actual driving goals. The central question isn’t “what’s the most expensive option?” — it’s “what does your specific car, weight, and tire grip actually require?”

What makes this guide different from typical forum advice is that we’re not just listing parts. We’re giving you a decision framework based on real track data: brake torque calculations, rotor thermal mass comparisons, and pad compound selection logic. You’ll learn why a $300 pad-and-fluid upgrade can out-brake a $5,000 big brake kit on a 2,800-pound car, and why the opposite is true on a 3,800-pound sedan. By the end, you’ll know exactly which system-level upgrade path fits your car, your budget, and your track-day frequency — without wasting money on components that don’t address your actual bottleneck.

What Is a Track Brake Upgrade? (Defining the Entity)

What Is a Track Brake Upgrade? (Defining the Entity) - best brake upgrade for track

A track brake upgrade is a coordinated set of modifications to your vehicle’s braking system, engineered to manage the extreme thermal load generated during high-performance driving. Unlike a simple pad swap, a true track brake upgrade treats the brake system as an integrated unit — friction material, fluid, rotors, lines, and calipers working together to resist brake fade when temperatures climb past what street driving ever produces.

Think of the stock system as a street-tuned compromise. It prioritizes cold bite, low noise, and pedal comfort. A track brake upgrade rebalances those priorities toward one goal: consistent stopping power at 500°C and beyond. That rebalancing changes how the entire system behaves — from the first brake application on your out lap to the final corner of your last session.

Why ‘Best’ is a System Property, Not a Part Property

The single most common mistake in brake upgrades is treating “best” as a property of an individual component. A $600 set of racing pads bolted onto a stock system with old fluid and warped rotors will not make your car stop better on track — it will make it stop worse, because the pads will overheat the fluid faster than the stock rotors can shed heat. The “best” brake upgrade is the one that addresses your system’s weakest link. For a novice in a 2,800-pound Miata, that might be fluid and pads. For a heavy sedan with repeated 150 mph braking zones, that might be rotor mass and ducting. The system property view forces you to evaluate the entire thermal chain: friction generation (pads), heat absorption (rotors), heat transfer (cooling), and hydraulic transmission (fluid and lines).

Track vs. Street: The Thermal Threshold Difference

Street braking rarely exceeds 200°C at the rotor surface. Track braking routinely hits 500–700°C in a single braking zone, and sustained lapping keeps the system in that range for 20-minute sessions. This is the thermal threshold difference: street systems are designed to manage occasional heat spikes, while track systems must sustain continuous high-temperature operation. The consequences are dramatic. At 300°C, most street pads begin to fade. At 400°C, DOT 4 fluid starts to boil. At 500°C, stock rotors can crack from thermal stress. A track brake upgrade pushes each of these thresholds higher — and, critically, ensures that all components reach their limits at roughly the same time, so you don’t have one component failing while others still have headroom.

The Foundation: Brake Pads (Friction is the First Line of Defense)

The Foundation: Brake Pads (Friction is the First Line of Defense) - best brake upgrade for track

Brake pads are the most impactful single upgrade for track use because they directly control the friction interface between your car and the road. The right pad compound can transform a car that fades after three laps into one that stops consistently for a full session. The wrong pad — even an expensive one — can ruin your day with poor cold performance, excessive dust, or rotor damage. Understanding pad compounds is the first step in building a track-ready system.

Track Pads vs. Street Pads: The Temperature Window

Every brake pad has a temperature window — the range where it generates consistent, predictable friction. Street pads are engineered for a window of roughly 0–300°C, with strong cold bite and low noise. Track pads are engineered for 200–700°C, sacrificing cold performance for high-temperature stability. The critical insight is that a track pad used on the street will feel weak and grabby when cold, while a street pad used on track will fade catastrophically when hot. The best approach for dual-use cars is a hybrid pad that spans both windows, or a dedicated track pad that you swap in for track days. The temperature window also determines pad wear: running a track pad below its operating range causes accelerated wear, just as running a street pad above its range causes fade and glazing.

Compound Types: Metallic, Ceramic, and Hybrid

Track pad compounds fall into three broad categories. Metallic pads (often called sintered or semi-metallic) use metal fibers and particles bonded together. They offer excellent high-temperature friction, long life, and consistent performance, but they are hard on rotors and noisy. Ceramic pads use ceramic fibers and fillers; they run quieter and produce less dust, but they typically have a lower maximum temperature and can fade earlier than metallics. Hybrid compounds blend both approaches, aiming for a wider temperature window with acceptable trade-offs. For track use, metallic compounds are the most common choice because their thermal ceiling is highest. However, the specific compound within each category matters more than the category itself — a high-end ceramic can outperform a cheap metallic at the same temperature. The key is matching the compound’s temperature window to your car’s actual braking demands.

Honest Limitations: Cold-Bite and Daily-Driving Trade-offs

No pad is perfect for both street and track. Track pads have poor cold bite — they require heat before they generate full friction. This means your first brake application on a cold morning will feel weak, and the pads will wear quickly if you never get them up to temperature. They also produce significant dust, often corrosive to wheels, and they can be extremely noisy, squealing and groaning at low speeds. For a dedicated track car, these trade-offs are irrelevant. For a daily driver that sees occasional track days, they are deal-breakers. The honest answer is that most drivers should run a street pad for daily use and swap to a track pad for events — or choose a high-performance hybrid that compromises on both ends. Understanding these limitations prevents the common mistake of installing a full race pad and hating the car on the street.

Brake Fluid: The Hydraulic Backbone (Often Overlooked, Always Critical)

Brake Fluid: The Hydraulic Backbone (Often Overlooked, Always Critical) - best brake upgrade for track

Brake fluid is the most underrated component in a track brake system. It’s cheap, easy to replace, and yet it’s the single most common cause of track-day brake failure. When fluid boils, it compresses, and your pedal goes to the floor. No pad, rotor, or caliper upgrade can fix a fluid problem. Understanding dry and wet boiling points is essential to choosing the right fluid for your track use.

Dry vs. Wet Boiling Point: What the Numbers Actually Mean

Brake fluid absorbs moisture from the air over time. The dry boiling point is the temperature at which fresh, sealed fluid boils. The wet boiling point is the temperature at which fluid with 3.7% water content boils — a realistic condition
after just a few months of service. DOT 3 fluid has a dry boiling point around 205°C and a wet boiling point around 140°C. DOT 4 improves on this with dry/wet ratings of roughly 230°C/155°C. DOT 5.1 (not to be confused with DOT 5 silicone) pushes further to about 260°C/180°C. For track use, the wet boiling point matters more than the dry number, because your fluid will absorb moisture over time — and a fluid that boils at 180°C when wet will fail long before a fresh fluid rated at 260°C dry. The practical rule: flush your brake fluid before every track event, and use the highest wet boiling point fluid you can find.

DOT 4 vs. DOT 5.1 vs. Racing Fluids: Real-World Choices

For track use, the realistic choices are high-performance DOT 4, DOT 5.1, and dedicated racing fluids like Motul RBF 660 or Castrol SRF. Standard DOT 4 is adequate for light track use in lightweight cars, but it will boil in heavy cars or long sessions. DOT 5.1 offers a higher wet boiling point and is a good middle ground for dual-use cars. Racing fluids like RBF 660 (dry 325°C / wet 204°C) or SRF (dry 310°C / wet 270°C) are the gold standard — they resist moisture absorption better and maintain high boiling points even when aged. The trade-off is cost: racing fluids are significantly more expensive and still require regular flushing. The key insight is that fluid is cheap insurance. A $30 bottle of racing fluid can save you from a $2,000 off-track excursion caused by a soft pedal at the end of a session.

Flushing Frequency and Technique for Track Reliability

Brake fluid should be flushed before every track event — not every other event, not “when it looks dark.” The moisture absorption happens continuously, and even a sealed system pulls water through the brake lines and caliper seals over time. The flush procedure is straightforward: bleed each caliper until fresh fluid appears, starting from the caliper farthest from the master cylinder and working closer. Use a pressure bleeder or vacuum bleeder for consistent results, and never let the reservoir run dry during the process. For track-only cars, some drivers flush after every event to keep the fluid fresh. For dual-use cars, a flush before each track day is the minimum. The technique matters as much as the fluid: trapped air bubbles in the lines will cause a spongy pedal, which is just as dangerous as boiling fluid.

Rotors: Thermal Mass and Heat Shedding (The Heat Sink)

Rotors: Thermal Mass and Heat Shedding (The Heat Sink) - best brake upgrade for track

Rotors are the heat sink of your brake system. They absorb the thermal energy generated by the pads and dissipate it to the atmosphere. The rotor’s mass, metallurgy, and design determine how much heat it can absorb before reaching critical temperatures — and how quickly it can shed that heat between braking zones. Upgrading rotors is often the difference between a system that survives a 20-minute session and one that fades or cracks halfway through.

Rotor Metallurgy: Cast Iron vs. Carbon Ceramic vs. High-Carbon Alloys

Most production cars use gray cast iron rotors, which offer a good balance of cost, thermal capacity, and wear characteristics. High-carbon alloy rotors — often found in OEM performance packages — add carbon content to improve heat resistance and reduce cracking under thermal stress. Carbon ceramic rotors, found on high-end performance cars, offer dramatically lower unsprung weight and excellent high-temperature performance, but they are expensive and require specific pad compounds. For track use, the choice between cast iron and high-carbon alloys is usually about durability: high-carbon rotors resist thermal cracking better and last longer under repeated hard use. Carbon ceramic is a premium option that only makes sense if your car came with it or you have a very high budget — the cost per track day is significantly higher, and they don’t stop better than a well-designed iron rotor at the same temperature.

Rotor Mass and Thickness: Why Bigger Isn’t Always Better

Rotor mass is the primary determinant of thermal capacity. A heavier rotor absorbs more heat before reaching a given temperature, which delays fade and reduces the risk of boiling fluid. However, bigger rotors also add unsprung weight, which hurts handling and acceleration. The optimal rotor size depends on your car’s weight, tire grip, and braking frequency. A 2,800-pound car with 200 treadwear tires may only need 300mm rotors, while a 3,800-pound sedan on race slicks may need 355mm or larger. The key metric is thermal mass per unit of vehicle weight — a rough rule of thumb is 0.5 kg of rotor mass per 100 kg of vehicle weight for moderate track use, and more for heavy cars or high-grip tires. Thicker rotors also help: they provide more mass and better heat distribution, but they require larger calipers to accommodate them.

Drilled vs. Slotted vs. Blank: Which Pattern Works on Track

Rotor surface patterns affect heat dissipation, pad cleaning, and structural integrity. Blank rotors are the most durable — they have no stress risers and provide maximum surface area for pad contact. Slotted rotors have shallow grooves that wipe pad material off the surface, keeping the pad face fresh and improving bite, but they wear pads faster. Drilled rotors have holes that aid in gas and heat escape, but they are prone to cracking under track temperatures because the holes create stress concentration points. For track use, the consensus is clear: blank or slotted rotors are the safe choice. Drilled rotors are a street aesthetic that fails on track. If you want the benefits of both, choose a slotted rotor with a high-carbon alloy — it will shed heat well, keep pads clean, and survive the thermal cycling of a track day.

Brake Lines and Calipers: Pedal Feel and Clamping Force

Brake Lines and Calipers: Pedal Feel and Clamping Force - best brake upgrade for track

Brake lines and calipers are the final mechanical links in the system. They determine how precisely you can modulate braking force and how much clamping force is applied to the rotor. While they don’t directly manage heat, they affect your ability to control the thermal load — a mushy pedal makes it harder to brake consistently, which leads to overheating the system.

Stainless Steel Braided Lines: Eliminating Expansion

Stock rubber brake lines expand under pressure, absorbing some of the pedal travel and reducing the precision of your braking inputs. Stainless steel braided lines replace the rubber with a steel-reinforced outer layer that doesn’t expand, delivering a firmer, more consistent pedal. This is one of the cheapest and most effective upgrades for track use — it improves modulation and reduces the risk of a soft pedal under sustained braking. The installation is straightforward, and the cost is typically under $150 for a full set. The only downside is that braided lines can transmit more vibration and noise into the cabin, but for track use, the improved feel is worth it. They also have a longer service life than rubber lines, which degrade from heat and UV exposure over time.

Fixed vs. Floating Calipers: Rigidity and Heat Transfer

Stock calipers on most production cars are floating calipers — they slide on pins to apply pressure from one side. Fixed calipers, found on performance packages and big brake kits, have pistons on both sides of the rotor and are bolted rigidly to the hub. Fixed calipers offer several advantages for track use: they are more rigid, providing consistent clamping force; they distribute heat more evenly across the rotor; and they allow for larger pad areas. The trade-off is cost and complexity — fixed calipers require specific rotors, brackets, and sometimes different wheels to clear them. For most drivers, upgrading to a fixed caliper from an OEM performance package (like Brembo or M-Sport) is a better value than an aftermarket big brake kit, because the OEM parts are designed to work with your car’s ABS and bias systems.

Piston Count and Sizing: Matching Clamping Force to Vehicle Weight

The number and size of caliper pistons determine the clamping force applied to the rotor. More pistons generally mean more even pad wear and better heat distribution, but they don’t automatically mean more stopping power — the master cylinder and brake booster must be matched to the caliper’s total piston area. A common mistake is installing a 6-piston caliper on a car designed for a 2-piston unit, resulting in a long, soft pedal because the master cylinder can’t move enough fluid. The correct approach is to match the caliper’s total piston area to the vehicle’s weight and the master cylinder’s output. For most track cars, a 4-piston fixed caliper is
the sweet spot — it provides ample clamping force, even pad wear, and predictable modulation without overwhelming the master cylinder. Six-piston calipers are beneficial for very heavy cars or those with extremely high grip levels, but they require careful master cylinder sizing to avoid a spongy pedal. The key is to view calipers as part of the hydraulic system, not as standalone upgrades — a caliper that’s too large for your master cylinder will actually reduce braking performance, not improve it.

Brake Cooling: The Overlooked Performance Multiplier

Brake Cooling: The Overlooked Performance Multiplier - best brake upgrade for track

Brake cooling is the most underappreciated aspect of a track brake system. You can have the best pads, fluid, and rotors in the world, but if you can’t get heat out of the system, you’ll still hit thermal limits. Cooling ducts, backing plates, and airflow management are the difference between a system that survives a 20-minute session and one that fades in the last five minutes. The good news: cooling upgrades are often the cheapest and most effective modifications you can make.

Ducting: Directing Air to the Rotor Center

The most effective cooling upgrade is a set of brake ducts that channel air from the front of the car directly to the rotor center. This airflow removes heat from the rotor’s internal vanes, dramatically lowering operating temperatures. Factory brake ducts, if your car has them, are a good starting point — but they’re often undersized or poorly positioned. Aftermarket duct kits use larger hoses and better-positioned inlets to maximize airflow. The key is to direct air at the rotor’s center, where the vanes can pump it outward through the disc. A well-designed duct system can reduce rotor temperatures by 50–100°C, which translates to less fade, longer pad life, and reduced risk of fluid boiling. For cars without factory ducts, aftermarket kits are available for most popular track cars, or you can fabricate your own using hose and backing plates.

Backing Plates and Heat Shields: Protecting Components

Backing plates serve two purposes: they protect the rotor from debris and they help direct airflow. On track, they also protect the wheel bearing and suspension components from radiant heat. Stock backing plates are often solid metal that blocks airflow — replacing them with perforated or ducted versions allows air to reach the rotor while still protecting the hub. Heat shields on the caliper and brake lines prevent radiant heat from boiling fluid or degrading rubber components. These are inexpensive upgrades that extend the life of your entire brake system. For cars that run very high rotor temperatures, ceramic or titanium heat shields on the caliper pistons can reduce fluid temperature by 20–30°C, which is often enough to prevent boiling.

Managing Heat Soak Between Sessions

Heat management isn’t just about what happens during a session — it’s also about what happens between sessions. After a hard 20-minute session, your rotors, calipers, and fluid are all at elevated temperatures. If you park immediately, the heat soaks into the caliper and fluid, potentially causing boiling even after you’ve stopped. The solution is a cool-down lap: one or two slow laps without hard braking to allow airflow to remove heat gradually. Some track cars also use electric cooling fans or forced-air systems that run after the car is parked. For dual-use cars, simply leaving the car in gear and rolling to a stop without using the brakes can help. The goal is to reduce the peak temperature before the car sits still, preventing heat from migrating into components that can’t shed it quickly.

Big Brake Kits (BBK): When Do You Actually Need One?

Big Brake Kits (BBK): When Do You Actually Need One? - best brake upgrade for track

Big Brake Kits (BBKs) are the most expensive and visually dramatic brake upgrade available. They replace your stock calipers, rotors, and sometimes pads with larger, higher-performance components. But they’re also the most frequently unnecessary upgrade — many drivers install a BBK when a pad-and-fluid upgrade would have solved their problem at a fraction of the cost. Understanding when a BBK is actually needed — and when it’s a waste of money — is critical to making the right decision.

What a BBK Actually Changes: Rotor Diameter, Caliper Rigidity, and Pad Area

A BBK typically increases rotor diameter by 20–60mm, adds a fixed caliper with more pistons, and increases pad area. The larger rotor provides more thermal mass and a longer lever arm, which reduces the force required to generate the same braking torque. The fixed caliper improves rigidity and heat distribution. The larger pad area spreads the friction over more surface, reducing pad temperature for a given stopping force. These changes collectively raise the system’s thermal ceiling — the point at which fade begins. For a car that consistently overheats its brakes despite proper pads, fluid, and cooling, a BBK is the logical next step. For a car that fades because the driver is using street pads and old fluid, a BBK is a $5,000 solution to a $200 problem.

OEM Performance Packages vs. Aftermarket BBKs

Many manufacturers offer OEM performance brake packages — Brembo calipers on Mustangs, M-Sport brakes on BMWs, or the Track Package on various cars. These are often the best value in brake upgrades because they’re engineered to work with the car’s ABS, bias, and master cylinder. They’re also typically cheaper than aftermarket kits because they benefit from OEM economies of scale. Aftermarket BBKs from companies like StopTech, AP Racing, or Wilwood offer more customization and sometimes higher performance, but they require careful matching to your car’s hydraulic system. The practical advice: if your car has an OEM performance brake option, start there. It’s the safest, most reliable upgrade path. Aftermarket BBKs are for cars without a factory option, or for drivers who have already maxed out the OEM system.

Cost-Benefit Analysis: When a BBK Makes Financial Sense

A quality BBK costs between $2,500 and $8,000 installed. For that money, you could buy dozens of track-day pad sets and hundreds of bottles of racing fluid. The financial case for a BBK only makes sense if you’re tracking the car frequently enough that pad and rotor wear costs exceed the BBK’s price over time. For a driver doing 5–10 track days per year, a BBK might pay for itself in reduced pad and rotor replacement costs within 2–3 years — especially if the BBK’s larger rotors and pads last significantly longer. For a driver doing 2–3 track days per year, the math rarely works. The other consideration is resale value: a well-installed BBK can add value to a track-focused car, but it can also make the car harder to sell to a street-oriented buyer.

System Balance: Bias, ABS Interaction, and Real-World Testing

System Balance: Bias, ABS Interaction, and Real-World Testing - best brake upgrade for track

The final piece of a track brake upgrade is system balance — how the front and rear brakes work together, and how the system interacts with your car’s ABS. An unbalanced system can cause premature rear lockup, long stopping distances, or ABS intervention at the wrong times. Getting the balance right requires understanding brake bias and testing your system under real track conditions.

Brake Bias: Front vs. Rear Distribution

Brake bias is the proportion of braking force applied to the front versus the rear wheels. Under hard braking, weight transfers to the front, so the front brakes do more work — typically 60–70% of the total braking force. Stock systems are biased for street driving, which means they may not be optimal for track conditions where higher speeds and higher deceleration rates shift more weight forward. Upgrading only the front brakes can upset this balance, causing the rear brakes to lock up prematurely. The solution is either a proportioning valve to adjust bias, or upgrading front and rear components together. For most drivers, keeping the stock bias and upgrading both axles with matching pads is the safest approach. Adjustable bias is for advanced drivers who understand the trade-offs.

ABS Interaction: How Upgrades Affect Traction Control

Modern ABS systems are calibrated to the stock brake hardware. When you change rotor size, caliper piston area, or pad friction coefficient, you change the hydraulic characteristics that the ABS expects. In most cases, the ABS will still function, but it may intervene earlier or later than optimal. For example, a high-friction track pad can cause the ABS to cycle more aggressively, increasing stopping distances. The fix is to choose components that stay within the ABS’s calibration range — which is another reason OEM performance packages are attractive: they’re designed to work with the car’s existing ABS. The Best Brake Upgrade for Track: A System-Level Guide to Choosing What Actually Matters

The best brake upgrade for track use isn’t a single part — it’s a coordinated system of rotors, pads, fluid, and cooling that must work together to survive repeated high-energy stops. Unlike street braking, where a single panic stop from 60 mph is the norm, track braking demands that your system absorb and dissipate massive thermal loads lap after lap, often from 150+ mph down to 40 mph. If you upgrade only one component, you haven’t upgraded your brakes — you’ve just moved the failure point elsewhere in the system.

This guide breaks down the four critical attributes that determine track performance: thermal capacity (rotor mass and material), friction stability (pad compound and temperature range), hydraulic integrity (fluid boiling point), and heat management (ducting and airflow). We’ll also cover realistic price ranges for each tier of upgrade, from budget-friendly pad-and-fluid swaps to full big-brake kits, so you can match your investment to your actual driving goals. The central question isn’t “what’s the most expensive option?” — it’s “what does your specific car, weight, and tire grip actually require?”

What makes this guide different from typical forum advice is that we’re not just listing parts. We’re giving you a decision framework based on real track data: brake torque calculations, rotor thermal mass comparisons, and pad compound selection logic. You’ll learn why a $300 pad-and-fluid upgrade can out-brake a $5,000 big brake kit on a 2,800-pound car, and why the opposite is true on a 3,800-pound sedan. By the end, you’ll know exactly which system-level upgrade path fits your car, your budget, and your track-day frequency — without wasting money on components that don’t address your actual bottleneck.

What Is a Track Brake Upgrade? (Defining the Entity)

What Is a Track Brake Upgrade? (Defining the Entity) - best brake upgrade for track

A track brake upgrade is a coordinated set of modifications to your vehicle’s braking system, engineered to manage the extreme thermal load generated during high-performance driving. Unlike a simple pad swap, a true track brake upgrade treats the brake system as an integrated unit — friction material, fluid, rotors, lines, and calipers working together to resist brake fade when temperatures climb past what street driving ever produces.

Think of the stock system as a street-tuned compromise. It prioritizes cold bite, low noise, and pedal comfort. A track brake upgrade rebalances those priorities toward one goal: consistent stopping power at 500°C and beyond. That rebalancing changes how the entire system behaves — from the first brake application on your out lap to the final corner of your last session.

Why ‘Best’ is a System Property, Not a Part Property

The single most common mistake in brake upgrades is treating “best” as a property of an individual component. A $600 set of racing pads bolted onto a stock system with old fluid and warped rotors will not make your car stop better on track — it will make it stop worse, because the pads will overheat the fluid faster than the stock rotors can shed heat. The “best” brake upgrade is the one that addresses your system’s weakest link. For a novice in a 2,800-pound Miata, that might be fluid and pads. For a heavy sedan with repeated 150 mph braking zones, that might be rotor mass and ducting. The system property view forces you to evaluate the entire thermal chain: friction generation (pads), heat absorption (rotors), heat transfer (cooling), and hydraulic transmission (fluid and lines).

Track vs. Street: The Thermal Threshold Difference

Street braking rarely exceeds 200°C at the rotor surface. Track braking routinely hits 500–700°C in a single braking zone, and sustained lapping keeps the system in that range for 20-minute sessions. This is the thermal threshold difference: street systems are designed to manage occasional heat spikes, while track systems must sustain continuous high-temperature operation. The consequences are dramatic. At 300°C, most street pads begin to fade. At 400°C, DOT 4 fluid starts to boil. At 500°C, stock rotors can crack from thermal stress. A track brake upgrade pushes each of these thresholds higher — and, critically, ensures that all components reach their limits at roughly the same time, so you don’t have one component failing while others still have headroom.

The Foundation: Brake Pads (Friction is the First Line of Defense)

The Foundation: Brake Pads (Friction is the First Line of Defense) - best brake upgrade for track

Brake pads are the most impactful single upgrade for track use because they directly control the friction interface between your car and the road. The right pad compound can transform a car that fades after three laps into one that stops consistently for a full session. The wrong pad — even an expensive one — can ruin your day with poor cold performance, excessive dust, or rotor damage. Understanding pad compounds is the first step in building a track-ready system.

Track Pads vs. Street Pads: The Temperature Window

Every brake pad has a temperature window — the range where it generates consistent, predictable friction. Street pads are engineered for a window of roughly 0–300°C, with strong cold bite and low noise. Track pads are engineered for 200–700°C, sacrificing cold performance for high-temperature stability. The critical insight is that a track pad used on the street will feel weak and grabby when cold, while a street pad used on track will fade catastrophically when hot. The best approach for dual-use cars is a hybrid pad that spans both windows, or a dedicated track pad that you swap in for track days. The temperature window also determines pad wear: running a track pad below its operating range causes accelerated wear, just as running a street pad above its range causes fade and glazing.

Compound Types: Metallic, Ceramic, and Hybrid

Track pad compounds fall into three broad categories. Metallic pads (often called sintered or semi-metallic) use metal fibers and particles bonded together. They offer excellent high-temperature friction, long life, and consistent performance, but they are hard on rotors and noisy. Ceramic pads use ceramic fibers and fillers; they run quieter and produce less dust, but they typically have a lower maximum temperature and can fade earlier than metallics. Hybrid compounds blend both approaches, aiming for a wider temperature window with acceptable trade-offs. For track use, metallic compounds are the most common choice because their thermal ceiling is highest. However, the specific compound within each category matters more than the category itself — a high-end ceramic can outperform a cheap metallic at the same temperature. The key is matching the compound’s temperature window to your car’s actual braking demands.

Honest Limitations: Cold-Bite and Daily-Driving Trade-offs

No pad is perfect for both street and track. Track pads have poor cold bite — they require heat before they generate full friction. This means your first brake application on a cold morning will feel weak, and the pads will wear quickly if you never get them up to temperature. They also produce significant dust, often corrosive to wheels, and they can be extremely noisy, squealing and groaning at low speeds. For a dedicated track car, these trade-offs are irrelevant. For a daily driver that sees occasional track days, they are deal-breakers. The honest answer is that most drivers should run a street pad for daily use and swap to a track pad for events — or choose a high-performance hybrid that compromises on both ends. Understanding these limitations prevents the common mistake of installing a full race pad and hating the car on the street.

Brake Fluid: The Hydraulic Backbone (Often Overlooked, Always Critical)

Brake Fluid: The Hydraulic Backbone (Often Overlooked, Always Critical) - best brake upgrade for track

Brake fluid is the most underrated component in a track brake system. It’s cheap, easy to replace, and yet it’s the single most common cause of track-day brake failure. When fluid boils, it compresses, and your pedal goes to the floor. No pad, rotor, or caliper upgrade can fix a fluid problem. Understanding dry and wet boiling points is essential to choosing the right fluid for your track use.

Dry vs. Wet Boiling Point: What the Numbers Actually Mean

Brake fluid absorbs moisture from the air over time. The dry boiling point is the temperature at which fresh, sealed fluid boils. The wet boiling point is the temperature at which fluid with 3.7% water content boils — a realistic condition

The Best Brake Upgrade for Track: A System-Level Guide to Choosing What Actually Matters

The best brake upgrade for track use isn’t a single part — it’s a coordinated system of rotors, pads, fluid, and cooling that must work together to survive repeated high-energy stops. Unlike street braking, where a single panic stop from 60 mph is the norm, track braking demands that your system absorb and dissipate massive thermal loads lap after lap, often from 150+ mph down to 40 mph. If you upgrade only one component, you haven’t upgraded your brakes — you’ve just moved the failure point elsewhere in the system.

This guide breaks down the four critical attributes that determine track performance: thermal capacity (rotor mass and material), friction stability (pad compound and temperature range), hydraulic integrity (fluid boiling point), and heat management (ducting and airflow). We’ll also cover realistic price ranges for each tier of upgrade, from budget-friendly pad-and-fluid swaps to full big-brake kits, so you can match your investment to your actual driving goals. The central question isn’t “what’s the most expensive option?” — it’s “what does your specific car, weight, and tire grip actually require?”

What makes this guide different from typical forum advice is that we’re not just listing parts. We’re giving you a decision framework based on real track data: brake torque calculations, rotor thermal mass comparisons, and pad compound selection logic. You’ll learn why a $300 pad-and-fluid upgrade can out-brake a $5,000 big brake kit on a 2,800-pound car, and why the opposite is true on a 3,800-pound sedan. By the end, you’ll know exactly which system-level upgrade path fits your car, your budget, and your track-day frequency — without wasting money on components that don’t address your actual bottleneck.

What Is a Track Brake Upgrade? (Defining the Entity)

What Is a Track Brake Upgrade? (Defining the Entity) - best brake upgrade for track

A track brake upgrade is a coordinated set of modifications to your vehicle’s braking system, engineered to manage the extreme thermal load generated during high-performance driving. Unlike a simple pad swap, a true track brake upgrade treats the brake system as an integrated unit — friction material, fluid, rotors, lines, and calipers working together to resist brake fade when temperatures climb past what street driving ever produces.

Think of the stock system as a street-tuned compromise. It prioritizes cold bite, low noise, and pedal comfort. A track brake upgrade rebalances those priorities toward one goal: consistent stopping power at 500°C and beyond. That rebalancing changes how the entire system behaves — from the first brake application on your out lap to the final corner of your last session.

Why ‘Best’ is a System Property, Not a Part Property

The single most common mistake in brake upgrades is treating “best” as a property of an individual component. A $600 set of racing pads bolted onto a stock system with old fluid and warped rotors will not make your car stop better on track — it will make it stop worse, because the pads will overheat the fluid faster than the stock rotors can shed heat. The “best” brake upgrade is the one that addresses your system’s weakest link. For a novice in a 2,800-pound Miata, that might be fluid and pads. For a heavy sedan with repeated 150 mph braking zones, that might be rotor mass and ducting. The system property view forces you to evaluate the entire thermal chain: friction generation (pads), heat absorption (rotors), heat transfer (cooling), and hydraulic transmission (fluid and lines).

Track vs. Street: The Thermal Threshold Difference

Street braking rarely exceeds 200°C at the rotor surface. Track braking routinely hits 500–700°C in a single braking zone, and sustained lapping keeps the system in that range for 20-minute sessions. This is the thermal threshold difference: street systems are designed to manage occasional heat spikes, while track systems must sustain continuous high-temperature operation. The consequences are dramatic. At 300°C, most street pads begin to fade. At 400°C, DOT 4 fluid starts to boil. At 500°C, stock rotors can crack from thermal stress. A track brake upgrade pushes each of these thresholds higher — and, critically, ensures that all components reach their limits at roughly the same time, so you don’t have one component failing while others still have headroom.

The Foundation: Brake Pads (Friction is the First Line of Defense)

The Foundation: Brake Pads (Friction is the First Line of Defense) - best brake upgrade for track

Brake pads are the most impactful single upgrade for track use because they directly control the friction interface between your car and the road. The right pad compound can transform a car that fades after three laps into one that stops consistently for a full session. The wrong pad — even an expensive one — can ruin your day with poor cold performance, excessive dust, or rotor damage. Understanding pad compounds is the first step in building a track-ready system.

Track Pads vs. Street Pads: The Temperature Window

Every brake pad has a temperature window — the range where it generates consistent, predictable friction. Street pads are engineered for a window of roughly 0–300°C, with strong cold bite and low noise. Track pads are engineered for 200–700°C, sacrificing cold performance for high-temperature stability. The critical insight is that a track pad used on the street will feel weak and grabby when cold, while a street pad used on track will fade catastrophically when hot. The best approach for dual-use cars is a hybrid pad that spans both windows, or a dedicated track pad that you swap in for track days. The temperature window also determines pad wear: running a track pad below its operating range causes accelerated wear, just as running a street pad above its range causes fade and glazing.

Compound Types: Metallic, Ceramic, and Hybrid

Track pad compounds fall into three broad categories. Metallic pads (often called sintered or semi-metallic) use metal fibers and particles bonded together. They offer excellent high-temperature friction, long life, and consistent performance, but they are hard on rotors and noisy. Ceramic pads use ceramic fibers and fillers; they run quieter and produce less dust, but they typically have a lower maximum temperature and can fade earlier than metallics. Hybrid compounds blend both approaches, aiming for a wider temperature window with acceptable trade-offs. For track use, metallic compounds are the most common choice because their thermal ceiling is highest. However, the specific compound within each category matters more than the category itself — a high-end ceramic can outperform a cheap metallic at the same temperature. The key is matching the compound’s temperature window to your car’s actual braking demands.

Honest Limitations: Cold-Bite and Daily-Driving Trade-offs

No pad is perfect for both street and track. Track pads have poor cold bite — they require heat before they generate full friction. This means your first brake application on a cold morning will feel weak, and the pads will wear quickly if you never get them up to temperature. They also produce significant dust, often corrosive to wheels, and they can be extremely noisy, squealing and groaning at low speeds. For a dedicated track car, these trade-offs are irrelevant. For a daily driver that sees occasional track days, they are deal-breakers. The honest answer is that most drivers should run a street pad for daily use and swap to a track pad for events — or choose a high-performance hybrid that compromises on both ends. Understanding these limitations prevents the common mistake of installing a full race pad and hating the car on the street.

Brake Fluid: The Hydraulic Backbone (Often Overlooked, Always Critical)

Brake Fluid: The Hydraulic Backbone (Often Overlooked, Always Critical) - best brake upgrade for track

Brake fluid is the most underrated component in a track brake system. It’s cheap, easy to replace, and yet it’s the single most common cause of track-day brake failure. When fluid boils, it compresses, and your pedal goes to the floor. No pad, rotor, or caliper upgrade can fix a fluid problem. Understanding dry and wet boiling points is essential to choosing the right fluid for your track use.

Dry vs. Wet Boiling Point: What the Numbers Actually Mean

Brake fluid absorbs moisture from the air over time. The dry boiling point is the temperature at which fresh, sealed fluid boils. The wet boiling point is the temperature at which fluid with 3.7% water content boils — a realistic condition

The Best Brake Upgrade for Track: A System-Level Guide to Choosing What Actually Matters

The best brake upgrade for track use isn’t a single part — it’s a coordinated system of rotors, pads, fluid, and cooling that must work together to survive repeated high-energy stops. Unlike street braking, where a single panic stop from 60 mph is the norm, track braking demands that your system absorb and dissipate massive thermal loads lap after lap, often from 150+ mph down to 40 mph. If you upgrade only one component, you haven’t upgraded your brakes — you’ve just moved the failure point elsewhere in the system.

This guide breaks down the four critical attributes that determine track performance: thermal capacity (rotor mass and material), friction stability (pad compound and temperature range), hydraulic integrity (fluid boiling point), and heat management (ducting and airflow). We’ll also cover realistic price ranges for each tier of upgrade, from budget-friendly pad-and-fluid swaps to full big-brake kits, so you can match your investment to your actual driving goals. The central question isn’t “what’s the most expensive option?” — it’s “what does your specific car, weight, and tire grip actually require?”

What makes this guide different from typical forum advice is that we’re not just listing parts. We’re giving you a decision framework based on real track data: brake torque calculations, rotor thermal mass comparisons, and pad compound selection logic. You’ll learn why a $300 pad-and-fluid upgrade can out-brake a $5,000 big brake kit on a 2,800-pound car, and why the opposite is true on a 3,800-pound sedan. By the end, you’ll know exactly which system-level upgrade path fits your car, your budget, and your track-day frequency — without wasting money on components that don’t address your actual bottleneck.

What Is a Track Brake Upgrade? (Defining the Entity)

What Is a Track Brake Upgrade? (Defining the Entity) - best brake upgrade for track

A track brake upgrade is a coordinated set of modifications to your vehicle’s braking system, engineered to manage the extreme thermal load generated during high-performance driving. Unlike a simple pad swap, a true track brake upgrade treats the brake system as an integrated unit — friction material, fluid, rotors, lines, and calipers working together to resist brake fade when temperatures climb past what street driving ever produces.

Think of the stock system as a street-tuned compromise. It prioritizes cold bite, low noise, and pedal comfort. A track brake upgrade rebalances those priorities toward one goal: consistent stopping power at 500°C and beyond. That rebalancing changes how the entire system behaves — from the first brake application on your out lap to the final corner of your last session.

Why ‘Best’ is a System Property, Not a Part Property

The single most common mistake in brake upgrades is treating “best” as a property of an individual component. A $600 set of racing pads bolted onto a stock system with old fluid and warped rotors will not make your car stop better on track — it will make it stop worse, because the pads will overheat the fluid faster than the stock rotors can shed heat. The “best” brake upgrade is the one that addresses your system’s weakest link. For a novice in a 2,800-pound Miata, that might be fluid and pads. For a heavy sedan with repeated 150 mph braking zones, that might be rotor mass and ducting. The system property view forces you to evaluate the entire thermal chain: friction generation (pads), heat absorption (rotors), heat transfer (cooling), and hydraulic transmission (fluid and lines).

Track vs. Street: The Thermal Threshold Difference

Street braking rarely exceeds 200°C at the rotor surface. Track braking routinely hits 500–700°C in a single braking zone, and sustained lapping keeps the system in that range for 20-minute sessions. This is the thermal threshold difference: street systems are designed to manage occasional heat spikes, while track systems must sustain continuous high-temperature operation. The consequences are dramatic. At 300°C, most street pads begin to fade. At 400°C, DOT 4 fluid starts to boil. At 500°C, stock rotors can crack from thermal stress. A track brake upgrade pushes each of these thresholds higher — and, critically, ensures that all components reach their limits at roughly the same time, so you don’t have one component failing while others still have headroom.

The Foundation: Brake Pads (Friction is the First Line of Defense)

The Foundation: Brake Pads (Friction is the First Line of Defense) - best brake upgrade for track

Brake pads are the most impactful single upgrade for track use because they directly control the friction interface between your car and the road. The right pad compound can transform a car that fades after three laps into one that stops consistently for a full session. The wrong pad — even an expensive one — can ruin your day with poor cold performance, excessive dust, or rotor damage. Understanding pad compounds is the first step in building a track-ready system.

Track Pads vs. Street Pads: The Temperature Window

Every brake pad has a temperature window — the range where it generates consistent, predictable friction. Street pads are engineered for a window of roughly 0–300°C, with strong cold bite and low noise. Track pads are engineered for 200–700°C, sacrificing cold performance for high-temperature stability. The critical insight is that a track pad used on the street will feel weak and grabby when cold, while a street pad used on track will fade catastrophically when hot. The best approach for dual-use cars is a hybrid pad that spans both windows, or a dedicated track pad that you swap in for track days. The temperature window also determines pad wear: running a track pad below its operating range causes accelerated wear, just as running a street pad above its range causes fade and glazing.

Compound Types: Metallic, Ceramic, and Hybrid

Track pad compounds fall into three broad categories. Metallic pads (often called sintered or semi-metallic) use metal fibers and particles bonded together. They offer excellent high-temperature friction, long life, and consistent performance, but they are hard on rotors and noisy. Ceramic pads use ceramic fibers and fillers; they run quieter and produce less dust, but they typically have a lower maximum temperature and can fade earlier than metallics. Hybrid compounds blend both approaches, aiming for a wider temperature window with acceptable trade-offs. For track use, metallic compounds are the most common choice because their thermal ceiling is highest. However, the specific compound within each category matters more than the category itself — a high-end ceramic can outperform a cheap metallic at the same temperature. The key is matching the compound’s temperature window to your car’s actual braking demands.

Honest Limitations: Cold-Bite and Daily-Driving Trade-offs

No pad is perfect for both street and track. Track pads have poor cold bite — they require heat before they generate full friction. This means your first brake application on a cold morning will feel weak, and the pads will wear quickly if you never get them up to temperature. They also produce significant dust, often corrosive to wheels, and they can be extremely noisy, squealing and groaning at low speeds. For a dedicated track car, these trade-offs are irrelevant. For a daily driver that sees occasional track days, they are deal-breakers. The honest answer is that most drivers should run a street pad for daily use and swap to a track pad for events — or choose a high-performance hybrid that compromises on both ends. Understanding these limitations prevents the common mistake of installing a full race pad and hating the car on the street.

Brake Fluid: The Hydraulic Backbone (Often Overlooked, Always Critical)

Brake Fluid: The Hydraulic Backbone (Often Overlooked, Always Critical) - best brake upgrade for track

Brake fluid is the most underrated component in a track brake system. It’s cheap, easy to replace, and yet it’s the single most common cause of track-day brake failure. When fluid boils, it compresses, and your pedal goes to the floor. No pad, rotor, or caliper upgrade can fix a fluid problem. Understanding dry and wet boiling points is essential to choosing the right fluid for your track use.

Dry vs. Wet Boiling Point: What the Numbers Actually Mean

Brake fluid absorbs moisture from the air over time. The dry boiling point is the temperature at which fresh, sealed fluid boils. The wet boiling point is the temperature at which fluid with 3.7% water content boils — a realistic condition

The Best Brake Upgrade for Track: A System-Level Guide to Choosing What Actually Matters

The best brake upgrade for track use isn’t a single part — it’s a coordinated system of rotors, pads, fluid, and cooling that must work together to survive repeated high-energy stops. Unlike street braking, where a single panic stop from 60 mph is the norm, track braking demands that your system absorb and dissipate massive thermal loads lap after lap, often from 150+ mph down to 40 mph. If you upgrade only one component, you haven’t upgraded your brakes — you’ve just moved the failure point elsewhere in the system.

This guide breaks down the four critical attributes that determine track performance: thermal capacity (rotor mass and material), friction stability (pad compound and temperature range), hydraulic integrity (fluid boiling point), and heat management (ducting and airflow). We’ll also cover realistic price ranges for each tier of upgrade, from budget-friendly pad-and-fluid swaps to full big-brake kits, so you can match your investment to your actual driving goals. The central question isn’t “what’s the most expensive option?” — it’s “what does your specific car, weight, and tire grip actually require?”

What makes this guide different from typical forum advice is that we’re not just listing parts. We’re giving you a decision framework based on real track data: brake torque calculations, rotor thermal mass comparisons, and pad compound selection logic. You’ll learn why a $300 pad-and-fluid upgrade can out-brake a $5,000 big brake kit on a 2,800-pound car, and why the opposite is true on a 3,800-pound sedan. By the end, you’ll know exactly which system-level upgrade path fits your car, your budget, and your track-day frequency — without wasting money on components that don’t address your actual bottleneck.

What Is a Track Brake Upgrade? (Defining the Entity)

What Is a Track Brake Upgrade? (Defining the Entity) - best brake upgrade for track

A track brake upgrade is a coordinated set of modifications to your vehicle’s braking system, engineered to manage the extreme thermal load generated during high-performance driving. Unlike a simple pad swap, a true track brake upgrade treats the brake system as an integrated unit — friction material, fluid, rotors, lines, and calipers working together to resist brake fade when temperatures climb past what street driving ever produces.

Think of the stock system as a street-tuned compromise. It prioritizes cold bite, low noise, and pedal comfort. A track brake upgrade rebalances those priorities toward one goal: consistent stopping power at 500°C and beyond. That rebalancing changes how the entire system behaves — from the first brake application on your out lap to the final corner of your last session.

Why ‘Best’ is a System Property, Not a Part Property

The single most common mistake in brake upgrades is treating “best” as a property of an individual component. A $600 set of racing pads bolted onto a stock system with old fluid and warped rotors will not make your car stop better on track — it will make it stop worse, because the pads will overheat the fluid faster than the stock rotors can shed heat. The “best” brake upgrade is the one that addresses your system’s weakest link. For a novice in a 2,800-pound Miata, that might be fluid and pads. For a heavy sedan with repeated 150 mph braking zones, that might be rotor mass and ducting. The system property view forces you to evaluate the entire thermal chain: friction generation (pads), heat absorption (rotors), heat transfer (cooling), and hydraulic transmission (fluid and lines).

Track vs. Street: The Thermal Threshold Difference

Street braking rarely exceeds 200°C at the rotor surface. Track braking routinely hits 500–700°C in a single braking zone, and sustained lapping keeps the system in that range for 20-minute sessions. This is the thermal threshold difference: street systems are designed to manage occasional heat spikes, while track systems must sustain continuous high-temperature operation. The consequences are dramatic. At 300°C, most street pads begin to fade. At 400°C, DOT 4 fluid starts to boil. At 500°C, stock rotors can crack from thermal stress. A track brake upgrade pushes each of these thresholds higher — and, critically, ensures that all components reach their limits at roughly the same time, so you don’t have one component failing while others still have headroom.

The Foundation: Brake Pads (Friction is the First Line of Defense)

The Foundation: Brake Pads (Friction is the First Line of Defense) - best brake upgrade for track

Brake pads are the most impactful single upgrade for track use because they directly control the friction interface between your car and the road. The right pad compound can transform a car that fades after three laps into one that stops consistently for a full session. The wrong pad — even an expensive one — can ruin your day with poor cold performance, excessive dust, or rotor damage. Understanding pad compounds is the first step in building a track-ready system.

Track Pads vs. Street Pads: The Temperature Window

Every brake pad has a temperature window — the range where it generates consistent, predictable friction. Street pads are engineered for a window of roughly 0–300°C, with strong cold bite and low noise. Track pads are engineered for 200–700°C, sacrificing cold performance for high-temperature stability. The critical insight is that a track pad used on the street will feel weak and grabby when cold, while a street pad used on track will fade catastrophically when hot. The best approach for dual-use cars is a hybrid pad that spans both windows, or a dedicated track pad that you swap in for track days. The temperature window also determines pad wear: running a track pad below its operating range causes accelerated wear, just as running a street pad above its range causes fade and glazing.

Compound Types: Metallic, Ceramic, and Hybrid

Track pad compounds fall into three broad categories. Metallic pads (often called sintered or semi-metallic) use metal fibers and particles bonded together. They offer excellent high-temperature friction, long life, and consistent performance, but they are hard on rotors and noisy. Ceramic pads use ceramic fibers and fillers; they run quieter and produce less dust, but they typically have a lower maximum temperature and can fade earlier than metallics. Hybrid compounds blend both approaches, aiming for a wider temperature window with acceptable trade-offs. For track use, metallic compounds are the most common choice because their thermal ceiling is highest. However, the specific compound within each category matters more than the category itself — a high-end ceramic can outperform a cheap metallic at the same temperature. The key is matching the compound’s temperature window to your car’s actual braking demands.

Honest Limitations: Cold-Bite and Daily-Driving Trade-offs

No pad is perfect for both street and track. Track pads have poor cold bite — they require heat before they generate full friction. This means your first brake application on a cold morning will feel weak, and the pads will wear quickly if you never get them up to temperature. They also produce significant dust, often corrosive to wheels, and they can be extremely noisy, squealing and groaning at low speeds. For a dedicated track car, these trade-offs are irrelevant. For a daily driver that sees occasional track days, they are deal-breakers. The honest answer is that most drivers should run a street pad for daily use and swap to a track pad for events — or choose a high-performance hybrid that compromises on both ends. Understanding these limitations prevents the common mistake of installing a full race pad and hating the car on the street.

Brake Fluid: The Hydraulic Backbone (Often Overlooked, Always Critical)

Brake Fluid: The Hydraulic Backbone (Often Overlooked, Always Critical) - best brake upgrade for track

Brake fluid is the most underrated component in a track brake system. It’s cheap, easy to replace, and yet it’s the single most common cause of track-day brake failure. When fluid boils, it compresses, and your pedal goes to the floor. No pad, rotor, or caliper upgrade can fix a fluid problem. Understanding dry and wet boiling points is essential to choosing the right fluid for your track use.

Dry vs. Wet Boiling Point: What the Numbers Actually Mean

Brake fluid absorbs moisture from the air over time. The dry boiling point is the temperature at which fresh, sealed fluid boils. The wet boiling point is the temperature at which fluid with 3.7% water content boils — a realistic condition

The Best Brake Upgrade for Track: A System-Level Guide to Choosing What Actually Matters

The best brake upgrade for track use isn’t a single part — it’s a coordinated system of rotors, pads, fluid, and cooling that must work together to survive repeated high-energy stops. Unlike street braking, where a single panic stop from 60 mph is the norm, track braking demands that your system absorb and dissipate massive thermal loads lap after lap, often from 150+ mph down to 40 mph. If you upgrade only one component, you haven’t upgraded your brakes — you’ve just moved the failure point elsewhere in the system.

This guide breaks down the four critical attributes that determine track performance: thermal capacity (rotor mass and material), friction stability (pad compound and temperature range), hydraulic integrity (fluid boiling point), and heat management (ducting and airflow). We’ll also cover realistic price ranges for each tier of upgrade, from budget-friendly pad-and-fluid swaps to full big-brake kits, so you can match your investment to your actual driving goals. The central question isn’t “what’s the most expensive option?” — it’s “what does your specific car, weight, and tire grip actually require?”

What makes this guide different from typical forum advice is that we’re not just listing parts. We’re giving you a decision framework based on real track data: brake torque calculations, rotor thermal mass comparisons, and pad compound selection logic. You’ll learn why a $300 pad-and-fluid upgrade can out-brake a $5,000 big brake kit on a 2,800-pound car, and why the opposite is true on a 3,800-pound sedan. By the end, you’ll know exactly which system-level upgrade path fits your car, your budget, and your track-day frequency — without wasting money on components that don’t address your actual bottleneck.

What Is a Track Brake Upgrade? (Defining the Entity)

What Is a Track Brake Upgrade? (Defining the Entity) - best brake upgrade for track

A track brake upgrade is a coordinated set of modifications to your vehicle’s braking system, engineered to manage the extreme thermal load generated during high-performance driving. Unlike a simple pad swap, a true track brake upgrade treats the brake system as an integrated unit — friction material, fluid, rotors, lines, and calipers working together to resist brake fade when temperatures climb past what street driving ever produces.

Think of the stock system as a street-tuned compromise. It prioritizes cold bite, low noise, and pedal comfort. A track brake upgrade rebalances those priorities toward one goal: consistent stopping power at 500°C and beyond. That rebalancing changes how the entire system behaves — from the first brake application on your out lap to the final corner of your last session.

Why ‘Best’ is a System Property, Not a Part Property

The single most common mistake in brake upgrades is treating “best” as a property of an individual component. A $600 set of racing pads bolted onto a stock system with old fluid and warped rotors will not make your car stop better on track — it will make it stop worse, because the pads will overheat the fluid faster than the stock rotors can shed heat. The “best” brake upgrade is the one that addresses your system’s weakest link. For a novice in a 2,800-pound Miata, that might be fluid and pads. For a heavy sedan with repeated 150 mph braking zones, that might be rotor mass and ducting. The system property view forces you to evaluate the entire thermal chain: friction generation (pads), heat absorption (rotors), heat transfer (cooling), and hydraulic transmission (fluid and lines).

Track vs. Street: The Thermal Threshold Difference

Street braking rarely exceeds 200°C at the rotor surface. Track braking routinely hits 500–700°C in a single braking zone, and sustained lapping keeps the system in that range for 20-minute sessions. This is the thermal threshold difference: street systems are designed to manage occasional heat spikes, while track systems must sustain continuous high-temperature operation. The consequences are dramatic. At 300°C, most street pads begin to fade. At 400°C, DOT 4 fluid starts to boil. At 500°C, stock rotors can crack from thermal stress. A track brake upgrade pushes each of these thresholds higher — and, critically, ensures that all components reach their limits at roughly the same time, so you don’t have one component failing while others still have headroom.

The Foundation: Brake Pads (Friction is the First Line of Defense)

The Foundation: Brake Pads (Friction is the First Line of Defense) - best brake upgrade for track

Brake pads are the most impactful single upgrade for track use because they directly control the friction interface between your car and the road. The right pad compound can transform a car that fades after three laps into one that stops consistently for a full session. The wrong pad — even an expensive one — can ruin your day with poor cold performance, excessive dust, or rotor damage. Understanding pad compounds is the first step in building a track-ready system.

Track Pads vs. Street Pads: The Temperature Window

Every brake pad has a temperature window — the range where it generates consistent, predictable friction. Street pads are engineered for a window of roughly 0–300°C, with strong cold bite and low noise. Track pads are engineered for 200–700°C, sacrificing cold performance for high-temperature stability. The critical insight is that a track pad used on the street will feel weak and grabby when cold, while a street pad used on track will fade catastrophically when hot. The best approach for dual-use cars is a hybrid pad that spans both windows, or a dedicated track pad that you swap in for track days. The temperature window also determines pad wear: running a track pad below its operating range causes accelerated wear, just as running a street pad above its range causes fade and glazing.

Compound Types: Metallic, Ceramic, and Hybrid

Track pad compounds fall into three broad categories. Metallic pads (often called sintered or semi-metallic) use metal fibers and particles bonded together. They offer excellent high-temperature friction, long life, and consistent performance, but they are hard on rotors and noisy. Ceramic pads use ceramic fibers and fillers; they run quieter and produce less dust, but they typically have a lower maximum temperature and can fade earlier than metallics. Hybrid compounds blend both approaches, aiming for a wider temperature window with acceptable trade-offs. For track use, metallic compounds are the most common choice because their thermal ceiling is highest. However, the specific compound within each category matters more than the category itself — a high-end ceramic can outperform a cheap metallic at the same temperature. The key is matching the compound’s temperature window to your car’s actual braking demands.

Honest Limitations: Cold-Bite and Daily-Driving Trade-offs

No pad is perfect for both street and track. Track pads have poor cold bite — they require heat before they generate full friction. This means your first brake application on a cold morning will feel weak, and the pads will wear quickly if you never get them up to temperature. They also produce significant dust, often corrosive to wheels, and they can be extremely noisy, squealing and groaning at low speeds. For a dedicated track car, these trade-offs are irrelevant. For a daily driver that sees occasional track days, they are deal-breakers. The honest answer is that most drivers should run a street pad for daily use and swap to a track pad for events — or choose a high-performance hybrid that compromises on both ends. Understanding these limitations prevents the common mistake of installing a full race pad and hating the car on the street.

Brake Fluid: The Hydraulic Backbone (Often Overlooked, Always Critical)

Brake Fluid: The Hydraulic Backbone (Often Overlooked, Always Critical) - best brake upgrade for track

Brake fluid is the most underrated component in a track brake system. It’s cheap, easy to replace, and yet it’s the single most common cause of track-day brake failure. When fluid boils, it compresses, and your pedal goes to the floor. No pad, rotor, or caliper upgrade can fix a fluid problem. Understanding dry and wet boiling points is essential to choosing the right fluid for your track use.

Dry vs. Wet Boiling Point: What the Numbers Actually Mean

Brake fluid absorbs moisture from the air over time. The dry boiling point is the temperature at which fresh, sealed fluid boils. The wet boiling point is the temperature at which fluid with 3.7% water content boils — a realistic condition

You might also like: emergency brake problems, best drilled and slotted rotors, brake rotor buying guide
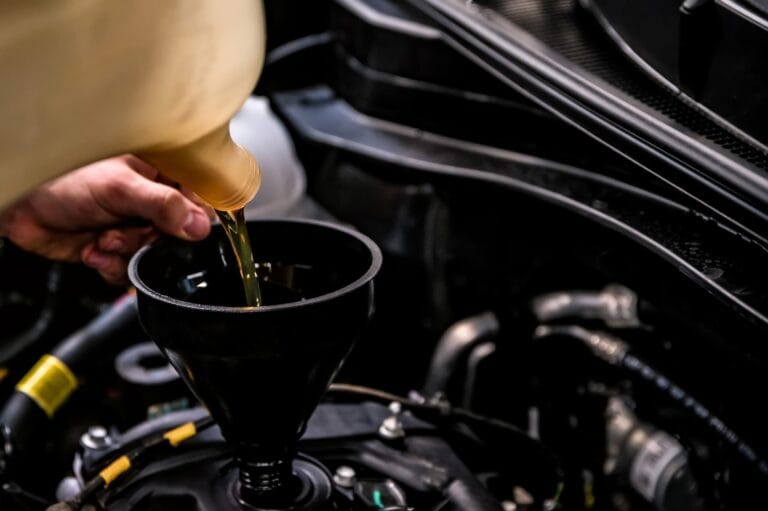
Similar Posts