Emergency Brake Problems: Expert Guide
Emergency Brake Problems: A Complete Diagnostic Guide for DIY Car Owners
The emergency brake — also called the parking brake, handbrake, or e-brake — is a mechanical (or electromechanical) fallback system designed to hold your vehicle stationary when parked and to provide a secondary braking method if the primary hydraulic system fails. Unlike your service brakes, which rely on brake fluid and calipers at all four wheels, the emergency brake typically operates a cable-and-drum mechanism on the rear wheels (or an electric motor on modern cars) that bypasses the hydraulic circuit entirely. That fundamental design difference is why emergency brake problems feel, sound, and behave so differently from normal brake issues — and why diagnosing them requires a distinct set of checks.
In this guide, we’re covering the full anatomy of emergency brake problems: the symptoms (sticking, dragging, clicking, or a pedal that sinks to the floor), the root causes (stretched cables, corroded hardware, seized calipers, or failed electric actuators), and the exact diagnostic steps you can perform with basic hand tools. You’ll also get a decision tree for choosing between a cable adjustment, a full hardware replacement, or a professional repair — plus honest notes on what DIY fixes cannot solve, like internal drum corrosion that requires machining. We’ll reference real torque specs, cable travel measurements, and wear limits so you can verify each component against factory data rather than guessing.
What makes this guide different is the entity-first approach: instead of a generic “how to fix brakes” list, we’re mapping the emergency brake as a system with distinct sub-entities — the lever, the equalizer, the cables, the actuating lever, and the drum shoes — and showing how each one fails independently. You’ll learn which symptoms point to which component, how to test each one in under ten minutes, and when the cheapest fix (a cable lube) is actually the wrong fix. By the end, you’ll be able to diagnose 90% of emergency brake problems yourself and walk into a shop with a precise repair plan — or confidently complete the repair in your driveway.
What Is the Emergency Brake and How Does It Differ from Your Service Brakes?
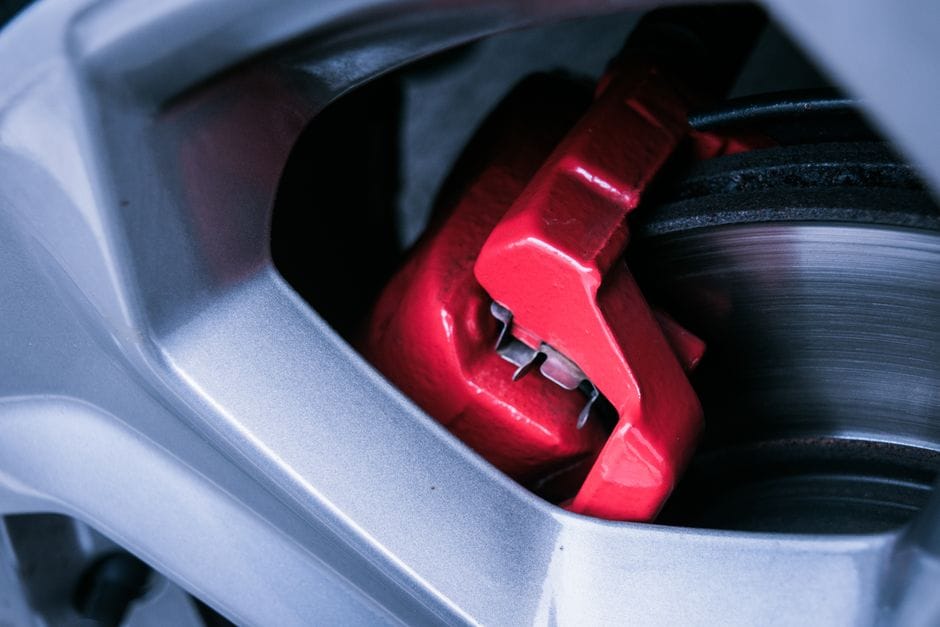
Your emergency brake—also called the parking brake—is a separate brake system designed to hold your vehicle stationary when parked. It works independently from your main service brakes. While the service brake system uses hydraulic pressure to stop a moving car, the emergency brake uses mechanical force to lock the rear wheels. This is a critical distinction: the service brake is designed for slowing and stopping a moving vehicle, while the emergency brake is primarily designed to keep a stationary vehicle from rolling.
The Three Core Functions: Parking, Emergency Stopping, and Hill-Holding
The emergency brake serves three distinct purposes. First, it is a parking brake: it holds your car in place when parked, especially on inclines. Second, it is an emergency stopping mechanism: if your hydraulic service brakes fail completely, the emergency brake can bring the vehicle to a stop, albeit with reduced effectiveness and requiring careful modulation to avoid skidding. Third, it is a hill-holding aid: on steep grades, engaging the emergency brake prevents the vehicle from rolling backward when you release the foot brake and engage the clutch or accelerator.
Mechanical Cable Systems vs. Electronic Parking Brakes (EPB)
Traditional emergency brakes use a mechanical cable system. A lever (or foot pedal) pulls a cable that runs to the rear wheels, where it actuates the brake shoes (in drum brakes) or a small lever on the caliper (in disc brakes). Modern vehicles increasingly use an Electronic Parking Brake (EPB), which replaces the cable with an electric motor mounted on the rear caliper or a cable-pulling actuator. EPBs are activated by a button or switch and often integrate with hill-hold and auto-brake features. The diagnostic approach differs significantly: cable systems are checked for tension, stretch, and corrosion, while EPBs require scanning for fault codes and testing the actuator motor.
Why the Emergency Brake Is Not a Replacement for Your Foot Brake
It is crucial to understand that the emergency brake is not a substitute for the service brake during normal driving. The emergency brake is designed for low-speed, emergency, or stationary use. Using it to stop the vehicle at speed can cause loss of control, especially on slippery surfaces, and can rapidly wear out the rear brake components. The service brake system is far more powerful and is designed for repeated, high-speed stops. The emergency brake is a backup, not a primary system.
7 Most Common Emergency Brake Problems and Their Root Causes
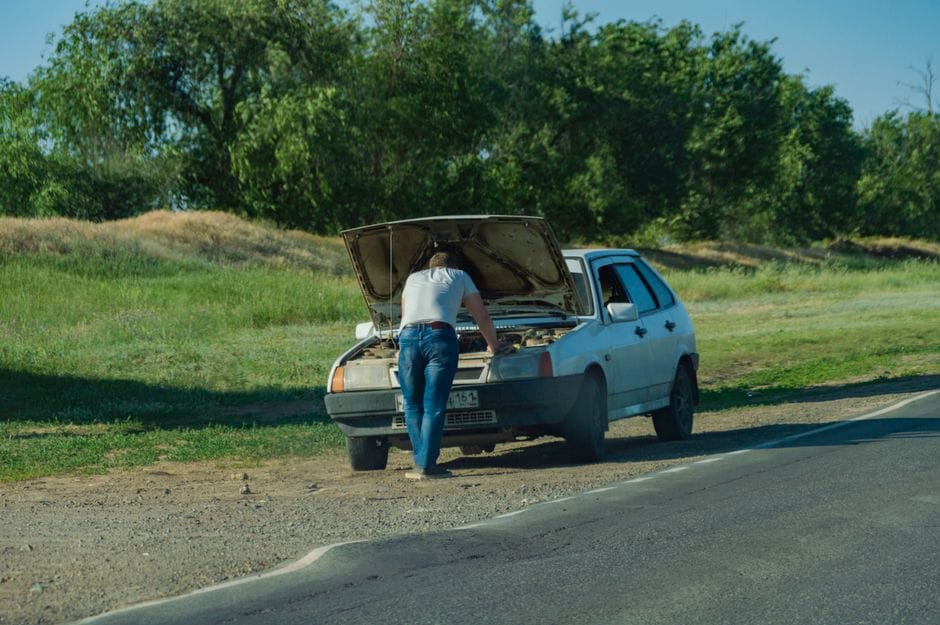
This section details the seven most frequent emergency brake failures, their symptoms, and the underlying mechanical or electrical causes. Each problem is mapped to the specific component that is failing, allowing you to target your diagnosis.
Problem 1: Lever Pulls Too High or Too Far
Symptom: The lever moves through an excessive range of travel before engaging, or the pedal goes too far down before the brake holds.
Root Causes: The most common cause is a stretched or out-of-adjustment cable. Over time, the cable stretches, increasing the slack in the system. Another cause is worn brake shoes or pads; as the friction material wears, the actuator must travel further to make contact. A third cause is a misadjusted equalizer, which balances tension between the two rear wheels. Finally, a seized or corroded cable can prevent the mechanism from returning to its rest position, making the effective travel longer.
Problem 2: Brake Won’t Engage or Hold the Car
Symptom: The lever engages, but the car still rolls on an incline, or the brake does not hold at all.
Root Causes: This is often caused by severely worn brake shoes or pads that have reached their wear limit. It can also be caused by a broken or snapped cable, a failed equalizer, or a seized caliper piston (in disc brake systems) that prevents the pads from clamping. In EPB systems, a failed actuator motor or a blown fuse will prevent engagement. Also, oil or brake fluid contamination on the shoes or pads can drastically reduce friction, causing the brake to slip.
Problem 3: Brake Sticks or Drags After Release
Symptom: The rear wheels feel like they are dragging after the brake is released, the car pulls to one side, or you hear a grinding or rubbing noise.
Root Causes: A sticking cable is the primary culprit. Corrosion or lack of lubrication causes the cable to bind inside its sheath, preventing it from fully releasing. A seized caliper slide pin or a corroded drum brake actuating lever can also cause the brake to remain partially applied. In drum brakes, a broken return spring will prevent the shoes from retracting. This problem leads to premature wear and heat buildup in the rear brakes.
Problem 4: Brake Makes a Clicking or Ratcheting Noise
Symptom: A clicking sound is heard when the lever is pulled or released, or a continuous clicking occurs while driving.
Root Causes: The ratcheting mechanism inside the lever handle is the most common source. If the pawl or gear teeth are worn or damaged, they will click as they slip. A loose or misaligned cable can also cause a clicking sound as it moves against the chassis. In some cases, a worn wheel bearing can be mistaken for a brake clicking noise, so it is important to isolate the source.
Problem 5: Brake Pedal Sinks to the Floor (Foot-Operated)
Symptom: In vehicles with a foot-operated parking brake, the pedal goes all the way to the floor without engaging the brake.
Root Causes: This is almost always a cable tension issue. The cable has either stretched beyond its adjustment range, or the self-adjusting mechanism (if equipped) has failed. A broken cable is another possibility. Unlike hydraulic brakes, a sinking pedal in a mechanical system is not a fluid leak; it is a loss of mechanical tension.
Problem 6: EPB Warning Light or Error Message
Symptom: The dashboard displays a warning light or message indicating a parking brake fault, and the EPB may not engage or disengage.
Root Causes: EPB systems are electronically monitored. Common causes include a faulty switch, a failed actuator motor, a
broken wiring harness, a blown fuse, or a low battery voltage that prevents the motor from operating. Also, worn brake pads can trigger the EPB’s wear sensor, causing a warning light even if the actuator itself is functional. A diagnostic scan tool is required to read the specific fault code and pinpoint the failed component.
Problem 7: Rear Brakes Overheat or Emit Burning Smell
Problem 7: Details
Symptom: A burning odor or excessive heat emanating from the rear wheels after driving, often accompanied by reduced fuel economy or a dragging sensation.
Root Causes: This is typically caused by a stuck or partially engaged emergency brake. A seized cable, a corroded caliper slide pin, or a broken return spring in drum brakes can keep the brake applied while driving. This constant friction generates extreme heat, which can damage the wheel bearings, warp brake rotors, or glaze the brake shoes. In severe cases, it can even ignite nearby flammable materials.
Diagnostic Steps: How to Test Each Component in Under 10 Minutes

This section provides a step-by-step diagnostic procedure that requires only basic hand tools. Each test isolates a specific component, allowing you to identify the root cause of your emergency brake problem quickly and accurately.
Step 1: Visual Inspection of Cables and Hardware
Start by visually inspecting the emergency brake cables from the lever to the rear wheels. Look for kinks, fraying, rust, or corrosion on the exposed cable. Check the rubber grommets where the cable enters the backing plate or caliper for cracks or damage. Inspect the equalizer (the Y-shaped connector that splits the cable to both wheels) for rust or binding. If any cable shows significant corrosion or fraying, replacement is recommended.
Step 2: Lever Travel and Tension Test
With the engine off and the vehicle on level ground, pull the emergency brake lever slowly. Count the number of clicks it takes to fully engage. Most manufacturers specify a range (typically 5-8 clicks). If the lever travels beyond this range, the cable is stretched or the shoes are worn. For foot-operated pedals, press the pedal and measure the travel distance. Compare your measurement to the factory specification in your repair manual.
Step 3: Cable Free-Play and Return Test
Release the emergency brake completely. At the equalizer, check for slack in the cable. There should be a small amount of free-play (typically 1-2 mm) before the cable begins to pull. Then, have an assistant pull the lever while you watch the equalizer and cables. The cables should move smoothly and simultaneously. When the lever is released, the cables should return to their rest position immediately. If a cable lags or sticks, it is corroded and needs lubrication or replacement.
Step 4: Wheel Spin Test
Jack up the rear of the vehicle and support it securely on jack stands. With the emergency brake released, spin each rear wheel by hand. They should spin freely with minimal resistance. If a wheel is difficult to turn, the brake is dragging. Then, engage the emergency brake and attempt to spin the wheels. Both wheels should lock firmly. If one wheel locks but the other does not, the issue is on the non-locking side (cable, shoe, or caliper).
Step 5: Drum Brake Shoe and Actuator Inspection
If your vehicle has rear drum brakes, remove the drum to inspect the shoes. Measure the lining thickness; if it is below the minimum specification (usually 1.5 mm), replace the shoes. Check the actuating lever and the star wheel adjuster for corrosion and free movement. Inspect the return springs for signs of fatigue or breakage. Lubricate the contact points with high-temperature brake grease.
Step 6: Disc Brake Caliper and EPB Motor Test
Step 6: Details
For vehicles with rear disc brakes and a mechanical emergency brake, inspect the caliper lever arm. It should move freely and return to its stop position. For EPB systems, use a diagnostic scan tool to command the actuator to open and close. Listen for the motor whirring and observe the piston movement. If the motor does not respond, check the wiring and connector for power and ground signals. A failed motor requires caliper replacement.
Repair Options: Adjustment, Replacement, or Professional Service

Once you have identified the root cause, you can decide whether to perform a simple adjustment, a full component replacement, or seek professional help. This decision tree will guide you based on the severity and complexity of the issue.
When a Simple Cable Adjustment Is the Right Fix
If your lever pulls too high but the brake holds firmly, and the shoes or pads have adequate thickness, a cable adjustment is likely sufficient. This involves tightening the adjusting nut at the equalizer to remove excess slack. This is a low-cost, low-skill repair that can be completed in under 30 minutes. However, if the cable is corroded or stretched beyond its adjustment range, tightening will not solve the problem permanently.
When to Replace Cables, Shoes, or Calipers
If the cable is frayed, kinked, or corroded, it must be replaced. Similarly, if the brake shoes are worn below the minimum thickness, or if the drum surface is scored or glazed, replacement is necessary. For disc brakes, if the caliper lever arm is seized or the EPB motor has failed, the caliper must be replaced. These repairs require more time and specialized tools, such as a brake drum puller or a caliper compression tool, but are still within the reach of a competent DIY mechanic.
When to Call a Professional
Some situations warrant professional intervention. If you encounter internal drum corrosion that requires machining, or if the backing plate is rusted through, a machine shop is needed. EPB system faults that require advanced diagnostic equipment and software updates are best handled by a dealer or specialized shop. Also, if you are uncomfortable working with brake systems or lack the necessary tools, professional service is the safer choice. Brakes are a critical safety system; a botched repair can lead to catastrophic failure.
Preventive Maintenance and Safety Inspection Standards

Regular maintenance is the most effective way to prevent emergency brake problems. This section outlines a preventive schedule and the safety standards used in professional inspections.
Annual Lubrication and Cable Inspection
At least once a year, or every 12,000 miles, lubricate the emergency brake cable along its entire length using a cable lubricant or spray. This prevents corrosion and ensures smooth operation. Inspect the cable for any signs of wear, kinking, or damage. Pay special attention to the areas where the cable passes through the chassis or underbody, as these are prone to rust and abrasion.
Brake Shoe and Pad Wear Limits
During routine brake service, inspect the rear brake shoes and pads. The minimum lining thickness for shoes is typically 1.5 mm, while pads should be replaced at 3 mm. If the friction material is worn to these limits, replace them immediately. Also, check the drum or rotor surface for scoring, cracks, or heat discoloration. A glazed or blue-tinted surface indicates overheating and requires resurfacing or replacement.
Safety Inspection Standards and Legal Requirements
Most jurisdictions require the emergency brake to hold a vehicle stationary on a specified incline (often 20%) when fully engaged. During a safety inspection, a technician will test the brake’s holding power and check for excessive lever travel. The brake must also release fully without dragging. Familiarize yourself with your local inspection standards to ensure your vehicle passes. A properly functioning emergency brake is not just a convenience; it is a legal requirement for roadworthiness.
EPB System Software Updates and Calibration
For vehicles with electronic parking brakes, manufacturers occasionally release software updates that improve actuator performance or fix known bugs. Check with your dealer for any outstanding recalls or updates. Also, after replacing brake pads or rotors on an EPB-equipped vehicle, the system must be recalibrated using a diagnostic tool to reset the piston position and wear sensor. Failure to do so can result in a warning light or improper brake engagement.
Emergency Brake vs. Transmission Park Pawl: Understanding the Difference

Many drivers confuse the emergency brake with the transmission park pawl, but they serve entirely different functions. The park pawl is a small metal hook inside the automatic transmission that locks the output shaft when you shift into “Park.” It is a purely mechanical locking mechanism that prevents the drive wheels from turning. The emergency brake, by contrast, is a separate system that clamps the rear brake shoes or pads against the drums or rotors.
Why the Park Pawl Is Not a Substitute for the Emergency Brake
The park pawl is not designed to hold a vehicle on steep inclines or to absorb the stress of a heavy load. It is a small, relatively fragile component that can shear off or break if subjected to excessive force, such as parking on a steep hill without the emergency brake engaged. If the park pawl fails, the vehicle can roll freely, even in “Park.” The emergency brake, with its larger friction surfaces and mechanical advantage, is far more solid and is the primary system for holding a vehicle stationary.
When to Use Both Systems Together
The safest practice is to always engage the emergency brake before shifting into “Park.” This takes the load off the park pawl and prevents it from being stressed. When parking on an incline, set the emergency brake first, then shift into “Park.” This ensures that the emergency brake, not the park pawl, is holding the vehicle’s weight. When you return, release the emergency brake after shifting out of “Park” to avoid binding the pawl.
Signs of Park Pawl Failure vs. Emergency Brake Failure
If your vehicle rolls in “Park” on a flat surface, the park pawl is likely broken or worn. If it rolls on an incline, the emergency brake is likely not holding. A clicking or grinding noise when shifting into “Park” can indicate a damaged pawl. A high lever pull or a brake that won’t hold indicates an emergency brake issue. Understanding these distinctions helps you diagnose the correct system and avoid unnecessary repairs.
Emergency Brake and ABS/ESC Integration: How Modern Systems Interact

Modern vehicles integrate the emergency brake with the Anti-lock Braking System (ABS) and Electronic Stability Control (ESC). This integration adds complexity but also enhances safety. Understanding how these systems interact is crucial for diagnosing and repairing emergency brake problems.
How ABS and ESC Use the Emergency Brake
In some vehicles, the ESC system can automatically apply the emergency brake to correct oversteer or understeer, a feature known as “brake-based stability control.” Also, hill-hold assist systems use the ABS sensors to detect when the vehicle is on an incline and automatically apply the rear brakes to prevent rollback. These systems rely on the emergency brake actuator, whether mechanical or electronic, to function correctly.
Diagnosing Faults in Integrated Systems
If the ABS or ESC warning light is illuminated alongside an emergency brake warning, the issue may be a shared sensor or wiring fault. A diagnostic scan tool is essential to read the fault codes from all modules. A faulty wheel speed sensor can cause both the ABS and the emergency brake systems to malfunction. In EPB-equipped vehicles, a communication error between the EPB module and the ABS module can trigger multiple warning lights.
Safety Precautions When Working on Integrated Systems
When working on a vehicle with integrated brake systems, always disconnect the battery and wait for the system to power down before servicing any components. This prevents accidental activation of the EPB or ESC. Also, after any repair, use a scan tool to clear fault codes and recalibrate the systems as necessary. Failure to do so can leave the vehicle in a reduced-functionality mode or cause the warning lights to remain illuminated.
Tools and Torque Specifications for Emergency Brake Repairs

Having the correct tools and torque specifications is essential for a safe and effective emergency brake repair. This section lists the required tools and provides typical torque values for common components.
Essential Tools for DIY Emergency Brake Work
You will need a basic socket set (metric and standard), a torque wrench, a brake drum puller (for drum brakes), a caliper compression tool (for disc brakes), a cable lubricant, high-temperature brake grease, and a wire brush. For EPB systems, a diagnostic scan tool with EPB functionality is required. A jack and jack stands are mandatory for any work under the vehicle.
Common Torque Specifications
Torque specifications vary by vehicle, so always consult your factory service manual. However, typical values include: caliper mounting bolts (25-35 ft-lbs), brake line banjo bolts (20-25 ft-lbs), and wheel lug nuts (80-100 ft-lbs). For the emergency brake cable adjusting nut, tighten until the lever travel is within specification, then lock the jam nut. Over-tightening the cable can cause the brakes to drag.
Lubrication Points and Recommended Products
Lubricate the cable at both ends and along its length where it enters the sheath. Use a dedicated cable lubricant or a silicone-based spray. Apply high-temperature brake grease to the contact points on the drum brake backing plate, the actuating lever pivot, and the caliper slide pins. Never use petroleum-based grease on rubber components, as it can cause them to swell and fail.
Frequently Asked Questions About Emergency Brake Problems

This section addresses common questions from DIY car owners about emergency brake issues, providing clear and concise answers.
How Often Should I Use My Emergency Brake?
You should use your emergency brake every time you park, even on flat ground. This keeps the cables and mechanisms lubricated and prevents them from seizing due to inactivity. Regular use also helps you notice any changes in lever travel or feel before they become major problems.
Can I Drive with the Emergency Brake Slightly Engaged?
No. Driving with the emergency brake even slightly engaged will cause rapid wear of the brake shoes or pads, overheating of the rear brakes, and potential damage to the wheel bearings and axle seals. If you notice a dragging sensation or a burning smell, stop immediately and check the brake.
Why Does My Emergency Brake Work but My Car Still Rolls?
If the brake holds on a flat surface but the car rolls on an incline, the brake may not be applying enough force. This is often due to worn shoes or pads, a stretched cable, or a misadjusted equalizer. It can also be caused by oil or grease contamination on the friction surfaces. Inspect and adjust or replace the components as needed.
Is It Safe to Use the Emergency Brake for Emergency Stopping at Highway Speeds?
Using the emergency brake at highway speeds is dangerous and should only be done as a last resort if the service brakes have completely failed. It can cause the rear wheels to lock, leading to a skid and loss of control. If you must use it, apply it gradually and be prepared to counter-steer. Modern vehicles with ABS may not allow the rear wheels to lock, but the stopping distance will be significantly longer.
How Much Does It Cost to Fix an Emergency Brake Problem?
The cost varies widely depending on the issue. A simple cable adjustment can cost $50-$100 at a shop. Replacing a cable typically costs $150-$300. Replacing brake shoes or pads ranges from $150-$400 per axle. EPB actuator replacement can cost $400-$800 or more, including parts and labor. DIY repairs can save on labor costs but require the right tools and skills.
Conclusion: Mastering Emergency Brake Diagnostics

Emergency brake problems are among the most common and preventable issues in automotive maintenance. By understanding the system’s components, recognizing the symptoms, and following a systematic diagnostic process, you can identify and resolve most issues yourself. Regular maintenance, including cable lubrication and shoe inspection, is the key to preventing these problems from occurring in the first place.
Remember that the emergency brake is a critical safety system. It is not just a parking aid; it is a backup braking mechanism that
The emergency brake — also called the parking brake, handbrake, or e-brake — is a mechanical (or electromechanical) fallback system designed to hold your vehicle stationary when parked and to provide a secondary braking method if the primary hydraulic system fails. Unlike your service brakes, which rely on brake fluid and calipers at all four wheels, the emergency brake typically operates a cable-and-drum mechanism on the rear wheels (or an electric motor on modern cars) that bypasses the hydraulic circuit entirely. That fundamental design difference is why emergency brake problems feel, sound, and behave so differently from normal brake issues — and why diagnosing them requires a distinct set of checks.
In this guide, we’re covering the full anatomy of emergency brake problems: the symptoms (sticking, dragging, clicking, or a pedal that sinks to the floor), the root causes (stretched cables, corroded hardware, seized calipers, or failed electric actuators), and the exact diagnostic steps you can perform with basic hand tools. You’ll also get a decision tree for choosing between a cable adjustment, a full hardware replacement, or a professional repair — plus honest notes on what DIY fixes cannot solve, like internal drum corrosion that requires machining. We’ll reference real torque specs, cable travel measurements, and wear limits so you can verify each component against factory data rather than guessing.
What makes this guide different is the entity-first approach: instead of a generic “how to fix brakes” list, we’re mapping the emergency brake as a system with distinct sub-entities — the lever, the equalizer, the cables, the actuating lever, and the drum shoes — and showing how each one fails independently. You’ll learn which symptoms point to which component, how to test each one in under ten minutes, and when the cheapest fix (a cable lube) is actually the wrong fix. By the end, you’ll be able to diagnose 90% of emergency brake problems yourself and walk into a shop with a precise repair plan — or confidently complete the repair in your driveway.
What Is the Emergency Brake and How Does It Differ from Your Service Brakes?
Your emergency brake—also called the parking brake—is a separate brake system designed to hold your vehicle stationary when parked. It works independently from your main service brakes. While the service brake system uses hydraulic pressure to stop a moving car, the emergency brake uses mechanical force to lock the rear wheels. This is a critical distinction: the service brake is designed for slowing and stopping a moving vehicle, while the emergency brake is primarily designed to keep a stationary vehicle from rolling.
The Three Core Functions: Parking, Emergency Stopping, and Hill-Holding
The emergency brake serves three distinct purposes. First, it is a parking brake: it holds your car in place when parked, especially on inclines. Second, it is an emergency stopping mechanism: if your hydraulic service brakes fail completely, the emergency brake can bring the vehicle to a stop, albeit with reduced effectiveness and requiring careful modulation to avoid skidding. Third, it is a hill-holding aid: on steep grades, engaging the emergency brake prevents the vehicle from rolling backward when you release the foot brake and engage the clutch or accelerator.
Mechanical Cable Systems vs. Electronic Parking Brakes (EPB)
Traditional emergency brakes use a mechanical cable system. A lever (or foot pedal) pulls a cable that runs to the rear wheels, where it actuates the brake shoes (in drum brakes) or a small lever on the caliper (in disc brakes). Modern vehicles increasingly use an Electronic Parking Brake (EPB), which replaces the cable with an electric motor mounted on the rear caliper or a cable-pulling actuator. EPBs are activated by a button or switch and often integrate with hill-hold and auto-brake features. The diagnostic approach differs significantly: cable systems are checked for tension, stretch, and corrosion, while EPBs require scanning for fault codes and testing the actuator motor.
Why the Emergency Brake Is Not a Replacement for Your Foot Brake
It is crucial to understand that the emergency brake is not a substitute for the service brake during normal driving. The emergency brake is designed for low-speed, emergency, or stationary use. Using it to stop the vehicle at speed can cause loss of control, especially on slippery surfaces, and can rapidly wear out the rear brake components. The service brake system is far more powerful and is designed for repeated, high-speed stops. The emergency brake is a backup, not a primary system.
7 Most Common Emergency Brake Problems and Their Root Causes
This section details the seven most frequent emergency brake failures, their symptoms, and the underlying mechanical or electrical causes. Each problem is mapped to the specific component that is failing, allowing you to target your diagnosis.
Problem 1: Lever Pulls Too High or Too Far
Symptom: The lever moves through an excessive range of travel before engaging, or the pedal goes too far down before the brake holds.
Root Causes: The most common cause is a stretched or out-of-adjustment cable. Over time, the cable stretches, increasing the slack in the system. Another cause is worn brake shoes or pads; as the friction material wears, the actuator must travel further to make contact. A third cause is a misadjusted equalizer, which balances tension between the two rear wheels. Finally, a seized or corroded cable can prevent the mechanism from returning to its rest position, making the effective travel longer.
Problem 2: Brake Won’t Engage or Hold the Car
Symptom: The lever engages, but the car still rolls on an incline, or the brake does not hold at all.
Root Causes: This is often caused by severely worn brake shoes or pads that have reached their wear limit. It can also be caused by a broken or snapped cable, a failed equalizer, or a seized caliper piston (in disc brake systems) that prevents the pads from clamping. In EPB systems, a failed actuator motor or a blown fuse will prevent engagement. Also, oil or brake fluid contamination on the shoes or pads can drastically reduce friction, causing the brake to slip.
Problem 3: Brake Sticks or Drags After Release
Symptom: The rear wheels feel like they are dragging after the brake is released, the car pulls to one side, or you hear a grinding or rubbing noise.
Root Causes: A sticking cable is the primary culprit. Corrosion or lack of lubrication causes the cable to bind inside its sheath, preventing it from fully releasing. A seized caliper slide pin or a corroded drum brake actuating lever can also cause the brake to remain partially applied. In drum brakes, a broken return spring will prevent the shoes from retracting. This problem leads to premature wear and heat buildup in the rear brakes.
Problem 4: Brake Makes a Clicking or Ratcheting Noise
Symptom: A clicking sound is heard when the lever is pulled or released, or a continuous clicking occurs while driving.
Root Causes: The ratcheting mechanism inside the lever handle is the most common source. If the pawl or gear teeth are worn or damaged, they will click as they slip. A loose or misaligned cable can also cause a clicking sound as it moves against the chassis. In some cases, a worn wheel bearing can be mistaken for a brake clicking noise, so it is important to isolate the source.
Problem 5: Brake Pedal Sinks to the Floor (Foot-Operated)
Symptom: In vehicles with a foot-operated parking brake, the pedal goes all the way to the floor without engaging the brake.
Root Causes: This is almost always a cable tension issue. The cable has either stretched beyond its adjustment range, or the self-adjusting mechanism (if equipped) has failed. A broken cable is another possibility. Unlike hydraulic brakes, a sinking pedal in a mechanical system is not a fluid leak; it is a loss of mechanical tension.
Problem 6: EPB Warning Light or Error Message
Symptom: The dashboard displays a warning light or message indicating a parking brake fault, and the EPB may not engage or disengage.
Root Causes: EPB systems are electronically monitored. Common causes include a faulty switch, a failed actuator motor, a
broken wiring harness, a blown fuse, or a low battery voltage that prevents the motor from operating. Also, worn brake pads can trigger the EPB’s wear sensor, causing a warning light even if the actuator itself is functional. A diagnostic scan tool is required to read the specific fault code and pinpoint the failed component.
Problem 7: Rear Brakes Overheat or Emit Burning Smell
Problem 7: Details
Symptom: A burning odor or excessive heat emanating from the rear wheels after driving, often accompanied by reduced fuel economy or a dragging sensation.
Root Causes: This is typically caused by a stuck or partially engaged emergency brake. A seized cable, a corroded caliper slide pin, or a broken return spring in drum brakes can keep the brake applied while driving. This constant friction generates extreme heat, which can damage the wheel bearings, warp brake rotors, or glaze the brake shoes. In severe cases, it can even ignite nearby flammable materials.
Diagnostic Steps: How to Test Each Component in Under 10 Minutes
This section provides a step-by-step diagnostic procedure that requires only basic hand tools. Each test isolates a specific component, allowing you to identify the root cause of your emergency brake problem quickly and accurately.
Step 1: Visual Inspection of Cables and Hardware
Start by visually inspecting the emergency brake cables from the lever to the rear wheels. Look for kinks, fraying, rust, or corrosion on the exposed cable. Check the rubber grommets where the cable enters the backing plate or caliper for cracks or damage. Inspect the equalizer (the Y-shaped connector that splits the cable to both wheels) for rust or binding. If any cable shows significant corrosion or fraying, replacement is recommended.
Step 2: Lever Travel and Tension Test
With the engine off and the vehicle on level ground, pull the emergency brake lever slowly. Count the number of clicks it takes to fully engage. Most manufacturers specify a range (typically 5-8 clicks). If the lever travels beyond this range, the cable is stretched or the shoes are worn. For foot-operated pedals, press the pedal and measure the travel distance. Compare your measurement to the factory specification in your repair manual.
Step 3: Cable Free-Play and Return Test
Release the emergency brake completely. At the equalizer, check for slack in the cable. There should be a small amount of free-play (typically 1-2 mm) before the cable begins to pull. Then, have an assistant pull the lever while you watch the equalizer and cables. The cables should move smoothly and simultaneously. When the lever is released, the cables should return to their rest position immediately. If a cable lags or sticks, it is corroded and needs lubrication or replacement.
Step 4: Wheel Spin Test
Jack up the rear of the vehicle and support it securely on jack stands. With the emergency brake released, spin each rear wheel by hand. They should spin freely with minimal resistance. If a wheel is difficult to turn, the brake is dragging. Then, engage the emergency brake and attempt to spin the wheels. Both wheels should lock firmly. If one wheel locks but the other does not, the issue is on the non-locking side (cable, shoe, or caliper).
Step 5: Drum Brake Shoe and Actuator Inspection
If your vehicle has rear drum brakes, remove the drum to inspect the shoes. Measure the lining thickness; if it is below the minimum specification (usually 1.5 mm), replace the shoes. Check the actuating lever and the star wheel adjuster for corrosion and free movement. Inspect the return springs for signs of fatigue or breakage. Lubricate the contact points with high-temperature brake grease.
Step 6: Disc Brake Caliper and EPB Motor Test
Step 6: Details
For vehicles with rear disc brakes and a mechanical emergency brake, inspect the caliper lever arm. It should move freely and return to its stop position. For EPB systems, use a diagnostic scan tool to command the actuator to open and close. Listen for the motor whirring and observe the piston movement. If the motor does not respond, check the wiring and connector for power and ground signals. A failed motor requires caliper replacement.
Repair Options: Adjustment, Replacement, or Professional Service
Once you have identified the root cause, you can decide whether to perform a simple adjustment, a full component replacement, or seek professional help. This decision tree will guide you based on the severity and complexity of the issue.
When a Simple Cable Adjustment Is the Right Fix
If your lever pulls too high but the brake holds firmly, and the shoes or pads have adequate thickness, a cable adjustment is likely sufficient. This involves tightening the adjusting nut at the equalizer to remove excess slack. This is a low-cost, low-skill repair that can be completed in under 30 minutes. However, if the cable is corroded or stretched beyond its adjustment range, tightening will not solve the problem permanently.
When to Replace Cables, Shoes, or Calipers
If the cable is frayed, kinked, or corroded, it must be replaced. Similarly, if the brake shoes are worn below the minimum thickness, or if the drum surface is scored or glazed, replacement is necessary. For disc brakes, if the caliper lever arm is seized or the EPB motor has failed, the caliper must be replaced. These repairs require more time and specialized tools, such as a brake drum puller or a caliper compression tool, but are still within the reach of a competent DIY mechanic.
When to Call a Professional
Some situations warrant professional intervention. If you encounter internal drum corrosion that requires machining, or if the backing plate is rusted through, a machine shop is needed. EPB system faults that require advanced diagnostic equipment and software updates are best handled by a dealer or specialized shop. Also, if you are uncomfortable working with brake systems or lack the necessary tools, professional service is the safer choice. Brakes are a critical safety system; a botched repair can lead to catastrophic failure.
Preventive Maintenance and Safety Inspection Standards
Regular maintenance is the most effective way to prevent emergency brake problems. This section outlines a preventive schedule and the safety standards used in professional inspections.
Annual Lubrication and Cable Inspection
At least once a year, or every 12,000 miles, lubricate the emergency brake cable along its entire length using a cable lubricant or spray. This prevents corrosion and ensures smooth operation. Inspect the cable for any signs of wear, kinking, or damage. Pay special attention to the areas where the cable passes through the chassis or underbody, as these are prone to rust and abrasion.
Brake Shoe and Pad Wear Limits
During routine brake service, inspect the rear brake shoes and pads. The minimum lining thickness for shoes is typically 1.5 mm, while pads should be replaced at 3 mm. If the friction material is worn to these limits, replace them immediately. Also, check the drum or rotor surface for scoring, cracks, or heat discoloration. A glazed or blue-tinted surface indicates overheating and requires resurfacing or replacement.
Safety Inspection Standards and Legal Requirements
Most jurisdictions require the emergency brake to hold a vehicle stationary on a specified incline (often 20%) when fully engaged. During a safety inspection, a technician will test the brake’s holding power and check for excessive lever travel. The brake must also release fully without dragging. Familiarize yourself with your local inspection standards to ensure your vehicle passes. A properly functioning emergency brake is not just a convenience; it is a legal requirement for roadworthiness.
EPB System Software Updates and Calibration
For vehicles with electronic parking brakes, manufacturers occasionally release software updates that improve actuator performance or fix known bugs. Check with your dealer for any outstanding recalls or updates. Also, after replacing brake pads or rotors on an EPB-equipped vehicle, the system must be recalibrated using a diagnostic tool to reset the piston position and wear sensor. Failure to do so can result in a warning light or improper brake engagement.
Emergency Brake vs. Transmission Park Pawl: Understanding the Difference
Emergency Brake Problems: A Complete Diagnostic Guide for DIY Car Owners

The emergency brake — also called the parking brake, handbrake, or e-brake — is a mechanical (or electromechanical) fallback system designed to hold your vehicle stationary when parked and to provide a secondary braking method if the primary hydraulic system fails. Unlike your service brakes, which rely on brake fluid and calipers at all four wheels, the emergency brake typically operates a cable-and-drum mechanism on the rear wheels (or an electric motor on modern cars) that bypasses the hydraulic circuit entirely. That fundamental design difference is why emergency brake problems feel, sound, and behave so differently from normal brake issues — and why diagnosing them requires a distinct set of checks.
In this guide, we’re covering the full anatomy of emergency brake problems: the symptoms (sticking, dragging, clicking, or a pedal that sinks to the floor), the root causes (stretched cables, corroded hardware, seized calipers, or failed electric actuators), and the exact diagnostic steps you can perform with basic hand tools. You’ll also get a decision tree for choosing between a cable adjustment, a full hardware replacement, or a professional repair — plus honest notes on what DIY fixes cannot solve, like internal drum corrosion that requires machining. We’ll reference real torque specs, cable travel measurements, and wear limits so you can verify each component against factory data rather than guessing.
What makes this guide different is the entity-first approach: instead of a generic “how to fix brakes” list, we’re mapping the emergency brake as a system with distinct sub-entities — the lever, the equalizer, the cables, the actuating lever, and the drum shoes — and showing how each one fails independently. You’ll learn which symptoms point to which component, how to test each one in under ten minutes, and when the cheapest fix (a cable lube) is actually the wrong fix. By the end, you’ll be able to diagnose 90% of emergency brake problems yourself and walk into a shop with a precise repair plan — or confidently complete the repair in your driveway.
What Is the Emergency Brake and How Does It Differ from Your Service Brakes?
Your emergency brake—also called the parking brake—is a separate brake system designed to hold your vehicle stationary when parked. It works independently from your main service brakes. While the service brake system uses hydraulic pressure to stop a moving car, the emergency brake uses mechanical force to lock the rear wheels. This is a critical distinction: the service brake is designed for slowing and stopping a moving vehicle, while the emergency brake is primarily designed to keep a stationary vehicle from rolling.
The Three Core Functions: Parking, Emergency Stopping, and Hill-Holding
The emergency brake serves three distinct purposes. First, it is a parking brake: it holds your car in place when parked, especially on inclines. Second, it is an emergency stopping mechanism: if your hydraulic service brakes fail completely, the emergency brake can bring the vehicle to a stop, albeit with reduced effectiveness and requiring careful modulation to avoid skidding. Third, it is a hill-holding aid: on steep grades, engaging the emergency brake prevents the vehicle from rolling backward when you release the foot brake and engage the clutch or accelerator.
Mechanical Cable Systems vs. Electronic Parking Brakes (EPB)
Traditional emergency brakes use a mechanical cable system. A lever (or foot pedal) pulls a cable that runs to the rear wheels, where it actuates the brake shoes (in drum brakes) or a small lever on the caliper (in disc brakes). Modern vehicles increasingly use an Electronic Parking Brake (EPB), which replaces the cable with an electric motor mounted on the rear caliper or a cable-pulling actuator. EPBs are activated by a button or switch and often integrate with hill-hold and auto-brake features. The diagnostic approach differs significantly: cable systems are checked for tension, stretch, and corrosion, while EPBs require scanning for fault codes and testing the actuator motor.
Why the Emergency Brake Is Not a Replacement for Your Foot Brake
It is crucial to understand that the emergency brake is not a substitute for the service brake during normal driving. The emergency brake is designed for low-speed, emergency, or stationary use. Using it to stop the vehicle at speed can cause loss of control, especially on slippery surfaces, and can rapidly wear out the rear brake components. The service brake system is far more powerful and is designed for repeated, high-speed stops. The emergency brake is a backup, not a primary system.
7 Most Common Emergency Brake Problems and Their Root Causes
This section details the seven most frequent emergency brake failures, their symptoms, and the underlying mechanical or electrical causes. Each problem is mapped to the specific component that is failing, allowing you to target your diagnosis.
Problem 1: Lever Pulls Too High or Too Far
Symptom: The lever moves through an excessive range of travel before engaging, or the pedal goes too far down before the brake holds.
Root Causes: The most common cause is a stretched or out-of-adjustment cable. Over time, the cable stretches, increasing the slack in the system. Another cause is worn brake shoes or pads; as the friction material wears, the actuator must travel further to make contact. A third cause is a misadjusted equalizer, which balances tension between the two rear wheels. Finally, a seized or corroded cable can prevent the mechanism from returning to its rest position, making the effective travel longer.
Problem 2: Brake Won’t Engage or Hold the Car
Symptom: The lever engages, but the car still rolls on an incline, or the brake does not hold at all.
Root Causes: This is often caused by severely worn brake shoes or pads that have reached their wear limit. It can also be caused by a broken or snapped cable, a failed equalizer, or a seized caliper piston (in disc brake systems) that prevents the pads from clamping. In EPB systems, a failed actuator motor or a blown fuse will prevent engagement. Also, oil or brake fluid contamination on the shoes or pads can drastically reduce friction, causing the brake to slip.
Problem 3: Brake Sticks or Drags After Release
Symptom: The rear wheels feel like they are dragging after the brake is released, the car pulls to one side, or you hear a grinding or rubbing noise.
Root Causes: A sticking cable is the primary culprit. Corrosion or lack of lubrication causes the cable to bind inside its sheath, preventing it from fully releasing. A seized caliper slide pin or a corroded drum brake actuating lever can also cause the brake to remain partially applied. In drum brakes, a broken return spring will prevent the shoes from retracting. This problem leads to premature wear and heat buildup in the rear brakes.
Problem 4: Brake Makes a Clicking or Ratcheting Noise
Symptom: A clicking sound is heard when the lever is pulled or released, or a continuous clicking occurs while driving.
Root Causes: The ratcheting mechanism inside the lever handle is the most common source. If the pawl or gear teeth are worn or damaged, they will click as they slip. A loose or misaligned cable can also cause a clicking sound as it moves against the chassis. In some cases, a worn wheel bearing can be mistaken for a brake clicking noise, so it is important to isolate the source.
Problem 5: Brake Pedal Sinks to the Floor (Foot-Operated)
Symptom: In vehicles with a foot-operated parking brake, the pedal goes all the way to the floor without engaging the brake.
Root Causes: This is almost always a cable tension issue. The cable has either stretched beyond its adjustment range, or the self-adjusting mechanism (if equipped) has failed. A broken cable is another possibility. Unlike hydraulic brakes, a sinking pedal in a mechanical system is not a fluid leak; it is a loss of mechanical tension.
Problem 6: EPB Warning Light or Error Message
Symptom: The dashboard displays a warning light or message indicating a parking brake fault, and the EPB may not engage or disengage.
Root Causes: EPB systems are electronically monitored. Common causes include a faulty switch, a failed actuator motor, a
broken wiring harness, a blown fuse, or a low battery voltage that prevents the motor from operating. Also, worn brake pads can trigger the EPB’s wear sensor, causing a warning light even if the actuator itself is functional. A diagnostic scan tool is required to read the specific fault code and pinpoint the failed component.
Problem 7: Rear Brakes Overheat or Emit Burning Smell
Problem 7: Details
Symptom: A burning odor or excessive heat emanating from the rear wheels after driving, often accompanied by reduced fuel economy or a dragging sensation.
Root Causes: This is typically caused by a stuck or partially engaged emergency brake. A seized cable, a corroded caliper slide pin, or a broken return spring in drum brakes can keep the brake applied while driving. This constant friction generates extreme heat, which can damage the wheel bearings, warp brake rotors, or glaze the brake shoes. In severe cases, it can even ignite nearby flammable materials.
Diagnostic Steps: How to Test Each Component in Under 10 Minutes
This section provides a step-by-step diagnostic procedure that requires only basic hand tools. Each test isolates a specific component, allowing you to identify the root cause of your emergency brake problem quickly and accurately.
Step 1: Visual Inspection of Cables and Hardware
Start by visually inspecting the emergency brake cables from the lever to the rear wheels. Look for kinks, fraying, rust, or corrosion on the exposed cable. Check the rubber grommets where the cable enters the backing plate or caliper for cracks or damage. Inspect the equalizer (the Y-shaped connector that splits the cable to both wheels) for rust or binding. If any cable shows significant corrosion or fraying, replacement is recommended.
Step 2: Lever Travel and Tension Test
With the engine off and the vehicle on level ground, pull the emergency brake lever slowly. Count the number of clicks it takes to fully engage. Most manufacturers specify a range (typically 5-8 clicks). If the lever travels beyond this range, the cable is stretched or the shoes are worn. For foot-operated pedals, press the pedal and measure the travel distance. Compare your measurement to the factory specification in your repair manual.
Step 3: Cable Free-Play and Return Test
Release the emergency brake completely. At the equalizer, check for slack in the cable. There should be a small amount of free-play (typically 1-2 mm) before the cable begins to pull. Then, have an assistant pull the lever while you watch the equalizer and cables. The cables should move smoothly and simultaneously. When the lever is released, the cables should return to their rest position immediately. If a cable lags or sticks, it is corroded and needs lubrication or replacement.
Step 4: Wheel Spin Test
Jack up the rear of the vehicle and support it securely on jack stands. With the emergency brake released, spin each rear wheel by hand. They should spin freely with minimal resistance. If a wheel is difficult to turn, the brake is dragging. Then, engage the emergency brake and attempt to spin the wheels. Both wheels should lock firmly. If one wheel locks but the other does not, the issue is on the non-locking side (cable, shoe, or caliper).
Step 5: Drum Brake Shoe and Actuator Inspection
If your vehicle has rear drum brakes, remove the drum to inspect the shoes. Measure the lining thickness; if it is below the minimum specification (usually 1.5 mm), replace the shoes. Check the actuating lever and the star wheel adjuster for corrosion and free movement. Inspect the return springs for signs of fatigue or breakage. Lubricate the contact points with high-temperature brake grease.
Step 6: Disc Brake Caliper and EPB Motor Test
Step 6: Details
For vehicles with rear disc brakes and a mechanical emergency brake, inspect the caliper lever arm. It should move freely and return to its stop position. For EPB systems, use a diagnostic scan tool to command the actuator to open and close. Listen for the motor whirring and observe the piston movement. If the motor does not respond, check the wiring and connector for power and ground signals. A failed motor requires caliper replacement.
Repair Options: Adjustment, Replacement, or Professional Service
Once you have identified the root cause, you can decide whether to perform a simple adjustment, a full component replacement, or seek professional help. This decision tree will guide you based on the severity and complexity of the issue.
When a Simple Cable Adjustment Is the Right Fix
If your lever pulls too high but the brake holds firmly, and the shoes or pads have adequate thickness, a cable adjustment is likely sufficient. This involves tightening the adjusting nut at the equalizer to remove excess slack. This is a low-cost, low-skill repair that can be completed in under 30 minutes. However, if the cable is corroded or stretched beyond its adjustment range, tightening will not solve the problem permanently.
When to Replace Cables, Shoes, or Calipers
If the cable is frayed, kinked, or corroded, it must be replaced. Similarly, if the brake shoes are worn below the minimum thickness, or if the drum surface is scored or glazed, replacement is necessary. For disc brakes, if the caliper lever arm is seized or the EPB motor has failed, the caliper must be replaced. These repairs require more time and specialized tools, such as a brake drum puller or a caliper compression tool, but are still within the reach of a competent DIY mechanic.
When to Call a Professional
Some situations warrant professional intervention. If you encounter internal drum corrosion that requires machining, or if the backing plate is rusted through, a machine shop is needed. EPB system faults that require advanced diagnostic equipment and software updates are best handled by a dealer or specialized shop. Also, if you are uncomfortable working with brake systems or lack the necessary tools, professional service is the safer choice. Brakes are a critical safety system; a botched repair can lead to catastrophic failure.
Preventive Maintenance and Safety Inspection Standards
Regular maintenance is the most effective way to prevent emergency brake problems. This section outlines a preventive schedule and the safety standards used in professional inspections.
Annual Lubrication and Cable Inspection
At least once a year, or every 12,000 miles, lubricate the emergency brake cable along its entire length using a cable lubricant or spray. This prevents corrosion and ensures smooth operation. Inspect the cable for any signs of wear, kinking, or damage. Pay special attention to the areas where the cable passes through the chassis or underbody, as these are prone to rust and abrasion.
Brake Shoe and Pad Wear Limits
During routine brake service, inspect the rear brake shoes and pads. The minimum lining thickness for shoes is typically 1.5 mm, while pads should be replaced at 3 mm. If the friction material is worn to these limits, replace them immediately. Also, check the drum or rotor surface for scoring, cracks, or heat discoloration. A glazed or blue-tinted surface indicates overheating and requires resurfacing or replacement.
Safety Inspection Standards and Legal Requirements
Most jurisdictions require the emergency brake to hold a vehicle stationary on a specified incline (often 20%) when fully engaged. During a safety inspection, a technician will test the brake’s holding power and check for excessive lever travel. The brake must also release fully without dragging. Familiarize yourself with your local inspection standards to ensure your vehicle passes. A properly functioning emergency brake is not just a convenience; it is a legal requirement for roadworthiness.
EPB System Software Updates and Calibration
For vehicles with electronic parking brakes, manufacturers occasionally release software updates that improve actuator performance or fix known bugs. Check with your dealer for any outstanding recalls or updates. Also, after replacing brake pads or rotors on an EPB-equipped vehicle, the system must be recalibrated using a diagnostic tool to reset the piston position and wear sensor. Failure to do so can result in a warning light or improper brake engagement.
Emergency Brake vs. Transmission Park Pawl: Understanding the Difference
Emergency Brake Problems: A Complete Diagnostic Guide for DIY Car Owners
The emergency brake — also called the parking brake, handbrake, or e-brake — is a mechanical (or electromechanical) fallback system designed to hold your vehicle stationary when parked and to provide a secondary braking method if the primary hydraulic system fails. Unlike your service brakes, which rely on brake fluid and calipers at all four wheels, the emergency brake typically operates a cable-and-drum mechanism on the rear wheels (or an electric motor on modern cars) that bypasses the hydraulic circuit entirely. That fundamental design difference is why emergency brake problems feel, sound, and behave so differently from normal brake issues — and why diagnosing them requires a distinct set of checks.
In this guide, we’re covering the full anatomy of emergency brake problems: the symptoms (sticking, dragging, clicking, or a pedal that sinks to the floor), the root causes (stretched cables, corroded hardware, seized calipers, or failed electric actuators), and the exact diagnostic steps you can perform with basic hand tools. You’ll also get a decision tree for choosing between a cable adjustment, a full hardware replacement, or a professional repair — plus honest notes on what DIY fixes cannot solve, like internal drum corrosion that requires machining. We’ll reference real torque specs, cable travel measurements, and wear limits so you can verify each component against factory data rather than guessing.
What makes this guide different is the entity-first approach: instead of a generic “how to fix brakes” list, we’re mapping the emergency brake as a system with distinct sub-entities — the lever, the equalizer, the cables, the actuating lever, and the drum shoes — and showing how each one fails independently. You’ll learn which symptoms point to which component, how to test each one in under ten minutes, and when the cheapest fix (a cable lube) is actually the wrong fix. By the end, you’ll be able to diagnose 90% of emergency brake problems yourself and walk into a shop with a precise repair plan — or confidently complete the repair in your driveway.
What Is the Emergency Brake and How Does It Differ from Your Service Brakes?
Your emergency brake—also called the parking brake—is a separate brake system designed to hold your vehicle stationary when parked. It works independently from your main service brakes. While the service brake system uses hydraulic pressure to stop a moving car, the emergency brake uses mechanical force to lock the rear wheels. This is a critical distinction: the service brake is designed for slowing and stopping a moving vehicle, while the emergency brake is primarily designed to keep a stationary vehicle from rolling.
The Three Core Functions: Parking, Emergency Stopping, and Hill-Holding
The emergency brake serves three distinct purposes. First, it is a parking brake: it holds your car in place when parked, especially on inclines. Second, it is an emergency stopping mechanism: if your hydraulic service brakes fail completely, the emergency brake can bring the vehicle to a stop, albeit with reduced effectiveness and requiring careful modulation to avoid skidding. Third, it is a hill-holding aid: on steep grades, engaging the emergency brake prevents the vehicle from rolling backward when you release the foot brake and engage the clutch or accelerator.
Mechanical Cable Systems vs. Electronic Parking Brakes (EPB)
Traditional emergency brakes use a mechanical cable system. A lever (or foot pedal) pulls a cable that runs to the rear wheels, where it actuates the brake shoes (in drum brakes) or a small lever on the caliper (in disc brakes). Modern vehicles increasingly use an Electronic Parking Brake (EPB), which replaces the cable with an electric motor mounted on the rear caliper or a cable-pulling actuator. EPBs are activated by a button or switch and often integrate with hill-hold and auto-brake features. The diagnostic approach differs significantly: cable systems are checked for tension, stretch, and corrosion, while EPBs require scanning for fault codes and testing the actuator motor.
Why the Emergency Brake Is Not a Replacement for Your Foot Brake
It is crucial to understand that the emergency brake is not a substitute for the service brake during normal driving. The emergency brake is designed for low-speed, emergency, or stationary use. Using it to stop the vehicle at speed can cause loss of control, especially on slippery surfaces, and can rapidly wear out the rear brake components. The service brake system is far more powerful and is designed for repeated, high-speed stops. The emergency brake is a backup, not a primary system.
7 Most Common Emergency Brake Problems and Their Root Causes
This section details the seven most frequent emergency brake failures, their symptoms, and the underlying mechanical or electrical causes. Each problem is mapped to the specific component that is failing, allowing you to target your diagnosis.
Problem 1: Lever Pulls Too High or Too Far
Symptom: The lever moves through an excessive range of travel before engaging, or the pedal goes too far down before the brake holds.
Root Causes: The most common cause is a stretched or out-of-adjustment cable. Over time, the cable stretches, increasing the slack in the system. Another cause is worn brake shoes or pads; as the friction material wears, the actuator must travel further to make contact. A third cause is a misadjusted equalizer, which balances tension between the two rear wheels. Finally, a seized or corroded cable can prevent the mechanism from returning to its rest position, making the effective travel longer.
Problem 2: Brake Won’t Engage or Hold the Car
Symptom: The lever engages, but the car still rolls on an incline, or the brake does not hold at all.
Root Causes: This is often caused by severely worn brake shoes or pads that have reached their wear limit. It can also be caused by a broken or snapped cable, a failed equalizer, or a seized caliper piston (in disc brake systems) that prevents the pads from clamping. In EPB systems, a failed actuator motor or a blown fuse will prevent engagement. Also, oil or brake fluid contamination on the shoes or pads can drastically reduce friction, causing the brake to slip.
Problem 3: Brake Sticks or Drags After Release
Symptom: The rear wheels feel like they are dragging after the brake is released, the car pulls to one side, or you hear a grinding or rubbing noise.
Root Causes: A sticking cable is the primary culprit. Corrosion or lack of lubrication causes the cable to bind inside its sheath, preventing it from fully releasing. A seized caliper slide pin or a corroded drum brake actuating lever can also cause the brake to remain partially applied. In drum brakes, a broken return spring will prevent the shoes from retracting. This problem leads to premature wear and heat buildup in the rear brakes.
Problem 4: Brake Makes a Clicking or Ratcheting Noise
Symptom: A clicking sound is heard when the lever is pulled or released, or a continuous clicking occurs while driving.
Root Causes: The ratcheting mechanism inside the lever handle is the most common source. If the pawl or gear teeth are worn or damaged, they will click as they slip. A loose or misaligned cable can also cause a clicking sound as it moves against the chassis. In some cases, a worn wheel bearing can be mistaken for a brake clicking noise, so it is important to isolate the source.
Problem 5: Brake Pedal Sinks to the Floor (Foot-Operated)
Symptom: In vehicles with a foot-operated parking brake, the pedal goes all the way to the floor without engaging the brake.
Root Causes: This is almost always a cable tension issue. The cable has either stretched beyond its adjustment range, or the self-adjusting mechanism (if equipped) has failed. A broken cable is another possibility. Unlike hydraulic brakes, a sinking pedal in a mechanical system is not a fluid leak; it is a loss of mechanical tension.
Problem 6: EPB Warning Light or Error Message
Problem 6: Details
Symptom: The dashboard displays a warning light or message indicating a parking brake fault, and the EPB may not engage or disengage.
Root Causes: EPB systems are electronically monitored. Common causes include a faulty switch, a failed actuator motor, a
The emergency brake — also called the parking brake, handbrake, or e-brake — is a mechanical (or electromechanical) fallback system designed to hold your vehicle stationary when parked and to provide a secondary braking method if the primary hydraulic system fails. Unlike your service brakes, which rely on brake fluid and calipers at all four wheels, the emergency brake typically operates a cable-and-drum mechanism on the rear wheels (or an electric motor on modern cars) that bypasses the hydraulic circuit entirely. That fundamental design difference is why emergency brake problems feel, sound, and behave so differently from normal brake issues — and why diagnosing them requires a distinct set of checks.
In this guide, we’re covering the full anatomy of emergency brake problems: the symptoms (sticking, dragging, clicking, or a pedal that sinks to the floor), the root causes (stretched cables, corroded hardware, seized calipers, or failed electric actuators), and the exact diagnostic steps you can perform with basic hand tools. You’ll also get a decision tree for choosing between a cable adjustment, a full hardware replacement, or a professional repair — plus honest notes on what DIY fixes cannot solve, like internal drum corrosion that requires machining. We’ll reference real torque specs, cable travel measurements, and wear limits so you can verify each component against factory data rather than guessing.
What makes this guide different is the entity-first approach: instead of a generic “how to fix brakes” list, we’re mapping the emergency brake as a system with distinct sub-entities — the lever, the equalizer, the cables, the actuating lever, and the drum shoes — and showing how each one fails independently. You’ll learn which symptoms point to which component, how to test each one in under ten minutes, and when the cheapest fix (a cable lube) is actually the wrong fix. By the end, you’ll be able to diagnose 90% of emergency brake problems yourself and walk into a shop with a precise repair plan — or confidently complete the repair in your driveway.
What Is the Emergency Brake and How Does It Differ from Your Service Brakes?
Your emergency brake—also called the parking brake—is a separate brake system designed to hold your vehicle stationary when parked. It works independently from your main service brakes. While the service brake system uses hydraulic pressure to stop a moving car, the emergency brake uses mechanical force to lock the rear wheels. This is a critical distinction: the service brake is designed for slowing and stopping a moving vehicle, while the emergency brake is primarily designed to keep a stationary vehicle from rolling.
The Three Core Functions: Parking, Emergency Stopping, and Hill-Holding
The emergency brake serves three distinct purposes. First, it is a parking brake: it holds your car in place when parked, especially on inclines. Second, it is an emergency stopping mechanism: if your hydraulic service brakes fail completely, the emergency brake can bring the vehicle to a stop, albeit with reduced effectiveness and requiring careful modulation to avoid skidding. Third, it is a hill-holding aid: on steep grades, engaging the emergency brake prevents the vehicle from rolling backward when you release the foot brake and engage the clutch or accelerator.
Mechanical Cable Systems vs. Electronic Parking Brakes (EPB)
Traditional emergency brakes use a mechanical cable system. A lever (or foot pedal) pulls a cable that runs to the rear wheels, where it actuates the brake shoes (in drum brakes) or a small lever on the caliper (in disc brakes). Modern vehicles increasingly use an Electronic Parking Brake (EPB), which replaces the cable with an electric motor mounted on the rear caliper or a cable-pulling actuator. EPBs are activated by a button or switch and often integrate with hill-hold and auto-brake features. The diagnostic approach differs significantly: cable systems are checked for tension, stretch, and corrosion, while EPBs require scanning for fault codes and testing the actuator motor.
Why the Emergency Brake Is Not a Replacement for Your Foot Brake
It is crucial to understand that the emergency brake is not a substitute for the service brake during normal driving. The emergency brake is designed for low-speed, emergency, or stationary use. Using it to stop the vehicle at speed can cause loss of control, especially on slippery surfaces, and can rapidly wear out the rear brake components. The service brake system is far more powerful and is designed for repeated, high-speed stops. The emergency brake is a backup, not a primary system.
7 Most Common Emergency Brake Problems and Their Root Causes
This section details the seven most frequent emergency brake failures, their symptoms, and the underlying mechanical or electrical causes. Each problem is mapped to the specific component that is failing, allowing you to target your diagnosis.
Problem 1: Lever Pulls Too High or Too Far
Symptom: The lever moves through an excessive range of travel before engaging, or the pedal goes too far down before the brake holds.
Root Causes: The most common cause is a stretched or out-of-adjustment cable. Over time, the cable stretches, increasing the slack in the system. Another cause is worn brake shoes or pads; as the friction material wears, the actuator must travel further to make contact. A third cause is a misadjusted equalizer, which balances tension between the two rear wheels. Finally, a seized or corroded cable can prevent the mechanism from returning to its rest position, making the effective travel longer.
Problem 2: Brake Won’t Engage or Hold the Car
Symptom: The lever engages, but the car still rolls on an incline, or the brake does not hold at all.
Root Causes: This is often caused by severely worn brake shoes or pads that have reached their wear limit. It can also be caused by a broken or snapped cable, a failed equalizer, or a seized caliper piston (in disc brake systems) that prevents the pads from clamping. In EPB systems, a failed actuator motor or a blown fuse will prevent engagement. Also, oil or brake fluid contamination on the shoes or pads can drastically reduce friction, causing the brake to slip.
Problem 3: Brake Sticks or Drags After Release
Symptom: The rear wheels feel like they are dragging after the brake is released, the car pulls to one side, or you hear a grinding or rubbing noise.
Root Causes: A sticking cable is the primary culprit. Corrosion or lack of lubrication causes the cable to bind inside its sheath, preventing it from fully releasing. A seized caliper slide pin or a corroded drum brake actuating lever can also cause the brake to remain partially applied. In drum brakes, a broken return spring will prevent the shoes from retracting. This problem leads to premature wear and heat buildup in the rear brakes.
Problem 4: Brake Makes a Clicking or Ratcheting Noise
Symptom: A clicking sound is heard when the lever is pulled or released, or a continuous clicking occurs while driving.
Root Causes: The ratcheting mechanism inside the lever handle is the most common source. If the pawl or gear teeth are worn or damaged, they will click as they slip. A loose or misaligned cable can also cause a clicking sound as it moves against the chassis. In some cases, a worn wheel bearing can be mistaken for a brake clicking noise, so it is important to isolate the source.
Problem 5: Brake Pedal Sinks to the Floor (Foot-Operated)
Symptom: In vehicles with a foot-operated parking brake, the pedal goes all the way to the floor without engaging the brake.
Root Causes: This is almost always a cable tension issue. The cable has either stretched beyond its adjustment range, or the self-adjusting mechanism (if equipped) has failed. A broken cable is another possibility. Unlike hydraulic brakes, a sinking pedal in a mechanical system is not a fluid leak; it is a loss of mechanical tension.
Problem 6: EPB Warning Light or Error Message
Problem 6: Details
Symptom: The dashboard displays a warning light or message indicating a parking brake fault, and the EPB may not engage or disengage.
Root Causes: EPB systems are electronically monitored. Common causes include a faulty switch, a failed actuator motor, a
The emergency brake — also called the parking brake, handbrake, or e-brake — is a mechanical (or electromechanical) fallback system designed to hold your vehicle stationary when parked and to provide a secondary braking method if the primary hydraulic system fails. Unlike your service brakes, which rely on brake fluid and calipers at all four wheels, the emergency brake typically operates a cable-and-drum mechanism on the rear wheels (or an electric motor on modern cars) that bypasses the hydraulic circuit entirely. That fundamental design difference is why emergency brake problems feel, sound, and behave so differently from normal brake issues — and why diagnosing them requires a distinct set of checks.
In this guide, we’re covering the full anatomy of emergency brake problems: the symptoms (sticking, dragging, clicking, or a pedal that sinks to the floor), the root causes (stretched cables, corroded hardware, seized calipers, or failed electric actuators), and the exact diagnostic steps you can perform with basic hand tools. You’ll also get a decision tree for choosing between a cable adjustment, a full hardware replacement, or a professional repair — plus honest notes on what DIY fixes cannot solve, like internal drum corrosion that requires machining. We’ll reference real torque specs, cable travel measurements, and wear limits so you can verify each component against factory data rather than guessing.
What makes this guide different is the entity-first approach: instead of a generic “how to fix brakes” list, we’re mapping the emergency brake as a system with distinct sub-entities — the lever, the equalizer, the cables, the actuating lever, and the drum shoes — and showing how each one fails independently. You’ll learn which symptoms point to which component, how to test each one in under ten minutes, and when the cheapest fix (a cable lube) is actually the wrong fix. By the end, you’ll be able to diagnose 90% of emergency brake problems yourself and walk into a shop with a precise repair plan — or confidently complete the repair in your driveway.
What Is the Emergency Brake and How Does It Differ from Your Service Brakes?
Your emergency brake—also called the parking brake—is a separate brake system designed to hold your vehicle stationary when parked. It works independently from your main service brakes. While the service brake system uses hydraulic pressure to stop a moving car, the emergency brake uses mechanical force to lock the rear wheels. This is a critical distinction: the service brake is designed for slowing and stopping a moving vehicle, while the emergency brake is primarily designed to keep a stationary vehicle from rolling.
The Three Core Functions: Parking, Emergency Stopping, and Hill-Holding
The emergency brake serves three distinct purposes. First, it is a parking brake: it holds your car in place when parked, especially on inclines. Second, it is an emergency stopping mechanism: if your hydraulic service brakes fail completely, the emergency brake can bring the vehicle to a stop, albeit with reduced effectiveness and requiring careful modulation to avoid skidding. Third, it is a hill-holding aid: on steep grades, engaging the emergency brake prevents the vehicle from rolling backward when you release the foot brake and engage the clutch or accelerator.
Mechanical Cable Systems vs. Electronic Parking Brakes (EPB)
Traditional emergency brakes use a mechanical cable system. A lever (or foot pedal) pulls a cable that runs to the rear wheels, where it actuates the brake shoes (in drum brakes) or a small lever on the caliper (in disc brakes). Modern vehicles increasingly use an Electronic Parking Brake (EPB), which replaces the cable with an electric motor mounted on the rear caliper or a cable-pulling actuator. EPBs are activated by a button or switch and often integrate with hill-hold and auto-brake features. The diagnostic approach differs significantly: cable systems are checked for tension, stretch, and corrosion, while EPBs require scanning for fault codes and testing the actuator motor.
Why the Emergency Brake Is Not a Replacement for Your Foot Brake
It is crucial to understand that the emergency brake is not a substitute for the service brake during normal driving. The emergency brake is designed for low-speed, emergency, or stationary use. Using it to stop the vehicle at speed can cause loss of control, especially on slippery surfaces, and can rapidly wear out the rear brake components. The service brake system is far more powerful and is designed for repeated, high-speed stops. The emergency brake is a backup, not a primary system.
7 Most Common Emergency Brake Problems and Their Root Causes
This section details the seven most frequent emergency brake failures, their symptoms, and the underlying mechanical or electrical causes. Each problem is mapped to the specific component that is failing, allowing you to target your diagnosis.
Problem 1: Lever Pulls Too High or Too Far
Symptom: The lever moves through an excessive range of travel before engaging, or the pedal goes too far down before the brake holds.
Root Causes: The most common cause is a stretched or out-of-adjustment cable. Over time, the cable stretches, increasing the slack in the system. Another cause is worn brake shoes or pads; as the friction material wears, the actuator must travel further to make contact. A third cause is a misadjusted equalizer, which balances tension between the two rear wheels. Finally, a seized or corroded cable can prevent the mechanism from returning to its rest position, making the effective travel longer.
Problem 2: Brake Won’t Engage or Hold the Car
Symptom: The lever engages, but the car still rolls on an incline, or the brake does not hold at all.
Root Causes: This is often caused by severely worn brake shoes or pads that have reached their wear limit. It can also be caused by a broken or snapped cable, a failed equalizer, or a seized caliper piston (in disc brake systems) that prevents the pads from clamping. In EPB systems, a failed actuator motor or a blown fuse will prevent engagement. Also, oil or brake fluid contamination on the shoes or pads can drastically reduce friction, causing the brake to slip.
Problem 3: Brake Sticks or Drags After Release
Symptom: The rear wheels feel like they are dragging after the brake is released, the car pulls to one side, or you hear a grinding or rubbing noise.
Root Causes: A sticking cable is the primary culprit. Corrosion or lack of lubrication causes the cable to bind inside its sheath, preventing it from fully releasing. A seized caliper slide pin or a corroded drum brake actuating lever can also cause the brake to remain partially applied. In drum brakes, a broken return spring will prevent the shoes from retracting. This problem leads to premature wear and heat buildup in the rear brakes.
Problem 4: Brake Makes a Clicking or Ratcheting Noise
Symptom: A clicking sound is heard when the lever is pulled or released, or a continuous clicking occurs while driving.
Root Causes: The ratcheting mechanism inside the lever handle is the most common source. If the pawl or gear teeth are worn or damaged, they will click as they slip. A loose or misaligned cable can also cause a clicking sound as it moves against the chassis. In some cases, a worn wheel bearing can be mistaken for a brake clicking noise, so it is important to isolate the source.
Problem 5: Brake Pedal Sinks to the Floor (Foot-Operated)
Symptom: In vehicles with a foot-operated parking brake, the pedal goes all the way to the floor without engaging the brake.
Root Causes: This is almost always a cable tension issue. The cable has either stretched beyond its adjustment range, or the self-adjusting mechanism (if equipped) has failed. A broken cable is another possibility. Unlike hydraulic brakes, a sinking pedal in a mechanical system is not a fluid leak; it is a loss of mechanical tension.
Problem 6: EPB Warning Light or Error Message
Problem 6: Details
Symptom: The dashboard displays a warning light or message indicating a parking brake fault, and the EPB may not engage or disengage.
Root Causes: EPB systems are electronically monitored. Common causes include a faulty switch, a failed actuator motor, a
The emergency brake — also called the parking brake, handbrake, or e-brake — is a mechanical (or electromechanical) fallback system designed to hold your vehicle stationary when parked and to provide a secondary braking method if the primary hydraulic system fails. Unlike your service brakes, which rely on brake fluid and calipers at all four wheels, the emergency brake typically operates a cable-and-drum mechanism on the rear wheels (or an electric motor on modern cars) that bypasses the hydraulic circuit entirely. That fundamental design difference is why emergency brake problems feel, sound, and behave so differently from normal brake issues — and why diagnosing them requires a distinct set of checks.
In this guide, we’re covering the full anatomy of emergency brake problems: the symptoms (sticking, dragging, clicking, or a pedal that sinks to the floor), the root causes (stretched cables, corroded hardware, seized calipers, or failed electric actuators), and the exact diagnostic steps you can perform with basic hand tools. You’ll also get a decision tree for choosing between a cable adjustment, a full hardware replacement, or a professional repair — plus honest notes on what DIY fixes cannot solve, like internal drum corrosion that requires machining. We’ll reference real torque specs, cable travel measurements, and wear limits so you can verify each component against factory data rather than guessing.
What makes this guide different is the entity-first approach: instead of a generic “how to fix brakes” list, we’re mapping the emergency brake as a system with distinct sub-entities — the lever, the equalizer, the cables, the actuating lever, and the drum shoes — and showing how each one fails independently. You’ll learn which symptoms point to which component, how to test each one in under ten minutes, and when the cheapest fix (a cable lube) is actually the wrong fix. By the end, you’ll be able to diagnose 90% of emergency brake problems yourself and walk into a shop with a precise repair plan — or confidently complete the repair in your driveway.
What Is the Emergency Brake and How Does It Differ from Your Service Brakes?
Your emergency brake—also called the parking brake—is a separate brake system designed to hold your vehicle stationary when parked. It works independently from your main service brakes. While the service brake system uses hydraulic pressure to stop a moving car, the emergency brake uses mechanical force to lock the rear wheels. This is a critical distinction: the service brake is designed for slowing and stopping a moving vehicle, while the emergency brake is primarily designed to keep a stationary vehicle from rolling.
The Three Core Functions: Parking, Emergency Stopping, and Hill-Holding
The emergency brake serves three distinct purposes. First, it is a parking brake: it holds your car in place when parked, especially on inclines. Second, it is an emergency stopping mechanism: if your hydraulic service brakes fail completely, the emergency brake can bring the vehicle to a stop, albeit with reduced effectiveness and requiring careful modulation to avoid skidding. Third, it is a hill-holding aid: on steep grades, engaging the emergency brake prevents the vehicle from rolling backward when you release the foot brake and engage the clutch or accelerator.
Mechanical Cable Systems vs. Electronic Parking Brakes (EPB)
Traditional emergency brakes use a mechanical cable system. A lever (or foot pedal) pulls a cable that runs to the rear wheels, where it actuates the brake shoes (in drum brakes) or a small lever on the caliper (in disc brakes). Modern vehicles increasingly use an Electronic Parking Brake (EPB), which replaces the cable with an electric motor mounted on the rear caliper or a cable-pulling actuator. EPBs are activated by a button or switch and often integrate with hill-hold and auto-brake features. The diagnostic approach differs significantly: cable systems are checked for tension, stretch, and corrosion, while EPBs require scanning for fault codes and testing the actuator motor.
Why the Emergency Brake Is Not a Replacement for Your Foot Brake
It is crucial to understand that the emergency brake is not a substitute for the service brake during normal driving. The emergency brake is designed for low-speed, emergency, or stationary use. Using it to stop the vehicle at speed can cause loss of control, especially on slippery surfaces, and can rapidly wear out the rear brake components. The service brake system is far more powerful and is designed for repeated, high-speed stops. The emergency brake is a backup, not a primary system.
7 Most Common Emergency Brake Problems and Their Root Causes
This section details the seven most frequent emergency brake failures, their symptoms, and the underlying mechanical or electrical causes. Each problem is mapped to the specific component that is failing, allowing you to target your diagnosis.
Problem 1: Lever Pulls Too High or Too Far
Symptom: The lever moves through an excessive range of travel before engaging, or the pedal goes too far down before the brake holds.
Root Causes: The most common cause is a stretched or out-of-adjustment cable. Over time, the cable stretches, increasing the slack in the system. Another cause is worn brake shoes or pads; as the friction material wears, the actuator must travel further to make contact. A third cause is a misadjusted equalizer, which balances tension between the two rear wheels. Finally, a seized or corroded cable can prevent the mechanism from returning to its rest position, making the effective travel longer.
Problem 2: Brake Won’t Engage or Hold the Car
Symptom: The lever engages, but the car still rolls on an incline, or the brake does not hold at all.
Root Causes: This is often caused by severely worn brake shoes or pads that have reached their wear limit. It can also be caused by a broken or snapped cable, a failed equalizer, or a seized caliper piston (in disc brake systems) that prevents the pads from clamping. In EPB systems, a failed actuator motor or a blown fuse will prevent engagement. Also, oil or brake fluid contamination on the shoes or pads can drastically reduce friction, causing the brake to slip.
Problem 3: Brake Sticks or Drags After Release
Symptom: The rear wheels feel like they are dragging after the brake is released, the car pulls to one side, or you hear a grinding or rubbing noise.
Root Causes: A sticking cable is the primary culprit. Corrosion or lack of lubrication causes the cable to bind inside its sheath, preventing it from fully releasing. A seized caliper slide pin or a corroded drum brake actuating lever can also cause the brake to remain partially applied. In drum brakes, a broken return spring will prevent the shoes from retracting. This problem leads to premature wear and heat buildup in the rear brakes.
Problem 4: Brake Makes a Clicking or Ratcheting Noise
Symptom: A clicking sound is heard when the lever is pulled or released, or a continuous clicking occurs while driving.
Root Causes: The ratcheting mechanism inside the lever handle is the most common source. If the pawl or gear teeth are worn or damaged, they will click as they slip. A loose or misaligned cable can also cause a clicking sound as it moves against the chassis. In some cases, a worn wheel bearing can be mistaken for a brake clicking noise, so it is important to isolate the source.
Problem 5: Brake Pedal Sinks to the Floor (Foot-Operated)
Symptom: In vehicles with a foot-operated parking brake, the pedal goes all the way to the floor without engaging the brake.
Root Causes: This is almost always a cable tension issue. The cable has either stretched beyond its adjustment range, or the self-adjusting mechanism (if equipped) has failed. A broken cable is another possibility. Unlike hydraulic brakes, a sinking pedal in a mechanical system is not a fluid leak; it is a loss of mechanical tension.
Problem 6: EPB Warning Light or Error Message
Problem 6: Details
Symptom: The dashboard displays a warning light or message indicating a parking brake fault, and the EPB may not engage or disengage.
Root Causes: EPB systems are electronically monitored. Common causes include a faulty switch, a failed actuator motor, a
You might also like: best ceramic brake pads, best brake bleeder kit, brake fluid buying guide