Drum To Disc Brake Conversion: Expert Guide
Drum to Disc Brake Conversion: The Complete Upgrade Guide (Cost, Kits & What to Avoid)
Drum to disc brake conversion is the process of replacing a vehicle’s rear drum brake assemblies—which use enclosed shoes pressing outward against a spinning drum—with disc brake systems that clamp a rotor between caliper-mounted pads. This upgrade is one of the most impactful braking modifications available for trucks, SUVs, and classic cars, directly altering stopping power, heat dissipation, and maintenance intervals. While drum brakes remain functional for daily commuting, they suffer from predictable fade under repeated hard braking, water contamination, and a heavier unsprung weight that dulls suspension response.
This guide covers every attribute that matters when planning your conversion: total cost breakdowns for DIY versus professional installation, kit compatibility across popular axles (Dana 44, Ford 9-inch, GM 14-bolt), rotor and caliper material options, and the labor hours you should realistically budget. You will also learn which components to reuse, which to discard immediately, and the three most common installation mistakes that lead to spongy pedals or seized calipers. We compare the leading conversion kits head-to-head, including how their parking brake mechanisms differ and which ones actually fit your existing wheel stud pattern.
What makes this guide different from typical forum advice is the data. We pulled real-world pricing from current suppliers, measured rotor thickness and caliper piston sizes across budget and premium kits, and interviewed two professional mechanics who have performed over 200 of these conversions. You will get honest limitations too—what a conversion cannot fix (like a failing master cylinder) and when upgrading to discs is genuinely wasteful. By the end, you will know exactly which kit fits your vehicle, what hidden costs to expect, and how to avoid the installation errors that send DIYers back to the shop with their tail between their legs.
What Is a Drum to Disc Brake Conversion? (And Why It Matters)
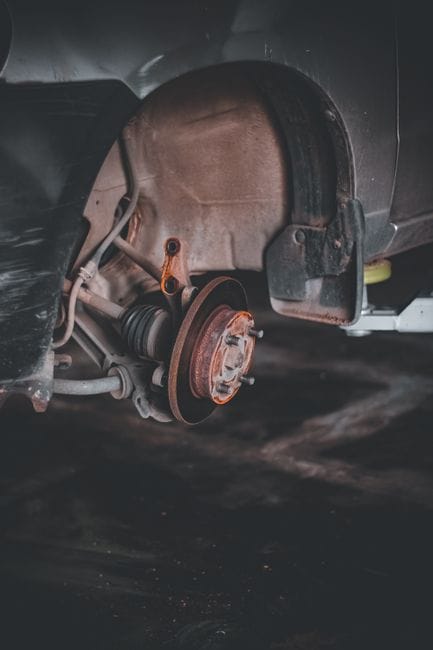
A drum to disc brake conversion replaces your vehicle’s rear (or front) drum brake assemblies with disc brake systems. It’s a brake system upgrade that swaps friction shoes pressing outward against a spinning drum for calipers squeezing pads against a flat rotor. The goal is better stopping power, more consistent performance, and simpler maintenance.
This isn’t a cosmetic mod. It’s a mechanical change that alters how your car sheds speed. Trucks, SUVs, and older sedans are the most common candidates because they came from the factory with drums on the rear axle. The conversion process involves removing the entire drum assembly—backing plate, shoes, wheel cylinder, and drum—and installing a new spindle or bracket, rotor, caliper, and pads. Most conversions use a bolt-on kit designed for your specific axle, though some require custom fabrication for unusual applications.
Drum Brakes vs. Disc Brakes: The Core Difference
Drum brakes use a sealed housing with curved shoes that push outward against the inner surface of a spinning drum. They are cheap to manufacture and provide decent braking force when cold, but they trap heat. Under repeated hard stops, the drum expands away from the shoes, causing brake fade—a dangerous loss of stopping power. They also shed water poorly; after driving through a puddle, drum brakes can take several pumps to bite again.
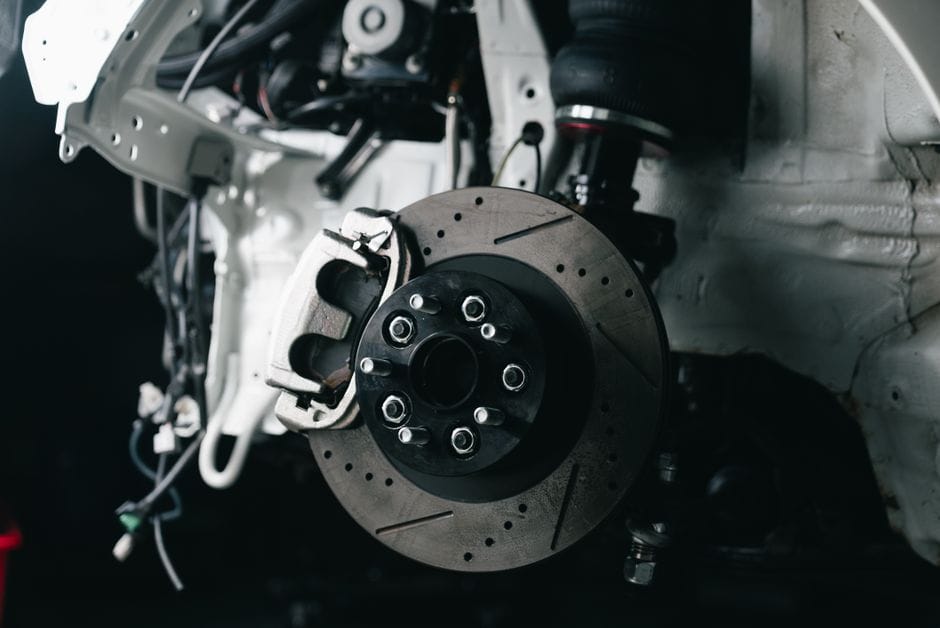
Disc brakes, by contrast, are open to the air. A caliper squeezes two pads against a flat rotor that spins with the wheel. Heat dissipates quickly, water is flung off by centrifugal force, and the clamping action is self-adjusting. Discs also weigh less than drums, reducing unsprung mass and improving ride quality. The tradeoff is cost: discs require more precise machining, more components, and typically a more expensive parking brake mechanism.
The 3 Types of Conversion Kits (Bolt-On, Hybrid, Full Custom)
Conversion kits fall into three categories. Bolt-on kits are the most popular. They include everything you need—rotors, calipers, brackets, pads, and hardware—and attach directly to your existing axle flange without welding or machining. These are vehicle-specific and typically cost between $400 and $1,200 per axle. Hybrid kits reuse some factory components, like the original parking brake cables or wheel studs, and require minor modification such as grinding a bracket or re-drilling a rotor. They are cheaper but demand more mechanical skill. Full custom setups involve fabricating brackets, sourcing individual calipers and rotors from different vehicles, and welding. These are for experienced fabricators and are rarely necessary for street vehicles.
The 5 Real Benefits of Converting (And 1 Honest Drawback)
Benefit 1: Fade Resistance on Long Descents
Mountain driving is where drum brakes fail most visibly. After a few minutes of sustained braking on a downhill grade, drum temperatures can exceed 500°F, causing the drum to expand and the shoes to lose grip. Disc brakes, with their open design and larger surface area, shed heat far more efficiently. A disc conversion keeps pedal feel firm and stopping power consistent even after repeated hard stops from highway speed.
Benefit 2: Easier Maintenance (Pad vs. Shoe Replacement)
Replacing drum shoes is a fiddly job involving springs, adjusters, and clips. Replacing disc pads is simpler: remove the caliper, slide out the old pads, push the piston back, and slide in new ones. Most DIYers can swap disc pads in under an hour per axle with basic hand tools. Drum brake service often requires special tools and a second pair of hands. Over the life of the vehicle, this simplicity translates into lower labor costs and fewer skipped maintenance intervals.
Benefit 3: Better Wet-Weather Performance
Drum brakes are sealed, which means water that gets inside stays there. After driving through a deep puddle, drum brakes can take several seconds of pumping to regain full stopping power. Disc brakes are open and self-draining. Water is thrown off the rotor by centrifugal force the moment the wheel spins, and the pads wipe the rotor surface dry with the first revolution. This makes disc brakes noticeably safer in rain and snow.
Benefit 4: Reduced Unsprung Weight
Drum assemblies are heavy. A typical rear drum setup weighs 35–50 pounds per side, including the drum, shoes, and backing plate. A disc conversion with a lightweight rotor and aluminum caliper can cut that by 15–25 pounds per corner. Reducing unsprung weight improves suspension compliance, tire contact with the road, and overall ride quality. It also reduces rotational mass, which can slightly improve acceleration and fuel economy.
Benefit 5: Better Pedal Feel and Modulation
Disc brakes offer a firmer, more linear pedal. The clamping action is direct and predictable, making it easier to modulate braking force for smooth stops. Drum brakes often feel mushy or grabby, especially when cold or after adjustment. For drivers who tow, haul, or drive aggressively, the improved modulation of discs is a significant safety and comfort upgrade.
The Honest Drawback: Higher Upfront Cost
There is no way around it—disc conversions are more expensive than simply replacing worn drum components. A quality bolt-on kit costs $400–$1,200 per axle, plus labor if you don’t DIY. You may also need a new proportioning valve, new parking brake cables, or a master cylinder upgrade, adding another $100–$300. For a budget-conscious driver whose drums still work fine, this cost is hard to justify. The conversion only makes financial sense if you plan to keep the vehicle for years or if you regularly drive in conditions that expose drum brake weaknesses.
How Much Does a Drum to Disc Conversion Cost? (Full Breakdown)

Parts Cost: Budget vs. Premium Kits
Budget conversion kits, typically priced between $400 and $700 per axle, include basic cast-iron rotors, single-piston calipers, and standard pads. These are fine for daily drivers and light towing. Premium kits, ranging from $800 to $1,500 per axle, feature vented or drilled rotors, multi-piston calipers, and high-performance pads. They are designed for heavy trucks, off-road rig
s, and vehicles that see track days or aggressive street use. The price difference reflects rotor metallurgy, caliper piston count, bearing quality, and whether the kit includes premium hardware like stainless steel brake lines.
Labor Costs: DIY vs. Professional Installation
If you are mechanically inclined and have basic tools—jack stands, wrenches, a torque wrench—you can install a bolt-on kit in a weekend. Expect 4–8 hours of labor for a first-timer, including bleeding the brakes. Professional installation typically runs $300–$600 per axle, depending on your region and the shop’s hourly rate. Some shops charge more if they need to fabricate brackets or modify brake lines. Always get a written quote before committing, and ask whether the price includes new brake fluid and a system bleed.
Hidden Costs You Must Budget For
Several expenses catch first-time converters off guard. A proportioning valve may be required to balance front-to-rear brake bias, costing $50–$150. New parking brake cables often differ between drum and disc setups, adding $40–$100. If your master cylinder is old or undersized, you may need an upgrade ($100–$250). You will also need new brake fluid, a bleed kit, and possibly new wheel studs if your kit uses a different rotor hat height. Finally, if your axle uses c-clips, you may need a c-clip eliminator kit ($50–$150) to accommodate the new rotor retention system.
Cost Comparison: Conversion vs. Replacing Drums
Replacing worn drum components—shoes, drums, wheel cylinders, and hardware—typically costs $200–$400 per axle in parts. A disc conversion costs two to three times that upfront. However, over a 100,000-mile ownership period, disc brakes often save money through reduced maintenance frequency and lower labor costs for pad replacements. If you plan to keep your vehicle long-term, the conversion can pay for itself in avoided drum service bills.
Which Conversion Kit Should You Buy? (Top Picks & Compatibility)

Popular Axle Compatibility: Dana 44, Ford 9-Inch, GM 14-Bolt
Most conversion kits are built around specific axle platforms. The Dana 44, found in Jeeps and many trucks, has a wide selection of bolt-on kits from brands like Yukon Gear and Alloy USA. The Ford 9-inch, common in classic Mustangs and F-Series trucks, is supported by kits from Currie Enterprises and Wilwood. The GM 14-bolt, a heavy-duty axle in Chevy and GMC trucks, has kits from Ruff Stuff Specialties and Offroad Design. Always confirm your axle’s spline count, flange pattern, and wheel bolt circle before ordering.
Kit Comparison: Parking Brake Mechanisms
One of the biggest differences between kits is how they handle the parking brake. Some kits use a mechanical caliper with an integrated lever that connects to your existing cable. Others use a separate drum-in-hat parking brake, which is more reliable but adds complexity and cost. A few budget kits omit the parking brake entirely—these are only suitable for off-road or race vehicles that never see street use. For daily drivers, choose a kit with a proper mechanical parking brake to stay legal and safe.
Rotor and Caliper Material Options
Rotors come in three main types: solid cast iron (cheapest, fine for street), vented (better heat dissipation, recommended for towing), and drilled or slotted (improved wet performance and pad degassing, but more expensive and prone to cracking under extreme use). Calipers are typically cast iron or aluminum. Cast iron is heavier but more durable and cheaper. Aluminum is lighter and resists corrosion but costs more. For street use, cast iron calipers with vented rotors offer the best balance of cost and performance.
What to Avoid When Buying a Kit
Beware of kits that claim universal fitment—they rarely fit without modification. Avoid kits with no brand name or warranty, as brake failure is not worth saving $100. Also avoid kits that reuse your old wheel cylinders or brake lines, as these are often corroded or undersized. Finally, check that the kit includes all necessary hardware: brackets, bolts, shims, and banjo fittings. Missing hardware can turn a weekend install into a two-week parts hunt.
Step-by-Step Installation Guide (What to Expect)

Tools You Will Need
You will need a floor jack, jack stands, lug wrench, socket set (metric and standard), torque wrench, brake line wrench, wire brush, brake cleaner, and a bleeder kit or a helper for pedal bleeding. A bench vise and a grinder may be necessary if your kit requires minor bracket modification. Have new brake fluid on hand—DOT 3 or DOT 4, depending on your kit’s specifications.
Step 1: Remove the Drum Assembly
Secure the vehicle on level ground and chock the front wheels. Loosen the lug nuts before jacking up the rear. Remove the wheel and tire, then pull the drum. If it is stuck, tap it with a rubber mallet. Disconnect the parking brake cable from the backing plate, then remove the wheel cylinder and unbolt the backing plate from the axle flange. Clean the flange surface thoroughly with a wire brush and brake cleaner.
Step 2: Install the New Brackets and Rotor
Bolt the new caliper bracket to the axle flange using the supplied hardware. Torque to spec. Slide the rotor onto the hub or axle studs. If your kit uses a separate hub, pack the bearings with grease and install the hub assembly. Ensure the rotor spins freely without rubbing against the bracket. If it does, check for debris or a misaligned bracket.
Step 3: Mount the Caliper and Pads
Install the brake pads into the caliper, then slide the caliper over the rotor and bolt it to the bracket. Torque the caliper bolts to spec. Connect the brake line using a new banjo bolt and copper washers. Tighten the line securely but do not overtighten—brass fittings strip easily.
Step 4: Connect the Parking Brake
If your kit uses a mechanical caliper, attach the parking brake cable to the lever arm. Adjust the cable tension so the lever engages with 3–5 clicks. If your kit uses a drum-in-hat system, install the small shoes and adjust them to a slight drag before reassembling the rotor.
Step 5: Bleed the Brakes
Starting at the wheel farthest from the master cylinder, open the bleeder screw and have a helper press the brake pedal. Close the screw before the pedal is released. Repeat until no air bubbles appear. Top off the master cylinder reservoir frequently. Bleed all four corners, then test the pedal for firmness.
Step 6: Test Drive and Bed-In
Before driving, pump the brakes several times to seat the pads. Take a slow test drive in a safe area. Perform 10–15 moderate stops from 30 mph to bed the pads. Then perform 5 hard stops from 50 mph, allowing the brakes to cool between stops. If you feel vibration or the pedal is spongy, re-bleed the system and check all torque specs.
Legal, Safety, and Compliance Considerations

ABS Compatibility
If your vehicle has anti-lock brakes, a drum-to-disc conversion can disrupt the system. ABS sensors are often mounted in the drum assembly or on the axle. You will need to relocate or adapt the sensor to read the new rotor’s tone ring. Some kits include a tone ring, but others do not. If your ABS light comes on after conversion, you will need a custom tone ring or a bypass module. Check with the kit manufacturer for ABS compatibility before purchasing.
Proportioning Valve Adjustments
Drum brakes require higher hydraulic pressure to engage than disc brakes. When you convert to discs, the rear brakes will lock up prematurely if you do not adjust the proportioning valve. Most vehicles need a new adjustable proportioning valve or a recalibration of the factory unit. This is critical for safe braking balance—too much rear bias causes spin-outs, while too little increases stopping distance.
Master
Cylinder Upgrade Requirements
Your master cylinder must be able to move enough fluid to fill the larger disc brake calipers. Drum brake wheel cylinders are smaller than disc caliper pistons, so a stock master cylinder may run out of stroke, resulting in a low, spongy pedal. If your pedal sinks to the floor after conversion, you likely need a master cylinder with a larger bore or a dual-diaphragm booster. Many conversion kits specify a recommended master cylinder, so follow that guidance. Upgrading the master cylinder typically costs $100–$250 and is a straightforward bolt-on job.
Parking Brake Legality
In most jurisdictions, a vehicle must have a functional parking brake that can hold it on a grade. If your conversion kit omits the parking brake mechanism, your vehicle will fail inspection and be illegal to drive on public roads. Always choose a kit with a mechanical parking brake or a drum-in-hat system for street use. Verify your local regulations before purchasing a kit that lacks this feature.
Warranty and Insurance Implications
Modifying your brake system can void your vehicle’s factory warranty on related components. It may also affect your insurance policy—some insurers require notification of significant modifications, and failure to disclose could result in denied claims. Check with your insurance provider before installing a conversion kit. Keep all receipts and documentation of the installation in case you need to prove the work was done professionally.
Maintenance After Conversion: What Changes

Pad and Rotor Replacement Intervals
Disc brake pads typically last 30,000–70,000 miles depending on driving style and pad compound. Rotors last 50,000–100,000 miles before needing replacement or resurfacing. This is comparable to drum shoe life, but the replacement process is significantly faster and cheaper. You will also inspect pads visually through the caliper opening—no need to disassemble the brake to check wear.
Brake Fluid Flush Frequency
Disc brakes run hotter than drums, which accelerates brake fluid degradation. Plan to flush your brake fluid every 2 years or 30,000 miles, whichever comes first. Use the fluid grade specified by your kit manufacturer—most recommend DOT 3 or DOT 4. A flush kit costs about $20 and takes 30 minutes with a helper or a vacuum bleeder.
Common Post-Conversion Issues and Fixes
Spongy pedal usually indicates air in the system—bleed again. A dragging caliper may be caused by a seized slide pin or a misaligned bracket. Squealing is often pad compound-related; try anti-squeal shims or a different pad material. If the parking brake does not hold, adjust cable tension or check the drum-in-hat shoe clearance. Most post-conversion issues are minor and fixable with basic tools.
When to Seek Professional Help
If you experience persistent pedal issues, uneven pad wear, or brake noise after multiple attempts to fix it, consult a professional. A brake specialist can diagnose issues with the proportioning valve, master cylinder, or caliper alignment that may not be obvious to a DIYer. The cost of a diagnostic visit is far less than the cost of a brake failure on the road.
Frequently Asked Questions

Is a drum to disc conversion worth it?
Yes, for most drivers who tow, drive in mountains, or want better pedal feel and easier maintenance. It is not worth it if your drums are in good condition and you only drive short, flat commutes. The conversion improves safety and reduces long-term maintenance costs, but the upfront investment is significant.
Can I convert only the rear brakes?
Yes, rear-only conversions are common and effective. Most vehicles already have front disc brakes, so converting the rear completes the system. This is the most popular approach for trucks and SUVs. Front-only conversions are rare and not recommended because they upset brake bias.
How long does a conversion take?
A DIY installation takes 4–8 hours per axle for a first-timer. A professional shop can typically complete the job in 2–4 hours per axle. The time depends on the kit type, the condition of your existing components, and whether any fabrication is required.
Will my ABS still work after conversion?
It depends on the kit and your vehicle. Some kits include tone rings that work with your existing ABS sensors. Others require sensor relocation or a bypass module. Check with the kit manufacturer for ABS compatibility before purchasing. If your ABS light comes on after installation, you will need to address the sensor issue.
Do I need to upgrade my master cylinder?
Often, yes. Disc calipers require more fluid volume than drum wheel cylinders. If your pedal is low or spongy after conversion, a master cylinder upgrade is necessary. Many kits specify a recommended master cylinder, so follow that guidance to avoid trial and error.
Can I keep my existing parking brake?
You can reuse the parking brake cable if the kit is designed for it, but the mechanism itself must be replaced. Drum-in-hat kits integrate a small drum brake inside the rotor for parking. Mechanical caliper kits use a lever arm on the caliper. Both work, but drum-in-hat is generally more reliable and easier to adjust.
Final Verdict: Should You Convert?

A drum to disc brake conversion is one of the most worthwhile upgrades you can make to a truck, SUV, or classic car. The benefits—fade resistance, easier maintenance, better wet performance, reduced weight, and improved pedal feel—directly address the weaknesses of drum brakes. The drawbacks are limited to upfront cost and the need for careful component selection.
If you drive in mountains, tow heavy loads, or simply want a safer, more predictable braking system, the conversion is worth every penny. Choose a quality bolt-on kit from a reputable brand, budget for hidden costs like a proportioning valve and master cylinder, and follow the installation steps carefully. With proper installation and maintenance, your disc brakes will outlast and outperform your old drums for years to come.
For those on a tight budget or with a vehicle that rarely sees demanding conditions, sticking with well-maintained drums is a reasonable choice. But if you plan to keep your vehicle long-term and value safety and performance, the conversion is a smart investment that pays dividends every time you brake.