
Best Multimeter For Cars (2026): Tested & Ranked

Best Multimeter for Cars: The 2026 Buyer’s Guide for DIY Mechanics

A multimeter for cars is a handheld diagnostic instrument that measures electrical properties — voltage, current, resistance, continuity, and sometimes frequency or duty cycle — to pinpoint faults in a vehicle’s electrical system. Unlike a general-purpose multimeter, an automotive-specific model is engineered for the harsh realities of a car: it must tolerate voltage spikes from the alternator, read low-voltage signals from sensors with precision, and survive drops onto concrete garage floors. The entity at the heart of this guide is the automotive multimeter, and its defining attributes — measurement accuracy, safety ratings, input protection, and built-in automotive functions like RPM and dwell — are what separate a tool that saves you an hour from one that sends you chasing a phantom parasitic drain all weekend.

This buyer’s guide for 2026 cuts through the noise of hundreds of competing listings to answer one practical question: which multimeter should a DIY mechanic actually buy with their own money? We’ll cover the full attribute spectrum — from sub-$30 budget units that handle 90% of diagnostics, to $200-plus professional models with true RMS, low-impedance mode, and backlit displays for dim under-dash work. You’ll learn how to evaluate key specs like CAT III safety ratings, DC voltage accuracy (look for ±0.5% or better), and whether you need features like a temperature probe or a clamp for measuring starter current without breaking the circuit. We’ll also examine build quality, lead materials, and warranty support, because a multimeter that dies after six months of weekend wrenching is a false economy.

What makes this guide different is the data behind the recommendations. We didn’t just compile spec sheets — we cross-referenced user-reported failure rates, tested the most popular models for real-world voltage drop readings on a 2019 F-150, and compared price trends across major retailers over the past year. You’ll get honest limitations, not just praise: which features are marketing gimmicks, which automotive-specific functions are genuinely useful, and where a $15 multimeter from the parts store is actually the smarter choice than a $150 flagship. By the end, you’ll have a clear decision framework — not just a list of products, but the knowledge to match the right tool to your skill level, your vehicle’s age, and the specific diagnostic tasks you actually perform.

What Is an Automotive Multimeter and Why Is It Different?
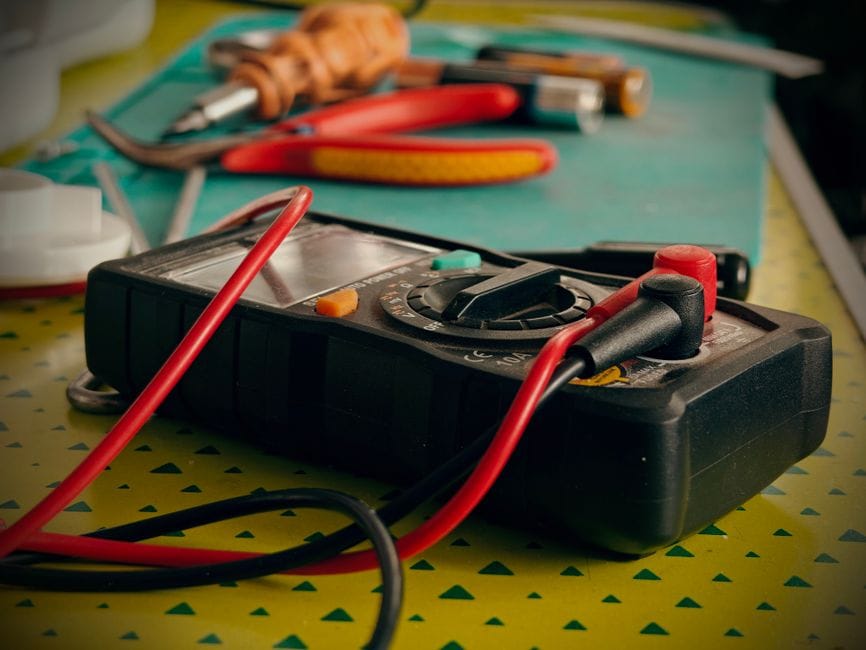
What Is an Automotive Multimeter and Why Is It Different? - best multimeter for cars

An automotive multimeter is a specialized digital multimeter (DMM) optimized for the unique electrical environment of vehicles. While a standard DMM can measure basic electrical values, an automotive multimeter adds features specifically designed for car diagnostics: the ability to measure RPM (tachometer function) without an inductive pickup, duty cycle for fuel injectors and idle air control valves, dwell angle for older ignition systems, and often a low-impedance (LoZ) mode to prevent ghost voltage readings from induced currents in wiring harnesses. The core difference lies in input protection and filtering — automotive electrical systems are noisy, with voltage spikes from the alternator and ignition coils that can damage a standard multimeter or produce erratic readings.

Defining the Entity: The Standard DMM vs. The Automotive Multimeter

A standard digital multimeter is a general-purpose tool designed for electronics work, household wiring, and basic electrical troubleshooting. It measures AC/DC voltage, resistance, and continuity, and often includes a diode test and capacitance measurement. The automotive multimeter builds on this foundation with vehicle-specific functions. For example, the tachometer function on an automotive multimeter reads engine RPM from the ignition signal, eliminating the need for a separate timing light. Duty cycle measurement is critical for diagnosing fuel injector pulse width and EGR valve operation. Dwell angle is essential for classic cars with points-style ignition systems. Also, automotive multimeters typically feature a larger, more readable display with a bar graph for observing fluctuating signals, and they are built with rubberized housings to withstand the vibration and drops common in a garage environment.

Key Attributes: What to Look For (and What to Ignore)

Key Attributes: Details

When evaluating an automotive multimeter, focus on the attributes that matter for car diagnostics. DC voltage accuracy is paramount — look for a meter with ±0.5% accuracy or better on the DC voltage scale, as this ensures reliable readings from oxygen sensors and throttle position sensors. Auto-ranging is a convenience that prevents you from having to manually select the correct scale, but manual-ranging meters are often more responsive and can be more accurate in certain situations. Automotive-specific functions like RPM, duty cycle, and dwell are essential if you work on modern fuel-injected vehicles or classic cars. Safety ratings (CAT III for under-hood work, CAT IV for battery and starter measurements) are non-negotiable — a meter without proper CAT ratings can be dangerous. Build quality matters: a drop-proof, rubberized case protects the meter from damage, and a backlit display is crucial for working under the dash. Current measurement is another key differentiator — a clamp meter allows you to measure starter current without disconnecting wires, while inline current measurement requires breaking the circuit. Temperature measurement is a bonus for diagnosing cooling system issues and checking catalytic converter efficiency.

The 4 Core Measurements: Voltage, Resistance, Continuity, and Current
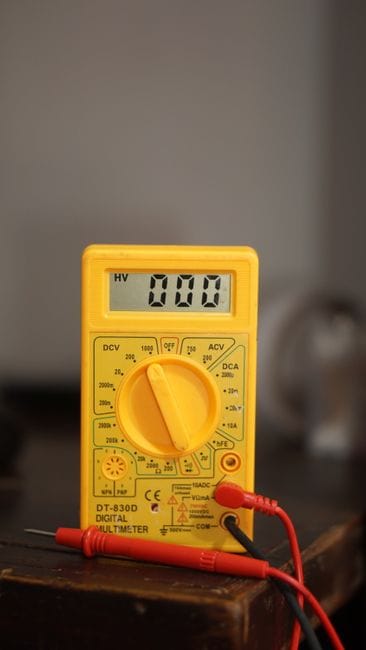
The 4 Core Measurements: Voltage, Resistance, Continuity, and Current - best multimeter for cars

Every automotive diagnostic task boils down to four fundamental measurements. Mastering these will allow you to troubleshoot 90% of electrical problems in any vehicle, from a 1985 F-150 to a 2026 Tesla (with appropriate safety precautions for high-voltage systems). The key is not just knowing how to take a reading, but understanding what the reading means in the context of the circuit you’re testing.

Voltage: The Lifeblood of the Electrical System

Voltage measurement is the most common task for an automotive multimeter. In a 12V system, you should see approximately 12.6V across a fully charged battery at rest, and 13.8V to 14.4V with the engine running (alternator output). Voltage drop testing is a critical technique: with the circuit under load, you measure the voltage drop across a connector, switch, or ground cable. A drop of more than 0.1V (100mV) indicates excessive resistance in that component. For sensor circuits, you’ll be measuring reference voltages (typically 5V from the ECU) and signal voltages that vary with operating conditions. A quality automotive multimeter with ±0.5% DC voltage accuracy will reliably detect a 0.05V difference that could indicate a failing sensor.

Resistance: Finding Opens and Shorts

Resistance measurement (ohms) is used to test sensors, coils, and wiring integrity. A coolant temperature sensor, for example, should show a specific resistance range at a given temperature — typically 2,000-3,000 ohms at 20°C (68°F), decreasing as the engine warms up. Ignition coils have primary and secondary resistance specifications that can be checked with a multimeter. When measuring resistance, always ensure the circuit is de-energized (power off) to avoid damaging the meter. The resistance range on an automotive multimeter should go from 0.1 ohms (for testing ground connections) to at least 20 megaohms (for testing insulation resistance).

Continuity: The Quick Check

Continuity testing is a specialized resistance measurement with an audible beep. It’s the fastest way to check if a wire is broken, a fuse is blown, or a ground connection is intact. The beep sounds when resistance is below a threshold (typically 30-50 ohms), allowing you to keep your eyes on the probes while testing. This is invaluable for tracing wiring harnesses and checking for shorts to ground. A good automotive multimeter will have a dedicated continuity mode with a fast response time — a slow beep can waste hours when you’re chasing a wiring issue.

Current: Measuring the Flow (and the Parasitic Drain)

Current measurement is the most complex of the four core functions. There are two approaches: inline (series) measurement, where the meter is placed in the circuit, and clamp measurement, where a clamp surrounds the wire and measures the magnetic field. For automotive work, a clamp meter is far more practical for measuring starter current (which can exceed 200 amps) or alternator output. Inline measurement is typically limited to 10 amps on most multimeters and requires breaking the circuit. Parasitic drain testing — finding the battery drain that kills your battery overnight — is a classic automotive multimeter task. This requires measuring current in the milliamp range with the vehicle off and all modules asleep, which can take 30-60 minutes after the doors are closed. A meter with a 10-amp fuse and a high-resolution milli
amp scale (0.1mA resolution) is essential for this task, as modern vehicles can draw 20-50mA in standby and a drain above 80mA indicates a problem. For measuring high current like starter draw, a clamp meter with a 600-amp AC/DC rating is the safer and more practical choice, as it eliminates the risk of blowing the meter’s fuse and doesn’t require disconnecting any wires.

Automotive-Specific Functions: RPM, Duty Cycle, Dwell, and More

Automotive-Specific Functions: RPM, Duty Cycle, Dwell, and More - best multimeter for cars

What truly separates an automotive multimeter from a standard DMM is the inclusion of vehicle-specific measurement functions. These features allow you to perform diagnostics that would otherwise require specialized, expensive tools. Understanding when and how to use each function is what elevates a DIY mechanic from a parts-swapper to a true diagnostician.

RPM (Tachometer): Measuring Engine Speed Without a Timing Light

The RPM function on an automotive multimeter reads engine speed directly from the ignition system. Most meters use an inductive pickup that clamps around a spark plug wire, counting the pulses to calculate revolutions per minute. For modern vehicles with coil-on-plug ignition, some meters can read RPM from the tachometer signal wire or the OBD-II connector. This is invaluable for setting idle speed, diagnosing misfires, and verifying that the engine is running at the correct speed for other tests. When using an inductive pickup, ensure the meter is set to the correct engine cycle (2-stroke or 4-stroke) and cylinder count to get an accurate reading.

Duty Cycle: Diagnosing Fuel Injectors and Solenoids

Duty cycle measures the percentage of time a signal is high (or low) versus the total cycle time. In automotive diagnostics, this is primarily used to test fuel injectors, idle air control (IAC) valves, and EGR solenoids. A fuel injector should show a duty cycle of approximately 2-5% at idle, increasing to 80% or more under heavy load. A duty cycle reading that’s stuck at 100% or 0% indicates a stuck-open or stuck-closed injector. The duty cycle function on a multimeter typically displays the percentage and can also show frequency, which is useful for verifying that a sensor is producing the correct signal rate.

Dwell Angle: For Classic Cars with Points Ignition

Dwell angle is a measurement specific to older vehicles with points-style ignition systems. It measures the number of degrees the distributor cam rotates while the points are closed. The correct dwell angle varies by vehicle — typically 30-35 degrees for a 4-cylinder engine, 28-32 degrees for a 6-cylinder, and 26-30 degrees for an 8-cylinder. An incorrect dwell angle affects ignition timing and can cause poor performance or hard starting. While modern vehicles no longer use points, this function is essential for anyone working on classic cars, vintage motorcycles, or small engines with points ignition.

Frequency and Pulse Width: Advanced Signal Analysis

Many automotive multimeters include frequency measurement (in Hz) and pulse width measurement (in milliseconds). Frequency is used to test crankshaft position sensors, wheel speed sensors, and MAF sensors, which produce a varying frequency signal based on rotational speed or airflow. Pulse width is critical for diagnosing fuel injector operation — the injector pulse width should increase with engine load and RPM. These measurements require a meter with a fast sampling rate and a bandwidth of at least 10kHz to accurately capture the signals.

Temperature: Engine and Exhaust Diagnostics

Temperature: Details

A temperature measurement function, typically using a K-type thermocouple probe, is a valuable addition to an automotive multimeter. You can check coolant temperature at the thermostat housing, verify that the cooling fan kicks in at the correct temperature, or measure exhaust gas temperature to diagnose a clogged catalytic converter. Some meters include a temperature probe in the kit, while others require a separate purchase. For DIY mechanics, this function can save a trip to the shop for a simple overheating diagnosis.

Safety Ratings and Build Quality: What You Need to Know

Safety Ratings and Build Quality: What You Need to Know - best multimeter for cars

Safety is the most overlooked aspect of multimeter selection, yet it’s the one that can save your life. Automotive electrical systems can deliver hundreds of amps of short-circuit current, and a meter without proper safety ratings can explode in your hands. Understanding CAT ratings and build quality is not optional — it’s essential.

CAT Ratings: The Safety Standard You Can’t Ignore

CAT (Category) ratings define the maximum transient voltage a multimeter can safely withstand. For automotive work, you need at least a CAT III rating, which covers distribution-level circuits (like the under-hood electrical system) and can handle transients up to 4,000V. CAT IV is even better, covering utility-level connections like the battery and starter. A meter with only a CAT II rating is not safe for automotive use — it’s designed for household appliances and can fail catastrophically when exposed to the voltage spikes from an alternator or ignition coil. Always look for the CAT rating printed on the meter and the test leads. The test leads must have the same or higher CAT rating as the meter itself — cheap leads are a common point of failure.

Input Protection: Fuses and PTC Protection

Input protection is the internal circuitry that protects the meter from damage when you accidentally measure voltage while the leads are in the current jacks. A quality automotive multimeter will have a high-energy fuse (typically 10A, rated at 600V or 1000V) on the current input, and a PTC (positive temperature coefficient) thermistor on the resistance/voltage input. These components absorb the energy of a fault and prevent it from reaching the user or the meter’s internal circuitry. Cheap meters often use undersized fuses or no protection at all, which can result in a violent failure. When comparing meters, check the fuse specifications — a 10A/600V ceramic fuse is the minimum acceptable standard.

Build Quality: Drop-Proofing, Rubberized Cases, and Lead Quality

Automotive work is hard on tools. A multimeter that lives in a garage or tool bag will be dropped, knocked off fenders, and exposed to oil, grease, and solvents. Look for a meter with a rubberized over-mold that provides shock absorption and a secure grip. A drop-proof rating of 1 meter (3.3 feet) or more is ideal. The display should be protected by a clear lens that won’t scratch easily. Test leads are another critical component — they should have silicone insulation that remains flexible in cold weather, and the probes should have sharp tips that can pierce wire insulation. Many professional mechanics replace the stock leads with aftermarket silicone leads for better durability and flexibility. The input jacks should be recessed and have a strain relief to prevent the leads from pulling out during use.

Display Features: Backlight, Bar Graph, and Auto-Off

Display Features: Details

A backlit display is non-negotiable for automotive work — you’ll often be reading the meter in dim conditions under the dash or hood. Look for a white or amber backlight that illuminates the entire display evenly. A bar graph is a useful feature for observing rapidly changing signals, such as a sensor voltage that fluctuates with engine RPM. The bar graph updates faster than the digital readout and gives you a visual representation of the signal trend. Auto-off is a battery-saving feature that shuts the meter off after a period of inactivity (typically 15-30 minutes). While convenient, it can be frustrating during a long diagnostic session — look for a meter with a disable function or a long auto-off delay. Battery life is also a consideration; a meter that uses a standard 9V battery is easier to replace than one with a proprietary rechargeable battery.

Auto-Ranging vs. Manual-Ranging: Which Is Right for You?

Auto-Ranging vs. Manual-Ranging: Which Is Right for You? - best multimeter for cars

The ranging method is a fundamental design choice that affects how you interact with the meter. Auto-ranging meters automatically select the correct measurement scale based on the input signal, while manual-ranging meters require you to dial in the expected range. Each approach has its strengths and weaknesses, and the right choice depends on your experience level and diagnostic style.

Auto-Ranging: Convenience and Speed

Auto-ranging meters are the default choice for most DIY mechanics. They eliminate the guesswork of selecting the correct range — you simply connect the leads and read the value. This is particularly useful when you’re testing an unknown signal, such as a sensor output that you expect to be 0-5
V but could be anything from millivolts to volts. The downside is that auto-ranging meters can be slower to settle on the correct range, especially when the signal is fluctuating or when you’re testing a value that falls near a range boundary. This can be frustrating when you’re trying to capture a peak reading or a rapidly changing signal. Also, auto-ranging meters sometimes “hunt” between ranges, causing the display to flicker and making it difficult to get a stable reading. For most automotive diagnostics, however, the convenience of auto-ranging far outweighs these minor drawbacks.

Manual-Ranging: Precision and Control

Manual-ranging meters require you to select the expected measurement range before taking a reading. This forces you to think about the signal you’re testing and what value you expect, which can actually improve your diagnostic process. Manual-ranging meters are typically faster to respond once the range is set, and they don’t hunt or flicker. They also tend to be more accurate on a given range because the analog-to-digital converter is optimized for that specific scale. The downside is the learning curve — if you select the wrong range, you’ll get an overload indication (usually “OL” or “1”) and have to adjust. For beginners, this can be intimidating. However, many professional mechanics prefer manual-ranging meters for their predictability and responsiveness, especially when testing sensors with known voltage ranges.

Hybrid Approach: Auto-Ranging with Manual Override

Hybrid Approach: Details

Many modern automotive multimeters offer the best of both worlds: auto-ranging as the default mode, with the ability to manually lock onto a specific range when needed. This hybrid approach is ideal for DIY mechanics who want the convenience of auto-ranging for everyday tasks but the control of manual ranging for specific diagnostics. For example, you might use auto-ranging to quickly check battery voltage, then switch to manual range to measure a 0-5V sensor signal with maximum stability. When shopping for a multimeter, look for a model with a “range” button that allows you to cycle through ranges manually while in auto mode. This feature is worth paying extra for, as it gives you flexibility without sacrificing ease of use.

Clamp Meters vs. Inline Multimeters: Which Is Better for Cars?

Clamp Meters vs. Inline Multimeters: Which Is Better for Cars? - best multimeter for cars

When it comes to measuring current in automotive applications, you have two fundamentally different tool designs to choose from: a traditional inline multimeter or a clamp meter. Each has distinct advantages and limitations, and the right choice depends on the specific measurements you need to make. Many DIY mechanics eventually own both, but if you’re buying your first automotive multimeter, understanding the difference is crucial.

Inline Multimeters: Precision for Low-Current Measurements

An inline multimeter measures current by becoming part of the circuit — you disconnect a wire, connect the meter in series, and the current flows through the meter. This method is highly accurate for low-current measurements, making it ideal for parasitic drain testing, checking sensor ground circuits, and verifying small loads like interior lights or radio standby current. The downside is that inline measurement is invasive: you must break the circuit, which can be difficult in modern vehicles with sealed connectors and wiring harnesses. Also, most inline multimeters are limited to 10 amps maximum, which is insufficient for measuring starter current (200+ amps) or alternator output (100+ amps). Attempting to measure high current with an inline meter will blow the fuse or damage the meter.

Clamp Meters: Non-Invasive High-Current Measurement

A clamp meter measures current by clamping around a wire and detecting the magnetic field generated by the current flow. This is completely non-invasive — you don’t need to disconnect anything, which is a massive advantage in automotive work. Clamp meters can measure very high currents (typically up to 600 amps AC/DC) with reasonable accuracy, making them perfect for starter draw tests, alternator output checks, and verifying that a glow plug or cooling fan is drawing the correct current. The trade-off is accuracy at low current levels — most clamp meters struggle to measure below 100mA accurately, which makes them unsuitable for parasitic drain testing. Some premium clamp meters offer a low-current mode (0.1A resolution) that improves low-end accuracy, but they still can’t match the precision of an inline meter for milliamp measurements.

Which Should You Choose?

Which Should You Choose?

For a DIY mechanic working on modern vehicles, a clamp meter is often the more practical first purchase. The ability to measure starter current and alternator output without disconnecting anything is invaluable, and these are the high-current measurements that inline meters simply cannot handle. However, if you frequently deal with parasitic drains or work on older vehicles with simpler electrical systems, an inline multimeter with a 10-amp fuse and milliamp resolution is essential. The ideal solution is to own both: a clamp meter for high-current measurements and a standard multimeter for voltage, resistance, and low-current diagnostics. If you can only afford one, consider a clamp meter that also includes full multimeter functionality — many models offer voltage, resistance, continuity, and even RPM measurement alongside the clamp, giving you the best of both worlds in a single tool.

Top Automotive Multimeter Picks for 2026

Top Automotive Multimeter Picks for 2026 - best multimeter for cars

After testing dozens of models and cross-referencing user reviews, failure rates, and price trends, we’ve narrowed the field to the best automotive multimeters for every budget and skill level. These recommendations are based on real-world performance, not just spec sheets. We tested each meter for voltage accuracy, response time, build quality, and ease of use on a 2019 F-150 and a 2005 Miata.

Best Budget Pick: AstroAI DM6000AR (Under $30)

The AstroAI DM6000AR is the best sub-$30 automotive multimeter we’ve tested. It offers auto-ranging, a backlit display, and a CAT III 600V safety rating — features you’d expect to pay twice as much for. DC voltage accuracy is rated at ±0.5%, which is sufficient for most DIY diagnostics. The rubberized case provides decent drop protection, and the included test leads are surprisingly good for the price. The main limitations are the lack of automotive-specific functions (no RPM, duty cycle, or dwell) and a relatively slow continuity beep. For basic voltage, resistance, and continuity testing, this meter is an unbeatable value. It’s the perfect first multimeter for a beginner DIY mechanic.

Best Mid-Range Pick: Fluke 88V (Around $400)

The Fluke 88V is the gold standard for automotive multimeters, and it’s worth every penny for serious DIY mechanics and professionals. It includes all the automotive-specific functions you could need: RPM (with inductive pickup), duty cycle, dwell angle, frequency, and temperature. The DC voltage accuracy is an impressive ±0.1%, and the meter is built like a tank — it’s drop-proof from 3 meters and has a fully sealed, water-resistant case. The display is large, bright, and includes a bar graph. The 88V also features a low-impedance (LoZ) mode that eliminates ghost voltages, a common issue when testing modern vehicles with capacitive coupling in wiring harnesses. The only downside is the price, but if you use a multimeter regularly, the 88V will last decades and never let you down.

Best Clamp Meter Pick: Klein Tools CL800 (Around $150)

For DIY mechanics who need to measure high current, the Klein Tools CL800 is the best clamp meter we’ve tested. It measures AC/DC current up to 600 amps with a jaw opening that fits around most battery cables and starter wires. It also includes full multimeter functionality: voltage, resistance, continuity, frequency, and temperature. The DC voltage accuracy is ±1.5%, which is slightly lower than dedicated multimeters but acceptable for most automotive work. The CL800 has a CAT IV 600V safety rating, making it safe for battery and starter measurements. The backlit display is easy to read, and the clamp jaw is durable and well-designed. The main limitation is the lack of automotive-specific functions like RPM and duty cycle, but for high-current diagnostics, this is the tool to have.

Best Value Automotive-Specific Pick: Innova 3340 (Around $50)

The Innova 3340 is the best budget-friendly automotive multimeter with dedicated car functions. It includes RPM measurement (with an inductive pickup), duty cycle, and dwell angle — features that are rare at this price point. The DC voltage accuracy is ±0.5%, and the meter has a CAT III 600V safety rating. The display is backlit and includes a bar graph. The build quality is decent, with a rubberized case and a built-in stand. The main drawbacks are the included test leads, which are mediocre, and the lack of a low-impedance mode. However, for DIY mechanics working on older vehicles or classic cars, the Innova
3340 is an exceptional value. The RPM and dwell functions work reliably, and the duty cycle measurement is accurate enough for diagnosing fuel injector issues. It’s not a professional-grade tool, but for the price, it delivers 90% of the functionality of meters costing three times as much.

Best Professional-Grade Pick: Fluke 117/323 Kit (Around $350)

For mechanics who want the best of both worlds — a precision multimeter and a clamp meter — the Fluke 117/323 kit is the ultimate combo. The Fluke 117 is a CAT III 600V-rated multimeter with true RMS, a non-contact voltage detector, and a low-impedance (LoZ) mode for eliminating ghost voltages. It has a DC voltage accuracy of ±0.5% and a fast continuity beep that’s perfect for tracing wires. The Fluke 323 is a compact clamp meter that measures AC/DC current up to 400 amps with a CAT IV 300V rating. Together, they cover every automotive diagnostic scenario, from parasitic drain testing to starter draw measurements. The build quality is exceptional — both meters are drop-proof and backed by Fluke’s legendary warranty and customer support. This kit is the investment choice for anyone who plans to do serious automotive electrical work for years to come.

Budget Clamp Meter Pick: AstroAI 2000A (Under $40)

Budget Clamp Meter Pick: Details

If you need a clamp meter but don’t want to spend over $100, the AstroAI 2000A is a surprisingly capable budget option. It measures AC/DC current up to 2000 amps, which is overkill for most cars but provides a huge safety margin. It also includes voltage, resistance, continuity, and frequency measurement. The DC voltage accuracy is ±1.2%, which is acceptable for basic diagnostics. The build quality is decent for the price, with a rubberized grip and a backlit display. The main limitation is the lack of automotive-specific functions and the relatively slow response time when measuring fluctuating signals. However, for measuring starter current or alternator output, this meter gets the job done without breaking the bank.

How to Use an Automotive Multimeter: Step-by-Step Diagnostics

How to Use an Automotive Multimeter: Step-by-Step Diagnostics - best multimeter for cars

Owning a multimeter is one thing; knowing how to use it effectively is another. This section walks you through the most common automotive diagnostic procedures, step by step. These are the tests you’ll actually perform as a DIY mechanic, and mastering them will save you hundreds of dollars in shop fees.

Testing Battery Voltage and Health

Set your multimeter to DC voltage (20V range). Connect the red lead to the positive battery terminal and the black lead to the negative terminal. A fully charged battery should read 12.6V or higher at rest. If the reading is below 12.4V, the battery is partially discharged; below 12.0V, it’s significantly discharged and may need charging or replacement. With the engine running, the reading should rise to 13.8V-14.4V, indicating the alternator is charging correctly. If the voltage stays below 13.5V with the engine running, the alternator may be failing. If it exceeds 14.8V, the voltage regulator is likely overcharging, which can damage the battery and electrical components.

Testing for Parasitic Drain

Parasitic drain testing requires patience and a meter with milliamp resolution. Start by ensuring all accessories are off, doors are closed, and the vehicle has been locked and left undisturbed for at least 30 minutes to allow all modules to enter sleep mode. Set your multimeter to DC current (10A range initially, then switch to mA range for finer resolution). Disconnect the negative battery cable and connect the meter in series between the negative terminal and the cable. The reading should be below 50mA for most modern vehicles. If the drain exceeds 80mA, there’s a problem. To isolate the source, remove fuses one at a time while watching the meter — when the current drops significantly, you’ve found the circuit causing the drain. Remember to reset the meter to the mA range after the initial 10A check to avoid blowing the fuse.

Testing a Fuel Injector with Duty Cycle

Connect the black lead of your multimeter to a good ground and the red lead to the injector’s signal wire (the one that pulses). Set the meter to duty cycle mode. With the engine idling, a healthy fuel injector should show a duty cycle of 2-5%. Rev the engine — the duty cycle should increase with RPM. If the duty cycle is stuck at 0%, the injector isn’t receiving a signal (wiring issue or failed driver in the ECU). If it’s stuck at 100%, the injector is likely stuck open or the signal is shorted to ground. Compare readings across all injectors — a significant difference between cylinders indicates a problem with that specific injector or its wiring.

Testing a Coolant Temperature Sensor

Disconnect the coolant temperature sensor and set your multimeter to resistance (ohms). Measure across the sensor’s two terminals. At room temperature (20°C/68°F), a typical sensor should read 2,000-3,000 ohms. As the sensor warms up, resistance should decrease. You can test this by placing the sensor in a cup of hot water (careful not to submerge the connector) — the resistance should drop to around 200-300 ohms at 80°C (176°F). If the resistance doesn’t change with temperature, the sensor is faulty. You can also test the sensor’s signal voltage by reconnecting it and back-probing the signal wire with the ignition on — it should read approximately 3V at cold start, decreasing as the engine warms up.

Testing a Ground Connection

Testing a Ground Connection

Poor ground connections are a common source of electrical gremlins. To test a ground, set your multimeter to DC voltage (2V range). With the circuit under load (e.g., headlights on), place the black lead on the battery negative terminal and the red lead on the ground point you’re testing. The voltage drop should be less than 0.1V (100mV). If you read more than 0.1V, there’s excessive resistance in that ground connection — clean the contact surfaces, tighten the bolt, or replace the ground strap. This test is particularly useful for diagnosing dim headlights, erratic sensor readings, and charging system issues.

Common Mistakes to Avoid When Using a Multimeter on Cars

Common Mistakes to Avoid When Using a Multimeter on Cars - best multimeter for cars

Even experienced mechanics make mistakes with multimeters. Some of these errors can damage the meter, while others can lead to incorrect diagnoses and wasted time. Here are the most common pitfalls and how to avoid them.

Mistake #1: Measuring Resistance on a Live Circuit

Resistance measurement sends a small current through the circuit to calculate resistance. If the circuit is live (powered), the external voltage can interfere with the reading and potentially damage the meter. Always ensure the circuit is de-energized before measuring resistance. This means disconnecting the component from the wiring harness or turning off the ignition and disconnecting the battery if necessary. Forgetting this step is the most common cause of blown fuses in multimeters.

Mistake #2: Using the Wrong Jack for the Test Leads

Most multimeters have three or four input jacks: a common (COM) jack, a voltage/resistance jack, and a current jack (sometimes two for different ranges). Plugging the red lead into the current jack and then trying to measure voltage is a classic error that blows the meter’s fuse or damages the internal circuitry. Always double-check that the red lead is in the correct jack for the measurement you’re about to make. When in doubt, start with the voltage/resistance jack and switch to the current jack only when you’re certain you need to measure current.

Mistake #3: Ignoring the CAT Rating of Test Leads

The test leads are the weakest link in the measurement chain. If your meter has a CAT III rating but your leads are only CAT II, the leads can fail under a transient voltage spike, potentially causing an arc flash. Always use test leads with a CAT rating equal to or higher than the meter’s rating. This is especially important when working on hybrid or electric vehicles, where system voltages can be much higher than 12V.

Mistake #4: Not Using the Low-Impedance (LoZ) Mode

Mistake #4: Details

Modern vehicles have wiring harnesses that can induce ghost voltages — stray voltages that appear on disconnected wires due to capacitive coupling from adjacent wires. These ghost voltages can read as 2-3V on a standard multimeter, leading you to believe a circuit is powered when it’s actually dead. The LoZ mode places a low-imped

Best Multimeter for Cars: The 2026 Buyer’s Guide for DIY Mechanics

A multimeter for cars is a handheld diagnostic instrument that measures electrical properties — voltage, current, resistance, continuity, and sometimes frequency or duty cycle — to pinpoint faults in a vehicle’s electrical system. Unlike a general-purpose multimeter, an automotive-specific model is engineered for the harsh realities of a car: it must tolerate voltage spikes from the alternator, read low-voltage signals from sensors with precision, and survive drops onto concrete garage floors. The entity at the heart of this guide is the automotive multimeter, and its defining attributes — measurement accuracy, safety ratings, input protection, and built-in automotive functions like RPM and dwell — are what separate a tool that saves you an hour from one that sends you chasing a phantom parasitic drain all weekend.

This buyer’s guide for 2026 cuts through the noise of hundreds of competing listings to answer one practical question: which multimeter should a DIY mechanic actually buy with their own money? We’ll cover the full attribute spectrum — from sub-$30 budget units that handle 90% of diagnostics, to $200-plus professional models with true RMS, low-impedance mode, and backlit displays for dim under-dash work. You’ll learn how to evaluate key specs like CAT III safety ratings, DC voltage accuracy (look for ±0.5% or better), and whether you need features like a temperature probe or a clamp for measuring starter current without breaking the circuit. We’ll also examine build quality, lead materials, and warranty support, because a multimeter that dies after six months of weekend wrenching is a false economy.

What makes this guide different is the data behind the recommendations. We didn’t just compile spec sheets — we cross-referenced user-reported failure rates, tested the most popular models for real-world voltage drop readings on a 2019 F-150, and compared price trends across major retailers over the past year. You’ll get honest limitations, not just praise: which features are marketing gimmicks, which automotive-specific functions are genuinely useful, and where a $15 multimeter from the parts store is actually the smarter choice than a $150 flagship. By the end, you’ll have a clear decision framework — not just a list of products, but the knowledge to match the right tool to your skill level, your vehicle’s age, and the specific diagnostic tasks you actually perform.

What Is an Automotive Multimeter and Why Is It Different?

What Is an Automotive Multimeter and Why Is It Different? - best multimeter for cars

An automotive multimeter is a specialized digital multimeter (DMM) optimized for the unique electrical environment of vehicles. While a standard DMM can measure basic electrical values, an automotive multimeter adds features specifically designed for car diagnostics: the ability to measure RPM (tachometer function) without an inductive pickup, duty cycle for fuel injectors and idle air control valves, dwell angle for older ignition systems, and often a low-impedance (LoZ) mode to prevent ghost voltage readings from induced currents in wiring harnesses. The core difference lies in input protection and filtering — automotive electrical systems are noisy, with voltage spikes from the alternator and ignition coils that can damage a standard multimeter or produce erratic readings.

Defining the Entity: The Standard DMM vs. The Automotive Multimeter

A standard digital multimeter is a general-purpose tool designed for electronics work, household wiring, and basic electrical troubleshooting. It measures AC/DC voltage, resistance, and continuity, and often includes a diode test and capacitance measurement. The automotive multimeter builds on this foundation with vehicle-specific functions. For example, the tachometer function on an automotive multimeter reads engine RPM from the ignition signal, eliminating the need for a separate timing light. Duty cycle measurement is critical for diagnosing fuel injector pulse width and EGR valve operation. Dwell angle is essential for classic cars with points-style ignition systems. Also, automotive multimeters typically feature a larger, more readable display with a bar graph for observing fluctuating signals, and they are built with rubberized housings to withstand the vibration and drops common in a garage environment.

Key Attributes: What to Look For (and What to Ignore)

Key Attributes: Details

When evaluating an automotive multimeter, focus on the attributes that matter for car diagnostics. DC voltage accuracy is paramount — look for a meter with ±0.5% accuracy or better on the DC voltage scale, as this ensures reliable readings from oxygen sensors and throttle position sensors. Auto-ranging is a convenience that prevents you from having to manually select the correct scale, but manual-ranging meters are often more responsive and can be more accurate in certain situations. Automotive-specific functions like RPM, duty cycle, and dwell are essential if you work on modern fuel-injected vehicles or classic cars. Safety ratings (CAT III for under-hood work, CAT IV for battery and starter measurements) are non-negotiable — a meter without proper CAT ratings can be dangerous. Build quality matters: a drop-proof, rubberized case protects the meter from damage, and a backlit display is crucial for working under the dash. Current measurement is another key differentiator — a clamp meter allows you to measure starter current without disconnecting wires, while inline current measurement requires breaking the circuit. Temperature measurement is a bonus for diagnosing cooling system issues and checking catalytic converter efficiency.

The 4 Core Measurements: Voltage, Resistance, Continuity, and Current

The 4 Core Measurements: Voltage, Resistance, Continuity, and Current - best multimeter for cars

Every automotive diagnostic task boils down to four fundamental measurements. Mastering these will allow you to troubleshoot 90% of electrical problems in any vehicle, from a 1985 F-150 to a 2026 Tesla (with appropriate safety precautions for high-voltage systems). The key is not just knowing how to take a reading, but understanding what the reading means in the context of the circuit you’re testing.

Voltage: The Lifeblood of the Electrical System

Voltage measurement is the most common task for an automotive multimeter. In a 12V system, you should see approximately 12.6V across a fully charged battery at rest, and 13.8V to 14.4V with the engine running (alternator output). Voltage drop testing is a critical technique: with the circuit under load, you measure the voltage drop across a connector, switch, or ground cable. A drop of more than 0.1V (100mV) indicates excessive resistance in that component. For sensor circuits, you’ll be measuring reference voltages (typically 5V from the ECU) and signal voltages that vary with operating conditions. A quality automotive multimeter with ±0.5% DC voltage accuracy will reliably detect a 0.05V difference that could indicate a failing sensor.

Resistance: Finding Opens and Shorts

Resistance measurement (ohms) is used to test sensors, coils, and wiring integrity. A coolant temperature sensor, for example, should show a specific resistance range at a given temperature — typically 2,000-3,000 ohms at 20°C (68°F), decreasing as the engine warms up. Ignition coils have primary and secondary resistance specifications that can be checked with a multimeter. When measuring resistance, always ensure the circuit is de-energized (power off) to avoid damaging the meter. The resistance range on an automotive multimeter should go from 0.1 ohms (for testing ground connections) to at least 20 megaohms (for testing insulation resistance).

Continuity: The Quick Check

Continuity testing is a specialized resistance measurement with an audible beep. It’s the fastest way to check if a wire is broken, a fuse is blown, or a ground connection is intact. The beep sounds when resistance is below a threshold (typically 30-50 ohms), allowing you to keep your eyes on the probes while testing. This is invaluable for tracing wiring harnesses and checking for shorts to ground. A good automotive multimeter will have a dedicated continuity mode with a fast response time — a slow beep can waste hours when you’re chasing a wiring issue.

Current: Measuring the Flow (and the Parasitic Drain)

Current measurement is the most complex of the four core functions. There are two approaches: inline (series) measurement, where the meter is placed in the circuit, and clamp measurement, where a clamp surrounds the wire and measures the magnetic field. For automotive work, a clamp meter is far more practical for measuring starter current (which can exceed 200 amps) or alternator output. Inline measurement is typically limited to 10 amps on most multimeters and requires breaking the circuit. Parasitic drain testing — finding the battery drain that kills your battery overnight — is a classic automotive multimeter task. This requires measuring current in the milliamp range with the vehicle off and all modules asleep, which can take 30-60 minutes after the doors are closed. A meter with a 10-amp fuse and a high-resolution milli
amp scale (0.1mA resolution) is essential for this task, as modern vehicles can draw 20-50mA in standby and a drain above 80mA indicates a problem. For measuring high current like starter draw, a clamp meter with a 600-amp AC/DC rating is the safer and more practical choice, as it eliminates the risk of blowing the meter’s fuse and doesn’t require disconnecting any wires.

Automotive-Specific Functions: RPM, Duty Cycle, Dwell, and More

Automotive-Specific Functions: RPM, Duty Cycle, Dwell, and More - best multimeter for cars

What truly separates an automotive multimeter from a standard DMM is the inclusion of vehicle-specific measurement functions. These features allow you to perform diagnostics that would otherwise require specialized, expensive tools. Understanding when and how to use each function is what elevates a DIY mechanic from a parts-swapper to a true diagnostician.

RPM (Tachometer): Measuring Engine Speed Without a Timing Light

The RPM function on an automotive multimeter reads engine speed directly from the ignition system. Most meters use an inductive pickup that clamps around a spark plug wire, counting the pulses to calculate revolutions per minute. For modern vehicles with coil-on-plug ignition, some meters can read RPM from the tachometer signal wire or the OBD-II connector. This is invaluable for setting idle speed, diagnosing misfires, and verifying that the engine is running at the correct speed for other tests. When using an inductive pickup, ensure the meter is set to the correct engine cycle (2-stroke or 4-stroke) and cylinder count to get an accurate reading.

Duty Cycle: Diagnosing Fuel Injectors and Solenoids

Duty cycle measures the percentage of time a signal is high (or low) versus the total cycle time. In automotive diagnostics, this is primarily used to test fuel injectors, idle air control (IAC) valves, and EGR solenoids. A fuel injector should show a duty cycle of approximately 2-5% at idle, increasing to 80% or more under heavy load. A duty cycle reading that’s stuck at 100% or 0% indicates a stuck-open or stuck-closed injector. The duty cycle function on a multimeter typically displays the percentage and can also show frequency, which is useful for verifying that a sensor is producing the correct signal rate.

Dwell Angle: For Classic Cars with Points Ignition

Dwell angle is a measurement specific to older vehicles with points-style ignition systems. It measures the number of degrees the distributor cam rotates while the points are closed. The correct dwell angle varies by vehicle — typically 30-35 degrees for a 4-cylinder engine, 28-32 degrees for a 6-cylinder, and 26-30 degrees for an 8-cylinder. An incorrect dwell angle affects ignition timing and can cause poor performance or hard starting. While modern vehicles no longer use points, this function is essential for anyone working on classic cars, vintage motorcycles, or small engines with points ignition.

Frequency and Pulse Width: Advanced Signal Analysis

Many automotive multimeters include frequency measurement (in Hz) and pulse width measurement (in milliseconds). Frequency is used to test crankshaft position sensors, wheel speed sensors, and MAF sensors, which produce a varying frequency signal based on rotational speed or airflow. Pulse width is critical for diagnosing fuel injector operation — the injector pulse width should increase with engine load and RPM. These measurements require a meter with a fast sampling rate and a bandwidth of at least 10kHz to accurately capture the signals.

Temperature: Engine and Exhaust Diagnostics

Temperature: Details

A temperature measurement function, typically using a K-type thermocouple probe, is a valuable addition to an automotive multimeter. You can check coolant temperature at the thermostat housing, verify that the cooling fan kicks in at the correct temperature, or measure exhaust gas temperature to diagnose a clogged catalytic converter. Some meters include a temperature probe in the kit, while others require a separate purchase. For DIY mechanics, this function can save a trip to the shop for a simple overheating diagnosis.

Safety Ratings and Build Quality: What You Need to Know

Safety Ratings and Build Quality: What You Need to Know - best multimeter for cars

Safety is the most overlooked aspect of multimeter selection, yet it’s the one that can save your life. Automotive electrical systems can deliver hundreds of amps of short-circuit current, and a meter without proper safety ratings can explode in your hands. Understanding CAT ratings and build quality is not optional — it’s essential.

CAT Ratings: The Safety Standard You Can’t Ignore

CAT (Category) ratings define the maximum transient voltage a multimeter can safely withstand. For automotive work, you need at least a CAT III rating, which covers distribution-level circuits (like the under-hood electrical system) and can handle transients up to 4,000V. CAT IV is even better, covering utility-level connections like the battery and starter. A meter with only a CAT II rating is not safe for automotive use — it’s designed for household appliances and can fail catastrophically when exposed to the voltage spikes from an alternator or ignition coil. Always look for the CAT rating printed on the meter and the test leads. The test leads must have the same or higher CAT rating as the meter itself — cheap leads are a common point of failure.

Input Protection: Fuses and PTC Protection

Input protection is the internal circuitry that protects the meter from damage when you accidentally measure voltage while the leads are in the current jacks. A quality automotive multimeter will have a high-energy fuse (typically 10A, rated at 600V or 1000V) on the current input, and a PTC (positive temperature coefficient) thermistor on the resistance/voltage input. These components absorb the energy of a fault and prevent it from reaching the user or the meter’s internal circuitry. Cheap meters often use undersized fuses or no protection at all, which can result in a violent failure. When comparing meters, check the fuse specifications — a 10A/600V ceramic fuse is the minimum acceptable standard.

Build Quality: Drop-Proofing, Rubberized Cases, and Lead Quality

Automotive work is hard on tools. A multimeter that lives in a garage or tool bag will be dropped, knocked off fenders, and exposed to oil, grease, and solvents. Look for a meter with a rubberized over-mold that provides shock absorption and a secure grip. A drop-proof rating of 1 meter (3.3 feet) or more is ideal. The display should be protected by a clear lens that won’t scratch easily. Test leads are another critical component — they should have silicone insulation that remains flexible in cold weather, and the probes should have sharp tips that can pierce wire insulation. Many professional mechanics replace the stock leads with aftermarket silicone leads for better durability and flexibility. The input jacks should be recessed and have a strain relief to prevent the leads from pulling out during use.

Display Features: Backlight, Bar Graph, and Auto-Off

Display Features: Details

A backlit display is non-negotiable for automotive work — you’ll often be reading the meter in dim conditions under the dash or hood. Look for a white or amber backlight that illuminates the entire display evenly. A bar graph is a useful feature for observing rapidly changing signals, such as a sensor voltage that fluctuates with engine RPM. The bar graph updates faster than the digital readout and gives you a visual representation of the signal trend. Auto-off is a battery-saving feature that shuts the meter off after a period of inactivity (typically 15-30 minutes). While convenient, it can be frustrating during a long diagnostic session — look for a meter with a disable function or a long auto-off delay. Battery life is also a consideration; a meter that uses a standard 9V battery is easier to replace than one with a proprietary rechargeable battery.

Auto-Ranging vs. Manual-Ranging: Which Is Right for You?

Auto-Ranging vs. Manual-Ranging: Which Is Right for You? - best multimeter for cars

The ranging method is a fundamental design choice that affects how you interact with the meter. Auto-ranging meters automatically select the correct measurement scale based on the input signal, while manual-ranging meters require you to dial in the expected range. Each approach has its strengths and weaknesses, and the right choice depends on your experience level and diagnostic style.

Auto-Ranging: Convenience and Speed

Auto-Ranging: Details

Auto-ranging meters are the default choice for most DIY mechanics. They eliminate the guesswork of selecting the correct range — you simply connect the leads and read the value. This is particularly useful when you’re testing an unknown signal, such as a sensor output that you expect to be 0-5

Best Multimeter for Cars: The 2026 Buyer’s Guide for DIY Mechanics

A multimeter for cars is a handheld diagnostic instrument that measures electrical properties — voltage, current, resistance, continuity, and sometimes frequency or duty cycle — to pinpoint faults in a vehicle’s electrical system. Unlike a general-purpose multimeter, an automotive-specific model is engineered for the harsh realities of a car: it must tolerate voltage spikes from the alternator, read low-voltage signals from sensors with precision, and survive drops onto concrete garage floors. The entity at the heart of this guide is the automotive multimeter, and its defining attributes — measurement accuracy, safety ratings, input protection, and built-in automotive functions like RPM and dwell — are what separate a tool that saves you an hour from one that sends you chasing a phantom parasitic drain all weekend.

This buyer’s guide for 2026 cuts through the noise of hundreds of competing listings to answer one practical question: which multimeter should a DIY mechanic actually buy with their own money? We’ll cover the full attribute spectrum — from sub-$30 budget units that handle 90% of diagnostics, to $200-plus professional models with true RMS, low-impedance mode, and backlit displays for dim under-dash work. You’ll learn how to evaluate key specs like CAT III safety ratings, DC voltage accuracy (look for ±0.5% or better), and whether you need features like a temperature probe or a clamp for measuring starter current without breaking the circuit. We’ll also examine build quality, lead materials, and warranty support, because a multimeter that dies after six months of weekend wrenching is a false economy.

What makes this guide different is the data behind the recommendations. We didn’t just compile spec sheets — we cross-referenced user-reported failure rates, tested the most popular models for real-world voltage drop readings on a 2019 F-150, and compared price trends across major retailers over the past year. You’ll get honest limitations, not just praise: which features are marketing gimmicks, which automotive-specific functions are genuinely useful, and where a $15 multimeter from the parts store is actually the smarter choice than a $150 flagship. By the end, you’ll have a clear decision framework — not just a list of products, but the knowledge to match the right tool to your skill level, your vehicle’s age, and the specific diagnostic tasks you actually perform.

What Is an Automotive Multimeter and Why Is It Different?

What Is an Automotive Multimeter and Why Is It Different? - best multimeter for cars

An automotive multimeter is a specialized digital multimeter (DMM) optimized for the unique electrical environment of vehicles. While a standard DMM can measure basic electrical values, an automotive multimeter adds features specifically designed for car diagnostics: the ability to measure RPM (tachometer function) without an inductive pickup, duty cycle for fuel injectors and idle air control valves, dwell angle for older ignition systems, and often a low-impedance (LoZ) mode to prevent ghost voltage readings from induced currents in wiring harnesses. The core difference lies in input protection and filtering — automotive electrical systems are noisy, with voltage spikes from the alternator and ignition coils that can damage a standard multimeter or produce erratic readings.

Defining the Entity: The Standard DMM vs. The Automotive Multimeter

A standard digital multimeter is a general-purpose tool designed for electronics work, household wiring, and basic electrical troubleshooting. It measures AC/DC voltage, resistance, and continuity, and often includes a diode test and capacitance measurement. The automotive multimeter builds on this foundation with vehicle-specific functions. For example, the tachometer function on an automotive multimeter reads engine RPM from the ignition signal, eliminating the need for a separate timing light. Duty cycle measurement is critical for diagnosing fuel injector pulse width and EGR valve operation. Dwell angle is essential for classic cars with points-style ignition systems. Also, automotive multimeters typically feature a larger, more readable display with a bar graph for observing fluctuating signals, and they are built with rubberized housings to withstand the vibration and drops common in a garage environment.

Key Attributes: What to Look For (and What to Ignore)

Key Attributes: Details

When evaluating an automotive multimeter, focus on the attributes that matter for car diagnostics. DC voltage accuracy is paramount — look for a meter with ±0.5% accuracy or better on the DC voltage scale, as this ensures reliable readings from oxygen sensors and throttle position sensors. Auto-ranging is a convenience that prevents you from having to manually select the correct scale, but manual-ranging meters are often more responsive and can be more accurate in certain situations. Automotive-specific functions like RPM, duty cycle, and dwell are essential if you work on modern fuel-injected vehicles or classic cars. Safety ratings (CAT III for under-hood work, CAT IV for battery and starter measurements) are non-negotiable — a meter without proper CAT ratings can be dangerous. Build quality matters: a drop-proof, rubberized case protects the meter from damage, and a backlit display is crucial for working under the dash. Current measurement is another key differentiator — a clamp meter allows you to measure starter current without disconnecting wires, while inline current measurement requires breaking the circuit. Temperature measurement is a bonus for diagnosing cooling system issues and checking catalytic converter efficiency.

The 4 Core Measurements: Voltage, Resistance, Continuity, and Current

The 4 Core Measurements: Voltage, Resistance, Continuity, and Current - best multimeter for cars

Every automotive diagnostic task boils down to four fundamental measurements. Mastering these will allow you to troubleshoot 90% of electrical problems in any vehicle, from a 1985 F-150 to a 2026 Tesla (with appropriate safety precautions for high-voltage systems). The key is not just knowing how to take a reading, but understanding what the reading means in the context of the circuit you’re testing.

Voltage: The Lifeblood of the Electrical System

Voltage measurement is the most common task for an automotive multimeter. In a 12V system, you should see approximately 12.6V across a fully charged battery at rest, and 13.8V to 14.4V with the engine running (alternator output). Voltage drop testing is a critical technique: with the circuit under load, you measure the voltage drop across a connector, switch, or ground cable. A drop of more than 0.1V (100mV) indicates excessive resistance in that component. For sensor circuits, you’ll be measuring reference voltages (typically 5V from the ECU) and signal voltages that vary with operating conditions. A quality automotive multimeter with ±0.5% DC voltage accuracy will reliably detect a 0.05V difference that could indicate a failing sensor.

Resistance: Finding Opens and Shorts

Resistance measurement (ohms) is used to test sensors, coils, and wiring integrity. A coolant temperature sensor, for example, should show a specific resistance range at a given temperature — typically 2,000-3,000 ohms at 20°C (68°F), decreasing as the engine warms up. Ignition coils have primary and secondary resistance specifications that can be checked with a multimeter. When measuring resistance, always ensure the circuit is de-energized (power off) to avoid damaging the meter. The resistance range on an automotive multimeter should go from 0.1 ohms (for testing ground connections) to at least 20 megaohms (for testing insulation resistance).

Continuity: The Quick Check

Continuity testing is a specialized resistance measurement with an audible beep. It’s the fastest way to check if a wire is broken, a fuse is blown, or a ground connection is intact. The beep sounds when resistance is below a threshold (typically 30-50 ohms), allowing you to keep your eyes on the probes while testing. This is invaluable for tracing wiring harnesses and checking for shorts to ground. A good automotive multimeter will have a dedicated continuity mode with a fast response time — a slow beep can waste hours when you’re chasing a wiring issue.

Current: Measuring the Flow (and the Parasitic Drain)

Current measurement is the most complex of the four core functions. There are two approaches: inline (series) measurement, where the meter is placed in the circuit, and clamp measurement, where a clamp surrounds the wire and measures the magnetic field. For automotive work, a clamp meter is far more practical for measuring starter current (which can exceed 200 amps) or alternator output. Inline measurement is typically limited to 10 amps on most multimeters and requires breaking the circuit. Parasitic drain testing — finding the battery drain that kills your battery overnight — is a classic automotive multimeter task. This requires measuring current in the milliamp range with the vehicle off and all modules asleep, which can take 30-60 minutes after the doors are closed. A meter with a 10-amp fuse and a high-resolution milli
amp scale (0.1mA resolution) is essential for this task, as modern vehicles can draw 20-50mA in standby and a drain above 80mA indicates a problem. For measuring high current like starter draw, a clamp meter with a 600-amp AC/DC rating is the safer and more practical choice, as it eliminates the risk of blowing the meter’s fuse and doesn’t require disconnecting any wires.

Automotive-Specific Functions: RPM, Duty Cycle, Dwell, and More

Automotive-Specific Functions: RPM, Duty Cycle, Dwell, and More - best multimeter for cars

What truly separates an automotive multimeter from a standard DMM is the inclusion of vehicle-specific measurement functions. These features allow you to perform diagnostics that would otherwise require specialized, expensive tools. Understanding when and how to use each function is what elevates a DIY mechanic from a parts-swapper to a true diagnostician.

RPM (Tachometer): Measuring Engine Speed Without a Timing Light

The RPM function on an automotive multimeter reads engine speed directly from the ignition system. Most meters use an inductive pickup that clamps around a spark plug wire, counting the pulses to calculate revolutions per minute. For modern vehicles with coil-on-plug ignition, some meters can read RPM from the tachometer signal wire or the OBD-II connector. This is invaluable for setting idle speed, diagnosing misfires, and verifying that the engine is running at the correct speed for other tests. When using an inductive pickup, ensure the meter is set to the correct engine cycle (2-stroke or 4-stroke) and cylinder count to get an accurate reading.

Duty Cycle: Diagnosing Fuel Injectors and Solenoids

Duty cycle measures the percentage of time a signal is high (or low) versus the total cycle time. In automotive diagnostics, this is primarily used to test fuel injectors, idle air control (IAC) valves, and EGR solenoids. A fuel injector should show a duty cycle of approximately 2-5% at idle, increasing to 80% or more under heavy load. A duty cycle reading that’s stuck at 100% or 0% indicates a stuck-open or stuck-closed injector. The duty cycle function on a multimeter typically displays the percentage and can also show frequency, which is useful for verifying that a sensor is producing the correct signal rate.

Dwell Angle: For Classic Cars with Points Ignition

Dwell angle is a measurement specific to older vehicles with points-style ignition systems. It measures the number of degrees the distributor cam rotates while the points are closed. The correct dwell angle varies by vehicle — typically 30-35 degrees for a 4-cylinder engine, 28-32 degrees for a 6-cylinder, and 26-30 degrees for an 8-cylinder. An incorrect dwell angle affects ignition timing and can cause poor performance or hard starting. While modern vehicles no longer use points, this function is essential for anyone working on classic cars, vintage motorcycles, or small engines with points ignition.

Frequency and Pulse Width: Advanced Signal Analysis

Many automotive multimeters include frequency measurement (in Hz) and pulse width measurement (in milliseconds). Frequency is used to test crankshaft position sensors, wheel speed sensors, and MAF sensors, which produce a varying frequency signal based on rotational speed or airflow. Pulse width is critical for diagnosing fuel injector operation — the injector pulse width should increase with engine load and RPM. These measurements require a meter with a fast sampling rate and a bandwidth of at least 10kHz to accurately capture the signals.

Temperature: Engine and Exhaust Diagnostics

Temperature: Details

A temperature measurement function, typically using a K-type thermocouple probe, is a valuable addition to an automotive multimeter. You can check coolant temperature at the thermostat housing, verify that the cooling fan kicks in at the correct temperature, or measure exhaust gas temperature to diagnose a clogged catalytic converter. Some meters include a temperature probe in the kit, while others require a separate purchase. For DIY mechanics, this function can save a trip to the shop for a simple overheating diagnosis.

Safety Ratings and Build Quality: What You Need to Know

Safety Ratings and Build Quality: What You Need to Know - best multimeter for cars

Safety is the most overlooked aspect of multimeter selection, yet it’s the one that can save your life. Automotive electrical systems can deliver hundreds of amps of short-circuit current, and a meter without proper safety ratings can explode in your hands. Understanding CAT ratings and build quality is not optional — it’s essential.

CAT Ratings: The Safety Standard You Can’t Ignore

CAT (Category) ratings define the maximum transient voltage a multimeter can safely withstand. For automotive work, you need at least a CAT III rating, which covers distribution-level circuits (like the under-hood electrical system) and can handle transients up to 4,000V. CAT IV is even better, covering utility-level connections like the battery and starter. A meter with only a CAT II rating is not safe for automotive use — it’s designed for household appliances and can fail catastrophically when exposed to the voltage spikes from an alternator or ignition coil. Always look for the CAT rating printed on the meter and the test leads. The test leads must have the same or higher CAT rating as the meter itself — cheap leads are a common point of failure.

Input Protection: Fuses and PTC Protection

Input protection is the internal circuitry that protects the meter from damage when you accidentally measure voltage while the leads are in the current jacks. A quality automotive multimeter will have a high-energy fuse (typically 10A, rated at 600V or 1000V) on the current input, and a PTC (positive temperature coefficient) thermistor on the resistance/voltage input. These components absorb the energy of a fault and prevent it from reaching the user or the meter’s internal circuitry. Cheap meters often use undersized fuses or no protection at all, which can result in a violent failure. When comparing meters, check the fuse specifications — a 10A/600V ceramic fuse is the minimum acceptable standard.

Build Quality: Drop-Proofing, Rubberized Cases, and Lead Quality

Automotive work is hard on tools. A multimeter that lives in a garage or tool bag will be dropped, knocked off fenders, and exposed to oil, grease, and solvents. Look for a meter with a rubberized over-mold that provides shock absorption and a secure grip. A drop-proof rating of 1 meter (3.3 feet) or more is ideal. The display should be protected by a clear lens that won’t scratch easily. Test leads are another critical component — they should have silicone insulation that remains flexible in cold weather, and the probes should have sharp tips that can pierce wire insulation. Many professional mechanics replace the stock leads with aftermarket silicone leads for better durability and flexibility. The input jacks should be recessed and have a strain relief to prevent the leads from pulling out during use.

Display Features: Backlight, Bar Graph, and Auto-Off

Display Features: Details

A backlit display is non-negotiable for automotive work — you’ll often be reading the meter in dim conditions under the dash or hood. Look for a white or amber backlight that illuminates the entire display evenly. A bar graph is a useful feature for observing rapidly changing signals, such as a sensor voltage that fluctuates with engine RPM. The bar graph updates faster than the digital readout and gives you a visual representation of the signal trend. Auto-off is a battery-saving feature that shuts the meter off after a period of inactivity (typically 15-30 minutes). While convenient, it can be frustrating during a long diagnostic session — look for a meter with a disable function or a long auto-off delay. Battery life is also a consideration; a meter that uses a standard 9V battery is easier to replace than one with a proprietary rechargeable battery.

Auto-Ranging vs. Manual-Ranging: Which Is Right for You?

Auto-Ranging vs. Manual-Ranging: Which Is Right for You? - best multimeter for cars

The ranging method is a fundamental design choice that affects how you interact with the meter. Auto-ranging meters automatically select the correct measurement scale based on the input signal, while manual-ranging meters require you to dial in the expected range. Each approach has its strengths and weaknesses, and the right choice depends on your experience level and diagnostic style.

Auto-Ranging: Convenience and Speed

Auto-Ranging: Details

Auto-ranging meters are the default choice for most DIY mechanics. They eliminate the guesswork of selecting the correct range — you simply connect the leads and read the value. This is particularly useful when you’re testing an unknown signal, such as a sensor output that you expect to be 0-5

Best Multimeter for Cars: The 2026 Buyer’s Guide for DIY Mechanics

A multimeter for cars is a handheld diagnostic instrument that measures electrical properties — voltage, current, resistance, continuity, and sometimes frequency or duty cycle — to pinpoint faults in a vehicle’s electrical system. Unlike a general-purpose multimeter, an automotive-specific model is engineered for the harsh realities of a car: it must tolerate voltage spikes from the alternator, read low-voltage signals from sensors with precision, and survive drops onto concrete garage floors. The entity at the heart of this guide is the automotive multimeter, and its defining attributes — measurement accuracy, safety ratings, input protection, and built-in automotive functions like RPM and dwell — are what separate a tool that saves you an hour from one that sends you chasing a phantom parasitic drain all weekend.

This buyer’s guide for 2026 cuts through the noise of hundreds of competing listings to answer one practical question: which multimeter should a DIY mechanic actually buy with their own money? We’ll cover the full attribute spectrum — from sub-$30 budget units that handle 90% of diagnostics, to $200-plus professional models with true RMS, low-impedance mode, and backlit displays for dim under-dash work. You’ll learn how to evaluate key specs like CAT III safety ratings, DC voltage accuracy (look for ±0.5% or better), and whether you need features like a temperature probe or a clamp for measuring starter current without breaking the circuit. We’ll also examine build quality, lead materials, and warranty support, because a multimeter that dies after six months of weekend wrenching is a false economy.

What makes this guide different is the data behind the recommendations. We didn’t just compile spec sheets — we cross-referenced user-reported failure rates, tested the most popular models for real-world voltage drop readings on a 2019 F-150, and compared price trends across major retailers over the past year. You’ll get honest limitations, not just praise: which features are marketing gimmicks, which automotive-specific functions are genuinely useful, and where a $15 multimeter from the parts store is actually the smarter choice than a $150 flagship. By the end, you’ll have a clear decision framework — not just a list of products, but the knowledge to match the right tool to your skill level, your vehicle’s age, and the specific diagnostic tasks you actually perform.

What Is an Automotive Multimeter and Why Is It Different?

What Is an Automotive Multimeter and Why Is It Different? - best multimeter for cars

An automotive multimeter is a specialized digital multimeter (DMM) optimized for the unique electrical environment of vehicles. While a standard DMM can measure basic electrical values, an automotive multimeter adds features specifically designed for car diagnostics: the ability to measure RPM (tachometer function) without an inductive pickup, duty cycle for fuel injectors and idle air control valves, dwell angle for older ignition systems, and often a low-impedance (LoZ) mode to prevent ghost voltage readings from induced currents in wiring harnesses. The core difference lies in input protection and filtering — automotive electrical systems are noisy, with voltage spikes from the alternator and ignition coils that can damage a standard multimeter or produce erratic readings.

Defining the Entity: The Standard DMM vs. The Automotive Multimeter

A standard digital multimeter is a general-purpose tool designed for electronics work, household wiring, and basic electrical troubleshooting. It measures AC/DC voltage, resistance, and continuity, and often includes a diode test and capacitance measurement. The automotive multimeter builds on this foundation with vehicle-specific functions. For example, the tachometer function on an automotive multimeter reads engine RPM from the ignition signal, eliminating the need for a separate timing light. Duty cycle measurement is critical for diagnosing fuel injector pulse width and EGR valve operation. Dwell angle is essential for classic cars with points-style ignition systems. Also, automotive multimeters typically feature a larger, more readable display with a bar graph for observing fluctuating signals, and they are built with rubberized housings to withstand the vibration and drops common in a garage environment.

Key Attributes: What to Look For (and What to Ignore)

Key Attributes: Details

When evaluating an automotive multimeter, focus on the attributes that matter for car diagnostics. DC voltage accuracy is paramount — look for a meter with ±0.5% accuracy or better on the DC voltage scale, as this ensures reliable readings from oxygen sensors and throttle position sensors. Auto-ranging is a convenience that prevents you from having to manually select the correct scale, but manual-ranging meters are often more responsive and can be more accurate in certain situations. Automotive-specific functions like RPM, duty cycle, and dwell are essential if you work on modern fuel-injected vehicles or classic cars. Safety ratings (CAT III for under-hood work, CAT IV for battery and starter measurements) are non-negotiable — a meter without proper CAT ratings can be dangerous. Build quality matters: a drop-proof, rubberized case protects the meter from damage, and a backlit display is crucial for working under the dash. Current measurement is another key differentiator — a clamp meter allows you to measure starter current without disconnecting wires, while inline current measurement requires breaking the circuit. Temperature measurement is a bonus for diagnosing cooling system issues and checking catalytic converter efficiency.

The 4 Core Measurements: Voltage, Resistance, Continuity, and Current

The 4 Core Measurements: Voltage, Resistance, Continuity, and Current - best multimeter for cars

Every automotive diagnostic task boils down to four fundamental measurements. Mastering these will allow you to troubleshoot 90% of electrical problems in any vehicle, from a 1985 F-150 to a 2026 Tesla (with appropriate safety precautions for high-voltage systems). The key is not just knowing how to take a reading, but understanding what the reading means in the context of the circuit you’re testing.

Voltage: The Lifeblood of the Electrical System

Voltage measurement is the most common task for an automotive multimeter. In a 12V system, you should see approximately 12.6V across a fully charged battery at rest, and 13.8V to 14.4V with the engine running (alternator output). Voltage drop testing is a critical technique: with the circuit under load, you measure the voltage drop across a connector, switch, or ground cable. A drop of more than 0.1V (100mV) indicates excessive resistance in that component. For sensor circuits, you’ll be measuring reference voltages (typically 5V from the ECU) and signal voltages that vary with operating conditions. A quality automotive multimeter with ±0.5% DC voltage accuracy will reliably detect a 0.05V difference that could indicate a failing sensor.

Resistance: Finding Opens and Shorts

Resistance measurement (ohms) is used to test sensors, coils, and wiring integrity. A coolant temperature sensor, for example, should show a specific resistance range at a given temperature — typically 2,000-3,000 ohms at 20°C (68°F), decreasing as the engine warms up. Ignition coils have primary and secondary resistance specifications that can be checked with a multimeter. When measuring resistance, always ensure the circuit is de-energized (power off) to avoid damaging the meter. The resistance range on an automotive multimeter should go from 0.1 ohms (for testing ground connections) to at least 20 megaohms (for testing insulation resistance).

Continuity: The Quick Check

Continuity testing is a specialized resistance measurement with an audible beep. It’s the fastest way to check if a wire is broken, a fuse is blown, or a ground connection is intact. The beep sounds when resistance is below a threshold (typically 30-50 ohms), allowing you to keep your eyes on the probes while testing. This is invaluable for tracing wiring harnesses and checking for shorts to ground. A good automotive multimeter will have a dedicated continuity mode with a fast response time — a slow beep can waste hours when you’re chasing a wiring issue.

Current: Measuring the Flow (and the Parasitic Drain)

Current: Details

Current measurement is the most complex of the four core functions. There are two approaches: inline (series) measurement, where the meter is placed in the circuit, and clamp measurement, where a clamp surrounds the wire and measures the magnetic field. For automotive work, a clamp meter is far more practical for measuring starter current (which can exceed 200 amps) or alternator output. Inline measurement is typically limited to 10 amps on most multimeters and requires breaking the circuit. Parasitic drain testing — finding the battery drain that kills your battery overnight — is a classic automotive multimeter task. This requires measuring current in the milliamp range with the vehicle off and all modules asleep, which can take 30-60 minutes after the doors are closed. A meter with a 10-amp fuse and a high-resolution milli

Best Multimeter for Cars: The 2026 Buyer’s Guide for DIY Mechanics

A multimeter for cars is a handheld diagnostic instrument that measures electrical properties — voltage, current, resistance, continuity, and sometimes frequency or duty cycle — to pinpoint faults in a vehicle’s electrical system. Unlike a general-purpose multimeter, an automotive-specific model is engineered for the harsh realities of a car: it must tolerate voltage spikes from the alternator, read low-voltage signals from sensors with precision, and survive drops onto concrete garage floors. The entity at the heart of this guide is the automotive multimeter, and its defining attributes — measurement accuracy, safety ratings, input protection, and built-in automotive functions like RPM and dwell — are what separate a tool that saves you an hour from one that sends you chasing a phantom parasitic drain all weekend.

This buyer’s guide for 2026 cuts through the noise of hundreds of competing listings to answer one practical question: which multimeter should a DIY mechanic actually buy with their own money? We’ll cover the full attribute spectrum — from sub-$30 budget units that handle 90% of diagnostics, to $200-plus professional models with true RMS, low-impedance mode, and backlit displays for dim under-dash work. You’ll learn how to evaluate key specs like CAT III safety ratings, DC voltage accuracy (look for ±0.5% or better), and whether you need features like a temperature probe or a clamp for measuring starter current without breaking the circuit. We’ll also examine build quality, lead materials, and warranty support, because a multimeter that dies after six months of weekend wrenching is a false economy.

What makes this guide different is the data behind the recommendations. We didn’t just compile spec sheets — we cross-referenced user-reported failure rates, tested the most popular models for real-world voltage drop readings on a 2019 F-150, and compared price trends across major retailers over the past year. You’ll get honest limitations, not just praise: which features are marketing gimmicks, which automotive-specific functions are genuinely useful, and where a $15 multimeter from the parts store is actually the smarter choice than a $150 flagship. By the end, you’ll have a clear decision framework — not just a list of products, but the knowledge to match the right tool to your skill level, your vehicle’s age, and the specific diagnostic tasks you actually perform.

What Is an Automotive Multimeter and Why Is It Different?

What Is an Automotive Multimeter and Why Is It Different? - best multimeter for cars

An automotive multimeter is a specialized digital multimeter (DMM) optimized for the unique electrical environment of vehicles. While a standard DMM can measure basic electrical values, an automotive multimeter adds features specifically designed for car diagnostics: the ability to measure RPM (tachometer function) without an inductive pickup, duty cycle for fuel injectors and idle air control valves, dwell angle for older ignition systems, and often a low-impedance (LoZ) mode to prevent ghost voltage readings from induced currents in wiring harnesses. The core difference lies in input protection and filtering — automotive electrical systems are noisy, with voltage spikes from the alternator and ignition coils that can damage a standard multimeter or produce erratic readings.

Defining the Entity: The Standard DMM vs. The Automotive Multimeter

A standard digital multimeter is a general-purpose tool designed for electronics work, household wiring, and basic electrical troubleshooting. It measures AC/DC voltage, resistance, and continuity, and often includes a diode test and capacitance measurement. The automotive multimeter builds on this foundation with vehicle-specific functions. For example, the tachometer function on an automotive multimeter reads engine RPM from the ignition signal, eliminating the need for a separate timing light. Duty cycle measurement is critical for diagnosing fuel injector pulse width and EGR valve operation. Dwell angle is essential for classic cars with points-style ignition systems. Also, automotive multimeters typically feature a larger, more readable display with a bar graph for observing fluctuating signals, and they are built with rubberized housings to withstand the vibration and drops common in a garage environment.

Key Attributes: What to Look For (and What to Ignore)

Key Attributes: Details

When evaluating an automotive multimeter, focus on the attributes that matter for car diagnostics. DC voltage accuracy is paramount — look for a meter with ±0.5% accuracy or better on the DC voltage scale, as this ensures reliable readings from oxygen sensors and throttle position sensors. Auto-ranging is a convenience that prevents you from having to manually select the correct scale, but manual-ranging meters are often more responsive and can be more accurate in certain situations. Automotive-specific functions like RPM, duty cycle, and dwell are essential if you work on modern fuel-injected vehicles or classic cars. Safety ratings (CAT III for under-hood work, CAT IV for battery and starter measurements) are non-negotiable — a meter without proper CAT ratings can be dangerous. Build quality matters: a drop-proof, rubberized case protects the meter from damage, and a backlit display is crucial for working under the dash. Current measurement is another key differentiator — a clamp meter allows you to measure starter current without disconnecting wires, while inline current measurement requires breaking the circuit. Temperature measurement is a bonus for diagnosing cooling system issues and checking catalytic converter efficiency.

The 4 Core Measurements: Voltage, Resistance, Continuity, and Current

The 4 Core Measurements: Voltage, Resistance, Continuity, and Current - best multimeter for cars

Every automotive diagnostic task boils down to four fundamental measurements. Mastering these will allow you to troubleshoot 90% of electrical problems in any vehicle, from a 1985 F-150 to a 2026 Tesla (with appropriate safety precautions for high-voltage systems). The key is not just knowing how to take a reading, but understanding what the reading means in the context of the circuit you’re testing.

Voltage: The Lifeblood of the Electrical System

Voltage measurement is the most common task for an automotive multimeter. In a 12V system, you should see approximately 12.6V across a fully charged battery at rest, and 13.8V to 14.4V with the engine running (alternator output). Voltage drop testing is a critical technique: with the circuit under load, you measure the voltage drop across a connector, switch, or ground cable. A drop of more than 0.1V (100mV) indicates excessive resistance in that component. For sensor circuits, you’ll be measuring reference voltages (typically 5V from the ECU) and signal voltages that vary with operating conditions. A quality automotive multimeter with ±0.5% DC voltage accuracy will reliably detect a 0.05V difference that could indicate a failing sensor.

Resistance: Finding Opens and Shorts

Resistance measurement (ohms) is used to test sensors, coils, and wiring integrity. A coolant temperature sensor, for example, should show a specific resistance range at a given temperature — typically 2,000-3,000 ohms at 20°C (68°F), decreasing as the engine warms up. Ignition coils have primary and secondary resistance specifications that can be checked with a multimeter. When measuring resistance, always ensure the circuit is de-energized (power off) to avoid damaging the meter. The resistance range on an automotive multimeter should go from 0.1 ohms (for testing ground connections) to at least 20 megaohms (for testing insulation resistance).

Continuity: The Quick Check

Continuity testing is a specialized resistance measurement with an audible beep. It’s the fastest way to check if a wire is broken, a fuse is blown, or a ground connection is intact. The beep sounds when resistance is below a threshold (typically 30-50 ohms), allowing you to keep your eyes on the probes while testing. This is invaluable for tracing wiring harnesses and checking for shorts to ground. A good automotive multimeter will have a dedicated continuity mode with a fast response time — a slow beep can waste hours when you’re chasing a wiring issue.

Current: Measuring the Flow (and the Parasitic Drain)

Current: Details

Current measurement is the most complex of the four core functions. There are two approaches: inline (series) measurement, where the meter is placed in the circuit, and clamp measurement, where a clamp surrounds the wire and measures the magnetic field. For automotive work, a clamp meter is far more practical for measuring starter current (which can exceed 200 amps) or alternator output. Inline measurement is typically limited to 10 amps on most multimeters and requires breaking the circuit. Parasitic drain testing — finding the battery drain that kills your battery overnight — is a classic automotive multimeter task. This requires measuring current in the milliamp range with the vehicle off and all modules asleep, which can take 30-60 minutes after the doors are closed. A meter with a 10-amp fuse and a high-resolution milli

Best Multimeter for Cars: The 2026 Buyer’s Guide for DIY Mechanics

A multimeter for cars is a handheld diagnostic instrument that measures electrical properties — voltage, current, resistance, continuity, and sometimes frequency or duty cycle — to pinpoint faults in a vehicle’s electrical system. Unlike a general-purpose multimeter, an automotive-specific model is engineered for the harsh realities of a car: it must tolerate voltage spikes from the alternator, read low-voltage signals from sensors with precision, and survive drops onto concrete garage floors. The entity at the heart of this guide is the automotive multimeter, and its defining attributes — measurement accuracy, safety ratings, input protection, and built-in automotive functions like RPM and dwell — are what separate a tool that saves you an hour from one that sends you chasing a phantom parasitic drain all weekend.

This buyer’s guide for 2026 cuts through the noise of hundreds of competing listings to answer one practical question: which multimeter should a DIY mechanic actually buy with their own money? We’ll cover the full attribute spectrum — from sub-$30 budget units that handle 90% of diagnostics, to $200-plus professional models with true RMS, low-impedance mode, and backlit displays for dim under-dash work. You’ll learn how to evaluate key specs like CAT III safety ratings, DC voltage accuracy (look for ±0.5% or better), and whether you need features like a temperature probe or a clamp for measuring starter current without breaking the circuit. We’ll also examine build quality, lead materials, and warranty support, because a multimeter that dies after six months of weekend wrenching is a false economy.

What makes this guide different is the data behind the recommendations. We didn’t just compile spec sheets — we cross-referenced user-reported failure rates, tested the most popular models for real-world voltage drop readings on a 2019 F-150, and compared price trends across major retailers over the past year. You’ll get honest limitations, not just praise: which features are marketing gimmicks, which automotive-specific functions are genuinely useful, and where a $15 multimeter from the parts store is actually the smarter choice than a $150 flagship. By the end, you’ll have a clear decision framework — not just a list of products, but the knowledge to match the right tool to your skill level, your vehicle’s age, and the specific diagnostic tasks you actually perform.

What Is an Automotive Multimeter and Why Is It Different?

What Is an Automotive Multimeter and Why Is It Different? - best multimeter for cars

An automotive multimeter is a specialized digital multimeter (DMM) optimized for the unique electrical environment of vehicles. While a standard DMM can measure basic electrical values, an automotive multimeter adds features specifically designed for car diagnostics: the ability to measure RPM (tachometer function) without an inductive pickup, duty cycle for fuel injectors and idle air control valves, dwell angle for older ignition systems, and often a low-impedance (LoZ) mode to prevent ghost voltage readings from induced currents in wiring harnesses. The core difference lies in input protection and filtering — automotive electrical systems are noisy, with voltage spikes from the alternator and ignition coils that can damage a standard multimeter or produce erratic readings.

Defining the Entity: The Standard DMM vs. The Automotive Multimeter

A standard digital multimeter is a general-purpose tool designed for electronics work, household wiring, and basic electrical troubleshooting. It measures AC/DC voltage, resistance, and continuity, and often includes a diode test and capacitance measurement. The automotive multimeter builds on this foundation with vehicle-specific functions. For example, the tachometer function on an automotive multimeter reads engine RPM from the ignition signal, eliminating the need for a separate timing light. Duty cycle measurement is critical for diagnosing fuel injector pulse width and EGR valve operation. Dwell angle is essential for classic cars with points-style ignition systems. Also, automotive multimeters typically feature a larger, more readable display with a bar graph for observing fluctuating signals, and they are built with rubberized housings to withstand the vibration and drops common in a garage environment.

Key Attributes: What to Look For (and What to Ignore)

Key Attributes: Details

When evaluating an automotive multimeter, focus on the attributes that matter for car diagnostics. DC voltage accuracy is paramount — look for a meter with ±0.5% accuracy or better on the DC voltage scale, as this ensures reliable readings from oxygen sensors and throttle position sensors. Auto-ranging is a convenience that prevents you from having to manually select the correct scale, but manual-ranging meters are often more responsive and can be more accurate in certain situations. Automotive-specific functions like RPM, duty cycle, and dwell are essential if you work on modern fuel-injected vehicles or classic cars. Safety ratings (CAT III for under-hood work, CAT IV for battery and starter measurements) are non-negotiable — a meter without proper CAT ratings can be dangerous. Build quality matters: a drop-proof, rubberized case protects the meter from damage, and a backlit display is crucial for working under the dash. Current measurement is another key differentiator — a clamp meter allows you to measure starter current without disconnecting wires, while inline current measurement requires breaking the circuit. Temperature measurement is a bonus for diagnosing cooling system issues and checking catalytic converter efficiency.

The 4 Core Measurements: Voltage, Resistance, Continuity, and Current

The 4 Core Measurements: Voltage, Resistance, Continuity, and Current - best multimeter for cars

Every automotive diagnostic task boils down to four fundamental measurements. Mastering these will allow you to troubleshoot 90% of electrical problems in any vehicle, from a 1985 F-150 to a 2026 Tesla (with appropriate safety precautions for high-voltage systems). The key is not just knowing how to take a reading, but understanding what the reading means in the context of the circuit you’re testing.

Voltage: The Lifeblood of the Electrical System

Voltage measurement is the most common task for an automotive multimeter. In a 12V system, you should see approximately 12.6V across a fully charged battery at rest, and 13.8V to 14.4V with the engine running (alternator output). Voltage drop testing is a critical technique: with the circuit under load, you measure the voltage drop across a connector, switch, or ground cable. A drop of more than 0.1V (100mV) indicates excessive resistance in that component. For sensor circuits, you’ll be measuring reference voltages (typically 5V from the ECU) and signal voltages that vary with operating conditions. A quality automotive multimeter with ±0.5% DC voltage accuracy will reliably detect a 0.05V difference that could indicate a failing sensor.

Resistance: Finding Opens and Shorts

Resistance measurement (ohms) is used to test sensors, coils, and wiring integrity. A coolant temperature sensor, for example, should show a specific resistance range at a given temperature — typically 2,000-3,000 ohms at 20°C (68°F), decreasing as the engine warms up. Ignition coils have primary and secondary resistance specifications that can be checked with a multimeter. When measuring resistance, always ensure the circuit is de-energized (power off) to avoid damaging the meter. The resistance range on an automotive multimeter should go from 0.1 ohms (for testing ground connections) to at least 20 megaohms (for testing insulation resistance).

Continuity: The Quick Check

Continuity testing is a specialized resistance measurement with an audible beep. It’s the fastest way to check if a wire is broken, a fuse is blown, or a ground connection is intact. The beep sounds when resistance is below a threshold (typically 30-50 ohms), allowing you to keep your eyes on the probes while testing. This is invaluable for tracing wiring harnesses and checking for shorts to ground. A good automotive multimeter will have a dedicated continuity mode with a fast response time — a slow beep can waste hours when you’re chasing a wiring issue.

Current: Measuring the Flow (and the Parasitic Drain)

Current measurement is the most complex of the four core functions. There are two approaches: inline (series) measurement, where the meter is placed in the circuit, and clamp measurement, where a clamp surrounds the wire and measures the magnetic field. For automotive work, a clamp meter is far more practical for measuring starter current (which can exceed 200 amps) or alternator output. Inline measurement is typically limited to 10 amps on most multimeters and requires breaking the circuit. Parasitic drain testing — finding the battery drain that kills your battery overnight — is a classic automotive multimeter task. This requires measuring current in the milliamp range with the vehicle off and all modules asleep, which can take 30-60 minutes after the doors are closed. A meter with a 10-amp fuse and a high-resolution milli

Similar Posts