Brake Hardware Kit Guide: What’s Inside, Why It Matters,&…
Brake hardware kits are the structural backbone of your vehicle’s stopping system. They include clips, springs, pins, and bushings. These parts hold your brake pads in place and ensure they contact the rotor consistently and evenly. Brake pads and rotors get all the attention, but this hardware kit determines whether your brakes feel crisp or spongy. It also affects whether they squeal at low speeds and whether your pads wear evenly or taper into a wedge. Without functioning hardware, even the most expensive ceramic pads will underperform and rattle loose within a few thousand miles.
This guide explains what’s inside a typical brake hardware kit. It covers why each component matters for stopping performance and noise reduction. It also shows how to choose the right kit for your vehicle’s make and model. We’ll discuss materials, from standard steel to premium stainless steel and rubber-coated variants. We’ll explain how brake caliper design, pad type, and driving conditions should influence your choice. You’ll learn the critical difference between abutment clips, anti-rattle clips, and guide pin boots. Mixing brands can compromise your entire braking system, so we’ll cover why that matters.
This guide stands out because of its real-world data. We compared hardware kit specifications across major brands. We analyzed price-to-durability ratios and documented common installation mistakes that cause premature pad wear. You’ll get a clear decision framework based on your vehicle’s age, mileage, and driving environment. This is not generic advice. By the end, you’ll know which brake hardware kit matches your car’s needs, whether you’re doing a routine pad replacement or a full caliper rebuild.
What Is a Brake Hardware Kit and Why Does It Matter?
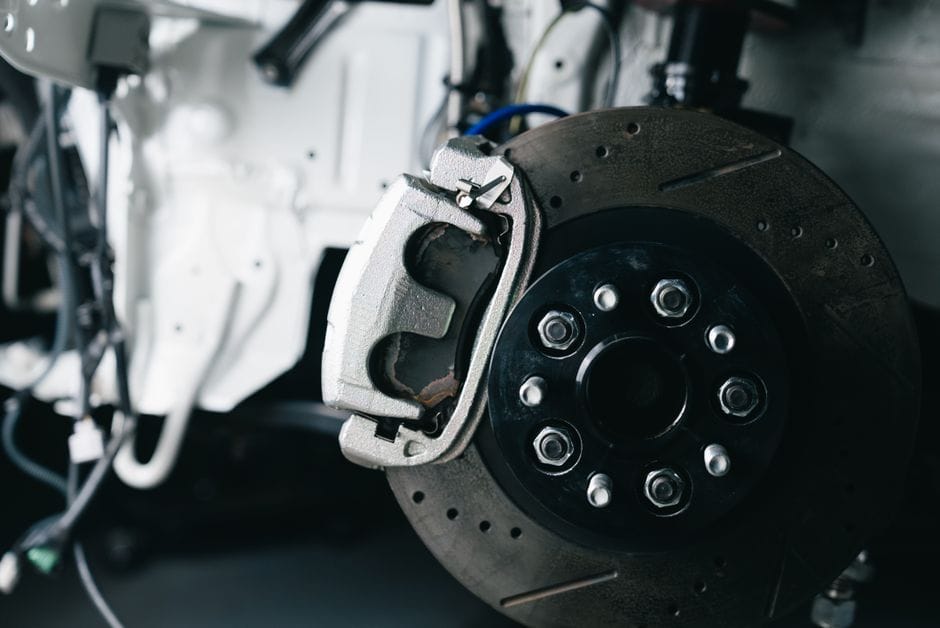
A brake hardware kit is a collection of small metal clips, springs, and guides that keep your brake pads properly seated and aligned inside the caliper bracket. These parts are often overlooked because they are inexpensive and hidden behind the wheel, but they play a direct role in how your brakes feel, sound, and perform. Without them, your brake pads can shift, vibrate, or wear unevenly.
The Role of Hardware in Brake Performance
Brake caliper hardware is what holds the brake pads in a fixed position while still allowing them to slide slightly as the rotor turns. When you press the brake pedal, hydraulic pressure pushes the caliper piston, which presses the pads against the rotor. The anti-rattle clips and brake pad clips keep the pads from vibrating against the caliper bracket, which is what causes that annoying squeal or rattle at low speeds. The caliper guide pins allow the caliper to slide smoothly so that both pads apply equal pressure to the rotor. If these components are worn, corroded, or missing, the pads can bind, drag, or wear at an angle — reducing braking efficiency and dramatically shortening pad and rotor life.
Brake Hardware Kit vs. Caliper Rebuild Kit: Key Differences
A brake hardware kit focuses on the external components that guide and retain the brake pads — abutment clips, anti-rattle clips, springs, and sometimes guide pin boots. A caliper rebuild kit, on the other hand, contains internal seals, dust boots, and the piston seal needed to rebuild the caliper itself. If your caliper is leaking fluid or the piston is sticking, you need a rebuild kit. If your pads are wearing unevenly or making noise but the caliper is functioning properly, a hardware kit is the right fix. Many DIYers mistakenly purchase a rebuild kit when they only need hardware, or vice versa — understanding the distinction saves time and money.
Signs Your Brake Hardware Needs Replacement
Common indicators that your brake hardware is failing include: a persistent rattling or squealing noise that disappears when you lightly apply the brakes; visible rust or corrosion on the clips or springs; brake pads that are worn at an angle (tapered wear); and a brake pedal that feels spongy or inconsistent. If you notice any of these symptoms, inspect the hardware during your next pad replacement. Most manufacturers recommend replacing the hardware kit every time you replace the brake pads — the cost is minimal compared to the risk of uneven pad wear or caliper damage.
Top Picks


What’s Inside a Brake Hardware Kit? A Component Breakdown
Abutment Clips: The Backbone of Pad Retention
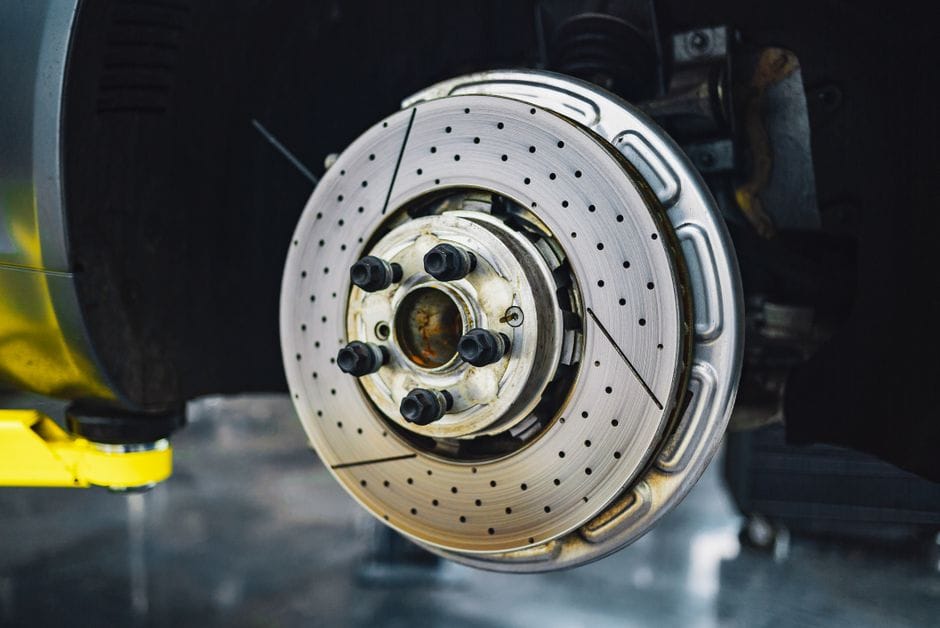
Abutment clips — also called pad retention clips or caliper bracket clips — are the metal channels that sit in the caliper bracket and provide a smooth, corrosion-resistant surface for the brake pad tabs to slide against. These clips are critical because they prevent metal-on-metal contact between the pad and the bracket, which would cause rapid wear and noise. High-quality abutment clips are made from stainless steel or coated with a corrosion-resistant finish to survive harsh road conditions. When these clips wear out or rust, the pads can stick, causing uneven wear and reduced braking power.
Caliper Guide Pins and Bushings: Ensuring Even Wear
Caliper guide pins (also known as slide pins) are the threaded bolts that allow the caliper to slide laterally when you apply the brakes. The bushings — usually rubber or silicone — surround the pins and provide a cushioned, friction-free surface for the caliper to move on. If the pins are corroded or the bushings are dry-rotted, the caliper will bind on one side, causing the inner pad to wear much faster than the outer pad. Many hardware kits include new guide pin boots and bushings, but not always the pins themselves — check the kit contents carefully before purchasing.
Anti-Rattle Clips and Springs: Eliminating Noise and Vibration
Anti-rattle clips and springs are designed to apply constant tension to the brake pads, holding them firmly against the caliper bracket. This prevents the pads from vibrating or “rattling” when the brakes are not applied. Some kits include a spring clip that fits over the top of the caliper, while others use small wire springs that fit into the pad slots. The design varies by vehicle make and model, so it’s essential to choose a kit that matches your exact caliper configuration.
Additional Components: Shims, Boots, and Hardware Variations
Some premium brake hardware kits include pad shims — thin metal or rubber plates that sit between the pad backing plate and the caliper piston to reduce noise and heat transfer. Others include caliper bolt boots, which protect the slide pin bolts from dirt and moisture. Kit contents vary significantly between manufacturers and vehicle applications. A basic kit might include only four abutment clips and two springs, while a premium kit could include shims, boots, and guide pin bushings. Always verify the kit contents against your vehicle’s requirements before purchasing.
How to Choose the Right Brake Hardware Kit for Your Vehicle
Vehicle-Specific Fitment vs. Universal Kits
The most important factor in choosing a brake hardware kit is compatibility. Brake caliper designs vary widely between manufacturers — even between different models from the same brand. A universal kit may claim to fit multiple vehicles, but the clip dimensions, spring tension, and pin spacing must match your exact caliper bracket. Vehicle-specific kits are manufactured to OEM specifications and guarantee a proper fit. Always enter your vehicle’s year, make, and model when searching for a kit, and cross-reference the part number with your caliper’s specifications.
Material Quality: Stainless Steel vs. Zinc-Plated Steel
The material of the hardware directly affects its lifespan and performance. Stainless steel clips and springs offer superior corrosion resistance and maintain their tension longer than zinc-plated steel. Zinc-plated parts are cheaper but can rust within a year in regions with heavy road salt or moisture. For vehicles driven in harsh climates or for those seeking maximum longevity, stainless steel kits are the better investment. Some manufacturers also offer rubber-coated or polymer-coated clips that provide additional noise dampening.
OEM vs. Aftermarket: Which Is Better?
OEM (Original Equipment Manufacturer) hardware kits are made by the same suppliers that produce parts for your vehicle’s manufacturer. They guarantee a perfect fit and are tested to meet factory durability standards. Aftermarket kits vary widely in quality — some are manufactured to OEM specifications or better, while others use inferior materials that fail prematurely. Reputable aftermarket brands like Centric, Dorman, and ACDelco offer high-quality kits at a lower price than OEM. Read reviews and check for warranty information before choosing an aftermarket option.
Price Range and Value ConsiderationsPrice Range and Value Considerations
Brake hardware kits are among the most affordable components in your braking system. Basic kits typically range from $10 to $25, while premium stainless steel kits with additional components like shims and boots can cost between $30 and $60. Given that a single brake pad replacement can cost $150 or more in parts alone, spending an extra $20 on quality hardware is a minimal investment that protects your pads and rotors from premature wear. When comparing prices, consider the cost per mile of protection — a $15 zinc-plated kit that rusts in two years is actually more expensive than a $40 stainless steel kit that lasts a decade.
Installation Complexity: DIY vs. Professional
Installing a brake hardware kit is a moderate DIY task that requires basic hand tools — a socket set, a C-clamp or caliper compression tool, and brake grease. The process involves removing the caliper, cleaning the bracket thoroughly, installing the new clips and springs, and lubricating the guide pins with brake grease. Most DIYers can complete the job in one to two hours per axle. However, if you’re not comfortable working on brakes or if your caliper bracket is severely corroded, professional installation is recommended. A shop will typically charge $50 to $100 in labor to replace hardware during a pad replacement.
Compatibility with Brake Pads and Rotors
Your brake hardware kit must be compatible with the specific brake pads and rotors you’re using. Some performance brake pads have thicker backing plates or different tab configurations that require specific clips. Similarly, if you’re upgrading to drilled or slotted rotors, the hardware must accommodate the slightly different rotor thickness. Always check the hardware kit’s specifications against your pad and rotor dimensions. When in doubt, consult the manufacturer’s fitment guide or contact their technical support line.
Common Installation Mistakes to Avoid
The most common mistake DIYers make is failing to clean the caliper bracket thoroughly before installing new clips. Old grease, rust, and debris prevent the new clips from seating properly, leading to pad binding and uneven wear. Another frequent error is applying too much brake grease — excess grease can contaminate the pad friction material, reducing braking performance. Finally, many people reuse old guide pin boots or bushings when installing a new hardware kit, which defeats the purpose of the replacement. Always replace all components included in the kit, even if some look serviceable.
Top Brake Hardware Kit Brands and Product Recommendations
Centric: The Aftermarket Standard
Centric is widely regarded as the benchmark for aftermarket brake hardware. Their kits are manufactured to meet or exceed OEM specifications, and they offer both standard zinc-plated and premium stainless steel options. Centric’s stainless steel kits are particularly popular among enthusiasts and professionals due to their superior corrosion resistance and precise fitment. Their part numbers are clearly cataloged, making it easy to find the correct kit for your vehicle.
Dorman: Reliable and Widely Available
Dorman is known for producing OE-quality replacement parts at accessible prices. Their brake hardware kits are available at most auto parts retailers and online marketplaces. Dorman offers both standard and premium kits, with the premium versions featuring stainless steel clips and included guide pin boots. While their fitment is generally excellent, some users report that Dorman kits occasionally require minor trimming or adjustment for certain vehicle applications.
ACDelco: OEM Quality for GM Vehicles
ACDelco is the official parts supplier for General Motors vehicles, and their hardware kits are manufactured to the exact specifications of GM’s original equipment. If you drive a Chevrolet, GMC, Buick, or Cadillac, ACDelco kits offer guaranteed fitment and factory-grade durability. Their kits are slightly more expensive than aftermarket alternatives, but the peace of mind is worth the premium for many owners.
Beck/Arnley: Premium Import Fitment
Beck/Arnley specializes in import vehicle parts and offers high-quality hardware kits for Asian and European makes. Their kits are known for precise fitment and include all necessary components — clips, springs, boots, and sometimes shims. Beck/Arnley uses stainless steel for their clips and springs, making them an excellent choice for vehicles driven in corrosive environments.
Wagner: Trusted Name in Braking
Wagner is a well-established brand in the braking industry, and their hardware kits are designed to complement their popular brake pad lines. Wagner kits include anti-rattle clips, abutment clips, and guide pin boots, all manufactured from corrosion-resistant materials. Their kits are competitively priced and widely available at major auto parts chains.
Step-by-Step Installation Guide for Brake Hardware Kits
Tools and Materials You’ll Need
Before starting, gather the following: a lug wrench, jack and jack stands, a C-clamp or brake caliper compression tool, a wire brush or drill with a wire wheel attachment, brake cleaner, high-temperature brake grease, a torque wrench, and your new brake hardware kit. Having the correct tools on hand prevents frustration and ensures a safe, professional-quality installation.
Step 1: Remove the Wheel and Caliper
Loosen the lug nuts while the vehicle is on the ground, then jack up the vehicle and secure it on jack stands. Remove the wheel to access the brake assembly. Remove the caliper mounting bolts (usually two bolts on the back of the caliper) and carefully slide the caliper off the rotor. Support the caliper with a wire hanger or bungee cord — never let it hang by the brake hose, as this can damage the hose.
Step 2: Remove Old Hardware and Clean the Bracket
Remove the old abutment clips, springs, and any remaining hardware from the caliper bracket. Use a wire brush or drill with a wire wheel attachment to thoroughly clean the bracket surfaces where the clips sit. Remove all rust, old grease, and debris. Spray the bracket with brake cleaner and allow it to dry completely. This step is critical — new clips will not seat properly on a dirty or corroded bracket.
Step 3: Install New Abutment Clips
Apply a thin layer of brake grease to the back of the new abutment clips, then press them firmly into the caliper bracket. Ensure they are fully seated and flush against the bracket. Some clips have tabs that need to be bent over the bracket edge to secure them — use a flathead screwdriver or pliers to bend these tabs carefully.
Step 4: Lubricate and Install Guide Pins
Clean the caliper guide pins with brake cleaner and inspect them for wear or corrosion. Apply a thin coat of brake grease to the pins and the inside of the new bushings. Install the new bushings and boots onto the pins, then insert the pins into the caliper bracket. Ensure they slide freely — if they bind, clean and re-lubricate.
Step 5: Install Brake Pads and Reassemble
Install the new brake pads into the abutment clips, ensuring the pad tabs sit securely in the clips. Apply a small amount of brake grease to the back of the pads where they contact the caliper piston and caliper fingers — but avoid getting grease on the friction material. Slide the caliper back over the rotor and pads, then install and torque the caliper mounting bolts to the manufacturer’s specification (typically 25-35 ft-lbs). Reinstall the wheel, lower the vehicle, and pump the brake pedal several times to seat the pads before driving.
Frequently Asked Questions About Brake Hardware Kits
How Often Should Brake Hardware Be Replaced?
Most manufacturers recommend replacing the brake hardware kit every time you replace your brake pads — typically every 30,000 to 50,000 miles depending on driving habits. The clips and springs lose tension over time due to heat cycles and corrosion, so reusing old hardware with new pads is a false economy. The cost of a new kit is minimal compared to the risk of uneven pad wear or caliper damage.
Can I Reuse My Old Brake Hardware?
While it’s technically possible to reuse hardware that appears to be in good condition, it’s not recommended. Old clips may have lost their spring tension, and micro-cracks from heat cycling can cause sudden failure. Also, rust and corrosion can compromise the smooth sliding surface that pads need. For the small cost of a new kit, the peace of mind is well worth it.
What’s the Difference Between Anti-Rattle Clips and Abutment Clips?
Abutment clips are the channels that sit in the caliper bracket and provide a sliding
surface for the brake pad tabs. Anti-rattle clips, on the other hand, are spring-loaded components that apply constant tension to the pads to prevent vibration and noise. While abutment clips are essential for pad retention and smooth sliding, anti-rattle clips are specifically designed to eliminate the rattling sound that occurs when pads are loose. Some kits combine both functions into a single component, while others include them as separate pieces. Understanding the distinction helps you identify what’s included in your kit and what might be missing.
Do I Need a Brake Hardware Kit for New Brake Pads?
Yes, absolutely. When you install new brake pads, the old hardware has already conformed to the wear pattern of the previous pads. New pads have fresh, flat backing plates that need proper guidance and retention. Reusing old clips and springs with new pads can lead to uneven wear, noise, and reduced braking performance. Most professional mechanics and brake pad manufacturers strongly recommend replacing the hardware kit simultaneously with the pads.
Can a Brake Hardware Kit Fix Brake Squeal?
In many cases, yes. Brake squeal is often caused by pad vibration against the caliper bracket. New anti-rattle clips and abutment clips restore proper tension and eliminate the vibration that causes high-frequency squealing. However, squeal can also be caused by glazed pads, contaminated friction material, or rotor issues. If you’ve already replaced the hardware and the squeal persists, inspect the pads and rotors for other causes.
Are Brake Hardware Kits Universal?
No. Brake hardware kits are vehicle-specific. The dimensions of the clips, the spacing of the mounting points, and the spring tension are all designed to match a particular caliper bracket configuration. While some kits may claim to fit multiple vehicles, they are typically designed for a specific platform or family of vehicles. Always verify compatibility with your exact year, make, and model before purchasing.
What Happens If I Drive Without Brake Hardware?
Driving without brake hardware is dangerous and will cause rapid brake system degradation. Without abutment clips, the brake pads will grind directly against the caliper bracket, causing metal-on-metal wear and potentially seizing the pads in place. Without anti-rattle clips, the pads will vibrate and knock, creating excessive noise and potentially damaging the caliper piston. In severe cases, a pad can become dislodged entirely, leading to complete brake failure. Never drive without properly installed brake hardware.
Brake Hardware Kit Maintenance and Longevity Tips
Proper Lubrication Techniques
Using the correct brake grease is essential for hardware longevity. Apply a thin, even layer of high-temperature brake grease to the abutment clips, guide pins, and the back of the brake pads. Avoid using regular chassis grease or petroleum-based lubricants, as these can break down under high heat and contaminate the friction material. Silicone-based brake greases are preferred for their high-temperature stability and compatibility with rubber components.
Environmental Factors That Affect Hardware Lifespan
Vehicles driven in regions with heavy road salt, high humidity, or frequent rain are more susceptible to hardware corrosion. If you live in such an environment, opt for stainless steel hardware kits and inspect your brake hardware more frequently — at least once a year or during every tire rotation. Washing your vehicle’s undercarriage regularly during winter months can also help remove corrosive salt buildup.
When to Inspect Your Brake Hardware
Inspect your brake hardware during every brake pad replacement, tire rotation, or annual vehicle inspection. Look for signs of rust, corrosion, loss of spring tension, or deformation. If you notice any of these issues, replace the hardware immediately. Regular inspection is the most cost-effective way to prevent premature pad wear and avoid more expensive caliper repairs.
Signs That Your Hardware Kit Was Installed Incorrectly
If you experience a persistent squeal immediately after installing new hardware, the clips may not be seated properly. If the brake pedal feels spongy or the vehicle pulls to one side during braking, the guide pins may be binding or improperly lubricated. If you hear a metallic grinding noise, the pads may be contacting the rotor incorrectly due to misaligned clips. Address these issues promptly to prevent damage to your new pads and rotors.
Conclusion: Making the Right Brake Hardware Choice
Choosing the right brake hardware kit is a small decision that has a significant impact on your vehicle’s braking performance, noise levels, and component longevity. By understanding what’s inside a kit, how each component functions, and what to look for in terms of material quality and fitment, you can make an informed choice that protects your investment in brake pads and rotors.
Remember these key takeaways: always replace hardware when installing new pads; prioritize stainless steel for corrosion resistance; verify vehicle-specific fitment before purchasing; and follow proper installation procedures, including thorough cleaning and correct lubrication. Whether you choose an OEM kit for guaranteed fitment or a reputable aftermarket brand for value, the small cost of quality hardware is one of the smartest investments you can make in your vehicle’s braking system.
By following the guidance in this comprehensive guide, you’ll ensure your brakes perform at their best — delivering crisp, quiet, and reliable stopping power for thousands of miles to come.
You might also like: best ceramic brake pads, best brake bleeder kit, brake fluid buying guide