brake pad thickness guide
Brake pad thickness is the most critical measurement for vehicle safety. Yet most drivers ignore it until they hear grinding. The brake pad is a friction component that clamps against the rotor. It converts kinetic energy into heat. The remaining material determines your stopping distance. It also tells you if you are driving on metal-to-metal contact. This guide is your complete reference for measuring brake pad thickness. It covers legal minimums and exactly when to replace them.
We cover everything you need to know. You will learn how to measure thickness with different tools. We explain the 3mm and 2mm replacement thresholds. We show how to check the inner pad, which wears faster. You will also learn to interpret wear indicators. Pad thickness matters across different vehicle types. This includes daily commuters and heavy trucks. Driving style also accelerates wear. We separate fact from fiction on minimums. We explain what the squeal really means. Finally, we give you a data-driven replacement schedule. This beats guessing.
Unlike generic advice elsewhere, this guide includes a comparison table of measurement methods. It offers a decision framework based on your driving conditions. We also share honest limitations. For example, a visual check alone can miss a failing inner pad. By the end, you will know how to assess your brake pads in ten minutes. You will know when to order new ones. This saves you money on unnecessary replacements. It also prevents dangerous brake failure.
What Is Brake Pad Thickness and Why It Matters
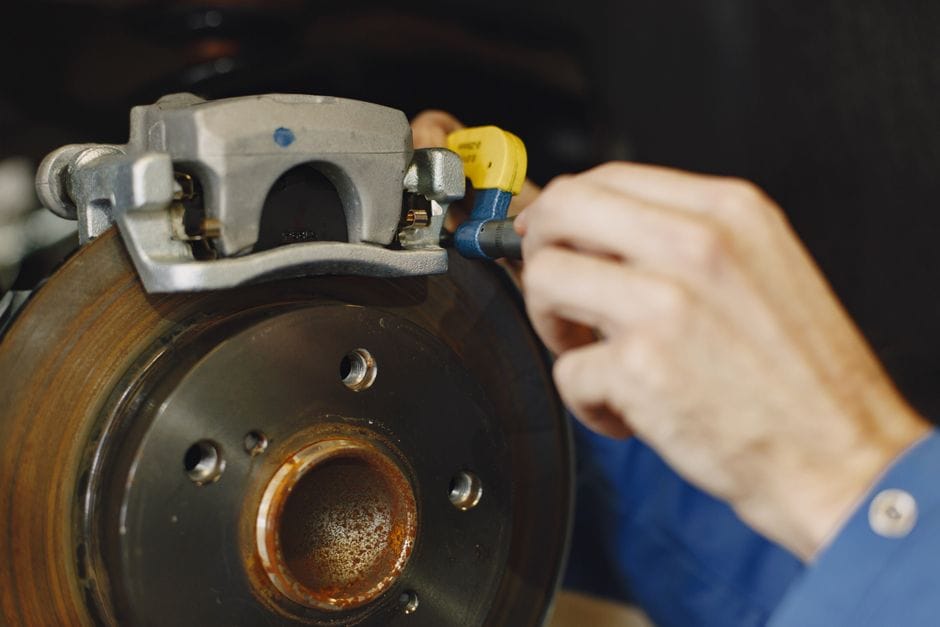
Brake pad thickness is the measurement of the friction material that remains on a brake pad. It’s the single most direct indicator of how much braking life you have left. When you press the brake pedal, hydraulic pressure pushes the caliper pistons, which press the friction material against the brake rotor. The thinner that material gets, the harder the system works to produce the same stopping force.
Defining Brake Pad Thickness: Friction Material vs. Backing Plate
A brake pad has two main layers. The friction material is the compound that contacts the rotor, and the backing plate is the steel base that the friction material is bonded to. When you measure brake pad thickness, you’re measuring only the friction material — not the backing plate. Most new brake pads come with roughly 10 to 12 millimeters of friction material. The backing plate adds about 4 to 6 millimeters on top of that, so a total pad assembly often measures 14 to 18 millimeters when new. Many DIY owners mistakenly measure the entire assembly and think they have more life left than they actually do. This distinction is critical: the friction material is what stops the vehicle, and the backing plate is just structural support. When the friction material wears down to the level of the backing plate, you’re at metal-on-metal contact, which damages the rotor and dramatically increases stopping distance.
How Brake Pad Thickness Differs from Rotor Thickness
Brake pad thickness and rotor thickness are two separate measurements that serve different purposes. The brake pad is the consumable friction material that presses against the rotor. The rotor is the metal disc that the pads clamp onto. Rotors also have a minimum thickness specification, but that’s about structural integrity and heat dissipation, not friction life. A rotor that’s too thin can warp or crack under heat, while a pad that’s too thin simply can’t generate enough friction. Both need to be checked during a brake service, but they wear at different rates and have different replacement thresholds. Pads typically need replacement every 30,000 to 70,000 miles, while rotors can last 50,000 to 100,000 miles or more, depending on driving conditions and pad material.
The Role of Thickness in Braking Performance and Heat Dissipation
Brake pad thickness directly affects braking performance in two ways. First, thicker pads have more friction material to generate stopping force. As the pad wears, the hydraulic system must push the caliper piston further to make contact, which can reduce braking response and increase pedal travel. Second, thicker pads dissipate heat better. The friction material acts as a thermal barrier between the rotor and the caliper. When the pad gets thin, more heat transfers into the caliper and brake fluid, which can lead to brake fade — a dangerous condition where braking power diminishes under heavy use. This is especially important for vehicles that carry heavy loads or are driven aggressively, where heat buildup is more severe. A pad at 2mm or less simply cannot manage heat the way a pad at 8mm can, making the entire braking system less effective and more prone to failure.
Top Picks
How to Measure Brake Pad Thickness: Step-by-Step Methods
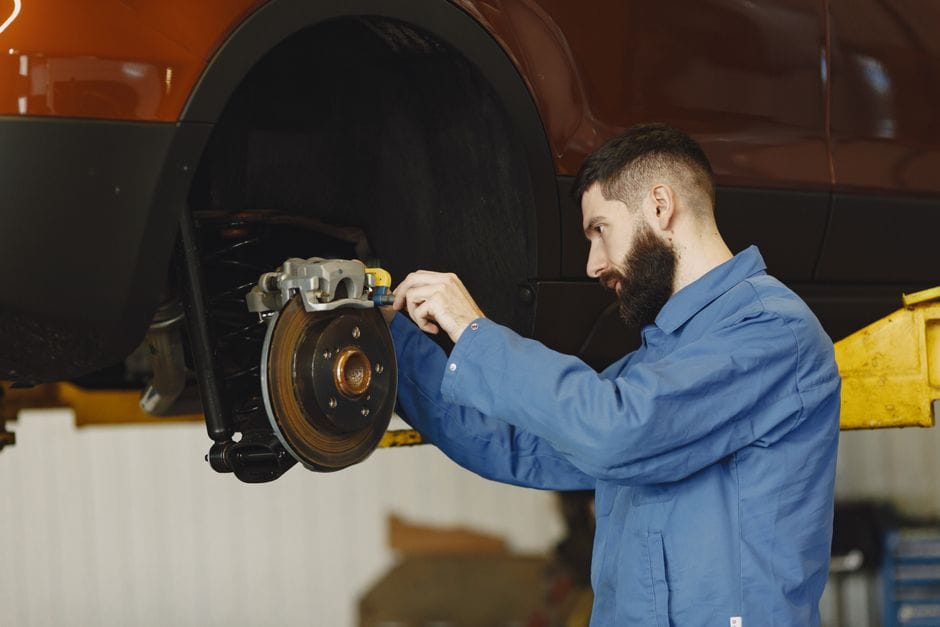
Measuring brake pad thickness accurately is the difference between catching wear early and discovering it after the rotor is scored. There are three primary methods, each with different levels of accuracy and effort. The method you choose depends on your tools, your vehicle, and how precise you need to be.
Visual Inspection: What You Can and Cannot See
A visual inspection is the quickest method, but it has significant limitations. You can often see the outer brake pad through the spokes of the wheel without removing anything. Shine a flashlight at the caliper and look for the friction material between the backing plate and the rotor. If you see less than 3mm of material, it’s time to replace. However, a visual check only shows the outer pad. The inner pad — the one closest to the engine — wears faster because it’s pressed first by the caliper piston. You cannot see the inner pad without removing the wheel or using a mirror. Many drivers discover their inner pad is completely worn while the outer pad still looks fine. Visual inspection is a good first check, but it should never be your only check.
Using a Ruler or Caliper: The Accurate Approach
For a precise measurement, you need a tool. A simple ruler can work if you can get it into the gap between the pad and rotor, but it’s awkward and prone to error. A caliper — either digital or dial — is the professional standard. To measure, remove the wheel for best access, then place the caliper jaws on the friction material only, not the backing plate. Take the measurement at the thickest point of the pad, which is typically the center. Digital calipers give you a reading to 0.01mm, which is more than enough precision for brake pad assessment. If you don’t have a caliper, a brake pad thickness gauge — a small tool with a needle that fits into the pad gap — is inexpensive and easy to use. The key is consistency: always measure the same spot on each pad so you can track wear over time.
Measuring Through the Wheel vs. Removing the Wheel
Measuring through the wheel is possible on many vehicles, especially those with open-spoke designs. You can use a thin ruler or a brake pad gauge to reach through the spokes and measure the outer pad. This method is quick and doesn’t require any disassembly, making it ideal for a monthly check. However, it only measures the outer pad, and the angle can make the reading inaccurate. Removing the wheel gives you full access to both the inner and outer pads, and you can measure at the correct angle. It takes about 10 minutes per wheel with a jack and lug wrench, but it’s the only way to get a complete picture of your brake pad condition. For a thorough inspection, remove the wheel at least once every oil change interval.
Minimum Brake Pad Thickness: Legal vs. Recommended Limits

Understanding the difference between legal minimums and recommended replacement thresholds can save you from a failed inspection — or a crash. The legal minimum is the absolute floor below which your vehicle is considered unsafe and unroadworthy. The recommended threshold is the point at which you should replace pads for optimal safety and to avoid damaging other components.
The 2mm Legal Minimum: What It Really Means
In most jurisdictions, the legal minimum brake pad thickness is 2mm of friction material. This is the point at which a vehicle fails a safety inspection. However, 2mm is not a safe operating level — it’s the absolute limit before metal contacts metal. At 2mm, the pad has almost no capacity to dissipate heat, and braking performance is severely degraded. The pad material is so thin that it can crack or separate from the backing plate under stress. Driving at
2mm is a gamble with your safety and your rotors. If you’re at 2mm, you’re already hearing the wear indicators or feeling a soft pedal. The legal minimum exists to give inspectors a clear cutoff, but it’s not a target — it’s a red line. In practice, a pad at 2mm will likely score your rotors within a few hundred miles, turning a $50 pad replacement into a $300 rotor-and-pad job.
The 3mm Recommended Replacement Threshold
Most professional mechanics and brake manufacturers recommend replacing pads at 3mm, not 2mm. The 3mm threshold gives you a safety margin. At 3mm, the pad still has enough material to handle heat and provide consistent braking, but it’s close enough to the end that waiting is risky. The 3mm rule is especially important for the inner pad, which wears faster. If you measure 3mm on the outer pad, the inner pad is likely at 2mm or less. Replacing at 3mm also protects your rotors — the friction material is thick enough to prevent metal-on-metal contact even under hard braking. For most drivers, 3mm is the practical replacement point.
4mm: The “Start Shopping” Threshold
At 4mm, your pads are about 40% worn. They’re still safe, but you should start planning for replacement. This is the point where you should begin researching pads, comparing prices, and scheduling a service appointment. At 4mm, you have roughly 10,000 to 15,000 miles of life left, depending on driving habits. If you do a lot of highway driving, you might get more. If you drive in stop-and-go city traffic, you’ll get less. The 4mm threshold is also the point where you should check your rotors for wear and decide whether they need resurfacing or replacement at the same time as the pads.
Why 2mm Is Dangerous: Heat, Fade, and Rotor Damage
The danger of 2mm pads goes beyond reduced stopping power. At 2mm, the friction material is so thin that it cannot insulate the caliper from rotor heat. Brake fluid can boil, causing a spongy pedal and complete brake failure in extreme cases. The pad backing plate can also contact the rotor, creating deep grooves that require rotor replacement. Also, thin pads are more prone to cracking and delamination — the friction material can separate from the backing plate entirely, leaving you with no brakes at all. The cost difference between replacing at 3mm and replacing at 2mm is minimal, but the safety difference is enormous.
Brake Pad Wear Indicators: Squealers, Sensors, and What They Tell You

Brake pad wear indicators are designed to alert you when pads are getting thin. They come in two main types: mechanical squealers and electronic sensors. Understanding how they work — and their limitations — helps you avoid being caught off guard.
Mechanical Squealers: The Metal Tab That Scrapes
Most brake pads have a small metal tab embedded in the friction material. When the pad wears down to about 2-3mm, this tab contacts the rotor and produces a high-pitched squeal when you brake. The sound is intentionally annoying — it’s designed to get your attention. However, the squealer only works when you’re braking, and it can be intermittent. Some drivers mistake the sound for a normal brake noise and ignore it. Others drive with the squeal for thousands of miles, wearing the pad down to the backing plate. The squealer is a warning, not a replacement schedule. If you hear it, measure your pads immediately.
Electronic Wear Sensors: The Dashboard Warning
Many modern vehicles use electronic wear sensors. These are small wires embedded in the pad that complete a circuit when they contact the rotor. When the circuit is broken, the dashboard displays a brake warning light. Electronic sensors are more reliable than squealers because they give a clear visual alert. However, they only monitor one pad per wheel — usually the inner pad — and they trigger at a specific thickness, typically 2mm. If you have electronic sensors, you still need to check the other pads manually. The sensor tells you when it’s critical, but it doesn’t tell you the condition of the entire brake system.
How to Interpret Wear Indicator Signals
A squeal or warning light means your pads are at or near the minimum thickness. It does not mean you have time to wait. When the indicator activates, you should replace the pads within a few hundred miles at most. Continuing to drive with an active wear indicator risks rotor damage and reduced braking performance. If you hear a grinding noise — not a squeal — that’s metal-on-metal contact, and you’ve already damaged the rotor. At that point, you need both new pads and new rotors. The wear indicator is your last warning before expensive damage occurs.
Friction Material Types: Ceramic, Semi-Metallic, and Organic

The type of friction material on your brake pads affects how quickly they wear, how they perform, and how much they cost. Understanding the differences helps you choose the right replacement pads and set realistic expectations for wear.
Ceramic Pads: Low Dust, Long Life
Ceramic pads are made from ceramic fibers, copper, and other materials. They’re the most common choice for modern passenger vehicles because they produce less brake dust, operate quietly, and last longer than organic pads. Ceramic pads typically last 50,000 to 70,000 miles. They perform well in normal driving conditions and handle heat effectively. However, they’re more expensive than organic pads and can be harder on rotors in some applications. Ceramic pads are the best choice for daily drivers who want low maintenance and clean wheels.
Semi-Metallic Pads: High Performance, Faster Wear
Semi-metallic pads contain 30-65% metal fibers — steel, copper, or iron — mixed with friction modifiers. They offer excellent stopping power and heat dissipation, making them ideal for trucks, SUVs, and performance vehicles. However, they wear faster than ceramic pads, typically lasting 30,000 to 50,000 miles. They also produce more brake dust and can be noisy, especially when cold. Semi-metallic pads are the right choice if you tow heavy loads, drive aggressively, or need maximum braking performance.
Organic Pads: Soft, Quiet, Short-Lived
Organic pads — also called non-asbestos organic (NAO) pads — are made from glass, rubber, Kevlar, and other materials. They’re soft, quiet, and gentle on rotors, but they wear quickly. Organic pads typically last 20,000 to 40,000 miles. They’re the cheapest option and are often found on older or economy vehicles. They perform adequately in light driving conditions but fade under heavy braking. If you drive a commuter car in city traffic, organic pads are acceptable. For anything more demanding, choose ceramic or semi-metallic.
Safety Implications of Thin Brake Pads

Thin brake pads are not just a maintenance issue — they’re a safety hazard. The consequences of driving on worn pads range from increased stopping distance to complete brake failure.
Increased Stopping Distance
The most immediate effect of thin pads is longer stopping distance. A pad at 2mm has significantly less friction material to generate stopping force. In an emergency stop, a vehicle with worn pads can take 20-30% longer to stop than one with new pads. At highway speeds, that’s the difference between a near-miss and a collision. The brake system is designed to work with a full pad — as the pad wears, the system becomes less effective, even if the pedal feels normal.
Brake Fade and Overheating
Thin pads cannot dissipate heat effectively. When you brake repeatedly — going down a mountain, towing a trailer, or driving in heavy traffic — the heat builds up in the rotor and transfers through the thin pad into the caliper and brake fluid. This causes brake fade, where the brakes lose effectiveness despite increased pedal pressure. In severe cases, the brake fluid can boil, causing a complete loss of braking. This is especially dangerous in mountainous terrain or emergency situations.
Rotor Damage and Expensive Repairs
When a pad wears down to the backing plate, the metal backing plate grinds against the rotor. This creates deep grooves in the rotor surface, requiring rotor replacement or resurfacing. The cost
of rotor replacement can easily double or triple the cost of a brake job. A $50 set of pads becomes a $500 repair when you also need new rotors. Also, the metal-on-metal grinding can damage the caliper pistons and seals, leading to even more expensive repairs. Replacing pads at 3mm is far cheaper than replacing pads, rotors, and calipers at 1mm.
Complete Brake Failure Scenarios
In the worst case, thin pads can lead to complete brake failure. If the friction material delaminates from the backing plate — which is more likely when the pad is very thin — you lose braking on that wheel entirely. If this happens on the front axle, you lose 70-80% of your braking power. The pedal goes to the floor, and you have no way to stop. This is a rare but real scenario that occurs when drivers ignore wear indicators and continue driving on pads at 1mm or less. The safety margin between 3mm and 1mm is not just about performance — it’s about preventing catastrophic failure.
Cost/Benefit of Early vs. Late Replacement

The decision of when to replace brake pads is ultimately a financial one. Replacing too early wastes money on unused friction material. Replacing too late costs more in rotor damage and safety risk. Understanding the economics helps you make the right call.
The Cost of Replacing Early
If you replace pads at 6mm, you’re throwing away roughly 50% of the friction material. For a typical set of ceramic pads costing $80-$150, that’s $40-$75 wasted. However, the cost of early replacement is relatively small compared to the cost of late replacement. If you’re doing the labor yourself, the only cost is the parts. If you’re paying a shop, labor is the same whether you replace at 6mm or 3mm. The real question is whether you value the peace of mind of new pads over the small savings of running them to the wear limit.
The Cost of Replacing Late
Replacing pads at 2mm or below is where the costs escalate. At 2mm, you risk rotor damage. New rotors cost $50-$150 each, plus labor. At 1mm or metal-on-metal, you’re looking at rotors, possibly calipers, and potentially brake fluid replacement. A $150 pad job becomes a $600-$800 repair. The cost difference between replacing at 3mm and replacing at 1mm is typically $300-$500. That’s a significant penalty for waiting an extra 5,000 miles.
The Optimal Replacement Point
The data is clear: the optimal replacement point is 3mm for most drivers. At 3mm, you have enough material to avoid rotor damage and maintain safe braking, but you’re not wasting significant friction material. For aggressive drivers or those who tow heavy loads, 4mm is a safer threshold. For light commuters who drive mostly highway miles, you might stretch to 2.5mm, but the savings are minimal compared to the risk. The 3mm rule is the sweet spot between cost and safety.
Brake Pad Thickness by Vehicle Type

Brake pad thickness requirements and wear rates vary significantly by vehicle type. A heavy truck wears pads faster than a compact car, and a performance vehicle needs more pad material for heat management. Understanding these differences helps you set appropriate replacement intervals.
Passenger Cars and Sedans
Most passenger cars use ceramic pads with a new thickness of 10-12mm. The 3mm replacement threshold applies universally. However, the wear rate depends on vehicle weight and driving conditions. A heavy sedan like a Toyota Camry will wear pads faster than a lightweight compact like a Honda Fit. City driving with frequent stops can cut pad life in half compared to highway driving. For most sedans, expect 40,000-60,000 miles between pad replacements.
SUVs and Trucks
SUVs and trucks are heavier and often used for towing, which dramatically increases brake pad wear. Many trucks use semi-metallic pads with a new thickness of 12-14mm to handle the extra heat and load. The 3mm threshold still applies, but the wear rate is faster — often 25,000-40,000 miles between replacements. If you tow regularly, check your pads every 10,000 miles and consider replacing at 4mm to account for the extra heat load.
Performance and Sports Cars
Performance vehicles use high-friction pads that wear faster but provide superior stopping power. These pads often have a new thickness of 10-12mm but may need replacement at 4mm because the high operating temperatures degrade the friction material faster. Track use can wear a set of performance pads in a single weekend. If you drive a sports car, check your pads before every track day and replace at 4mm for street use.
Heavy-Duty and Commercial Vehicles
Heavy-duty trucks and commercial vehicles have much thicker brake pads — often 18-20mm new — because they carry massive loads. The legal minimum for commercial vehicles is often higher than 2mm, typically 3-4mm, due to the increased stopping distance required at highway speeds. These vehicles also use air brakes or hydraulic systems with different wear characteristics. If you drive a commercial vehicle, follow the manufacturer’s maintenance schedule and the legal requirements for your jurisdiction.
How Driving Style and Conditions Affect Pad Wear

Your driving habits have a greater impact on brake pad life than almost any other factor. Aggressive driving can cut pad life in half, while smooth driving can extend it significantly. Understanding how your habits affect wear helps you predict when you’ll need replacements.
Aggressive Braking vs. Smooth Braking
Hard braking from high speeds generates more heat and wears pads faster than gradual braking. Every time you slam on the brakes, you’re removing a measurable amount of friction material. Drivers who brake aggressively — tailgating, speeding, and stopping suddenly — can wear out pads in 20,000 miles. Smooth drivers who anticipate stops and brake gradually can get 70,000 miles or more from the same pads. The difference is entirely in your right foot.
City Driving vs. Highway Driving
City driving is the worst environment for brake pads. Stop-and-go traffic means constant braking, and each stop generates heat and wear. A city commuter might need new pads every 25,000 miles. Highway driving, by contrast, involves minimal braking — you might only brake a few times per hour. Highway drivers can often get 60,000-80,000 miles from a set of pads. If you do a mix of both, expect somewhere in between.
Mountain Driving and Towing
Mountain driving and towing put extreme stress on brakes. Descending a long grade requires continuous braking, which generates enormous heat. This can cause brake fade and accelerate pad wear dramatically. If you drive in mountainous terrain or tow a trailer, use engine braking to reduce the load on your brakes, and check your pads more frequently. Consider upgrading to semi-metallic pads for better heat dissipation.
Environmental Factors: Weather and Road Conditions
Rain, snow, and road salt can accelerate brake pad wear. Water and salt can cause corrosion on the pad backing plate and reduce the effectiveness of the friction material. Sand and gravel roads can embed particles in the pads, increasing wear. If you live in an area with harsh winters or dusty roads, check your pads more frequently and consider washing your wheels regularly to remove corrosive debris.
Brake Pad Thickness vs. Brake Rotor Thickness: What’s the Difference?

Many drivers confuse brake pad thickness with rotor thickness, but they’re two different measurements with different purposes. Understanding the distinction is essential for proper brake maintenance.
What Rotor Thickness Measures
Rotor thickness measures the metal disc that the pads clamp onto. New rotors typically measure 22-32mm, depending on the vehicle. Rotors have a minimum thickness specification — usually stamped on the rotor hub — below which they must be replaced. This minimum is about structural integrity, not friction. A rotor that’s too thin can warp, crack, or fail under heat and pressure.
How Pad Thickness and Rotor Thickness Interact
Brake pad thickness and rotor thickness are independent measurements, but they affect each other. A worn rotor with a rough surface will wear pads faster. A pad worn down to the backing plate will score the rotor, reducing its thickness and requiring replacement. When you replace pads, you should always measure the rotors. If the rotors are below the minimum thickness specification, they must be replaced. If they’re close to the minimum, resurfacing may be an option, but only if the remaining thickness after resurfacing will still be above the minimum. The interaction between pad and rotor wear is why a complete brake job includes both components.
When to Replace Rotors vs. Pads
Pads are consumable items that need replacement every 30,000-70,000 miles. Rotors are longer-lived components that typically last 50,000-100,000 miles. However, rotors can fail prematurely if pads are worn to metal, if they’re warped from overheating, or if they’re machined too thin during resurfacing. The rule of thumb is: replace pads at 3mm, and replace rotors when they’re below the minimum thickness specification or when they’re warped, cracked, or deeply scored. If you’re replacing pads and the rotors are within spec, you can reuse them. If the rotors are marginal, replacing them at the same time saves labor costs.
Measuring Rotor Thickness: Tools and Techniques
Rotor thickness is measured with a micrometer or caliper at several points around the rotor. The measurement is taken at the thinnest point, typically near the edge where the pad contacts. Rotors can wear unevenly, so you should measure at least three points around the circumference. The minimum thickness is stamped on the rotor hub or bell. If your measurement is below this spec, the rotor must be replaced. If it’s above but close, you need to consider whether resurfacing will bring it below the minimum. A rotor that’s been resurfaced once may not have enough material for a second resurfacing.
Brake Pad Thickness and Brake Fluid: The Connection

Brake pad thickness has a direct relationship with brake fluid level. As pads wear, the caliper pistons extend further to maintain contact with the rotor, which draws more brake fluid from the reservoir. Monitoring your brake fluid level can give you a clue about pad wear.
How Pad Wear Affects Brake Fluid Level
When brake pads are new, the caliper pistons are retracted, and the brake fluid reservoir is full. As the pads wear, the pistons extend further, and the fluid level in the reservoir drops. A drop in brake fluid level over time is a normal consequence of pad wear. However, a sudden drop in fluid level could indicate a leak. If you notice the fluid level dropping steadily, it’s worth checking your pad thickness. When you install new pads, the caliper pistons are pushed back, and the fluid level rises back to the full mark.
Checking Brake Fluid as a Wear Indicator
The brake fluid reservoir is typically translucent, allowing you to see the level without opening it. If the fluid is at the “MIN” line, your pads are likely worn. If it’s below the “MIN” line, you may have a leak or severely worn pads. However, this is an indirect indicator — the fluid level can also drop due to a leak or normal evaporation. Use the fluid level as a supplementary check, not a primary one. The most reliable method is still measuring the pad thickness directly.
When to Replace Brake Fluid
Brake fluid should be replaced every 2-3 years or 30,000 miles, regardless of pad thickness. Brake fluid is hygroscopic — it absorbs moisture over time, which lowers its boiling point and can cause brake fade. If you’re replacing pads, it’s a good time to flush the brake fluid as well, since you’re already working on the brake system. Fresh fluid ensures optimal braking performance and protects the calipers and master cylinder from corrosion.
Brake Pad Shims and Hardware: What You Need to Know

Brake pad shims are thin metal or rubber plates that sit between the pad backing plate and the caliper piston. They serve several purposes: reducing noise, preventing vibration, and distributing pressure evenly across the pad. When you replace pads, you should also replace the shims and hardware.
The Role of Shims in Brake Performance
Shims act as a buffer between the caliper piston and the pad backing plate. They reduce brake squeal by dampening vibration, and they help distribute the piston’s pressure evenly across the pad surface. Over time, shims can corrode, wear, or become compressed, reducing their effectiveness. If you’re replacing pads, new shims are inexpensive and ensure proper performance. Some pads come with shims pre-installed; others require you to transfer the old shims or purchase new ones.
Brake Pad Hardware: Clips, Springs, and Pins
Brake pad hardware includes the clips that hold the pads in the caliper bracket, the springs that keep the pads separated from the rotor, and the slide pins that allow the caliper to move. Worn or corroded hardware can cause uneven pad wear, noise, and reduced braking performance. Most brake pad kits include new hardware, but if yours doesn’t, purchase it separately. Replacing hardware with every pad change is cheap insurance against premature wear and brake noise.
How Shims and Hardware Affect Pad Wear
Properly installed shims and hardware ensure that the pad contacts the rotor evenly. If a shim is missing or worn, the pad may wear at an angle, reducing its effective life. If a slide pin is seized, the caliper may not release fully, causing the pad to drag on the rotor and wear prematurely. Checking and replacing hardware during a pad change is essential for maximizing pad life and ensuring even wear.
Brake Pad Wear Sensors: Types and Replacement

Brake pad wear sensors are an important part of the brake system, providing early warning of pad wear. There are two main types: mechanical and electronic. Understanding how they work and when to replace them is essential for maintaining your brake system.
Mechanical Wear Sensors: The Squealer Clip
Mechanical wear sensors are small metal clips attached to the pad backing plate. When the pad wears down to about 2-3mm, the clip contacts the rotor and produces a high-pitched squeal. This is the most common type of wear indicator, found on most vehicles. The squeal is intentionally loud and annoying to get your attention. When you hear it, you should replace the pads as soon as possible. The clip is part of the pad assembly and is replaced with the pad.
Electronic Wear Sensors: The Dashboard Light
Electronic wear sensors are small wires embedded in the pad. When the pad wears down to a certain thickness, the wire contacts the rotor, completing a circuit that triggers a warning light on the dashboard. These sensors are more reliable than mechanical squealers because they provide a clear visual alert. However, they only monitor one pad per wheel, typically the inner pad. When the light comes on, you should replace the pads and the sensor. Some sensors are reusable, but most are designed for single use.
Replacing Wear Sensors
When you replace brake pads, you should also replace the wear sensors. Mechanical sensors are part of the pad assembly and are replaced automatically. Electronic sensors are separate components that need to be purchased and installed. They’re relatively inexpensive — typically $10-$30 per sensor — and are essential for maintaining the warning system. If you don’t replace the sensor, the warning light may stay on or fail to activate when the new pads wear down.
Brake Pad Thickness Measurement Tools: A Comparison

Choosing the right tool for measuring brake pad thickness depends on your budget, skill level, and how often you plan to check your brakes. Here’s a comparison of the most common tools.
Visual Inspection: Free but Limited
Visual inspection costs nothing and requires no tools. You can see the outer pad through the wheel spokes and estimate the thickness. However, it’s inaccurate and
Brake pad thickness is the most critical measurement for vehicle safety. Yet most drivers ignore it until they hear grinding. The brake pad is a friction component that clamps against the rotor. It converts kinetic energy into heat. The remaining material determines your stopping distance. It also tells you if you are driving on metal-to-metal contact. This guide is your complete reference for measuring brake pad thickness. It covers legal minimums and exactly when to replace them.
We cover everything you need to know. You will learn how to measure thickness with different tools. We explain the 3mm and 2mm replacement thresholds. We show how to check the inner pad, which wears faster. You will also learn to interpret wear indicators. Pad thickness matters across different vehicle types. This includes daily commuters and heavy trucks. Driving style also accelerates wear. We separate fact from fiction on minimums. We explain what the squeal really means. Finally, we give you a data-driven replacement schedule. This beats guessing.
Unlike generic advice elsewhere, this guide includes a comparison table of measurement methods. It offers a decision framework based on your driving conditions. We also share honest limitations. For example, a visual check alone can miss a failing inner pad. By the end, you will know how to assess your brake pads in ten minutes. You will know when to order new ones. This saves you money on unnecessary replacements. It also prevents dangerous brake failure.
What Is Brake Pad Thickness and Why It Matters

Brake pad thickness is the measurement of the friction material that remains on a brake pad. It’s the single most direct indicator of how much braking life you have left. When you press the brake pedal, hydraulic pressure pushes the caliper pistons, which press the friction material against the brake rotor. The thinner that material gets, the harder the system works to produce the same stopping force.
Defining Brake Pad Thickness: Friction Material vs. Backing Plate
A brake pad has two main layers. The friction material is the compound that contacts the rotor, and the backing plate is the steel base that the friction material is bonded to. When you measure brake pad thickness, you’re measuring only the friction material — not the backing plate. Most new brake pads come with roughly 10 to 12 millimeters of friction material. The backing plate adds about 4 to 6 millimeters on top of that, so a total pad assembly often measures 14 to 18 millimeters when new. Many DIY owners mistakenly measure the entire assembly and think they have more life left than they actually do. This distinction is critical: the friction material is what stops the vehicle, and the backing plate is just structural support. When the friction material wears down to the level of the backing plate, you’re at metal-on-metal contact, which damages the rotor and dramatically increases stopping distance.
How Brake Pad Thickness Differs from Rotor Thickness
Brake pad thickness and rotor thickness are two separate measurements that serve different purposes. The brake pad is the consumable friction material that presses against the rotor. The rotor is the metal disc that the pads clamp onto. Rotors also have a minimum thickness specification, but that’s about structural integrity and heat dissipation, not friction life. A rotor that’s too thin can warp or crack under heat, while a pad that’s too thin simply can’t generate enough friction. Both need to be checked during a brake service, but they wear at different rates and have different replacement thresholds. Pads typically need replacement every 30,000 to 70,000 miles, while rotors can last 50,000 to 100,000 miles or more, depending on driving conditions and pad material.
The Role of Thickness in Braking Performance and Heat Dissipation
Brake pad thickness directly affects braking performance in two ways. First, thicker pads have more friction material to generate stopping force. As the pad wears, the hydraulic system must push the caliper piston further to make contact, which can reduce braking response and increase pedal travel. Second, thicker pads dissipate heat better. The friction material acts as a thermal barrier between the rotor and the caliper. When the pad gets thin, more heat transfers into the caliper and brake fluid, which can lead to brake fade — a dangerous condition where braking power diminishes under heavy use. This is especially important for vehicles that carry heavy loads or are driven aggressively, where heat buildup is more severe. A pad at 2mm or less simply cannot manage heat the way a pad at 8mm can, making the entire braking system less effective and more prone to failure.
How to Measure Brake Pad Thickness: Step-by-Step Methods

Measuring brake pad thickness accurately is the difference between catching wear early and discovering it after the rotor is scored. There are three primary methods, each with different levels of accuracy and effort. The method you choose depends on your tools, your vehicle, and how precise you need to be.
Visual Inspection: What You Can and Cannot See
A visual inspection is the quickest method, but it has significant limitations. You can often see the outer brake pad through the spokes of the wheel without removing anything. Shine a flashlight at the caliper and look for the friction material between the backing plate and the rotor. If you see less than 3mm of material, it’s time to replace. However, a visual check only shows the outer pad. The inner pad — the one closest to the engine — wears faster because it’s pressed first by the caliper piston. You cannot see the inner pad without removing the wheel or using a mirror. Many drivers discover their inner pad is completely worn while the outer pad still looks fine. Visual inspection is a good first check, but it should never be your only check.
Using a Ruler or Caliper: The Accurate Approach
For a precise measurement, you need a tool. A simple ruler can work if you can get it into the gap between the pad and rotor, but it’s awkward and prone to error. A caliper — either digital or dial — is the professional standard. To measure, remove the wheel for best access, then place the caliper jaws on the friction material only, not the backing plate. Take the measurement at the thickest point of the pad, which is typically the center. Digital calipers give you a reading to 0.01mm, which is more than enough precision for brake pad assessment. If you don’t have a caliper, a brake pad thickness gauge — a small tool with a needle that fits into the pad gap — is inexpensive and easy to use. The key is consistency: always measure the same spot on each pad so you can track wear over time.
Measuring Through the Wheel vs. Removing the Wheel
Measuring through the wheel is possible on many vehicles, especially those with open-spoke designs. You can use a thin ruler or a brake pad gauge to reach through the spokes and measure the outer pad. This method is quick and doesn’t require any disassembly, making it ideal for a monthly check. However, it only measures the outer pad, and the angle can make the reading inaccurate. Removing the wheel gives you full access to both the inner and outer pads, and you can measure at the correct angle. It takes about 10 minutes per wheel with a jack and lug wrench, but it’s the only way to get a complete picture of your brake pad condition. For a thorough inspection, remove the wheel at least once every oil change interval.
Minimum Brake Pad Thickness: Legal vs. Recommended Limits

Understanding the difference between legal minimums and recommended replacement thresholds can save you from a failed inspection — or a crash. The legal minimum is the absolute floor below which your vehicle is considered unsafe and unroadworthy. The recommended threshold is the point at which you should replace pads for optimal safety and to avoid damaging other components.
The 2mm Legal Minimum: What It Really Means
In most jurisdictions, the legal minimum brake pad thickness is 2mm of friction material. This is the point at which a vehicle fails a safety inspection. However, 2mm is not a safe operating level — it’s the absolute limit before metal contacts metal. At 2mm, the pad has almost no capacity to dissipate heat, and braking performance is severely degraded. The pad material is so thin that it can crack or separate from the backing plate under stress. Driving at
2mm is a gamble with your safety and your rotors. If you’re at 2mm, you’re already hearing the wear indicators or feeling a soft pedal. The legal minimum exists to give inspectors a clear cutoff, but it’s not a target — it’s a red line. In practice, a pad at 2mm will likely score your rotors within a few hundred miles, turning a $50 pad replacement into a $300 rotor-and-pad job.
The 3mm Recommended Replacement Threshold
Most professional mechanics and brake manufacturers recommend replacing pads at 3mm, not 2mm. The 3mm threshold gives you a safety margin. At 3mm, the pad still has enough material to handle heat and provide consistent braking, but it’s close enough to the end that waiting is risky. The 3mm rule is especially important for the inner pad, which wears faster. If you measure 3mm on the outer pad, the inner pad is likely at 2mm or less. Replacing at 3mm also protects your rotors — the friction material is thick enough to prevent metal-on-metal contact even under hard braking. For most drivers, 3mm is the practical replacement point.
4mm: The “Start Shopping” Threshold
At 4mm, your pads are about 40% worn. They’re still safe, but you should start planning for replacement. This is the point where you should begin researching pads, comparing prices, and scheduling a service appointment. At 4mm, you have roughly 10,000 to 15,000 miles of life left, depending on driving habits. If you do a lot of highway driving, you might get more. If you drive in stop-and-go city traffic, you’ll get less. The 4mm threshold is also the point where you should check your rotors for wear and decide whether they need resurfacing or replacement at the same time as the pads.
Why 2mm Is Dangerous: Heat, Fade, and Rotor Damage
The danger of 2mm pads goes beyond reduced stopping power. At 2mm, the friction material is so thin that it cannot insulate the caliper from rotor heat. Brake fluid can boil, causing a spongy pedal and complete brake failure in extreme cases. The pad backing plate can also contact the rotor, creating deep grooves that require rotor replacement. Also, thin pads are more prone to cracking and delamination — the friction material can separate from the backing plate entirely, leaving you with no brakes at all. The cost difference between replacing at 3mm and replacing at 2mm is minimal, but the safety difference is enormous.
Brake Pad Wear Indicators: Squealers, Sensors, and What They Tell You

Brake pad wear indicators are designed to alert you when pads are getting thin. They come in two main types: mechanical squealers and electronic sensors. Understanding how they work — and their limitations — helps you avoid being caught off guard.
Mechanical Squealers: The Metal Tab That Scrapes
Most brake pads have a small metal tab embedded in the friction material. When the pad wears down to about 2-3mm, this tab contacts the rotor and produces a high-pitched squeal when you brake. The sound is intentionally annoying — it’s designed to get your attention. However, the squealer only works when you’re braking, and it can be intermittent. Some drivers mistake the sound for a normal brake noise and ignore it. Others drive with the squeal for thousands of miles, wearing the pad down to the backing plate. The squealer is a warning, not a replacement schedule. If you hear it, measure your pads immediately.
Electronic Wear Sensors: The Dashboard Warning
Many modern vehicles use electronic wear sensors. These are small wires embedded in the pad that complete a circuit when they contact the rotor. When the circuit is broken, the dashboard displays a brake warning light. Electronic sensors are more reliable than squealers because they give a clear visual alert. However, they only monitor one pad per wheel — usually the inner pad — and they trigger at a specific thickness, typically 2mm. If you have electronic sensors, you still need to check the other pads manually. The sensor tells you when it’s critical, but it doesn’t tell you the condition of the entire brake system.
How to Interpret Wear Indicator Signals
A squeal or warning light means your pads are at or near the minimum thickness. It does not mean you have time to wait. When the indicator activates, you should replace the pads within a few hundred miles at most. Continuing to drive with an active wear indicator risks rotor damage and reduced braking performance. If you hear a grinding noise — not a squeal — that’s metal-on-metal contact, and you’ve already damaged the rotor. At that point, you need both new pads and new rotors. The wear indicator is your last warning before expensive damage occurs.
Friction Material Types: Ceramic, Semi-Metallic, and Organic

The type of friction material on your brake pads affects how quickly they wear, how they perform, and how much they cost. Understanding the differences helps you choose the right replacement pads and set realistic expectations for wear.
Ceramic Pads: Low Dust, Long Life
Ceramic pads are made from ceramic fibers, copper, and other materials. They’re the most common choice for modern passenger vehicles because they produce less brake dust, operate quietly, and last longer than organic pads. Ceramic pads typically last 50,000 to 70,000 miles. They perform well in normal driving conditions and handle heat effectively. However, they’re more expensive than organic pads and can be harder on rotors in some applications. Ceramic pads are the best choice for daily drivers who want low maintenance and clean wheels.
Semi-Metallic Pads: High Performance, Faster Wear
Semi-metallic pads contain 30-65% metal fibers — steel, copper, or iron — mixed with friction modifiers. They offer excellent stopping power and heat dissipation, making them ideal for trucks, SUVs, and performance vehicles. However, they wear faster than ceramic pads, typically lasting 30,000 to 50,000 miles. They also produce more brake dust and can be noisy, especially when cold. Semi-metallic pads are the right choice if you tow heavy loads, drive aggressively, or need maximum braking performance.
Organic Pads: Soft, Quiet, Short-Lived
Organic pads — also called non-asbestos organic (NAO) pads — are made from glass, rubber, Kevlar, and other materials. They’re soft, quiet, and gentle on rotors, but they wear quickly. Organic pads typically last 20,000 to 40,000 miles. They’re the cheapest option and are often found on older or economy vehicles. They perform adequately in light driving conditions but fade under heavy braking. If you drive a commuter car in city traffic, organic pads are acceptable. For anything more demanding, choose ceramic or semi-metallic.
Safety Implications of Thin Brake Pads

Thin brake pads are not just a maintenance issue — they’re a safety hazard. The consequences of driving on worn pads range from increased stopping distance to complete brake failure.
Increased Stopping Distance
The most immediate effect of thin pads is longer stopping distance. A pad at 2mm has significantly less friction material to generate stopping force. In an emergency stop, a vehicle with worn pads can take 20-30% longer to stop than one with new pads. At highway speeds, that’s the difference between a near-miss and a collision. The brake system is designed to work with a full pad — as the pad wears, the system becomes less effective, even if the pedal feels normal.
Brake Fade and Overheating
Thin pads cannot dissipate heat effectively. When you brake repeatedly — going down a mountain, towing a trailer, or driving in heavy traffic — the heat builds up in the rotor and transfers through the thin pad into the caliper and brake fluid. This causes brake fade, where the brakes lose effectiveness despite increased pedal pressure. In severe cases, the brake fluid can boil, causing a complete loss of braking. This is especially dangerous in mountainous terrain or emergency situations.
Rotor Damage and Expensive Repairs
When a pad wears down to the backing plate, the metal backing plate grinds against the rotor. This creates deep grooves in the rotor surface, requiring rotor replacement or resurfacing. The cost
of rotor replacement can easily double or triple the cost of a brake job. A $50 set of pads becomes a $500 repair when you also need new rotors. Also, the metal-on-metal grinding can damage the caliper pistons and seals, leading to even more expensive repairs. Replacing pads at 3mm is far cheaper than replacing pads, rotors, and calipers at 1mm.
Complete Brake Failure Scenarios
In the worst case, thin pads can lead to complete brake failure. If the friction material delaminates from the backing plate — which is more likely when the pad is very thin — you lose braking on that wheel entirely. If this happens on the front axle, you lose 70-80% of your braking power. The pedal goes to the floor, and you have no way to stop. This is a rare but real scenario that occurs when drivers ignore wear indicators and continue driving on pads at 1mm or less. The safety margin between 3mm and 1mm is not just about performance — it’s about preventing catastrophic failure.
Cost/Benefit of Early vs. Late Replacement

The decision of when to replace brake pads is ultimately a financial one. Replacing too early wastes money on unused friction material. Replacing too late costs more in rotor damage and safety risk. Understanding the economics helps you make the right call.
The Cost of Replacing Early
If you replace pads at 6mm, you’re throwing away roughly 50% of the friction material. For a typical set of ceramic pads costing $80-$150, that’s $40-$75 wasted. However, the cost of early replacement is relatively small compared to the cost of late replacement. If you’re doing the labor yourself, the only cost is the parts. If you’re paying a shop, labor is the same whether you replace at 6mm or 3mm. The real question is whether you value the peace of mind of new pads over the small savings of running them to the wear limit.
The Cost of Replacing Late
Replacing pads at 2mm or below is where the costs escalate. At 2mm, you risk rotor damage. New rotors cost $50-$150 each, plus labor. At 1mm or metal-on-metal, you’re looking at rotors, possibly calipers, and potentially brake fluid replacement. A $150 pad job becomes a $600-$800 repair. The cost difference between replacing at 3mm and replacing at 1mm is typically $300-$500. That’s a significant penalty for waiting an extra 5,000 miles.
The Optimal Replacement Point
The data is clear: the optimal replacement point is 3mm for most drivers. At 3mm, you have enough material to avoid rotor damage and maintain safe braking, but you’re not wasting significant friction material. For aggressive drivers or those who tow heavy loads, 4mm is a safer threshold. For light commuters who drive mostly highway miles, you might stretch to 2.5mm, but the savings are minimal compared to the risk. The 3mm rule is the sweet spot between cost and safety.
Brake Pad Thickness by Vehicle Type

Brake pad thickness requirements and wear rates vary significantly by vehicle type. A heavy truck wears pads faster than a compact car, and a performance vehicle needs more pad material for heat management. Understanding these differences helps you set appropriate replacement intervals.
Passenger Cars and Sedans
Most passenger cars use ceramic pads with a new thickness of 10-12mm. The 3mm replacement threshold applies universally. However, the wear rate depends on vehicle weight and driving conditions. A heavy sedan like a Toyota Camry will wear pads faster than a lightweight compact like a Honda Fit. City driving with frequent stops can cut pad life in half compared to highway driving. For most sedans, expect 40,000-60,000 miles between pad replacements.
SUVs and Trucks
SUVs and trucks are heavier and often used for towing, which dramatically increases brake pad wear. Many trucks use semi-metallic pads with a new thickness of 12-14mm to handle the extra heat and load. The 3mm threshold still applies, but the wear rate is faster — often 25,000-40,000 miles between replacements. If you tow regularly, check your pads every 10,000 miles and consider replacing at 4mm to account for the extra heat load.
Performance and Sports Cars
Performance vehicles use high-friction pads that wear faster but provide superior stopping power. These pads often have a new thickness of 10-12mm but may need replacement at 4mm because the high operating temperatures degrade the friction material faster. Track use can wear a set of performance pads in a single weekend. If you drive a sports car, check your pads before every track day and replace at 4mm for street use.
Heavy-Duty and Commercial Vehicles
Heavy-duty trucks and commercial vehicles have much thicker brake pads — often 18-20mm new — because they carry massive loads. The legal minimum for commercial vehicles is often higher than 2mm, typically 3-4mm, due to the increased stopping distance required at highway speeds. These vehicles also use air brakes or hydraulic systems with different wear characteristics. If you drive a commercial vehicle, follow the manufacturer’s maintenance schedule and the legal requirements for your jurisdiction.
How Driving Style and Conditions Affect Pad Wear

Your driving habits have a greater impact on brake pad life than almost any other factor. Aggressive driving can cut pad life in half, while smooth driving can extend it significantly. Understanding how your habits affect wear helps you predict when you’ll need replacements.
Aggressive Braking vs. Smooth Braking
Hard braking from high speeds generates more heat and wears pads faster than gradual braking. Every time you slam on the brakes, you’re removing a measurable amount of friction material. Drivers who brake aggressively — tailgating, speeding, and stopping suddenly — can wear out pads in 20,000 miles. Smooth drivers who anticipate stops and brake gradually can get 70,000 miles or more from the same pads. The difference is entirely in your right foot.
City Driving vs. Highway Driving
City driving is the worst environment for brake pads. Stop-and-go traffic means constant braking, and each stop generates heat and wear. A city commuter might need new pads every 25,000 miles. Highway driving, by contrast, involves minimal braking — you might only brake a few times per hour. Highway drivers can often get 60,000-80,000 miles from a set of pads. If you do a mix of both, expect somewhere in between.
Mountain Driving and Towing
Mountain driving and towing put extreme stress on brakes. Descending a long grade requires continuous braking, which generates enormous heat. This can cause brake fade and accelerate pad wear dramatically. If you drive in mountainous terrain or tow a trailer, use engine braking to reduce the load on your brakes, and check your pads more frequently. Consider upgrading to semi-metallic pads for better heat dissipation.
Environmental Factors: Weather and Road Conditions
Rain, snow, and road salt can accelerate brake pad wear. Water and salt can cause corrosion on the pad backing plate and reduce the effectiveness of the friction material. Sand and gravel roads can embed particles in the pads, increasing wear. If you live in an area with harsh winters or dusty roads, check your pads more frequently and consider washing your wheels regularly to remove corrosive debris.
Brake Pad Thickness vs. Brake Rotor Thickness: What’s the Difference?

Many drivers confuse brake pad thickness with rotor thickness, but they’re two different measurements with different purposes. Understanding the distinction is essential for proper brake maintenance.
What Rotor Thickness Measures
Rotor thickness measures the metal disc that the pads clamp onto. New rotors typically measure 22-32mm, depending on the vehicle. Rotors have a minimum thickness specification — usually stamped on the rotor hub — below which they must be replaced. This minimum is about structural integrity, not friction. A rotor that’s too thin can warp, crack, or fail under heat and pressure.
Brake Pad Thickness Guide: Minimums, Measurements & When to Replace
Brake pad thickness is the most critical measurement for vehicle safety. Yet most drivers ignore it until they hear grinding. The brake pad is a friction component that clamps against the rotor. It converts kinetic energy into heat. The remaining material determines your stopping distance. It also tells you if you are driving on metal-to-metal contact. This guide is your complete reference for measuring brake pad thickness. It covers legal minimums and exactly when to replace them.
We cover everything you need to know. You will learn how to measure thickness with different tools. We explain the 3mm and 2mm replacement thresholds. We show how to check the inner pad, which wears faster. You will also learn to interpret wear indicators. Pad thickness matters across different vehicle types. This includes daily commuters and heavy trucks. Driving style also accelerates wear. We separate fact from fiction on minimums. We explain what the squeal really means. Finally, we give you a data-driven replacement schedule. This beats guessing.
Unlike generic advice you’ll find elsewhere, this guide includes a comparison table of measurement methods, a decision framework based on your driving conditions, and honest limitations — like why a visual check alone can miss a failing inner pad. By the end, you’ll know exactly how to assess your brake pads in ten minutes and when to order new ones, saving you money on unnecessary replacements and preventing dangerous brake failure.
What Is Brake Pad Thickness and Why It Matters
Brake pad thickness is the measurement of the friction material that remains on a brake pad. It’s the single most direct indicator of how much braking life you have left. When you press the brake pedal, hydraulic pressure pushes the caliper pistons, which press the friction material against the brake rotor. The thinner that material gets, the harder the system works to produce the same stopping force.
Defining Brake Pad Thickness: Friction Material vs. Backing Plate
A brake pad has two main layers. The friction material is the compound that contacts the rotor, and the backing plate is the steel base that the friction material is bonded to. When you measure brake pad thickness, you’re measuring only the friction material — not the backing plate. Most new brake pads come with roughly 10 to 12 millimeters of friction material. The backing plate adds about 4 to 6 millimeters on top of that, so a total pad assembly often measures 14 to 18 millimeters when new. Many DIY owners mistakenly measure the entire assembly and think they have more life left than they actually do. This distinction is critical: the friction material is what stops the vehicle, and the backing plate is just structural support. When the friction material wears down to the level of the backing plate, you’re at metal-on-metal contact, which damages the rotor and dramatically increases stopping distance.
How Brake Pad Thickness Differs from Rotor Thickness
Brake pad thickness and rotor thickness are two separate measurements that serve different purposes. The brake pad is the consumable friction material that presses against the rotor. The rotor is the metal disc that the pads clamp onto. Rotors also have a minimum thickness specification, but that’s about structural integrity and heat dissipation, not friction life. A rotor that’s too thin can warp or crack under heat, while a pad that’s too thin simply can’t generate enough friction. Both need to be checked during a brake service, but they wear at different rates and have different replacement thresholds. Pads typically need replacement every 30,000 to 70,000 miles, while rotors can last 50,000 to 100,000 miles or more, depending on driving conditions and pad material.
The Role of Thickness in Braking Performance and Heat Dissipation
Brake pad thickness directly affects braking performance in two ways. First, thicker pads have more friction material to generate stopping force. As the pad wears, the hydraulic system must push the caliper piston further to make contact, which can reduce braking response and increase pedal travel. Second, thicker pads dissipate heat better. The friction material acts as a thermal barrier between the rotor and the caliper. When the pad gets thin, more heat transfers into the caliper and brake fluid, which can lead to brake fade — a dangerous condition where braking power diminishes under heavy use. This is especially important for vehicles that carry heavy loads or are driven aggressively, where heat buildup is more severe. A pad at 2mm or less simply cannot manage heat the way a pad at 8mm can, making the entire braking system less effective and more prone to failure.
How to Measure Brake Pad Thickness: Step-by-Step Methods

Measuring brake pad thickness accurately is the difference between catching wear early and discovering it after the rotor is scored. There are three primary methods, each with different levels of accuracy and effort. The method you choose depends on your tools, your vehicle, and how precise you need to be.
Visual Inspection: What You Can and Cannot See
A visual inspection is the quickest method, but it has significant limitations. You can often see the outer brake pad through the spokes of the wheel without removing anything. Shine a flashlight at the caliper and look for the friction material between the backing plate and the rotor. If you see less than 3mm of material, it’s time to replace. However, a visual check only shows the outer pad. The inner pad — the one closest to the engine — wears faster because it’s pressed first by the caliper piston. You cannot see the inner pad without removing the wheel or using a mirror. Many drivers discover their inner pad is completely worn while the outer pad still looks fine. Visual inspection is a good first check, but it should never be your only check.
Using a Ruler or Caliper: The Accurate Approach
For a precise measurement, you need a tool. A simple ruler can work if you can get it into the gap between the pad and rotor, but it’s awkward and prone to error. A caliper — either digital or dial — is the professional standard. To measure, remove the wheel for best access, then place the caliper jaws on the friction material only, not the backing plate. Take the measurement at the thickest point of the pad, which is typically the center. Digital calipers give you a reading to 0.01mm, which is more than enough precision for brake pad assessment. If you don’t have a caliper, a brake pad thickness gauge — a small tool with a needle that fits into the pad gap — is inexpensive and easy to use. The key is consistency: always measure the same spot on each pad so you can track wear over time.
Measuring Through the Wheel vs. Removing the Wheel
Measuring through the wheel is possible on many vehicles, especially those with open-spoke designs. You can use a thin ruler or a brake pad gauge to reach through the spokes and measure the outer pad. This method is quick and doesn’t require any disassembly, making it ideal for a monthly check. However, it only measures the outer pad, and the angle can make the reading inaccurate. Removing the wheel gives you full access to both the inner and outer pads, and you can measure at the correct angle. It takes about 10 minutes per wheel with a jack and lug wrench, but it’s the only way to get a complete picture of your brake pad condition. For a thorough inspection, remove the wheel at least once every oil change interval.
Minimum Brake Pad Thickness: Legal vs. Recommended Limits

Understanding the difference between legal minimums and recommended replacement thresholds can save you from a failed inspection — or a crash. The legal minimum is the absolute floor below which your vehicle is considered unsafe and unroadworthy. The recommended threshold is the point at which you should replace pads for optimal safety and to avoid damaging other components.
The 2mm Legal Minimum: What It Really Means
In most jurisdictions, the legal minimum brake pad thickness is 2mm of friction material. This is the point at which a vehicle fails a safety inspection. However, 2mm is not a safe operating level — it’s the absolute limit before metal contacts metal. At 2mm, the pad has almost no capacity to dissipate heat, and braking performance is severely degraded. The pad material is so thin that it can crack or separate from the backing plate under stress. Driving at
Brake pad thickness is the single most critical measurement for vehicle safety, yet it’s the one most drivers overlook until the grinding starts. The brake pad is a friction component that clamps against the rotor to convert kinetic energy into heat, and its remaining material determines your stopping distance — and whether you’re driving on metal-to-metal contact. This guide is your complete reference for measuring brake pad thickness, understanding the legal minimums, and knowing exactly when to replace them.
We’ll cover the full range of what you need to know: how to measure thickness with different tools, the 3mm and 2mm replacement thresholds, how to check the inner pad (which wears faster), and how to interpret wear indicators. You’ll also learn why pad thickness matters across different vehicle types — from a daily commuter to a heavy truck — and how driving style accelerates wear. We’ll separate fact from fiction on minimums, explain what the squeal really means, and give you a data-driven replacement schedule that beats guessing.
Unlike generic advice you’ll find elsewhere, this guide includes a comparison table of measurement methods, a decision framework based on your driving conditions, and honest limitations — like why a visual check alone can miss a failing inner pad. By the end, you’ll know exactly how to assess your brake pads in ten minutes and when to order new ones, saving you money on unnecessary replacements and preventing dangerous brake failure.
What Is Brake Pad Thickness and Why It Matters

Brake pad thickness is the measurement of the friction material that remains on a brake pad. It’s the single most direct indicator of how much braking life you have left. When you press the brake pedal, hydraulic pressure pushes the caliper pistons, which press the friction material against the brake rotor. The thinner that material gets, the harder the system works to produce the same stopping force.
Defining Brake Pad Thickness: Friction Material vs. Backing Plate
A brake pad has two main layers. The friction material is the compound that contacts the rotor, and the backing plate is the steel base that the friction material is bonded to. When you measure brake pad thickness, you’re measuring only the friction material — not the backing plate. Most new brake pads come with roughly 10 to 12 millimeters of friction material. The backing plate adds about 4 to 6 millimeters on top of that, so a total pad assembly often measures 14 to 18 millimeters when new. Many DIY owners mistakenly measure the entire assembly and think they have more life left than they actually do. This distinction is critical: the friction material is what stops the vehicle, and the backing plate is just structural support. When the friction material wears down to the level of the backing plate, you’re at metal-on-metal contact, which damages the rotor and dramatically increases stopping distance.
How Brake Pad Thickness Differs from Rotor Thickness
Brake pad thickness and rotor thickness are two separate measurements that serve different purposes. The brake pad is the consumable friction material that presses against the rotor. The rotor is the metal disc that the pads clamp onto. Rotors also have a minimum thickness specification, but that’s about structural integrity and heat dissipation, not friction life. A rotor that’s too thin can warp or crack under heat, while a pad that’s too thin simply can’t generate enough friction. Both need to be checked during a brake service, but they wear at different rates and have different replacement thresholds. Pads typically need replacement every 30,000 to 70,000 miles, while rotors can last 50,000 to 100,000 miles or more, depending on driving conditions and pad material.
The Role of Thickness in Braking Performance and Heat Dissipation
Brake pad thickness directly affects braking performance in two ways. First, thicker pads have more friction material to generate stopping force. As the pad wears, the hydraulic system must push the caliper piston further to make contact, which can reduce braking response and increase pedal travel. Second, thicker pads dissipate heat better. The friction material acts as a thermal barrier between the rotor and the caliper. When the pad gets thin, more heat transfers into the caliper and brake fluid, which can lead to brake fade — a dangerous condition where braking power diminishes under heavy use. This is especially important for vehicles that carry heavy loads or are driven aggressively, where heat buildup is more severe. A pad at 2mm or less simply cannot manage heat the way a pad at 8mm can, making the entire braking system less effective and more prone to failure.
How to Measure Brake Pad Thickness: Step-by-Step Methods

Measuring brake pad thickness accurately is the difference between catching wear early and discovering it after the rotor is scored. There are three primary methods, each with different levels of accuracy and effort. The method you choose depends on your tools, your vehicle, and how precise you need to be.
Visual Inspection: What You Can and Cannot See
A visual inspection is the quickest method, but it has significant limitations. You can often see the outer brake pad through the spokes of the wheel without removing anything. Shine a flashlight at the caliper and look for the friction material between the backing plate and the rotor. If you see less than 3mm of material, it’s time to replace. However, a visual check only shows the outer pad. The inner pad — the one closest to the engine — wears faster because it’s pressed first by the caliper piston. You cannot see the inner pad without removing the wheel or using a mirror. Many drivers discover their inner pad is completely worn while the outer pad still looks fine. Visual inspection is a good first check, but it should never be your only check.
Using a Ruler or Caliper: The Accurate Approach
For a precise measurement, you need a tool. A simple ruler can work if you can get it into the gap between the pad and rotor, but it’s awkward and prone to error. A caliper — either digital or dial — is the professional standard. To measure, remove the wheel for best access, then place the caliper jaws on the friction material only, not the backing plate. Take the measurement at the thickest point of the pad, which is typically the center. Digital calipers give you a reading to 0.01mm, which is more than enough precision for brake pad assessment. If you don’t have a caliper, a brake pad thickness gauge — a small tool with a needle that fits into the pad gap — is inexpensive and easy to use. The key is consistency: always measure the same spot on each pad so you can track wear over time.
Measuring Through the Wheel vs. Removing the Wheel
Measuring through the wheel is possible on many vehicles, especially those with open-spoke designs. You can use a thin ruler or a brake pad gauge to reach through the spokes and measure the outer pad. This method is quick and doesn’t require any disassembly, making it ideal for a monthly check. However, it only measures the outer pad, and the angle can make the reading inaccurate. Removing the wheel gives you full access to both the inner and outer pads, and you can measure at the correct angle. It takes about 10 minutes per wheel with a jack and lug wrench, but it’s the only way to get a complete picture of your brake pad condition. For a thorough inspection, remove the wheel at least once every oil change interval.
Minimum Brake Pad Thickness: Legal vs. Recommended Limits

Understanding the difference between legal minimums and recommended replacement thresholds can save you from a failed inspection — or a crash. The legal minimum is the absolute floor below which your vehicle is considered unsafe and unroadworthy. The recommended threshold is the point at which you should replace pads for optimal safety and to avoid damaging other components.
The 2mm Legal Minimum: What It Really Means
In most jurisdictions, the legal minimum brake pad thickness is 2mm of friction material. This is the point at which a vehicle fails a safety inspection. However, 2mm is not a safe operating level — it’s the absolute limit before metal contacts metal. At 2mm, the pad has almost no capacity to dissipate heat, and braking performance is severely degraded. The pad material is so thin that it can crack or separate from the backing plate under stress. Driving at
Brake pad thickness is the single most critical measurement for vehicle safety, yet it’s the one most drivers overlook until the grinding starts. The brake pad is a friction component that clamps against the rotor to convert kinetic energy into heat, and its remaining material determines your stopping distance — and whether you’re driving on metal-to-metal contact. This guide is your complete reference for measuring brake pad thickness, understanding the legal minimums, and knowing exactly when to replace them.
We’ll cover the full range of what you need to know: how to measure thickness with different tools, the 3mm and 2mm replacement thresholds, how to check the inner pad (which wears faster), and how to interpret wear indicators. You’ll also learn why pad thickness matters across different vehicle types — from a daily commuter to a heavy truck — and how driving style accelerates wear. We’ll separate fact from fiction on minimums, explain what the squeal really means, and give you a data-driven replacement schedule that beats guessing.
Unlike generic advice you’ll find elsewhere, this guide includes a comparison table of measurement methods, a decision framework based on your driving conditions, and honest limitations — like why a visual check alone can miss a failing inner pad. By the end, you’ll know exactly how to assess your brake pads in ten minutes and when to order new ones, saving you money on unnecessary replacements and preventing dangerous brake failure.
What Is Brake Pad Thickness and Why It Matters

Brake pad thickness is the measurement of the friction material that remains on a brake pad. It’s the single most direct indicator of how much braking life you have left. When you press the brake pedal, hydraulic pressure pushes the caliper pistons, which press the friction material against the brake rotor. The thinner that material gets, the harder the system works to produce the same stopping force.
Defining Brake Pad Thickness: Friction Material vs. Backing Plate
A brake pad has two main layers. The friction material is the compound that contacts the rotor, and the backing plate is the steel base that the friction material is bonded to. When you measure brake pad thickness, you’re measuring only the friction material — not the backing plate. Most new brake pads come with roughly 10 to 12 millimeters of friction material. The backing plate adds about 4 to 6 millimeters on top of that, so a total pad assembly often measures 14 to 18 millimeters when new. Many DIY owners mistakenly measure the entire assembly and think they have more life left than they actually do. This distinction is critical: the friction material is what stops the vehicle, and the backing plate is just structural support. When the friction material wears down to the level of the backing plate, you’re at metal-on-metal contact, which damages the rotor and dramatically increases stopping distance.
How Brake Pad Thickness Differs from Rotor Thickness
Brake pad thickness and rotor thickness are two separate measurements that serve different purposes. The brake pad is the consumable friction material that presses against the rotor. The rotor is the metal disc that the pads clamp onto. Rotors also have a minimum thickness specification, but that’s about structural integrity and heat dissipation, not friction life. A rotor that’s too thin can warp or crack under heat, while a pad that’s too thin simply can’t generate enough friction. Both need to be checked during a brake service, but they wear at different rates and have different replacement thresholds. Pads typically need replacement every 30,000 to 70,000 miles, while rotors can last 50,000 to 100,000 miles or more, depending on driving conditions and pad material.
The Role of Thickness in Braking Performance and Heat Dissipation
Brake pad thickness directly affects braking performance in two ways. First, thicker pads have more friction material to generate stopping force. As the pad wears, the hydraulic system must push the caliper piston further to make contact, which can reduce braking response and increase pedal travel. Second, thicker pads dissipate heat better. The friction material acts as a thermal barrier between the rotor and the caliper. When the pad gets thin, more heat transfers into the caliper and brake fluid, which can lead to brake fade — a dangerous condition where braking power diminishes under heavy use. This is especially important for vehicles that carry heavy loads or are driven aggressively, where heat buildup is more severe. A pad at 2mm or less simply cannot manage heat the way a pad at 8mm can, making the entire braking system less effective and more prone to failure.
How to Measure Brake Pad Thickness: Step-by-Step Methods

Measuring brake pad thickness accurately is the difference between catching wear early and discovering it after the rotor is scored. There are three primary methods, each with different levels of accuracy and effort. The method you choose depends on your tools, your vehicle, and how precise you need to be.
Visual Inspection: What You Can and Cannot See
A visual inspection is the quickest method, but it has significant limitations. You can often see the outer brake pad through the spokes of the wheel without removing anything. Shine a flashlight at the caliper and look for the friction material between the backing plate and the rotor. If you see less than 3mm of material, it’s time to replace. However, a visual check only shows the outer pad. The inner pad — the one closest to the engine — wears faster because it’s pressed first by the caliper piston. You cannot see the inner pad without removing the wheel or using a mirror. Many drivers discover their inner pad is completely worn while the outer pad still looks fine. Visual inspection is a good first check, but it should never be your only check.
Using a Ruler or Caliper: The Accurate Approach
For a precise measurement, you need a tool. A simple ruler can work if you can get it into the gap between the pad and rotor, but it’s awkward and prone to error. A caliper — either digital or dial — is the professional standard. To measure, remove the wheel for best access, then place the caliper jaws on the friction material only, not the backing plate. Take the measurement at the thickest point of the pad, which is typically the center. Digital calipers give you a reading to 0.01mm, which is more than enough precision for brake pad assessment. If you don’t have a caliper, a brake pad thickness gauge — a small tool with a needle that fits into the pad gap — is inexpensive and easy to use. The key is consistency: always measure the same spot on each pad so you can track wear over time.
Measuring Through the Wheel vs. Removing the Wheel
Measuring through the wheel is possible on many vehicles, especially those with open-spoke designs. You can use a thin ruler or a brake pad gauge to reach through the spokes and measure the outer pad. This method is quick and doesn’t require any disassembly, making it ideal for a monthly check. However, it only measures the outer pad, and the angle can make the reading inaccurate. Removing the wheel gives you full access to both the inner and outer pads, and you can measure at the correct angle. It takes about 10 minutes per wheel with a jack and lug wrench, but it’s the only way to get a complete picture of your brake pad condition. For a thorough inspection, remove the wheel at least once every oil change interval.
Minimum Brake Pad Thickness: Legal vs. Recommended Limits

Understanding the difference between legal minimums and recommended replacement thresholds can save you from a failed inspection — or a crash. The legal minimum is the absolute floor below which your vehicle is considered unsafe and unroadworthy. The recommended threshold is the point at which you should replace pads for optimal safety and to avoid damaging other components.
The 2mm Legal Minimum: What It Really Means
In most jurisdictions, the legal minimum brake pad thickness is 2mm of friction material. This is the point at which a vehicle fails a safety inspection. However, 2mm is not a safe operating level — it’s the absolute limit before metal contacts metal. At 2mm, the pad has almost no capacity to dissipate heat, and braking performance is severely degraded. The pad material is so thin that it can crack or separate from the backing plate under stress. Driving at
Brake pad thickness is the single most critical measurement for vehicle safety, yet it’s the one most drivers overlook until the grinding starts. The brake pad is a friction component that clamps against the rotor to convert kinetic energy into heat, and its remaining material determines your stopping distance — and whether you’re driving on metal-to-metal contact. This guide is your complete reference for measuring brake pad thickness, understanding the legal minimums, and knowing exactly when to replace them.
We’ll cover the full range of what you need to know: how to measure thickness with different tools, the 3mm and 2mm replacement thresholds, how to check the inner pad (which wears faster), and how to interpret wear indicators. You’ll also learn why pad thickness matters across different vehicle types — from a daily commuter to a heavy truck — and how driving style accelerates wear. We’ll separate fact from fiction on minimums, explain what the squeal really means, and give you a data-driven replacement schedule that beats guessing.
Unlike generic advice you’ll find elsewhere, this guide includes a comparison table of measurement methods, a decision framework based on your driving conditions, and honest limitations — like why a visual check alone can miss a failing inner pad. By the end, you’ll know exactly how to assess your brake pads in ten minutes and when to order new ones, saving you money on unnecessary replacements and preventing dangerous brake failure.
What Is Brake Pad Thickness and Why It Matters

Brake pad thickness is the measurement of the friction material that remains on a brake pad. It’s the single most direct indicator of how much braking life you have left. When you press the brake pedal, hydraulic pressure pushes the caliper pistons, which press the friction material against the brake rotor. The thinner that material gets, the harder the system works to produce the same stopping force.
Defining Brake Pad Thickness: Friction Material vs. Backing Plate
A brake pad has two main layers. The friction material is the compound that contacts the rotor, and the backing plate is the steel base that the friction material is bonded to. When you measure brake pad thickness, you’re measuring only the friction material — not the backing plate. Most new brake pads come with roughly 10 to 12 millimeters of friction material. The backing plate adds about 4 to 6 millimeters on top of that, so a total pad assembly often measures 14 to 18 millimeters when new. Many DIY owners mistakenly measure the entire assembly and think they have more life left than they actually do. This distinction is critical: the friction material is what stops the vehicle, and the backing plate is just structural support. When the friction material wears down to the level of the backing plate, you’re at metal-on-metal contact, which damages the rotor and dramatically increases stopping distance.
How Brake Pad Thickness Differs from Rotor Thickness
Brake pad thickness and rotor thickness are two separate measurements that serve different purposes. The brake pad is the consumable friction material that presses against the rotor. The rotor is the metal disc that the pads clamp onto. Rotors also have a minimum thickness specification, but that’s about structural integrity and heat dissipation, not friction life. A rotor that’s too thin can warp or crack under heat, while a pad that’s too thin simply can’t generate enough friction. Both need to be checked during a brake service, but they wear at different rates and have different replacement thresholds. Pads typically need replacement every 30,000 to 70,000 miles, while rotors can last 50,000 to 100,000 miles or more, depending on driving conditions and pad material.
The Role of Thickness in Braking Performance and Heat Dissipation
Brake pad thickness directly affects braking performance in two ways. First, thicker pads have more friction material to generate stopping force. As the pad wears, the hydraulic system must push the caliper piston further to make contact, which can reduce braking response and increase pedal travel. Second, thicker pads dissipate heat better. The friction material acts as a thermal barrier between the rotor and the caliper. When the pad gets thin, more heat transfers into the caliper and brake fluid, which can lead to brake fade — a dangerous condition where braking power diminishes under heavy use. This is especially important for vehicles that carry heavy loads or are driven aggressively, where heat buildup is more severe. A pad at 2mm or less simply cannot manage heat the way a pad at 8mm can, making the entire braking system less effective and more prone to failure.
How to Measure Brake Pad Thickness: Step-by-Step Methods

Measuring brake pad thickness accurately is the difference between catching wear early and discovering it after the rotor is scored. There are three primary methods, each with different levels of accuracy and effort. The method you choose depends on your tools, your vehicle, and how precise you need to be.
Visual Inspection: What You Can and Cannot See
A visual inspection is the quickest method, but it has significant limitations. You can often see the outer brake pad through the spokes of the wheel without removing anything. Shine a flashlight at the caliper and look for the friction material between the backing plate and the rotor. If you see less than 3mm of material, it’s time to replace. However, a visual check only shows the outer pad. The inner pad — the one closest to the engine — wears faster because it’s pressed first by the caliper piston. You cannot see the inner pad without removing the wheel or using a mirror. Many drivers discover their inner pad is completely worn while the outer pad still looks fine. Visual inspection is a good first check, but it should never be your only check.
Using a Ruler or Caliper: The Accurate Approach
For a precise measurement, you need a tool. A simple ruler can work if you can get it into the gap between the pad and rotor, but it’s awkward and prone to error. A caliper — either digital or dial — is the professional standard. To measure, remove the wheel for best access, then place the caliper jaws on the friction material only, not the backing plate. Take the measurement at the thickest point of the pad, which is typically the center. Digital calipers give you a reading to 0.01mm, which is more than enough precision for brake pad assessment. If you don’t have a caliper, a brake pad thickness gauge — a small tool with a needle that fits into the pad gap — is inexpensive and easy to use. The key is consistency: always measure the same spot on each pad so you can track wear over time.
Measuring Through the Wheel vs. Removing the Wheel
Measuring through the wheel is possible on many vehicles, especially those with open-spoke designs. You can use a thin ruler or a brake pad gauge to reach through the spokes and measure the outer pad. This method is quick and doesn’t require any disassembly, making it ideal for a monthly check. However, it only measures the outer pad, and the angle can make the reading inaccurate. Removing the wheel gives you full access to both the inner and outer pads, and you can measure at the correct angle. It takes about 10 minutes per wheel with a jack and lug wrench, but it’s the only way to get a complete picture of your brake pad condition. For a thorough inspection, remove the wheel at least once every oil change interval.
Minimum Brake Pad Thickness: Legal vs. Recommended Limits

Understanding the difference between legal minimums and recommended replacement thresholds can save you from a failed inspection — or a crash. The legal minimum is the absolute floor below which your vehicle is considered unsafe and unroadworthy. The recommended threshold is the point at which you should replace pads for optimal safety and to avoid damaging other components.
The 2mm Legal Minimum: What It Really Means
In most jurisdictions, the legal minimum brake pad thickness is 2mm of friction material. This is the point at which a vehicle fails a safety inspection. However, 2mm is not a safe operating level — it’s the absolute limit before metal contacts metal. At 2mm, the pad has almost no capacity to dissipate heat, and braking performance is severely degraded. The pad material is so thin that it can crack or separate from the backing plate under stress. Driving at
You might also like: best ceramic brake pads, best brake bleeder kit, brake fluid buying guide