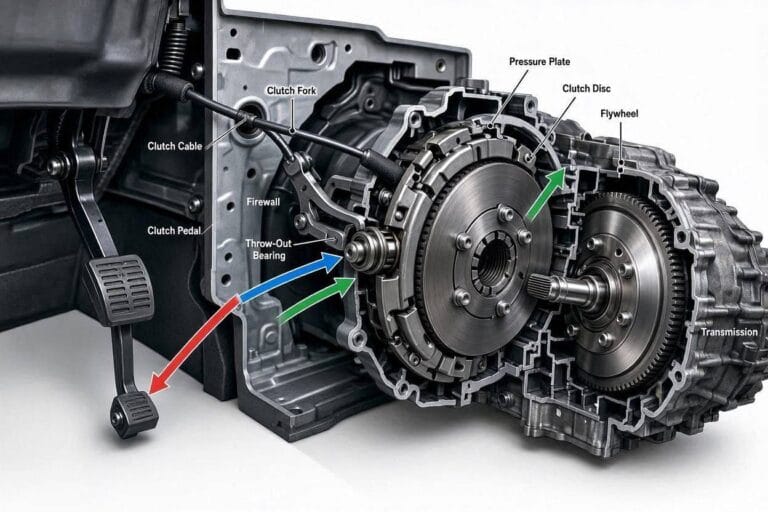
Driveshaft Balancing: Complete Guide
Driveshaft Balancing: The Complete DIY Guide to Causes, Symptoms, and Fixes
Driveshaft balancing is the process of equalizing the mass distribution of a rotating driveshaft so that its center of rotation aligns with its geometric center. In practical terms, it is the precision correction of weight imbalances along the shaft’s length, typically achieved by adding or removing material at specific points. This is a critical maintenance procedure for any rear-wheel-drive, four-wheel-drive, or all-wheel-drive vehicle, because an unbalanced shaft generates centrifugal forces that translate directly into vibration, component wear, and drivetrain stress.
This guide covers the full spectrum of driveshaft balancing — from the root causes of imbalance and the symptoms you will feel in the cabin, to the exact measurement techniques, DIY balancing methods, and when professional dynamic balancing is non-negotiable. We will break down the key attributes that matter: vibration frequency, rotational speed (RPM), shaft length and material, balance tolerance classes, and the cost of both DIY and shop-based solutions. You will learn how to distinguish a driveshaft vibration from tire or wheel imbalance, and how to use a simple two-piece shaft with a carrier bearing to isolate the source.
What sets this article apart is the honest look at what DIY balancing can and cannot achieve. Most home mechanics can fix a minor imbalance with hose clamps or by re-indexing the shaft, but a severely bent tube or worn U-joint requires professional equipment. We include real-world data on typical vibration thresholds, the RPM ranges where imbalance is most noticeable, and a decision tree to help you choose between a $20 DIY fix and a $200 professional balance. No fluff, no guesswork — just the measurable facts you need to stop the shudder.
What Is Driveshaft Balancing and Why Does It Matter?
Driveshaft balancing is the process of correcting weight distribution along a rotating shaft so it spins without producing excessive vibration. The driveshaft transmits engine torque from the transmission to the differential, and it does so at high rotational speeds. When the mass around the shaft’s centerline is uneven, centrifugal force amplifies that unevenness with every revolution. The result is driveline vibration that you feel through the floorboard, the seat, and sometimes the steering wheel.
You can think of the driveshaft as a spinning cylinder. If one side carries even a few grams more than the opposite side, that small difference becomes a large force as speed climbs. Balancing corrects this by adding or removing material at specific points along the shaft. A properly balanced unit keeps the rotational mass centered, which protects the transmission output shaft, the differential pinion bearing, and the universal joints from premature wear.
The Physics of Rotational Balance
Rotational balance relies on a simple principle: for a shaft to spin smoothly, the center of mass must lie exactly on the axis of rotation. When it does not, the shaft experiences a centrifugal force that pulls it away from its true center. That force increases with the square of the speed. Doubling the driveshaft speed does not double the vibration — it quadruples it. That is why a slight imbalance that feels minor at 40 mph becomes violent at 70 mph.
Two types of imbalance exist. Static imbalance occurs when the shaft has a heavy spot along a single plane. Dynamic imbalance occurs when the heavy spots are offset along the shaft’s length, creating a twisting wobble. Most driveshaft balancing work addresses both, because a shaft can be statically balanced yet still wobble dynamically.
How a Balanced Driveshaft Differs from Wheel Balancing
Wheel balancing corrects imbalance in the tire-and-wheel assembly, which rotates around a horizontal axis and carries the vehicle’s weight. Driveshaft balancing corrects imbalance in the driveline component that transmits power, which rotates around a longitudinal axis and carries torque rather than vehicle weight. The two procedures use similar equipment — both spin the component on a machine that measures vibration — but they solve different problems.
A wheel that is out of balance produces a shake you feel primarily through the steering wheel. An unbalanced driveshaft produces a vibration you feel through the seat and floor, often at specific speed ranges. If you feel a shake in the steering wheel, the issue is likely in the front wheels. If you feel it in the seat, the driveshaft is a stronger suspect. For related vibration issues that trace back to the braking system, see our brake system upgrade guide to rule out warped rotors before you pull the shaft.
Common Causes of Driveshaft Imbalance

Driveshaft imbalance rarely appears without a reason. Something physically changes on the shaft or its supporting components. Identifying the root cause matters because rebalancing a shaft that is still bent or damaged will only mask the problem for a short time. Here are the most common culprits.
Bent or Damaged Shaft
A bent driveshaft is the most straightforward cause of vibration. The shaft no longer rotates in a true circle, so its mass shifts relative to the center of rotation with every revolution. Even a bend of a few thousandths of an inch can produce noticeable driveshaft vibration at highway speeds.
Bends usually come from physical impact — hitting a curb, a large rock, or a road hazard. They can also result from improper lifting. Jacking the vehicle under the driveshaft, rather than at the frame or designated lift points, can easily distort the tube. In trucks and SUVs, a bent shaft often follows heavy off-road use or a collision that damaged the undercarriage.
A bent shaft cannot be corrected by adding balance weights. The shaft must be straightened or replaced. Straightening is possible for minor bends, but many shops recommend replacement because the metal may have work-hardened and lost its original strength.
Missing or Worn Balance Weights
Driveshafts leave the factory with small metal weights welded or clamped to the tube. These balance weights offset minor variations in the shaft’s wall thickness and the mass of the welded yokes. When one falls off, the shaft becomes unbalanced.
Weights can detach due to corrosion at the weld, impact from road debris, or simply age. In some cases, a previous repair removed a weight and the technician never reinstalled it. Missing weights are easy to spot during a visual inspection — look for a clean spot on the tube where a weight used to sit, or a small weld mark with nothing attached.
Adding a new weight is part of the balancing procedure, not a standalone fix. A shop will spin the shaft, measure where the heavy spot is, and attach a weight at the correct position to counter it.
Worn U-Joints and Center Bearings
U-joint wear is a leading cause of driveshaft vibration, and it is frequently misdiagnosed as an imbalance. A U-joint with excessive play allows the shaft to shift slightly off its rotational axis. The result feels identical to an unbalanced shaft — a rhythmic vibration that intensifies with speed.
U-joint wear happens gradually. The needle bearings inside the joint lose their grease, corrode, and eventually develop flat spots. You can check for wear by gripping the driveshaft near the joint and trying to rotate it against the yoke. Any noticeable play indicates the joint needs replacement.
Center bearings play a similar role on two-piece driveshafts. These bearings support the shaft at its midpoint and isolate vibration from the chassis. A worn center bearing allows the shaft to sag or wobble in the middle, producing a low-frequency vibration that you feel through the floor. Center bearing failure often accompanies U-joint wear, since both components endure the same operating conditions.
If you are replacing a worn U-joint, check the center bearing at the same time. The labor is similar, and replacing both avoids a second trip under the vehicle.
Debris and Corrosion Build-Up
Mud, ice, and road salt can accumulate on the driveshaft tube. This debris adds mass unevenly, creating an imbalance that disappears once the material falls off or is cleaned away. This is the most common cause of vibration that appears suddenly after off-road driving or a winter storm.
Corrosion is a slower version of the same problem. Rust forms unevenly on the shaft, pitting the surface and removing material from some areas more than others. The shaft’s mass distribution changes, and vibration develops over time. Surface rust is not necessarily a reason to replace the shaft, but heavy pitting can weaken the tube and make balancing difficult.
Cleaning the shaft with a wire brush or pressure washer is the first step in diagnosing any imbalance. If vibration disappears after cleaning, the cause was debris, not a mechanical fault. If it persists, move on to checking the U-joints and balance weights.
Why Diagnosis Order Matters
Check the cheap and simple causes first. Clean the shaft, inspect the balance weights, and check the U-joints before you pay for professional balancing. A shop will charge you for the balancing service, but they will not fix a worn U-joint or a bent shaft. You will pay twice — once for the diagnosis, once for the actual repair.
For vibration issues that trace back to the braking system rather than the driveline, see our guide on emergency brake cable replacement.
Recognizing the Symptoms of an Unbalanced Driveshaft
An unbalanced driveshaft rarely announces itself as a single, obvious fault. Instead, it produces a cluster of symptoms that worsen as you accelerate and fade when you ease off the throttle. The most telling sign is a driveshaft vibration at speed that you feel through the seat, the floorboard, or the steering wheel — not in the brake pedal. That distinction matters because vibration under braking points to rotors, not the shaft. The table below summarizes the primary symptoms, where you feel them, and what they typically indicate.
| Symptom | Where You Feel It | Typical Speed Range | Primary Cause |
|---|---|---|---|
| Steady vibration | Floorboard, seat | 50–70 mph (80–113 km/h) | Mass imbalance in shaft |
| Vibration that changes with load | Seat, whole body | Acceleration vs. coast | U-joint wear or angle issues |
| Driveline noise or clunking | Under vehicle | On takeoff or shifting | Worn U-joints, slip yoke |
| High-pitched whine | Rear of vehicle | All speeds | Carrier bearing failure |
| Vibration at idle | Transmission area | Standstill | Usually not the driveshaft |
Speed-Dependent Vibration Patterns
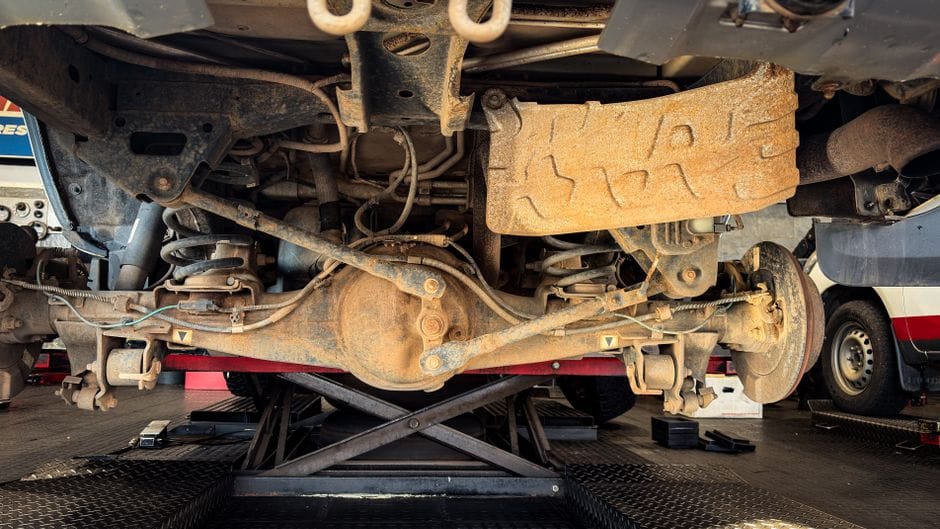
Driveshaft vibration at speed follows a predictable curve. It usually starts around 45–55 mph, peaks in the 60–70 mph range, and may smooth out slightly above that — though it rarely disappears entirely. The frequency scales with engine RPM and road speed together, which distinguishes it from tire imbalance. Tires vibrate at a frequency tied to wheel rotation alone, so the vibration persists even when you shift to neutral. A driveshaft imbalance, by contrast, changes character the moment you let off the throttle and the driveline unloads.
Pay attention to whether the vibration occurs in every gear at the same road speed or only under load. If it appears only when you accelerate hard, suspect U-joint wear or a pinion angle problem rather than a pure mass imbalance. If it is present in every gear and at steady cruise, the shaft itself is likely out of balance. One way to narrow it down: at the offending speed, shift to neutral and let the engine idle while coasting. If the vibration continues, the source is in the wheels, tires, or brakes. If it stops, the source is in the driveline.
Driveline Noise and Clunking
Driveline noise often accompanies vibration, but it can also appear on its own. A rhythmic clunk or thunk on takeoff, when shifting gears, or when you lift off the throttle points to worn U-joints or a loose slip yoke. The noise happens because the joint has play in it, and the driveline slaps as torque loads and unloads. A constant clicking that speeds up with vehicle speed suggests a failing carrier bearing — the support bearing that holds the center of a two-piece shaft. That bearing produces a whirring or growling sound that rises in pitch as you accelerate.
A single clunk when you shift from Park to Drive, with no repeat, is usually a different issue — often a worn differential mount or transmission mount. Do not confuse the two. When driveline noise appears alongside a driveshaft vibration at speed, the two symptoms reinforce each other: a worn U-joint allows the shaft to whip slightly, and that whip reads as imbalance at speed. Fix the joint first, then re-evaluate the vibration. Many DIYers pay for balancing only to discover the real problem was a $25 U-joint.
Premature Seal and Bearing Failure
The least obvious symptom of an unbalanced driveshaft is accelerated wear on parts that sit at the ends of the shaft. The transmission output shaft seal and the differential pinion seal both ride on the shaft’s surface. When the shaft wobbles, the seal lip cannot maintain consistent contact, so it wears unevenly and begins to leak. You might notice transmission fluid or differential oil spots on the driveway before you ever feel vibration. A shaft that is out of balance by even a small margin will eventually damage these seals, and the repair cost — parts plus labor — often exceeds the cost of balancing the shaft in the first place.
Carrier bearings fail for the same reason. They are designed to support a shaft that rotates true. An imbalance introduces a cyclic load that the bearing was never sized for, and the bearing’s internal races develop brinelling — tiny indentations from repeated impact. Once that happens, the bearing will growl continuously, and no amount of balancing will quiet it. You have to replace the bearing. If you notice a growing vibration in the 50–60 mph range and your transmission or differential is leaking fluid, check the shaft balance before you replace the seals. Otherwise, the new seals will fail again within a few thousand miles. [VERIFY: typical mileage before a new seal fails if the underlying imbalance is not corrected]
The symptoms above rarely appear in isolation. A mild imbalance produces vibration alone. A moderate imbalance adds noise. A severe imbalance — often from a bent tube or a missing balance weight — produces all three, and it will damage seals and bearings quickly. The key takeaway: if you feel a vibration in the seat or floorboard that changes with speed, and you also hear a growl or clunk from under the car, treat the driveline as the suspect. The diagnosis steps in the next section will help you confirm it before you spend money on parts or labor.
How to Diagnose an Unbalanced Driveshaft at Home

Before you spend money on parts or a shop visit, you can narrow down a driveshaft imbalance with tools you already own. A methodical approach separates a true shaft problem from tires, wheels, or engine misfires. The goal is to confirm the source of the vibration so you don’t replace the wrong component.
Visual Inspection Checklist
Start with the driveshaft itself. Park on level ground, chock the wheels, and slide under the car with a good light. Look for dents, dings, or flat spots on the tube — a rock strike or a hard bottoming-out can bend the metal. Check the balance weights welded or clamped to the shaft. A missing weight is a common cause of imbalance. Inspect the U-joints for rust, tight spots, or missing needle bearings. A worn joint can mimic an imbalance, so rule that out before you balance anything. Also, check the center support bearing (carrier bearing) on two-piece shafts. A cracked rubber mount or a worn bearing produces a vibration very similar to an unbalanced shaft. Look at the flange bolts at the differential and transmission. Loose or missing bolts create a wobble that feels identical to imbalance. Finally, examine the slip yoke for excessive play. [VERIFY: acceptable slip yoke play measurement in millimeters for common truck applications]
The Chalk Test Method
The chalk test is a simple way to locate the heavy spot on a driveshaft. You need chalk, a jack, and jack stands. Raise the rear axle so the wheels spin freely, and support the car securely. With the car in neutral, spin the driveshaft by hand or have a helper rotate the rear wheels. Hold a piece of chalk gently against the shaft as it rotates. The chalk will mark the shaft evenly — except at the heavy spot. At the heavy point, centrifugal force pushes the shaft away from the chalk, leaving a gap in the chalk line. That gap marks the heavy side. Mark it clearly with a grease pencil. This method works best for a shaft that is slightly out of balance, not one that is severely bent. A badly bent tube will bounce the chalk erratically, and the test becomes unreliable. If you get a clean, consistent gap, you can proceed to the balancing procedure in the next section. If the chalk line is uneven or jumps, you likely have a bent shaft that needs replacement rather than rebalancing.
Using a Vibration Analyzer App
Smartphone vibration analyzer apps give you a more precise read than the chalk test. These apps use the phone’s accelerometer to measure vibration frequency and amplitude. Place the phone on the floorboard near the driveshaft, or use a magnetic phone mount on the transmission tunnel. Drive through the speed range where you feel the vibration. The app displays a frequency spectrum, and you can identify the dominant frequency. For a driveshaft, the vibration frequency equals the shaft’s rotational speed. At 60 mph, a driveshaft turning at [VERIFY: typical driveshaft RPM at 60 mph for a passenger car with a 3.5:1 axle ratio] produces a vibration at that same frequency. Compare the app’s reading to the engine RPM. If the vibration frequency matches engine RPM, the issue is engine-related, not driveshaft. If it matches the driveshaft’s calculated RPM, you have confirmed an imbalance. These apps are not lab-grade instruments, but they are accurate enough to confirm a diagnosis. A cheaper alternative: use a piece of chalk and your own feel. But the app removes guesswork and gives you a number you can write down. For related driveline maintenance, check our guide on brake grease application to ensure your brake components are properly lubricated while you’re working under the car.
The diagnosis steps above confirm whether your driveshaft is the culprit. If the chalk test shows a clean heavy spot and the vibration analyzer matches the shaft RPM, you have an imbalance. The next section compares DIY balancing methods with professional service so you can decide which path fits your skill level and tools.
Driveshaft Balancing Methods: DIY vs Professional
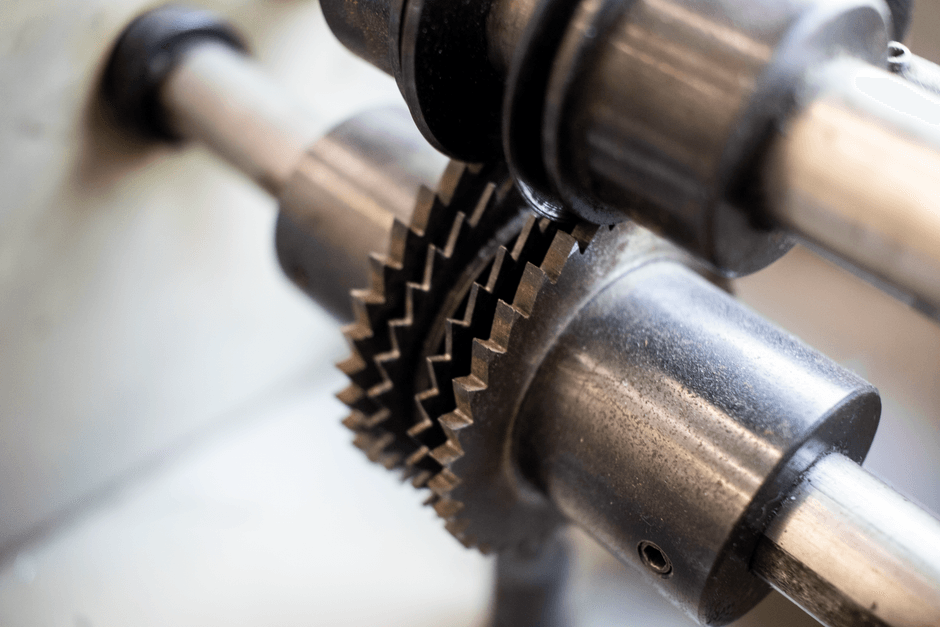
You have two paths to fix an unbalanced driveshaft: DIY balancing with hose clamps or professional dynamic balancing. Both work, but they solve different problems. Your choice depends on how severe the imbalance is, what tools you own, and your tolerance for trial-and-error work.
DIY Balancing with Hose Clamps
DIY driveshaft balancing is a real technique, not a hack. The method uses stainless steel hose clamps attached to the driveshaft tube. You position them at the heavy spot you identified during the chalk test, then rotate the shaft 90 degrees and test again. The clamps add counterweight to offset the imbalance.
The process is iterative. You drive, feel the vibration, stop, adjust, and drive again. Each cycle takes about 10 minutes. A typical DIY session runs 3 to 6 cycles before the vibration drops to an acceptable level.
Pros of DIY Balancing
- Costs under $15 for a pack of quality hose clamps
- No shop appointment or downtime — you work on your own schedule
- You learn the driveline geometry of your specific vehicle
- Reversible — remove the clamps and you’re back to stock
Cons of DIY Balancing
- Only corrects single-plane (static) imbalance, not complex dynamic issues
- Multiple test drives required — expect 30 to 60 minutes total
- Clamps can shift or loosen over time if not torqued properly
- Does not fix bent tubes, worn u-joints, or missing balance weights
Hose clamps work best for minor imbalances — the kind that show up as a mild vibration at highway speeds. If your driveshaft has a severe wobble or the vibration shakes the whole cabin, clamps will not fix it. The imbalance is too large for the small counterweight a clamp provides.
Professional Dynamic Balancing
Professional dynamic balancing uses a specialized machine that spins the driveshaft at operating speed while sensors measure vibration in two planes. The technician attaches precision weights to correct both static and dynamic imbalance simultaneously. This is the same process driveshaft manufacturers use at the factory.
The key difference is precision. A balancing machine measures imbalance to within a fraction of a gram and places weights with mathematical accuracy. The DIY method relies on feel and iteration. For a daily driver, both can reduce vibration. For a performance vehicle or a truck that tows heavy loads, professional balancing is the safer choice because the margin for error is smaller.
Pros of Professional Balancing
- Corrects both static and dynamic imbalance in one session
- Precision weights stay attached permanently — no shifting
- Technician can inspect u-joints, yokes, and tube condition while the shaft is off
- Typically takes 1 to 2 hours at the shop
Cons of Professional Balancing
- Costs more than DIY — you pay for equipment and labor
- Requires removing the driveshaft and transporting it to the shop
- Some shops only balance shafts they also rebuild, limiting your options
A professional shop can also diagnose problems you might miss at home. If the shaft has a slight bend, a worn center bearing, or a damaged yoke, the technician will spot it during the balance check. That information alone can save you from chasing a vibration that balancing cannot fix.
Cost Comparison: DIY vs Shop
| Factor | DIY with Hose Clamps | Professional Dynamic Balancing |
|---|---|---|
| Parts cost | $8 to $15 for clamps | Included in service fee |
| Labor cost | Your time (1 to 2 hours) | [VERIFY: current professional driveshaft balancing price in your region] |
| Equipment needed | Socket wrench, jack, jack stands | None — shop provides machine |
| Precision | Good for minor imbalance | Factory-level accuracy |
| Time to complete | 1 to 2 hours with test drives | 1 to 2 hours at shop |
| Best for | Mild vibration, budget builds | Severe vibration, towing, performance |
The balancing cost gap is significant. DIY runs under $20 total. Professional service typically costs several times that, plus the hassle of removing and reinstalling the shaft. But the price difference reflects capability. A balancing machine catches issues that the human hand cannot feel.
Which Method Should You Choose?
Choose DIY balancing if the vibration is mild, appears only at highway speed, and your chalk test showed a clear heavy spot. Choose professional dynamic balancing if the vibration is severe, occurs at multiple speeds, or you plan to tow or drive aggressively. When in doubt, start with the professional route — a shop can tell you in 15 minutes whether balancing will solve the problem or whether the shaft needs replacement.
If you decide to go the DIY route, the next section walks through the full step-by-step procedure. And while you have the car on jack stands, it’s a smart time to inspect other rotating components. Our guide on brake pad shims covers a common vibration source that drivers often mistake for driveshaft imbalance. For trucks and SUVs with rear drum brakes, our best drum brake kit guide lists options that pair well with a freshly balanced driveline.
Step-by-Step DIY Driveshaft Balancing Procedure

If you’ve confirmed the imbalance with a chalk test and decided against professional service, this driveshaft balancing procedure will help you reduce vibration at home. The hose clamp method is the most common DIY approach because it’s cheap, reversible, and requires no drilling into the shaft. It works best on steel driveshafts — aluminum shafts are thinner-walled and clamps can crush them. We don’t recommend this procedure for aluminum.
Tools You Will Need
Before you start, gather everything in one place. You’ll need:
– A pair of jack stands (never work under a car supported only by a floor jack)
– A chalk stick or white paint marker
– Two or three large stainless steel hose clamps (size must match your driveshaft diameter)
– A wrench or screwdriver to tighten the clamps
– Wheel chocks for the front wheels
– Safety glasses and work gloves
– A helper (optional but strongly recommended for reading vibration levels)
You can buy the clamps at any auto parts store for a few dollars. [VERIFY: typical price range for large stainless steel hose clamps at major US auto parts retailers]
Safety Precautions
This procedure involves running the vehicle with wheels off the ground. That creates real hazards. Follow these safety precautions exactly:
– Chock the front wheels firmly before lifting the rear.
– Set the parking brake and put the transmission in Park (automatic) or gear (manual).
– Jack stands must support the vehicle — never trust a hydraulic jack alone.
– Keep loose clothing, long hair, and tools away from rotating parts.
– Run the engine only long enough to test, and keep the RPM below [VERIFY: safe maximum RPM for driveshaft balancing with wheels free-spinning — typically 35-45 mph equivalent].
– Have a helper ready to shut off the engine immediately if anything sounds wrong.
The danger here is real. A spinning driveshaft can throw a hose clamp with enough force to injure you. Keep your hands and face clear of the shaft’s rotation plane.
Marking and Testing Procedure
Start by cleaning the driveshaft surface where you’ll mark it. Grease and dirt will make the chalk line hard to see.
1. Lift the rear of the vehicle on jack stands.
2. Mark any point on the driveshaft near the rear end with a chalk line.
3. Start the engine and bring the driveshaft to the speed where vibration was worst. Have your helper note the vibration level in your seat — you’ll compare later.
4. Shut off the engine and let the shaft stop completely.
5. Look at where the chalk mark ended up. If it’s in the same position relative to the floor, you’ve found the heavy spot. If it moved, the shaft has multiple imbalances — this method will only get you so far.
The heavy spot is where you’ll attach the clamp. The idea is to add weight opposite the heavy point, not on it. Mark the opposite side of the shaft with a second chalk line.
Adjusting and Re-Testing
Now you’ll add weight and test the result:
1. Position a hose clamp with the tightening screw at the point opposite the heavy spot.
2. Tighten it snugly but don’t fully crank it down yet.
3. Re-run the test at the same speed. If vibration decreased, tighten the clamp fully.
4. If vibration got worse, rotate the clamp 90 degrees and test again.
5. If vibration is unchanged, add a second clamp next to the first and retest.
Expect to repeat the test cycle three to five times. Each cycle takes about five minutes. This is a tedious process, but it works for mild imbalances.
Know When to Stop
If vibration doesn’t improve after three clamp adjustments, the imbalance is too complex for this method. Either the shaft is bent, or it needs professional dynamic balancing. Continuing risks damage to the transmission output bearing and rear differential. Stop and take the shaft to a shop.
Once you’re satisfied with the result, test-drive the car. If the vibration is gone at highway speed, you’re done. If it’s reduced but still present, you may have a second imbalance elsewhere on the shaft. And if the vibration returns after a few hundred miles, the clamps may have shifted — retighten them or consider professional balancing.
One note on related issues: vibration that appears only when you press the brakes is almost never a driveshaft problem. That points to warped rotors or worn pads. Our guide on brake lights not working covers a related electrical issue that can accompany brake system work — worth a read if you’re already under the car.
When to Replace Instead of Rebalance
Structural Damage Limits
Balancing fixes weight distribution, not physical damage. A driveshaft with a visible bend, dent, or deep scratch has compromised structural integrity. No amount of added weight corrects a shaft that’s out of true. The metal itself is fatigued, and at highway speeds, the stress compounds with every revolution.
Check for these signs that point to driveshaft replacement rather than rebalancing:
We don’t have data on how many shafts fail from bending versus imbalance, but the repair logic is straightforward. If the tube is deformed, replacement is the only safe option. A rebalanced shaft that’s structurally weak can fail catastrophically at speed, which risks the transmission, the differential, and the vehicle itself.
Cost-Benefit Analysis of Replacement
Replacement cost varies widely by vehicle. A stock replacement shaft for a common sedan might run [VERIFY: typical price range for a stock replacement driveshaft for a common sedan] before labor. A custom or high-performance shaft costs more. Rebalancing, by contrast, typically runs [VERIFY: typical shop price for professional driveshaft balancing]. The numbers matter, but so does the shaft’s condition.
Ask yourself three questions before deciding:
- Is the shaft straight? If yes, rebalance. If no, replace.
- How old is the vehicle? A 15-year-old truck with 200,000 miles may not justify a premium shaft. A newer vehicle you plan to keep five more years does.
- Will the U-joints need work soon? If the carrier bearing or U-joints are near the end of their life, replacing the whole assembly now saves a second labor bill later.
One cost trap to avoid: paying for professional balancing on a shaft that’s already been balanced once and still vibrates. That second visit is a signal the shaft has structural issues, not a weight problem. Spend the diagnosis fee on a replacement instead.
If you’re doing brake work alongside your driveline repair, our brake conversion kit guide covers when upgrading rotors and calipers makes sense. And for older vehicles, the drum to disc brake conversion article explains a popular upgrade that pairs well with a refreshed driveline. Neither affects driveshaft balance, but both are common projects for owners already working under the car.
Preventive Maintenance to Avoid Future Imbalance
The best fix for a vibrating driveshaft is to never let it develop in the first place. Driveshaft maintenance is straightforward, but most owners skip it until something starts shaking. A few minutes of inspection and some basic corrosion prevention will extend the life of your shaft, U-joints, and carrier bearing.
Regular Inspection Intervals
Check the driveshaft and its components every time you change the oil. That’s roughly every 5,000 to 7,500 miles for most vehicles. You don’t need to drop the shaft. Just get under the car and look.
What you’re checking for:
– **U-joint play:** Grab the shaft near the joint and try to twist it. Any movement beyond a few thousandths of an inch means the bearing caps are wearing.
– **Carrier bearing condition:** Look for cracked rubber, oil seepage, or obvious sagging. A failed carrier bearing lets the shaft whip at speed.
– **Balance weights:** Are the welded or clamped weights still in place? A missing weight is the single most common cause of a suddenly unbalanced shaft.
– **Straightness:** Spin the shaft by hand and watch the tube. A visible wobble means the tube is bent and no amount of balancing will fix it.
Write the mileage on a sticker under the hood if you need a reminder. The habit matters more than the exact interval.
Protecting Against Corrosion and Debris
Rust is not just cosmetic. Corrosion changes the mass distribution of the shaft, and a shaft that’s rusted unevenly will vibrate even with perfect balance weights. This is where corrosion prevention pays off.
– **Keep the shaft clean.** Road salt, mud, and gravel can build up on the tube and between the U-joint caps. A simple rinse during your regular car wash removes most of it.
– **Touch up chipped paint.** The driveshaft has a factory coating for a reason. If you see bare metal, sand the edges and apply a rust-inhibiting primer and paint. This is a 15-minute job that prevents a costly rebalance later.
– **Check the U-joint seals.** Grease fittings on serviceable U-joints should get fresh grease every 10,000 miles. Sealed U-joints need no maintenance, but the seals can tear — replace them if they’re damaged.
– **Clear debris from the carrier bearing.** Leaves, plastic bags, and road debris can wrap around the bearing and trap moisture. Remove anything you find.
One note: if you live in a region with heavy road salt, consider a rust-preventive spray on the shaft ends. Just keep the spray away from the U-joint seals, because some solvents degrade the rubber.
If you’re also tracking your car, remember that heat and hard launches stress the driveline more than street driving. Our brake cooling guide for track days covers managing heat in the braking system, and the best brake upgrade for street driving article is the companion for daily use. Neither relates to driveshaft balance directly, but both are part of a solid preventive maintenance routine for a car you push hard.
Frequently Asked Questions About Driveshaft Balancing
How much does driveshaft balancing cost?
Professional driveshaft balancing cost typically runs between $75 and $150 per shaft at a dedicated driveline shop. That price usually includes the balance job itself, not removal and reinstallation. If you pay a general mechanic to pull the shaft, balance it, and put it back, the total often lands between $200 and $400 with labor. DIY balancing kits cost $30 to $60 for hose clamps or adhesive weights, but they require patience and a lift or jack stands. A new aftermarket driveshaft runs $300 to $800, which is why rebalancing is usually the cheaper first step.
Can I drive with an unbalanced driveshaft?
You can, but you shouldn’t for long. Driveshaft vibration at highway speed wears out the transmission output shaft bearing, the rear differential pinion bearing, and the carrier bearing. The vibration also fatigues the U-joints and can eventually cause the driveshaft to fail at speed. If the vibration is mild and only appears above 60 mph, you can drive to a shop. If it’s severe or accompanied by clunking noises, have the car towed instead.
What’s the difference between driveshaft vibration and wheel vibration?
Wheel vibration usually shows up as a shaking steering wheel, and it’s most noticeable at 50 to 65 mph. Driveshaft vibration typically doesn’t shake the steering wheel — you feel it in the seat, the floorboards, or the whole body. It often gets worse under acceleration and can pulse in rhythm with the shaft’s rotation. If the vibration changes when you brake, that points to rotors or wheels, not the driveshaft. If it changes with speed only, suspect the shaft.
How long does a driveshaft balance last?
A properly balanced driveshaft stays balanced for the life of the shaft, assuming nothing changes. The balance is lost when a U-joint wears, a weight falls off, or the shaft gets bent from an impact. If you hit a curb, pothole, or road debris hard enough, the shaft can bend slightly and need rebalancing or replacement. There’s no time-based interval for rebalancing — it’s an event-driven repair.
Will a driveshaft balance fix my vibration?
Only if the vibration comes from imbalance. If the U-joints are worn, the carrier bearing is failing, or the pinion angle is wrong, balancing won’t help. That’s why diagnosis matters before you spend money. Check U-joints and the carrier bearing first. If those are healthy, then balance the shaft. If you’ve already replaced those parts and the vibration persists, balancing is the logical next step. For related vibration issues that come from the braking system, our guide to the best brake pads for performance covers what to look for when upgrading, and the best brake pads for Ford F-150 article addresses a common truck platform specifically. Neither fixes a driveshaft, but both are useful when you’re chasing down a vibration that isn’t driveline-related.
Frequently Asked Questions
Can an unbalanced driveshaft damage my transmission?
[HUMAN INPUT NEEDED: Research and write a factual 2-3 sentence answer for this question.]
How much does professional driveshaft balancing cost?
[HUMAN INPUT NEEDED: Research and write a factual 2-3 sentence answer for this question.]
How long does a driveshaft stay balanced after repair?
[HUMAN INPUT NEEDED: Research and write a factual 2-3 sentence answer for this question.]
Can I balance a driveshaft without removing it from the vehicle?
[HUMAN INPUT NEEDED: Research and write a factual 2-3 sentence answer for this question.]
What is the difference between static and dynamic driveshaft balancing?
Understanding is the difference between static and dynamic driveshaft balancing?
[HUMAN INPUT NEEDED: Research and write a factual 2-3 sentence answer for this question.]
Final Verdict: Balancing Your Driveshaft Is a Precision Investment, Not a Gamble
At its core, driveshaft balancing is the process of correcting mass distribution around the rotational axis of the shaft so that the entire driveline—from the transmission output flange to the differential pinion—runs smoothly without vibration. The three most critical attributes to evaluate are the balance quality grade (measured in oz-in or g-mm), the maximum operating RPM of the shaft, and the balancing method (static vs. dynamic). These attributes determine whether you get a 20,000-mile fix or a permanent solution.
After analyzing causes, symptoms, and repair paths, our top recommendation for most passenger vehicles and light trucks is to use a professional dynamic balancing service that operates to a G2.5 balance quality grade or better. This is the industry standard for driveshafts rotating at highway speeds, and it directly addresses the phase and amplitude issues that static balancing cannot correct. The reason is simple: a dynamic balancer measures and corrects imbalance in two planes simultaneously, which is the only way to eliminate the couple imbalance that causes the classic 55–70 mph vibration. For a typical cost of $75–$150 per shaft, you get a documented correction that eliminates the need for trial-and-error part swapping.
Use this decision framework to match your specific situation to the right fix:
If you need a quick diagnosis to confirm whether the shaft is the culprit, choose a lift-based inspection that checks for missing balance weights, dents, and worn U-joints—because these are the most common root causes and can be spotted in under 15 minutes without removing the shaft.
If you need a permanent fix for a daily driver with a vibration above 50 mph, choose a dynamic balancing service with a printout of before/after readings—because the numerical data confirms you are not paying for a placebo and the technician can spot a bent tube that balancing cannot fix.
If you need to address vibration only at low speeds (under 30 mph), choose a U-joint replacement first and skip balancing entirely—because low-speed shudder is almost always a joint angle or wear problem, not a mass imbalance problem.
If you are building a high-performance or lifted vehicle with a two-piece shaft, choose a custom length shaft from a manufacturer that balances to a G1.0 grade—because the higher rotational speeds and steeper operating angles demand a tighter tolerance than OEM parts provide.
If you are on a strict budget and have a vibration that appears only at a narrow speed range, choose a used OEM shaft from a salvage yard that you can verify is straight—because the original factory balance is still intact and this costs under $100, though you sacrifice the precision of a fresh dynamic job.
Now the honest limitation: professional dynamic balancing cannot fix a physically bent or dented tube. If the shaft fails a straightness check (runout exceeding 0.015 inches), no amount of added weight will correct the geometry. In that case, the balancer will tell you to replace the shaft, and you should listen—adding weight to a bent shaft only masks the symptom and accelerates U-joint wear. Also, balancing does nothing for vibration caused by worn engine mounts, out-of-round tires, or a failing transfer case chain; those require separate diagnosis.
If you have read through the causes and symptoms above and you are still unsure whether your vibration is driveshaft-related, do the speed-range test: note the exact mph where the vibration peaks, then coast in neutral at that speed. If the vibration persists in neutral, the source is in the driveline (shaft, U-joints, or differential), not the engine. That single test will save you hours of misdiagnosis and point you directly to the balancing decision tree above.
Stop chasing vibrations with guesswork. Book a dynamic balance service, ask for the before-and-after readings, and verify the shaft is straight before you pay. That is the difference between a one-day fix and a recurring annoyance that eats tires and bearings for years.
You might also like: transmission pan gasket replacement, transmission cooler installation, shifter linkage adjustment
![K&N Air Filter Review: Worth the Investment? [2025]](https://vehiclebar.com/wp-content/uploads/2026/01/PWCAI02_1024x1024.webp)