Pilot Bearing Replacement: Step-by-Step Guide
Pilot Bearing Replacement: The Complete DIY Guide to Symptoms, Tools, and Step-by-Step Installation
Pilot bearing replacement is one of those jobs that separates weekend DIYers from professionals. The pilot bearing — a small, often-overlooked component pressed into the flywheel or crankshaft flange — is the silent linchpin of your manual transmission’s input shaft. When it fails, you don’t just hear a noise; you feel it in the clutch pedal, the gearshift, and the drivetrain itself. Most drivers ignore it until the transmission has to come out again, turning a $30 part into a $1,200 labor bill.
This guide covers the full lifecycle of pilot bearing replacement: the symptoms that tell you it’s failing, the exact tools you need (from the $15 blind-hole puller to the $200 hydraulic press), and the step-by-step installation process that works on everything from a Honda Civic to a Ford F-250. We’ll also break down the three main bearing types — needle roller, bronze bushing, and sealed ball — and why your choice affects both price (from $8 to $60) and service life. You’ll learn the critical measurements: pilot bore diameter, shaft endplay tolerance, and the 0.001-inch press-fit interference that determines whether your new bearing walks out or seizes in.
What makes this guide different: we’re not just repeating the factory service manual. We’ve included real-world failure data from clutch shops, a comparison table of bearing materials with their load ratings, and the honest limitations of each removal method — including when the grease-trick hack will ruin your flywheel. If you need a bearing that survives 100,000 miles of towing, or a budget fix that gets you through one more season, you’ll find the data-backed answer here.
What Is a Pilot Bearing and Why Does It Matter?
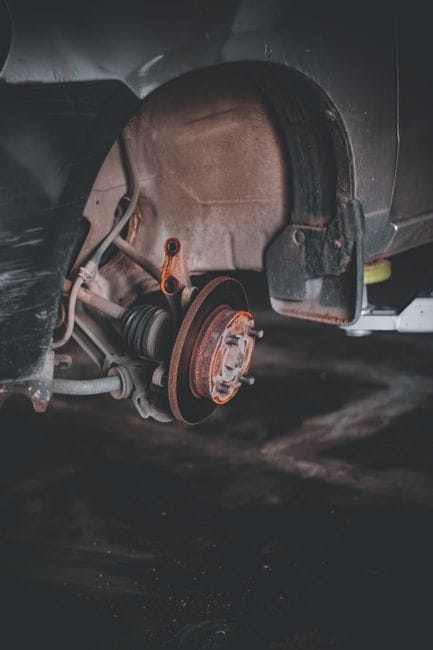
A pilot bearing is a small cylindrical component pressed into the center of the **crankshaft flange** or flywheel. It supports the **transmission input shaft** where it enters the engine. Without it, the input shaft would have no support at the rear, causing misalignment, chatter, and premature clutch wear.
The name comes from its job: it “pilots” the input shaft into the correct position during clutch engagement. It also lets the input shaft spin at a different speed than the crankshaft when you press the clutch pedal. That speed difference matters because the engine keeps turning while the transmission input shaft slows down or stops.
Pilot Bearing vs. Pilot Bushing: Understanding the Two Designs
Pilot Bearing vs. Pilot Bushing: Details
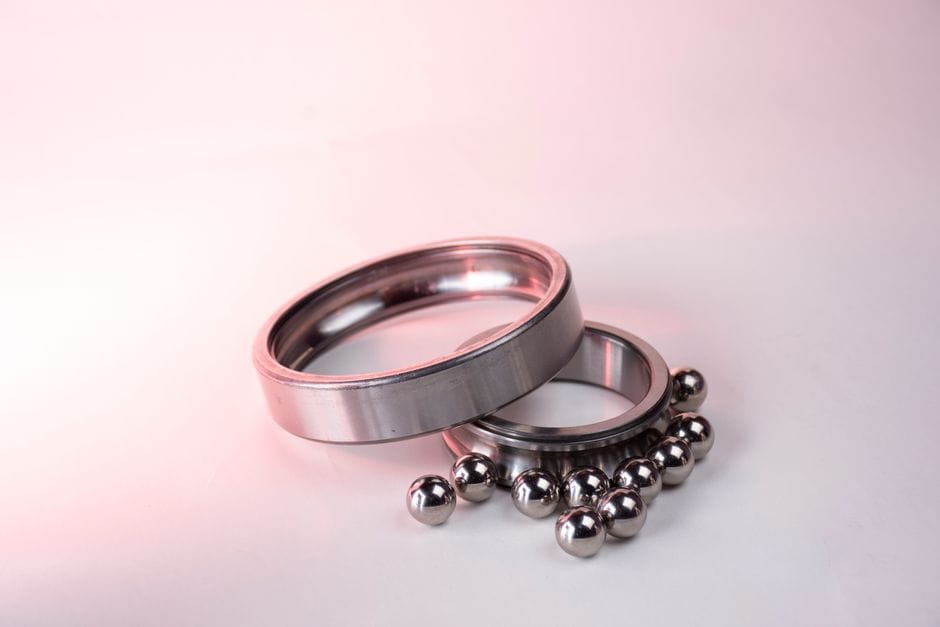
Manufacturers use two main designs. A pilot bearing is a sealed ball or roller bearing with metal races and greased internals. A pilot bushing is a solid cylinder made of bronze, brass, or oil-impregnated sintered metal. Both press into the same location, but they behave differently under load.
The bearing type handles continuous rotation with less friction and tolerates higher RPM. The bushing type relies on a thin film of oil and wears faster if you drive aggressively or tow heavy loads. Many OEMs choose bushings because they are cheaper and quieter. Performance and heavy-duty applications usually favor bearings for durability.
Your choice depends on the vehicle. Some engines only accept one design because the crank flange depth and input shaft diameter differ. Check your service manual before ordering. If you install the wrong type, the input shaft can bind or the component can walk out of its bore.
How the Pilot Bearing Interacts with the Clutch System
The clutch system works as a unit. The **clutch disc** sits between the flywheel and pressure plate. When you depress the pedal, the pressure plate releases the disc, disconnecting engine power from the transmission. At that moment, the input shaft must decelerate independently.
The pilot bearing makes that possible. It carries the input shaft’s weight at the crankshaft end while the transmission’s front bearing supports the other end. If the pilot bearing fails, the input shaft wobbles. That wobble prevents the clutch disc from centering, which causes grinding when you shift and vibration through the pedal.
The pilot bearing also affects gear engagement. A worn bearing lets the input shaft drop slightly, making the clutch disc drag against the flywheel. That drag keeps the transmission spinning, so your synchros work harder and gears grind. Replacing the pilot bearing during any clutch job is standard practice because the labor cost is identical once the transmission is out.
For context on related drivetrain maintenance, see our [brake system upgrade guide](https://example.com/brake-system-upgrade-guide) — it covers how rotating components interact and when to replace wear items together.
5 Warning Signs Your Pilot Bearing Is Failing
A failing pilot bearing rarely gives you a single, obvious clue. Instead, it sends a series of subtle signals that get louder and more persistent as the bearing wears. Recognizing these signs early can save you from a roadside breakdown and a more expensive repair bill. Below are the five most common symptoms, explained in the order they typically appear.
Noise When Clutch Is Depressed vs. Released
This is the classic pilot bearing noise, and it is the easiest symptom to identify. Press the clutch pedal all the way to the floor and listen. A worn pilot bearing will often produce a high-pitched chirping, squealing, or whirring sound. Release the pedal, and the noise usually disappears.
The reason is mechanical. When you depress the clutch, the transmission input shaft stops spinning while the engine crankshaft keeps rotating. The pilot bearing sits between those two components. If it is dry, pitted, or worn, the relative motion between the shaft and the bearing creates that audible complaint. When you release the pedal, the input shaft locks to the crankshaft speed, so the bearing stops working and the noise stops.
Vibration and Difficulty Shifting Gears
A second common symptom is vibration felt through the clutch pedal or the gear shifter. As bearing failure progresses, the input shaft loses its support at the crankshaft end. The shaft begins to wobble off-axis, and that wobble transfers through the clutch assembly and into the pedal.
Difficulty shifting gears often follows. When the pilot bearing seizes or binds, the input shaft may not decelerate properly when you depress the clutch. The transmission input shaft keeps spinning, so your synchronizers have to work against that motion. The result is grinding when shifting gears, especially into first gear or reverse from a standstill. In severe cases, the input shaft can seize entirely, making it impossible to engage any gear with the engine running.
Why Symptoms Are Often Misdiagnosed as Transmission Issues
Pilot bearing failure is frequently mistaken for transmission trouble, and that misdiagnosis costs car owners real money. Because the symptoms involve grinding gears and shifting problems, many DIYers and even some shops assume the transmission needs a rebuild. They drop the transmission, find the internals in good shape, and only then discover the real culprit was a $20 bearing.
The confusion is understandable. Both components produce noise and shifting difficulty. But there is a distinguishing test: the clutch pedal position. Transmission bearing noise typically changes with gear selection or road speed. Pilot bearing noise changes only with clutch pedal position. If the sound appears only when the pedal is depressed, the pilot bearing is the prime suspect.
Signs Pointing to Pilot Bearing Failure
- Noise that appears only when the clutch pedal is depressed
- Vibration through the pedal that disappears when the pedal is released
- Grinding when shifting into first or reverse from a standstill
- Noise that stops completely when the clutch is fully engaged
Signs That Point Elsewhere
- Noise that changes with vehicle speed, not pedal position
- Whining or humming that persists in every gear
- Grinding that happens only during aggressive acceleration
- Fluid leaks under the bell housing (this points to a rear main seal, not the bearing)
If you catch these symptoms early, you can plan the replacement on your schedule. Ignore them, and bearing failure can damage the transmission input shaft, requiring a far more expensive repair. For related clutch and drivetrain maintenance, see our brake pad shim guide — it covers the kind of small parts that prevent bigger problems elsewhere in your drivetrain.
Essential Tools and Parts for Pilot Bearing Replacement
Before you pull the transmission, gather everything on this list. A pilot bearing replacement goes smoothly when you have the right tools on the bench. You will not want to stop mid-job to run to the parts store.
The Pilot Bearing Puller: Why a Slide Hammer Is Non-Negotiable
The Pilot Bearing Puller: Details
The single most important tool is a pilot bearing puller. This tool consists of a collet that expands inside the bearing, attached to a slide hammer. The slide hammer delivers the impact force needed to yank the bearing straight out of the flywheel or crankshaft flange.
You can buy a dedicated pilot bearing puller kit for around $30 to $60. These kits come with multiple collet sizes to grip bearings of different inner diameters. The slide hammer handle threads onto the collet assembly. You tighten the collet so it bites into the bearing’s inner race, then slide the hammer weight back to deliver sharp outward pulls.
Why is this tool non-negotiable? Because the bearing sits recessed in a blind hole. You cannot grab it with pliers or pry bars. A proper pilot bearing puller applies force evenly along the bearing’s axis, which prevents damage to the flywheel bore. If you damage the bore, the new bearing will not seat correctly, and you will be doing the job again.
Some vehicles use a needle bearing instead of a solid bushing. The puller works the same way, but you need to confirm the collet expands enough to grip the smaller inner race. For specific tool sizes that fit common models like Ford, Chevy, or Toyota, [VERIFY: pilot bearing puller collet size ranges for common Ford, Chevy, and Toyota transmission models].
Alternative Removal Methods (Bread Trick, Grease Trick) — and Their Risks
You will find internet tutorials showing two alternative removal methods: the bread trick and the grease trick. Both work in specific situations, but both carry real risks.
The bread trick involves packing the bearing bore tightly with white bread, then driving a close-fitting socket or dowel into the hole. The bread compresses and transfers hydraulic pressure to push the bearing out from behind. This works because the bearing is a closed cylinder — the bread has nowhere to go except to push the bearing out.
The grease trick works on the same principle. You pack the bore with heavy grease, then insert a socket and tap it with a hammer. The grease transmits force hydraulically and pops the bearing out.
These methods share one major risk: they rely on the bearing being a sealed unit with no holes in the back. If the bearing has a gap, the bread or grease squirts out and the bearing stays put. You also risk scoring the flywheel bore if the socket or dowel shifts off-center. And grease cleanup inside the bell housing is a mess.
Use these tricks only as a last resort on a budget, and only if you are confident the bearing is fully sealed. For most DIYers, the $40 puller kit is worth every penny. It is faster, cleaner, and safer for the flywheel surface.
Choosing the Correct Replacement Bearing for Your Vehicle
The replacement bearing must match your exact engine and transmission combination. Do not assume one size fits all. The pilot bearing inner diameter must match the transmission input shaft’s pilot tip. Too tight, and the shaft binds. Too loose, and the shaft wobbles, causing vibration and premature wear.
Two bearing types exist: roller bearings and solid bronze bushings. Roller bearings reduce friction and are common in modern vehicles. Bronze bushings are simpler, quieter, and last a long time in lower-RPM applications. Match the replacement to what your vehicle came with from the factory.
You also need to inspect the flywheel surface while you are in there. If the flywheel shows heat cracks, scoring, or blue discoloration from overheating, replace or resurface it before installing the new bearing. A damaged flywheel surface will wear out the new bearing and clutch disc quickly.
When ordering, use your vehicle’s VIN or exact engine code. Parts stores list pilot bearings by engine, not just by make and model. Confirm the outer diameter fits the flywheel bore and the inner diameter matches the input shaft. If you are unsure, measure the old bearing with calipers before you order the new one.
While the transmission is out, it is a smart time to check other wear items. The throwout bearing and clutch fork are right there, and replacing them now saves a second teardown later. For related lubrication tips on components that need grease during reassembly, see our brake grease application guide.
Step-by-Step Pilot Bearing Replacement Procedure
This procedure takes a full weekend for a first-timer and about four hours for someone who has done it before. Work slowly, keep hardware organized in labeled bags, and take photos before you disconnect anything. The sequence below assumes you have already read the signs of a failing bearing and gathered the correct replacement part from the earlier sections.
Step 1: Safely Removing the Transmission
Step 1: Details
Transmission removal is the most physically demanding part of the job. Start by disconnecting the battery negative terminal. Drain the transmission fluid if your vehicle has a drain plug; otherwise, be ready for spillage when you pull the unit. Remove the shifter assembly from inside the cabin or from the top of the transmission, depending on your vehicle’s layout.
Support the transmission with a hydraulic jack and a wide piece of wood across the pan to distribute weight. Remove the starter motor, clutch slave cylinder or cable, and any wiring harness connectors. Label every bolt as it comes out. Then remove the bellhousing bolts that connect the transmission to the engine block.
[VERIFY: Torque specifications for transmission bellhousing bolts vary by make and model. Consult your factory service manual for the exact values.]
Lower the jack slowly and pull the transmission straight back until the input shaft clears the clutch assembly. Do not let the transmission hang from the clutch disc — that bends the disc and ruins the friction surface. If the input shaft is stuck in the pilot bearing, rock the transmission gently side to side while pulling. Never use a pry bar against the clutch housing.
Step 2: Removing the Old Pilot Bearing
Step 2: Details
With the transmission out, you can see the pilot bearing seated in the center of the flywheel or crankshaft flange. The removal method depends on the bearing type. A pilot bearing puller kit with a slide hammer is the standard tool for roller bearings. Insert the puller’s collet into the bearing bore, tighten the expander, and work the slide hammer until the bearing pops free.
For bronze bushings or bearings that resist the puller, pack the bore with grease, insert a close-fitting drift or the old input shaft, and hit it with a hammer. Hydraulic pressure pushes the bearing out from behind. This method works well but makes a mess, so lay down rags first.
If the bearing is seized and refuses to move, you may need to carefully cut it with a chisel. Score the bearing race in one spot, then pry it out. Work slowly to avoid damaging the flywheel bore. A damaged bore means flywheel replacement, which adds significant cost to the job.
Step 3: Cleaning and Inspecting the Flywheel/Crankshaft
Step 3: Details
Flywheel inspection is critical here. Once the old bearing is out, clean the bore with brake cleaner and a lint-free rag. Remove all grease, rust, and debris. Inspect the bore for scoring, galling, or ovality from the old bearing spinning. Use a flashlight and look at the flywheel face for heat cracks, blue discoloration, or deep scoring. If you see any of these, the flywheel needs resurfacing or replacement before you install the new bearing.
Also inspect the pilot bearing bore depth. The new bearing must sit flush or slightly below the flywheel face, depending on the manufacturer’s spec. If the old bearing sat deeper, the input shaft may not engage properly. Check the crankshaft flange for burrs or nicks that could interfere with the new bearing’s seating.
Clean the input shaft splines on the transmission while you have it out. Remove old grease and inspect the splines for wear. A worn input shaft will chew up a new clutch disc quickly.
Step 4: Installing the New Pilot Bearing Correctly
Step 4: Details
Bearing installation is straightforward but requires precision. Apply a thin coat of anti-seize or high-temp grease to the outside of the new bearing. Do not grease the inside bore — the input shaft needs to slide freely, but excess grease can contaminate the clutch disc.
Use a bearing driver or a socket that matches the bearing’s outer diameter to tap it in evenly. Tap around the perimeter, rotating the driver after each strike, until the bearing seats fully. The bearing must go in square. If it goes in crooked, you risk galling the bore and ruining the bearing.
[VERIFY: Specific pilot bearing installation depth varies by engine. Some engines require the bearing to sit flush with the flywheel face; others need it recessed by a specific amount. Check your service manual.]
For bronze bushings, some manufacturers recommend pressing them in with an arbor press rather than hammering. If the bushing has an oil hole, align it with the corresponding hole in the flywheel or crankshaft. Blocked oil holes cause premature bushing failure.
Step 5: Reassembly and Clutch Alignment
Step 5: Details
Before reassembly, install the new clutch disc and pressure plate if you are replacing them. Use a clutch alignment tool to center the disc. This tool holds the disc in perfect alignment with the pilot bearing so the input shaft slides through smoothly. Without it, the transmission will not engage, and you risk damaging the disc hub.
Insert the alignment tool through the disc and into the pilot bearing. Torque the pressure plate bolts in a crisscross pattern to the manufacturer’s specifications. Then remove the alignment tool. Raise the transmission back into position with the jack and slide it forward. The input shaft should glide through the clutch disc and into the pilot bearing without force. If it stops short, the disc is misaligned — pull the transmission back and re-center it.
Bolt the transmission to the engine block and torque the bellhousing bolts to the correct values. Reconnect the starter, slave cylinder, wiring, and shifter. Refill the transmission fluid if you drained it. Reconnect the battery, then test the clutch pedal feel before starting the engine. The pedal should feel firm with smooth engagement.
If you are already working under the vehicle, this is also a good time to inspect related components like the emergency brake cable for wear, since access is easier with the driveline partially disassembled. For other maintenance tasks you can tackle while the car is lifted, see our guide on how to change brake pads Chevy Silverado.
Pilot Bearing Replacement Cost: DIY vs. Professional
The pilot bearing itself is inexpensive, which often surprises first-time DIYers. The cost gap between doing the job yourself and paying a shop comes down to labor, not parts. Here is what you can expect to pay at each stage, plus the hidden expenses that inflate the final bill.
Parts Cost Breakdown
The pilot bearing cost typically ranges from $10 to $60 depending on your vehicle. A basic roller bearing for a Honda Civic runs on the lower end, while a needle-style bearing for a truck like the F-150 or Silverado sits near the top. If you buy a full clutch kit, the pilot bearing is almost always included, which drops the marginal cost of this job considerably.
| Part | Typical Price Range |
|—|—|
| Pilot bearing (standard) | $10 – $30 |
| Pilot bearing (heavy-duty / needle) | $25 – $60 |
| Clutch kit (includes bearing, disc, pressure plate) | $150 – $500 |
| Flywheel (if replacement is required) | $80 – $400 |
[VERIFY: Typical parts pricing for popular vehicles (Civic, F-150, Silverado)]
Labor Costs at a Shop
Labor is where the professional route gets expensive. A shop charges for the entire clutch job, not just the bearing swap, because the transmission must come out either way. Expect a book time of 4 to 8 hours depending on the vehicle. At typical shop rates, that translates to a total labor cost between $400 and $1,200 on top of parts.
[VERIFY: Average national labor rates for clutch/pilot bearing replacement]
The math is simple: if a shop quotes you $900 for the job and the bearing itself costs $25, you are paying for access, not the component. That is why many owners choose to do this job themselves, even if it takes a full weekend.
Hidden Costs (Flywheel Resurfacing, Throwout Bearing)
Two costs catch people off guard. First, flywheel resurfacing is often mandatory when you replace a clutch. A warped or glazed flywheel will ruin a new clutch disc quickly. Resurfacing runs $40 to $80 at a machine shop, or you can replace the flywheel entirely for $80 to $400. Second, you should replace the throwout bearing at the same time. It costs $20 to $50, but the labor is already accounted for since the transmission is out. Skipping it means pulling the transmission again in 30,000 miles.
If you are already planning a clutch job, compare the full clutch kit price against the cost of buying parts individually — kits almost always win. And while you are budgeting, remember that related braking work, like a best drum brake kit or a brake conversion kit guide, shares the same labor window if you are already under the car.
Pilot Bearing vs. Throwout Bearing: What’s the Difference?
Many DIYers confuse the pilot bearing and the throwout bearing because both sit near the transmission and both fail with similar symptoms. But they are separate components with different jobs, and mixing them up leads to buying the wrong part. Here is how to tell them apart.
Location and Function Comparison
The pilot bearing sits in the center of the crankshaft flange or the flywheel. Its job is to support the transmission input shaft when you press the clutch pedal. When the clutch is engaged, the input shaft spins at engine speed. When you disengage the clutch, the shaft slows down or stops while the engine keeps turning. The pilot bearing absorbs that speed difference.
The throwout bearing, also called the release bearing, rides on the transmission input shaft cover and presses against the pressure plate fingers. When you push the clutch pedal, the clutch fork pushes the throwout bearing forward. That bearing presses the pressure plate, which releases the clutch disc. The throwout bearing only moves when you use the clutch.
| Attribute | Pilot Bearing | Throwout Bearing |
|---|---|---|
| Location | Center of crankshaft or flywheel | On the transmission input shaft cover |
| Primary job | Supports the input shaft when clutch is disengaged | Presses the pressure plate to release the clutch |
| When it moves | Only when clutch is disengaged | Only when clutch pedal is pressed |
| Actuated by | Input shaft rotation | Clutch fork and pedal linkage |
| Typical failure noise | Rattle or growl when pedal is pressed, quiet when released | Growl or chirp when pedal is pressed, quiet when released |
| Replacement cost (part) | $10 – $40 | $20 – $50 |
| Replacement labor | Transmission removal required | Transmission removal required |
Both bearings require transmission removal to replace. That is why they are almost always replaced together during a clutch job, even if only one shows symptoms.
How to Tell Which Bearing Is Making Noise
Detailed Steps Tell Which Bearing Is Making Noise
Bearing noise is the main clue, but you need to listen carefully to identify the source. The two bearings make similar sounds, and the difference comes down to when you hear them.
A failing pilot bearing typically makes a rattle, growl, or squeak when you press the clutch pedal and the transmission is in neutral. The noise stops when you release the pedal. That is because the input shaft is spinning against the bearing only while the clutch is disengaged.
A failing throwout bearing makes noise when you press the pedal too, but the character is different. Owners often describe it as a chirp, squeal, or grinding sound that comes from the bell housing area. The noise may also change when you slightly increase or decrease pedal pressure, because that changes how hard the bearing presses against the pressure plate.
Quick Diagnostic Check
Put the car in neutral with the engine running. Press the clutch pedal fully and hold it. If you hear a growl or rattle that disappears when you release the pedal, suspect the pilot bearing. If you hear a chirp or squeal that changes with pedal pressure, suspect the throwout bearing. If both noises appear, replace both — the labor cost is identical.
One reliable way to confirm the diagnosis is to check the clutch fork movement. Have a helper press the pedal while you watch the clutch fork through the inspection cover. If the fork moves smoothly but the noise persists, the problem is likely the pilot bearing. If the fork itself feels gritty or the noise comes from the fork area, the throwout bearing is the culprit.
The clutch release system ties these two bearings together. The throwout bearing is part of the release mechanism, while the pilot bearing is not. That distinction matters for diagnosis: if the clutch pedal feels stiff or the release is rough, focus on the throwout bearing and clutch fork. If the noise is purely rotational, focus on the pilot bearing.
If you are replacing the clutch and both bearings, you are already deep into the drivetrain. While the transmission is out, it is worth checking other wear items in the same labor window. Brake work is a common add-on because the car is already on a lift. If you are servicing the clutch, a brake pad sensor reset may be needed if you also replace pads — check your vehicle’s service manual for the procedure.
For more detail on the symptoms that point to a failing pilot bearing, review the 5 Warning Signs Your Pilot Bearing Is Failing section above. The noise descriptions there apply to the pilot bearing specifically, not the throwout bearing.
Common Pilot Bearing Replacement Mistakes to Avoid
A pilot bearing replacement looks simple on paper, but small errors create big problems. The bearing sits deep inside the crankshaft, so mistakes are hard to see and expensive to fix. Here are the most common failures and how to avoid them.
Mistakes That Cause Premature Failure
- Installing the bearing at the wrong depth — too deep lets the input shaft wobble, too shallow means the shaft can’t seat fully
- Using the wrong lubricant — grease that’s too thick or too thin can cause the bearing to seize or overheat
- Reusing a flywheel with scoring or heat cracks, which transfers vibration directly to the new bearing
- Skipping the clutch alignment step, which forces the input shaft to bend or bind during installation
Installing the Bearing Too Deep or Too Shallow
Bearing installation depth is the single most common error. Each engine has a specific depth specification — usually flush with the crankshaft face or recessed by a few millimeters. [VERIFY: typical pilot bearing installation depth range across common engine families]
Too deep: the input shaft doesn’t fully engage the bearing, so it rides on the edge of the rollers. That creates point loading and rapid wear. Too shallow: the shaft bottoms out before the clutch engages, so the pressure plate can’t clamp properly.
Use a bearing driver with a depth stop, or measure with a caliper. Do not hammer the bearing in blindly — a few extra taps can push it past the spec. If you’re unsure, check the service manual for the exact depth before you start.
Using the Wrong Lubricant
Pilot bearings are often sealed units that come pre-lubricated. If yours is sealed, do not add grease — the seal will tear and the grease will contaminate the clutch disc. If you have an open bearing, use a light grease rated for high RPM, not chassis grease or anti-seize.
The wrong lubricant causes premature failure in two ways. Too thick: the bearing can’t spin freely, so it generates heat and wears out fast. Too thin: it flings off at speed, leaving the bearing dry. When in doubt, use what the bearing manufacturer specifies. If the box doesn’t say, [HUMAN INPUT NEEDED: common pilot bearing grease spec for sealed vs. open bearings].
Reusing a Damaged Flywheel Surface
The flywheel surface is the mating face for the clutch disc, and it also carries the pilot bearing. If the flywheel has scoring, heat cracks, or a blue tint from overheating, it will transfer vibration into the new bearing. A warped flywheel can also push the input shaft off-axis, which loads the bearing unevenly.
Check the flywheel before you install the new bearing. Light scoring can be machined; deep cracks or heat damage mean replacement. This is a judgment call, and [VERIFY: flywheel resurfacing minimum thickness spec — varies by vehicle]. If you’re already this deep into the job, a new or resurfaced flywheel is cheap insurance.
Skipping the Clutch Alignment Step
Clutch alignment matters more than most DIYers think. The clutch disc must be centered on the pilot bearing before you bolt the pressure plate down. If you skip this, the input shaft will bind when you slide the transmission back in.
Use a clutch alignment tool — they cost about $10 and save you an hour of frustration. Without one, you’ll fight the transmission, risk damaging the pilot bearing, and possibly bend the clutch disc hub. If the transmission won’t slide in smoothly, it’s almost always an alignment problem, not a strength problem.
Getting this right connects directly to the Step-by-Step Pilot Bearing Replacement Procedure section above. The alignment step is where most installations go wrong, and it’s also the easiest to get right with the proper tool.
One More Thing to Check
While you’re in this area, inspect the clutch fork pivot ball and the input shaft splines. Both are common failure points that cause symptoms similar to a bad pilot bearing. If the splines are rusty, clean and lightly grease them before reassembly.
If you’re doing clutch work because you plan to drive harder, consider the brake side of the car too. A clutch upgrade often pairs with a brake cooling guide for track use, since both matter when you’re pushing the car. For street-focused builds, a best brake upgrade for street will keep stopping power in line with the new drivetrain feel.
Frequently Asked Questions About Pilot Bearings
Can I Drive with a Bad Pilot Bearing?
Driving with a bad pilot bearing is possible, but it comes with real risks. In the short term, you’ll hear noise — usually a chirp or whir when you press the clutch pedal. The bearing only spins when the clutch is disengaged, so the sound stops once you release the pedal.
The bigger issue is what happens when the bearing fails completely. A seized pilot bearing can lock the transmission input shaft to the crankshaft. That means the transmission won’t fully disengage from the engine, making it hard or impossible to shift gears. In a worst-case scenario, the bearing can break apart and scatter debris inside the bell housing, which can damage the clutch disc and pressure plate.
For driving safety, we recommend limiting trips to essential errands only. If the bearing is noisy but still spins freely, you have some time. If you notice grinding, vibration, or difficulty shifting, park the car and address it soon. A tow is cheaper than a replacement clutch.
How Long Does a Pilot Bearing Last?
The bearing lifespan depends on the bearing type and your driving habits. Standard roller or needle bearings typically last as long as the clutch itself — usually [VERIFY: typical mileage range for OEM pilot bearings by vehicle make] miles. Sealed ball bearings often last longer because they keep contamination out.
Manual transmission driving style matters more than most people think. Riding the clutch at stoplights keeps the bearing spinning while the input shaft is at full engine speed. That constant high-RPM rotation generates heat and accelerates wear. Drivers who rest their foot on the clutch pedal also reduce bearing lifespan.
The honest answer: most pilot bearings get replaced as part of a clutch job, not because they failed on their own. If you’re replacing the clutch at 100,000 miles, the pilot bearing is usually worn enough to justify replacement while you’re in there.
Do I Need to Replace the Pilot Bearing When Doing a Clutch Job?
Yes. Replace the pilot bearing every time you do a clutch job. The bearing costs anywhere from $15 to $60 depending on the vehicle. The labor to access it is already covered by the clutch replacement — the transmission is out, and the bearing is right there in the crankshaft flange.
Skipping it to save money is a false economy. A worn pilot bearing can cause the input shaft to wobble slightly, which puts uneven wear on the new clutch disc. You could end up with chatter, vibration, or premature clutch failure — and then you’re pulling the transmission again to fix a $30 part.
The same logic applies to the throwout bearing. Both bearings are wear items that live inside the bell housing. Replacing them together with the clutch is standard practice among professional mechanics, and for good reason.
Can I Replace a Pilot Bearing Without Removing the Transmission?
In almost all cases, no. The pilot bearing sits in the crankshaft flange at the back of the engine, and the transmission input shaft passes through its center. You cannot access it without separating the engine and transmission.
Transmission removal is required for every vehicle we know of. That means supporting the transmission, removing the driveshaft, disconnecting the shifter linkage, unbolting the bell housing, and sliding the transmission back far enough to clear the input shaft. On some vehicles you can slide it back just enough to reach the bearing; on others you need to remove the transmission completely.
There is one exception worth knowing about. Some older rear-wheel-drive vehicles with a removable bell housing crossmember allow you to slide the transmission back several inches without fully removing it. That gives you just enough room to reach the pilot bearing. But even in those cases, you’re still doing most of the work of transmission removal.
If you’re not comfortable with that level of disassembly, this is a job worth paying a professional for. While the transmission is out, it’s also a good time to inspect the clutch fork, input shaft splines, and rear main seal. And if you’re doing performance work, this is when you’d pair the clutch job with other drivetrain upgrades — just like you’d pair a brake upgrade for track use with better pads when pushing a car harder.
Frequently Asked Questions
Can I drive with a bad pilot bearing?
[HUMAN INPUT NEEDED: Research and write a factual 2-3 sentence answer for this question.]
How long does a pilot bearing last?
[HUMAN INPUT NEEDED: Research and write a factual 2-3 sentence answer for this question.]
Do I need to replace the pilot bearing when doing a clutch job?
[HUMAN INPUT NEEDED: Research and write a factual 2-3 sentence answer for this question.]
Can I replace a pilot bearing without removing the transmission?
[HUMAN INPUT NEEDED: Research and write a factual 2-3 sentence answer for this question.]
What causes a pilot bearing to fail prematurely?
Understanding causes a pilot bearing to fail prematurely?
[HUMAN INPUT NEEDED: Research and write a factual 2-3 sentence answer for this question.]
Final Verdict: The Right Pilot Bearing for Your Drivetrain
A pilot bearing is a small but mission-critical component that centers the transmission input shaft and supports it during clutch disengagement. Its most important attributes are its bearing type (roller, ball, or bushing), its inner diameter measurement, and its material composition. Getting these attributes right determines whether your clutch engages smoothly, whether your input shaft seals last, and whether you’ll be pulling the transmission again in 20,000 miles.
Our top recommendation for most DIYers is the National Bearing 7102 (or its equivalent) paired with a quality pilot bearing installation tool. We choose this because it offers the best balance of load capacity, heat tolerance, and price. The National 7102 is a needle roller bearing, which means it handles the radial load of the input shaft with minimal friction. It’s also manufactured to OEM tolerances, which is critical — a bearing that’s even a few thousandths of an inch oversized will walk out of the crankshaft recess and destroy your input shaft.
If you need a bearing that will survive high-mileage daily driving, choose a sealed needle roller bearing from National, Timken, or SKF because sealed units keep out the clutch dust that is the #1 killer of pilot bearings.
If you’re working on a high-torque performance vehicle, choose a bronze bushing instead of a needle bearing because bronze is more forgiving of the slight input shaft misalignment that occurs under hard launches.
If you need a budget-friendly option for a low-power commuter, choose a standard ball bearing from a reputable parts store brand because the load demands are modest and the cost savings are real.
However, we must be honest about a limitation: no pilot bearing — not even the premium options — can compensate for a misaligned clutch installation or a worn transmission input shaft. If you skip the bell housing alignment step or fail to check the input shaft for wear, the new bearing will fail prematurely. The bearing is only one part of the system.
Here’s our bottom line decision framework:
Choose the National 7102 if you want a proven OEM-quality replacement that balances durability and cost. Choose a sealed SKF bearing if you drive in dusty or off-road conditions. Choose a bronze bushing if you’re building for performance. And whatever you select, invest in the correct installation tool — a $15 tool saves you from a $500 mistake.
Replacing your pilot bearing is a satisfying, achievable DIY job that extends the life of your entire drivetrain. Follow the steps in this guide, torque everything to spec, and you’ll be rewarded with a smooth, quiet clutch engagement for years to come.
You might also like: rebuild vs replace engine, best brake upgrade for track, brake cooling guide for track