Battery Testing Guide: Complete Guide
Battery Testing Guide: How to Test a Car Battery (Voltage, Load, and Health)
A car battery is the electrical heart of your vehicle—a lead-acid or AGM (Absorbent Glass Mat) storage device that delivers the high burst of current needed to crank the engine and powers everything from your headlights to your infotainment system. Unlike a fuel tank, which gives you a clear gauge reading, a battery’s health is invisible until it fails, often at the worst possible moment: a cold morning, a busy intersection, or a remote trailhead. That’s why understanding how to test a car battery isn’t just a mechanic’s skill—it’s a practical life skill that can save you time, money, and a tow truck call.
This guide walks you through every method of battery testing, from the simplest multimeter voltage check to more advanced load testing and conductance analysis. You’ll learn what the numbers actually mean—why 12.6 volts indicates a full charge while 12.4 volts means only 75% capacity—and how to distinguish a dying battery from a faulty alternator or a parasitic drain. We’ll cover the essential tools you need, their costs (from a $15 multimeter to a $200 professional load tester), and the exact step-by-step procedures for each test type, including safety precautions for handling sulfuric acid and explosive hydrogen gas.
What sets this guide apart is its data-driven approach. Instead of vague advice like “check your battery regularly,” you’ll get a clear decision matrix: if your resting voltage reads below 12.4 volts, here’s the exact recharge protocol; if your load test drops below 9.6 volts at 80°F, here’s why the battery is condemned, regardless of what the voltage alone suggests. We’ll also cover the honest limitations of each test method—why a voltage reading can look perfect on a surface-charged battery while the internal plates are already sulfated and failing. By the end, you’ll have the knowledge to test any car battery with confidence, interpret the results like a professional technician, and decide whether to recharge, replace, or call for professional diagnostics.
What Is Car Battery Testing and Why It Matters
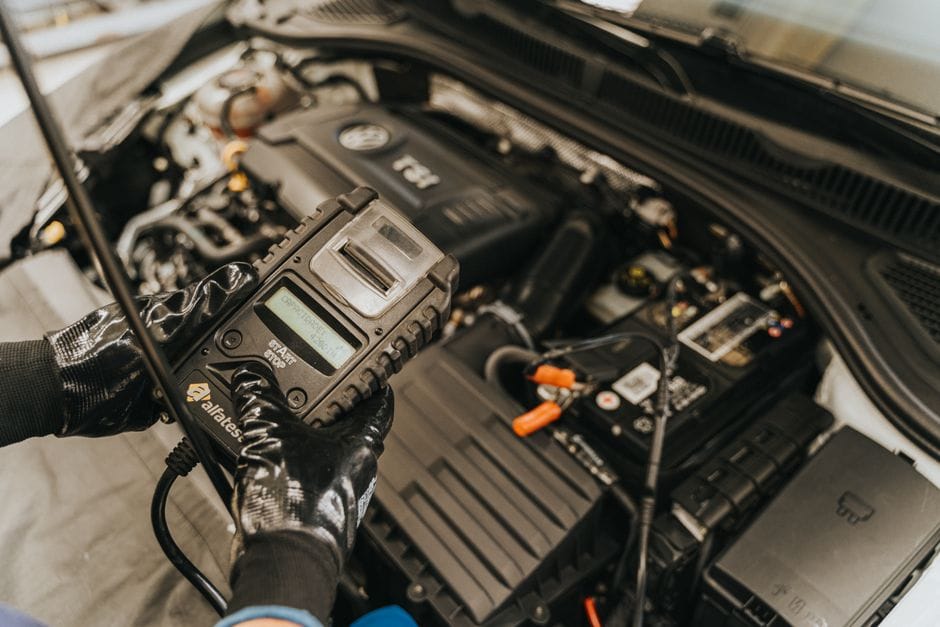
Car battery testing is the process of measuring a battery’s ability to hold a charge and deliver the current your engine needs to start. A battery that reads 12.6 volts when resting can still fail under load. That gap between resting voltage and real-world performance is exactly why this battery testing guide exists — to help you distinguish a healthy battery from one that’s about to leave you stranded.
Defining the Battery Test: Voltage, Load, and Conductance
Car battery testing encompasses three primary measurement methods, each revealing different information about the battery’s condition. Voltage measurement is the most basic: using a digital multimeter, you check the resting voltage (should be 12.6V or higher for a fully charged battery) and the cranking voltage (should stay above 9.6V while the engine turns over). Load testing goes deeper by applying a controlled electrical load—typically half the battery’s Cold Cranking Amps (CCA) rating for 15 seconds—while monitoring voltage drop. A healthy battery maintains at least 9.6 volts at 80°F under this stress. Conductance testing is the most advanced method, sending a small AC signal through the battery to measure internal resistance. Low internal resistance indicates healthy plates and good electron flow; high resistance points to sulfation, corrosion, or plate damage that voltage alone cannot reveal. Each method has its place: voltage for quick screening, load testing for definitive capacity verification, and conductance for fast, non-invasive health assessment.
How Battery Testing Differs from Alternator or Starter Testing
Battery testing focuses exclusively on the battery’s ability to store and deliver energy. Alternator testing, by contrast, measures the charging system’s output—typically 13.8 to 14.4 volts at the battery terminals with the engine running. Starter testing evaluates the starter motor’s ability to crank the engine, which draws hundreds of amps from the battery. A common diagnostic error is blaming the battery when the alternator fails to recharge it, or blaming the starter when the battery lacks sufficient cranking amps. The key distinction: a battery test tells you if the battery can hold and deliver a charge; an alternator test tells you if the battery is being recharged; a starter test tells you if the electrical demand is reasonable. Proper diagnosis requires isolating each component. If your battery tests weak, recharge it fully and retest before condemning it—a discharged battery from a faulty alternator will fail a load test even though the battery itself is healthy.
The Real Goal: Predicting Failure Before It Strands You
The ultimate purpose of battery testing is predictive maintenance—identifying a failing battery weeks or months before it leaves you stranded. A battery’s lifespan typically ranges from three to five years, but heat, vibration, and deep discharges accelerate degradation. Testing reveals the trend: a battery that measured 12.6 volts last month but reads 12.3 volts today is losing capacity. A load test that passed at 10.2 volts six months ago but now drops to 9.4 volts is approaching the failure threshold. Conductance readings that decline by 20% or more from the battery’s rated CCA signal imminent failure. By testing at regular intervals—every six months for batteries over two years old, and before extreme weather seasons—you can replace the battery on your schedule, not on the side of the road. This proactive approach costs less than a tow truck, a missed appointment, or an emergency purchase at a premium price.
Essential Tools for Battery Testing
Digital Multimeter: The $15 Baseline Tool
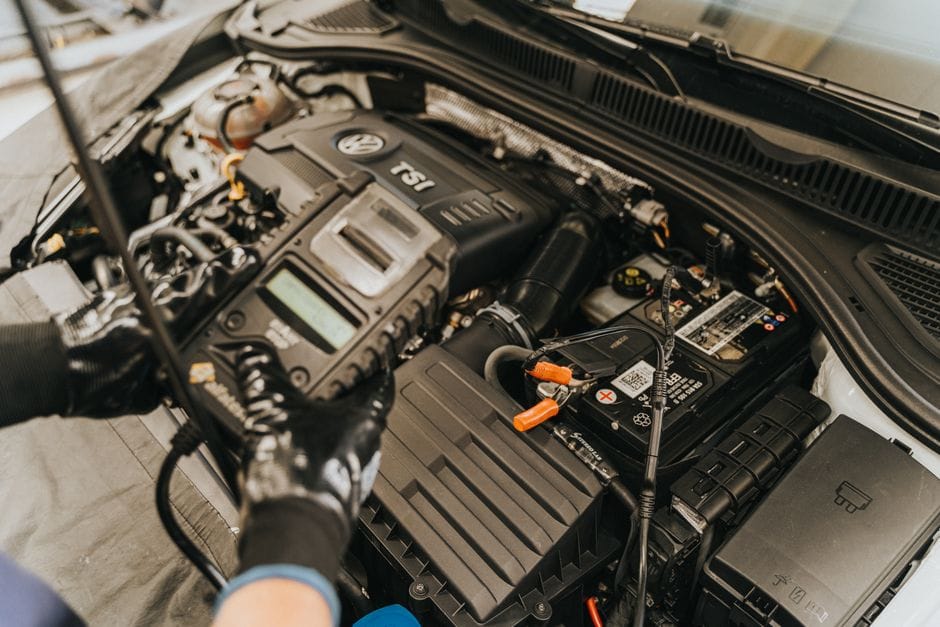
A digital multimeter (DMM) is the most accessible and affordable battery testing tool. For under $20, you can measure DC voltage with reasonable accuracy. Look for a meter with a 20V DC range and at least 0.1V resolution. To test a battery, set the meter to DC volts, connect the red lead to the positive terminal and the black lead to the negative terminal, and read the voltage. A fully charged battery reads 12.6V or higher; 12.4V indicates 75% charge; 12.2V is 50%; below 12.0V means the battery is significantly discharged. The multimeter also enables cranking voltage tests—have a helper crank the engine while you watch the meter; voltage should not drop below 9.6V. The limitation: a multimeter cannot apply a load, so it cannot detect a battery that reads full voltage but collapses under real-world current draw.
Load Tester: The Professional Standard
A carbon pile load tester applies a controlled resistive load to the battery, typically at half the CCA rating for 15 seconds. Professional units cost $50–$200 and include a voltmeter and ammeter. The procedure: connect the tester’s clamps, set the load to half the battery’s CCA rating, apply for 15 seconds, and read the voltage. At 80°F, a healthy battery maintains at least 9.6V; at 32°F, the minimum drops to 9.0V. If voltage falls below these thresholds, the battery is condemned. Load testers are the definitive method for verifying capacity, but they require the battery to be at least 75% charged (12.4V) before testing—otherwise, you’re testing a discharged battery, not a bad one. Some load testers also include a built-in ammeter to verify the load current, ensuring accurate results.
Conductance Analyzer: Fast and Non-Invasive
Conductance analyzers, such as the Midtronics or Bosch units used by professional shops, send a small AC signal through the battery and measure the conductance (in siemens) or the inverse, internal resistance. These units cost $100–$500 for consumer models and $1,000+ for professional versions. The test takes seconds, requires no load, and works on batteries as low as 20% charge. The analyzer compares the measured conductance to the battery’s rated CCA and reports a percentage of health. A reading above 75% indicates a healthy battery; 50–75% suggests marginal condition; below 50% means replacement is recommended. Conductance testing is particularly valuable for sealed batteries where you cannot check electrolyte levels, and it’s safe for AGM and gel batteries that cannot tolerate traditional load testing. The limitation: conductance measures internal resistance, not actual capacity, so a battery with high resistance but adequate capacity may be falsely condemned.
Battery Charger and Hydrometer: Supporting Tools
A battery charger is essential for preparing a battery for testing—you must fully charge a battery before load testing to get valid results. Smart chargers with desulfation modes can sometimes revive sulfated batteries. A hydrometer measures the specific gravity of electrolyte in flooded lead-acid batteries, providing a direct reading of state
of charge. A fully charged battery shows a specific gravity of 1.265–1.299; a discharged battery drops below 1.200. Hydrometers cost under $10 and are invaluable for diagnosing individual cell failures—if one cell reads significantly lower than the others, that cell is shorted and the battery must be replaced. However, hydrometers cannot be used on sealed AGM or gel batteries, and they require careful handling of corrosive acid. Together, these tools form a complete battery testing kit, allowing you to screen, verify, and diagnose any battery issue with confidence.
Step-by-Step Battery Testing Procedures

Safety First: Preventing Sparks, Acid Burns, and Explosions
Before touching any battery terminal, prioritize safety. Lead-acid batteries contain sulfuric acid that can cause severe burns, and they emit explosive hydrogen gas during charging and discharging. Always work in a well-ventilated area, away from open flames or sparks. Wear safety glasses and acid-resistant gloves. Remove metal jewelry—rings, watches, bracelets—that could short across terminals. When connecting test leads, always connect the positive (red) lead first, then the negative (black) lead. When disconnecting, remove the negative lead first. Never lean directly over the battery while testing. If acid contacts skin or eyes, flush immediately with water for at least 15 minutes and seek medical attention. Keep a box of baking soda nearby to neutralize any acid spills.
Pre-Test Preparation: Cleaning Terminals and Checking Water Levels
Accurate testing requires clean, tight connections. Corrosion on terminals—the white or blue-green crust—creates resistance that skews voltage readings and load test results. Clean the terminals with a wire brush or terminal cleaner, then tighten the connections. For flooded lead-acid batteries with removable caps, check the electrolyte level. The plates must be covered with fluid; if low, add distilled water (never tap water, which contains minerals that contaminate the electrolyte). Do not overfill—leave space for expansion during charging. If the battery is sealed (AGM, gel, or maintenance-free), skip this step. After cleaning, allow the battery to rest for at least 30 minutes before testing to let surface charge dissipate. If the battery was just driven or charged, surface charge can read artificially high—a battery that shows 12.8V immediately after driving may drop to 12.6V after resting.
Testing Resting Voltage with a Multimeter
With the engine off and all electrical loads off (lights, radio, doors closed), connect the multimeter to the battery terminals. Read the DC voltage. Interpret the results: 12.6V or higher indicates a fully charged battery (100% SOC); 12.4V is 75% charged; 12.2V is 50%; 12.0V is 25%; below 11.8V is essentially discharged. If the resting voltage is below 12.4V, charge the battery fully before proceeding with load testing—testing a discharged battery will produce misleading results. If the resting voltage is above 12.6V but the battery is known to be old or weak, proceed to a load test to verify actual capacity. A resting voltage test alone cannot determine battery health; it only indicates state of charge.
Performing a Load Test
Load testing requires the battery to be at least 75% charged (12.4V). Connect the load tester’s clamps to the battery terminals, ensuring good contact. Set the load to half the battery’s CCA rating—for a 600 CCA battery, apply 300 amps. Apply the load for 15 seconds and read the voltage at the end of the 15-second period. At 80°F, a healthy battery maintains at least 9.6V. At 32°F, the minimum is 9.0V. If the voltage drops below these thresholds, the battery fails the test and should be replaced. If the battery passes, it has adequate capacity. Note that load testing generates heat and consumes battery charge—allow the battery to recover for at least 5 minutes before retesting or recharging. For batteries rated in Ah (amp-hours) rather than CCA, apply a load equal to three times the Ah rating.
Conductance Testing for Quick Health Assessment
Conductance testing is the fastest and safest method for assessing battery health. Connect the conductance analyzer’s clamps to the battery terminals, ensuring clean contact. Enter the battery’s CCA rating into the analyzer (or let it auto-detect). Initiate the test—it takes 5–10 seconds. The analyzer displays the measured conductance, the battery’s health percentage, and often a recommendation (good, charge and retest, replace). A health percentage above 75% indicates a good battery; 50–75% is marginal; below 50% requires replacement. Conductance testing works on batteries as low as 20% charge, making it ideal for diagnosing weak batteries that won’t hold a charge. The test is non-invasive and does not discharge the battery, so it can be repeated as often as needed.
Testing Cranking Voltage
Cranking voltage testing evaluates the battery’s performance under the real-world stress of starting the engine. With the multimeter connected to the battery terminals, disable the ignition or fuel system to prevent the engine from starting (or have a helper crank for 3–5 seconds). Crank the engine and observe the voltage drop. A healthy battery maintains at least 9.6V during cranking at 80°F. If voltage drops below 9.6V, the battery is weak or the starter is drawing excessive current. This test is particularly useful for diagnosing intermittent starting problems—a battery that passes a bench load test but fails a cranking test may have a high-resistance internal connection that only manifests under the extreme current draw of a starter motor.
Interpreting Test Results: What the Numbers Mean

State of Charge (SOC) vs. State of Health (SOH)
State of Charge (SOC) measures how much energy the battery currently holds relative to its full capacity—essentially the “fuel gauge” of the battery. SOC is determined by resting voltage or specific gravity. State of Health (SOH) measures the battery’s ability to hold and deliver charge compared to when it was new—the “aging gauge.” SOH is determined by load testing or conductance testing. A battery can have 100% SOC (fully charged) but 40% SOH (nearly dead)—it’s full but can’t deliver the current needed. Conversely, a battery can have 50% SOC (half discharged) but 90% SOH (healthy)—it just needs a charge. Understanding this distinction is critical: SOC tells you whether to charge; SOH tells you whether to replace.
Voltage Readings: The Complete Reference Table
Resting voltage (after 30 minutes of no load) correlates directly with SOC: 12.6V+ = 100%; 12.4V = 75%; 12.2V = 50%; 12.0V = 25%; 11.8V = 0%. Cranking voltage should stay above 9.6V. Charging voltage (engine running) should read 13.8–14.4V—if it reads below 13.5V, the alternator is undercharging; above 14.8V indicates overcharging. A surface charge (measured immediately after charging or driving) can read 12.8–13.0V, which is misleading—always rest the battery before measuring. Temperature affects voltage readings: for every 10°F below 80°F, the minimum acceptable load test voltage drops by 0.1V.
Load Test Results: Pass/Fail Criteria
A load test applies half the CCA rating for 15 seconds. The minimum acceptable voltage at the end of the test depends on temperature: 9.6V at 80°F; 9.5V at 70°F; 9.4V at 60°F; 9.3V at 50°F; 9.1V at 40°F; 9.0V at 30°F; 8.8V at 20°F; 8.5V at 0°F. If the battery fails, it must be replaced. If it passes but is close to the threshold, retest after a full charge—a marginal pass may indicate a battery nearing end of life. A battery that passes a load test at 80°F may fail at 0°F because cold increases internal resistance and reduces chemical reaction rates.
Conductance Readings: Health Percentage Interpretation
Conductance analyzers report health as a percentage of the battery’s rated CCA. Above 75%: good—battery is healthy and can be expected to perform reliably. 50–75%: marginal—battery is aging; monitor closely and plan for replacement within 6–12 months. Below 50%: replace—battery has significant internal resistance and will
likely fail soon, especially in cold weather. Conductance readings are temperature-compensated by most modern analyzers, so results are reliable across a wide temperature range. However, conductance testing can sometimes give false positives on batteries with surface charge—always rest the battery for 30 minutes before testing for the most accurate reading. If the analyzer recommends “charge and retest,” follow that advice: a deeply discharged battery will show low conductance simply because it lacks charge, not because it’s defective.
Temperature Effects on Battery Testing
Temperature dramatically affects battery performance and test results. Cold temperatures slow the chemical reactions inside the battery, reducing available current—a battery that delivers 600 CCA at 80°F may only deliver 400 CCA at 0°F. Conversely, heat accelerates chemical reactions and can temporarily mask a weak battery. When testing, always note the ambient temperature and adjust your pass/fail criteria accordingly. For load testing, use the temperature-adjusted voltage thresholds listed above. For conductance testing, most modern analyzers automatically compensate for temperature. Also, extreme cold can cause a battery to freeze if it’s discharged—a fully charged battery freezes at -76°F, but a 50% discharged battery freezes at -10°F. If you suspect a frozen battery, do not test or charge it—allow it to thaw at room temperature first.
Common Misdiagnoses and How to Avoid Them
The most common diagnostic error is condemning a good battery that’s simply discharged. Always charge the battery fully and retest before making a replacement decision. Another frequent mistake is testing a battery with surface charge—always rest the battery for 30 minutes after charging or driving. A third error is ignoring the charging system: if the alternator is faulty, a new battery will fail within days. Always test the alternator output (13.8–14.4V with engine running) when diagnosing battery issues. Finally, don’t overlook parasitic drains—a vehicle that sits for days may have a small electrical draw (50–100 mA) that slowly discharges the battery. Test for parasitic drain by disconnecting the negative battery cable and connecting a multimeter in series (set to amps) to measure the draw. If it exceeds 50 mA, there’s a parasitic drain that needs investigation.
Battery Maintenance and Lifespan Extension
Battery Maintenance and Lifespan Extension – battery testing guide” class=”vb-content-img” loading=”lazy” src=”/output/images/battery_testing_guide_4.jpeg”/>
Cleaning Terminals and Preventing Corrosion
Corrosion on battery terminals is a leading cause of electrical problems and premature battery failure. The white or blue-green crust is caused by acid fumes reacting with metal terminals. Clean terminals every six months using a wire brush or a mixture of baking soda and water (which neutralizes acid). After cleaning, apply a thin layer of dielectric grease or petroleum jelly to the terminals to prevent future corrosion. Ensure the battery hold-down bracket is tight—vibration is a major killer of batteries, causing internal plate damage. Check the battery case for cracks, bulges, or leaks, which indicate internal damage and require immediate replacement.
Maintaining Proper Water Levels in Flooded Batteries
Flooded lead-acid batteries require periodic water checks. Remove the cell caps and inspect the electrolyte level—the plates must be covered. If low, add distilled water only. Tap water contains minerals that contaminate the electrolyte and reduce battery life. Do not overfill; leave about 1/8 inch of space below the fill well to allow for expansion during charging. Overfilling causes acid to overflow, which corrodes terminals and the battery tray. Check water levels every three months, more frequently in hot climates where water evaporates faster. If a cell consistently requires more water than others, that cell may be overcharging or failing—have the battery tested.
Proper Charging Practices to Extend Battery Life
The way you charge your battery significantly impacts its lifespan. Avoid deep discharges—recharge the battery before it drops below 50% SOC (12.2V). Use a smart charger that automatically adjusts voltage and current based on the battery’s state of charge. Smart chargers with desulfation modes can reverse sulfation—the buildup of lead sulfate crystals on the plates that occurs when a battery sits discharged. For batteries that sit unused for extended periods (seasonal vehicles, classic cars), use a battery maintainer (trickle charger) that keeps the battery at full charge without overcharging. A battery that sits discharged for weeks will sulfate and permanently lose capacity. If you don’t have a maintainer, charge the battery monthly and disconnect the negative terminal to minimize parasitic drain.
When to Replace: Signs of Battery Failure
Several signs indicate a battery is nearing end of life: slow cranking (the engine turns over sluggishly), dim headlights at idle, the battery warning light on the dashboard, swelling or bulging case, a rotten egg smell (sulfur gas), or the battery being more than five years old. If you experience any of these, test the battery immediately. A battery that fails a load test or shows less than 50% health on a conductance test should be replaced. Don’t wait for complete failure—replace the battery when tests indicate marginal health, especially before winter or summer extremes. A new battery costs $100–$250; a tow truck and emergency replacement costs significantly more.
Advanced Testing: Parasitic Drain and Charging System

Testing for Parasitic Drain
A parasitic drain is an electrical load that continues to draw current after the vehicle is turned off. Normal parasitic draw is 20–50 mA (for clocks, security systems, and memory functions). A draw exceeding 50 mA indicates a problem—a stuck relay, a faulty module, or an interior light left on. To test: ensure all lights and accessories are off, disconnect the negative battery cable, and connect a multimeter in series (set to DC amps) between the negative terminal and the negative cable. Read the current draw. If it exceeds 50 mA, begin removing fuses one at a time until the draw drops—the circuit with the problematic component is the last fuse removed. Note that some vehicles have modules that “wake up” periodically, so observe the draw for several minutes to get an accurate reading.
Testing the Alternator Output
The alternator recharges the battery while the engine runs. A faulty alternator will drain the battery even if the battery is healthy. To test: start the engine and measure voltage at the battery terminals with the multimeter set to DC volts. With the engine at idle, voltage should read 13.8–14.4V. Turn on all electrical loads (headlights, heater, rear defroster) and rev the engine to 2,000 RPM—voltage should remain above 13.5V. If voltage reads below 13.5V, the alternator is undercharging; above 14.8V indicates overcharging, which can damage the battery. Also listen for unusual noises from the alternator (whining or grinding) and check the serpentine belt for wear or looseness—a slipping belt reduces alternator output.
Testing the Starter Motor
The starter motor draws the highest current from the battery—typically 150–300 amps. A faulty starter can drain the battery or prevent starting even with a healthy battery. To test the starter: measure cranking voltage as described earlier. If voltage stays above 9.6V during cranking but the engine turns slowly, the starter may be faulty. Listen for a clicking sound without cranking—this indicates a faulty solenoid or a weak battery. A grinding noise suggests worn starter gears. If the battery tests healthy but the starter draws excessive current (causing voltage to drop below 9.6V), the starter has an internal short and needs replacement. Starter testing often requires professional equipment, so if you suspect starter issues, consult a mechanic.
Battery Testing Frequency and Best Practices

Recommended Testing Schedule
Test your battery at least twice a year—once before winter and once before summer. Extreme temperatures stress batteries, so testing before seasonal changes helps catch weaknesses early. For batteries over three years old, test quarterly. If you experience any starting issues, test immediately. For vehicles that sit unused for extended periods, test before each use. Professional shops offer free battery testing—take advantage of this service during oil changes or routine maintenance. Regular testing creates a trend line: a battery that drops from 90% health to 70% in six months is failing faster than one that drops from 90% to 85% in the same period.
Best Practices for Accurate Results
Always test a battery that is at least 75% charged (12.4V) for load testing. Rest the battery for 30 minutes before testing to eliminate surface charge. Ensure clean, tight connections on both the battery terminals and the test equipment. Use the correct test method for your battery type—do not load test AGM or gel batteries with a traditional carbon
pile load tester, as this can damage them. Instead, use a conductance analyzer designed for AGM/gel batteries. Record your test results in a log—date, voltage, load test result, conductance percentage—to track the battery’s decline over time. When testing, always compare readings to the battery’s rated CCA, not to another battery’s readings. Finally, if a battery fails a test, don’t immediately replace it—verify the charging system is working correctly first. A new battery installed with a faulty alternator will fail prematurely, wasting your money and time.
When to Seek Professional Diagnostics
While this guide covers all the essential testing methods, some situations require professional equipment and expertise. If your battery tests healthy but you still experience starting problems, the issue may be in the starter, ignition switch, or wiring—diagnosing these requires specialized tools. If your battery fails repeatedly despite proper charging, there may be an underlying electrical issue such as a shorted cell or an internal open circuit that requires professional analysis. If you’re uncomfortable working with acid or electricity, or if the battery is in a difficult-to-reach location, seek professional help. Most auto parts stores offer free battery testing and can provide a printout of the results. A professional diagnostic can save you from replacing parts unnecessarily and ensure your vehicle’s electrical system is functioning correctly.
Conclusion: Master Your Battery’s Health

Battery testing is not a complex procedure—it’s a straightforward process that anyone can learn with the right tools and knowledge. This battery testing guide has walked you through the three core methods: voltage measurement for quick screening, load testing for definitive capacity verification, and conductance testing for fast, non-invasive health assessment. You’ve learned how to interpret the numbers, understand the difference between state of charge and state of health, and recognize the signs of a failing battery before it strands you.
The key takeaways are simple: test your battery regularly (at least twice a year), always charge before load testing, rest the battery before measuring voltage, and understand that temperature affects results. Use the right tool for the job—a multimeter for voltage, a load tester for capacity, a conductance analyzer for health percentage. And remember, a battery test is only one part of the electrical system diagnosis—always verify the alternator and check for parasitic drains when troubleshooting.
By mastering battery testing, you take control of your vehicle’s reliability. You’ll know when to recharge, when to replace, and when to seek professional help. You’ll avoid the inconvenience of a dead battery on a cold morning, the expense of an emergency replacement, and the frustration of a car that won’t start. A $15 multimeter and a few minutes of your time can save you hundreds of dollars and countless headaches. Test your battery today—your future self will thank you.