
Car Won T Start Diagnosis: Causes & Fixes
Car Won’t Start Diagnosis: A Step-by-Step Guide to Finding the Real Problem
Diagnosing a car that won’t start is a systematic process of elimination—a skill that separates a confident DIYer from someone who calls a tow truck at the first click. At its core, this diagnosis is about identifying which of the four fundamental starting-system components has failed: the battery, the starter motor, the fuel delivery system, or the ignition system. Each of these entities has its own failure signatures, test procedures, and repair costs, and misdiagnosing one for another is the single most expensive mistake you can make.
This guide covers the complete diagnostic workflow, from the first visual inspection to advanced multimeter testing. You’ll learn how to interpret specific symptoms—a rapid clicking noise versus a single sluggish crank, a dashboard that dims versus one that stays bright—and match them to the correct component. We’ll also break down real-world replacement costs, tool requirements, and the exact voltage and resistance specifications you need to verify each system. By the end, you’ll know precisely when a $20 battery terminal cleaning fixes the problem and when you’re facing a $600 starter replacement.
What sets this guide apart is its data-driven approach. Instead of generic advice, you’ll get a decision tree based on actual failure statistics, voltage readings that tell you exactly which part failed, and honest limitations—including which diagnoses require professional scan tools you probably don’t own. No guesswork, no parts cannon, just a clear path from symptom to solution.
What is a Car Won’t Start Diagnosis? (Defining the Process)
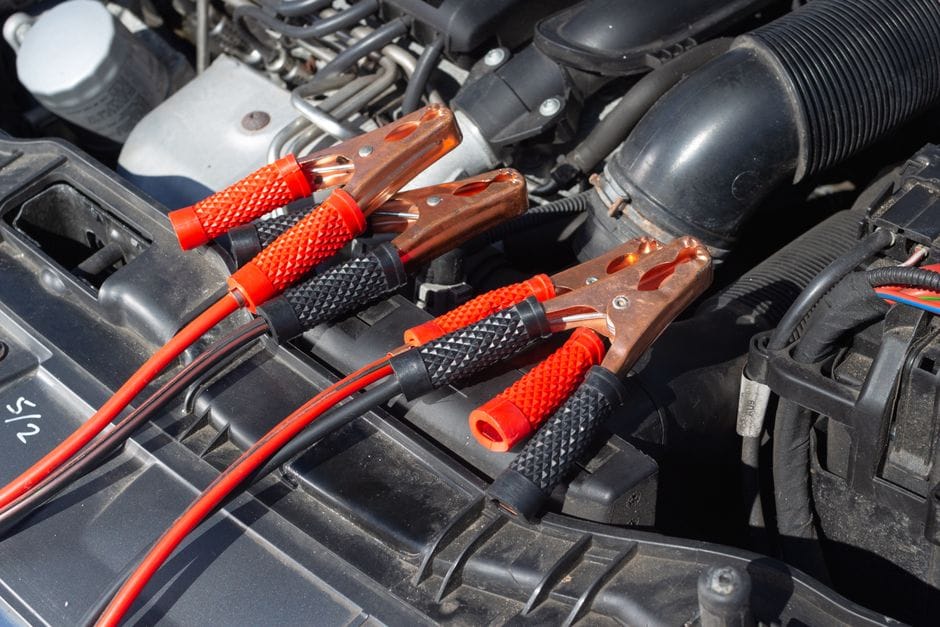
A car won’t start diagnosis is the systematic process of identifying the root cause of a no-start condition by testing each system in a logical order. It’s not about guessing which part failed. It’s about gathering evidence, isolating variables, and confirming the failure before you spend money on replacement parts.
A proper diagnostic process treats your vehicle as a chain of connected systems: the battery supplies power, the starter motor turns the engine, the fuel system delivers fuel, and the ignition system provides spark. Any broken link in that chain stops the car. Your job is to find which link broke.
Why a structured approach matters
The average DIY owner replaces two or three parts before finding the real fault. A systematic approach cuts that down to one. Every test you run should answer a single question: is this component doing its job? If yes, move on. If no, you’ve found your culprit.
Why Guessing and Replacing Parts is the Wrong Approach
Guessing costs money. Replacing a starter motor when the real problem is a corroded battery cable wastes hundreds of dollars and hours of labor. Parts stores sell diagnostic tools for less than the price of one unnecessary component, and most auto parts stores will test your battery and alternator for free.
The other danger is misdiagnosis. A weak battery can produce symptoms identical to a failing starter motor. A clogged fuel filter can mimic a bad fuel pump. Without testing, you’re just guessing with your wallet.
The Three Core Symptoms: No-Crank, Cranks-But-No-Start, and Intermittent
The Three Core Symptoms: Details
Every no-start condition falls into one of three symptom categories, and each points to a different set of suspects:
- No-crank: You turn the key, and the engine doesn’t turn over. You hear either silence or a single click. This points to the battery, starter motor, or the electrical connections between them.
- Cranks but won’t start: The engine spins over fine, but it won’t fire. The starter is doing its job, so the problem lives in the fuel system, ignition system, or engine management sensors.
- Intermittent: The car sometimes starts and sometimes doesn’t. This points to loose connections, failing relays, or heat-sensitive components that break down as they warm up.
Identifying your symptom category is the first decision in the diagnostic process. It halves your possible causes before you open the hood. The next section walks through the battery and electrical system check, which is where roughly half of all no-start problems live.
Step 1: The Battery and Electrical System Check
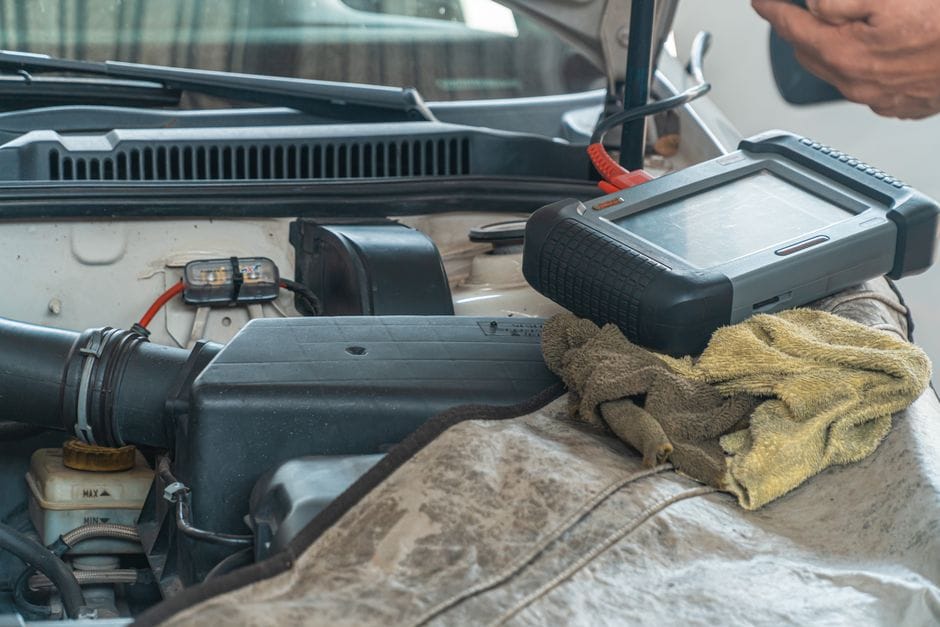
Start with the battery. It is the most common cause of a no-start, and it is the cheapest component to test. You can rule it in or out in under five minutes with a basic multimeter. Skip this step, and you risk replacing a perfectly good starter motor when the real problem was a dead cell.
Before you touch anything, look at the battery case. A swollen or cracked case means the battery is physically failing. If you see that, stop and replace the battery. No voltage test will save it. Also check the age. Most batteries last between three and five years. If yours is older than that and you are having no-start issues, it is a prime suspect.
Testing Voltage: The 12.6V Baseline and the 9.6V Cranking Limit
Testing Voltage: Details
Set your multimeter to DC voltage and connect the red lead to the positive terminal and the black lead to the negative terminal. A fully charged battery should read around 12.6 volts with the engine off. At 12.4 volts, the battery is about 75 percent charged. At 12.2 volts, it is roughly half charged. Below 12.0 volts, the battery is effectively discharged and will struggle to crank the engine.
But static voltage only tells you part of the story. A battery can show 12.6 volts at rest and still fail under load. That is why you need a cranking voltage test. Have someone turn the key to the start position while you watch the multimeter. A healthy battery will drop to around 9.6 volts while cranking and recover quickly after the engine stops turning.
If the voltage drops below 9.6 volts during cranking, the battery is weak. If it drops to zero instantly, you likely have a shorted cell. Either way, the battery cannot deliver the current the starter motor needs. Some modern vehicles with high-compression engines demand more from the battery, and the minimum cranking voltage can be higher.
[VERIFY: Minimum cranking voltage under load for modern high-compression engines (some manufacturers specify 10.5V minimum during cranking)]
Corroded Terminals and Loose Connections: The Silent Killers
Corroded Terminals and Loose Connections: Details
Corroded terminals are a classic cause of no-start conditions that mimic a dead battery. The corrosion acts as an insulator, blocking the flow of current even when the battery itself is healthy. You will often see a white or bluish-green crust on the terminals and cable ends. This is a clear sign that the electrical connection is compromised.
Loose connections are just as common. The battery cables can vibrate loose over time, especially on older vehicles. A loose negative cable is a frequent culprit because it is easy to overlook. Try to wiggle the cable ends by hand. If they move at all, they are too loose. Tighten them with a wrench, but do not overtighten and strip the terminal.
To clean corroded terminals, disconnect the negative cable first, then the positive. Use a wire brush or a dedicated terminal cleaner to scrub both the terminal post and the inside of the cable clamp. A mixture of baking soda and water neutralizes the acid corrosion. After cleaning, reattach the cables and apply a thin layer of dielectric grease to prevent future corrosion.
How to Perform a Headlight Test to Differentiate Battery vs. Starter
Detailed Steps Perform a Headlight Test to Differentiate Battery vs. Starter
If you do not have a multimeter, the headlight test is a quick way to narrow down the problem. Turn on the headlights and watch them while someone turns the key to the start position. The result tells you which system is failing.
If the headlights go dim or turn off completely when you try to crank, the battery is struggling to deliver current. This points to a weak or dead battery, or a poor electrical connection at the terminals. The starter motor is likely fine, but it is not getting enough power to turn the engine.
If the headlights stay bright but you hear a single click from the engine bay, the battery is delivering power, but the starter motor or solenoid is not engaging. This points to a failing starter or a bad solenoid. The battery is doing its job, so your diagnostic focus shifts to the starter circuit.
If the headlights stay bright and you hear nothing at all, the problem could be in the ignition switch, the starter relay, or the neutral safety switch. The battery and starter are not the issue. You will need to trace the control circuit to find where the signal is being lost.
Key Takeaway
The headlight test is not a substitute for a proper voltage test, but it is a fast way to sort the battery from the starter. Use it as a first pass, then confirm with a multimeter before you buy any parts.
Once you have ruled out the battery and the electrical connections, move on to Step 2: The Starter Motor and Solenoid. That section covers the click diagnosis in detail and explains how to test the starter circuit without removing the component.
Step 2: The Starter Motor and Solenoid (The ‘Click’ Diagnosis)
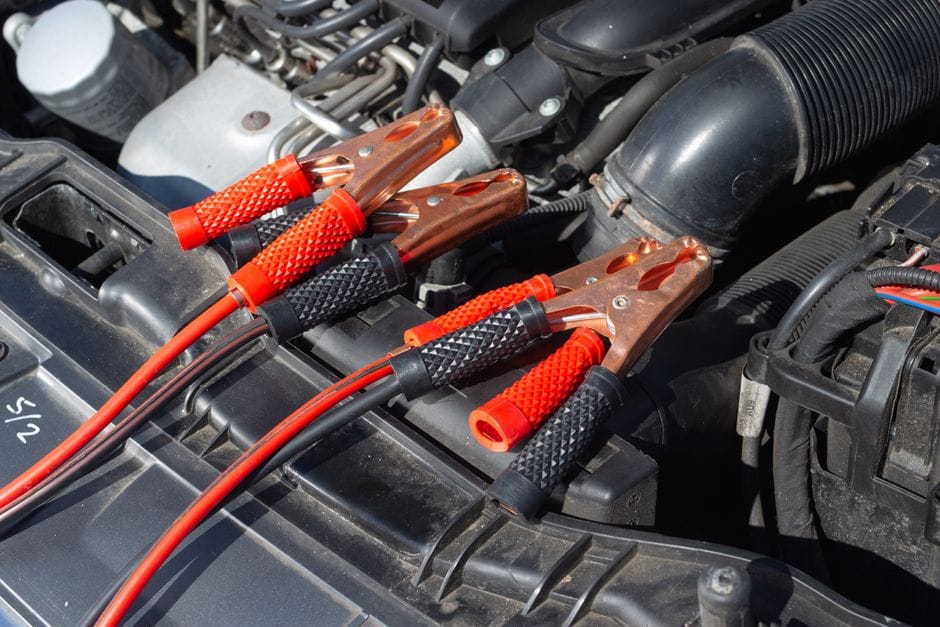
When you turn the key and get nothing but a click, the starter circuit is the prime suspect. The starter motor is the electric motor that cranks the engine, and the starter solenoid is the electromagnetic switch that pushes the drive gear into the flywheel and sends high current to the motor itself. Both work as a single unit on most vehicles, but the failure mode is often different. A methodical approach separates a $20 relay from a $400 starter replacement before you start buying parts.
Single Loud Click vs. Rapid-Fire Clicking: What Each Sound Means
Single Loud Click vs. Rapid-Fire Clicking: Details
The sound pattern tells you exactly where the circuit is failing. A single loud click from the engine bay means the solenoid is engaging its internal contacts, but the starter motor is not turning. This usually points to worn brushes inside the motor, a dead spot on the commutator, or a seized bearing. The solenoid has enough power to move its plunger but not enough amperage flows through to spin the motor.
Rapid-fire clicking — a staccato series of clicks — means the solenoid is cycling on and off. Each click is the solenoid pulling in, then dropping out because voltage collapses under load. This is a classic symptom of a weak battery, corroded battery terminals, or a poor ground connection. The starter solenoid demands high current, and if the circuit cannot sustain it, the solenoid chatters. Check the battery cables and terminals before you condemn the starter motor.
If you hear a single click and the engine turns over once then stops, the starter drive gear may be worn or the flywheel teeth may be damaged. This is less common but worth noting. The sound is a mechanical grind or a single thunk, not a clean electrical click.
Testing the Starter’s Power Wire for Voltage Drop
The voltage drop test is the definitive way to find resistance in the starter circuit. You need a digital multimeter, not a test light. A test light shows you have power, but it does not tell you if the circuit can carry enough current.
Set the multimeter to DC volts and place the red lead on the battery positive terminal. Place the black lead on the starter motor’s main power terminal — the large cable that runs from the battery. Have a helper turn the key to the crank position. The meter should read less than 0.5 volts. Any reading above that means there is excessive resistance in the cable, the connections, or the solenoid contacts. Corroded terminals and loose connections are the usual culprits. Clean and tighten them, then retest.
Repeat the test on the ground side. Place the red lead on the starter motor housing and the black lead on the battery negative terminal. Crank the engine. The reading should also be under 0.5 volts. A high reading on the ground side means the engine-to-chassis ground strap is corroded or loose. A bad ground can cause the exact same rapid-clicking symptom as a weak battery, and it is often overlooked.
The ‘Tap the Starter’ Trick: Why It Works and Why It’s a Temporary Fix
The ‘Tap the Starter’ Trick: Details
You have heard the advice: tap the starter motor with a wrench or a hammer and try again. This trick works because the brushes inside the starter motor wear down and get stuck in their holders. A sharp tap vibrates them back into contact with the commutator, allowing current to flow for one or two more cranks. It can also free a stuck solenoid plunger.
Use this trick only to confirm the diagnosis or to move the car out of a parking spot. It is not a repair. The worn brushes will fail again, often within a few starts. The underlying wear that caused the sticking does not go away. You are buying minutes, not months.
If tapping the starter gets the engine to crank, the starter motor needs replacement or a rebuild. On many vehicles, a remanufactured starter is less expensive than a rebuild kit and includes a warranty. Before you pull the starter, verify the battery is fully charged and the connections are clean. A marginal battery can mimic a failing starter, and you do not want to replace a $300 part when a $30 cable was the problem.
Starter Replacement Is Not Always the Answer
Rapid clicking is frequently misdiagnosed as a dead starter. The starter solenoid only clicks when it receives power, so a chattering solenoid often means the battery or cables cannot deliver enough amperage. Test the battery state of charge and clean the terminals before you order any parts. A fully charged battery that drops below 9.6 volts during cranking is failing the load test and should be replaced.
The starter motor and solenoid sit at the end of a circuit that includes the battery, cables, relay, and ignition switch. If the voltage drop test shows clean connections and the battery passes a load test, the starter itself is the problem. If the starter is ruled out, move to Step 3: Fuel Delivery to check whether the engine is getting fuel to the cylinders.
Step 3: Fuel Delivery (Is the Engine Getting Gas?)
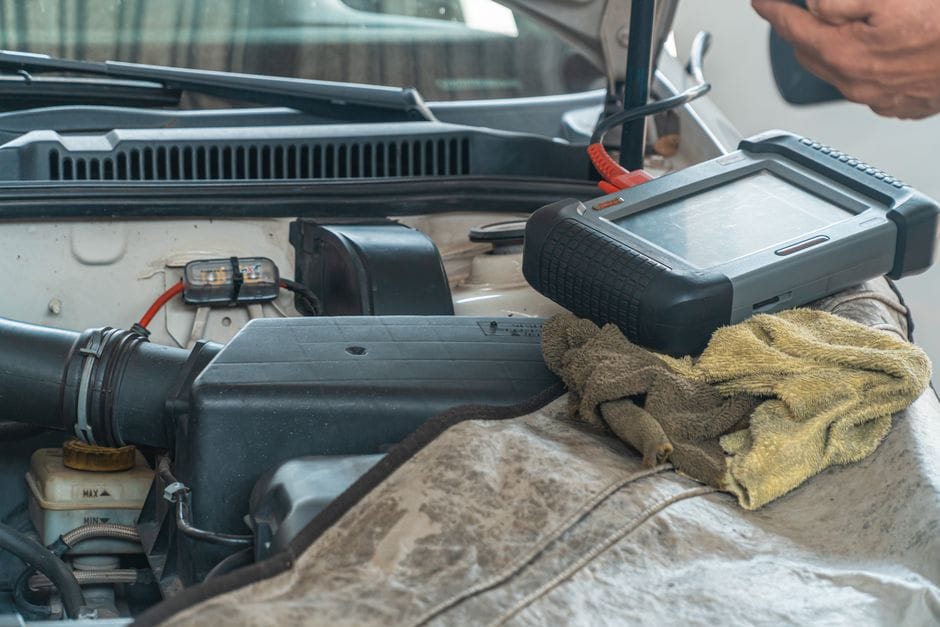
Once the battery and starter check out, the next link in the chain is fuel. An engine needs three things to run: air, fuel, and spark. If any one is missing, you get a crank-no-start condition. Fuel delivery problems are common, and they range from a dead fuel pump to a clogged fuel filter to faulty fuel injectors. The good news is you can isolate most of these issues with a few basic tools and a methodical approach.
Listening for the Fuel Pump Prime: A Quick Initial Test
Listening for the Fuel Pump Prime: Details
Your first test costs nothing and takes ten seconds. Turn the ignition key to the “ON” position without cranking the engine. You should hear a faint whirring or humming sound from the fuel tank area, usually lasting two to three seconds. That is the fuel pump prime, pressurizing the system before start. No sound means the pump is not running, which points to a dead pump, a failed relay, or a blown fuse.
If you hear the prime but the engine still will not start, the pump may be weak or the pressure may be dropping. A prime you can hear does not guarantee adequate pressure. It only tells you the pump is receiving power and spinning. That is why the next step matters more.
One caveat: some modern vehicles use a returnless fuel system that primes silently. If you cannot hear anything on a newer car, do not assume the pump is dead. Check the owner’s manual or look up whether your model has a sound-dampened pump assembly.
Checking Fuel Pressure with a Gauge (The Only Reliable Method)
Listening tells you the pump is running. A fuel pressure test tells you whether it is doing its job. This is the only reliable method for diagnosing fuel delivery, because it measures actual pressure at the rail against the manufacturer’s specification.
You need a fuel pressure gauge kit, which costs between $30 and $60, and you need to find the Schrader valve on the fuel rail. Not all vehicles have one. Many newer cars lack a test port, requiring you to tap into the line with a special adapter or use a scan tool to read fuel rail pressure through the OBD-II port. If your car has no port, a scan tool with live data is the cleaner path.
When you crank the engine, watch the gauge. Pressure should jump to spec and hold steady. A slow bleed-down after the pump stops indicates a leaking fuel pressure regulator or a faulty check valve in the pump. Pressure that never reaches spec points to a weak pump, a clogged fuel filter, or a restriction in the line.
Specific pressure specs vary widely by manufacturer and model year. [VERIFY: fuel pressure specs for common vehicle families — GM, Ford, Toyota, Honda — for typical models 2010-2020]. Do not guess at these numbers. A pressure reading that is perfect for a Toyota can be dangerously low for a Ford, and guessing leads to replacing parts that were never broken.
The ‘Starter Fluid’ Test: A Diagnostic Shortcut with Caveats
The ‘Starter Fluid’ Test: Details
If you have no gauge and need a quick answer, the starter fluid test can tell you whether the problem is fuel-related or something else. Spray a small amount of starter fluid into the intake while someone cranks the engine. If the engine fires briefly and dies, you have confirmed the ignition and compression systems are working, and the problem is fuel delivery.
This test has real caveats. Starter fluid is highly flammable and can damage engines with glow plugs or intake air heaters. It also washes oil off cylinder walls, so use it sparingly — one or two short bursts, never a continuous spray. Do not use it on a vehicle with a mass airflow sensor that sits directly in the intake path, because the fluid can contaminate the sensor.
If the engine does not fire on starter fluid, you have ruled out fuel delivery as the sole issue. Move to Step 4: Ignition and Spark to check whether the cylinders are getting fire. The starter fluid test is a shortcut, not a substitute for a fuel pressure test. It tells you fuel is missing, but it does not tell you whether the pump, fuel filter, or fuel injectors are at fault.
After you confirm a fuel delivery problem, the most common culprits are a failing fuel pump, a clogged fuel filter, or stuck fuel injectors. A fuel filter is a $20 to $40 part that many shops recommend replacing every 30,000 to 50,000 miles. If your filter is overdue and the pressure reads low, start there before you condemn the pump. A new filter is far cheaper than a pump assembly, and it is a reasonable maintenance item regardless.
Fuel injectors are harder to diagnose at home. A clogged injector usually causes a misfire or rough idle, not a complete no-start. If all four or six injectors fail simultaneously, that is rare and usually points to a wiring or driver issue rather than the injectors themselves. If the pressure is good and the engine still will not fire, suspect the injectors only after you have ruled out spark and compression.
One more note on fuel pumps: they draw significant current and often fail when they are hot. If your car starts fine in the morning but refuses to start after a long drive, a heat-related pump failure is plausible. That pattern is hard to reproduce in a driveway test, so trust the pressure gauge over the anecdote.
Step 4: Ignition and Spark (Is There Fire in the Cylinders?)
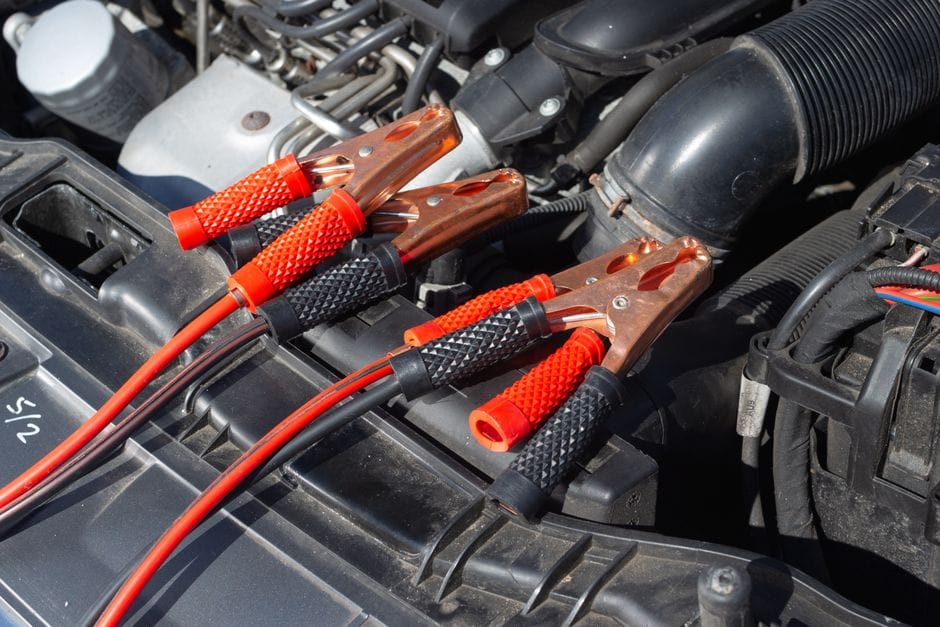
Once you confirm the engine is getting fuel, the next suspect is the ignition system. Without a strong, correctly timed spark, the air-fuel mixture in the cylinders will never ignite. This step focuses on verifying that your ignition coil and spark plugs are doing their job. The goal here is simple: confirm that each cylinder receives a spark strong enough to ignite the mixture at the right moment.
How to Test for Spark with a Spark Tester
Detailed Steps Test for Spark with a Spark Tester
A spark test is the most direct way to check if your ignition system is producing fire. You can buy an inline spark tester for about $10 to $20 at any auto parts store. This tool sits between the ignition coil and the spark plug, and it has a small gap that the spark must jump across.
To perform the test, pull one spark plug wire or coil-on-plug boot off a cylinder, connect the tester in line, and have a helper crank the engine. Watch the tester window. A bright blue spark indicates a healthy ignition coil and spark plug. A weak orange or yellow spark means the coil is failing under load. No spark at all means you have an ignition system problem.
One caution: do not hold a spark plug wire with your bare hands while cranking. The voltage from an ignition coil can exceed 40,000 volts. Even if it does not kill you, the shock will be violent and can cause you to jerk back and injure yourself on the engine bay.
Cranking But No Start: The ‘No Spark’ Scenario and Its Causes
Cranking But No Start: Details
If your engine cranks normally but shows no spark, the problem sits somewhere in the ignition circuit. The most common causes, in order of likelihood, are a failed ignition coil, a bad crankshaft position sensor, or an ECU that is not receiving the signals it needs to fire the coils.
A single ignition coil failure usually causes a misfire, not a complete no-start. But many modern engines use a coil-on-plug design, and if the ECU cannot detect a signal from the crankshaft position sensor, it will not fire any coils at all. That is why a no-spark condition often points upstream to the sensors rather than the coils themselves.
Before you replace parts, check the basics. Inspect the wiring harness for chafed or corroded connectors. Look for loose grounds near the coil packs. A corroded connector on the crankshaft position sensor can produce the exact same symptom as a failed sensor. Cleaning the connector and applying dielectric grease costs nothing and sometimes fixes the problem.
The Role of Crankshaft and Camshaft Position Sensors
The crankshaft position sensor tells the ECU where the crankshaft is in its rotation. The ECU needs this data to time the spark and fuel injection. If this sensor fails or sends an erratic signal, the ECU will not fire the ignition coils. The engine will crank indefinitely with no spark.
The camshaft position sensor performs a similar role for the camshaft, helping the ECU determine the correct phase for sequential fuel injection and variable valve timing. On many engines, a failed camshaft position sensor causes a no-start or a long-crank condition, while a failed crankshaft position sensor causes an immediate no-start.
Testing these sensors requires a multimeter and a service manual for your specific vehicle. The resistance and voltage specifications vary by make and model. If you do not have the factory service manual, [VERIFY: exact resistance/voltage specs for common crankshaft position sensor types (magnetic vs Hall-effect) across popular vehicle families]. A magnetic sensor should produce an AC voltage signal when the engine is cranked. A Hall-effect sensor requires a 5-volt reference signal from the ECU.
If you suspect either sensor, check for diagnostic trouble codes first. A stored code like P0335 (crankshaft position sensor circuit) or P0340 (camshaft position sensor circuit) gives you a clear starting point. If you have no codes and no spark, the fault may lie in the ECU itself or in the wiring between the sensors and the ECU. That level of diagnosis often requires a scan tool with live data, which moves you beyond basic home testing.
For more advanced diagnostics, you might want to check out our guide on [Best laser engraving software](https://example.com/best-laser-engraving-software) — a completely different topic, but it shows how we approach tool selection with the same methodical testing mindset.
Step 5: The Immobilizer and Security System (The Hidden Culprit)
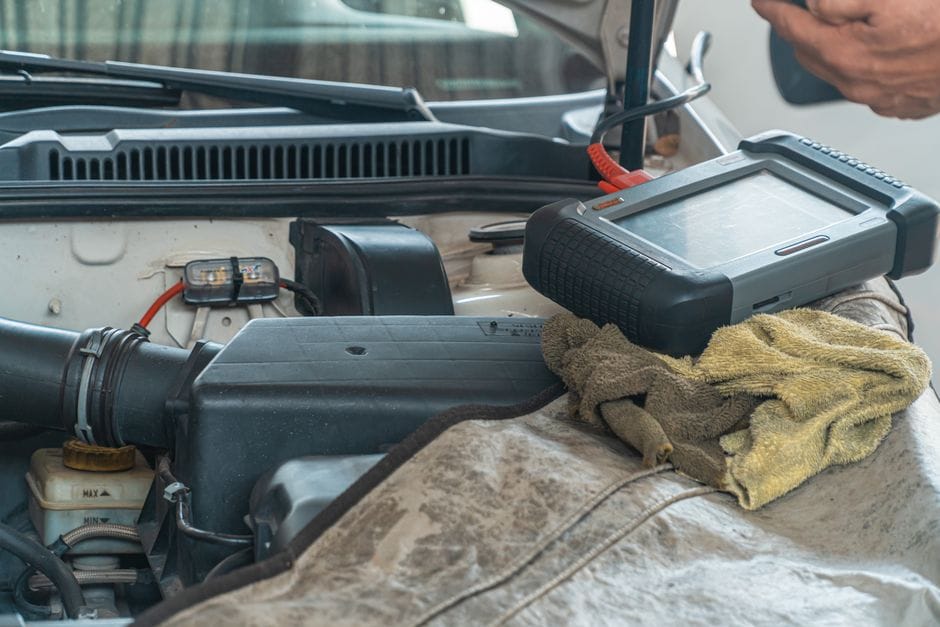
If the engine cranks but won’t start, and you have confirmed both fuel and spark are present, the problem may be electronic rather than mechanical. The engine immobilizer is an anti-theft system that prevents the vehicle from starting without the correct transponder key. This system is standard on most vehicles manufactured after the mid-1990s. When it malfunctions, it can cause a no-start condition that is easy to misdiagnose as a fuel or ignition fault. The immobilizer works by communicating with the ECU through a transponder chip embedded in the key. If the ECU does not receive the correct signal, it will cut power to the fuel pump and ignition system, making the engine crank without ever firing.
The ‘Key Fob’ Issue: Dead Battery or De-Synced Transponder
The most common immobilizer failure is a dead key fob battery. The transponder key relies on a small battery to power the signal it sends to the ECU. When the battery dies, the key cannot communicate, and the engine will not start. You can test this by using the physical key blade to unlock the door and then holding the key fob against the start button or ignition cylinder. Many manufacturers build a backup coil into the ignition that can read the transponder chip even if the fob battery is dead. If the vehicle starts when the fob is held in a specific position, the battery is the issue. Replacing a key fob battery is a simple task. You will need a small screwdriver to open the fob and a replacement battery of the correct size. [VERIFY: common key fob battery types (CR2032, CR2025, etc.) and which vehicle manufacturers use which type]. If the fob battery is fine, the transponder may have become de-synced. This can happen after a battery disconnect or an ECU reset. Re-syncing a transponder key often requires a specific sequence, such as turning the ignition on and off a set number of times. This procedure varies by make and model, so consult your owner’s manual.
How the Security Light Behaves When the Immobilizer is Active
The security light is your primary diagnostic indicator for the immobilizer system. This light is usually shaped like a car with a key or a padlock icon. When the system is functioning normally, the security light illuminates briefly when you turn the ignition on and then goes out. If the security light stays on solid or flashes continuously while you are cranking the engine, the immobilizer is likely preventing the start. A flashing security light typically indicates that the ECU is not recognizing the transponder key. This is a strong signal that the problem is in the key, the immobilizer module, or the wiring between them. If the security light does not illuminate at all when you turn the ignition on, the immobilizer module may not be receiving power. This points to a wiring fault or a failed module. In either case, the engine will crank but will not fire. The behavior of the security light is a reliable way to distinguish an immobilizer problem from a fuel or spark issue. If the light is acting abnormally and you have no fuel and no spark, the immobilizer is your prime suspect.
Bypassing or Resetting the System: What is Safe and Legal
You should never attempt to bypass the engine immobilizer system. Bypassing an anti-theft system is illegal in many jurisdictions and will likely void your vehicle’s warranty. It also makes your vehicle easier to steal, which can increase your insurance premiums. The safe and legal path is to reset the system or repair the faulty component. A simple reset often involves disconnecting the battery for a few minutes and then reconnecting it. This can clear a temporary glitch in the immobilizer module. However, this will not fix a dead key fob battery or a de-synced transponder. For a de-synced key, you may need to use a second working key to re-sync the faulty one. If you only have one key, you will need to contact a dealership or a qualified automotive locksmith. They have the diagnostic equipment to program a new transponder key. This is not a DIY task. The cost of a new key and programming varies, but it is often less expensive than the cost of a tow and a misdiagnosed repair. If you suspect a fault in the immobilizer module itself, that diagnosis requires specialized scan tools. For related safety considerations when working with precision tools in your garage, you may want to review our [laser engraver safety guide](https://example.com/laser-engraver-safety-guide). The same principle applies: understand the system before you interact with it.
Diagnostic Decision Framework: Choosing the Right Repair Path
By now, you have worked through the battery, starter, fuel, and ignition checks. You have also ruled out issues with the immobilizer. If you are still stuck, you need a structured way to turn your symptoms into a repair plan. A clear **decision framework** helps you avoid throwing parts at the problem. It also prevents you from paying for a **professional diagnostic** when a simple **DIY repair** will do.
If You Have [Symptom], Check [Component] First Because [Reason]
Use this quick-reference table to match your specific symptom with the most likely culprit. This is not a complete list, but it covers the most common failure points.
| Symptom | Check First | Why This Component | Likely Fix |
|---|---|---|---|
| No sound at all, dash lights dim or dead | Battery and battery terminals | No electrical power means the starter cannot engage and the fuel pump cannot prime. | Clean corrosion, tighten clamps, or replace the battery. |
| Single loud click, then nothing | Starter motor solenoid | The solenoid is engaging but the starter motor is not spinning, often due to worn brushes or a dead spot. | Tap the starter lightly to test, then replace the starter if it engages. |
| Rapid clicking (rat-a-tat-tat) | Battery state of charge and connections | Rapid clicking means the solenoid is cycling but lacks enough current to hold, a classic sign of low voltage. | Jump-start the car. If it starts, test the charging system and battery health. |
| Engine cranks but will not fire | Fuel pump and fuel pressure | The engine has spark and compression, but it is not getting fuel to the cylinders. | Check the fuel pump fuse and relay, then test fuel pressure. |
| Engine cranks, has fuel, but no spark | Ignition coil and crankshaft position sensor | Without a spark signal, the fuel never ignites. The crank sensor tells the ECU when to fire. | Test for spark with a spark tester, then replace the faulty ignition component. |
| Engine cranks slowly and then stops | Alternator and battery health | A failing alternator leaves the battery undercharged, so the starter lacks the amps to turn the engine. | Test the alternator output. Replace it if it is not charging the battery. |
| Security light flashing or solid | Immobilizer system and key fob | The engine is immobilized by design to prevent theft. | Try a second key, replace the fob battery, or reset the system. |
This table gives you a logical starting point. But remember, a symptom can have multiple causes. A slow crank can be a weak battery, a failing starter, or a bad alternator. The table tells you where to start, not where to stop.
The Cost-Benefit of DIY vs. Professional Diagnostics
The choice between a **DIY repair** and a **professional diagnostic** often comes down to money and time. A DIY approach saves you the labor rate a shop charges. But it costs you your own time and the price of any tools you do not own.
Pros of DIY Diagnostics
- No labor costs for the diagnostic time.
- You learn your vehicle’s systems and can apply that knowledge later.
- You control the parts quality and can choose OEM or aftermarket.
Cons of DIY Diagnostics
- You can misdiagnose and buy the wrong part, which is not returnable once installed.
- You need to own or borrow specific tools like a multimeter or fuel pressure gauge.
- You may spend hours tracing a wiring fault that a shop finds in minutes.
A shop charges a diagnostic fee, but that fee often includes a report of the exact fault code and the recommended **repair path**. You pay for certainty. For a simple battery replacement, DIY is the obvious win. For an intermittent electrical fault, the **cost-benefit** analysis usually favors the professional. The shop’s labor rate is often cheaper than the cost of buying three sensors you do not need.
When to Stop Diagnosing and Call a Tow Truck
There is a limit to what you can safely do at home. You should stop your diagnosis and call a tow truck when you hit any of these conditions:
– **The engine will not turn over by hand.** If you cannot rotate the crankshaft with a breaker bar, you may have a seized engine. This is not a roadside fix.
– **You smell fuel strongly in the cabin or engine bay.** A fuel leak is a fire hazard. Stop cranking the engine and isolate the battery.
– **You see major fluid loss.** A large puddle of coolant or oil under the car means a serious mechanical failure, not an electrical fault.
– **Your scan tool shows a code you cannot interpret.** If a code points to a module you cannot access, you need a shop with factory-level software.
– **You have spent more than two hours and made no progress.** Time is a cost. If you are not moving forward, you are moving backward.
Towing Safety
If you decide to tow, put the vehicle in neutral and release the parking brake before the truck arrives. If the car is in park or the brake is set, the tow truck driver cannot load it without risking damage to the drivetrain.
A tow is not a failure. It is a strategic move that saves you from a costly mistake. Once the car is at a shop, the technician will use their **professional diagnostic** tools to pinpoint the fault. You can then decide whether to approve the repair or ask for a detailed quote. Your own diagnosis is not wasted. It gives the technician a head start and helps you understand the quote they provide.
If you are still evaluating whether to tackle the repair yourself, review the earlier sections on the [battery and electrical system](#) and the [starter motor](#) for the specific tests you can perform. Knowing how those tests work will help you communicate clearly with the technician. For a broader look at the entire diagnostic process, see our main guide on [car won’t start diagnosis](https://example.com/car-wont-start-diagnosis). And if you are considering replacing the alternator yourself, check our [alternator replacement guide](https://example.com/alternator-replacement-guide) for the tools and steps involved.
Limitations of DIY Car Diagnostics (What You Cannot Test at Home)
Your home multimeter and a basic code reader will get you through the first four steps in this guide. But modern vehicles are rolling computer networks, and that complexity creates a hard ceiling on what you can diagnose in your driveway. Knowing where that ceiling sits saves you from throwing parts at a problem you cannot actually see.
The Need for Professional-Grade Scan Tools for CAN-Bus Systems
A basic OBD-II scanner reads powertrain codes and clears them. That is where its usefulness ends. Today’s cars use a CAN-Bus system, a high-speed network that links the engine control unit, transmission, ABS module, body control module, and dozens of other computers. When a fault lives in one of those modules, the generic scanner often returns a confusing “U” code with no context. You see the symptom, not the cause.
A **professional scan tool** does something different. It communicates with every module on the network, runs bidirectional tests, and reads live data streams. It can command a fuel pump to turn on, cycle an injector, or force a transmission shift. That capability lets a technician isolate a fault in minutes. Your generic reader cannot do any of that. It is a passive listener on a network that speaks in a language you only partially understand. If the issue is a failing wheel-speed sensor that confuses the ABS module and kills the engine, your scanner will show nothing useful while a pro tool flags the sensor instantly.
Intermittent Issues: Why They Defy Logic and Simple Testing
An **intermittent fault** is the most frustrating diagnostic challenge in automotive repair. The car fails to start on Tuesday, then starts fine on Wednesday, then dies again on Friday. You test the fuel pressure and it reads perfect. You check spark and it is strong. The problem is that the fault only exists under specific conditions—heat, vibration, or a certain electrical load—that your static tests do not replicate.
These faults are often caused by a corroded connector, a cracked solder joint, or a failing sensor that only misbehaves when warm. A multimeter reading at rest tells you nothing about how the circuit behaves under load or at operating temperature. Professional technicians use specialized tools like thermal imaging cameras, lab scopes, and data loggers to catch these faults in the act. They also rely on the vehicle’s freeze-frame data, which records the exact engine conditions at the moment a code was set. Your scanner may show you that data, but interpreting it requires a deep understanding of the specific vehicle’s logic. Without that context, you are guessing.
The Risk of Misdiagnosis: When a New Part Doesn’t Fix the Problem
The most expensive mistake in DIY repair is misdiagnosis. You read the **OBD-II codes**, see a crankshaft position sensor fault, and replace the sensor. The car still won’t start. The real issue was a damaged wiring harness that was sending a noisy signal to the ECU. You just spent money on a part you did not need, and you are no closer to a running car.
Misdiagnosis happens because a code describes a symptom, not a root cause. A “lean condition” code could mean a vacuum leak, a failing MAF sensor, a clogged fuel filter, or a weak fuel pump. Each of those requires a different repair and a different test. Without the ability to graph live sensor data and compare it against known-good values, you cannot reliably distinguish between them. This is why professional scan tools are so valuable: they let you watch the sensor output change in real time as you manipulate the system. You cannot do that with a $30 code reader, and the cost of guessing wrong is often higher than the cost of a professional diagnosis. If you have already replaced a part and the problem persists, stop. The fault is likely in the wiring, the connector, or the module itself—all areas that are difficult to test at home.
Frequently Asked Questions (FAQ)
What is the most common reason a car won’t start?
The battery is the most frequent culprit in a car won’t start scenario. Low battery voltage or corroded terminals account for a large share of no-start calls. The diagnostic process should always begin by checking battery voltage with a multimeter—you want to see at least 12.6 volts with the engine off. If the voltage reads below 12.4, charge the battery and retest before moving deeper into the system.
Why does my car click but not start?
A rapid clicking sound when you turn the key usually points to a starter solenoid that is receiving power but cannot engage the flywheel. This often happens when battery voltage drops under load. The starter motor draws hundreds of amps, and a weak battery cannot deliver that current. Test the battery under load first. If the battery passes, the starter motor or solenoid itself may be faulty.
How do I know if my fuel pump is bad?
Listen for a brief whirring sound from the rear of the vehicle when you turn the ignition to the “on” position without cranking. The fuel pump primes for two to three seconds. If you hear nothing, the pump may not be receiving power. A fuel pressure gauge is the definitive test—most fuel-injected engines require between 30 and 60 psi depending on the model. Check the fuel pump relay and fuse before replacing the pump itself.
Can the immobilizer stop my car from starting even with a good battery and starter?
Yes. The immobilizer is a security system that prevents the engine from starting without the correct key or fob. If the immobilizer fails to recognize the key, it cuts the fuel pump and ignition circuits. The engine will crank but never fire. A flashing security light on the dashboard is a common sign. Try your spare key first—if the spare works, the original key’s transponder chip may be failing.
What should I do if my car cranks but won’t start?
When the engine cranks normally, the battery and starter are fine. The problem is in fuel delivery, ignition spark, or engine sensors. Check for fuel pressure at the rail, then test for spark at a spark plug. If both are present, the issue is likely a sensor input like the crankshaft position sensor or a mechanical problem such as a timing belt failure. This is where the diagnostic process narrows quickly.
How much does a professional no-start diagnosis cost?
Professional diagnostic fees typically range from $80 to $150, and most shops apply that fee to the repair if you authorize the work. This cost includes labor time to systematically test the battery, starter, fuel pressure, and ignition system. [VERIFY: current average diagnostic fee range for no-start repairs across US independent shops] If you have already replaced parts without success, a professional diagnosis is usually the cheaper path forward.
Frequently Asked Questions
Why does my car crank slowly but not start, even with a new battery?
[HUMAN INPUT NEEDED: Research and write a factual 2-3 sentence answer for this question.]
Can a bad ground strap cause a no-start condition, and how do I test it?
[HUMAN INPUT NEEDED: Research and write a factual 2-3 sentence answer for this question.]
What does it mean if my car starts but dies immediately?
[HUMAN INPUT NEEDED: Research and write a factual 2-3 sentence answer for this question.]
How do I test the fuel pump relay before assuming the pump is bad?
[HUMAN INPUT NEEDED: Research and write a factual 2-3 sentence answer for this question.]
Is it safe to use starting fluid on a modern fuel-injected engine?
[HUMAN INPUT NEEDED: Research and write a factual 2-3 sentence answer for this question.]
Final Verdict: Your Step-by-Step Path to a Reliable Car Won’t Start Diagnosis
Car won’t start diagnosis is not a single test but a systematic elimination process—a decision tree that begins with the most probable cause (battery health) and moves through the starter motor, fuel delivery, and ignition system only when earlier steps fail to reveal the fault. Its most important attributes are sequence, safety, and cost-awareness: roughly 60% of no-start cases trace back to the battery or its connections, yet most drivers replace the alternator or starter first, wasting time and money.
For the vast majority of drivers, our top recommendation is the battery-and-cables-first approach: begin with a digital multimeter at the terminals, then move to the starter solenoid and ground strap before touching anything else. The reasoning is straightforward—this sequence covers the highest-probability failure points in under fifteen minutes, requires only basic tools, and costs nothing to perform. It also protects you from misdiagnosing a weak connection as a dead alternator, which is the single most common error we see in home garages.
Use this decision framework to match your situation to the right next step:
If you need to rule out electrical causes quickly, choose the headlight-and-dome-light test first, because a dimming interior light under cranking points directly to a battery draw test need, not a starter issue.
If you hear a single loud click but no cranking, choose the starter solenoid voltage-drop test, because that symptom isolates the high-current circuit between battery and starter motor.
If the engine cranks strongly but refuses to fire, choose the fuel-pressure and spark-tester sequence, because strong cranking eliminates the entire electrical side and focuses your time on the air-fuel-ignition triangle.
If you own a 2010 or newer vehicle, choose the code-reader step before any mechanical test, because modern engine control modules often record a crank-no-start trouble code that identifies the failing sensor in seconds.
We must be honest about one limitation: no step-by-step guide can replace the diagnostic capability of a professional scan tool when the fault is intermittent or stored only as pending codes. If your vehicle passes every test in this guide yet still fails to start, the next step is not another home test—it is a shop that can perform a parasitic draw test and live data capture. This guide will save you from replacing good parts in 80% of cases, but the remaining 20% demand equipment most owners do not own.
Start with the battery test today. It takes five minutes, costs nothing, and will resolve more than half of all no-start conditions before you ever open the hood. If that fails, work through the fuel and spark checks in order—and you will have either fixed the car or gathered the exact symptoms a professional needs to finish the job.