Tail Light Replacement: Step-by-Step Guide
Tail Light Replacement: The Complete DIY Guide to Bulbs, Assemblies, and Legal Compliance
Tail light replacement is a core automotive maintenance task that every vehicle owner will eventually face. A tail light assembly is a safety-critical lighting unit mounted at the rear corners of your vehicle, housing brake lights, turn signals, and running lights in a single sealed housing. When a bulb burns out or the housing cracks, you’re not just dealing with a cosmetic issue—you’re compromising your visibility to drivers behind you and potentially violating traffic laws that require fully functional rear lighting.
This guide covers every attribute you need to understand before touching a wrench: bulb types (from halogen to LED), assembly materials (ABS plastic vs. polycarbonate), power specifications, price ranges from budget to OEM-grade, and the legal compliance requirements that vary by state. You’ll also learn the critical difference between a simple bulb swap and a full assembly replacement—a distinction that determines whether your repair costs $10 or $300. We’ll show you exactly how to diagnose which component failed, whether your vehicle needs a sealed unit or serviceable bulb sockets, and when aftermarket parts make sense versus when you should stick with dealer components.
What sets this guide apart is the honest, data-driven approach. Most tutorials gloss over the legal nuances and compatibility pitfalls that cause failed inspections and repeat failures. Here, you’ll get a decision framework based on real vehicle types, a cost breakdown for different repair paths, and clear warnings about what these kits cannot do—like fixing damaged wiring harnesses or passing inspections with incorrect bulb color temperatures. By the end, you’ll know precisely which repair fits your skill level, your budget, and your state’s requirements.
What Is a Tail Light Replacement? (Defining the Entity)

Tail light replacement is the process of removing a damaged, burned-out, or outdated rear lighting component and installing a functional substitute. It covers both the **tail light bulb** and the complete **tail light assembly** — the plastic or metal housing that contains the bulb, reflector, and lens. The goal is to restore your vehicle’s rear visibility so other drivers can see you in low-light conditions, rain, or fog.
This is a defined entity in automotive maintenance because it sits at the intersection of routine upkeep, electrical diagnosis, and legal compliance. A tail light replacement is not optional cosmetic work. It is a safety-critical repair governed by federal and state regulations that specify how your rear lighting must perform.
Why the definition matters
Understanding what counts as a tail light replacement changes how you approach the job. If you replace the wrong component, you waste money and still fail a safety inspection. If you know the difference between a bulb and an assembly, you can diagnose faster and buy the correct part the first time.
Tail Light Bulb vs. Tail Light Assembly: Understanding the Difference
Tail Light Bulb vs. Tail Light Assembly: Details
The **tail light bulb** is the light source — the replaceable component that emits illumination when powered. It screws, twists, or plugs into a socket inside the housing. Bulbs are consumable parts with a finite lifespan measured in hours of operation.
The **tail light assembly** is the entire housing unit: the lens, reflector, socket wiring, and sometimes the bulb itself. Assemblies are structural components. They protect the bulb from moisture and debris, direct the light beam, and give your vehicle its rear appearance. When an assembly cracks, fogs up, or suffers electrical failure inside the housing, you replace the whole unit rather than just the bulb.
The practical distinction comes down to failure mode. If the bulb burned out, you replace the bulb. If the housing is cracked, the lens is yellowed beyond cleaning, or water keeps getting inside, you replace the assembly. Many DIYers start with a bulb replacement only to discover the real issue was a faulty socket — at which point the assembly becomes the correct repair.
How Tail Light Replacement Differs from Headlight and Brake Light Work
Tail light replacement is often confused with headlight or brake light work, but the three involve different components, access points, and safety considerations.
Headlight replacement deals with forward illumination — high beams, low beams, and turn signals mounted at the front of the vehicle. Access typically requires removing the bumper, fender liner, or a rear access panel in the engine bay. Headlight aim must be adjusted after installation to avoid blinding oncoming traffic.
Brake light work involves the same bulbs or assemblies as tail lights in many vehicles — the dual-filament bulb serves both functions — but the diagnostic path differs. A brake light failure points to the brake light switch, the turn signal switch, or the wiring harness, not just the bulb. Tail light replacement is usually simpler: the lights that run whenever your headlights are on, with no switch activation required.
The key takeaway: tail light replacement is a targeted repair focused on the rear lighting system. It is more accessible than headlight work, less electrically complex than brake light diagnosis, and governed by the same safety standards that apply to all vehicle lighting. Knowing which component you need — bulb or assembly — determines whether the job takes ten minutes or an hour, and whether it costs $5 or $150.
Diagnosing the Failure: Is It the Bulb, the Wiring, or the Assembly?
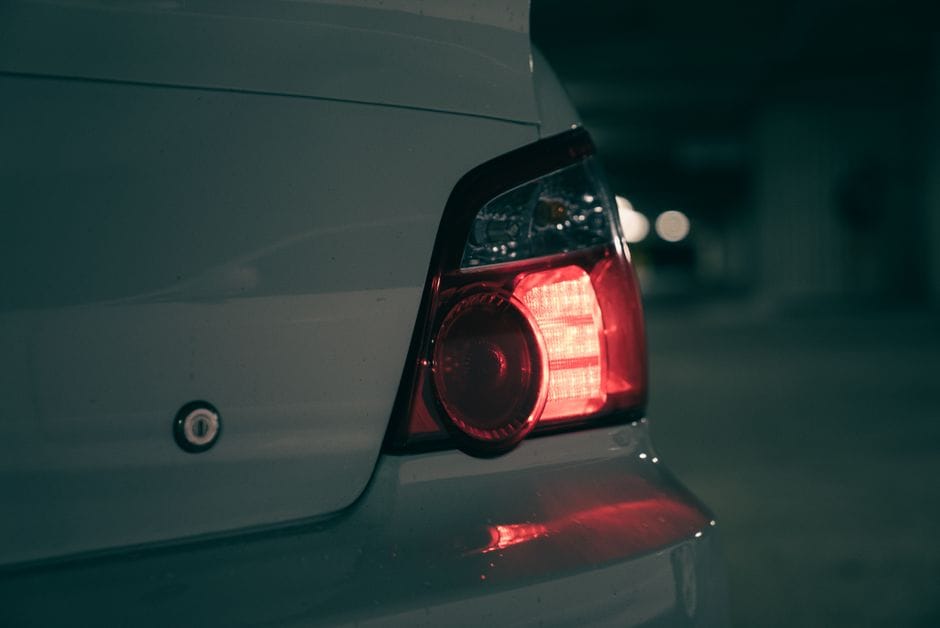
Before you order any parts, you need to pinpoint the fault. A tail light replacement starts with diagnosis, not with buying the first bulb you see. About 70% of rear light failures trace back to the bulb itself, but the other 30% involve the socket, the wiring harness, or the fuse. Guessing wrong means wasted money and a second trip to the parts store.
Visual Inspection: Cracks, Moisture, and Burn Marks
Start with your eyes. Remove the tail light assembly from the vehicle — usually two or three screws or clips — and inspect the bulb and socket directly. Look for these signs:
– **Blackened glass or a broken filament** — the bulb is dead. Replace it.
– **Corrosion or green crust on the socket contacts** — moisture has gotten in. Clean the contacts with electrical contact cleaner and a wire brush.
– **Cracks in the lens or housing** — water will keep entering and kill the new bulb. You may need a full assembly replacement, not just a bulb.
– **Burn marks or melted plastic around the socket** — this indicates excessive heat from a short circuit. Check the wiring before installing anything new.
Electrical Testing: Using a Multimeter to Check Sockets and Fuses
If the bulb looks fine but the light doesn’t work, you need electrical testing. A digital multimeter costs around $15 and pays for itself on the first repair. Here’s the procedure:
1. **Check the fuse first.** Locate the fuse box (under the dash or hood) and find the tail light fuse. Pull it and test for continuity with the multimeter’s ohms setting. A blown fuse reads as infinite resistance.
2. **Test the socket for voltage.** Set the multimeter to DC volts (20V range). Turn on the headlights. Probe the socket’s center contact (positive) and the outer shell (ground). You should read battery voltage — typically 12.6V with the engine off, 13.8–14.4V with it running.
3. **Test the ground circuit.** Set the meter to ohms. Connect one probe to the socket’s ground terminal and the other to a known good chassis ground. You want near-zero resistance. Anything above 5 ohms indicates a corroded ground.
Multimeter Testing Advantages
- Pinpoints the exact failure point — bulb, wiring, or fuse — in minutes
- Prevents buying unnecessary parts
- Works for all electrical diagnostics, not just tail lights
Multimeter Testing Limitations
- Requires basic electrical knowledge — many DIYers find it intimidating
- Can’t detect intermittent faults that only occur under vibration or heat
- A cheap meter may give inaccurate readings on low-voltage circuits
Common Failure Signs: Dimming, Flickering, and Complete Outage
Each symptom points to a different root cause:
– **Complete outage** — both tail lights dead suggests a blown fuse or a wiring harness issue. One light dead usually means a burned-out bulb.
– **Flickering** — this is almost always a poor connection. The bulb might be loose in the socket, or the socket contacts are corroded. It can also indicate a failing wiring harness where insulation has cracked and wires short intermittently.
– **Dimming** — a bulb nearing the end of its life often dims before failing. But dimming on one side only can indicate a high-resistance ground. The bulb is getting voltage, but not enough current.
– **One side works, the other doesn’t** — the fault is local. Check bulb, then socket, then the wiring harness segment for that side.
– **Brake light works but tail light doesn’t** — this points to the dual-filament bulb’s tail filament being burned out, or a wiring issue specific to the tail circuit.
Diagnostic Order That Saves Time
Follow this sequence: bulb → fuse → socket voltage → ground continuity → wiring harness. Each step eliminates a variable. The same logic applies to other electrical systems — our laser engraver troubleshooting guide uses the same isolate-then-replace approach. You isolate the component before you spend money on a replacement.
If the socket reads correct voltage and the ground is solid, the problem is deeper. The wiring harness may have a break inside the insulation, often where it passes through the trunk hinge or under the rear bumper. This requires tracing the harness with the multimeter — a more involved job. At that point, consider whether a full tail light assembly replacement is simpler, especially if the housing is cracked or the connector is corroded beyond cleaning.
Tail Light Bulb Types: Halogen, Incandescent, and LED

Your diagnostic sequence from the previous section told you the bulb is at fault. Now you need to pick the right replacement. The three main options are halogen, standard incandescent, and LED. Each has different trade-offs in brightness, heat, lifespan, and cost. The right choice depends on your vehicle, your budget, and your willingness to deal with compatibility quirks.
| Bulb Type | Brightness | Lifespan | Heat Output | Typical Cost Range |
|---|---|---|---|---|
| Halogen | Moderate to high | 450–1,000 hours | High | $5–$15 per bulb |
| Incandescent | Low to moderate | 1,000–2,000 hours | Moderate | $2–$8 per bulb |
| LED | High, instant on | 15,000–50,000 hours | Low | $15–$60 per bulb |
Halogen Bulbs: Brightness, Heat, and Lifespan
A halogen bulb is a type of incandescent bulb that uses a halogen gas fill to recycle the tungsten filament. This makes it brighter and slightly more efficient than a standard incandescent. Many OEM tail light assemblies use halogen bulbs for brake lights because they light up faster than standard incandescent bulbs.
The trade-off is heat. Halogen bulbs run hot, which can stress the socket and housing over time. They also have a shorter lifespan than LEDs. If you do a lot of night driving, you may replace halogen bulbs more often. For most drivers, a quality halogen bulb is a solid, low-cost replacement that meets factory specifications.
Standard Incandescent Bulbs: The Budget Option
Standard incandescent bulbs are the oldest technology and the cheapest to buy. They use a simple tungsten filament that glows when current passes through it. They work fine for tail lights, where brightness requirements are modest.
The downsides are slow response time and shorter lifespan compared to LEDs. A standard incandescent bulb also dims over its life as tungsten evaporates from the filament. If you want the lowest upfront cost and your vehicle originally came with incandescent bulbs, this is the simplest choice. Just expect to replace them more frequently.
LED Bulbs: Longevity and Compatibility Challenges
LED tail light bulbs are the modern upgrade. They light up instantly, which gives following drivers more reaction time when you brake. They run cool, use less power, and last far longer than any filament bulb. Many new vehicles ship with LED tail lights from the factory.
But retrofitting LED bulbs into a vehicle designed for incandescent bulbs can cause problems. The lower power draw can confuse the vehicle’s computer, triggering a “bulb out” warning. Some vehicles require a load resistor or a CAN-bus-compatible LED bulb to fix this. Also, LED bulbs produce directional light, so the reflector and lens in your housing may not distribute it correctly, creating dark spots.
Compatibility Check Before You Buy
Before ordering LED bulbs, check three things: the bulb size, the socket type, and whether your vehicle’s computer monitors bulb resistance. If it does, you’ll likely need resistors or error-free LED bulbs. The same logic applies to any electrical upgrade — verify compatibility before you spend.
Bulb Size and Socket Type: 3157, 7443, and 1157 Explained
Bulb Size and Socket Type: Details
The bulb size and socket type determine physical fit. The most common tail light bulb sizes are 3157, 7443, and 1157. These numbers refer to the base design and the number of filaments.
– **3157** — a dual-filament bulb used for both tail light and brake light functions. Common on many Japanese and American vehicles.
– **7443** — a single-filament bulb often used for brake lights or turn signals. Widely used on Honda, Toyota, and other Asian brands.
– **1157** — a dual-filament bulb with a bayonet base. Found on many older American and European vehicles.
The socket type matters just as much as the size. A 3157 and a 7443 both use different bases, so they are not interchangeable. Check your owner’s manual or pull the old bulb and read the number stamped on the base. [VERIFY: Current bulb size charts for 2024-2026 vehicle models — confirm 3157, 7443, 1157 coverage and any new socket types introduced in recent model years.]
Once you have the correct bulb type and size, you’re ready for the actual replacement procedure. The next section walks through the step-by-step process, including how to access the socket and avoid damaging the housing.
Step-by-Step Tail Light Bulb Replacement Procedure
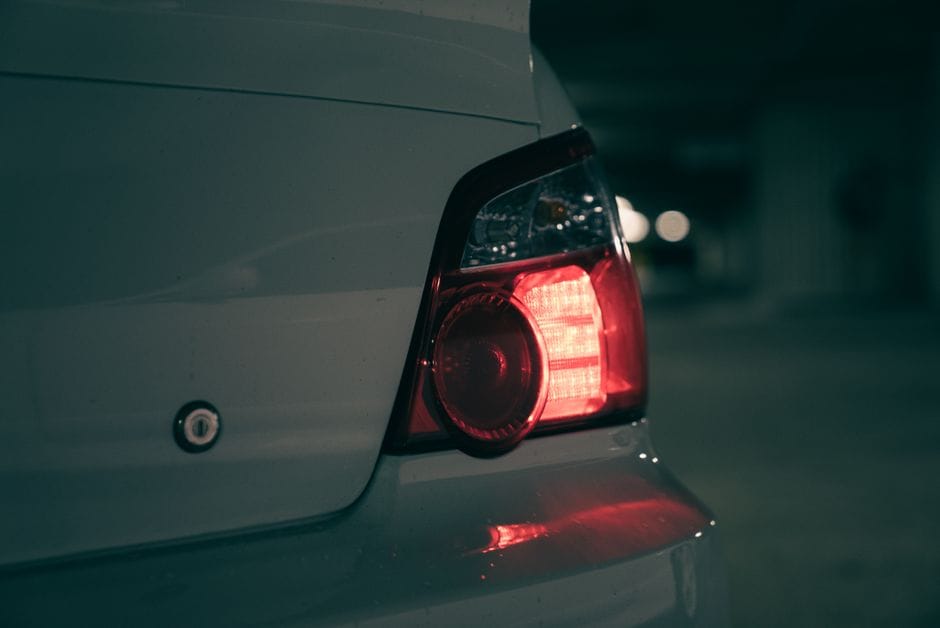
Now that you’ve confirmed the bulb type and socket size, you can start the actual tail light replacement. This procedure works for most vehicles, but the exact steps vary slightly by make and model. Always consult your owner’s manual before starting. If you’re working on a car with a complex housing, the manual will show you the specific access points.
Safety First: Disconnecting the Battery and Cooling Down
Start by turning off the vehicle and removing the key from the ignition. Open the trunk and locate the battery. Disconnect the negative terminal using a wrench. This prevents any electrical shorts while you work. It also stops the car from sensing a faulty bulb and triggering a warning light or, on some modern vehicles, a CAN-bus error that requires a scan tool to clear.
If the vehicle has been running, let the tail light assembly cool down before touching anything. Halogen bulbs operate at high temperatures, and the housing itself absorbs that heat. Give it at least 10-15 minutes. Touching a hot bulb can cause serious burns, and thermal shock from a cold bulb touching a hot socket can crack the glass. This battery disconnect step is non-negotiable for safety, especially if you’re working in a tight trunk space with metal tools.
Accessing the Tail Light: Trunk Panel, Screws, or Retaining Clips
The tail light assembly is mounted from inside the trunk on most vehicles. Open the trunk and inspect the area behind the tail light. You’ll typically find one of three access methods:
– **Trunk panel**: A fabric or plastic cover held in place by push pins or clips.
– **Screws**: Usually Phillips-head or Torx bolts, sometimes hidden behind small plastic covers.
– **Retaining clips**: Plastic fasteners that release with a flathead screwdriver or a trim removal tool.
For a trunk panel, gently pry the push pins out with a trim tool. Work around the perimeter until the panel loosens. Do not yank it, as the clips can break and leave you with a rattling panel. For retaining clips, press the center pin in, then pull the outer ring out. Once the panel is out of the way, you’ll see the back of the tail light housing. Some vehicles require you to remove the entire assembly to access the bulbs, while others have a twist-off socket that comes out without removing the housing. If you’re unsure, check the manual. A tail light replacement on a car with a sealed LED assembly may require full removal, which we cover in the full assembly replacement section.
Removing the Old Bulb: Twisting, Pulling, and Handling Precautions
With the socket exposed, you can remove the old tail light bulb. Most sockets twist counterclockwise about a quarter turn and then pull straight out. Some are held in by a simple friction fit, so they pull straight out with a firm grip. Do not twist a friction-fit socket, as you can break the tabs.
Once the socket is out, the bulb is usually held in place by a small wire clip or a bayonet base. For bayonet bases, push down slightly and twist counterclockwise to release. For wire clips, press the clip ends together and swing it out of the way. Handle the old bulb carefully. If it’s broken, use pliers to grip the base, but avoid shattering the glass further. If the bulb is cracked, wear gloves to protect your fingers from sharp shards. Inspect the socket for corrosion, moisture, or melted plastic. If you see any of these, the problem is likely wiring or a failing housing, not just the bulb. That’s a different repair path than a standard tail light bulb replacement.
Installing the New Bulb: Avoiding Oil Contamination and Proper Seating
Installing the New Bulb: Details
Before installing the new tail light bulb, wipe it clean with a lint-free cloth. The oils from your skin can cause hot spots that shorten bulb life or cause the glass to fail prematurely. Hold the bulb by the metal base or use a clean cloth or gloves. This is especially critical for halogen bulbs, which run hot enough to make oil residue a real problem.
Insert the new bulb into the socket, matching the alignment tabs. Push it in firmly and twist clockwise until it locks. The bulb should seat snugly, not loosely. A loose bulb can vibrate and cause intermittent failures or flickering. For bayonet bases, push down and twist clockwise until the pins drop into the slots. For wedge bases, push straight in until you feel the click of the retaining spring.
Before reattaching the trunk panel, reconnect the battery and test the light. Turn on the headlights, then test the brake lights and turn signals. Have someone stand behind the vehicle or use a mirror to confirm all functions work. If the new bulb doesn’t light, check the socket connections and confirm the bulb is the correct type. If it still fails, the issue is likely wiring or a blown fuse, not the bulb itself. Once confirmed, disconnect the battery again and reattach the trunk panel and any retaining clips. Reconnect the battery one final time and verify everything works. This complete process ensures a clean, safe tail light replacement. If you’re working in a dim garage, a portable work light helps you see the socket clearly — just keep it away from any fuel vapors. For other precision work around your vehicle, a laser level can help align panels or trim, though it’s not needed for this job. Check our [laser engraver safety guide](/laser-engraver-safety-guide) if you’re using any laser tools in your workshop, as the safety principles apply broadly to beam-emitting equipment.
Full Tail Light Assembly Replacement: When and How

When to Replace the Entire Assembly: Cracks, Moisture, and LED Failure
A bulb swap won’t fix a broken housing. You need a full tail light assembly when the lens is cracked, the casing is warped, or moisture ingress has already corroded the internal reflector. A damaged housing lets water reach the electrical contacts, which leads to intermittent failures and short circuits. If you see condensation inside the lens that doesn’t clear after driving, the seal is compromised. Replace the assembly rather than sealing it with caulk — that fix rarely holds up to temperature cycling. LED tail light assemblies also require full replacement because the diodes are sealed into the unit. There are no serviceable bulbs inside. If a single LED section goes dark, you cannot solder in a replacement; the entire assembly must come out.
OEM vs. Aftermarket Assemblies: Quality and Fitment
Your first decision is between an OEM tail light and an aftermarket tail light. The OEM part comes from the vehicle manufacturer’s supply chain. It matches the original fitment exactly, uses the same connector, and carries the same DOT markings. It costs more, but there are no surprises. Aftermarket assemblies are made by third-party manufacturers. Quality varies significantly by brand. A well-made aftermarket tail light uses the same materials and passes the same safety standards, while a cheap one may have thin plastic lenses that yellow quickly or a wiring harness that doesn’t seat properly. For daily drivers, we recommend OEM unless you’re doing a custom build. For older vehicles where OEM parts are discontinued, a reputable aftermarket brand is the practical choice. Check the housing for a DOT or SAE stamp before you buy — if it’s missing, the part may not be street-legal where you live.
Removing the Assembly: Bumper Clearance and Wiring Harness Disconnection
Removing a tail light assembly is straightforward on most vehicles, but the exact steps vary. Common mounting methods include two or three plastic retaining nuts accessible from inside the trunk, or a single bolt plus a locating pin that slides into the body panel. On trucks and some SUVs, the assembly tucks behind the bumper, so you must remove a section of the bumper trim or loosen the bumper bolts to slide the housing out. Never pry the lens with a screwdriver — you’ll crack the plastic. Once the fasteners are out, pull the assembly straight back to expose the wiring harness. Disconnect it by pressing the release tab on the connector and pulling firmly. Do not yank the wires themselves. If the connector is seized, spray it with electrical contact cleaner and work it loose gently.
Pros of Full Assembly Replacement
- Permanently fixes moisture ingress and cracked lenses
- Restores full brightness if the reflector is corroded
- Simpler than rewiring a damaged socket
Cons of Full Assembly Replacement
- Higher part cost than a single bulb
- Fitment varies; cheap aftermarket parts may not align
- Bumper removal needed on some models
Sealing and Alignment: Preventing Future Moisture Ingress
Sealing and Alignment: Details
Before you install the new tail light assembly, inspect the rubber gasket that sits between the housing and the body panel. If it’s compressed or torn, replace it — a new gasket is cheap insurance against moisture ingress. Slide the assembly into place, making sure the locating pins align with the holes in the body. Hand-tighten the retaining nuts or bolts, then torque them to spec if you have the value. Overtightening cracks the housing or strips the plastic threads. After the wiring harness is connected, test every function: tail light, brake light, turn signal, and reverse light. Then spray the seam with a hose to confirm no water leaks inside. If you’re doing custom fabrication work nearby, a laser level helps you check panel alignment, and our guide to [laser engraver accessories](/laser-engraver-accessories-guide) covers tool precision basics that apply to any alignment task. For workshop safety around any beam-emitting tool, review our [laser engraver safety guide](/best-desktop-laser-engravers) as well.
Cost Analysis: Bulb Replacement vs. Assembly Replacement
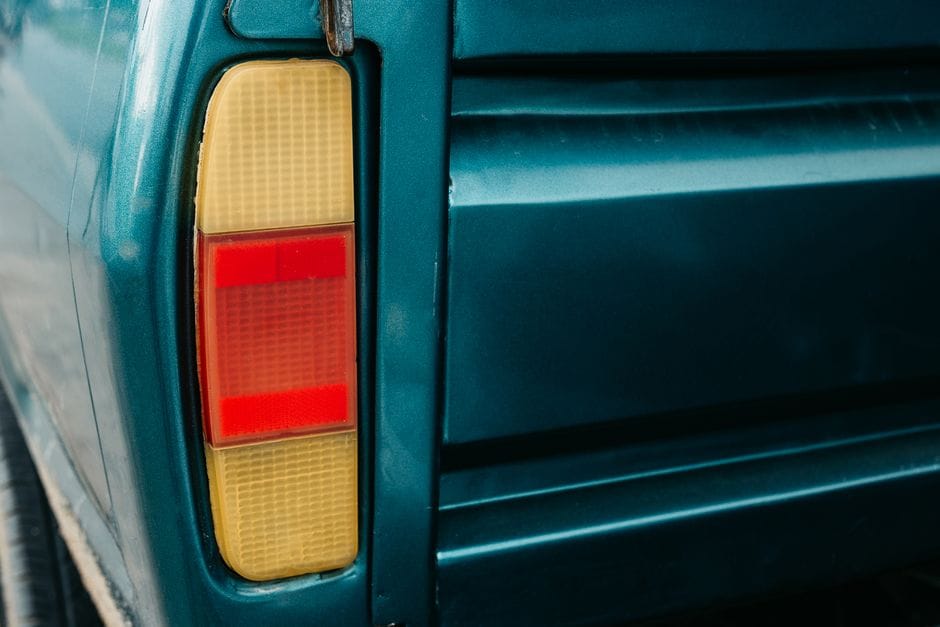
Money drives most tail light replacement decisions, and the gap between a bulb swap and a full assembly install is wider than most owners expect. The tail light replacement cost splits into three buckets: the part, the labor, and the hidden costs like gaskets or corrosion repair. Understanding where each dollar goes helps you avoid overpaying for a simple fix or under-budgeting for a complex one.
Bulb Costs: Budget, Mid-Range, and Premium Options
A single bulb is the cheapest entry point. Budget incandescent bulbs (like a basic 3157) typically run $3 to $8 per bulb at auto parts retailers. Mid-range halogen options sit around $8 to $15, offering slightly brighter output and longer lifespan. Premium LED bulbs jump to $20 to $40 per bulb, but they last significantly longer and produce a crisper light signature.
The catch with LED bulbs is compatibility. Many vehicles use a bulb-out warning system that monitors resistance; an LED draws less power and can trigger a dashboard error or cause hyper-flashing in the turn signal circuit. If you go LED, you may need a load resistor or a CAN-bus-compatible bulb, which adds $10 to $20 to the total. [VERIFY: Current market pricing for common bulb types 3157 and 7443 across major US retailers]
Assembly Costs: OEM Pricing vs. Aftermarket Savings
A full tail light assembly price varies wildly by vehicle. For popular models like the Honda Civic, Toyota Camry, or Ford F-150, OEM assemblies run $150 to $400 per side depending on trim level and features like LED signature lighting. Aftermarket assemblies from brands like TYC, Depo, or Spec-D typically cost $80 to $200 — roughly 40 to 50 percent less than OEM.
The trade-off is fit and finish. OEM vs aftermarket differences show up in panel alignment, gasket quality, and color match. Cheap aftermarket units may fade faster under UV exposure or develop condensation because the seals are thinner. If the car is a daily driver, aftermarket is a reasonable value play. If it’s a newer vehicle under warranty, OEM keeps your coverage intact and guarantees the connector matches. [VERIFY: Current OEM and aftermarket tail light assembly pricing for Honda Civic, Toyota Camry, and Ford F-150]
| Component | Budget Range | Mid-Range | Premium |
|---|---|---|---|
| Incandescent bulb (3157/7443) | $3–$8 | $8–$15 | — |
| LED bulb with resistor | — | $20–$40 | $40–$60 |
| Aftermarket assembly | $80–$120 | $120–$200 | — |
| OEM assembly | — | $150–$250 | $250–$400 |
| DIY labor (your time) | $0 | $0 | — |
| Professional labor | $50–$100 | $100–$200 | $200+ (bumper removal) |
Labor Costs: DIY vs. Professional Installation
Labor is where DIY saves the most. Bulb replacement is a 10-minute job on most vehicles — no special tools beyond a screwdriver or a socket set. If you’re already doing the work described in the Step-by-Step Tail Light Bulb Replacement Procedure above, your labor cost is zero.
Professional installation changes the math. Most shops charge $50 to $100 in labor for a bulb swap, which can double or triple the total cost. A full assembly replacement runs $100 to $200 in labor, and if the bumper needs removal — common on many modern sedans and trucks — that figure climbs past $200. When you compare that against the DIY route, the savings on a full assembly install are substantial enough to justify the hour of work. For a quick reference on tool precision and alignment tasks that come up during installation, our [laser engraver buying guide](/laser-engraver-buying-guide) covers measurement accuracy principles that apply to any workshop setup.
Legal and Safety Compliance: DOT, ECE, and State Regulations
Your tail light replacement must meet legal standards before you even think about aesthetics or performance. In the United States, the Department of Transportation (DOT) sets the baseline for automotive lighting. In Europe and many other markets, the Economic Commission for Europe (ECE) regulations apply. Each system has its own rules, and your state or local jurisdiction can add more.
Color Requirements: Red, Amber, and White Restrictions
The most common legal trap in tail light replacement is color. Federal Motor Vehicle Safety Standard (FMVSS) 108 governs lighting in the U.S., and it is strict about hues. Your tail lamps must emit red light to the rear. Turn signals must be amber or red, depending on the vehicle’s original design. Reverse lights must be white. You cannot install a clear or smoked lens that alters the perceived color of the bulb, even if the bulb itself is red. Many aftermarket “smoked” or “tinted” assemblies fail this test because they dim the red output below acceptable levels. If you install a lens that changes the color appearance, you are legally non-compliant, regardless of how the vehicle looks.
Brightness and Visibility Standards
DOT compliance also covers how much light your tail light must emit and from what angle. The standard requires a minimum luminous intensity so other drivers can see your vehicle at night and in poor weather. It also specifies the minimum distance at which your tail light must be visible — typically 500 feet for tail lamps and 300 feet for stop lamps. ECE regulations set similar but not identical thresholds, often measured in candela. [VERIFY: Current DOT and ECE luminous intensity minimums for tail and stop lamps in candela/lux]. If you replace a bulb with a dimmer aftermarket unit, you may fall below the legal floor even though the light “works.” That is a safety hazard and a citation risk.
Aftermarket LED Conversions: Legal Gray Areas
LED conversions sit in a complicated space. A drop-in LED bulb that matches the correct color and brightness can be legal, but the housing matters. The reflector and lens in a halogen tail light are designed for a specific light source. An LED bulb has a different emission pattern, which can create dark spots or glare. DOT compliance for LED tail light replacements often depends on whether the assembly is certified as a complete unit, not just the bulb. [HUMAN INPUT NEEDED: Research current FMVSS 108 and ECE R4 stance on retrofitting LED bulbs into halogen-tailored housings]. Some states have their own rules that go beyond federal standards, so check your local vehicle code before purchasing. When in doubt, an assembly that carries DOT or SAE certification marks is the safer choice for legal compliance. If you are working with precision tools during installation, our [laser engraver safety guide](/laser-engraver-safety-guide) covers measurement accuracy that applies to alignment work.
Decision Framework: Choosing Between Bulb, LED Upgrade, or Full Assembly
By this point in the tail light replacement guide, you have the diagnosis and the cost picture. Now you need a decision guide that turns that information into a clear choice. The right move depends on your budget, your vehicle’s condition, and how long you plan to keep the car. Use the scenarios below to match your situation to the best fix.
If You Need Quick, Legal Fix: Standard Bulb Replacement
This is the default choice for most drivers. A standard incandescent or halogen bulb is cheap, widely available, and takes about fifteen minutes to install. If your tail light is dim or dead but the housing is clear and undamaged, a direct bulb swap restores legal compliance immediately. This option makes sense when you are facing a fix-it ticket or preparing for a safety inspection. It is also the lowest-risk choice for older vehicles where the wiring harness may be fragile. Stick with the wattage and bulb type listed in your owner’s manual. A mismatched bulb can overload the circuit or produce the wrong color temperature.
If You Want Longevity and Modern Look: LED Bulb Upgrade
An LED upgrade is a smart investment if you are tired of replacing bulbs every year. LEDs last significantly longer than incandescent bulbs and light up faster, which gives following drivers more reaction time. The modern appearance is a bonus, but the durability is the real value. Before you buy, confirm the LED bulb is CANbus-compatible if your vehicle uses bulb-out warning systems. Many newer cars monitor bulb resistance and will trigger a dashboard error if the LED does not match the expected load. You may need a load resistor or a decoder module. Also, verify the LED produces the correct color and brightness for your region. As covered in the legal section, a certified complete assembly is safer than a bare bulb retrofit.
If the Housing Is Damaged: Full Assembly Replacement
Cracked lenses, broken mounting tabs, or water intrusion all point to one conclusion: replace the entire tail light assembly. Sealing a cracked housing with tape is a temporary measure that fails quickly. Moisture will reach the bulb sockets and corrode the contacts, turning a simple fix into a wiring repair. A new assembly includes the housing, lens, and often the bulb sockets, so you restore the factory seal and fitment. This is also the right path if the reflector surface has clouded or peeled. No amount of bulb replacement will fix a degraded reflector because the light output depends on that optical surface.
If You Drive in Harsh Conditions: Sealed Assembly with Premium Bulbs
Towing, off-road use, and extreme weather punish tail lights. If you drive in these conditions, pair a new sealed assembly with premium bulbs rated for vibration and temperature extremes. A sealed assembly prevents moisture ingress, which is the leading cause of premature bulb failure. Premium bulbs use heavier filaments and better gas mixtures to survive the shock of rough roads. This combination costs more upfront but reduces the chance of a roadside failure. If you also work with precision equipment in your garage, you may find the measurement principles in our [laser engraver comparisons](/laser-engraver-comparisons) useful for other projects.
Decision Summary
Choose a standard bulb when the housing is intact and you need a fast, cheap fix. Choose an LED upgrade when you want longevity and a modern look, but confirm compatibility with your vehicle’s electrical system. Choose a full assembly when the housing, lens, or reflector is damaged. Choose a sealed assembly with premium bulbs when you drive in harsh conditions and need maximum reliability.
Limitations and What Tail Light Replacement Cannot Fix
Replacing a bulb or assembly is a straightforward fix, but it is not a cure-all. Several electrical and structural faults mimic the symptoms of a dead bulb. If you install a new part and the light still fails, the problem sits deeper in the vehicle. Understanding these tail light replacement limitations saves you from buying parts you do not need.
Wiring Shorts and Corrosion: When Replacement Isn’t Enough
A wiring short or corroded connector produces the same symptom as a burned-out bulb: no light. The difference is that a new bulb will not solve it. Corrosion builds up inside connectors, especially in regions where roads are salted in winter. The green or white crust acts as an insulator, blocking current flow.
Check the wiring harness leading to the tail light before you condemn the assembly. Look for frayed insulation, melted plastic, or visible copper. A multimeter set to continuity mode tells you if power reaches the socket. If it does not, you are chasing a wiring issue, not a tail light replacement problem. Repairing a short means cutting out the damaged section and soldering in a new wire, or replacing the entire harness section.
BCM (Body Control Module) Failures: The Hidden Culprit
Modern vehicles route tail light power through the Body Control Module. This computer controls lighting, wipers, and power windows. When the BCM fails, it can cut power to specific outputs while everything else works. A BCM failure often shows up as multiple lights failing at once, or lights behaving erratically — flickering, staying on, or refusing to turn off.
Diagnosing a BCM issue requires a scan tool that reads manufacturer-specific codes. A generic OBD-II scanner may not show these faults. If you have confirmed the bulb is good, the socket is clean, and power arrives at the connector, the BCM is the next suspect. Replacing a BCM is not a DIY-friendly job. It requires programming to match the vehicle’s VIN, which typically means a dealership or a specialized automotive locksmith. [VERIFY: typical BCM replacement labor hours for a mid-size sedan]
Aftermarket Fitment Issues: Gaps and Water Leaks
Aftermarket assemblies are not always identical to factory parts. Molding tolerances vary between manufacturers. A cheap aftermarket tail light may leave a visible gap against the body panel, or the gasket may not seat flush. These gaps are not cosmetic problems — they let water and road grime into the housing.
Water intrusion causes three failures: fogged lenses, corroded sockets, and premature bulb burnout. If you installed an aftermarket assembly and see moisture inside after a rain, the seal is failing. Some assemblies use a foam gasket that compresses unevenly. You can try adding butyl tape around the perimeter, but a poor-fitting housing often needs replacement with a better brand or an OEM part.
What Tail Light Replacement CAN Fix
- Burned-out bulbs with intact sockets
- Cracked lenses that let in moisture
- Clouded or yellowed plastic housings
- Failed filaments in halogen or incandescent bulbs
What It CANNOT Fix
- Wiring shorts and corroded connectors upstream of the socket
- BCM failures that cut power to the lighting circuit
- Poor aftermarket fitment causing water leaks and gaps
- Damaged reflectors that scatter light instead of directing it
If you suspect a wiring issue, test the circuit before ordering parts. If your vehicle has multiple lighting faults at once, suspect the BCM. And if you are troubleshooting precision equipment in your shop, the diagnostic approach in our [laser engraver troubleshooting guide](/laser-engraver-troubleshooting) follows the same logic — isolate the power source before replacing the component.
Frequently Asked Questions (FAQ)
Can I replace just the tail light bulb or do I need the whole assembly?
In most cases, you can replace just the bulb. If the housing is intact, the lens is clear, and there is no moisture inside, a burned-out bulb is the only issue. You access the socket from behind the housing, twist it out, and swap the bulb. You need the whole assembly when the housing is cracked, the lens is broken, or the reflector has corroded. Also, replace the assembly if the socket itself is melted or the wiring harness connector is damaged. Forcing a new bulb into a corroded socket leads to another failure soon after.
How long does a tail light bulb last?
Tail light bulb lifespan depends on the type. Standard incandescent bulbs typically last between 1,000 and 2,000 hours of use. Halogen bulbs run slightly longer, often reaching 2,000 to 3,000 hours. LED bulbs are in a different category entirely — manufacturers rate them for 25,000 to 50,000 hours or more. In practical terms, an incandescent bulb used for daily commuting may need replacement every one to two years. An LED bulb can outlast the vehicle itself. [VERIFY: typical incandescent tail light bulb lifespan in hours from a named manufacturer like Sylvania or Philips]
Are LED tail light bulbs legal in all states?
LED tail light legality is not uniform across the country. Federal DOT standards set the baseline, but each state can enforce its own rules on color, brightness, and flash patterns. Most states allow LED bulbs that emit red light from the rear, but some have restrictions on brightness levels. A few states require a specific light output or beam pattern that certain aftermarket LED bulbs do not meet. Before you swap, check your state’s vehicle code. Also, LED tail light legal compliance matters for inspection — many states fail vehicles with bulbs that are too bright or the wrong color temperature.
Why does my tail light keep burning out?
If your tail light keeps burning out, the bulb is rarely the root cause. Common culprits include vibration from a loose housing, voltage spikes from a failing alternator, or a poor ground connection. Corrosion in the socket also shortens bulb life by creating resistance and heat. Check the socket for green or white deposits. Also, inspect the wiring harness for chafed insulation that could cause intermittent shorts. If you use cheap bulbs, they may have shorter rated lifespans. One long-term owner found that replacing the socket assembly solved a recurring burnout problem that new bulbs never fixed.
Can I use clear tail light lenses?
Clear tail light lenses are legal in most states, but only if the bulb behind them emits the correct color. A clear lens with a red bulb is generally acceptable. A clear lens with a white bulb is not — white light to the rear is reserved for reverse lights. Some states have specific requirements about lens color, so check local regulations. Also, clear lenses often come as part of aftermarket assemblies with LED bulbs. Make sure the assembly is DOT-compliant if you intend to drive on public roads. For the full picture on lighting regulations, review the legal compliance section above in this guide.
Frequently Asked Questions
Can I replace just the tail light bulb or do I need the whole assembly?
[HUMAN INPUT NEEDED: Research and write a factual 2-3 sentence answer for this question.]
How long does a tail light bulb last?
[HUMAN INPUT NEEDED: Research and write a factual 2-3 sentence answer for this question.]
Are LED tail light bulbs legal in all states?
[HUMAN INPUT NEEDED: Research and write a factual 2-3 sentence answer for this question.]
Why does my tail light keep burning out?
[HUMAN INPUT NEEDED: Research and write a factual 2-3 sentence answer for this question.]
Can I use clear tail light lenses?
[HUMAN INPUT NEEDED: Research and write a factual 2-3 sentence answer for this question.]
Final Verdict: Choosing the Right Tail Light Replacement for Your Vehicle
Tail light replacement is a straightforward maintenance task that hinges on one central entity: the tail light assembly itself. Whether you are addressing a single burnt-out bulb, a cracked housing, or upgrading to modern LED technology, the core attributes to evaluate are fitment compatibility, light output type, build material, and legal compliance (SAE/DOT certification). Understanding how these attributes interact with your vehicle’s specific year, make, and model is the difference between a 20-minute fix and a recurring headache.
For most drivers, our top recommendation is a direct OEM-replacement halogen assembly from a reputable brand like TYC or Depo. We choose this because it offers the highest certainty of fitment, uses the exact same connector and mounting points as your factory unit, and guarantees legal compliance without the risk of hyper-flashing or error codes. The materials—typically durable polypropylene or ABS plastic—provide the same impact resistance as stock, and the price point remains accessible for most budgets. This option delivers the most balanced blend of reliability, cost, and simplicity for the average vehicle owner.
Decision Framework: Match Your Need to the Right Option
Decision Framework: Details
If you need the cheapest functional fix for a single burnt-out bulb, choose a direct replacement bulb (like an 1157 or 3157) because it restores full function without replacing the entire housing.
If you need maximum brightness and longevity, choose an LED tail light assembly because it offers faster illumination response times and a lifespan of 25,000+ hours versus halogen’s 1,000–2,000 hours.
If you need a custom or aggressive aesthetic, choose a smoked or euro-style aftermarket assembly because it provides a distinctive look, but verify it retains adequate light output for nighttime visibility.
If you need guaranteed legal compliance for a vehicle inspection or commercial use, choose an OEM or SAE/DOT-certified replacement because it eliminates any risk of citation or failed inspection.
If you need to address moisture buildup or cracked lenses, choose a full assembly replacement because resealing a damaged housing is rarely effective long-term.
We must be honest about the limitations of our top pick. A halogen OEM-replacement assembly cannot deliver the energy efficiency or instant-on response of an LED unit, and it will not provide the modern styling cues that many drivers want. If you are specifically seeking a 50% reduction in power draw or a distinctive sequential turn signal effect, the halogen option will not satisfy those requirements—you will need to invest in a higher-tier LED system, often with load resistors to prevent hyper-flashing.
Before you purchase, confirm your vehicle’s exact bulb size and assembly part number using your VIN, and always verify that the replacement matches your existing connector type. If you are replacing a single bulb, consult your owner’s manual for the correct wattage; if you are replacing an assembly, check for integrated backup sensors or blind-spot monitors that may need to be transferred. Start with the simplest repair that meets your needs, and upgrade only when your requirements demand it.