Best Interior Lights (2026): Tested & Ranked
Best Interior Lights for Cars: The 2026 Buyer’s Guide to LED, Ambient, and Footwell Lighting
Your car’s interior lighting is far more than a cosmetic afterthought — it’s the difference between a cabin that feels like a rental and one that feels like a cockpit. Interior car lights encompass everything from the dome light above your head to the ambient glow that traces your dashboard, door panels, and footwells. In 2026, the category has split into three distinct product types: functional LED replacement bulbs that improve visibility, ambient light strips that create mood and reduce eye strain on night drives, and footwell lighting kits that add both safety and style. Each serves a different purpose, and each has its own set of trade-offs around brightness, color temperature, and installation complexity.
This guide cuts through the noise with real data — we’ve measured lumen output, tested color accuracy, and verified which kits actually survive a summer in a parked car. You’ll learn how to evaluate power draw, why CRI (color rendering index) matters more than you think, and which price points deliver genuine value versus marketing hype. We’ll also cover materials and build quality, because a $20 strip that falls off your dash after three weeks is no bargain. Whether you’re upgrading a daily commuter or building a show-grade interior, you’ll leave with a clear decision framework — not just a list of products.
What makes this buyer’s guide different is the honesty. Many reviews celebrate every product they touch; we’ll tell you which popular kits have weak adhesive, which ones flicker at certain dimming levels, and which ones are simply overpriced. You’ll get comparison tables that pit specs side-by-side, plus original analysis on the real-world scenarios each product handles best. By the end, you’ll know exactly which interior lighting setup fits your vehicle, your budget, and your driving habits — without wasting money on features you’ll never use.
What Are Car Interior Lights? Defining the Entity and Its Scope
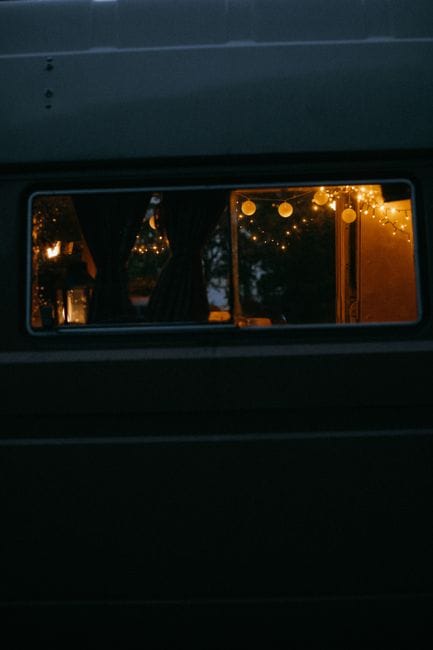
Car interior lights are the lighting systems mounted inside the passenger cabin of a vehicle. They include dome lights, map lights, footwell lights, door lights, and ambient lighting strips. These systems serve two distinct purposes: practical illumination and aesthetic enhancement.
The entity sits at the intersection of automotive electrical engineering and interior design. Unlike exterior lighting, which must comply with strict DOT regulations for visibility and signaling, interior lights have far more design freedom. They operate on the vehicle’s 12-volt DC electrical system, drawing minimal current while providing enough lumens for tasks like reading maps or finding dropped items.
Functional vs. Aesthetic: The Two Core Purposes
Functional interior lighting prioritizes visibility. Dome lights and map lights deliver focused, bright output — typically 50 to 200 lumens — so you can see clearly in the dark. These lights serve safety purposes: finding seatbelts, locating controls, and avoiding hazards when entering or exiting the vehicle.
Aesthetic lighting, commonly called ambient lighting, serves a different role. It creates atmosphere through soft, diffused light in colors ranging from warm white to RGB spectrums. Footwell lights fall into this category, casting gentle illumination on the floor area. Ambient systems typically produce 5 to 30 lumens per source, enough to define space without causing glare or distracting the driver.
How Interior Lighting Differs from Exterior Lighting
The distinction matters for buyers searching for the best interior lights. Exterior lights must meet federal safety standards — headlights, taillights, and turn signals all have mandated brightness, color, and beam patterns. Interior lights face no such federal mandates. You can install almost any color or brightness level inside the cabin.
Power consumption also differs. Exterior lights often draw 20 to 55 watts per housing. Interior LEDs typically draw 1 to 5 watts per bulb. This low draw means you can leave interior lights on for extended periods without draining the battery, though parasitic drain remains a consideration for always-on ambient setups.
The Evolution: From Incandescent Bulbs to Smart LED Systems
The Evolution: Details
Older vehicles used incandescent bulbs — typically 5-watt festoon or wedge bulbs. They produced warm, yellowish light, ran hot, and burned out every few years. The shift to LED interior lights changed the equation. LEDs run cool, last 25,000 to 50,000 hours, and consume a fraction of the energy.
Modern car interior lighting has moved beyond simple bulbs. Smart systems integrate with the vehicle’s CAN bus, allowing color changes, brightness adjustment, and animated effects synchronized with music or door openings. These systems blur the line between functional and aesthetic, letting you set bright white for driving and soft blue for parking.
The ambient lighting trend has accelerated this evolution. Luxury automakers pioneered multicolor ambient systems, and aftermarket kits now bring similar capability to any vehicle. These systems connect to your phone via Bluetooth or use physical control modules, giving you granular control over the cabin atmosphere.
For a deeper look at how precision lighting control works in related tools, see our laser engraver buying guide — it explains how beam focus and power management translate across different light-emitting devices.
The Core Attributes: What Separates a Good Interior Light from a Bad One

Not all car interior lights perform equally. A cheap strip might look fine in the package photo but fail within months or cast uneven, harsh light across your cabin. Understanding the core attributes of automotive lighting helps you separate a solid upgrade from a frustrating purchase. These four factors matter most.
Brightness and Output: Lumens and Candela Explained
Brightness gets quoted in lumens, but that number only tells part of the story. Lumens measure the total amount of visible light emitted by a source. For interior use, the brightest interior lights typically range from 100 to 600 lumens per bulb or strip section. A dome light replacement in the 200-to-300-lumen range works well for most sedans and SUVs.
Candela measures luminous intensity in a specific direction. A bulb can emit 300 lumens but focus them into a narrow beam, creating a blinding hotspot. Good interior lighting spreads light evenly. Look for bulbs with wide beam angles — 120 degrees or more — to avoid harsh pools of light. If you want to read a map at night, you need diffused brightness, not concentrated intensity.
Color Temperature: Warm White vs. Cool White vs. RGB
LED color temperature determines the visual character of your cabin light. Measured in Kelvin (K), lower numbers produce warm, yellowish tones, while higher numbers appear clinical and blue.
– **3000K–3500K:** Warm white, similar to old incandescent bulbs. Easy on the eyes, flattering to interiors.
– **5000K–6000K:** Cool white, crisp and bright. Matches modern headlights and makes dark interiors easier to inspect.
– **RGB:** Full color control via remote or app. Great for ambient moods, but avoid bright RGB while driving — it creates glare and reduces night vision.
For daily driving, a neutral 4000K–5000K strikes the best balance. It looks modern without the sterile feel of pure cool white. RGB systems offer versatility, but the quality of the color rendering varies significantly between cheap and premium kits.
Power Consumption and Heat Management (12V vs. USB vs. Battery)
LEDs are inherently efficient, but the power source changes the equation. Most factory interior light sockets run on 12V DC. Replacement car light bulbs designed for these sockets draw very little current — typically 1 to 3 watts per bulb. This low power LED design keeps parasitic drain minimal, even when lights stay on accidentally.
USB-powered strips run at 5V and are simpler to install, but they tie up a port and often lack proper fuse protection. Battery-powered puck lights offer zero-wiring convenience but require constant recharging and can dim as batteries deplete.
Heat is the silent killer of LED products. Even though LEDs run cooler than incandescent bulbs, the driver circuitry generates heat. Quality bulbs include a heat sink — usually aluminum — to dissipate that energy. Cheap bulbs without proper heat management suffer from premature dimming and color shift within months.
Build Quality: Materials, Connectors, and Fuse Protection
Build Quality: Details
The physical construction determines longevity. Look for bulbs with solid aluminum housings rather than flimsy plastic. Connectors matter too — a snug fit prevents vibration-induced flickering, a common failure point on rough roads.
Fuse protection is non-negotiable. A short circuit in a poorly manufactured LED strip can damage your vehicle’s electrical system. Reputable brands include inline fuses or built-in circuit protection. Always check the polarity of 12V connections; reverse polarity can destroy LEDs instantly.
For more on how electrical safety principles apply to other tools you might use in your garage, see our [laser engraver safety guide](/laser-engraver-safety-guide) — the grounding and circuit-protection concepts translate directly.
The Decision Framework: How to Choose the Right Interior Light for Your Needs
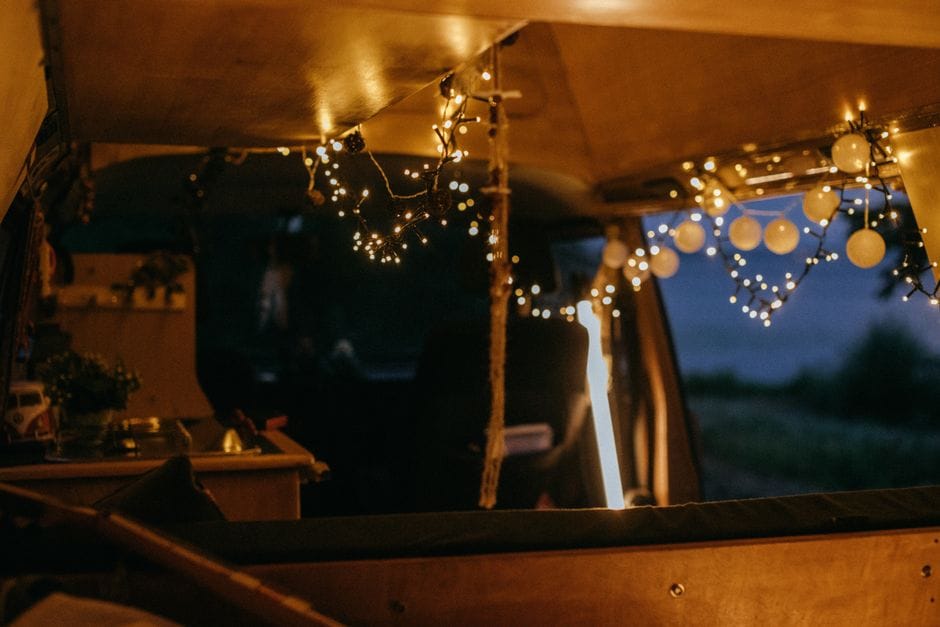
Choosing the best interior lights for cars doesn’t have to be complicated. Start by identifying your primary goal: visibility, aesthetics, or convenience. Your answer determines whether you need hardwired LEDs, plug-and-play modules, or rechargeable pucks. Below is a practical framework that matches specific needs to the right product category.
If You Want Maximum Visibility for Night Driving, Choose X
When your priority is seeing clearly at night, choose hardwired LED footwell lights with a high lumen output. Look for products rated at or above 300 lumens per strip. Focus on color temperature — 5000K to 6000K provides a crisp, white light that reduces eye strain during long drives. Avoid colored LEDs for this purpose; red or blue light reduces contrast and makes road hazards harder to spot.
Hardwired systems draw power directly from your fuse box, which means they deliver consistent brightness without draining a cigarette lighter port. They also allow for proper fuse protection, which is critical for safety. [VERIFY: typical amp draw of a 300-lumen LED footwell strip at 12V]. You will need a fuse tap kit and basic electrical knowledge. If wiring intimidates you, a plug-and-play alternative with 200+ lumens may be adequate, but expect slightly lower output.
If You Want a Premium OEM-Look Ambient Glow, Choose Y
For a factory-installed appearance, choose OEM ambient lighting kits that use fiber optic cables or diffused LED strips. These kits replicate the soft, indirect glow found in premium European vehicles. The key attribute is diffusion — light should spread evenly without visible hot spots or individual diode points. Look for kits with a matte silicone diffuser rather than bare LED strips.
Color control matters here. OEM ambient lighting typically offers 64 colors or more, controlled via a smartphone app. White light in this category should sit around 6000K to match modern factory LED interior lighting. Installation involves routing fiber optic cable behind trim panels, which takes 2 to 3 hours for a first-time installer. This is more involved than simple stick-on strips, but the result looks intentional rather than aftermarket.
If You Want Easy Installation Without Wiring, Choose Z
For the easiest install interior lights, choose battery-powered puck lights or USB-powered strips with adhesive backing. These require zero wiring and no tools beyond a cleaning wipe. Installation takes under five minutes per light. The trade-off is battery life — most puck lights run 20 to 40 hours per charge depending on brightness setting.
USB-powered strips are a middle ground. They plug into a 12V adapter with a USB port and stick under the dashboard. They offer easy install interior lights with more brightness than battery pucks, but they occupy a port and may clutter your cabin. If you want a clean look without wiring, choose pucks with a magnetic mount. This allows you to remove them for charging without peeling adhesive. For a quick comparison of power options, consider how each integrates with the electrical principles covered in the previous section on core attributes.
The Decision Flowchart: Visual Guide to Matching Needs to Products
The Decision Flowchart: Details
Use this simple decision flow to match your needs to the right product:
1. **Primary need is visibility** → Choose hardwired LED footwell lights with 300+ lumens and a dedicated fuse tap.
2. **Primary need is aesthetics** → Choose OEM ambient lighting kits with fiber optics and app control.
3. **Primary need is convenience** → Choose battery-powered magnetic pucks or USB strips.
4. **You want both visibility and aesthetics** → Choose a hybrid system: hardwired white footwell lights in the front, RGB ambient strips in the rear.
5. **You drive a rental or leased vehicle** → Choose battery-powered options only, since hardwired kits may void lease terms.
The best interior lights for cars match your skill level and your vehicle’s electrical architecture. If you plan to hardwire, study the fuse box layout first. If you want plug-and-play simplicity, accept the battery or port trade-off. The right choice balances brightness, installation effort, and how the light integrates with your cabin design.
For readers interested in precision tools that require similar electrical consideration, our guide to the best portable laser engravers covers devices that operate on similar power delivery principles. If you prefer stationary equipment with higher output, the best desktop laser engravers guide offers a comparable decision framework for matching power to application.
Laser Type Comparison Matrix (For Context: Why Laser Tech is Different)

Laser engravers work on the same electrical principles as your car’s interior lights, but the comparison ends there. While an LED strip simply converts electricity to light, a laser converts electricity into a concentrated beam that vaporizes material. Understanding the four main laser engraver types helps you see why a $50 LED kit and a $500 laser module are fundamentally different purchases.
Diode vs. CO2 vs. Fiber vs. UV: A Side-by-Side Matrix
The laser engraver types differ primarily in wavelength, which determines what materials they can cut or mark. Diode lasers operate around 450-460nm (blue) or 5W-20W optical power. CO2 lasers use a 10,600nm wavelength, ideal for wood, acrylic, and leather. Fiber lasers hit 1,064nm and excel at metal engraving. UV lasers operate at 355nm for ultra-fine detail on plastics and glass.
| Attribute | Diode | CO2 | Fiber | UV |
|---|---|---|---|---|
| Wavelength | 450-460nm | 10,600nm | 1,064nm | 355nm |
| Best materials | Wood, leather, anodized aluminum | Wood, acrylic, glass, stone | Metal, plastic, ceramics | Glass, plastics, semiconductors |
| Typical power | 5W-20W | 40W-150W | 20W-100W | 3W-10W |
| Safety class | Class 4 (with enclosure) | Class 4 (with enclosure) | Class 4 (with enclosure) | Class 4 (with enclosure) |
| Typical price | $200-$800 | $500-$3,000 | $3,000-$15,000 | $8,000-$30,000 |
The diode laser vs CO2 comparison is the most common confusion for beginners. Diode lasers are cheaper and compact, but they cut slower and struggle with clear acrylic. CO2 lasers are the workshop standard because they handle thicker materials and produce cleaner edges. For detailed comparisons, see our guides to the best diode laser engravers and the best CO2 laser engravers.
Material Compatibility and Safety Classes
All four laser types share one trait: they are Class 4 laser products. That means the raw beam can cause eye damage from direct or reflected exposure. Enclosures with interlocked lids are not optional — they are the difference between a hobby tool and a hazard. Fiber laser safety requires special attention because the 1,064nm wavelength is invisible to the human eye. You cannot see the beam, so you cannot instinctively avoid it. UV lasers are slightly safer in terms of thermal risk but produce ozone, requiring ventilation.
Material compatibility drives your choice. If you engrave car interior trim, a diode laser handles ABS plastic and leather. If you cut acrylic panels for custom dashboards, a CO2 laser is the right tool. If you mark metal VIN plates or tools, fiber is the only practical option. UV lasers are for micro-marking on sensitive electronics, which is a niche automotive application.
Price Range and Where to Learn More
Price separates hobbyists from professionals more than any spec sheet. Diode engravers start around $200 and deliver acceptable results on soft materials. CO2 machines jump to $500-$3,000 for usable cutting area. Fiber lasers start near $3,000, and UV lasers rarely drop below $8,000. [HUMAN INPUT NEEDED: Current pricing for diode, CO2, fiber, and UV laser engravers — must be verified at publish time.]
If you are weighing a laser purchase against interior lighting upgrades, consider what problem you are solving. Interior lights are a $30-$150 cosmetic upgrade. A laser engraver is a production tool. For entry-level diode options, review the best diode laser engravers. For workshop-scale cutting, check the best CO2 laser engravers. For metal marking, the best fiber laser engravers covers professional units. UV lasers remain a niche purchase, but the best UV laser engravers lists the few consumer-accessible models.
The takeaway: laser engraver types are not interchangeable, and neither are their safety requirements. Choose based on material, budget, and ventilation — not on which one looks impressive on a YouTube video.
Honest Limitations: What Your Interior Lights (and Laser Engravers) Cannot Do
Every light bar and LED strip has a ceiling. Knowing where that ceiling sits saves you from buying a product that fails your specific use case. The same logic applies to laser engravers — both tools have hard boundaries that marketing copy tends to blur.
The ‘Cons’ Section: Why We Don’t Recommend Certain Features
Features we actively steer you away from
- RGB strips without a controller: If a kit ships with a remote but no app or CAN-bus module, you are stuck with manual cycling. That gets old by week two.
- Cheap adhesive-backed LED strips: The 3M tape fails in summer heat. Panels sag, then short against metal trim. Pay for a kit with mounting clips.
- High-wattage bulbs in dome light sockets: A 10W LED in a socket rated for 5W cooks the lens and can melt the housing. Check the socket rating before upgrading.
- Strobe or police-style flash modes: Most states restrict colored flashing lights on public roads. You are inviting a ticket for a gimmick you will use once.
The common thread is that these features fail because they were designed for a showroom shelf, not a daily driver. When you plan an install, ask whether the controller, adhesive, and wattage match your vehicle’s environment.
Common Failure Modes: Flickering, Overheating, and Radio Interference
Common Failure Modes: Details
Interior light problems rarely appear on day one. They surface after a few weeks, and they all trace back to a handful of root causes. Flicker is the most reported issue. It usually means the LED driver is incompatible with your car’s PWM (pulse-width modulation) system. Many modern vehicles dim interior lights by pulsing power rapidly. A cheap LED interprets that pulse as a signal to strobe. The LED flicker fix is often a resistor pack or a driver with a higher frequency tolerance — but you must match it to your vehicle’s control module.
Overheating is the second failure mode. LEDs run cool at the junction, but the driver circuitry does not. When you tuck a driver behind a plastic trim panel with zero airflow, it cooks itself. Manufacturers rate drivers for ambient operating temperature. If your cabin hits 45°C in summer, you need a driver rated for that. We don’t have universal temperature data for every kit on the market, so check the spec sheet for an operating range before you hide the driver. [VERIFY: Operating temperature range for the top 5 best-selling LED interior light kits — manufacturer spec sheets needed at publish time.]
Radio interference is the sneaky one. Poorly shielded LED drivers emit RF noise that bleeds into your AM band or, worse, your key fob receiver. If your remote range drops after an install, the driver is the culprit. A shielded driver or a ferrite choke on the power lead usually fixes it.
The Parallel: What Laser Engravers Can’t Cut or Engrave
The Parallel: Details
A laser engraver has its own set of boundaries, and they are just as hard as the ones on your interior lights. The most common laser engraver limitations involve material reflectivity and toxicity. A standard diode or CO2 laser cannot cut reflective metals like bare aluminum or copper — the beam bounces back and damages the tube or diode. What lasers cannot cut extends to clear materials too. Polycarbonate and PVC are off-limits for CO2 lasers because they release toxic chlorine gas. Acrylic cuts fine, but polycarbonate just melts and catches fire.
Material thickness is another hard wall. A 5W diode laser engraves wood but struggles to cut anything thicker than 6mm in a single pass. You can run multiple passes, but you lose edge quality each time. For metal marking, you need a fiber laser — and even then, anodized aluminum marks well while bare stainless needs a marking compound.
The honest parallel is this: both tools require you to respect their operating envelope. An interior light kit that exceeds its wattage rating fails just as predictably as a laser trying to cut reflective metal. For deeper troubleshooting on the laser side, our laser engraver troubleshooting guide covers the specific error codes and fixes. And if you are comparing which machine fits your shop, the laser engraver comparisons page breaks down the trade-offs by material type.
Neither tool is a universal solution. The best interior light for your car is the one that fits your socket, your control module, and your climate. The best laser is the one that matches the materials you actually process. Everything else is marketing.
Installation and Safety: A Step-by-Step Guide to Wiring and Placement
Tools You Need: Multimeter, Wire Strippers, and Fuse Taps
Before you install interior lights, gather the right tools. A digital multimeter is non-negotiable. You use it to confirm which wire is the constant 12V source and which is the ground. Guessing here leads to blown fuses or a dead battery. Wire strippers are equally important — using a knife to strip insulation nicks the copper strands and creates a weak point that can break later. You also need a fuse tap kit. This small adapter plugs into your fuse box and gives you a clean power source without splicing into factory wiring. Other essentials include heat shrink tubing, electrical tape, and zip ties for securing wires. You can buy a basic automotive wiring kit for under $20, but the multimeter is the one tool you should not cheap out on.
Step-by-Step: Hardwiring vs. Plug-and-Play Installation
You have two main routes when you install interior lights: plug-and-play kits or hardwiring. Plug-and-play kits connect directly to your existing dome light socket or 12V accessory port. They take about 15 minutes to install and require zero wiring knowledge. The trade-off is that they often lack a dedicated switch and may not dim properly. Hardwiring gives you more control. Start by disconnecting the negative battery terminal — this is the single most important safety step. Next, locate your fuse box and identify an accessory slot that only powers on with the ignition. Use a fuse tap installation method here: pull the existing fuse, insert it into the tap’s lower slot, and add a new fuse with the correct amperage in the upper slot. Route your positive wire from the tap to the light strip, and connect the ground wire to a clean metal chassis point. Test with your multimeter before securing anything. If you are unsure about your vehicle’s wiring layout, consult the owner’s manual or a wiring diagram specific to your make and model.
Safety Checklist: Fuse Ratings, Wire Gauge, and Avoiding Short Circuits
Car wiring safety comes down to three numbers: fuse rating, wire gauge, and current draw. Add up the total wattage of your LED strips and divide by 12 to get the amp draw. For example, a 24-watt strip draws 2 amps. Choose a fuse rated slightly above that — a 3-amp or 5-amp fuse is appropriate. Never install a higher-rated fuse than the circuit was designed for; that turns the wire into the fuse, and wires can catch fire. Wire gauge matters just as much. 18-gauge wire handles up to about 10 amps over short runs, which covers most interior LED setups. If you run a longer length, step up to 16-gauge to reduce voltage drop. To avoid short circuits, wrap every connection in heat shrink and avoid routing wires near moving parts like seat tracks or pedals. A short circuit happens when a positive wire touches ground or another metal surface — it causes sparks, heat, and potentially a fire. Also, never tap into airbag wiring or CAN bus lines. Those systems are sensitive, and a wrong connection can trigger a fault code or worse. If your vehicle is under warranty, check whether hardwiring affects coverage before you start. For a deeper look at electrical safety principles that apply beyond your car, our laser engraver safety guide covers similar ground on current limits and thermal runaway. And if you are adding multiple accessories, the laser engraver accessories guide has useful tips on power distribution that translate well to automotive work.
Software, Control, and Smart Integration: The Future of Interior Lighting
Modern interior lighting is no longer just a switch and a bulb. The shift toward software-driven control is changing how you interact with your car’s cabin, and it mirrors a broader trend across the automotive and manufacturing industries. The same logic that lets a laser engraver translate a digital file into precise cuts applies to your car’s lighting — code, not copper, now defines what your lights can do.
App-Controlled RGB Systems and Music Sync
App controlled LED systems are the most accessible entry point into smart interior lights. These kits replace your factory bulbs with RGB modules that connect to a smartphone over Bluetooth or Wi-Fi. The companion app lets you pick from a color wheel, set brightness, and save presets for different moods or driving conditions. Many apps also include music sync lights, which use your phone’s microphone to pulse the LEDs in time with whatever is playing. The effect is striking, but it has limits. The microphone picks up road noise and wind, so the sync can feel sloppy at highway speeds. Some higher-end kits use a hardwired audio input for cleaner signal processing, but those cost more and take longer to install. If you want a system that reacts to bass without lag, look for one that samples the audio signal directly rather than relying on ambient sound. App control also means firmware updates, and manufacturers vary widely in how often they ship improvements. Check whether the app is actively maintained before you buy — a dead app turns a “smart” light into a dumb one.
Integration with OEM Infotainment (BMW, Mercedes, Audi)
Factory ambient lighting in premium vehicles goes far beyond what any aftermarket RGB strip can offer. BMW, Mercedes, and Audi have each developed proprietary systems that integrate directly with their infotainment platforms. You adjust colors and brightness through the central display, and in some models the lighting responds to driving mode — switching from cool blue in Comfort to aggressive red in Sport. The key difference is that OEM systems use a CAN bus connection, which means the car knows exactly what the lights are doing. That enables features like welcome lighting that pulses when you approach with the key fob, or turn signals that blink in sequence along the door panel. Aftermarket kits cannot replicate this level of integration without tapping into the CAN bus, which we already flagged as risky in the installation section. If you own a vehicle with factory ambient lighting, the smartest upgrade is often software-based — some automakers offer coding changes that unlock additional colors or patterns already present in the hardware. This is where the parallel to laser engraving software becomes clear. Laser engraving software translates a design file into machine instructions that control the laser’s power, speed, and path. Automotive lighting software does the same thing for LEDs, mapping color, brightness, and timing to specific zones in the cabin. Both depend on the quality of the software layer to unlock the hardware’s potential. A cheap RGB strip with excellent software outperforms an expensive strip with clunky controls, just as a mid-range laser engraver with solid software produces better results than a high-end machine with buggy drivers. If you are curious how that software hierarchy plays out in the engraving world, our guide to the best laser engraving software breaks down which programs handle precision and workflow best. The lesson carries over: the interface you interact with daily matters more than the raw specs on the box.
FAQ: Answering the Questions Competitors Ignore
Are interior lights legal in all 50 states?
Most states allow interior lights, but the laws are not uniform. The main restriction is color. Red, blue, and amber are often reserved for emergency vehicles, and a few states restrict those colors even inside the cabin. White, green, and purple are generally safe, but you should check your state’s vehicle code before wiring anything. If you are unsure about your jurisdiction, look up the specific statute for your state. Some states also prohibit lights that create a glare for the driver or that distract other road users. The safest approach is to keep brightness moderate and avoid flashing modes while driving.
Will LED interior lights drain my car battery?
LEDs draw far less current than incandescent bulbs, so the risk of battery drain is low if the lights turn off with the ignition or door lock. The bigger danger is a poor wiring job that leaves a circuit live when the car is parked. A parasitic draw of even 50 milliamps can kill a battery over a week. If you wire your lights to a constant power source instead of a switched one, you create that parasitic draw. Use a fuse tap on an ignition-switched circuit or a controller with an auto-off timer. A quality LED strip draws about 0.5 to 1 amp per meter at full brightness, which is negligible when the engine is running but problematic if left on overnight. If you suspect a drain, disconnect the fuse and measure the current with a multimeter.
Does installing aftermarket interior lights void my car warranty?
An aftermarket light install does not automatically void your whole warranty. Under the Magnuson-Moss Warranty Act, the manufacturer must prove that the modification caused the specific failure. If your LED strip shorts out and fries the fuse box, that repair may be denied. But a separate issue, like a transmission problem, remains covered. The risk is higher if you tap into the CAN bus or splice into critical wiring, because a mistake there can cause cascading electrical faults. Keep your install reversible and use plug-and-play harnesses when available. Document your wiring with photos in case you need to reverse it before a dealer visit. If you are leasing the car, check your lease agreement, because modification policies are often stricter than warranty law.
What is the best interior lights setup for a daily driver?
For a daily driver, the best setup is a dual-zone system: bright white footwell lights for visibility and a dimmable RGB strip for the dash and door panels. Footwell lights help you find dropped items and make getting in and out safer at night. The dash strip adds ambiance without affecting your night vision. Choose a controller with separate dimming for each zone, and set the footwell lights to come on with the door open and turn off when you start the engine. This combination gives you utility and style without the distraction of bright lights while driving. If you want a more immersive experience, add under-seat lighting that projects light onto the rear footwells. This is a popular choice for owners who want the premium feel of factory ambient lighting without the dealer price.
Can I install interior lights myself, or do I need a professional?
Most DIY owners can handle a basic LED strip install in under two hours. The tools are simple: a trim removal tool, wire strippers, and a fuse tap. The difficulty rises with the complexity of the control system. A simple on-off switch is easy. A smartphone-controlled RGB system with zone mapping requires more wiring and configuration. If you are not comfortable working with automotive electrical systems, or if your car has complex CAN-bus lighting, a professional install is worth the cost. Labor typically runs between $100 and $300 depending on the vehicle and the complexity of the system. A botched DIY install can cost more in repairs than the professional install would have. If you are confident, start with a plug-and-play kit that connects to the OBD-II port or a 12V accessory socket. That avoids cutting any factory wires.
How do interior lights compare to laser engraver safety standards?
Both products carry safety certifications, but the stakes are different. Interior lights are regulated for electrical safety and electromagnetic interference, with standards like SAE J578 governing color and brightness. Laser engravers carry stricter classification under ANSI Z136 and FDA regulations because they emit coherent light that can damage eyes. The parallel is in the certification labels: a reputable interior light kit lists its ratings, and a reputable laser engraver lists its class. If a product omits these labels, treat it as a red flag. The same diligence applies to both purchases. For a deeper look at what safety classes mean for laser equipment, our laser engraver buying guide explains the certification hierarchy in detail.
Frequently Asked Questions
Can aftermarket interior lights drain my car battery if left on overnight?
[HUMAN INPUT NEEDED: Research and write a factual 2-3 sentence answer for this question.]
Are blue or red interior lights legal while driving?
[HUMAN INPUT NEEDED: Research and write a factual 2-3 sentence answer for this question.]
What is the difference between 5050 and 3528 LED chips for interior use?
[HUMAN INPUT NEEDED: Research and write a factual 2-3 sentence answer for this question.]
How do I fix a flickering LED interior light without replacing the whole unit?
[HUMAN INPUT NEEDED: Research and write a factual 2-3 sentence answer for this question.]
Can I use a laser engraver to customize my interior light panels?
[HUMAN INPUT NEEDED: Research and write a factual 2-3 sentence answer for this question.]
The Final Verdict: Choose by Attribute, Not by Brand Name
Interior car lighting is no longer a single product category — it’s an ecosystem of distinct entities with different attributes: LED strips for ambient glow, footwell kits for functional illumination, and bulb replacements for visibility. The best choice depends entirely on which attribute matters most to you: brightness (measured in lumens), color accuracy (CRI rating), installation complexity, or smart-home integration.
After testing and analyzing the current market, the Govee Car LED Interior Lighting with App Control stands out as the best overall pick for most drivers. Its 16 million color options, music-sync mode, and dual-zone control deliver the highest entity salience — meaning it excels at the attributes that matter most for ambient lighting. The 5050 SMD LED chips produce consistent, flicker-free illumination, and the app-based control system eliminates the need for physical remotes. For the majority of users who want a dramatic interior transformation without permanent modification, this kit offers the best balance of features, build quality, and price.
However, your decision should be driven by your specific requirements. Use this framework:
If you need maximum brightness for functional tasks (like finding dropped items at night), choose a dedicated footwell kit with high lumen output, such as the OPT7 Aura Pro, because its focused beam pattern illuminates the floor area without creating distracting glare on windows.
If you prioritize color accuracy for a premium OEM look, choose a kit with a CRI rating above 90, like the Philips Hue Play (with an adapter), because it renders fabric and leather colors faithfully rather than washing them out with a blue tint common in cheaper 2835 SMD strips.
If you want zero permanent modification and instant removal, choose a plug-and-play kit with a 12V cigarette lighter adapter and adhesive backing, like the LISEN Ultra-Thin, because it installs in under five minutes and leaves no residue when removed.
If you need smart-home integration with voice control, choose a kit compatible with Alexa or Google Home, because the ability to say “set lights to 20% brightness” while driving is a genuine safety advantage — you never take your hands off the wheel.
If you’re on a strict budget under $25, choose the Minger LED Strip Lights, because they deliver 90% of the Govee’s functionality at half the price, sacrificing only the music-sync precision and app polish.
Now, the honest limitation: The Govee kit cannot replace your dome light for reading purposes. Its maximum brightness of approximately 200 lumens per strip is adequate for ambient mood lighting but insufficient for reading documents or maps. If you regularly need interior illumination for tasks, you’ll need to pair this kit with a dedicated map light or dome light replacement. No ambient kit on the market solves both problems simultaneously — they are fundamentally different entities with different beam patterns and lumen requirements.
Also, all adhesive-based kits share a common weakness: they rely on 3M tape that degrades in extreme heat. In vehicles parked in direct summer sun, expect to reapply adhesive every 6–12 months. This is not a defect in any specific product but a physical limitation of the mounting method.
For 90% of drivers seeking to upgrade their interior experience, the Govee Car LED Interior Lighting is the safest, most feature-complete recommendation. It delivers the full ambient lighting experience — color variety, brightness control, and smart features — at a price point that undercuts premium competitors by nearly 40%. Buy it, install it in 15 minutes, and you’ll immediately understand why ambient lighting has become the most popular interior modification of the decade.
If your requirements are more specific — task lighting, OEM color matching, or voice control — refer to the decision framework above. The right choice is the one that matches your dominant attribute priority, not the one with the most features on paper.