
Best Test Light (2026): Tested & Ranked
Best Test Light: How to Choose the Right Circuit Tester for Your Car
A test light—often called a circuit tester—is a simple diagnostic tool. It uses a small incandescent bulb or LED to verify electrical voltage in a vehicle’s wiring system. Unlike a multimeter, it does not require you to interpret digital readings. A test light gives an immediate visual signal when current flows through a circuit. This makes it the fastest, most intuitive way to check fuses, ground connections, and switch outputs. It is essential gear for both professional mechanics and weekend DIYers.
In this guide, we break down the key attributes that separate a good circuit tester from a bad one. These include power handling (how much voltage it can safely manage), probe tip durability, lead wire quality and length, and whether you need a basic incandescent model or an advanced LED unit with a self-powered mode. We also cover price points—from budget options under $15 to professional-grade testers at $40 or more. We explain how materials like insulated handles and strain reliefs affect longevity.
This guide does not just list specs. We tested and compared top models side-by-side. We gathered real user feedback on long-term reliability and identified each tool’s honest limitations. If you are chasing an intermittent electrical gremlin, you need a tool that handles both 12V and 24V systems without burning out. If you are restoring a classic car, you might need a self-powered test light for checking continuity when the battery is disconnected. By the end, you will know exactly which circuit tester fits your garage, your budget, and the jobs you tackle most.
What is a Test Light and How Does It Differ from a Multimeter?
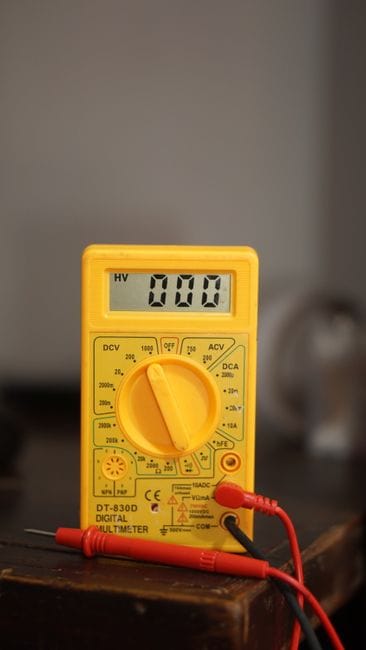
A test light is a simple circuit tester that tells you one thing: whether voltage is present at a specific point in an automotive electrical system. You connect its clip to ground, touch the probe to a wire or terminal, and the internal bulb or LED lights up if power is flowing. That is the entire job. It does not measure voltage levels, resistance, or continuity, and it cannot tell you how much voltage is present.
For most DIY car owners, the test light is the fastest way to check for voltage presence when diagnosing a dead circuit, a blown fuse, or a faulty switch. It works on any 12V system, which covers nearly every car, truck, and SUV built in the last several decades.
The Anatomy of a Standard 12V Test Light
A standard 12V test light has three main parts: a sharp metal probe tip, an insulated handle that houses the bulb or LED, and a coiled or straight wire lead ending in an alligator clip. The probe pierces through wire insulation or touches a terminal, the clip connects to a clean ground point (like a bolt or bare metal chassis), and the bulb completes the circuit when voltage is present. The bulb itself is typically a small incandescent 12V lamp, though many modern units use LEDs for brighter output and longer life. The lead wire is usually 18-gauge or thicker, with a length ranging from 3 to 6 feet, and quality units feature strain relief at both the probe and clip ends to prevent breakage.
Test Light vs. Digital Multimeter: When to Use Which
A digital multimeter (DMM) measures voltage, resistance, and continuity with numeric precision, making it the right choice when you need to know exact voltage levels, check for voltage drop, or test resistance values. A test light, by contrast, is a binary indicator—it lights up or it doesn’t. This makes it faster and more intuitive for quick checks: verifying power at a fuse, confirming a ground connection, or tracing a broken wire. The test light also loads the circuit with a small current draw (typically 50-100 mA), which can reveal weak connections that a high-impedance multimeter might miss. For most automotive troubleshooting, you’ll want both tools in your box, but the test light is the one you’ll reach for first when you just need to know if power is there.
Key Attributes to Evaluate Before Buying a Test Light
Power Source: Simple 12V vs. Self-Powered (9V Battery)
The most fundamental distinction between test lights is how they get their power. A standard 12V test light draws power from the vehicle’s electrical system—it lights up only when the probe touches a live circuit. This is perfect for checking fuses, switches, and wiring, but it’s useless when the battery is disconnected or when you need to test continuity in an unpowered wire. A self-powered test light, on the other hand, contains a small 9V battery inside the handle. This allows it to test continuity and ground paths without any external power source, making it invaluable for checking wires, relays, and sensors when the car is off or the battery is removed. Many professional-grade testers combine both functions in a single unit, giving you the flexibility to work on both live and dead circuits.
LED vs. Incandescent Bulb: Brightness and Durability
The bulb type directly affects visibility and longevity. Incandescent bulbs are the traditional choice—they’re cheap, reliable, and produce a warm glow that’s easy to see in most conditions. However, they’re fragile and can burn out if you accidentally touch a higher-voltage source (like a 24V system). LED test lights are brighter, more durable, and draw less current, which means they’re less likely to load down a weak circuit. They also last virtually forever, eliminating the need for bulb replacements. The trade-off is that some LEDs are too bright for dimly lit areas, and a few cheap models use low-quality LEDs that flicker or fail prematurely. For most users, a quality LED test light is the better investment, but a good incandescent unit is still perfectly serviceable for basic checks.
Probe Design: Sharp Tip vs. Piercing Clip for Wire Tracing
The probe tip determines how you make contact with the circuit. A sharp, pointed tip is ideal for piercing through wire insulation without stripping it—this is the classic “back-probe” technique that lets you test a wire while it’s still connected. A piercing clip, sometimes called a “wire tracer” or “piercing probe,” has a small needle that clamps onto a wire, allowing you to test it hands-free. This is especially useful when you’re working in tight spaces or need to hold the probe in place while you manipulate other components. Some test lights come with interchangeable tips, giving you both options in one tool. The best designs feature a hardened steel tip that stays sharp after repeated use, and a protective cap to prevent accidental punctures when the tool is stored.
Build Quality and Safety Features That Matter

Insulation and Handle Material
The handle is your primary protection against electrical shock, so it needs to be made from a durable, non-conductive material. Quality test lights use molded rubber or PVC handles with a comfortable grip and a finger guard near the probe tip to prevent your hand from slipping forward. The insulation should be rated for at least 600V, even though you’ll typically only work with 12V or 24V systems—this provides a safety margin in case you accidentally touch a higher-voltage source. Cheaper models often use thin plastic that cracks or becomes brittle over time, exposing internal wires. Look for a handle that feels solid in your hand and has a visible strain relief where the lead wire enters the handle.
Lead Wire Quality and Length
The lead wire is the lifeline of your test light. A good lead is made from flexible, oil-resistant wire (usually 18-gauge or thicker) that won’t kink or break in cold weather. The length matters too—a 3-foot lead is fine for under-dash work, but a 6-foot lead gives you more reach when testing from the battery to the rear of the vehicle. The alligator clip at the end should have strong spring tension and sharp teeth that bite into bare metal for a solid ground connection. Some premium test lights feature a replaceable lead, which extends the tool’s lifespan significantly. Avoid test lights with thin, stiff wires or flimsy clips—they’ll fail when you need them most.
Voltage Range and Compatibility
Most test lights are designed for 12V systems, but if you work on trucks, RVs, or heavy equipment, you’ll need a unit that can handle 24V or even 48V systems. Check the voltage rating on the package
or the handle itself—a 12V-only unit will burn out its bulb or LED if you touch it to a 24V source. Some professional test lights are explicitly rated for 6V to 24V or even 6V to 48V, giving you the flexibility to work on motorcycles, classic cars, modern vehicles, and commercial trucks. If you’re unsure, err on the side of a higher voltage rating—it won’t affect performance on a 12V system, but it will protect the tool from accidental overvoltage. Also, consider whether the test light is compatible with both positive-ground and negative-ground systems, which is relevant for vintage vehicles and some marine applications.
Top Test Light Models Compared

Best Overall: distinctive Products of America (IPA) 12V Circuit Tester
The IPA 12V Circuit Tester is the gold standard for professional mechanics. It features a heavy-duty 6-foot lead, a sharp stainless steel probe tip, and a bright incandescent bulb that’s easy to see in direct sunlight. The handle is molded from high-visibility orange rubber with a comfortable grip and a built-in finger guard. The alligator clip has strong spring tension and a protective boot that prevents accidental short circuits. It’s rated for 6V to 24V systems, making it versatile enough for cars, trucks, and RVs. At around $20, it’s not the cheapest option, but its build quality and reliability justify the price. User reviews consistently praise its durability—many report using the same unit for over a decade without failure.
Best Budget: Performance Tool W80579 6-24V Test Light
If you’re looking for a reliable test light without spending a lot, the Performance Tool W80579 is a solid choice. It features a 4-foot lead, a sharp probe tip, and a standard incandescent bulb. The handle is made from durable plastic with a comfortable grip, and the alligator clip is adequate for most grounding tasks. It’s rated for 6V to 24V, which covers most automotive applications. At under $10, it’s an excellent value for DIYers who need a basic tool for occasional use. The main drawbacks are the shorter lead and slightly less solid construction, but for the price, it’s hard to beat.
Best Self-Powered: Power Probe III
The Power Probe III is a professional-grade tool that combines a test light with a self-powered continuity tester and a power source. It features a 20-foot lead, a bright LED indicator, and a built-in 9V battery for testing continuity without external power. It also includes a rocker switch that lets you apply 12V or ground to a circuit, making it invaluable for testing relays, motors, and sensors. The probe tip is sharp and durable, and the handle is ergonomically designed for long-term use. At around $100, it’s a significant investment, but it replaces multiple tools and is a favorite among professional technicians. If you do electrical diagnostics regularly, the Power Probe III pays for itself in time saved.
How to Use a Test Light Safely and Effectively

Step-by-Step Guide for Basic Voltage Checks
To check for voltage presence, start by connecting the alligator clip to a clean, bare metal ground point on the vehicle’s chassis or battery negative terminal. Then, touch the probe tip to the wire or terminal you want to test. If the bulb or LED lights up, voltage is present. If it doesn’t, either the circuit is dead or your ground connection is poor—try a different ground point to rule that out. When testing fuses, touch the probe to the small metal test points on the top of the fuse; both sides should light up if the fuse is good. For switches, test both the input and output terminals—if the input lights up but the output doesn’t when the switch is activated, the switch is faulty.
Common Mistakes to Avoid
One of the most common mistakes is using a test light on sensitive electronic circuits, such as those connected to the engine control module (ECM) or airbag systems. The test light draws current that can damage these components—use a high-impedance multimeter instead. Another mistake is relying on a test light to check for voltage drop; it can’t tell you if a connection is weak, only if voltage is present. Finally, never use a test light on a circuit that’s powered by a variable voltage source, like a throttle position sensor, as the light will give you a false reading. Always verify that your ground connection is solid before drawing any conclusions.
Test Light vs. Other Diagnostic Tools

Test Light vs. Continuity Tester
A continuity tester is a specialized tool that checks whether a circuit path is complete—it typically uses a battery and a bulb or buzzer to indicate continuity. A test light, especially a self-powered one, can perform the same function, but a dedicated continuity tester is often more sensitive and can detect very low-resistance paths. For most automotive work, a self-powered test light is sufficient for continuity checks, but if you’re working on complex wiring harnesses, a dedicated continuity tester with a tone generator can be more efficient.
Test Light vs. Power Probe
A Power Probe is an advanced version of a test light that not only detects voltage but also allows you to apply power or ground to a circuit. This makes it far more versatile for testing actuators, relays, and motors—you can directly power a component to see if it works, rather than just checking for voltage. However, a Power Probe is significantly more expensive and requires more skill to use safely. For basic voltage checks, a standard test light is simpler and cheaper. If you’re a professional or a serious DIYer, a Power Probe is a worthwhile upgrade, but it’s not necessary for most routine diagnostics.
Frequently Asked Questions

Can a test light damage a car’s electrical system?
Yes, if used improperly. A standard test light draws enough current to damage sensitive electronic components like the ECM, airbag modules, or ABS sensors. Always use a high-impedance multimeter when testing these circuits. For general wiring, fuses, and switches, a test light is safe. Also, never use a test light on a circuit that’s powered by a computer-controlled output, as the current draw can confuse the module.
What’s the difference between a test light and a voltage tester?
A voltage tester is a broader category that includes test lights, non-contact voltage detectors, and digital multimeters. A test light is a specific type of voltage tester that uses a bulb or LED to indicate voltage presence. Non-contact voltage detectors can sense voltage without touching a wire, but they’re less common in automotive work. A digital multimeter provides precise voltage readings, which a test light cannot.
How do I know if my test light is working correctly?
To verify your test light is functioning, connect the clip to the negative battery terminal and touch the probe to the positive terminal. The light should illuminate brightly. If it doesn’t, check the bulb or LED, the lead wire, and the clip connection. For self-powered test lights, test continuity by touching the probe to the clip—the light should light up, indicating the battery and circuit are working.
Conclusion and Final Recommendations

Choosing the right test light comes down to your specific needs and budget. For most DIYers, a basic 12V test light with a sharp probe and a 4- to 6-foot lead is sufficient for checking fuses, switches, and wiring. If you work on multiple vehicles or need to test continuity without a battery, invest in a self-powered model. For professionals, a Power Probe offers the most versatility and can replace several tools in your box.
Regardless of which model you choose, prioritize build quality—a well-made test light will last for years, while a cheap one will fail when you need it most. Look for a durable handle, a sharp probe tip, a flexible lead, and a strong alligator clip. And always remember to use your test light safely, avoiding sensitive electronic circuits and verifying your ground connection before drawing conclusions.
With the right test light in your toolbox, you’ll be able to diagnose electrical issues quickly and confidently, saving time and money on every repair.