
High Compression Diagnosis: Causes & Fixes
High Compression Diagnosis: The Complete Guide to Reading Cylinder Pressure Like a Pro
High compression diagnosis is the systematic measurement and interpretation of cylinder pressure to evaluate an engine’s internal health. It’s the single most informative test a mechanic can perform before tearing down an engine, because cylinder compression directly reflects the condition of the piston rings, valves, head gasket, and cylinder walls. A compression test doesn’t tell you everything, but it tells you exactly where to look next — and that’s what separates a parts-swapper from a true diagnostician.
This guide covers the full diagnostic workflow: how to run a compression test correctly, how to interpret the four pressure patterns (good, low, leaking, and carboned-up), and how to distinguish a ring problem from a valve problem using wet and dry tests. You’ll also learn the critical specifications that matter — compression ratio, cranking pressure, leak-down percentage, and the factory service limits for common engine families. We’ll cover the tools you need, from a basic gauge to a full leak-down tester, and the price range you should expect to pay for professional-grade equipment.
What makes this guide different is the decision framework. Instead of vague advice like “low compression is bad,” you’ll get a clear diagnostic tree: if you see X pattern on the gauge, here’s the likely cause, here’s the confirmation test, and here’s the repair path. We’ll also include a real-world comparison table of compression readings across popular engines, plus honest limitations — including what a compression test cannot detect, like a cracked block or a bent connecting rod. By the end, you’ll be able to read cylinder pressure like a pro and make confident repair decisions without guesswork.
What Is High Compression Diagnosis and Why It Matters

High compression diagnosis is the process of measuring the pressure each cylinder generates during the compression stroke to assess engine health. It tells you how well your cylinders seal combustion gases, which directly affects power, fuel economy, and emissions. If you suspect worn rings, leaking valves, or a blown head gasket, this test gives you the first clear answer.
Defining High Compression Diagnosis
Compression diagnosis is a systematic check of cylinder pressure using a compression gauge threaded into the spark plug hole. The engine is cranked several revolutions, and the gauge records the peak pressure. Consistent readings across all cylinders indicate a healthy engine. A single low reading points to a localized issue — often a valve or ring problem — while uniformly low readings across all cylinders suggest general wear or a timing issue. High readings, though less common, can indicate carbon buildup reducing combustion chamber volume, which artificially raises compression and can cause detonation.
How It Differs from a Simple Compression Test
A simple compression test is a single measurement — you crank the engine, note the number, and move on. High compression diagnosis goes further. It involves multiple measurements under different conditions: dry readings, wet readings (with oil added to the cylinder), and sometimes cranking vs. running compression. It also correlates those readings with other tests like leak-down testing and engine vacuum analysis. The goal isn’t just to know the pressure — it’s to understand why the pressure is what it is and what specific component is failing.
The Role of Compression Ratio in Diagnosis
Compression ratio is the static relationship between the cylinder volume at bottom dead center (BDC) and top dead center (TDC). It’s a design specification, not a measured value. However, it sets the expected baseline for cranking pressure. A 10:1 engine typically produces 150–170 PSI, while a 12:1 engine may show 180–200 PSI. If your measured pressure is significantly higher than expected for the compression ratio, carbon buildup is the likely culprit. If it’s lower, you’re looking at wear, leakage, or valve timing issues. Understanding this relationship is essential for accurate interpretation.
The Science Behind Cylinder Pressure Readings
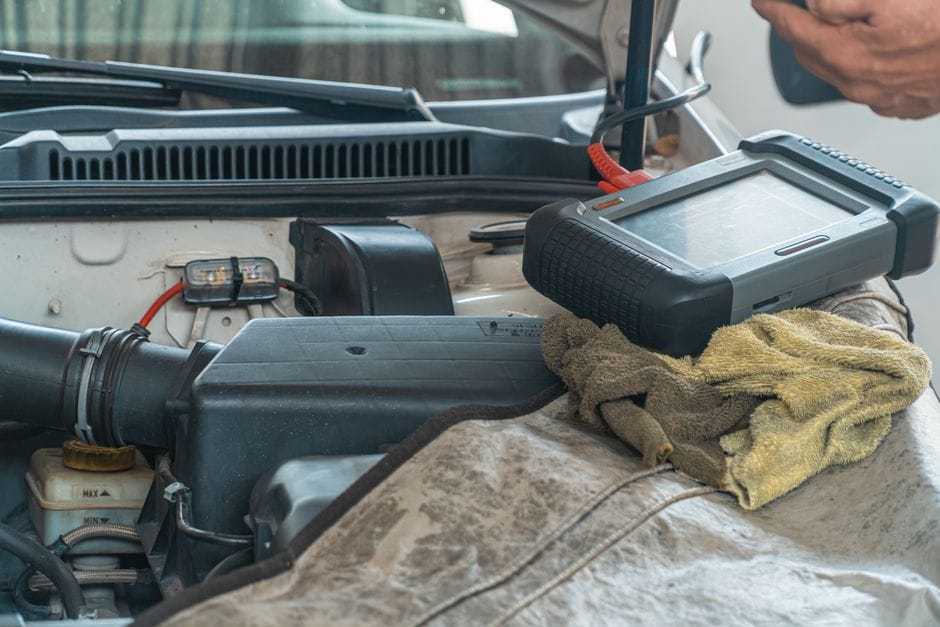
To read compression like a pro, you need to understand what the gauge is actually measuring and what variables can skew your results. This section breaks down the physics and the practical factors that affect every reading.
Understanding PSI and Compression Ratio Relationship
The relationship between compression ratio and measured PSI is not linear. A rule of thumb is that cranking compression in PSI is roughly 15–20 times the compression ratio for a healthy engine. For example, a 9.5:1 engine should show around 142–190 PSI. However, this varies with camshaft timing — a performance cam with late intake valve closing will produce lower cranking pressure despite a high static compression ratio. This is why you must always compare readings to factory specifications, not just theoretical math.
Factors That Affect Measured Pressure (Altitude, Temperature, RPM)
Three external factors significantly influence compression readings. First, altitude: at higher elevations, air density drops, reducing cranking pressure by roughly 1 PSI per 100 feet above sea level. Second, temperature: a warm engine produces higher readings because heat expands the air and improves ring sealing. Testing on a cold engine can understate compression by 10–15 PSI. Third, cranking RPM: the faster the engine cranks, the higher the pressure, because there’s less time for leakage past the rings. Most testers require a minimum of 200–250 RPM for accurate results. If the battery is weak or the starter is slow, readings will be artificially low.
Normal vs. Abnormal Pressure Ranges
While factory specs vary, general guidelines apply. For most gasoline engines, 120–180 PSI is considered normal. Readings below 100 PSI indicate significant wear or damage. A variation of more than 10% between cylinders is a red flag, even if all readings are within the normal range. For example, if three cylinders read 150 PSI and one reads 135 PSI, that 10% difference points to a problem in the low cylinder. Abnormally high readings — above 200 PSI on a stock engine — suggest carbon buildup or an incorrect cylinder head (e.g., a high-compression head installed by mistake).
Step-by-Step Compression Test Procedure

Running a compression test correctly is critical. A sloppy test produces misleading data that can send you down the wrong diagnostic path. Follow this procedure every time for reliable results.
Tools You Need: Tester, Adapter, Gauge
You’ll need a compression tester kit that includes a gauge, a flexible hose, and threaded adapters to fit various spark plug thread sizes (typically 14mm and 18mm). A screw-in type tester is far more accurate than a rubber-cone type, which can leak and give false low readings. You’ll also need a spark plug socket, a ratchet, and a battery charger to maintain cranking voltage. For wet testing, keep a squirt bottle of clean engine oil on hand. A leak-down tester is a separate tool used for confirmation, but it’s not required for the initial compression test.
Warm vs. Cold Testing: Which Is Better?
Warm testing is the gold standard. Run the engine to operating temperature (about 15 minutes of driving or idle), then shut it off and remove all spark plugs. Warm testing ensures that the rings, cylinder walls, and valve seats are at their normal operating clearances, giving you the most accurate picture of engine health. Cold testing is acceptable for a quick check or if the engine won’t start, but be aware that readings will be lower — typically 10–15 PSI less. If you cold-test and get borderline readings, warm the engine and retest before making any conclusions.
Throttle Open vs. Closed: Why It Matters
Always hold the throttle wide open during a compression test. With the throttle closed, the engine can’t draw in a full charge of air, which reduces the pressure in the cylinder and gives falsely low readings. The difference can be 20–30 PSI or more. To do this properly, have an assistant press the accelerator pedal to the floor while you crank the engine. If you’re working alone, you can wedge the throttle open with a block or use a remote starter switch while manually holding the throttle linkage.
Recording and Comparing Cylinder Readings
Test each cylinder in sequence, cranking the engine for the same number of revolutions (typically 5–7 compression strokes) for each cylinder. Record the highest reading on the gauge for each cylinder. After all cylinders
are tested, compare the readings. A healthy engine shows less than 10% variation between the highest and lowest cylinder. If one cylinder is significantly lower, note it — that’s your problem cylinder. Also observe the gauge behavior during cranking: a cylinder that builds pressure slowly on the first stroke but catches up by the fourth or fifth stroke often indicates worn rings, while a cylinder that never builds pressure suggests a valve leak or head gasket issue.
Interpreting Compression Readings: The Four Patterns

Once you have your readings, the real diagnostic work begins. There are four distinct patterns you’ll encounter, and each points to a different root cause. This is where high compression diagnosis separates from a simple test — it’s about pattern recognition.
Pattern 1: Uniformly Good Readings (Healthy Engine)
If all cylinders read within 10% of each other and within the factory spec range, the engine’s sealing surfaces are in good condition. This means rings, valves, and head gasket are all functioning properly. If the engine still runs poorly, the problem lies elsewhere — fuel delivery, ignition, timing, or a sensor issue. Don’t waste time tearing down the engine; focus your diagnostic efforts on other systems.
Pattern 2: One Low Cylinder (Localized Problem)
A single low reading — say, 90 PSI when the others read 150 PSI — indicates a localized issue in that cylinder. The most common causes are a burnt or bent valve, a worn valve seat, a broken piston ring, or a head gasket leak between that cylinder and an adjacent one. To narrow it down, perform a wet test (add a tablespoon of oil to the cylinder and retest). If the reading jumps significantly (15 PSI or more), the rings are the culprit. If it stays the same, the problem is in the valves or head gasket.
Pattern 3: Two Adjacent Low Cylinders (Head Gasket Failure)
If two cylinders that are next to each other in the firing order both read low, the likely cause is a head gasket failure between them. The gasket has blown, allowing pressure to leak from one cylinder to the other. This is especially common on engines with a history of overheating. Confirm with a leak-down test — you’ll hear air escaping through the adjacent cylinder’s spark plug hole or through the radiator if the gasket is leaking into the coolant passage.
Pattern 4: Uniformly Low Readings (General Wear or Timing)
Pattern 4: Details
If all cylinders read low — say, 90–100 PSI across the board — the engine has either worn rings and cylinder walls from high mileage, or the camshaft timing is off. A wet test can help distinguish: if readings improve significantly with oil added, it’s ring wear. If they don’t improve, suspect timing. Also check the timing belt or chain for skipped teeth. Uniformly low readings can also result from a faulty compression gauge, so verify your equipment before condemning the engine.
Wet vs. Dry Test Methodology

The wet test is a simple but powerful confirmation technique that isolates ring wear from valve problems. It’s an essential step in high compression diagnosis and takes only a few extra minutes.
How to Perform a Wet Test
After completing the dry test and identifying a low cylinder, squirt about one tablespoon of clean engine oil into the spark plug hole. Crank the engine a few times to distribute the oil around the rings, then retest that cylinder using the same procedure as before. The oil temporarily seals worn rings, allowing the cylinder to build more pressure. Compare the wet reading to the dry reading.
Interpreting Wet Test Results
If the wet reading increases by 15 PSI or more, the rings are worn or damaged — the oil is filling the gap between the rings and the cylinder wall, improving the seal. If the wet reading stays roughly the same (within 5 PSI), the rings are sealing fine, and the leak is through the valves or head gasket. A small improvement of 5–10 PSI is inconclusive and may indicate a combination of issues. In that case, proceed to a leak-down test for a definitive answer.
Limitations of the Wet Test
The wet test is not perfect. It can temporarily hydrolock the engine if you add too much oil, so use a measured amount. It also doesn’t tell you which valve is leaking — only that the leak isn’t through the rings. And on engines with catalytic converters, excess oil can damage the converter if it’s not burned off. Always crank the engine with the spark plugs removed and the ignition disabled to avoid firing the oil out through the exhaust.
Leak-Down Test Correlation

A leak-down test is the natural companion to a compression test. While a compression test measures peak pressure, a leak-down test measures how well the cylinder holds pressure at TDC. Together, they give you a complete picture of engine sealing.
What a Leak-Down Test Tells You
A leak-down test pressurizes the cylinder with compressed air (typically 80–100 PSI) and measures the percentage of air that leaks past the rings, valves, or head gasket. A healthy engine shows less than 10% leakage. 10–20% indicates moderate wear. Over 20% means significant leakage that requires repair. The test also tells you where the air is going: listen for hissing at the oil filler cap (rings), the exhaust (exhaust valve), the intake (intake valve), or the radiator (head gasket).
How to Correlate Compression and Leak-Down Results
If a cylinder has low compression but a good leak-down result (under 10%), the issue may be camshaft timing or a collapsed lifter, not a sealing problem. If both tests show problems, you’ve confirmed a mechanical issue. The leak-down test is especially useful when the wet test is inconclusive. For example, if wet testing improves compression but leak-down still shows high leakage, the rings are worn but the valves may also be leaking. This dual-test approach eliminates guesswork and tells you exactly which component to inspect.
When to Skip the Leak-Down Test
If your compression readings are all within spec and uniform, a leak-down test is unnecessary — the engine is sealing fine. If you have one low cylinder and the wet test clearly points to rings (big improvement), you can skip leak-down and go straight to repair. But if you’re facing a head gasket decision or an expensive repair, always confirm with leak-down before tearing down the engine. It’s cheap insurance against misdiagnosis.
Diagnostic Tools and Equipment

Having the right tools makes the difference between a frustrating guessing game and a confident diagnosis. Here’s what you need and what you should expect to pay.
Compression Tester Types and Price Ranges
Basic compression testers with a rubber cone start around $20–30 but are prone to leakage and inaccurate readings. Screw-in testers with flexible hoses start at $40–60 and are significantly more reliable. Professional-grade kits with multiple adapters, a quick-release valve, and a high-quality gauge run $80–150. For serious DIYers or professionals, the extra cost is worth it — a cheap tester can give you false low readings that lead to unnecessary repairs. Look for a tester with a gauge that reads up to 300 PSI to cover high-compression engines.
Leak-Down Tester Essentials
A leak-down tester typically costs $50–150. It includes a regulated air input, a calibrated orifice, and two gauges (one for input pressure, one for cylinder pressure). Some kits include a TDC stop and adapters for various thread sizes. The key is to use a tester with a dual-gauge design so you can read the percentage directly without math. Cheaper single-gauge testers require manual calculation and are less accurate. Also ensure your air compressor can deliver at least 90 PSI continuously — a small pancake compressor may struggle.
Additional Tools for Accurate Diagnosis
Beyond the testers, you’ll need a spark plug socket, a torque wrench (for reinstalling plugs), a battery charger to maintain cranking voltage, and a remote starter
switch for solo testing. A borescope is invaluable for visually confirming carbon buildup, valve damage, or cylinder wall scoring before you commit to a repair. A vacuum gauge is another useful diagnostic tool — it can reveal valve timing issues, restricted exhaust, or vacuum leaks that a compression test alone won’t catch. For diesel engines, you’ll need a specialized diesel compression tester that can handle the much higher pressures (400–600 PSI) and the different glow plug thread sizes.
Common Causes of High Compression Readings

While low compression is the more common complaint, high compression readings are a real diagnostic finding that shouldn’t be ignored. Here’s what causes them and what they mean for engine health.
Carbon Buildup: The Primary Culprit
Excessive carbon deposits on the piston crown, cylinder head, and valve faces reduce the combustion chamber volume, effectively raising the compression ratio. This can push readings 10–20 PSI above factory spec. Carbon buildup is caused by oil consumption, rich fuel mixtures, or prolonged low-speed driving. The danger is that higher compression increases the risk of detonation (knock), which can damage pistons and bearings. If you see uniformly high readings across all cylinders, carbon is the likely cause. A borescope inspection will confirm it.
Incorrect Cylinder Head or Gasket
If someone previously installed a thinner head gasket, milled the cylinder head, or swapped in a high-compression head, the compression ratio will be higher than stock. This is common on modified engines but can also happen by mistake. Check the engine’s casting numbers and the head gasket thickness to verify. If the engine is otherwise stock and the readings are high, this is a red flag that the engine has been modified or incorrectly assembled.
Valve Timing Issues
If the camshaft timing is advanced, the intake valve closes earlier in the compression stroke, trapping more air and raising cranking pressure. This can also cause high readings across all cylinders. However, advanced timing usually comes with other symptoms like rough idle, backfiring, or hard starting. Check the timing marks and verify the camshaft position before assuming carbon is the cause.
Real-World Compression Readings: Comparison Table

To help you calibrate your expectations, here’s a reference table of typical compression readings for popular engine families. Remember that these are approximate — always consult the factory service manual for your specific engine.
| Engine | Compression Ratio | Typical Cranking PSI | Minimum Acceptable |
|---|---|---|---|
| Honda K24 (2.4L) | 10.5:1 | 170–190 | 135 |
| Toyota 2JZ-GE (3.0L) | 10.0:1 | 160–180 | 128 |
| Ford 5.0 Coyote | 11.0:1 | 180–200 | 140 |
| Chevy LS1 (5.7L) | 10.1:1 | 160–185 | 130 |
| Subaru EJ25 (2.5L) | 10.0:1 | 155–175 | 120 |
| VW 2.0T EA888 | 9.6:1 | 145–165 | 115 |
| BMW N54 (3.0L) | 10.2:1 | 165–185 | 130 |
| Mercedes M271 (1.8L) | 9.3:1 | 140–160 | 110 |
These figures assume sea level, warm engine, wide-open throttle, and a fully charged battery. Adjust for altitude and temperature as discussed earlier. If your readings fall below the minimum acceptable value, the engine needs attention.
Limitations of Compression Testing

No diagnostic test is perfect, and compression testing has specific blind spots. Knowing these limitations prevents you from drawing false conclusions and helps you choose the right follow-up tests.
What a Compression Test Cannot Detect
A compression test cannot detect a cracked block or cylinder head — the crack may not open up until the engine is under load and hot. It also cannot identify a bent connecting rod, a worn camshaft lobe, or a collapsed hydraulic lifter, because these don’t directly affect cylinder sealing. A compression test also won’t reveal fuel delivery problems, ignition issues, or sensor failures — those require other diagnostic methods. If compression is good but the engine runs poorly, expand your testing to fuel pressure, spark, and scan tool data.
When Compression Readings Are Misleading
On engines with variable valve timing (VVT), the camshaft position during cranking can affect compression readings. Some VVT systems default to a position that reduces cranking pressure, giving falsely low readings. Similarly, engines with cylinder deactivation (like MDS or AFM) may have solenoids that bleed pressure during cranking. Always research your specific engine’s quirks before interpreting results. Also, a weak battery or a faulty starter can produce uniformly low readings that look like engine wear but are actually just slow cranking.
Combining Tests for a Complete Picture
For a definitive diagnosis, combine compression testing with leak-down testing, a vacuum gauge test, and a borescope inspection. Each test covers a different aspect of engine health. Compression tells you about peak pressure, leak-down tells you about sealing at TDC, vacuum tells you about valve timing and intake restrictions, and a borescope gives you visual confirmation. Together, these four tests give you a complete picture that no single test can provide.
Diagnostic Decision Tree: From Reading to Repair

Here’s a practical decision framework to guide you from raw readings to a confident repair plan. Follow this tree step by step, and you’ll avoid the guesswork that leads to unnecessary parts replacement.
Step 1: Evaluate the Overall Pattern
Start by looking at the big picture. Are all readings uniform and within spec? If yes, the engine is mechanically sound — move on to other systems. Are all readings uniformly low? Check battery, starter, and cranking RPM first, then consider timing or general wear. Is there one low cylinder? Proceed to Step 2. Are there two adjacent low cylinders? Suspect head gasket and confirm with leak-down.
Step 2: Perform a Wet Test on Low Cylinders
Add oil to the low cylinder and retest. If the reading improves by 15 PSI or more, the rings are worn — plan for a ring and cylinder wall repair. If there’s no improvement, the leak is through the valves or head gasket. Proceed to Step 3.
Step 3: Confirm with a Leak-Down Test
Pressurize the cylinder at TDC and listen for the leak location. Hissing at the exhaust = exhaust valve. Hissing at the intake = intake valve. Bubbling in the radiator = head gasket. Air from the oil filler = rings. This tells you exactly which component to inspect and replace.
Step 4: Make the Repair Decision
Based on your findings, decide whether to repair or replace. A single burnt valve can be fixed with a valve job. Worn rings on a high-mileage engine may justify a full rebuild. A blown head gasket on an otherwise healthy engine is a straightforward repair. If the engine has multiple issues — low compression, high oil consumption, and overheating — a replacement engine may be more cost-effective than a rebuild.
You might also like: carbon buildup cleaning, oil change Toyota Camry, best oil for hybrid engines