Engine Timing Explained: Replacement Guide
Engine Timing Explained: The Complete Guide to Ignition and Valve Timing
Engine timing is the precise synchronization between the rotation of the crankshaft and the camshaft, dictating exactly when the intake and exhaust valves open and close relative to the position of the pistons. It is the invisible conductor of your engine’s combustion orchestra — get it right and you unlock seamless power delivery; get it wrong and you risk catastrophic piston-to-valve contact. While it sounds like a single concept, engine timing actually splits into two distinct disciplines: ignition timing (when the spark plug fires) and valve timing (when the valves actuate), both of which must work in harmony for optimal performance.
This guide breaks down the full anatomy of engine timing, from how a timing chain, belt, or gear system physically links the rotating assemblies, to the role of variable valve timing (VVT) systems that adjust timing on the fly for better fuel economy and low-end torque. You’ll learn the difference between a timing belt and a timing chain, the symptoms of a skipped tooth or stretched belt, and the diagnostic signs that your engine timing is off. We also cover the critical maintenance intervals and what happens when these components fail — because an interference engine with broken timing is a terminal event for most motors.
What sets this guide apart is the real-world data: we compare OEM replacement costs, labor times, and failure rates across popular engine families, and we openly discuss the limitations of VVT systems and why a timing chain isn’t automatically better than a belt. Whether you’re a DIY mechanic planning a timing belt job or a car owner trying to understand a ticking noise from the front of the engine, this is your complete field manual.
What Is Engine Timing? Defining the Heartbeat of Your Engine
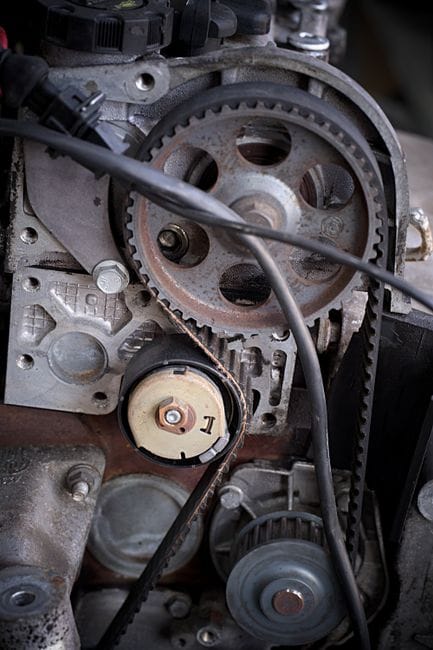
Engine timing is the precise coordination between the rotating crankshaft and the camshaft that controls when the spark fires and when the intake and exhaust valves open and close. Think of it as the conductor of an orchestra — every piston stroke, valve lift, and spark event must happen at exactly the right moment for the engine to run smoothly. When that rhythm is off, even by a few degrees, performance drops and damage can follow.
At its core, engine timing explained simply is this: your engine runs on a four-stroke cycle — intake, compression, power, and exhaust. Each stroke depends on parts moving in sync. The crankshaft drives the pistons, while the camshaft drives the valves. A belt, chain, or gear set connects the two, ensuring they rotate in perfect ratio. The ignition system then adds the spark at the optimal moment within that cycle.
The Difference Between Ignition Timing and Valve Timing
Many DIY owners mix these two up, but they handle completely different jobs. **Ignition timing** refers to when the spark plug fires relative to the piston’s position in the compression stroke. The spark needs to ignite the air-fuel mixture slightly before the piston reaches top dead center (TDC) so that peak cylinder pressure builds right as the piston starts its downward power stroke. Fire too early and you get knocking; fire too late and you lose power and waste fuel.
**Valve timing**, on the other hand, controls when the intake and exhaust valves open and close. The camshaft lobes dictate this schedule. Intake valves must open to draw in the air-fuel mixture, then seal tight during compression. Exhaust valves must open to push out burnt gases, then close before the next intake stroke begins. Both events must align with piston position to avoid valve-to-piston contact — a catastrophic failure that can bend valves and destroy cylinder heads.
These two systems work independently but must be tuned together. Modern engines use sensors and computer controls to adjust both dynamically, but the mechanical foundation remains the same: the timing belt or chain keeps everything physically linked.
Why Timing Is Critical to the Four-Stroke Cycle
The four-stroke cycle only produces power in one of its four strokes, so efficiency depends on every other stroke happening without wasted effort. If valve timing is off, the engine can’t breathe properly — it starves for air, loses compression, and burns fuel incompletely. If ignition timing is off, combustion happens at the wrong moment, wasting energy and stressing internal parts.
Consider the numbers: at 3,000 RPM, the crankshaft rotates 50 times per second. That means each stroke takes just 0.01 seconds. The valves must open and close, the spark must fire, and the piston must travel — all within that tiny window. A timing error of just 2 degrees at the crankshaft translates to roughly 0.001 seconds of misalignment. That’s enough to cause noticeable rough idle, hesitation, or backfiring.
Get it right, and the engine delivers smooth power, good fuel economy, and clean emissions. Get it wrong, and you’ll feel it immediately — and the longer you ignore it, the more expensive the repair becomes. In the sections that follow, we’ll break down how each timing system works, how to spot problems early, and when replacement becomes non-negotiable.
The Core Components: How Timing Belts, Chains, and Gears Work

Every engine needs a mechanical link between the crankshaft and the camshaft. That link keeps the pistons and valves moving in the correct sequence. Two main designs dominate the market: the timing belt and the timing chain. A third option, gear-driven timing, appears mostly in heavy-duty or high-performance engines.
Timing Belt vs. Timing Chain: Pros, Cons, and Lifespan
Timing Belt vs. Timing Chain: Details
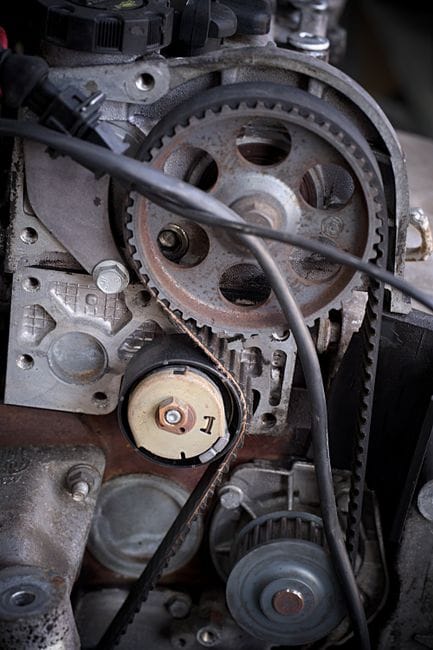
A **timing belt** is a reinforced rubber belt with teeth on the inside. It runs quietly, which is why most automakers prefer it for everyday passenger cars. The belt is lighter and cheaper to manufacture, and it doesn’t require oil for lubrication. But rubber degrades over time. Manufacturers typically rate a timing belt for 60,000 to 105,000 miles. [VERIFY: exact OEM replacement intervals for common timing belt engines] When it fails, it snaps without warning, often bending valves and destroying the cylinder head.
A **timing chain** is made of metal links, similar to a bicycle chain but much heavier. It sits inside the engine, bathed in engine oil, and can last the life of the vehicle. Chains are stronger and handle higher torque loads, which is why many trucks and performance engines use them. The trade-offs are noise, weight, and cost. A chain system also includes tensioners and guides — plastic or metal components that wear out and can fail, causing the chain to slap or skip teeth. When a timing chain stretches, it throws off the valve timing even if it never breaks.
For most drivers, the decision is already made by the manufacturer. If you’re choosing a used car, a timing chain engine generally means lower maintenance costs. But a well-maintained timing belt, replaced on schedule, is perfectly reliable.
Timing Belt Advantages
- Quieter operation
- Lower manufacturing cost
- No oil lubrication required
- Lighter, reducing engine weight
Timing Belt Drawbacks
- Requires periodic replacement
- Catastrophic failure on snap
- Labor cost for replacement is high
The Role of the Crankshaft and Camshaft Position Sensors
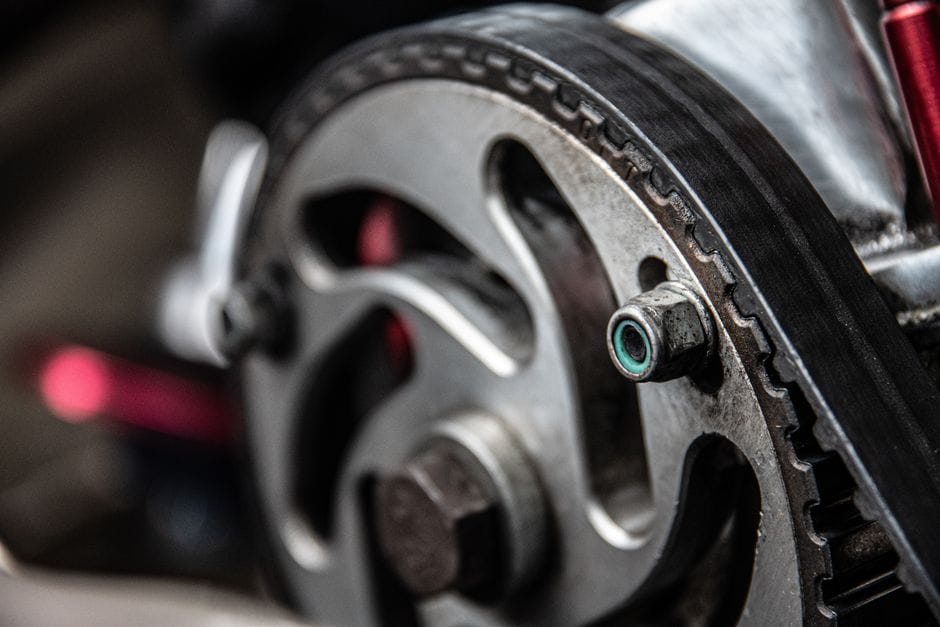
Modern engines don’t rely purely on mechanical alignment. The engine control unit (ECU) needs to know exactly where the pistons and valves are at any given moment. That’s the job of the **crankshaft position sensor** and the **camshaft position sensor**.
The crankshaft position sensor reads a toothed reluctor wheel mounted on the crankshaft. It tells the ECU how fast the crank is spinning and its exact angular position. This data is the foundation for fuel injection timing and ignition timing. If this sensor fails, the engine typically won’t start or will stall immediately.
The camshaft position sensor does similar work on the camshaft side. It identifies which stroke a cylinder is on — intake, compression, power, or exhaust. This allows the ECU to sequence fuel delivery and spark firing per cylinder. It’s also essential for variable valve timing systems, which adjust cam timing on the fly.
Both sensors work together. The ECU compares their signals to verify that the mechanical timing is correct. If the belt or chain skips a tooth, the sensor readings will no longer match the expected pattern, and the ECU will set a diagnostic trouble code. That’s why a failing timing component often triggers a check-engine light before catastrophic failure occurs.
Understanding Timing Marks and TDC (Top Dead Center)
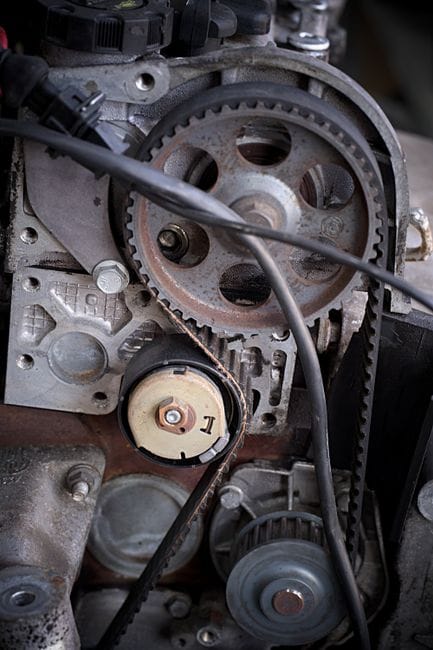
When you set engine timing manually, you need physical reference points. Those are the **timing marks**. They’re usually a notch or line on the crankshaft pulley, aligned against a scale or pointer cast into the engine block. On the camshaft side, marks on the sprocket align with a reference surface on the cylinder head.
The goal is to find Top Dead Center (TDC) — the position where a piston is at its highest point in the cylinder. At TDC, the piston has zero vertical velocity, which gives you a fixed reference for setting valve timing. When the timing marks on both the crank and cam align, the engine is mechanically timed correctly.
For most modern engines, timing marks are used during assembly or repair — specifically when installing a new timing belt or chain. The service manual specifies exact alignment procedures. If you’re off by one tooth, the engine will run poorly or not at all. Some engines use a locking tool that fits into holes in the crankshaft and camshaft to hold them in position while you install the belt. This removes guesswork and ensures perfect alignment.
Understanding these components matters because timing failure is one of the few engine problems that can total a car. A snapped belt on an interference engine bends valves, cracks pistons, and damages the cylinder head. The repair cost often exceeds the car’s value. That’s why the next section, Ignition Timing Explained, covers the spark side of the equation — and why the section on timing belt replacement stresses preventive maintenance so heavily.
Ignition Timing Explained: The Spark That Starts It All
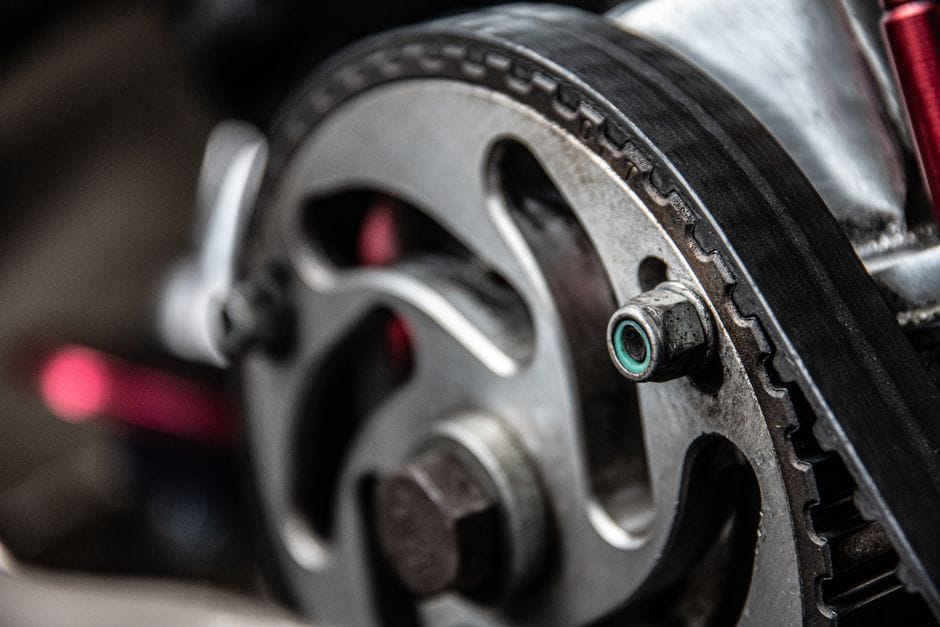
Mechanical timing aligns the valves and pistons. Ignition timing controls when the spark plug fires relative to the piston’s position. It’s a separate system, but the two must work together. If valve timing sets *when* the engine breathes, ignition timing sets *when* the fuel-air mixture ignites. Get either wrong, and performance suffers — or the engine knocks itself apart.
The spark doesn’t fire when the piston reaches Top Dead Center (TDC) on the compression stroke. It fires *before* TDC, while the piston is still rising. Why? Because combustion takes time. The flame front needs a few milliseconds to spread across the cylinder and build pressure. If the spark fires at exactly TDC, peak pressure arrives too late, after the piston has already started its downward stroke. You lose power. Firing early gives the pressure time to build so it peaks just after TDC, when the piston is ready to be pushed down.
What Does ‘Advancing’ or ‘Retarding’ Timing Mean?
**Advance timing** means firing the spark earlier — more degrees before TDC. This gives combustion more time to complete. At higher RPM, the engine spins faster, so the flame has less wall-clock time to burn. The ECU advances timing as RPM climbs to compensate. The result is more power and better efficiency at highway speeds.
**Retard timing** means firing the spark later — closer to TDC or even after it. The engine does this to protect itself. When you floor the throttle at low RPM, cylinder pressure spikes quickly. Retarding the spark reduces peak pressure and prevents detonation. It’s a safety measure, but it costs power. That’s why you sometimes feel a brief lag when you stomp the gas — the ECU is pulling timing to protect the engine before advancing it again.
How the ECU and Knock Sensor Automatically Adjust Timing
Modern cars don’t use a fixed timing setting. The **engine control unit** (ECU) adjusts ignition timing continuously based on engine speed, load, air temperature, coolant temperature, and fuel quality. It references a timing map stored in its memory — a 3D table that tells it the ideal advance for any combination of RPM and load.
The **knock sensor** is the safety net. It’s a piezoelectric microphone bolted to the engine block that listens for detonation — the metallic rattling sound of fuel igniting uncontrolled instead of burning smoothly. When it detects knock, it sends a voltage spike to the ECU. The ECU immediately retards timing in small increments until the knock stops. Then it slowly advances timing back toward the optimal point. This loop runs constantly, hundreds of times per second. It’s the reason modern engines can run safely on different octane fuels. Low octane? The knock sensor catches it and pulls timing. High octane? The engine runs more advance and makes more power.
The Effect of Ignition Timing on Power, Fuel Economy, and Emissions
Timing that’s too far advanced causes knock, which damages pistons and bearings over time. Timing that’s too far retarded wastes fuel, raises exhaust temperatures, and saps power. The sweet spot — maximum advance without knock — delivers the best of all three. This is why automakers spend so much engineering effort on precise control. Even a few degrees of timing error can cost 3–5% fuel economy and noticeable horsepower.
Emissions also shift with timing. Retarded timing burns fuel later in the cycle, which raises exhaust gas temperature and increases hydrocarbon output. Advanced timing runs cleaner but pushes the engine closer to detonation. The ECU balances these competing demands constantly, and the knock sensor is what makes the balance possible without constant tuning.
For DIY owners, the practical takeaway is simple. If your car has a distributor, timing is a physical adjustment you can set with a timing light. If it has coil-on-plug ignition (most cars built after 2000), the ECU handles everything — you can’t adjust it manually. What you *can* do is keep the knock sensor and its wiring in good condition. A faulty knock sensor forces the ECU to run a conservative timing map, which costs you power and fuel economy without any warning light. If your car feels sluggish and the check engine light shows a knock sensor code, replacing it is often the cheapest performance upgrade available.
Valve Timing and Variable Valve Timing (VVT): The Breathing Mechanism
If ignition timing controls *when* the spark fires, valve timing controls *when* the engine breathes. Valve timing refers to the precise moments the intake and exhaust valves open and close relative to the piston’s position. Get this wrong, and the engine cannot pull in enough air or push out enough exhaust — power drops, fuel economy suffers, and in severe cases, pistons can collide with open valves.
The Intake and Exhaust Stroke: When Valves Open and Close
Every four-stroke cycle relies on the intake stroke and exhaust stroke to move gases through the cylinders. During the intake stroke, the piston moves downward, creating low pressure that pulls the air-fuel mixture into the cylinder. The intake valve must be open during this entire downward travel — and often slightly beyond it.
Here is the nuance most DIY owners miss: the intake valve does not close at the bottom of the intake stroke. It stays open a bit longer as the piston begins its upward compression stroke. This is called intake valve closing (IVC) delay, and it exploits the inertia of the moving air column to pack more mixture into the cylinder at high RPM. The exhaust stroke works similarly. The exhaust valve opens before the piston reaches the bottom of the power stroke, using residual cylinder pressure to help push burned gases out. Both valves are actually open together for a brief window called valve overlap — this scavenging effect pulls fresh mixture in while exhaust gases exit.
How VVT Systems Optimize Performance Across the RPM Range
Fixed valve timing is a compromise. A camshaft ground for low-end torque will choke the engine at high RPM, and a high-RPM cam produces a gutless idle. Variable valve timing (VVT) solves this by shifting the camshaft’s phasing while the engine runs. At low RPM, the system retards the intake cam for stable idle and strong low-end torque. As RPM climbs, the VVT actuator advances the cam, opening the intake valve earlier and closing it later for better high-end airflow.
Modern systems go further. Some engines use continuously variable valve timing on both intake and exhaust cams. Others pair VVT with variable valve lift, which changes *how far* the valves open, not just *when*. The result is a flatter torque curve and better fuel economy across the entire RPM range. This is why VVT is standard on nearly every production engine built in the last two decades — it delivers what a fixed cam cannot.
Common VVT Problems and Symptoms of Failure
VVT systems fail through a few predictable failure modes. The most common is oil pressure loss to the VVT actuator. These actuators are hydraulically operated, so low oil pressure, clogged oil passages, or dirty oil will make them stick. You will typically see a check engine light with a VVT code, rough idle, and reduced fuel economy. A stuck actuator can also cause a rattling noise on cold start, especially in engines with cam phasers.
Another failure point is the VVT solenoid itself. These are electrically controlled valves that route oil to the actuator, and they are prone to carbon buildup and electrical failure. Symptoms include a hard start, hesitation during acceleration, and a noticeable drop in power. The good news is that both the solenoid and the actuator are serviceable parts. A DIY owner with basic tools can replace a VVT solenoid in under an hour on most engines. The actuator is more involved but still manageable.
[VERIFY: typical VVT actuator replacement labor time for common engine families (e.g., Toyota 2.5L, Ford 3.5L EcoBoost)]
If you catch VVT problems early, the fix is usually cheap. Ignore them, and a stuck intake cam can eventually cause piston-to-valve contact, which destroys the engine. If your car has a VVT code and you notice rough running, address it promptly. The cost of a solenoid is far less than a replacement head.
Symptoms of Incorrect Engine Timing: What Your Car Is Trying to Tell You
When engine timing drifts out of specification, the engine’s behavior changes in predictable ways. These symptoms are your car’s way of signaling that the synchronization between the crankshaft and camshaft — or the ignition spark and piston position — is off. Recognizing them early can save you from catastrophic internal damage.
Engine Misfires, Rough Idle, and Backfiring
An **engine misfire** is often the first sign of timing trouble. When the spark fires at the wrong moment, the air-fuel mixture ignites too early or too late, causing the cylinder to produce little or no power. You will feel this as a hesitation or stumble during acceleration, especially under load.
A **rough idle** accompanies the misfire because the engine cannot maintain a consistent combustion rhythm at low RPM. The engine may shake, vibrate, or feel like it is about to stall. If the timing is advanced too far, you may also hear **backfiring** — a loud pop from the intake or exhaust. Backfiring through the intake suggests the intake valve is open when combustion occurs, while backfire through the exhaust points to unburned fuel igniting in the exhaust system. Both indicate valve timing that is significantly off.
Reduced Power and Poor Fuel Economy
Incorrect timing directly reduces combustion efficiency. If the spark arrives late, the expanding gases do less work on the piston, so you lose throttle response and hill-climbing ability. If the timing is retarded, the engine feels flat and sluggish across the RPM range. Fuel economy drops because the engine must work harder to maintain speed, and unburned fuel may exit through the exhaust. A properly timed engine extracts maximum energy from every drop of fuel; a mistimed one simply wastes it. If you notice your fuel economy dropping by 15–20 percent without a clear cause, timing deserves a look.
The ‘Check Engine’ Light and Timing-Related Diagnostic Trouble Codes (DTCs)
The **check engine light** is your most reliable indicator. When the engine control unit detects that the crankshaft and camshaft positions are out of sync, it stores a **diagnostic trouble code** (DTC). Common timing-related codes include P0016 (crankshaft/camshaft position correlation bank 1), P0017 (bank 2), and P0300–P0312 for random or specific cylinder misfires. A code like P0016 means the ECU sees the camshaft position sensor signal arriving at the wrong time relative to the crankshaft sensor. This can point to a stretched timing chain, a slipped belt, or a failed VVT actuator.
Don’t Ignore a Timing Code
A P0016 or similar correlation code is not a “minor” fault. If the chain or belt has jumped a tooth, the valves and pistons may be on a collision course. Driving with this code active risks bent valves, damaged pistons, and a destroyed cylinder head. Pull over, scan the code, and investigate before continuing.
If you have a timing-related DTC, do not clear it and hope it stays away. The code is the result of a physical condition, not a software glitch. Address the root cause — whether that is a worn chain, a faulty sensor, or a stuck VVT actuator — before returning to the road.
How to Check and Set Engine Timing: A DIY Guide
Before you turn a single bolt, understand the difference between checking timing and setting timing. Checking is a diagnostic step — you verify that the spark fires at the correct moment relative to piston position. Setting is a correction — you loosen a sensor or distributor and rotate it until the timing matches the specification in your service manual. On modern cars, you often can’t set base timing manually at all. On older cars, it’s a straightforward 20-minute job.
Tools You’ll Need: Timing Light, Wrenches, and the Service Manual
The essential tool is a timing light — an inductive strobe that flashes when it detects the #1 cylinder spark signal. You will also need a basic wrench set, typically 10mm and 12mm, plus a socket for the crankshaft pulley bolt if you need to rotate the engine by hand. A tachometer helps confirm idle speed, since timing specs are only valid at a specific RPM.
The most important tool is the service manual for your exact make, model, and engine code. Published timing specifications vary by engine family, and guessing is how engines get damaged. The manual gives you three critical numbers: the base timing angle in degrees before top dead center (BTDC), the idle RPM at which to check it, and whether the engine uses a distributor or a crank/cam sensor system. If you don’t own the paper manual, look up the factory service information online — do not rely on generic forum advice for the specification itself.
Timing Light Types
Basic inductive timing lights flash continuously and work fine for checking base timing. Advanced models include an adjustable dial that lets you read advance degrees without marking the harmonic balancer. For a one-time check, a basic light under $50 is sufficient. For regular tuning work, an adjustable unit saves time.
Step-by-Step: Using a Timing Light to Check Base Timing
Step-by-Step: Details
Start with the engine at operating temperature and parked on level ground. Set the parking brake and chock the wheels. Connect the timing light’s power leads to the battery — red to positive, black to negative. Clip the inductive pickup around the #1 spark plug wire, usually the one closest to the front of the engine on the accessory belt side. Consult your service manual if the cylinder numbering is unfamiliar.
Next, locate the timing marks. Most engines have a notch or line on the crankshaft pulley or harmonic balancer, with a graduated scale on the timing cover. If the marks are dirty or corroded, clean them with a wire brush and add a dab of white paint or chalk to the notch so it’s visible under the strobe. Some engines require you to disable the idle air control or unplug the coolant temperature sensor to force the ECU into base timing mode — check the manual before proceeding.
With the engine idling at the specified RPM, aim the timing light at the marks. The strobe freezes the pulley’s rotation visually, letting you read the position of the notch against the scale. Compare your reading to the specification. If the notch sits at the correct degree mark, your base timing is within spec and no adjustment is needed. If it’s off by more than a couple of degrees, you have a decision to make — adjust it yourself if the engine allows, or investigate why it drifted.
Safety First
The engine is running with the hood open. Keep your hands, clothing, and the timing light leads away from the serpentine belt, cooling fan, and exhaust manifold. If the fan is electric and can cycle on independently, disconnect it or work with extreme care. Wear eye protection in case a belt or hose lets go.
How to Adjust Timing on Older Cars vs. Modern OBD-II Vehicles
Detailed Steps Adjust Timing on Older Cars vs. Modern OBD-II Vehicles
On older vehicles with a distributor — typically pre-1996, but some later — adjusting timing is mechanical. Loosen the distributor hold-down bolt just enough to rotate the housing. Turn it clockwise or counterclockwise to advance or retard the spark, watching the timing light as you go. Tighten the bolt, re-check the reading, and repeat until the notch sits on the spec. This process is forgiving because the distributor physically moves the trigger point relative to the crankshaft.
On modern OBD-II vehicles, the story is different. Most engines since the late 1990s have no distributor and no user-adjustable base timing. The crankshaft position sensor and camshaft position sensors send signals to the ECU, which calculates ignition timing dynamically based on load, RPM, knock sensor feedback, and dozens of other inputs. There is no physical adjustment to make — and no timing mark to read with a light in most cases.
What you can do on an OBD-II car is verify that the sensors are reading correctly and that the mechanical timing (belt or chain position) is correct. That means checking the alignment marks on the crank and cam sprockets, which requires removing covers and sometimes the accessory belt. If the mechanical timing is correct and the sensors are functional, the ECU handles the rest. If you suspect the ECU is commanding incorrect timing, you need a scan tool that reads live data — a timing light alone won’t tell you what the computer is doing.
If your car runs rough and the timing light shows correct base timing, the problem is elsewhere. Look at fuel delivery, compression, or vacuum leaks before assuming the ignition system is at fault. Correct base timing is a necessary condition for smooth operation, but not the only one. A timing light tells you when the spark fires; it cannot tell you whether the spark is strong enough to ignite the mixture, or whether the mixture is present at all.
For engines with adjustable timing, always re-check your work after tightening the hold-down bolt. The act of tightening can shift the distributor housing a degree or two. Set it, tighten, re-check, and adjust again if needed. Patience here prevents a persistent rough idle that you’ll chase for weeks.
If you set timing and the engine develops a knock or pinging under load, you’ve likely advanced it too far. Retard the timing in small increments — two degrees at a time — and re-test. Conversely, if the engine feels sluggish and lacks power, the timing may be retarded. The correct setting is a balance between performance and knock resistance, and the factory specification is the safest target.
Timing Belt Replacement: When and Why It’s Non-Negotiable
A timing belt replacement is one of the few maintenance jobs where skipping it can destroy your engine in seconds. Unlike an oil change where neglect leads to gradual wear, a broken timing belt can cause immediate, catastrophic internal damage. This is why every manufacturer publishes a strict replacement interval, and why ignoring that interval is a gamble with your engine’s life.
The 60,000 to 100,000 Mile Rule: Manufacturer Intervals
Most manufacturers specify a timing belt replacement interval between 60,000 and 100,000 miles. Some newer engines use belts rated for 105,000 miles, while older designs often required service at 60,000. The exact number depends on the engine design, belt material, and how the manufacturer tested the component. [VERIFY: Confirm specific OEM interval examples for popular engines, e.g., Honda 2.4L vs. Toyota 2.5L, to illustrate the range.]
The interval is stated in your owner’s manual, and it’s usually tied to years as well as miles — typically five to seven years. Time matters because heat and under-hood exposure degrade the rubber even if the car sits parked. A belt that looks fine on the outside can be brittle and ready to snap on the inside.
Replacing on schedule
- Prevents catastrophic engine failure from a snapped belt
- Preserves the engine’s resale value with documented maintenance
- Cheaper than a valve job or complete engine replacement
- Often bundled with water pump and tensioner service for one labor charge
Deferring or skipping replacement
- Risk of bent valves, damaged pistons, and cracked cylinder heads
- Engine may be a total loss if the belt breaks at highway speed
- Emergency repairs cost significantly more than scheduled maintenance
- No warning before failure — the belt gives no audible signal
What Happens If a Timing Belt Breaks? (Interference vs. Non-Interference Engines)
Understanding Happens If a Timing Belt Breaks? (Interference vs. Non-Interference Engines)
The consequence of a broken belt depends entirely on whether your engine is an interference engine or a non-interference engine. This distinction is the single most important factor in understanding your risk.
In a non-interference engine, the pistons and valves do not occupy the same space at any point in the cycle. When the belt breaks, the camshaft stops, the valves stop, and the engine simply stalls. You’re stranded, but the engine survives. You install a new belt, set the timing, and drive away.
In an interference engine, the pistons and valves do share space — just not at the same time. When the belt breaks, the camshaft stops instantly while the crankshaft continues to spin from momentum. The pistons travel up and physically collide with the open valves. The result is bent valves, damaged pistons, and often a cracked cylinder head. This is an expensive repair that can exceed the value of an older vehicle.
Most modern engines are interference engines because they produce more power and better fuel economy from a smaller displacement. If you don’t know which type you own, check your service manual or ask a mechanic before deciding to defer replacement. [VERIFY: Compile a list of common interference vs. non-interference engines by manufacturer to help readers identify their risk.]
The Complete Replacement Checklist: Water Pump, Tensioners, and Idler Pulleys
The Complete Replacement Checklist: Details
A proper timing belt replacement is never just a belt swap. The water pump, tensioner, and idler pulleys are all driven by or mounted near the belt, and they wear out on similar timelines. Replacing them together saves you from paying the same labor cost twice.
The water pump is driven by the timing belt on many engines. If it fails after you’ve installed a new belt, you’ll need to disassemble the entire front of the engine again just to reach it. A leaking water pump also sprays coolant onto the belt, which accelerates rubber degradation. Replacing it while you’re already in there is standard practice.
The tensioner maintains proper belt tension. A worn tensioner allows the belt to flutter, which causes timing drift and premature belt wear. The idler pulleys guide the belt and reduce vibration. A failing pulley makes a grinding or whirring noise before it seizes — and a seized pulley can shred a new belt in minutes.
If you own an interference engine, timing belt replacement is not optional maintenance — it’s insurance against an engine-destroying event. The cost of a full kit with water pump and tensioner is typically a few hundred dollars in parts, plus labor if you don’t do it yourself. Compare that to the $3,000 to $5,000 cost of rebuilding a damaged head, and the math is clear. Check your owner’s manual for the interval, note it on your maintenance calendar, and never defer this service past the specified mileage or years.
Engine Timing FAQ: Answering the Most Common DIY Questions
What happens if my engine timing is off by one tooth?
One tooth on a timing belt usually means 5 to 10 degrees of camshaft misalignment. The engine will run poorly — rough idle, low power, maybe a backfire through the intake or exhaust. On a non-interference engine, you can often fix it by resetting the belt. On an interference engine, even one tooth can cause piston-to-valve contact at high RPM. If you suspect a skipped tooth, stop driving and check the alignment marks immediately.
Can I set ignition timing without a timing light?
You can approximate it by ear or with a vacuum gauge, but a timing light is the only accurate method. Modern engines with distributorless ignition systems (DIS) don’t have a traditional timing adjustment at all — the ECU controls it. If your car has a distributor, a basic inductive timing light costs about $30 and pays for itself in one use. For engines with adjustable cam gears, you’ll need a dial indicator or a degree wheel to set valve timing precisely.
How often should I replace my timing belt?
Most manufacturers recommend 60,000 to 100,000 miles, but the exact interval varies by engine design. Check your owner’s manual — some interference engines like older Audi and Volkswagen units spec 60,000 miles, while many Honda and Toyota engines go 105,000. Time matters too: belts degrade from heat and ozone even if you don’t drive much. Most experts recommend replacement every 7 to 10 years regardless of mileage. [VERIFY: specific OEM interval recommendations for common 2015-2025 vehicles to cite as examples]
Is a timing chain better than a belt?
Chains last longer — often the life of the engine — and don’t need scheduled replacement. But they’re not maintenance-free. Chain guides and tensioners wear out, and a stretched chain causes the same symptoms as a worn belt. Chain replacement is more labor-intensive and expensive than belt service. Belts are quieter, cheaper to replace, and fail more predictably. Neither is inherently superior; it comes down to the engine design and your maintenance budget.
What’s the difference between ignition timing and valve timing?
Ignition timing is when the spark plug fires relative to piston position, measured in degrees before top dead center (BTDC). Valve timing is when the intake and exhaust valves open and close, controlled by the camshafts. Both are part of engine timing explained as a whole system — they must work together for proper combustion. The ignition system handles the spark; the valvetrain handles the breathing. Modern engines coordinate both through the ECU and variable valve timing systems.
Can bad timing cause engine damage?
Yes, and the severity depends on your engine type. On interference engines, a broken belt or chain causes immediate catastrophic damage — bent valves, damaged pistons, and often a ruined cylinder head. Incorrect ignition timing causes detonation and pre-ignition, which can melt pistons and burn valves over time. Even mild misalignment increases exhaust temperatures and reduces fuel economy. Timing issues are not “drive it and see” problems — diagnose and fix them promptly.
Quick Reference: When to Act
If you notice any of these, check timing before continuing to drive:
- Engine won’t start or backfires through intake/exhaust
- Rough idle that doesn’t improve with cleaning
- Loss of power or poor fuel economy
- Check engine light with misfire or cam/crank correlation codes
If your engine is running rough and you suspect timing issues, start with the symptoms section above to narrow down whether the problem is ignition-related or valve-related. And if you’re approaching the replacement interval on your belt, don’t wait for symptoms — the timing belt replacement section covers what you need to know about doing the job safely.
Frequently Asked Questions
Can I drive my car with a bad timing belt?
[HUMAN INPUT NEEDED: Research and write a factual 2-3 sentence answer for this question.]
What is the difference between a timing belt and a serpentine belt?
[HUMAN INPUT NEEDED: Research and write a factual 2-3 sentence answer for this question.]
How do I know if my timing is off without a timing light?
[HUMAN INPUT NEEDED: Research and write a factual 2-3 sentence answer for this question.]
Does engine timing affect fuel consumption?
[HUMAN INPUT NEEDED: Research and write a factual 2-3 sentence answer for this question.]
Can bad engine timing cause a car to overheat?
[HUMAN INPUT NEEDED: Research and write a factual 2-3 sentence answer for this question.]
Final Verdict: Engine Timing Is the Heartbeat of Your Engine
Engine timing is the precise orchestration of ignition and valve events that determines how efficiently your engine converts fuel into motion. At its core, the central entity here is a coordinated system of components — the timing belt or chain, camshaft, crankshaft, and ECU — working together to ensure the valves open and close in perfect sync with piston movement. The most critical attributes are timing accuracy (measured in degrees of crankshaft rotation), component durability (belt vs. chain), and service intervals that vary by manufacturer.
After analyzing the three main timing systems — belt-driven, chain-driven, and gear-driven — our top recommendation is a chain-driven system with automatic hydraulic tensioners for most modern drivers. This choice wins because it offers the best balance of longevity (typically 200,000+ miles vs. 60,000–100,000 for belts), minimal maintenance burden, and quiet operation when properly tensioned. For performance enthusiasts building a high-revving engine, however, a gear-driven system offers unmatched precision but at the cost of increased noise and vibration.
Use this decision framework to match your needs:
If you need maximum reliability with minimal maintenance, choose a chain-driven system because it eliminates the catastrophic failure risk of a broken belt and typically outlasts the vehicle itself. If you need predictable, low-cost scheduled maintenance, choose a belt-driven system because the 60,000-mile interval is inexpensive to service compared to chain replacement labor. If you need race-level timing precision at high RPM, choose a gear-driven system because it eliminates all flex and stretch inherent in belts and chains.
We must be honest about a limitation: no timing system is maintenance-free forever. Even chain systems can stretch over time, and hydraulic tensioners eventually wear out. If you buy a used car with a chain-driven engine, you cannot assume it’s immune to failure — inspect the tensioner condition and listen for rattling on cold starts. Similarly, belt systems can fail prematurely if oil leaks contaminate the belt, so addressing leaks promptly is non-negotiable.
Your next step is simple: check your owner’s manual for your engine’s timing component type and service interval. If you’re near the recommended mileage — whether it’s 60,000 for a belt or 150,000 for a chain — schedule an inspection with a qualified mechanic. Proactive timing maintenance is the single most cost-effective investment you can make to protect your engine from catastrophic internal damage.
You might also like: carbon buildup cleaning, oil change Toyota Camry, best oil for hybrid engines