Coilover Installation: Complete Guide
Coilover installation is the process of replacing a vehicle’s factory suspension struts and springs with a single, integrated assembly known as a coilover — a coil spring wrapped around a shock absorber with adjustable ride height and, on higher-tier units, adjustable damping. This is a suspension modification, not a simple bolt-on accessory; it changes the geometric relationship between the chassis, control arms, and wheels, which is why getting the procedure right matters as much as choosing the correct part. For the DIY enthusiast, the job sits at an intermediate skill level: it demands basic hand tools, a jack and stands, and roughly four to six hours of uninterrupted garage time, but it rewards you with a drop in center of gravity, sharper turn-in response, and the ability to dial in corner weights that no factory strut can offer.
This guide walks you through the full installation sequence — from pre-installation prep and spring preload adjustment to torque specs, brake line routing, and the critical first-drive alignment check. I will cover the attributes that separate a safe install from a sloppy one: correct torque values for the top hat and lower mounting bolts, the difference between pillowball and rubber upper mounts, and why you must never tighten control arm bushings with the suspension at full droop. I also include honest limitations — coilovers will not fix a bent subframe, and they will make a daily driver stiffer no matter how soft you set the damping. Where most guides stop at “bolt it on and drop it,” this article gives you the data-driven details: spring rate math for street versus track use, the exact torque sequence for BMW and Honda platforms, and a troubleshooting table for the clunks and squeaks that follow a bad install.
What Is a Coilover Installation and How Does It Differ from Standard Suspension Work?
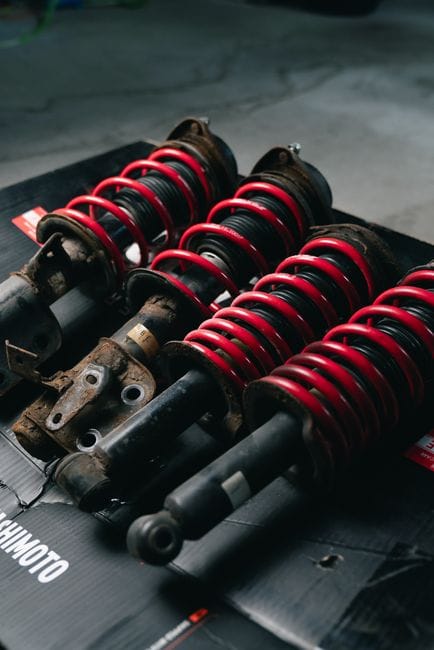
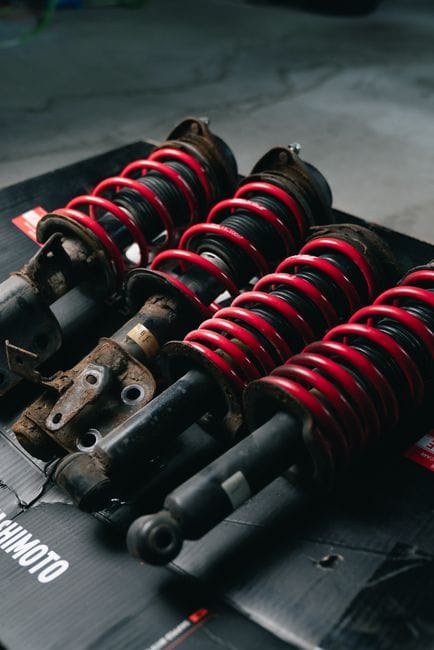
A coilover installation is the process of removing a vehicle’s factory suspension components and replacing them with adjustable coilover units. The name comes from the design itself—a coil spring mounted over a shock absorber, forming one integrated assembly. This is a fundamental change from how most stock suspension systems are built, and the installation process reflects that difference.
Defining the Coilover Unit: Spring and Damper as One Assembly
In a standard suspension system, the spring and the damper (shock absorber) are separate parts. They mount to the vehicle at different points and work together through the suspension geometry, but you replace them independently. An adjustable coilover combines both into a single unit. The spring sits directly on the damper body, and threaded collars let you change spring preload and ride height without removing the whole assembly.
This unified design is the core reason coilover installation differs from routine suspension work. When you install coilovers, you are not just swapping worn parts for new ones. You are changing the structural relationship between the spring and damper, which alters how the suspension system compresses, rebounds, and transfers load to the tires.
Coilover Installation vs. Strut Replacement: Key Differences
Many DIY enthusiasts confuse coilover installation with strut replacement. A strut is also a single unit—the shock absorber and spring are assembled together in the factory. But a factory strut is a sealed, non-adjustable component. You bolt it in, align the car, and drive away. The spring rate, ride height, and damping are fixed by the manufacturer.
Coilover installation is more involved because you control those variables. The adjustable coilover units arrive with a base setup, but the installer must set spring preload, choose a ride height, and adjust damping to match the vehicle’s weight and intended use. Strut replacement takes an hour per corner. A proper coilover installation takes several hours because you are tuning, not just bolting on parts.
What Coilover Installation Does to Your Vehicle’s Dynamics
Understanding Coilover Installation Does to Your Vehicle’s Dynamics
The most obvious effect of coilover installation is ride height adjustment. Lowering the center of gravity reduces body roll in corners and improves the vehicle’s stance. But the benefits go deeper. Adjustable coilover units with separate compression and rebound damping let you tune how the suspension system responds to bumps, braking, and weight transfer.
There is an important trade-off to understand. Lowering the car changes the suspension geometry—the angles of the control arms, tie rods, and half shafts. If you lower the ride height beyond the range the factory geometry was designed for, you introduce bump steer, premature tire wear, and reduced suspension travel. A quality coilover installation accounts for this with camber plates and adjustable control arms, but those are additional components you should budget for.
[VERIFY: maximum recommended drop for common chassis (e.g., Honda Civic, BMW 3 Series) before geometry correction parts are required]
The factory suspension is engineered for a specific compromise between comfort, handling, and tire longevity. Coilover installation shifts that balance toward performance. You gain sharper response and lower body roll, but you typically lose ride comfort and gain noise from stiffer bushings and spring perches. If you daily-drive the car, factor that in before you start.
One more distinction matters for planning. Coilover installation is not a single procedure—it is a series of steps that includes pre-installation preparation, removing the factory suspension, mounting the new units, setting ride height and damping, and a post-installation checklist for alignment and re-torque. Each stage is covered in the sections below, and the mistakes to avoid section covers the common pitfalls that turn a straightforward job into a weekend project.
Pre-Installation Preparation: Tools, Parts, and Safety Checks
Before you touch a single bolt, you need to know exactly what you are working with. The difference between a smooth coilover installation and a frustrating weekend project usually comes down to preparation. You will need the right tools, a solid understanding of your car’s current condition, and a workspace that does not put you in danger.
Complete Tool List: From Jack Stands to Torque Wrenches
A coilover installation demands specific tools. You cannot improvise your way through this with a basic socket set alone. Here is what you need on hand before you start:
– **Jack stands** (at least two, rated for your vehicle’s weight) and a floor jack. Never rely on the factory scissor jack for this job.
– A **torque wrench** — this is non-negotiable. Suspension bolts have specific torque specifications, and guessing means either loose bolts or stripped threads. Get one that covers the range your car requires, typically 20–150 ft-lbs.
– A breaker bar with a long handle. Factory suspension bolts are often torqued to spec and then corroded in place. You will need leverage.
– Standard and deep-well sockets, plus combination wrenches in metric and SAE sizes. You will not know which your car uses until you look.
– A spring compressor — if you are disassembling the factory strut assembly, you must compress the spring safely before removing the top nut.
– Penetrating oil, a wire brush, and a mallet for seized hardware.
– A pry bar for separating ball joints and lower control arms.
– Anti-seize compound for reassembly, and thread-locker for specific fasteners.
Torque Wrench Etiquette
Do not use your torque wrench as a breaker bar. That damages the internal mechanism and throws off its calibration. Break bolts loose with the breaker bar first, then use the torque wrench only for tightening to spec. Store it at its lowest setting when not in use.
Pre-Installation Inspection: What to Check Before You Start
Your new coilovers will not fix pre-existing suspension problems. They will amplify them. Before you begin, inspect the components you are about to disturb:
– **Check for worn bushings and ball joints.** If these are loose, your new coilovers will transmit that play directly to the chassis.
– **Inspect the strut mounts and top hats.** If they are cracked or worn, replace them now. You do not want to redo this job in six months because you skipped a $40 part.
– **Look at your brake lines and ABS sensor wires.** They route near the strut assembly. A seized bracket or a chafed line will cause problems during removal.
– **Note the condition of your sway bar end links.** They often need to be disconnected during a coilover installation, and they are cheap to replace while you are in there.
If you find corroded or seized bolts during inspection, apply penetrating oil and let it soak overnight before you start the actual removal. This is the single biggest time-saver in suspension work.
Preparing Your Workspace for a Safe Coilover Installation
Safety procedures are not optional for this job. You are working with heavy components under a vehicle that is raised off the ground. The stakes are high.
Never Work Under a Car Supported Only by a Jack
Never Work Under a Car Supported Only by a Jack
Hydraulic jacks can fail or leak. Jack stands are your primary support. Place them on solid, level ground on the frame rails or designated jack points — never on the floor pan or suspension components. Give the car a firm shake after lowering it onto the stands to confirm it is stable.
Your workspace needs to be level, dry, and well-lit. If you are working in a garage, clear the area of clutter. If you are working on gravel or dirt, use a piece of plywood under the jack and jack stands to prevent sinking. Keep a fire extinguisher nearby — not because this job involves fuel, but because you will be using penetrating oil and possibly a heat source for seized bolts.
Wear appropriate safety equipment: safety glasses to protect against debris, and heavy-duty gloves when handling springs and suspension components. A spring compressor failure can send parts flying with enough force to cause serious injury. Never stand directly over a compressed spring.
For your own safety, review proper lifting and jacking procedures before you begin. The technique for safely raising your vehicle is covered in our guide to basic automotive safety measures, and it applies directly to the prep work for this project. A coilover installation is rewarding, but only if you finish it without injury or damage to your car.
Step-by-Step Coilover Installation: Removing the Factory Suspension
Lifting and Securing the Vehicle: A Non-Negotiable Safety Step
Lifting and Securing the Vehicle: Details
Before you touch a single bolt, get the car on four jack stands. You will be under the vehicle, and a hydraulic jack alone is not a stable platform. Place the stands at the manufacturer’s designated lift points — check your owner’s manual if you are unsure where those are. Give the car a firm shake once it is on the stands. If it moves, lower it and reset the stands. Your safety depends on this step, so do not rush it.
Chock the wheels that stay on the ground. If you are working on the front, chock the rear wheels on both sides. Set the parking brake as well. This prevents any chance of the vehicle rolling while you are loosening bolts under load. A car that rolls off a jack stand is a catastrophic failure, not a minor inconvenience.
For the coilover installation to go smoothly, you need clear access to the strut tower and the lower control arm. If your vehicle sits low, you may find it easier to remove the wheels first so you can see exactly what you are working with. Loosen the lug nuts while the car is still on the ground — this stops the wheel from spinning as you break them free. Then raise the vehicle and remove the wheels completely. Store them flat under the car as an extra layer of protection, just in case a stand fails.
Removing the Wheel and Disconnecting the Factory Strut Assembly
Removing the Wheel and Disconnecting the Factory Strut Assembly
With the wheel off, you have a clear view of the factory strut. The typical setup has three upper nuts accessible from the engine bay (or trunk on some rear setups) and two lower bolts connecting the strut to the steering knuckle. Start with the upper nuts. Spray them with penetrating oil and let it soak for a few minutes. These are frequently rusted, especially on older vehicles.
You will need a second set of hands or a jack to support the strut once you remove the lower bolts. Do not let the assembly hang by the brake line or the ABS sensor wire. Loosen the lower bolts while the strut is still secured at the top. Then, have your helper hold the strut, or place a floor jack under the control arm to keep tension on the assembly. Remove the lower bolts and gently lower the strut out of the wheel well.
If the strut will not come free, do not force it. The lower control arm may need to be pried down slightly to release the strut from the knuckle. A pry bar between the control arm and the subframe usually does the trick. If the bolts are seized, apply heat carefully with a torch — but keep it away from any rubber bushings or brake components. A seized bolt that snaps inside the knuckle turns a simple job into a much larger repair, so patience here prevents problems later.
Handling ABS Sensors and Brake Lines: Avoiding Costly Mistakes
Handling ABS Sensors and Brake Lines: Details
Before you pull the strut free, disconnect the ABS sensor wire from its bracket. These sensors are fragile and expensive to replace. Do not yank on the wire. Use a small flathead screwdriver to release the clip, then guide the wire out of its mounting points. Tuck it out of the way so you do not accidentally crush it with a wrench or jack.
Brake lines are the other major hazard. The factory hard line runs down the strut and connects to a flexible hose at the knuckle. You do not need to disconnect the hard line for most coilover installations — the new unit uses the same mounting point. If you must disconnect the brake line, be prepared to bleed the brakes afterward. That is an extra step, so avoid it unless the line is in the way. If the line is rusted or brittle, replace it before reassembly. A failing brake line is a safety issue, not just a performance concern.
The factory strut assembly is now out. Set it aside carefully — you will need the upper mount and bearing if you are reusing them, or you may be replacing them with new units. Check the condition of the spring isolators and bump stops while you have everything apart. If they are cracked or perished, now is the time to replace them. This is also the moment to inspect your control arm bushings for wear. If they are shot, a coilover installation will amplify the sloppiness in your suspension geometry, and you will feel it in the steering wheel. For a deeper look at diagnosing suspension wear before you reassemble, our guide on control arm troubleshooting covers the signs you should watch for.
Keep the area around the strut tower clean. Dirt and debris that fall into the tower will sit between the new coilover’s upper mount and the chassis, which can cause creaking noises later. Wipe the mounting surface down before you proceed to the next step.
Step-by-Step Coilover Installation: Mounting the New Coilover Units
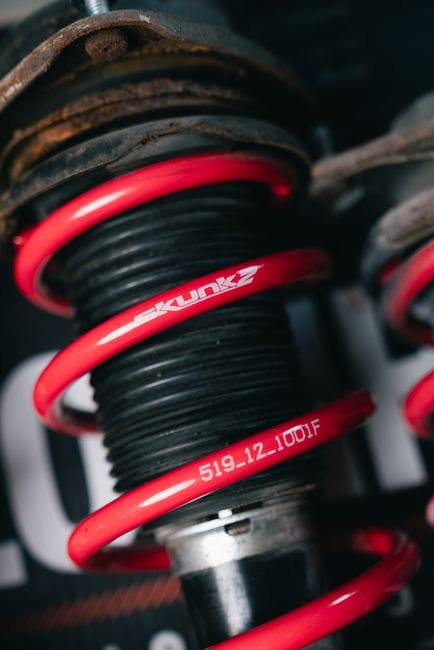
With the factory strut assembly removed and the mounting surface clean, you are ready to install the new coilover units. This stage of the coilover installation demands patience and attention to detail. Rushing the assembly here can lead to premature bearing failure, loose hardware, or a dangerous setup that settles incorrectly once the car is back on the ground.
Setting Initial Spring Preload: Where to Start
Setting Initial Spring Preload: Details
Before you mount anything, set the initial spring preload. Most coilovers ship with a baseline setting, but you should verify it. Preload is the amount of compression applied to the spring when the damper is fully extended. It is not ride height. Adjusting preload changes how the suspension reacts to weight transfer, while ride height adjustment moves the spring perch and the lower bracket together.
Start with the manufacturer’s recommended baseline, usually between zero and 5 mm of preload. To set this, loosen the locking collar on the threaded body, then turn the spring perch until it just contacts the spring. From there, add the specified amount of additional compression. If you compress the spring too much, the suspension will feel harsh and the car may not settle to the height you expect. Too little preload can cause the spring to rattle or unseat during rebound.
A common mistake is cranking preload to lower the car. That is the wrong tool for the job. You lower the car by adjusting the lower bracket or the spring perch as a whole, not by crushing the spring.
Mounting the Coilover: Top Hats, Bearings, and Hardware
Mounting the Coilover: Details
Now assemble the top components. The top hat sits between the coilover shaft and the chassis. If your kit uses a pillow ball mount, it includes a bearing that allows the strut to rotate with steering input. If the bearing is binding or feels gritty out of the box, stop and inspect it — a seized top hat bearing will make steering heavy and cause clunking noises.
Transfer the top hat and bearing from your factory assembly if the coilover kit requires it, or use the new units supplied in the box. Apply a thin coat of anti-seize to the threads on the damper shaft before sliding the top hat on. This prevents corrosion and makes future adjustment or disassembly far easier. Ensure the bearing is oriented correctly; most have a directional marking or a flat side that seats against the chassis.
When you lift the coilover into the strut tower, guide the top hat studs through the holes in the chassis. Do not let the unit hang by the brake line or the ABS sensor wire. Use a floor jack under the lower control arm to help align the bottom of the coilover with the knuckle. This is safer than forcing the assembly into place and prevents damaging the new damper.
Torque Specifications: Why Guessing Is Not an Option
Torque Specifications: Details
This is the step where a coilover installation succeeds or fails. Every fastener on a coilover has a specific torque specification. The top hat nuts, the knuckle bolts, and the lower bracket bolts all need to be tightened to the values listed in the kit’s manual. Guessing at torque is not an option because both undertightening and overtightening cause failures.
Undertightened bolts allow movement and create knocking sounds. Overtightened bolts can strip threads or crush bushings, ruining the ride quality you just paid for. Use a calibrated torque wrench for every fastener. If your kit did not include a torque specification chart, contact the manufacturer before proceeding.
For the top hat nuts, use a wrench on the damper shaft to hold it steady while you torque the nut. Do not let the shaft spin, as this can damage the internal valving. Torque the knuckle bolts to the factory specification for your specific vehicle, which you can find in the service manual. If you are reusing factory hardware, clean the threads thoroughly and apply thread locker to the knuckle bolts. The lower bracket bolts are typically the same specification as the factory strut-to-knuckle bolts, but confirm this in your kit’s documentation.
[VERIFY: Torque specification chart for common coilover kits (top hat nuts, knuckle bolts, lower bracket bolts) for popular vehicle applications]
Once everything is torqued, double-check that the spring is seated properly in its upper and lower perches, and that the preload collar is locked down tight. Give the assembly a firm shake to confirm nothing is loose. The mounting phase is complete when the coilover is secure, the hardware is torqued, and the unit moves freely with the suspension. From here, you will move on to setting the ride height and damping, which is the adjustment phase covered in the next section.
Setting Ride Height and Damping: The Art of Coilover Adjustment
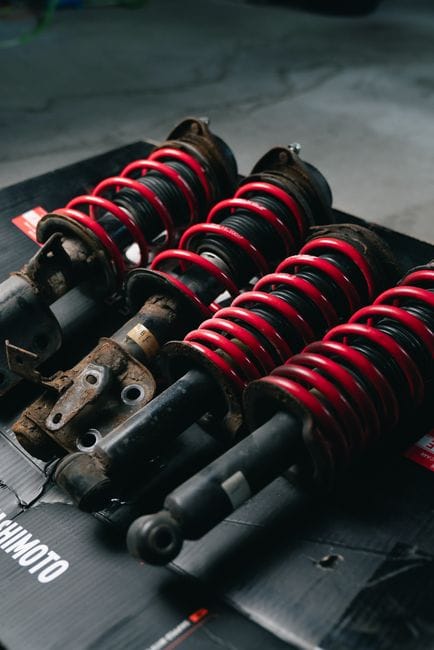
With the new units mounted and torqued, the suspension is mechanically complete. The next phase is where coilovers differ from every other spring-and-shock combo: you now control the car’s stance, travel, and feel through ride height and damping adjustment. This is the step that separates a car that simply sits lower from one that handles predictably.
How to Adjust Ride Height Without Introducing Suspension Binding
Detailed Steps Adjust Ride Height Without Introducing Suspension Binding
Ride height adjustment on a coilover changes the spring perch position on the threaded body. Lowering the perch reduces ride height; raising it increases ride height. The critical rule is to adjust the perch, not the spring preload, when changing stance. Preload sets the spring’s initial compression force, while the perch sets the chassis height. Confusing the two leads to a harsh ride or a spring that unseats during suspension travel.
You must also respect the coilover’s designed travel range. Every kit has a minimum and maximum height window. Running the car at the extreme low end of that window often causes the internal bump stop to engage on normal roads, which feels like a solid hit over every expansion joint. Worse, you can introduce suspension binding—where the control arms, axle shafts, or tie rods hit their limits before the suspension compresses fully. To check for binding, lower the car off the jack stands and, with the wheels on the ground, have a helper push down on the front fender. The suspension should compress and rebound freely. If you hear a clunk or feel a hard stop, raise the ride height until the movement is smooth.
A practical approach is to set the ride height with the car on the ground, not on jack stands. Suspension geometry changes as the car settles, so a height set in the air will be different once the vehicle’s weight is on the wheels. Roll the car back and forth a few feet to let the suspension settle, then measure from the fender lip to the center of the wheel hub. Adjust in small increments—a quarter turn of the perch is roughly [VERIFY: millimeters of ride height change per full turn for common coilover thread pitches]—and re-measure each time.
Damping Adjustment: From Soft to Firm and Everything Between
Damping Adjustment: Details
Damping adjustment controls how quickly the shock absorber resists compression and rebound. Most entry-level coilovers offer a single adjustment that changes both simultaneously, while higher-end units separate rebound and compression into independent knobs. The adjustment is typically a knob on the top of the damper shaft or a dial on the lower body. Turn it clockwise for firmer, counterclockwise for softer.
Start with the manufacturer’s baseline setting, usually marked in the manual or on the knob itself. From there, adjust in two-click increments. Drive the same stretch of road—one with a few bumps and a sweeping corner—and change only one setting at a time. If the car feels floaty and the body rolls excessively in corners, firm up the damping. If the ride is jarring and the wheels skip over bumps, soften it. The goal is a balance where the suspension absorbs impacts without allowing excessive body movement.
A common mistake is cranking damping to full firm, assuming that means better handling. Over-damped suspension cannot compress quickly enough to absorb bumps, so the tires lose contact with the road. This reduces grip, not increases it. Similarly, overly soft damping makes the car pitch and dive under braking. The correct setting is one where the car feels composed but not harsh, and where the tires stay planted over undulating surfaces.
Corner Balancing: What It Is and Why It Matters
Corner Balancing: Details
Corner balancing is the process of adjusting ride height at each corner so the car’s weight is distributed evenly across all four wheels. It is not the same as setting the car level. A car can sit perfectly level yet still have one corner carrying significantly more weight than the others, which causes that tire to work harder and wear faster.
The process requires four scales, one under each wheel. The car is rolled onto the scales, and the weight at each corner is recorded. Then, the ride height at the corners is adjusted to equalize the diagonal weight distribution—front-left plus rear-right should roughly equal front-right plus rear-left. This is a precise, iterative process: change one corner’s height, re-measure all four, and repeat until the diagonals are within [VERIFY: acceptable weight distribution tolerance in percentage for street vs. track use]. It is not a critical step for a daily driver, but it is essential for track use or any car where predictable handling is the priority.
If you do not have access to scales, you can still improve weight distribution by setting the ride height evenly at all four corners and checking that the car sits level side-to-side. This will not achieve true corner balancing, but it prevents the most obvious weight bias. For a proper corner balance, seek out a shop with the equipment—the process is straightforward but requires the tools.
With the ride height and damping set, the mechanical setup is complete. The next step is the post-installation checklist, where you will verify alignment, take a test drive, and re-torque the hardware after the suspension has settled.
Post-Installation Checklist: Alignment, Test Drive, and Re-Torque
Once the coilover installation is complete and the ride height is set, the mechanical work is not finished. Three critical steps remain: a wheel alignment, a controlled test drive, and a re-torque of the suspension components after the car settles. Skipping any of these can undo the setup work or create a safety risk.
Why a Wheel Alignment Is Mandatory After Coilover Installation
Lowering the car changes the suspension geometry. The control arms move into a different arc, which alters camber, caster, and toe angles. Even if the car drove straight before, the new ride height will push the alignment out of spec. A wheel alignment is not optional after a coilover installation—it is a required step to protect tire life and predictable handling.
Without an alignment, you will likely see accelerated edge wear on the tires. The steering may also pull to one side, and the car can feel unstable under braking. For street driving, a standard alignment to factory specs is a safe baseline. For track use, you may want a performance alignment with added negative camber. Tell the technician the car has new coilovers and state your driving goals so they can set the correct targets. The cost is a small fraction of the price of new tires.
The Test Drive: What to Listen and Feel For
The test drive is your chance to verify the coilover installation before putting the car under real stress. Start in a parking lot at low speed. Turn the steering wheel lock-to-lock and listen for popping or clicking sounds from the front suspension. These noises often indicate a loose top nut or a spring that is not seated correctly.
Move to a smooth road and accelerate gently, then brake firmly. The car should stay stable without pulling to one side. Listen for clunks from the rear when going over dips—this can signal loose hardware or a misaligned spring perch. On a rough road, note any harsh banging that sounds like metal-on-metal contact. That usually means the damper is bottoming out or the spring is binding. If you hear any of these sounds, return and inspect the suspension components before driving further.
Re-Torque After 100 Miles: The Step Most DIYers Skip
New coilovers settle into place after the first few drives. The bushings compress, and the spring perches seat fully. This movement can loosen the hardware that was tightened when the suspension was in the air. After roughly 100 miles of driving, put the car back on jack stands and re-check every bolt and nut you touched during the coilover installation.
Use the torque specifications from the coilover manufacturer and the vehicle service manual. Pay special attention to the top strut nut, the lower mounting bolts, and the sway bar end links. If the car is driven hard or taken to a track, consider a second re-torque after 500 miles. This step is tedious, but a loose strut bolt at speed is a serious hazard. For more on checking mechanical components after a job, see our guide on [laser engraver troubleshooting](/laser-engraver-troubleshooting) for a similar systematic verification approach.
Coilover Installation Mistakes: What to Avoid and How to Fix Them
Even a careful DIYer can make errors during a coilover installation. The good news is that most mistakes are fixable. The bad news is that ignoring them can damage your new suspension or make the car unsafe to drive. Here are the most common problems and how to solve them.
H3: Over-Tightening Bolts: The Silent Suspension Killer
Over-tightening is the most frequent mistake in any coilover installation. When you use an impact wrench on suspension bolts, you can easily exceed the manufacturer’s torque specifications. This stretches the bolt or strips the threads in the mounting point. The bolt may hold for a while, but it can fail suddenly under load.
The fix is to use a calibrated torque wrench for every fastener. If you suspect a bolt is over-tightened, remove it and inspect the threads. A stretched bolt shows necking near the head. Replace it with a new OEM-grade bolt rather than risking a failure. Also, remember that torque specifications are for clean, dry threads unless the manual says otherwise. Lubricated threads can reach the same clamping force at lower torque settings.
H3: Incorrect Spring Preload: Symptoms and Solutions
Spring preload is the amount of compression applied to the spring before the car’s weight is on it. Getting this wrong during a coilover installation leads to a poor ride and odd handling. Too much preload makes the suspension feel harsh and can cause the spring to bind. Too little preload allows the spring to move or rattle inside the perch.
Symptoms of incorrect preload include a clunking noise over bumps, uneven ride height side-to-side, and a car that sits lower on one corner. To fix it, adjust the preload collars equally on both sides. Use the manufacturer’s recommended preload setting as a starting point. Then measure the ride height at each corner and adjust in small increments. Keep a log of your adjustments so you can return to a known-good setting.
H3: Ignoring Squeaks and Rattles: Diagnosing Post-Installation Noises
After a coilover installation, new noises are a signal, not a nuisance. A squeak often comes from a dry or misaligned bushing. A rattle can mean a loose end link or a spring that isn’t seated in its perch. Ignoring these sounds lets a small issue become a major repair.
Start by checking the simplest causes first. Apply a silicone-based lubricant to the bushings and see if the squeak stops. If it does, the bushing is the source. For rattles, re-check every bolt you touched, especially the ones that connect the coilover to the knuckle and the top mount. A spring that rotates slightly when you turn the wheel can also make a popping noise; this usually means the spring perch is not level. Loosen the lower mount, rotate the spring to seat it properly, and re-tighten to the correct torque specifications.
What to Do Right
- Torque every bolt to spec, not by feel.
- Set spring preload equally on both sides.
- Investigate any new noise immediately.
- Re-check all fasteners after 100 miles.
Mistakes to Avoid
- Over-tightening bolts with an impact gun.
- Guessing at spring preload settings.
- Dismissing squeaks and rattles as normal.
- Skipping the post-installation re-torque.
If a noise persists after you’ve checked the obvious causes, you may have a damaged component. [VERIFY: what specific coilover component failures cause persistent noises after installation, e.g., worn top mounts or damaged spring isolators]. For a structured approach to diagnosing mechanical issues, the same logic used in [laser engraver troubleshooting](/laser-engraver-troubleshooting) applies here: isolate the variable, test one change at a time, and document the results.
Coilover Installation vs. Other Suspension Upgrades: A Decision Framework
If You Want Adjustability, Choose Coilovers Because…
Coilover installation is the only path that gives you simultaneous control over ride height, damping, and spring preload. With a quality set, you can lower the car for track days and raise it back up for daily driving in about 30 minutes of work. That level of adjustability matters when you are chasing suspension geometry changes. You can dial in corner weights, adjust the center of gravity, and fine-tune the damping to match specific tires or driving conditions. No other bolt-on upgrade gives you that range. The trade-off is that you are taking on more complexity. More adjustment points mean more variables to get wrong, which is why the steps in the earlier sections of this guide matter.
If You Want Comfort, Consider Performance Shocks Because…
Performance shocks and struts replace only the dampers while keeping your factory springs. That means you keep the original spring rates and ride height, so the car feels closer to stock. For a daily driver that sees rough roads, this is often the smarter move. A good set of performance shocks can tighten body roll and improve control without the harshness that stiff coilover springs introduce. You also avoid the alignment headaches and suspension geometry changes that come with lowering. If you never plan to adjust ride height, spending money on coilovers is wasted adjustability you will not use.
If You Want Extreme Height Adjustment, Air Suspension Might Be Better Because…
Air suspension gives you a much wider ride height range than any coilover. You can drop the car to the ground for show and raise it to stock height for speed bumps or driveways. That flexibility comes with real costs: more parts, more failure points, and a much higher price tag. Air systems also change the suspension geometry dynamically as the car rises and falls, which can complicate alignment. Coilovers are the middle ground. They offer meaningful ride height adjustment without the compressor, tank, and air lines that an air system requires. For most enthusiasts, coilover installation is the practical sweet spot between adjustability and reliability.
Frequently Asked Questions About Coilover Installation
How long does a coilover installation take?
For a first-time DIYer working in a home garage with basic tools, plan for a full weekend. Expect six to ten hours of labor spread across two days. The front suspension typically takes longer than the rear because of strut design and tighter access to top-hat bolts.
An experienced mechanic with an impact wrench and a lift can finish the job in two to three hours. Your time will vary based on rusted bolts, seized hardware, and whether you are working on all four corners or just one axle. If you are also replacing suspension parts like sway bar links or control arms, add another hour or two to the estimate.
Can I install coilovers without a spring compressor?
Yes, and this is one of the main advantages of coilovers over traditional spring-and-shock setups. Factory struts require a spring compressor because the spring is held under tension between the upper mount and the lower perch. Coilovers come pre-assembled with the spring already seated at the correct spring preload, so you do not need to compress anything.
That said, you still need to handle the old factory strut assembly. Removing the top nut on a factory strut without a spring compressor is dangerous — the spring can release with enough force to cause serious injury. If you are removing a stock setup, rent or borrow a spring compressor for that step only. Never attempt to disassemble a factory strut without one.
Will coilovers damage my car’s ride quality?
That depends entirely on the spring rate you choose and how you set the damping. A coilover with a spring rate far stiffer than your factory setup will make the car feel harsh over bumps and rough pavement. This is not damage, but it can accelerate wear on other suspension parts and make daily driving unpleasant.
Many coilover kits offer damping adjustment, which lets you soften the ride for daily use and firm it up for track days. If you prioritize ride quality, choose a coilover with a broad damping range and start with settings closer to the soft end. Keep in mind that lowering the car reduces suspension travel, so you will feel sharp impacts more directly no matter how you set the dampers.
Do I need to replace other suspension parts during coilover installation?
Do I need to replace other suspension parts during coilover installation?
Not always, but you should inspect everything while the suspension is apart. Worn bushings, ball joints, tie rod ends, and sway bar links will be much harder to replace later if you have to remove the coilover again to access them. If any of these show play or cracking, replace them during the same job.
You also need to consider the top mounts. Some coilover kits include new camber-adjustable top mounts; others reuse your factory upper strut mounts. If your factory mounts are old or worn, replace them while the strut is out. And do not forget the hardware — many coilover kits use new nuts and bolts, but if yours does not, buy fresh fasteners rather than reusing corroded originals.
For more on choosing the right tools and equipment for precision work in your garage, see our laser engraver buying guide — it covers the same kind of fit-for-purpose decision-making you will apply to suspension upgrades.
Frequently Asked Questions
How long does a coilover installation take?
[HUMAN INPUT NEEDED: Research and write a factual 2-3 sentence answer for this question.]
Can I install coilovers without a spring compressor?
[HUMAN INPUT NEEDED: Research and write a factual 2-3 sentence answer for this question.]
Will coilovers damage my car’s ride quality?
[HUMAN INPUT NEEDED: Research and write a factual 2-3 sentence answer for this question.]
Do I need to replace other suspension parts during coilover installation?
Do I need to replace other suspension parts during coilover installation?
[HUMAN INPUT NEEDED: Research and write a factual 2-3 sentence answer for this question.]
Final Verdict: Is DIY Coilover Installation Right for You?
Coilover installation is the single most transformative suspension upgrade you can perform on your vehicle, merging the spring and shock absorber into one adjustable unit. Its most important attributes are adjustable ride height, damping force control, and corner-weighting capability — features that no fixed-rate spring-and-shock combo can match. However, the installation itself is not a simple bolt-on job; it demands mechanical aptitude, specialized tools, and a commitment to post-install alignment and setup.
For the vast majority of DIY enthusiasts, our top recommendation is the KW Variant 1 coilover kit. We choose it because it offers a stainless steel body for corrosion resistance, pre-set damping tuned by factory engineers (eliminating guesswork), and a threaded perch design that allows for up to 30mm of height adjustment without compromising suspension travel. It is the sweet spot between performance, longevity, and install simplicity — no external reservoir lines, no complex rebound/compression clicker adjustments, just a clean, reliable setup.
Use this decision framework to match your specific needs to the right coilover system:
- If you need daily-driver comfort with occasional spirited driving, choose the KW V1 because its pre-set damping curve is engineered to absorb road imperfections while maintaining body control.
- If you are a track-day regular who needs fine-tuned handling, choose the Ohlins Road & Track because its dual-flow valve technology provides independent low-speed and high-speed compression adjustment.
- If you are on a strict budget and need a reliable drop with basic adjustability, choose the BC Racing BR series because its monotube design offers 30-way damping adjustment at an entry-level price point.
- If you drive in harsh winter climates with road salt, choose the KW Variant 3 because its stainless steel construction resists corrosion far better than painted or zinc-coated bodies.
We must be honest about the limitations of our top pick. The KW V1 cannot be corner-weighted — its damping is fixed, so you cannot fine-tune the suspension to balance each wheel’s load for maximum grip. It also lacks a camber plate, meaning you must purchase camber-adjustable top mounts separately if you want aggressive negative camber for track use. For hardcore track enthusiasts, this makes the V1 a compromise; for everyone else, it is the most forgiving and user-friendly option.
If you have the tools, the patience, and a torque wrench you trust, DIY coilover installation is a weekend project that will save you $400–$600 in labor costs and give you a deep understanding of your vehicle’s suspension geometry. Follow the step-by-step guide above, take your time with the torque specs, and book an alignment immediately after installation. Your car will reward you with sharper turn-in, reduced body roll, and a stance that turns heads — just make sure you are prepared for the responsibility of maintaining a lowered, performance-tuned suspension.