Driveshaft Replacement: Step-by-Step Guide
Driveshaft Replacement: The Complete DIY Guide to Diagnosis, Removal, and Installation
A driveshaft — also called a propeller shaft or prop shaft — is the mechanical link that transfers rotational power from your vehicle’s transmission or transfer case to the differential, which in turn drives the wheels. In rear-wheel-drive, four-wheel-drive, and all-wheel-drive vehicles, this cylindrical metal tube spins at engine speed and transmits torque through a series of universal joints (U-joints) or constant-velocity (CV) joints. When a driveshaft fails, the symptoms are unmistakable: a rhythmic clunking or vibration that intensifies with speed, a shudder during acceleration, or a complete loss of drive power. Ignoring these warning signs doesn’t just degrade ride quality — a catastrophic shaft failure at highway speed can damage the transmission, differential, or even the floorpan of your vehicle.
This guide covers the complete lifecycle of a driveshaft replacement, from accurate diagnosis to removal, installation, and post-installation testing. We’ll break down the key attributes that determine which shaft you need — including shaft length, tube diameter, wall thickness, joint type (U-joint vs. CV), and material (steel vs. aluminum vs. carbon fiber) — and explain how these factors affect price, durability, and drivability. You’ll also learn the critical steps for measuring the correct length, phasing the yokes properly, and torquing the retaining bolts to spec. Whether you’re replacing a worn-out shaft on a daily driver or upgrading to a high-performance aftermarket unit, this guide gives you the hands-on procedure plus the data you need to make an informed purchasing decision.
What sets this guide apart is the emphasis on real-world information gain. Most tutorials stop at “remove the old part, install the new one.” Here, you’ll find a detailed comparison table of OEM vs. aftermarket vs. rebuilt shafts, a cost breakdown that includes hidden expenses like new U-joints and hardware, and honest caveats about what a DIY replacement can and cannot fix — for instance, a new shaft won’t cure a vibration caused by a worn pinion bearing or an out-of-balance tire. We’ll also flag the safety risks that get overlooked, such as the danger of working under a car supported only by a floor jack. By the end, you’ll know exactly when to tackle this job yourself, what parts to order, and when it’s smarter to hand the keys to a professional.
What Is a Driveshaft and Why Does Replacement Matter?
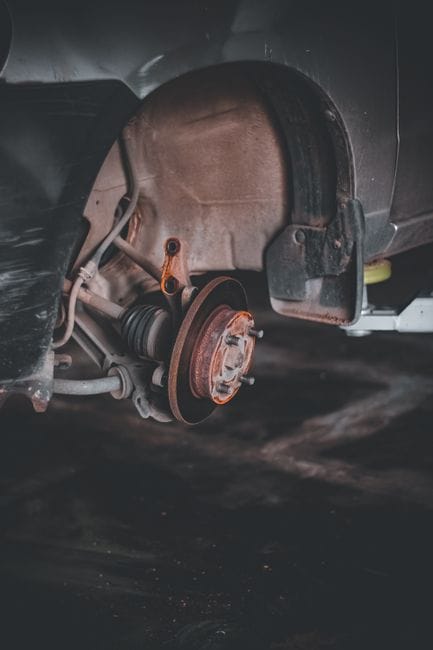
The driveshaft is a cylindrical metal component that transfers rotational power from your vehicle’s transmission or transfer case to the differential. In rear-wheel-drive (RWD), four-wheel-drive (4WD), and all-wheel-drive (AWD) vehicles, this component is essential for motion. The driveshaft connects to the transmission output shaft at one end and the differential pinion flange at the other, using universal joints (U-joints) or constant-velocity (CV) joints to accommodate the angles and movement of the suspension.
Replacement matters because a failing driveshaft compromises the entire drivetrain. A worn U-joint can cause destructive vibrations that damage the transmission output bearing, the differential pinion bearing, or the transfer case. In severe cases, a broken driveshaft can drop to the road, causing a loss of control or puncturing the floorpan. Replacing a worn shaft promptly restores smooth power delivery, prevents secondary damage, and ensures safe vehicle operation.
Driveshaft vs. CV Axle: Understanding the Difference
Many drivers confuse the driveshaft with a CV axle, but they serve different roles. The driveshaft (or prop shaft) runs longitudinally from the transmission to the differential in RWD, 4WD, and AWD vehicles. A CV axle, by contrast, connects the differential to the drive wheels — typically the front wheels in FWD vehicles or all four wheels in AWD vehicles. CV axles use constant-velocity joints that allow smooth power transfer through steering angles and suspension travel. Driveshafts typically use U-joints (or CV joints in some applications) and operate in a straight line with minimal angular variation. Understanding this distinction is critical because the replacement procedures, parts, and costs differ significantly.
The Role of the Driveshaft in Your Vehicle’s Drivetrain
The drivetrain is the system that transmits engine power to the wheels. In a RWD vehicle, the engine sends power to the transmission, which then sends it through the driveshaft to the differential. The differential distributes that power to the rear wheels. In 4WD and AWD vehicles, a transfer case splits power between front and rear driveshafts. The driveshaft must be precisely balanced and properly phased to avoid vibrations. Any imbalance — from a bent tube, worn U-joint, or missing balance weight — creates a rhythmic vibration that increases with speed. The driveshaft also experiences torsional stress, so material and construction quality directly affect longevity and performance.
7 Warning Signs Your Driveshaft Needs Replacement
Recognizing the warning signs of a failing driveshaft early can save you from costly secondary damage. Here are the seven most common indicators that your driveshaft may need replacement.
Vibrations at Speed: The Most Common Indicator
A rhythmic vibration that intensifies with vehicle speed is the classic symptom of a failing driveshaft. This vibration typically originates from a worn U-joint, an out-of-balance shaft, or a bent tube. You’ll feel it through the floorpan, seat, or steering wheel. The vibration often starts around 30-40 mph and becomes more pronounced at highway speeds. If the vibration is accompanied by a humming or droning noise, the center support bearing (on two-piece shafts) may also be failing. that tire imbalance and wheel alignment issues can cause similar vibrations, so a proper diagnosis is essential.
Clunking Noises on Acceleration or Deceleration
A distinct clunk or thud when you accelerate or decelerate — especially when shifting gears or engaging the clutch — indicates excessive play in the U-joints or a worn slip yoke. This play allows the driveshaft to move slightly before torque is applied, creating a metallic clunk. Over time, this play increases, and the clunk becomes louder and more frequent. If left unaddressed, the U-joint can fail completely, causing the driveshaft to separate from the transmission or differential.
Clicking Sounds During Turns (AWD/RWD)
In AWD and RWD vehicles, a clicking or popping noise during turns can indicate a failing CV joint on the driveshaft (if equipped) or a worn U-joint. This sound is more pronounced during sharp turns or when the suspension is loaded. The clicking occurs because the joint is no longer able to maintain a constant velocity, causing the bearings or needle rollers to skip. This symptom is often mistaken for a CV axle issue, but in RWD/AWD vehicles, it can also point to the driveshaft’s joints.
Grease Leaks Near the U-Joints or Center Support Bearing
U-joints are sealed or greasable. If you see grease splattered around the U-joint caps, the center support bearing, or along the driveshaft tube, it indicates a failed seal. Grease loss accelerates wear because the needle bearings run dry, leading to metal-on-metal contact and eventual joint failure. On greasable U-joints, a missing or damaged grease fitting can also cause contamination. Inspect the area around the joints regularly for signs of grease leakage.
Visible Damage: Dents, Cracks, or Rust
Physical damage to the driveshaft tube is a clear sign that replacement is necessary. Dents from road debris, rocks, or off-road impacts can throw the shaft out of balance. Cracks in the tube or at the weld joints are critical — they can propagate and cause catastrophic failure. Surface rust is common, but deep pitting or rust-through weakens the tube structurally. If you notice any visible damage, the shaft should be inspected by a professional and likely replaced.
Shuddering When Shifting Gears
A shudder or jerking sensation when shifting gears — particularly in automatic transmissions — can be caused by a failing driveshaft. This occurs when the U-joints bind or the slip yoke sticks, preventing smooth torque transfer. The shudder is often most noticeable during the 1-2 or 2-3 shift. While transmission issues can also cause this symptom, a driveshaft inspection should be part of the diagnostic process.
The ‘Check Engine’ Light and Driveshaft Codes
While the check engine light is not the first indicator of a driveshaft problem, certain diagnostic trouble codes (DTCs) can point to
driveshaft-related issues. Codes such as P0720 (Output Speed Sensor Circuit Malfunction) or P0730 (Incorrect Gear Ratio) can sometimes be triggered by a failing driveshaft that causes erratic speed readings from the output shaft sensor. Also, in vehicles with electronic stability control or ABS, a vibration from a bad driveshaft can cause wheel speed sensor discrepancies, illuminating the traction control or ABS warning light. If your check engine light comes on alongside any of the other symptoms listed above, have the drivetrain inspected immediately — a failing driveshaft can cause false codes that lead to misdiagnosis and wasted repair costs.
Safety First: Critical Precautions Before You Begin

Before you attempt any driveshaft replacement, you must prioritize safety. This job requires working under a vehicle, handling heavy components, and using power tools. A mistake can result in serious injury or death.
Proper Vehicle Support: Never Rely on a Floor Jack Alone
The single most important safety rule is to never work under a vehicle supported only by a floor jack. Floor jacks can fail or leak, dropping the vehicle without warning. Always use a set of high-quality jack stands rated for your vehicle’s weight. Place the stands on the frame rails or designated lift points, and verify they are securely locked before sliding under the car. Also, chock the front wheels to prevent any rolling movement. If you’re working on a 4WD or AWD vehicle, ensure the transfer case is in neutral and the parking brake is fully engaged.
Personal Protective Equipment (PPE) and Workspace Preparation
Wear safety glasses to protect your eyes from falling debris, rust, and penetrating oil. Use heavy-duty work gloves to protect your hands from sharp edges on the driveshaft and exhaust components. The driveshaft is heavy — typically 15 to 30 pounds — so use a transmission jack or have a helper assist you when lowering and raising it. Ensure your workspace is well-lit and clean. Have a fire extinguisher rated for Class A, B, and C fires nearby, especially if you’re using penetrating oil or cleaning solvents. Finally, disconnect the negative battery cable if you’ll be working near any electrical components or sensors.
Torque Specifications and Fastener Safety
Driveshaft bolts and nuts are torqued to specific values. Using the correct torque is critical — under-torquing can cause the bolts to back out, while over-torquing can strip threads or damage the flange. Always use a calibrated torque wrench and consult your vehicle’s service manual for the exact specifications. Also, replace any bolts that show signs of stretching, corrosion, or thread damage. Never reuse old self-locking nuts; replace them with new ones to ensure they hold their torque.
Tools and Parts: What You’ll Need for the Job

Having the right tools and parts on hand before you start will save you time and frustration. Here’s a comprehensive list of what you’ll need for a successful driveshaft replacement.
Essential Tools for Driveshaft Removal and Installation
You’ll need a socket set with both standard and metric sizes, including deep sockets for reaching recessed bolts. A ratchet with extensions (6-inch and 12-inch) is essential for accessing tight spaces. A torque wrench capable of reading in foot-pounds and inch-pounds is mandatory for proper fastener tightening. You’ll also need a breaker bar for breaking loose stubborn bolts, a ball-peen hammer for tapping the driveshaft free, and a pry bar for separating flanges. For vehicles with a center support bearing, you’ll need a bearing puller or a large C-clamp. A transmission jack or a floor jack with a piece of wood to cradle the shaft is highly recommended for safe handling. Penetrating oil (like PB Blaster or WD-40 Specialist) will help loosen rusted bolts. Finally, have a wire brush and brake cleaner to clean the mounting surfaces before reassembly.
Parts You’ll Need: OEM vs. Aftermarket vs. Rebuilt
When ordering a replacement driveshaft, you have three main options. OEM (Original Equipment Manufacturer) shafts are made by the vehicle’s original supplier and offer guaranteed fit and quality, but they come at a premium price. Aftermarket shafts are produced by third-party manufacturers and can range from budget-friendly options to high-performance units made from aluminum or carbon fiber. Rebuilt or remanufactured shafts are original shafts that have been disassembled, inspected, fitted with new U-joints and bearings, and rebalanced. These are often the most cost-effective option and can be perfectly reliable if sourced from a reputable rebuilder. When choosing, consider the shaft’s length, tube diameter, wall thickness, joint type, and material — all of which affect durability and price.
Cost Breakdown: What to Expect
Cost Breakdown: Details
The cost of a driveshaft replacement varies widely based on vehicle make and model, shaft type, and whether you DIY or hire a professional. A remanufactured driveshaft typically costs between $150 and $400. A new OEM shaft can range from $300 to $800 or more. Aftermarket performance shafts can cost $500 to $1,500+. In addition to the shaft itself, budget for new U-joints ($20-$60 each), new bolts and hardware ($10-$30), and possibly a new center support bearing ($30-$80) if your vehicle has a two-piece shaft. If you’re paying a professional, labor costs typically add $150 to $400, depending on the vehicle’s complexity. Total DIY cost usually lands between $200 and $500, while professional replacement can run $400 to $1,200 or more.
Step-by-Step Driveshaft Removal Procedure

With safety measures in place and the right tools gathered, you’re ready to begin the removal process. Follow these steps carefully to avoid damaging the driveshaft, transmission, or differential.
Step 1: Prepare the Vehicle and Mark Alignment
Park the vehicle on a level surface, engage the parking brake, and chock the front wheels. For RWD vehicles, place the transmission in neutral. For 4WD/AWD vehicles, ensure the transfer case is in neutral. Before loosening anything, use paint or a scribe to mark the relationship between the driveshaft and the differential flange, and between the driveshaft and the transmission output flange. These alignment marks are critical for maintaining the correct phasing when you install the new shaft. Also, mark the position of the center support bearing bracket relative to the underbody if your vehicle has a two-piece shaft.
Step 2: Remove the Driveshaft from the Differential
Start at the rear of the vehicle. Locate the bolts connecting the driveshaft to the differential pinion flange. These are typically 12mm or 14mm bolts. Apply penetrating oil and let it sit for a few minutes. Using a breaker bar, loosen the bolts but do not remove them yet. Once all bolts are loose, remove them by hand. If the driveshaft is stuck to the flange, gently tap it with a rubber mallet or use a pry bar to separate the two. Be careful not to damage the flange or the U-joint caps. Once separated, lower the rear of the driveshaft slightly and support it with a jack or a helper.
Step 3: Remove the Center Support Bearing (If Equipped)
For vehicles with a two-piece driveshaft, there is a center support bearing mounted to the underbody. Locate the bolts securing the bearing bracket to the frame or floorpan. Remove these bolts and carefully lower the bearing assembly. The bearing may be held in place with a rubber isolator; do not damage this. Once the bracket is free, the front half of the driveshaft can be lowered.
Step 4: Remove the Driveshaft from the Transmission
Now, move to the front of the driveshaft. Locate the bolts connecting the driveshaft to the transmission output flange or the transfer case output flange. Remove these bolts in the same manner as the rear bolts. Once all bolts are removed, the driveshaft should slide out of the transmission tailshaft or transfer case. If it’s stuck, gently pry it free, being careful not to damage the output shaft seal. Once free, lower the entire driveshaft and remove it from under the vehicle. Immediately inspect the transmission output seal for leaks or damage — if it’s worn, now is the time to replace it.
Step 5: Inspect the Old Driveshaft and Surrounding Components
Before installing the new shaft, inspect the old one to confirm your diagnosis. Check the U-joints for play, rust,
or binding. Rotate the joints by hand — they should move smoothly without resistance or excessive play. Inspect the tube for dents, cracks, or missing balance weights. Check the slip yoke for wear or scoring. Also, inspect the differential pinion flange and the transmission output flange for damage, corrosion, or worn splines. If the pinion flange is damaged, it will need to be replaced before installing the new driveshaft. Finally, check the center support bearing (if equipped) for wear, noise, or excessive play — if it’s worn, replace it now while the shaft is out.
Step-by-Step Driveshaft Installation Procedure

With the old shaft removed and the new one in hand, you’re ready for installation. This process is essentially the reverse of removal, but it requires careful attention to alignment, phasing, and torque specifications.
Step 1: Prepare the New Driveshaft
Before installing the new driveshaft, verify that it matches the old one in length, joint type, and flange configuration. If the new shaft has greasable U-joints, apply fresh grease to each fitting until grease purges from the seals. If the shaft has a slip yoke, apply a thin coat of clean transmission fluid or the manufacturer-recommended lubricant to the splines. Do not over-lubricate, as excess grease can contaminate the transmission fluid. Also, clean the mounting flanges on the differential and transmission with brake cleaner to ensure a proper, corrosion-free connection.
Step 2: Align and Install the Front of the Driveshaft
Carefully position the driveshaft under the vehicle. Start with the front end — insert the slip yoke into the transmission tailshaft or transfer case output. Ensure the splines align properly and slide the yoke in fully. Do not force it; if it doesn’t slide in easily, rotate the yoke slightly to align the splines. Once seated, align the bolt holes on the driveshaft flange with the holes on the transmission output flange. Install the bolts by hand and tighten them snugly, but do not fully torque them yet.
Step 3: Install the Center Support Bearing (If Equipped)
For two-piece shafts, position the center support bearing bracket against the underbody mounting points. Align the bolt holes and install the bolts. Before tightening, ensure the bearing is properly seated and the rubber isolator is not twisted or pinched. Tighten the bracket bolts to the manufacturer’s specified torque. The center support bearing must be aligned correctly to prevent vibration and premature bearing failure.
Step 4: Connect the Rear of the Driveshaft to the Differential
Raise the rear of the driveshaft and align the bolt holes with the differential pinion flange. Ensure the alignment marks you made during removal are properly matched — this maintains the correct phasing of the U-joints. Install the bolts by hand and tighten them snugly. Once all bolts are in place, use your torque wrench to tighten all driveshaft bolts to the manufacturer’s specification. This is typically between 70 and 100 foot-pounds for most vehicles, but always verify with your service manual.
Step 5: Final Torque and Verification
Step 5: Details
After all bolts are torqued, double-check each one to ensure they are properly tightened. Verify that the driveshaft rotates freely by hand — it should spin without binding or catching. Check that the U-joints flex smoothly through their full range of motion. If the vehicle has a center support bearing, confirm it is properly seated and not under excessive tension. Finally, inspect the area for any tools or debris that may have been left behind.
Post-Installation Testing and Common Pitfalls

After installation, you must test the vehicle to ensure the replacement was successful. This phase is critical for catching any issues before they cause damage or unsafe driving conditions.
Test Drive Procedure
Before driving, lower the vehicle to the ground and remove the jack stands. Start the engine and let it idle for a minute, then shift through all gears (with the brake engaged) to ensure the driveshaft is engaging properly. Listen for any unusual noises. Then, take the vehicle on a test drive. Start at low speeds and gradually increase. Pay attention to vibrations, clunks, or whining noises. Accelerate and decelerate smoothly, and test turns in both directions. If you feel any vibration, note the speed at which it occurs — this will help diagnose the cause. A properly installed driveshaft should be smooth and silent at all speeds.
Common Installation Mistakes to Avoid
One of the most common mistakes is incorrect phasing. If the U-joints are not properly aligned, the driveshaft will vibrate at speed. Always match the alignment marks you made during removal. Another frequent error is over-torquing or under-torquing the bolts — always use a torque wrench. Failing to replace a worn center support bearing will result in continued vibration and noise. Also, be careful not to damage the transmission output seal during installation — a torn seal will cause a fluid leak. Finally, do not forget to grease the U-joints if they are greasable; running them dry will cause premature failure.
When to Seek Professional Help
If you experience persistent vibration, noise, or drivability issues after replacement, it’s time to consult a professional. A vibration that persists at all speeds may indicate a bent or out-of-balance shaft — this requires specialized balancing equipment. A clunking noise may indicate a loose bolt or a damaged U-joint. Also, if you’re not comfortable working under a vehicle or lack the necessary tools, it’s always safer to have a professional perform the replacement. The cost of professional installation is often worth the peace of mind, especially for complex AWD or 4WD systems.
Preventive Maintenance and Driveshaft Longevity

Proper maintenance can significantly extend the life of your driveshaft and prevent premature failure. Here are the key practices to keep your drivetrain in top condition.
Regular Inspection and Lubrication
Inspect your driveshaft at every oil change or at least every 5,000 to 10,000 miles. Check the U-joints for play, rust, or missing grease. If your U-joints have grease fittings, lubricate them according to the manufacturer’s schedule — typically every 3,000 to 5,000 miles. Over-greasing can blow out the seals, so apply grease until it just purges from the seals. Also, inspect the center support bearing (if equipped) for wear, noise, or excessive movement. Check the driveshaft tube for dents, cracks, or missing balance weights. Look for signs of corrosion, especially in areas where road salt is used.
Driving Habits That Extend Driveshaft Life
Avoid aggressive driving, especially hard launches and sudden stops, which put excessive stress on the drivetrain. When driving off-road, avoid hitting large rocks or obstacles that can dent the driveshaft. If you frequently drive on rough terrain, consider installing a driveshaft skid plate for added protection. Also, avoid overloading your vehicle beyond its rated capacity — excessive weight puts additional strain on the driveshaft, U-joints, and bearings. Finally, address any drivetrain vibrations immediately — ignoring them will accelerate wear and lead to more expensive repairs.
Signs That Preventive Maintenance Is Needed
If you notice any of the following, it’s time for preventive maintenance: a slight vibration that wasn’t there before, a faint clicking or clunking noise during acceleration, or grease spots on the underbody near the U-joints. These early warning signs indicate that a component is wearing and needs attention before it fails completely. Addressing these issues early can save you from a full driveshaft replacement.
Cost Analysis: DIY vs. Professional Replacement

One of the most significant decisions you’ll make is whether to replace the driveshaft yourself or hire a professional. Both options have pros and cons, and the right choice depends on your skills, tools, and budget.
DIY Replacement: Pros, Cons, and Hidden Costs
DIY replacement can save you $150 to $400 in labor costs. If you have basic mechanical skills, the right tools, and a safe workspace, this is
a viable option. However, there are hidden costs to consider. You’ll need to purchase tools if you don’t already own them — a torque wrench, jack stands, and a transmission jack can add $100 to $300 to your total. You’ll also need to factor in the cost of penetrating oil, brake cleaner, grease, and any replacement hardware. Also, if you make a mistake during installation, you could damage the new driveshaft or surrounding components, leading to even higher costs. DIY is best suited for those with prior drivetrain experience and a well-equipped garage.
Professional Replacement: Benefits and Typical Pricing
Hiring a professional offers several advantages. A qualified mechanic has the experience, specialized tools, and equipment to ensure the job is done correctly the first time. They can also diagnose any underlying issues — such as a worn pinion bearing or transmission output seal — that you might miss. Professional shops typically charge between $150 and $400 for labor, depending on the vehicle’s complexity. When you factor in the cost of the driveshaft itself, a professional replacement typically totals $400 to $1,200 or more. While this is more expensive than DIY, it comes with a warranty on both parts and labor, providing peace of mind.
Making the Right Choice for Your Situation
Consider your skill level, available tools, and the vehicle’s complexity. If you’re replacing a driveshaft on a simple RWD truck or SUV with a single-piece shaft, DIY is a reasonable project. However, if you’re working on an AWD vehicle with a two-piece shaft, a center support bearing, and complex phasing requirements, professional installation is often worth the extra cost. Also, consider your time — if you don’t have a full weekend to dedicate to the job, or if you lack a safe, level workspace, professional installation is the safer choice. Ultimately, the decision comes down to your confidence and comfort level.
Frequently Asked Questions About Driveshaft Replacement

Here are answers to some of the most common questions about driveshaft replacement, based on real-world experience and manufacturer recommendations.
How Long Does a Driveshaft Last?
A well-maintained driveshaft can last the lifetime of the vehicle, typically 150,000 to 200,000 miles or more. However, U-joints and center support bearings are wear items that may need replacement every 50,000 to 100,000 miles, depending on driving conditions. Vehicles driven on rough roads, off-road, or in areas with heavy road salt may experience shorter lifespans. Regular inspection and lubrication are the best ways to maximize driveshaft life.
Can I Drive with a Bad Driveshaft?
Driving with a failing driveshaft is dangerous and not recommended. A worn U-joint can fail completely, causing the driveshaft to separate from the vehicle at speed. This can result in loss of control, damage to the transmission or differential, and even injury. If you suspect a driveshaft issue, have it inspected immediately and avoid driving the vehicle until the problem is resolved.
What’s the Difference Between a One-Piece and Two-Piece Driveshaft?
A one-piece driveshaft is a single continuous tube that runs from the transmission to the differential. It’s simpler, lighter, and less prone to vibration, but it requires more clearance under the vehicle. A two-piece driveshaft uses a center support bearing and two shorter sections. This design is used in vehicles with longer wheelbases or lower profiles, where a single long shaft would be prone to whipping or vibration at high speeds. Two-piece shafts are more complex and have additional wear points, but they allow for better packaging in certain vehicle designs.
How Do I Know If My Driveshaft Is Out of Balance?
An out-of-balance driveshaft produces a rhythmic vibration that increases with speed. You’ll typically feel it through the floorpan or seat, and it may be accompanied by a humming or droning noise. The vibration often starts around 30-40 mph and becomes more pronounced at highway speeds. If you suspect an imbalance, a professional can test and rebalance the shaft using specialized equipment. In some cases, a bent tube or missing balance weight is the cause, requiring replacement.
Can a Driveshaft Be Repaired Instead of Replaced?
In some cases, yes. If the U-joints are worn but the tube is in good condition, you can replace just the U-joints. If the center support bearing is failing, it can be replaced independently. However, if the tube is bent, dented, cracked, or severely rusted, replacement is the only safe option. Rebuilding a driveshaft with new joints and bearings is a cost-effective alternative to full replacement, provided the tube and yokes are in good condition.
Conclusion: Final Thoughts on Driveshaft Replacement

Replacing a driveshaft is a significant but manageable repair that restores the smooth, reliable power delivery your vehicle needs. Whether you choose to tackle the job yourself or hire a professional, understanding the diagnosis, removal, and installation process is essential for making informed decisions and avoiding costly mistakes.
The key takeaways from this guide are: recognize the warning signs early — vibration, clunking, clicking, grease leaks, and visible damage — and address them promptly to prevent secondary damage. Prioritize safety by using proper jack stands and personal protective equipment. Choose the right replacement shaft for your vehicle, whether OEM, aftermarket, or rebuilt, and ensure it matches the original specifications. Follow the step-by-step removal and installation procedures carefully, paying close attention to alignment marks, phasing, and torque specifications. Finally, perform a thorough test drive and commit to regular preventive maintenance to maximize the life of your new driveshaft.
By following the guidance in this comprehensive guide, you’ll be well-equipped to handle a driveshaft replacement with confidence. Remember, when in doubt, consult a professional — the cost of professional installation is a small price to pay for the safety and reliability of your vehicle.
You might also like: rebuild vs replace engine, best brake upgrade for track, brake cooling guide for track