Delayed Shifting Diagnosis: Causes & Fixes
Delayed Shifting Diagnosis: A Step-by-Step Guide to Finding the Real Culprit
Delayed shifting is a transmission fault where the gearbox hesitates or refuses to engage the next gear when commanded, often hanging 500–1,000 RPM past the normal shift point before finally catching. It is a symptom, not a root cause — and that distinction matters because the same delayed shift can originate from a hydraulic pressure leak, a failing solenoid, a worn clutch pack, or a software calibration error. Treating the symptom without isolating the true culprit leads to wasted parts, repeated labor, and a transmission that still misbehaves.
This guide walks through a systematic diagnosis of delayed shifting, covering the key attributes you must evaluate: transmission fluid condition and level, line pressure readings, solenoid resistance and duty cycle, valve body wear patterns, torque converter clutch behavior, and the electronic control module’s shift logic. We also cover the cost realities — from a $15 fluid additive to a $3,500 valve body replacement — so you can make an informed repair decision rather than guessing. What sets this guide apart is the decision tree: a structured sequence of tests that eliminates variables one at a time, plus honest limitations of each diagnostic method, including what a scan tool cannot tell you.
Whether you are a DIY mechanic with a code reader or a shop owner chasing a come-back complaint, the goal here is the same: identify the failing component on the first attempt. We will show you how to distinguish a pressure-related delay from an electronic one, when to rebuild versus replace, and why the cheapest fix is rarely the correct one. By the end, you will have a repeatable diagnostic procedure — not just a list of possible causes.
What Is Delayed Shifting? Defining the Symptom vs. the Failure
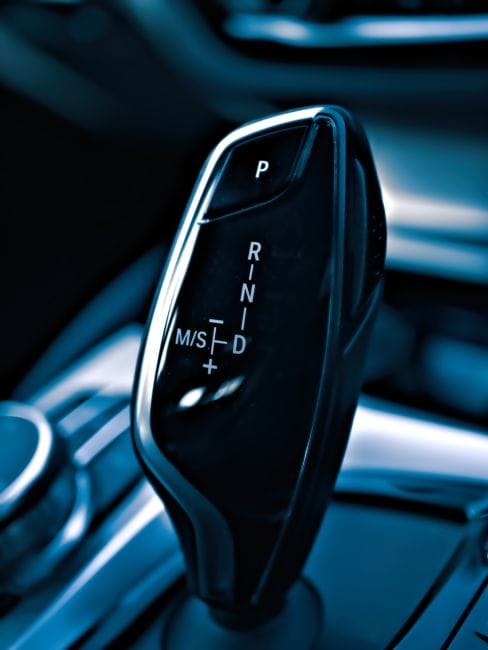
Delayed shifting is the noticeable pause between selecting a gear and feeling the transmission engage. You press the pedal, the engine revs, and then the gear finally catches. That lag is the symptom. The underlying cause could be anything from low fluid to a failing solenoid. The key is separating what you feel from what is actually broken.
In technical terms, this is an engagement delay. It happens when the transmission takes longer than expected to build hydraulic pressure or receive the electronic signal to shift. A healthy automatic transmission shifts in a fraction of a second. When that time stretches, you have a diagnostic problem, not just a driving annoyance.
Delayed Shifting vs. Transmission Slipping: Key Differences
Delayed shifting and transmission slipping are often confused, but they are distinct failure modes. Delayed shifting is a time-based issue: the gear eventually engages, but only after a pause. Slipping is a grip-based issue: the gear engages, but the engine revs without proportional acceleration, as if the clutch or band cannot hold torque. A transmission can exhibit both, but the diagnostic paths differ. Delayed shifting points to hydraulic pressure build-up or signal timing; slipping points to worn friction material or a failing torque converter clutch. Misdiagnosing one for the other leads to replacing the wrong component — a costly mistake.
Why a 1-Second Delay Is Normal and a 3-Second Delay Is Not
Every automatic transmission has a built-in delay as the valve body routes fluid and the clutches apply. A 1-second delay — especially on a cold morning or after the vehicle has sat overnight — is within normal operating parameters. A 3-second delay, however, indicates a systemic problem: line pressure is too low, a solenoid is sticking, or a clutch pack is worn past its apply limit. The threshold matters. If you are chasing a 1.5-second delay on a 20-year-old truck, you may be chasing normal behavior. If you are seeing 3+ seconds consistently, you have a genuine fault that requires investigation.
The First Check: Fluid Level and Condition (The 5-Minute Test)
Before you touch a single bolt, check the transmission fluid. This is the cheapest, fastest, and most revealing diagnostic step you can take. Low fluid starves the pump, which drops line pressure, which delays clutch application. Burnt fluid indicates friction material has shed from clutches or bands, contaminating the valve body and clogging orifices. Both conditions produce delayed shifting, but they require completely different repairs.
How to Read a Transmission Dipstick: Color, Smell, and Texture
Pull the dipstick while the engine is running and the transmission is at operating temperature (if the vehicle requires it — some sealed units have no dipstick). Wipe it clean, reinsert, and pull again. Healthy fluid is bright red or pink, translucent, and has a mild petroleum smell. Dark brown or black fluid means the fluid has been overheated and oxidized. A burnt, acrid smell indicates clutch material has been cooked. A gritty or sandy texture means metal particles are circulating — a sign of mechanical wear inside the pump, planetary gears, or clutch drums. Each of these findings narrows your diagnostic path.
Low Fluid vs. Burnt Fluid: Two Different Failure Modes
Low Fluid vs. Burnt Fluid: Details
Low fluid is a simple fix: top it off and check for leaks. But low fluid is also a symptom — something is leaking. Burnt fluid is a different animal. It means the transmission has been slipping or overheating, which has destroyed the friction material. Burnt fluid requires a fluid flush at minimum, and likely a rebuild. Do not add a “stop-slip” additive to burnt fluid; it will not restore friction material, and it can clog the valve body further. The fluid test tells you whether you are dealing with a maintenance issue or a mechanical failure.
Reading the Codes: What the TCM/PCM Is Telling You

Modern transmissions are controlled by a Transmission Control Module (TCM) or the engine’s Powertrain Control Module (PCM). These computers monitor input shaft speed, output shaft speed, throttle position, and hydraulic pressure. When something is off, they set diagnostic trouble codes (DTCs). Reading these codes is step two in your diagnosis — but only if you interpret them correctly.
P0750, P0755, P0780, and Other Shift-Related Codes
Common codes associated with delayed shifting include P0750 (shift solenoid A malfunction), P0755 (shift solenoid B malfunction), P0780 (shift malfunction), and P0730 (incorrect gear ratio). These codes tell you which circuit is failing, but not why. A P0750 could mean the solenoid is electrically dead, the wiring harness is chafed, or the valve body bore is worn and sticking the solenoid’s plunger. The code is a starting point, not a verdict.
How to Interpret Live Data: Shift Timing, TPS, and Speed Sensors
How to Interpret Live Data: Details
A scan tool with live data capability is essential. Watch the Throttle Position Sensor (TPS) voltage, input and output shaft speeds, and commanded gear vs. actual gear. If the TCM commands a shift from 2nd to 3rd, but the output shaft speed does not change for 2.5 seconds, you have confirmed the delay. If the TPS is reading 80% when you are only pressing the pedal 30%, the TCM may be delaying shifts because it thinks you are demanding heavy acceleration. Live data separates a sensor problem from a hydraulic problem.
Pressure Testing: Measuring the Hydraulic Heartbeat

If fluid is good and codes point to a hydraulic issue, the next step is a manual pressure test. This requires a transmission pressure gauge, a t-fitting, and the service manual for your specific vehicle. You are measuring line pressure, which is the master pressure that feeds all clutches and bands. Low line pressure means the pump is weak, the pressure regulator valve is stuck, or there is an internal leak.
How to Perform a Line Pressure Test Safely
Locate the line pressure tap on the
transmission case — typically on the valve body cover or near the pump. Install the gauge, warm the transmission to operating temperature, and apply the parking brake with the wheels chocked. With the engine running, read the pressure in Park, Neutral, Drive, and Reverse at idle and at stall (brake applied, throttle held at 1,500–2,000 RPM briefly). Compare your readings to the factory specification. A reading 20–30 PSI below spec at idle points to a worn pump or a stuck pressure regulator. A reading that drops sharply when you shift into gear indicates an internal seal leak — often a worn clutch drum seal or a cracked piston.
Interpreting Low Pressure: Pump Wear vs. Internal Leaks
Interpreting Low Pressure: Details
Low pressure in all gears points to the pump or the pressure regulator valve. Low pressure in only one gear points to a leak in that specific clutch circuit — a worn seal, a cracked drum, or a stuck check ball. If pressure is normal at idle but drops under load, the pump is likely worn and cannot maintain volume at higher RPM. If pressure is high at idle but low at stall, the torque converter’s stator support seal may be leaking. Each pattern tells you exactly where to look next.
Solenoid Testing: The Electronic Gatekeepers

Shift solenoids are electro-hydraulic valves that direct fluid to the clutch packs. When they fail, they either stick open, stick closed, or fail electrically. A stuck-closed solenoid delays the shift because fluid cannot reach the clutch. A stuck-open solenoid causes a shift flare or a missed gear entirely. Testing solenoids requires both electrical and mechanical checks.
Measuring Resistance and Duty Cycle with a Multimeter
Disconnect the transmission wiring harness and measure the resistance across each solenoid’s terminals. Most shift solenoids should read between 10 and 30 ohms. A reading outside that range — or an open circuit — means the solenoid coil is dead. Next, check the duty cycle using a scan tool or an oscilloscope. The TCM pulses the solenoid with a variable duty cycle to modulate pressure. If the duty cycle is pegged at 100% or 0%, the TCM is commanding full or zero pressure, which may indicate a wiring issue or a failed driver in the TCM itself.
When a Solenoid Tests Good but Still Fails: The Valve Body Bore Problem
When a Solenoid Tests Good but Still Fails: Details
A solenoid can pass an electrical test and still fail mechanically. The valve body bore it sits in can wear oval-shaped over time, allowing fluid to bypass the solenoid’s plunger. This is common on high-mileage transmissions. If the solenoid tests good but the shift is still delayed, remove the valve body and inspect the bore for scoring or wear. A worn bore requires either a new valve body or a bore repair sleeve — a job that is often more cost-effective than a full rebuild.
Valve Body Wear: The Hidden Culprit Behind Chronic Delays

The valve body is the hydraulic brain of the transmission. It contains dozens of spool valves, check balls, and springs that route fluid to the correct clutch at the correct time. Over time, these valves wear against the aluminum bore, creating grooves that allow fluid to leak past. This drops pressure to the clutches and delays engagement. Valve body wear is the most common cause of delayed shifting in transmissions with over 100,000 miles.
Identifying Worn Check Balls, Springs, and Valve Lands
When you remove the valve body, inspect the check balls for flat spots or pitting. Check the springs for cracks or collapsed coils. Examine the valve lands — the machined ridges on each spool valve — for scoring or a shiny, polished appearance that indicates metal-to-metal contact. A worn valve body can sometimes be repaired with a reconditioning kit, but if the bores are badly scored, replacement is the only reliable fix.
Why a Shift Kit Can Mask — Not Fix — the Underlying Problem
Aftermarket shift kits increase line pressure and firm up shifts, which can mask a delay by forcing the clutches to apply harder and faster. But if the delay is caused by a worn valve body bore or a leaking seal, the shift kit will only accelerate the wear. The transmission will fail sooner, and you will have spent money on a band-aid instead of a cure. Diagnose the root cause before you modify the calibration.
Torque Converter and Mechanical Wear: When the Problem Is Physical

If fluid, codes, pressure, solenoids, and valve body all check out, the problem may be mechanical. The torque converter’s clutch (TCC) can fail to apply, causing a delay in lockup and a sensation of slipping. Inside the transmission, clutch packs and bands wear down over time. When friction material is gone, the clutch cannot hold, and the shift delays as the TCM tries to compensate with higher pressure.
Torque Converter Clutch (TCC) Failure vs. Clutch Pack Wear
A failing TCC typically causes a shudder or a delay when the converter tries to lock up at highway speed. Clutch pack wear, on the other hand, causes delays in specific gears — 2nd gear delay points to the 2nd clutch pack, 3rd gear delay points to the 3rd clutch pack. A stall test can help differentiate: if the engine RPM rises higher than spec with the brake applied, the torque converter or the forward clutch is slipping. If the RPM is normal but the shift is delayed, the problem is likely in the clutch pack or valve body.
When to Rebuild vs. Replace the Transmission
If you have confirmed mechanical wear — burnt fluid, metal shavings, or a failed stall test — you are facing a rebuild or a replacement. A rebuild is cost-effective if the hard parts (case, planetary gears, pump) are in good condition. A replacement is better if the case is cracked, the pump is scored, or the cost of parts and labor exceeds the value of a used or remanufactured unit. Get a written estimate for both options before you commit.
Electronic Control Module (TCM/PCM) Issues: The Software Side

Sometimes the transmission hardware is fine, but the computer is commanding the wrong behavior. A TCM with outdated software, a corrupted calibration, or a failing internal driver can delay shifts even when every hydraulic and mechanical component tests good. This is rare, but it happens — especially after a battery disconnect, a jump start, or a software update gone wrong.
How to Check for TCM Calibration Updates and Reflashes
Check with your dealership or an independent shop with access to the manufacturer’s diagnostic system. Many automakers release TCM calibration updates to fix shift quality complaints. A reflash is often inexpensive — sometimes under $150 — and can resolve a delay that no mechanical part will fix. Always check for a TSB (Technical Service Bulletin) related to your vehicle’s delayed shifting complaint before you start replacing parts.
When the TCM Itself Is Failing: Symptoms and Replacement Costs
When the TCM Itself Is Failing: Details
A failing TCM may cause erratic shifting, no shifting, or a delay that gets worse over time. It may also set communication codes like U0100 (lost communication with TCM). Replacement costs vary widely — from $300 for a remanufactured unit to over $1,200 for a dealer-programmed module. Before replacing the TCM, verify power, ground, and wiring integrity. A corroded connector or a broken wire can mimic a dead TCM.
Building a Diagnostic Decision Tree: Step-by-Step Flowchart

To avoid wasted time and money, follow a structured sequence. Start with the cheapest and least invasive tests, and escalate only when the evidence points to a deeper problem. This decision tree eliminates variables one at a time.
Step 1: Verify the Symptom — Is It Really Delayed Shifting?
Drive the vehicle and document the delay. Note the gear, the RPM
at which the shift occurs, the temperature of the transmission, and whether the delay happens on upshifts, downshifts, or both. A delay that only happens when the transmission is cold points to a fluid viscosity issue or a worn pump that cannot build pressure until the fluid thins. A delay that happens only when hot points to internal seal leakage that worsens as the fluid expands. Documenting these conditions will guide every subsequent test.
Step 2: Check Fluid and Codes Before You Disassemble Anything
Pull the dipstick and read the codes. If the fluid is low, top it off and test drive again — sometimes that is the entire fix. If the fluid is burnt, stop driving and plan for a rebuild. If codes are present, address the specific circuit they point to. If no codes are present and the fluid is healthy, move to the pressure test. This step alone will resolve or eliminate the most common causes of delayed shifting.
Step 3: Pressure Test to Isolate Hydraulic vs. Electronic vs. Mechanical
Install the pressure gauge and measure line pressure in all gears. If pressure is low, the problem is hydraulic — pump, regulator, or internal leak. If pressure is normal, the problem is either electronic (solenoid, wiring, TCM) or mechanical (clutch pack, band, torque converter). A normal pressure reading with a delayed shift points to a solenoid that is not receiving the right signal or a clutch pack that is worn but not yet leaking enough to drop pressure.
Step 4: Test Solenoids and Inspect the Valve Body
If pressure is normal, test the solenoids electrically and mechanically. If they pass, remove the valve body and inspect for wear. A worn valve body bore will cause a delay even with good solenoids and normal line pressure. If the valve body is clean and the solenoids test good, the delay is likely mechanical — inside the clutch drums or the torque converter.
Step 5: Mechanical Inspection and the Rebuild/Replace Decision
Step 5: Details
If you have reached this step, you have eliminated fluid, codes, pressure, solenoids, and valve body issues. The remaining suspects are clutch packs, bands, the torque converter, or the pump. At this point, the transmission must come out for a bench inspection. This is where you decide: rebuild the existing unit or replace it with a remanufactured one. A qualified transmission shop can provide a definitive diagnosis once the unit is on the bench.
Cost Analysis: From a $15 Additive to a $3,500 Rebuild

Delayed shifting repairs range from trivial to catastrophic in cost. Understanding the price spectrum helps you make an informed decision before you authorize any work. The cheapest fix is a fluid top-off or a bottle of transmission additive — but these only work if the problem is minor fluid degradation or a sticking check ball. The most expensive fix is a full rebuild or replacement, which can exceed $3,500 depending on the vehicle.
Fluid Additives and Stop-Slip Products: Do They Actually Work?
Some additives contain friction modifiers that can temporarily restore grip to a worn clutch pack. Others contain seal conditioners that can soften hardened seals and reduce internal leaks. These products work — but only for a short time, and only if the damage is minor. They are a band-aid, not a cure. If you use an additive and the delay returns within a few thousand miles, the transmission needs mechanical repair. Do not rely on additives as a permanent solution.
Cost Breakdown: Fluid Flush, Solenoid Replacement, Valve Body, Rebuild
A fluid flush costs $150–$300 and is the first step if the fluid is merely dark but not burnt. A solenoid replacement costs $200–$600 in parts and labor, depending on whether the valve body must be dropped. A valve body replacement runs $800–$1,500. A full rebuild ranges from $2,000–$3,500, and a replacement transmission (new or remanufactured) can cost $3,000–$5,000 installed. The right choice depends on the vehicle’s age, mileage, and overall condition.
When to Walk Away: Total Loss Math for Older Vehicles
When to Walk Away: Details
If your vehicle is worth less than the cost of the repair, it may be time to walk away. A $3,500 rebuild on a car worth $2,000 is a poor investment. However, if the vehicle is otherwise reliable and you plan to keep it for several more years, the repair may still make sense. Calculate the repair cost against the cost of a replacement vehicle — including taxes, registration, and the risk of buying another used car with unknown issues.
Preventive Maintenance: How to Avoid Delayed Shifting in the Future

Most delayed shifting issues are preventable with routine maintenance. The transmission fluid is the lifeblood of the system — it lubricates, cools, and transmits hydraulic pressure. Over time, it breaks down, accumulates contaminants, and loses its ability to protect the internal components. Regular fluid changes are the single most effective preventive measure.
Fluid Change Intervals: Follow the Severe Service Schedule
Most manufacturers recommend a transmission fluid change every 30,000–60,000 miles under normal driving conditions. If you tow, drive in stop-and-go traffic, or live in a hot climate, follow the severe service schedule — typically every 30,000 miles. Do not trust the “lifetime fluid” claims; those are marketing terms, not engineering guarantees. A fluid change is cheap insurance against a $3,500 rebuild.
Cooler Installation: Protecting Against Heat-Related Wear
Heat is the number one killer of automatic transmissions. If you tow or drive aggressively, consider installing an auxiliary transmission cooler. These units — typically $100–$300 — reduce fluid temperature by 50–100 degrees Fahrenheit, dramatically extending the life of the fluid and the friction materials. A cooler is one of the cheapest and most effective upgrades you can make.
Regular Solenoid and Valve Body Inspections
During routine fluid changes, have your mechanic inspect the solenoids and valve body for wear. Catching a worn bore or a sticking solenoid early can prevent a full failure. Many shops offer a “transmission health check” that includes a pressure test and a solenoid resistance check for under $100. This is a small price to pay for peace of mind.
Tools and Equipment You Will Need for Diagnosis

Before you start, gather the right tools. A diagnostic scan tool with live data is essential for reading codes and monitoring shift timing. A transmission pressure gauge kit is required for hydraulic testing. A digital multimeter is needed for solenoid resistance checks. And a good service manual — either a factory manual or a reputable aftermarket guide — is indispensable for torque specs, pressure specs, and test procedures.
Essential Scan Tools: What to Buy and What to Skip
Entry-level code readers ($50–$150) can read and clear codes, but they cannot display live data. A mid-range scan tool ($200–$500) with live data streaming is the minimum for transmission diagnosis. Professional-grade tools ($1,000+) offer bidirectional control — allowing you to command solenoids and shifts manually — but are overkill for most DIY mechanics. Rent or borrow a professional tool if you only need it once.
Pressure Gauge Kits and Adapters for Common Transmissions
A quality pressure gauge kit costs $50–$150 and includes a gauge, a hose, and a set of adapters. Make sure the kit includes the adapters for your specific transmission — common fittings include 1/8″ NPT, M10 x 1.0, and M12 x 1.5. Some kits are transmission-specific, such as those for GM 4L60E or Ford 4R70W units. Check your service manual for the correct tap location and thread size before you buy.
Multimeter Basics: Resistance, Voltage, and Duty Cycle
Multimeter Basics: Details
A digital multimeter is essential for testing solenoids and wiring. You need a meter that can measure resistance (ohms), DC voltage, and frequency/duty cycle. A basic $30 meter will handle most jobs, but a $100 meter with a frequency setting is more versatile. Learn how to use the meter before you start — a wrong reading can send you down the wrong diagnostic path.
Common Mistakes to Avoid When Diagnosing Delayed Shifting

Even experienced mechanics make errors when diagnosing delayed shifting. The most common mistake is replacing parts based on a single code or symptom without verifying the root cause. Another frequent error is skipping the fluid check entirely — assuming the problem is electronic because a code is present. And perhaps the most costly mistake is ignoring the vehicle’s service history, which can reveal whether the transmission has been neglected or previously repaired.
Mistake #1: Replacing Solenoids Without Testing Them
A P0750 code does not automatically mean the solenoid is bad. It could be a wiring issue, a connector problem, or a worn valve body bore. Replacing solenoids without testing them first is a gamble — and the odds are not in your favor. Always measure resistance and check the duty cycle before you spend money on new parts.
Mistake #2: Assuming Low Fluid Is the Only Problem
Low fluid causes delayed shifting, but it is also a symptom of a leak. If you simply top off the fluid and send the vehicle on its way, the leak will return — and so will the delay. Always inspect the transmission pan, the cooler lines, the front and rear seals, and the torque converter area for leaks before you declare the problem fixed.
Mistake #3: Ignoring the Torque Converter Clutch
Mistake #3: Details
Many DIY mechanics focus exclusively on the transmission itself and forget the torque converter. A failing TCC can cause a delay in lockup that feels like a delayed shift. If you have ruled out fluid, codes, pressure, solenoids, and valve body issues, do not forget to test the torque converter before you pull the transmission.
Case Studies: Real-World Delayed Shifting Diagnoses

Nothing teaches like real-world examples. The following case studies illustrate how the diagnostic process works in practice — and how skipping steps leads to wasted time and money.
Case Study 1: The 2015 Ford F-150 with a 3-Second Reverse Delay
A 2015 F-150 with the 6R80 transmission came in with a 3-second delay when shifting into Reverse. The owner had already replaced the shift solenoid pack — a $400 mistake. The fluid was clean, and no codes were present. A pressure test revealed low line pressure in Reverse only. The culprit was a worn reverse clutch drum seal. The fix required a transmission removal and a seal replacement — a $1,800 job that could have been diagnosed correctly the first time with a pressure test.
Case Study 2: The 2012 Toyota Camry with a Cold-Start 2nd Gear Delay
A 2012 Camry with the U760E transmission had a 2-second delay shifting from 1st to 2nd gear, but only when the engine was cold. The fluid was slightly dark but not burnt. No codes were present. The owner assumed the transmission was failing and was quoted $3,200 for a rebuild. A pressure test showed normal pressure when warm but low pressure when cold — a classic sign of a worn pump that cannot build pressure with thick cold fluid. The fix was a pump replacement, not a full rebuild, saving the owner over $2,000.
Case Study 3: The 2008 Chevrolet Silverado with Intermittent Delays
Case Study 3: Details
A 2008 Silverado with the 4L60E had intermittent delayed shifts that occurred only when the transmission was hot. The owner had already replaced the fluid and filter twice. A scan tool showed a P0780 code and a TPS reading that fluctuated erratically. The TPS was the culprit — a faulty sensor was sending incorrect throttle position data to the TCM, causing it to delay shifts. A $60 sensor replacement fixed the problem completely.
Frequently Asked Questions About Delayed Shifting

Here are answers to the most common questions about delayed shifting diagnosis and repair.
Can a Delayed Shift Fix Itself?
No. Delayed shifting is a symptom of a mechanical, hydraulic, or electronic fault. It will not resolve on its own. In some cases, it may temporarily improve after a fluid change or a software reset, but the underlying issue will return. Ignoring the problem will only cause further damage to the transmission.
Is It Safe to Drive with a Delayed Shift?
Short-term, yes — but only if the delay is minor and the transmission is not slipping. If the delay is severe (3+ seconds) or accompanied by slipping, continued driving will cause catastrophic damage. The friction material will burn, and metal particles will circulate through the transmission, destroying the pump and valve body. If you must drive, keep speeds low and avoid heavy acceleration.
How Long Does a Transmission Rebuild Take?
A professional rebuild typically takes 3–5 days, depending on the shop’s workload and parts availability. A DIY rebuild can take a week or more, especially if you encounter unexpected wear or need to order parts. A replacement transmission can be installed in 1–2 days if the unit is in stock.
What Is the Difference Between a Rebuild and a Replacement?
Understanding Is the Difference Between a Rebuild and a Replacement?
A rebuild involves removing the transmission, disassembling it, replacing worn parts (clutches, bands, seals, gaskets, and sometimes the torque converter), and reassembling it. A replacement involves removing the old unit and installing a new, remanufactured, or used unit. Rebuilds are often cheaper but require a skilled technician. Replacements are more expensive but come with a warranty and are generally more reliable.
Conclusion: The Systematic Path to a Correct Diagnosis

Delayed shifting is a frustrating problem, but it is not a mystery. By following a structured diagnostic process — checking fluid first, reading codes, testing pressure, testing solenoids, inspecting the valve body, and finally examining mechanical components — you can identify the root cause on the first attempt. Skipping steps leads to wasted parts, repeated labor, and a transmission that still misbehaves.
The key takeaway is this: delayed shifting is a symptom, not a failure. The failure is always in a specific component — a pump, a seal, a solenoid, a valve body bore, a clutch pack, or a torque converter. Your job is to find that component before you spend a single dollar on parts. Use the decision tree in this guide, gather the right tools, and do not be afraid to ask for professional help when you reach the limits of your expertise.
With the right approach, you can fix the problem correctly the first time — and avoid the costly trial-and-error that plagues so many transmission repairs. Whether you are a DIY mechanic or a shop owner, the systematic method outlined here will save you time, money, and frustration.