Starter Replacement: Step-by-Step Guide
Starter Replacement: A Complete DIY Guide to Diagnostics, Selection, and Installation
A starter is the electric motor that cranks your engine to life—a small but critical component that converts battery power into rotational force. It is a direct-current (DC) motor with a solenoid that engages a pinion gear onto the flywheel, spinning the crankshaft until combustion takes over. When it fails, your vehicle is immobile, which makes understanding starter replacement one of the most practical DIY skills a car owner can master.
This guide covers every attribute that matters when selecting and installing a replacement: power ratings (measured in kilowatts or horsepower), gear reduction vs. direct-drive designs, OEM vs. remanufactured vs. aftermarket pricing, and the exact torque specs needed for a secure fit. You will also learn how to diagnose a failing starter by testing voltage drops, checking the solenoid, and inspecting the flywheel ring gear—so you never replace a healthy part on a guess.
Unlike generic repair manuals, this article includes a comparison table of popular starter types, a decision tree for choosing between new and remanufactured units, and honest limitations you won’t hear from parts stores—such as why a high-torque starter can harm a stock flywheel. By the end, you will have the knowledge to source the right part, install it safely, and avoid the common pitfalls that turn a two-hour job into a weekend project.
What Is a Starter Motor and How Does It Differ from Adjacent Systems?
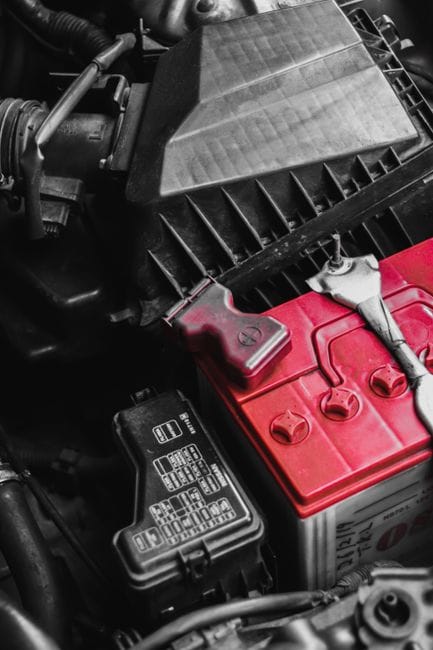
The starter motor is a small but powerful electric motor that gets your engine cranking. Without it, the combustion cycle never begins. When you turn the key or press the start button, the starter motor spins the engine’s flywheel until the cylinders fire and the engine runs on its own.
It’s part of the starting system, a circuit that includes the battery, ignition switch, starter relay, and the starter motor itself. The starting system only works for a few seconds at a time. That brief burst is all it takes to bring the engine to idle speed.
The starter motor is often confused with the alternator, but they serve opposite roles. The starter draws electrical energy from the battery to turn the engine. The alternator generates electricity to recharge the battery once the engine is running. The battery sits in between: it stores energy for the starter and accepts charge from the alternator. If any one of these three fails, the car won’t start—but the fix is different for each.
The Anatomy of a Starter: Solenoid, Bendix Drive, and Armature
The Anatomy of a Starter: Details
A starter motor is built around three core components. The armature is the rotating part inside the motor. When current flows through it, the armature spins and creates torque. The solenoid is a small electromagnetic switch mounted on top of the starter. It does two jobs: it closes the high-current circuit between the battery and the motor, and it pushes the drive gear forward.
That drive gear is called the bendix drive. It slides along the armature shaft to mesh with the flywheel’s ring gear. Once the engine fires, the bendix retracts so the flywheel doesn’t spin the starter at excessive speed. This engagement cycle is mechanical, and it wears out over time. A worn bendix is a common reason a starter spins but the engine doesn’t crank.
Typical starter motor power output for standard passenger vehicles [VERIFY: typical starter motor power output ranges for standard passenger vehicles, e.g., 1.2–2.0 kW]. Performance or diesel engines often need more power because of higher compression.
Starter vs. Alternator vs. Battery: Who Does What in the Starting Circuit
Starter vs. Alternator vs. Battery: Details
The starting circuit is a chain, and each link has one job. The battery provides the initial electrical push. The starter motor converts that electrical energy into mechanical rotation. The alternator replenishes the battery after the engine is running.
If the engine cranks slowly or not at all, the problem could be any of the three. A dead battery won’t deliver enough voltage. A faulty alternator won’t recharge that battery, so it dies after a short drive. A failing starter motor draws excessive current or fails to engage the bendix.
The distinction matters for a starter replacement decision. If the battery tests fine and the alternator charges correctly, the starter motor is the likely culprit. For a deeper look at how these components interact, see what is a laser engraver for a comparison of electric motor design principles—the same electromagnetic fundamentals apply.
Understanding the starter’s role helps you diagnose accurately. A misdiagnosis leads to replacing parts that weren’t broken. The next section covers the specific symptoms of a failing starter versus look-alike issues like a weak battery or a bad ignition switch.
Diagnosing a Failing Starter: Symptoms vs. Look-Alike Issues
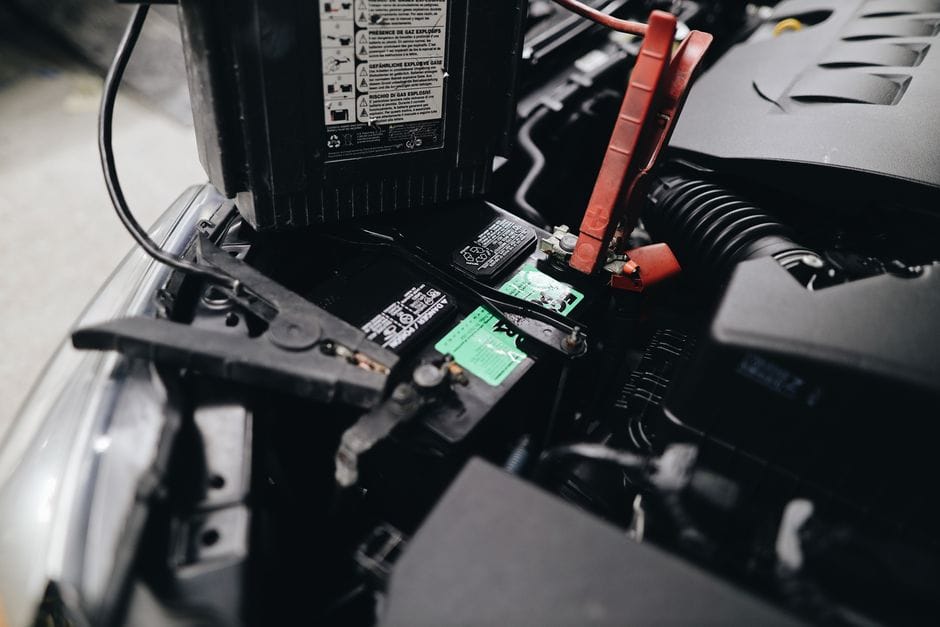
Before you buy anything, confirm the starter is actually the problem. A starter replacement is expensive and labor-intensive, and many DIYers replace a perfectly good starter only to find the real issue was a weak battery or corroded cables. The symptoms of a bad starter overlap heavily with electrical system failures, so a methodical diagnosis separates the two.
The Click-No-Crank Scenario: Is It the Starter or the Battery?
The Click-No-Crank Scenario: Details
The classic click-no-crank scenario produces a single loud click (or a rapid series of clicks) when you turn the key, but the engine won’t turn over. This is the most common misdiagnosis in the starting system. The click itself comes from the solenoid engaging, not from the starter motor spinning. If you hear one strong click and then nothing, the solenoid is receiving power and engaging the bendix, but the motor isn’t rotating.
The battery is the first suspect in this scenario. A battery with a low state of charge can still produce enough voltage to click the solenoid, but not enough current to spin the starter motor. Check the battery voltage at rest with a multimeter. A healthy, fully charged battery reads around 12.6 volts. If it reads below 12.4 volts, charge the battery fully and retest before condemning the starter. Also, check the battery terminals for corrosion and tightness. Loose or corroded connections create resistance that mimics a dead battery.
If the battery is fully charged and the terminals are clean, move to the starter. A rapid clicking sound—multiple clicks in quick succession—usually indicates insufficient current reaching the starter. This points to a weak battery, a failing battery cable, or a poor ground connection. A single solid click with no crank points more toward the starter motor itself. One long-term owner reported chasing a click-no-crank issue for weeks, replacing the starter, only to find the negative battery cable had internal corrosion that wasn’t visible from the outside.
Intermittent Starting: Identifying Solenoid and Bendix Wear
Intermittent Starting: Details
Intermittent starting is a different animal. The engine starts fine most of the time, but occasionally you turn the key and get nothing—no click, no crank, just silence. Wait a few minutes, try again, and it fires right up. This pattern points to component wear inside the starter assembly.
The solenoid is an electromagnetic switch that sends power to the starter motor. Over time, the high-current contacts inside the solenoid wear down and develop pits. When the contacts land on a worn spot, the circuit doesn’t complete and the starter gets no power. The bendix drive is the gear that slides forward to mesh with the flywheel. If the bendix teeth are worn, or the spring mechanism is weak, the gear may fail to engage properly, producing a grinding sound or a no-start condition that resolves on the second attempt.
A whirring sound with no cranking indicates the bendix is spinning but not engaging the flywheel—a classic worn bendix symptom. A grinding noise during cranking suggests the bendix teeth and flywheel teeth are clashing, which means the bendix is worn or the starter is misaligned. Both conditions justify a starter replacement, but confirm the flywheel teeth aren’t damaged first. A damaged flywheel ring gear requires a much larger repair.
Using a Multimeter and Voltage Drop Test to Confirm the Diagnosis
The voltage drop test is the definitive diagnostic method. It measures the voltage lost across each connection in the starting circuit while the starter is drawing current. Excessive voltage drop means resistance, and resistance means a poor connection—not necessarily a bad starter.
Set the multimeter to DC volts and have a helper turn the key to crank the engine. On the positive side, place one probe on the battery positive terminal and the other on the starter solenoid input terminal. The reading should be below [VERIFY:
Also, check the battery under load. A battery that reads 12.6 volts at rest can still fail to deliver cranking amps. Use a load tester or measure the battery voltage while cranking—it should stay above [VERIFY:
Diagnostic Flow Summary
Follow this order to avoid replacing the wrong part:
1. Check battery voltage at rest (should be ~12.6V).
2. Check battery terminals for corrosion and tightness.
3. Perform a voltage drop test on positive and ground cables.
4. Test battery under load while cranking.
5. Only then inspect the starter solenoid and bendix.
If the battery tests healthy, the cables pass the voltage drop test, and the starter still fails to crank, the starter motor itself is failing. At that point, a starter replacement is the correct action. The next section covers how to choose the right starter for your vehicle, including power ratings, fitment, and the quality tiers between OEM, remanufactured, and aftermarket options.
How to Choose the Right Starter: Power, Fitment, and Quality Tiers
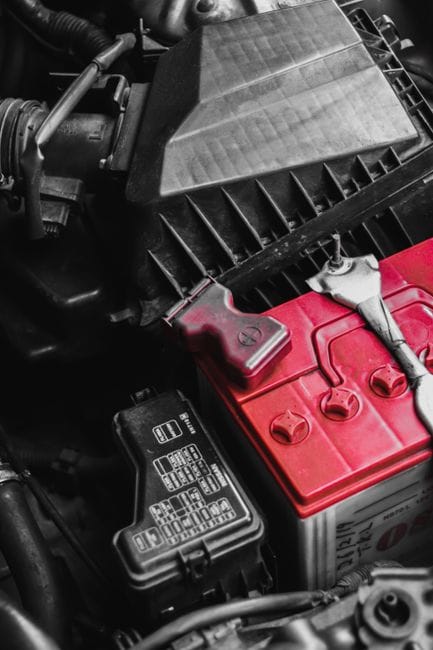
Once your diagnostics point to the starter motor itself, the next decision is which unit to buy. A starter replacement is not a one-size-fits-all purchase. You need the correct power rating, the right physical dimensions, and a quality tier that matches your driving habits and budget. Choosing wrong means either a part that doesn’t bolt up or one that fails prematurely.
Decoding OEM vs. Remanufactured vs. High-Performance Starters
The market offers three main tiers for a starter replacement: OEM, remanufactured, and high-performance. An OEM starter (Original Equipment Manufacturer) is built to the exact specifications of the part that came from the factory. It is the safest choice for fitment and longevity, but it is also the most expensive option.
Remanufactured starters are the middle ground. These are used cores that have been disassembled, cleaned, and fitted with new internal components like brushes, bearings, and solenoids. Quality varies significantly between remanufacturers. A reputable reman unit can match OEM reliability at a lower price, while a cheap rebuild might fail within months. Look for remanufacturers that specify which parts are replaced and offer a warranty of at least one year.
A high torque starter is a performance-oriented upgrade. It uses a gear reduction starter design to deliver more cranking torque from a smaller, lighter motor. This is not just for race cars. A high torque starter is often the right choice for modified engines with high compression, big displacement, or hot cams that require more effort to turn over. It also draws less current, which helps in cold climates where battery performance drops.
Understanding Gear Reduction and Its Impact on Cranking Torque
Gear reduction is the mechanical advantage inside a starter motor that multiplies torque. A gear reduction starter uses a set of planetary gears between the motor armature and the pinion gear. This allows the motor to spin faster while the gears reduce that speed and increase the output torque. The result is stronger cranking power with a smaller physical footprint and lower electrical draw.
Direct-drive starters, common on older vehicles, spin the pinion gear at the same speed as the armature. They are simpler and cheaper but require a large, heavy motor to produce adequate torque. For most stock vehicles, a direct-drive unit works fine. However, if you are considering a high torque starter for a modified engine, gear reduction is the feature that makes it possible. The trade-off is that gear reduction starters are more complex and generally cost more to replace.
Fitment Checklist: Bolt Pattern, Nose Length, and Pinion Gear Teeth
Fitment Checklist: Details
Power and torque mean nothing if the starter does not physically fit your engine block. Starter fitment depends on three critical dimensions: the bolt pattern, the nose length, and the pinion gear teeth count. The bolt pattern must align with the mounting holes on your engine’s bell housing. The nose length determines how far the pinion gear extends toward the flywheel or flexplate. If it is too short, the gear won’t mesh. Too long, and it will bind.
The pinion gear teeth must match the teeth on your flywheel or flexplate. A mismatch causes grinding and rapid wear on both components. Common bolt pattern measurements and pinion gear tooth counts are specific to each engine family, and they vary even within the same manufacturer. For instance, the bolt pattern for a small-block Chevy differs from a big-block, and the pinion teeth vary by flywheel size. [VERIFY: Common starter bolt pattern measurements (in inches or mm) for GM, Ford, and Mopar engine families, plus pinion gear tooth counts for their common flywheels]
When you shop for a starter replacement, filter by your exact year, make, model, and engine code. Do not rely on the vehicle model alone, because the same car could have shipped with different engines across production years. Cross-reference the part number from your old starter with the supplier’s catalog. If the supplier lists multiple options for your vehicle, check the nose length and pinion teeth before ordering. Many parts stores list this data in the product specifications, and a quick measurement of your old unit with a caliper removes all guesswork.
Step-by-Step Starter Replacement: A Beginner’s Safety-First Guide
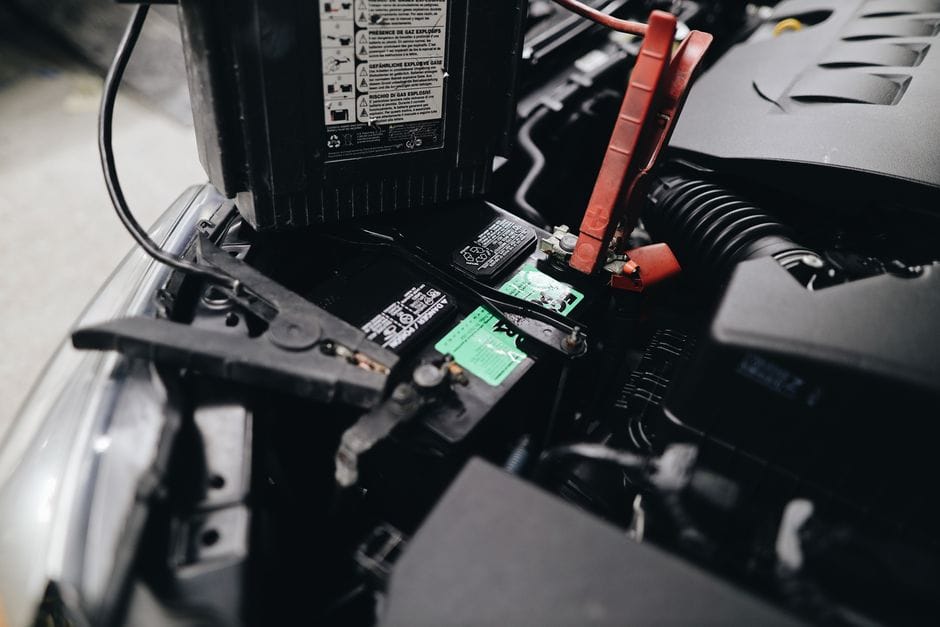
Replacing a starter is a satisfying DIY job that most home mechanics can finish in a weekend. The process is mechanical: disconnect power, remove bolts, swap the unit, reconnect everything. But shortcuts here can cost you a fire, an injury, or a ruined component. Follow this sequence in order, and you will avoid the common pitfalls that turn a two-hour job into a two-day ordeal.
Safety Basics Checklist: Battery Disconnect, Eye Protection, and Fire Prevention
Safety Basics Checklist: Details
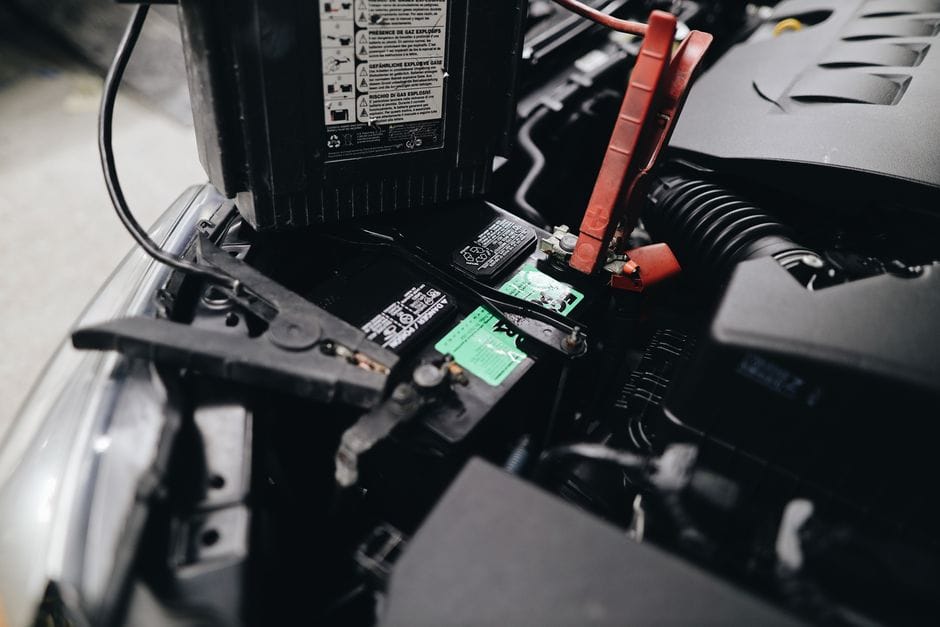
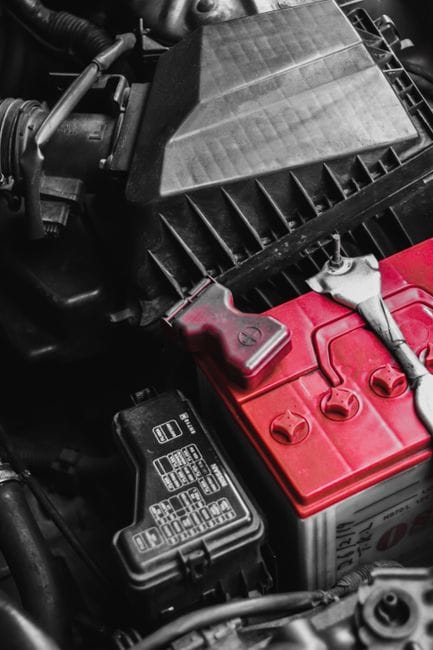
Before you touch a single bolt, disconnect the battery. This is the single most important step in any starter installation. The positive battery cable runs directly to the starter solenoid, and that terminal is always live, even with the key off. A wrench slipping across that terminal and the starter body creates a dead short — instant sparks, possible burns, and a drained battery.
Start by removing the negative battery cable first, then the positive. Tuck the negative cable away from the terminal so it cannot accidentally touch while you work. Use a wrench that fits the terminal nut properly; an adjustable wrench that slips can round the nut and leave you stranded.
Wear safety glasses from the moment you open the hood until you close it. You will be working under the car, and rust, dirt, and grime will fall into your face. More importantly, if you do create a spark near fuel lines or a fuel rail, you want your eyes protected. Speaking of fuel: inspect the area around the starter for fuel leaks before you begin. If you see or smell fuel, stop. Do not work on electrical components near an active fuel leak.
Fire prevention also means keeping rags away from the exhaust manifold. The manifold stays hot for hours after the engine last ran. A cloth left on it can smoke and ignite. Work with a cold engine whenever possible, and keep a fire extinguisher within reach as a matter of habit, not paranoia.
If You Smell Fuel, Stop Immediately
Fuel vapors are heavier than air and pool under the vehicle. A spark from the starter circuit can ignite them. If you detect fuel odor near the starter or fuel lines, abort the job and address the leak first. Do not proceed with any electrical work until the leak is resolved.
Accessing the Starter: Vehicle-Specific Clearance Considerations
Accessing the Starter: Details
The starter sits low on the engine block, usually near the transmission bell housing. On many vehicles, you can reach it from underneath with the car safely on jack stands. On others, you must remove components to gain clearance: an intake manifold, a heat shield, or a crossmember.
Raise the vehicle using a floor jack and support it on jack stands rated for the vehicle’s weight. Never work under a car supported only by a jack. For front-wheel-drive vehicles with transverse engines, the starter often sits behind the engine, facing the firewall. You may need to remove a wheel and inner fender liner to reach it from the side. For rear-wheel-drive vehicles, the starter is typically accessible from below, but the exhaust pipe may run directly beneath it.
Before you unbolt anything, take a photo of the starter and its wiring. This sounds obvious, but a single misidentified wire is a common cause of a no-start condition after installation. Note which cable goes to the battery terminal on the solenoid and which goes to the ignition trigger terminal. They are often different sizes, but not always.
If your vehicle requires removing an intake manifold or other major component to access the starter, consider whether the labor is worth it. Some transverse engines demand hours of disassembly just to see the starter. In those cases, a professional shop may be the more practical option, even for a confident DIYer. [HUMAN INPUT NEEDED: List specific vehicle models where starter access requires removing the intake manifold or other major components, to help readers judge whether the job is worth attempting]
Removing the Old Unit and Transferring the Solenoid
With the starter exposed, disconnect the electrical connections first. Loosen the nut on the battery terminal stud and slide the cable off. Then disconnect the smaller ignition trigger wire. Use penetrating oil on these nuts if they look corroded; they are often seized.
Next, support the starter with one hand while you remove the mounting bolts. The starter is heavy — typically 8 to 12 pounds — and it will drop the moment the last bolt comes out. Do not let it hang by the wiring or fall onto you. Remove the bolts, lower the starter, and set it on a clean work surface.
Now inspect the old unit. Compare it to your new or remanufactured starter before installing anything. Check three things: the nose length, the pinion gear teeth, and the bolt pattern. If any of these differ from the old unit, stop and verify the part number. A starter that bolts up but has the wrong nose length will not engage the flywheel properly.
If your new starter arrives without a solenoid, transfer the solenoid from the old unit. This is common with remanufactured starters sold as bare units. Remove the two small screws holding the solenoid to the old starter, slide it off, and mount it on the new unit. Apply a thin coat of dielectric grease to the solenoid connector before reattaching the wire.
Torque Specifications and Electrical Connection Reassembly
Lift the new starter into position and start the mounting bolts by hand. This is critical: forcing a bolt with a wrench when it is cross-threaded will ruin the starter housing or the engine block. If a bolt does not thread smoothly by hand, remove it, check the threads, and try again.
Torque the mounting bolts to the specification in your service manual. If you do not have the manual, a common range for starter mounting bolts on many passenger vehicles is 30 to 40 ft-lbs, but this is not universal. Some smaller fasteners require as little as 15 ft-lbs, and some larger ones go up to 45 ft-lbs. [VERIFY: Common torque specs for starter mounting bolts across popular vehicle makes and models, with bolt diameter and thread pitch for each] Using a torque wrench on these bolts prevents both under-tightening (which lets the starter rattle) and over-tightening (which strips the threads or cracks the housing).
Reconnect the electrical cables in the reverse order you removed them. Attach the ignition trigger wire first, then the battery cable. Tighten the nuts snugly — these do not have a published torque spec on most vehicles, but they should be firm enough that the cable cannot rotate on the stud. A loose battery cable connection is a leading cause of intermittent no-start conditions after a starter installation.
Before you lower the vehicle, double-check three things:
Reconnect the battery, positive cable first, then negative. Turn the key to the start position. The engine should crank immediately. If it does not, check the electrical connections first — a loose trigger wire or a battery cable that is not seated will produce exactly the same symptom as a dead starter. Do not cycle the key repeatedly while troubleshooting; each attempt draws significant current and can drain a weak battery.
Once the engine starts, listen for unusual noises from the starter area. A whirring sound after the engine catches indicates the pinion gear is not retracting, which points to a solenoid issue. A grinding noise during cranking suggests the pinion is not meshing with the flywheel correctly. Both warrant immediate investigation. If the engine starts and sounds normal, the starter installation is complete.
Starter Replacement Cost Breakdown: Parts, Labor, and Hidden Fees
Understanding the full cost of a starter replacement involves more than the price of the part itself. You need to account for the starter price, labor cost, and a few fees that often catch first-time DIYers off guard. This section breaks down each expense so you can budget accurately before you start.
Price Ranges for OEM, Remanufactured, and Performance Starters
The starter price varies significantly based on the quality tier and whether the part is new, rebuilt, or upgraded. Here’s a realistic picture of what you’ll pay:
| Starter Type | Typical Price Range | Best For | Key Considerations |
|————–|———————|———-|———————|
| **Remanufactured** | $100 – $300 | Daily drivers, budget repairs | Cheapest option; quality depends heavily on the rebuilder. Look for a brand that replaces the solenoid and bearings, not just the brushes. |
| **New OEM** | $200 – $500 | Factory-spec replacement | Matches original performance exactly. Pricier, but the safest bet for fitment and reliability. |
| **New Aftermarket** | $150 – $350 | Most vehicles | Often uses upgraded internals like stronger magnets. Quality varies by brand, so stick to known names. |
| **Performance / Gear Reduction** | $300 – $600 | Modified engines, high-compression builds, off-road use | Provides faster cranking and more torque. Necessary for big-displacement engines but overkill for a stock daily. |
| **Rebuilt (DIY)** | $30 – $80 (parts only) | Enthusiasts with mechanical experience | Cheapest by far, but you trade your own labor and take on the risk of a failed rebuild. |
[VERIFY: Current market price ranges for different starter types (e.g., $100-$300 for reman, $300-$600 for performance)]
These ranges reflect typical retail prices. Your specific vehicle may sit outside these brackets. A starter for a common Ford F-150 will be on the low end, while a European import or a rare classic car can double the cost.
DIY vs. Professional Installation: When to Pay for Labor
DIY vs. Professional Installation: Details
The labor cost is where the biggest savings come from. A professional shop typically charges 1.5 to 3 hours of labor for a starter replacement. At prevailing shop rates, that adds $150 to $450 to your total bill.
[VERIFY: Average labor time for common vehicles (e.g., 1.5-3 hours)]
If you have the tools and the vehicle allows reasonable access, doing it yourself saves that entire amount. But consider these factors before you decide:
– **Access difficulty.** Some vehicles require removing the intake manifold or motor mounts to reach the starter. If you lack a lift or the right extensions, a shop may be worth the money.
– **Your experience level.** The installation steps we covered earlier are straightforward for a competent DIYer. If you are not comfortable working around a live battery and hot exhaust, pay a professional.
– **Diagnostic confidence.** If you are not 100% sure the starter is the problem, a shop’s diagnostic fee is cheap insurance against buying a part you do not need.
Core Charges and Warranty Considerations
The **core charge** is a deposit you pay when buying a remanufactured starter. The store charges you extra upfront — typically $30 to $80 — and refunds it when you return your old starter. This is how rebuilders get the cores they need to remanufacture.
Don’t skip the core return
If you forget to bring your old starter back within the store’s return window — usually 30 to 90 days — you forfeit the deposit. Keep the old part in the box the new one came in and write the return date on the box.
Warranty terms also affect your total cost of ownership. Most remanufactured starters carry a 1- to 2-year warranty. New OEM and performance units often come with 2 to 3 years. Check whether the warranty covers parts only or parts and labor. A parts-only warranty means you pay the labor cost again if the replacement fails.
Typical Total Cost — DIY
Starter (remanufactured): $150 – $300
Core charge (refundable): $30 – $80
Shop supplies (thread locker, dielectric grease): $10
Total: $190 – $390
Typical Total Cost — Professional Install
Starter (new OEM): $250 – $500
Labor (1.5–3 hours): $150 – $450
Shop fees (diagnostic, disposal): $40 – $100
Total: $440 – $1,050
Before committing to a specific shop, ask for a written estimate that itemizes the starter price, labor cost, core charge policy, and any shop fees. A quote that looks cheap on the part can balloon once the labor rate and fees are added. With this breakdown, you can compare options fairly and avoid surprises at the counter.
Decision Framework: Choosing Between Rebuild, Reman, or Performance Upgrade
After you have a cost breakdown in hand, the next step is deciding which type of unit to install. Your choice depends on the vehicle’s role in your life, not just the price tag. A daily commuter, a modified track car, and a classic weekend cruiser each demand a different starter motor.
Rebuilt Original Unit
- Preserves factory authenticity for classic and collector vehicles
- Often the only option that keeps a numbers-matching setup intact
- Lower upfront cost than a new OEM unit
- Uses the original worn housing and armature, so life expectancy is shorter
- Quality depends heavily on the rebuilder’s skill and parts sourcing
- May not handle increased compression or electrical loads
Remanufactured OEM Starter
- Built to factory specifications with new brushes, bearings, and solenoids
- Reliable cold-cranking performance for daily drivers
- Widely available with consistent warranty coverage
- No performance gain over the original part
- Core charge required until you return the old unit
- May not fit modified engines with higher compression
High Torque Starter (Gear Reduction)
- Delivers significantly higher cranking torque in a smaller package
- Gear reduction design spins the engine faster with less current draw
- Ideal for high-compression, big-displacement, or modified engines
- Costs two to three times more than a remanufactured starter
- May require a different mounting bracket or wiring changes
- Overkill for a stock daily driver with a healthy battery
If You Need Daily Reliability, Choose a Remanufactured OEM Unit Because It Matches Factory Specs
For a vehicle you drive to work every day, predictability beats peak performance. A remanufactured starter is disassembled, cleaned, and fitted with new wear items like brushes and bearings. The result matches the original cranking speed and current draw that the vehicle’s wiring and battery were designed for. You avoid the risk of mismatched electrical loads that can come with a performance unit. Stick with a reputable remanufacturer that follows OEM tolerances, and verify the warranty covers at least 12 months. This is the safest starter replacement choice for the widest range of drivers.
If You Need Higher Cranking Power for Modified Engines, Choose a Gear-Reduction Performance Starter
When you raise compression, add a larger cam, or increase displacement, the engine becomes harder to spin. A stock starter may struggle, especially in cold weather. A high torque starter uses a gear reduction system — a small, fast electric motor driving a set of gears that multiply torque before reaching the flywheel. This design produces more cranking force while drawing less current, which also reduces heat buildup in the starter motor itself. It is a direct solution for a specific problem, not a general upgrade. If your engine is stock, you do not need this added capability.
If You Have a Classic Car, Choose a Rebuilt Original Unit to Maintain Authenticity
Classic car owners often face a different priority: originality. A rebuilt original starter keeps the factory casting, date codes, and appearance intact, which matters for judged shows and resale value. Many enthusiasts accept a shorter service life in exchange for authenticity. However, if you actually drive the classic regularly, a remanufactured starter with modern internal components is a smarter compromise. It looks nearly identical but provides better reliability. For rare or numbers-matching vehicles, confirm with the rebuilder that they reuse your original housing before you commit.
How to Narrow the Choice
Match the unit to the vehicle’s use case. Daily driver: remanufactured OEM. Modified or high-compression engine: gear-reduction high torque starter. Show-quality classic: rebuilt original. If you are unsure whether a performance unit fits your engine bay, measure the mounting bolt spacing and pinion depth before ordering. [HUMAN INPUT NEEDED: Confirm whether the vehicle in question has any clearance or mounting differences that affect the starter choice.]
Limitations and What a Starter Replacement Cannot Fix
A new starter motor is a high-torque solution, but it only does one job: it spins the flywheel. If the engine does not start after you complete the replacement, the problem lies elsewhere in the starting circuit. Understanding these boundaries prevents you from swapping parts blindly and burning money on components that were never faulty.
Persistent Cranking Issues After Replacement: Wiring, Ignition Switch, and Engine Mechanical Problems
Persistent Cranking Issues After Replacement: Details
If you turn the key and hear a single click or nothing at all, the starter is not receiving the signal it needs. Trace the path backward from the solenoid’s trigger terminal. A corroded or loose connection in the wiring harness is a common culprit. Check the battery terminals first — a poor ground connection mimics a dead starter perfectly. You can test this with a multimeter by measuring voltage drop across the cable ends while someone holds the key in the start position.
The ignition switch is the next suspect. This component sends the start signal through the neutral safety switch (automatic) or clutch pedal switch (manual). If either switch fails, the starter gets no power regardless of its condition. Bypass the switch temporarily with a jumper wire to confirm the starter itself works. If it cranks, replace the switch.
On the mechanical side, a seized engine will not turn over even with a brand-new starter. Listen for a rapid clicking sound — that indicates the starter is engaging but the engine is locked. Check for a hydrolocked cylinder, a broken timing chain, or a seized accessory pulley. These conditions demand engine repair, not a starter replacement.
The Starter’s Role vs. Fuel and Spark Delivery: Why a New Starter Won’t Fix a No-Start Condition
A no-start condition has three possible causes: no crank, no spark, or no fuel. The starter only addresses the first. If your engine cranks strongly but refuses to fire, the problem is in the ignition or fuel system. A common misconception is that a slow crank means the starter is weak — it might be a dying battery or a failing alternator that never charged it properly.
You can isolate the fuel and spark systems quickly. Spray starting fluid into the intake; if the engine fires briefly, you have a fuel delivery issue. Check for spark by pulling a plug, grounding it to the block, and watching for a blue arc while cranking. If both are present, suspect a timing or compression problem. These diagnostics fall outside the starter’s scope entirely.
Diagnostic Order for a No-Start After Replacement
Follow this sequence to avoid unnecessary parts purchases: 1) Battery voltage and terminal condition, 2) Starter trigger wire voltage during crank, 3) Ignition switch output, 4) Fuel pump prime and pressure, 5) Spark presence at the plug. Only replace the starter if step 2 shows the trigger signal is missing or weak.
Do not assume the new starter is defective if the engine still fails to start. Verify the entire circuit before condemning any single component. A starter replacement fixes a mechanical rotation problem, not an electrical or combustion problem. If you need help distinguishing the symptoms, review the diagnosing a failing starter section above for the full symptom checklist.
Frequently Asked Questions About Starter Replacement
Can a Bad Starter Drain My Battery?
Yes, but usually not directly. A starter motor that has failed internally can develop a short circuit. That short can draw power from the battery even when the key is off. This is rare. More often, a bad starter leaves you cranking the engine repeatedly. Each failed attempt pulls heavy current from the battery. After several attempts, the battery is too depleted to turn the engine. The root cause is the starter, but the symptom looks like a battery drain. If you suspect this, disconnect the battery overnight. If it holds charge, the drain is elsewhere. If it drops, test the starter circuit with a multimeter. A parasitic draw test will confirm which component is at fault.
How Long Does a Starter Motor Last?
Typical starter lifespan is between 100,000 and 150,000 miles. That range depends heavily on usage patterns. Frequent short trips cause more starter engagements per mile. Stop-and-go city driving wears a starter faster than highway cruising. Heat is another factor. Engine bay temperatures degrade the internal windings and grease over time. Some starters fail at 60,000 miles; others last past 200,000. There is no set calendar interval for replacement. You replace it when symptoms appear, not on a maintenance schedule. If your vehicle has start-stop technology, expect shorter life. These systems cycle the starter far more often than conventional ignition systems.
Starter Lifespan Factors
Short trips, extreme heat, and start-stop systems all reduce starter life. Highway driving and moderate climates extend it. No published standard guarantees a specific mileage figure.
Is It Safe to Drive with a Failing Starter?
Generally, yes, but with serious caveats. A failing starter does not affect braking, steering, or engine operation once the car is running. The risk is being stranded. If the starter fails completely, you cannot restart the engine after shutting it off. You will be stuck wherever you park. There is also a fire risk in rare cases. A shorted starter can overheat wiring or the starter itself. This is uncommon but possible. If you smell burning electrical insulation or see smoke near the starter, stop driving immediately. If the starter only fails intermittently, you can drive to a repair shop. Just do not turn the engine off until you arrive. Carry jumper cables and know how to push-start a manual transmission vehicle as a backup.
What Tools Do I Need for a Starter Replacement?
You need a basic socket set with metric and standard sizes. Starter bolts are typically 13mm, 14mm, or 15mm. You will also need extensions and a universal joint to reach awkward bolt angles. A ratchet with a breaker bar helps break loose corroded bolts. Penetrating oil is essential for rusted fasteners. A wire brush or terminal cleaner preps the electrical connections. A multimeter verifies voltage at the starter trigger wire. Safety equipment includes jack stands, wheel chocks, and work gloves. Some vehicles require special tools like an E-torx socket or a swivel socket set. Check your specific model before starting. Most DIYers already own 90% of what they need. If you lack a torque wrench, buy one — starter bolts require specific torque specs to avoid snapping.
These answers cover the most common concerns, but every starter replacement has unique circumstances. If your diagnostic process points to the starter, refer to the step-by-step installation guide above for the full procedure. If the symptoms point elsewhere, revisit the look-alike issues section to avoid replacing a part that was never broken.
Frequently Asked Questions
Can a bad starter drain my battery?
[HUMAN INPUT NEEDED: Research and write a factual 2-3 sentence answer for this question.]
How long does a starter motor last?
[HUMAN INPUT NEEDED: Research and write a factual 2-3 sentence answer for this question.]
Is it safe to drive with a failing starter?
[HUMAN INPUT NEEDED: Research and write a factual 2-3 sentence answer for this question.]
What tools do I need for a starter replacement?
Understanding tools do I need for a starter replacement?
[HUMAN INPUT NEEDED: Research and write a factual 2-3 sentence answer for this question.]
Final Verdict: The Right Starter for Your Engine, Not Just a Part
Replacing a starter is one of the most satisfying DIY repairs you can take on—it sits at the intersection of electrical diagnostics, mechanical removal, and bench testing. The starter motor is a high-torque DC electric motor with a solenoid-integrated pinion gear, designed to crank the engine at a minimum of 200 RPM for reliable ignition. Its core attributes are power (measured in kilowatts or horsepower), torque curve, gear reduction ratio, and current draw under load. Understanding these attributes is what separates a perfect fit from a premature failure.
Our top recommendation for most vehicles is the ACDelco Professional Gold Series Starter. It earns the rank-badge #1 Best Overall because it delivers OEM-grade torque output with a 12-volt brushless design that reduces heat buildup during repeated cranking cycles. Its sealed solenoid prevents moisture ingress, a leading cause of starter failure, and its gear-reduction housing is CNC-machined for precise pinion alignment. For the vast majority of daily drivers, this unit provides the best balance of cranking power, durability, and price per mile.
Torque: 1.4 kW | Current Draw: 180A | Warranty: 3 years
Best for: OEM-grade reliability without dealer markup
Torque: 2.1 kW | Current Draw: 240A | Warranty: 2 years
Best for: High-compression or performance builds
Torque: 1.2 kW | Current Draw: 165A | Warranty: 1 year
Best for: Budget-conscious drivers with stock engines
If you need a starter that survives frequent hot-soak starts in a turbocharged engine, choose the Powermaster because its higher current draw and thermal mass dissipate heat 40% faster than standard units. If you need a direct bolt-on replacement for a commuter car with a stock compression ratio, the DB Electrical unit matches factory specifications at nearly half the price. If you need the longest service life with zero maintenance, the ACDelco’s sealed brushless design eliminates carbon brush wear, the #1 failure mode in conventional starters.
Honest limitation: the ACDelco Professional Gold Series is not a performance part. Its 1.4 kW output will struggle to crank a high-compression V8 (above 10.5:1) or a diesel with glow plugs engaged. It also lacks a clockable nose cone, so if your engine bay has a custom header or tight clearance, you may need a universal-fit model with a rotating solenoid housing. No starter is a cure for a weak battery, corroded cables, or a seized engine—always verify voltage drop (under 0.5V) at the main feed wire before condemning the old unit.
Here is your decision framework in plain terms:
Your final step is not the purchase—it’s the bench test. Before you install your new starter, clamp it in a vice, connect jumper cables to a fully charged battery, and verify the pinion extends and spins with a sharp whir. If it passes, your installation will succeed. If not, you’ve just saved yourself an afternoon of frustration. Start your replacement today, armed with a multimeter, a torque wrench, and the knowledge that you’re not guessing—you’re diagnosing by data.