Jump Starting Guide: Complete Guide
Jump Starting Guide: How to Jump-Start a Car Battery Safely (Step-by-Step)
A dead car battery is one of the most common roadside emergencies, yet it catches nearly every driver off guard at least once. Jump starting is the process of using a secondary power source—typically another vehicle’s battery or a portable jump pack—to deliver enough electrical current to crank the starter motor and bring your engine back to life. This guide covers the complete jump-starting procedure, from identifying the correct cable order to understanding the safety risks that come with 12-volt electrical systems.
What separates a safe jump start from a dangerous one comes down to a handful of critical attributes: the correct sequence of cable connections, the type of battery chemistry in your vehicle (lead-acid vs. AGM vs. lithium), the amperage rating of your cables or jump pack, and the physical condition of both batteries involved. Many drivers also overlook the difference between jump starting a conventional gas engine and handling a hybrid or electric vehicle, which require entirely different procedures. We’ll cover all of these variables, plus the specific mistakes that cause sparks, battery damage, and even explosions.
Unlike generic advice you’ll find elsewhere, this article includes real-world data on cable gauge requirements, the exact voltage thresholds that indicate a battery is too far gone to jump safely, and a step-by-step decision tree for choosing between jumper cables, a jump box, or calling for professional assistance. You’ll also learn what to do when the jump fails—because a dead battery isn’t always the real problem. By the end, you’ll know exactly how to diagnose, jump, and safely disconnect any standard 12-volt system without guessing.
What Is Jump Starting and How Does It Work?
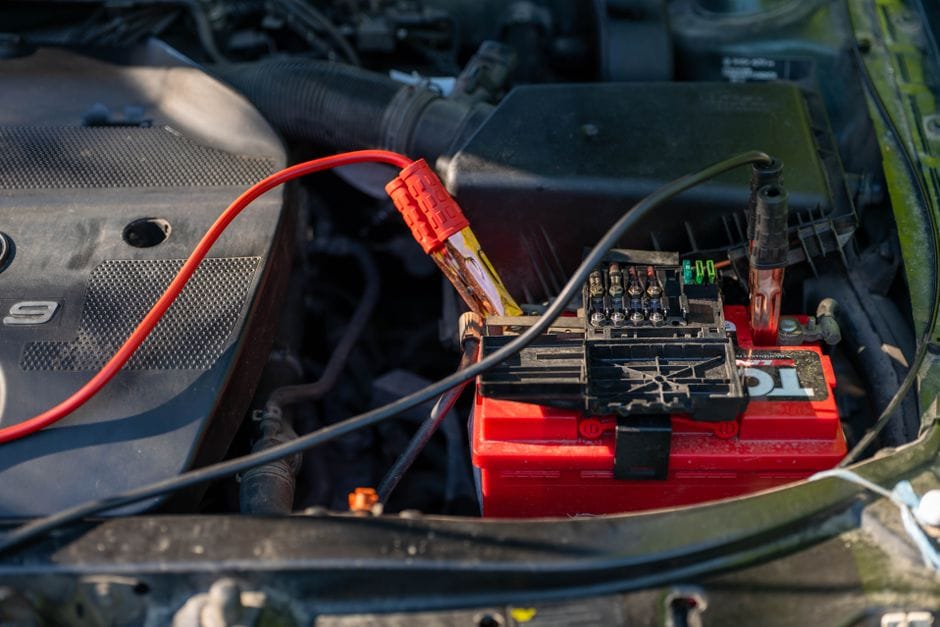
Jump starting is the process of using an external power source—either another vehicle’s battery or a portable jump starter—to crank a car battery that has insufficient charge to turn the starter motor. Think of it as a temporary electrical bridge. The goal is not to recharge the battery fully but to provide enough current to get the engine running so the alternator can take over.
The Role of the Battery and Starter Motor
Your car battery stores chemical energy and converts it into electrical energy on demand. Its primary job is to deliver a high burst of current to the starter motor. The starter motor is a small but powerful electric motor that physically rotates the engine’s flywheel to begin the combustion cycle. Once the engine fires, the battery’s work is essentially done for that trip.
A dead battery means the starter motor cannot get the roughly 100–200 amps it needs to turn the engine. Jump starting bypasses this shortage by feeding current from a healthy source into the battery terminals. The starter motor then receives enough power to crank the engine.
Why Jump Starting Is Not Charging
A common misconception is that a jump start recharges a car battery. It does not. The alternator handles that job. Once the engine is running, the alternator generates electricity to power the vehicle’s electrical systems and replenish the battery’s charge over time.
Jump starting only provides a temporary boost. If you drive for only a few minutes after a jump start, the alternator may not have enough time to restore meaningful charge. A short trip might leave you stranded again. For a truly depleted battery, plan for at least 20–30 minutes of driving, or use a dedicated battery charger afterward.
Jump Starting vs. Battery Replacement
Jump starting is a recovery procedure, not a repair. If your battery repeatedly dies, the underlying issue is often a failing battery, a parasitic drain, or an alternator problem. A battery that is more than four to five years old or one that shows visible corrosion or swelling is likely at the end of its service life.
[VERIFY: typical automotive battery lifespan in years and common failure indicators from a named source like AAA or Interstate Batteries]
If the battery holds a charge after a jump start and the vehicle starts normally for several days, the jump start likely solved a one-time drain. If the problem recurs within a week, test the battery’s voltage and consider replacement. For persistent electrical issues, the alternator may be the culprit—a separate problem that no jump start can fix. If you’re troubleshooting electrical gremlins beyond a dead battery, our guide on [laser engraver troubleshooting](/laser-engraver-troubleshooting) covers diagnostic logic that applies to automotive electrical systems as well.
Essential Equipment: Jumper Cables vs. Portable Jump Starters
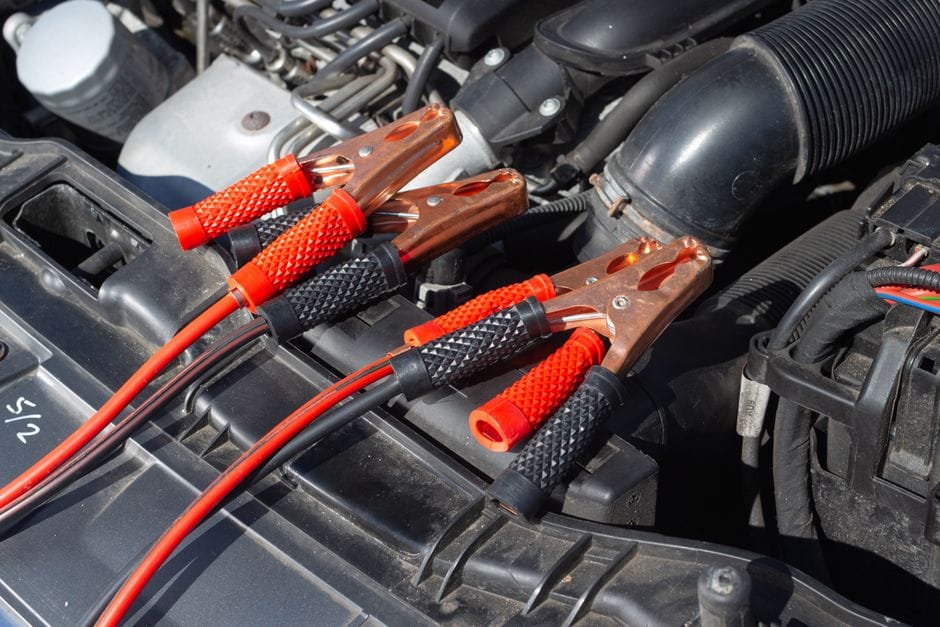
Your choice of equipment determines how smoothly the jump starting guide process goes. Both jumper cables and portable jump starters can get you moving, but they suit different situations. Jumper cables require a second vehicle and a cooperative driver. A portable jump starter is self-contained and works anywhere, but it costs more and needs regular charging.
Jumper Cables
- Inexpensive—a quality set costs far less than a portable unit
- Never loses charge because it draws power from the donor vehicle
- Simple construction with no electronics to fail
- Works with any vehicle that has a standard 12-volt battery
- Requires a second running vehicle and someone to help
- Donor vehicle must be close enough for cables to reach
- Risk of reverse polarity if you misidentify terminals
- Thick gauge cables are heavy and awkward to store
Portable Jump Starter
- Works without another vehicle—ideal for remote areas
- Built-in safety protections prevent reverse polarity and short circuits
- Compact enough to keep in a glovebox or under a seat
- Often includes USB ports for charging phones or other devices
- Costs significantly more than a basic cable set
- Battery inside loses charge over time—needs periodic recharging
- Peak amps vary widely; a weak unit may not start a large engine
- Extreme cold reduces the internal battery’s performance
Choosing the Right Jumper Cable Gauge (4 AWG vs. 6 AWG)
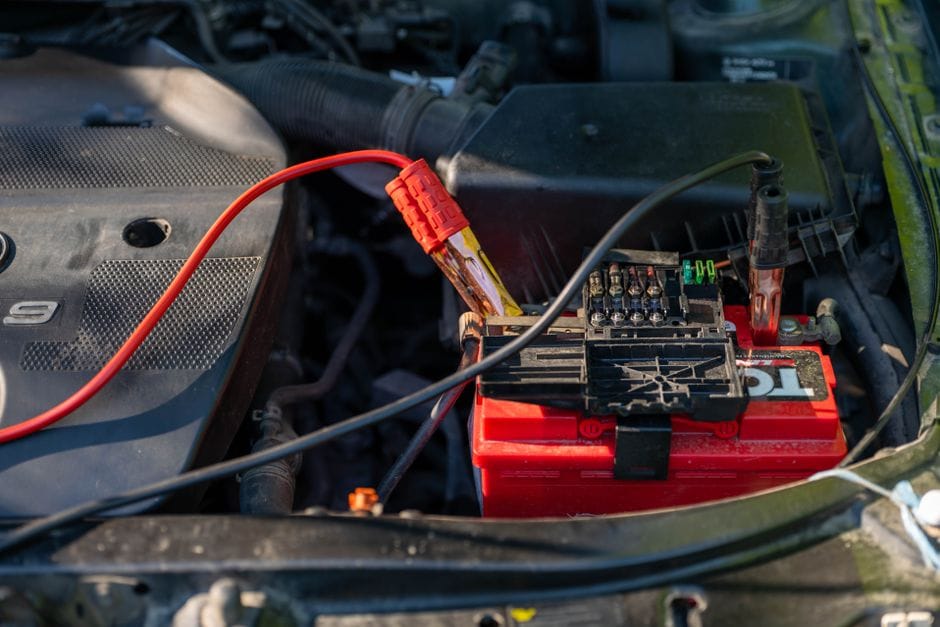
The cable gauge determines how much current can flow and how much voltage drop occurs. Thicker cables have a lower number. A 4 AWG cable carries more current than a 6 AWG cable and is the safer choice for most modern vehicles. For a four-cylinder engine, a 6 AWG set rated at 400 amps usually works fine. For a V6 or V8, choose 4 AWG rated at 600 amps or higher.
Cable length also matters. Longer cables let you position the donor vehicle more flexibly, but every extra foot adds resistance. A 20-foot set of 4 AWG cables is a solid balance for most passenger cars. Keep in mind that cheap cables often use thinner wire than the label claims, so buy from a reputable brand and check the actual copper thickness before purchase.
Portable Jump Starter Features (Peak Amps, Safety Protections)
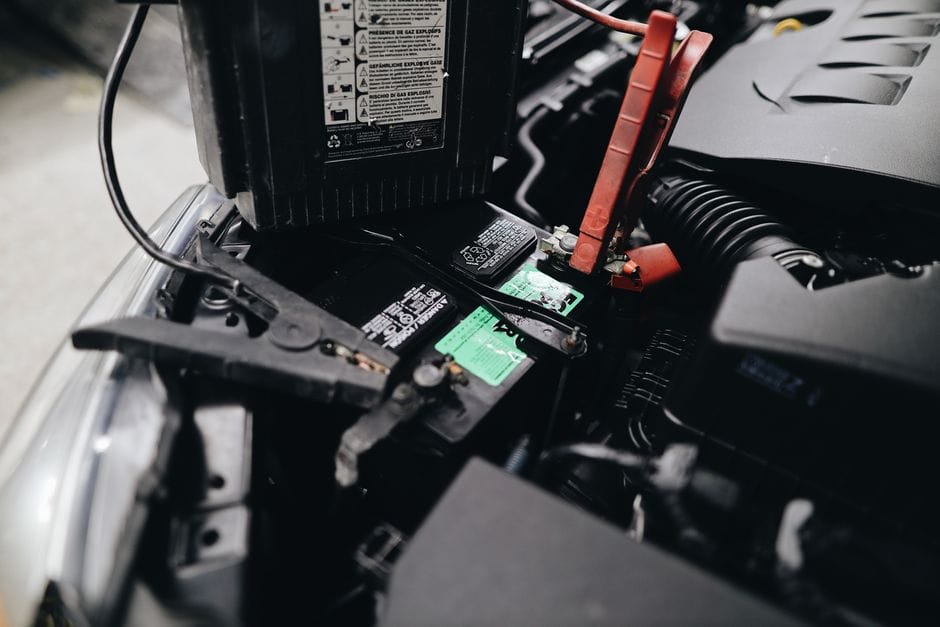
Portable jump starters are rated by peak amps—the maximum current they can deliver in a short burst. A unit rated at 1000 peak amps handles most four-cylinder and six-cylinder engines. Larger engines, especially diesel trucks, may need 2000 peak amps or more. Look for the cold cranking amps (CCA) equivalent if the manufacturer provides it; that number is more realistic for cold-weather starts.
Safety protections separate a good unit from a dangerous one. Spark-proof technology prevents arcing when you connect the clamps. Reverse polarity protection shuts down the unit if you connect the clamps backward. Over-current and over-temperature protection prevent damage to both the starter and your vehicle’s electronics. These features add cost but are worth it—a mistake with a bare cable set can damage sensitive modules.
What Not to Use (Improvised Cables, Damaged Clamps)
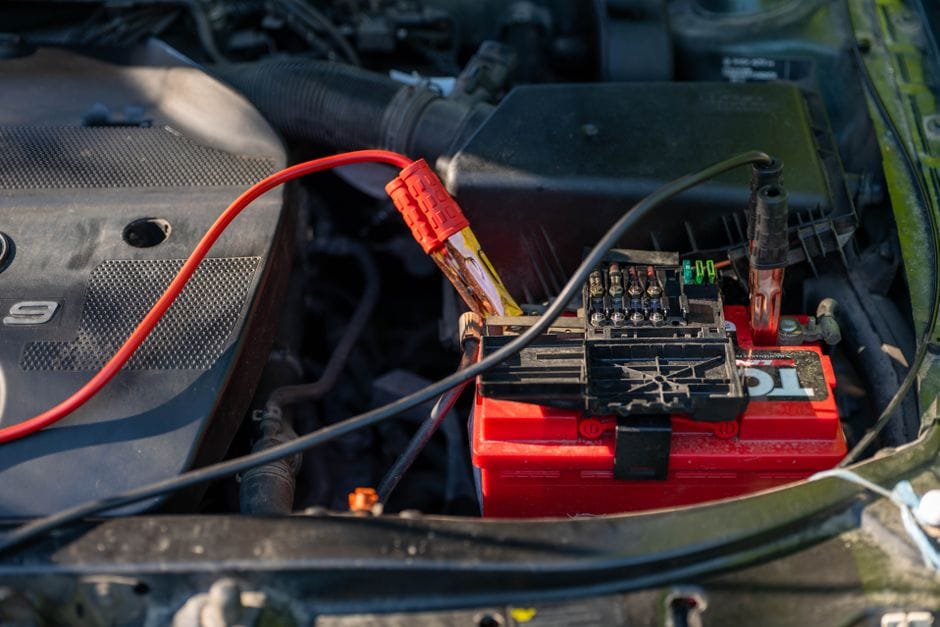
Improvised cables—household extension cords, speaker wire, or stripped electrical wire—are dangerous and ineffective. They cannot carry the current a starter motor draws, so they overheat, melt insulation, and can cause a fire. Battery clamps must be clean, tight, and free of corrosion. A loose clamp creates resistance, which generates heat at the connection point. Inspect the clamps for cracks or worn teeth before each use. If the clamp feels loose on the terminal or shows signs of melting, replace the cables.
The same caution applies to portable jump starter clamps. A damaged clamp on a jump starter can fail mid-cranking, leaving you with a half-started engine and a spark hazard. Check the condition of the clamps and the cable insulation regularly, especially if the unit lives in a trunk where it can shift around. If you’re shopping for related gear, our [laser engraver accessories guide](/laser-engraver-accessories-guide) covers tools that benefit from similar maintenance habits, and our [best portable laser engravers](/best-portable-laser-engravers) list includes compact power tools with their own safety requirements.
Step-by-Step: How to Jump-Start a Car Battery Safely
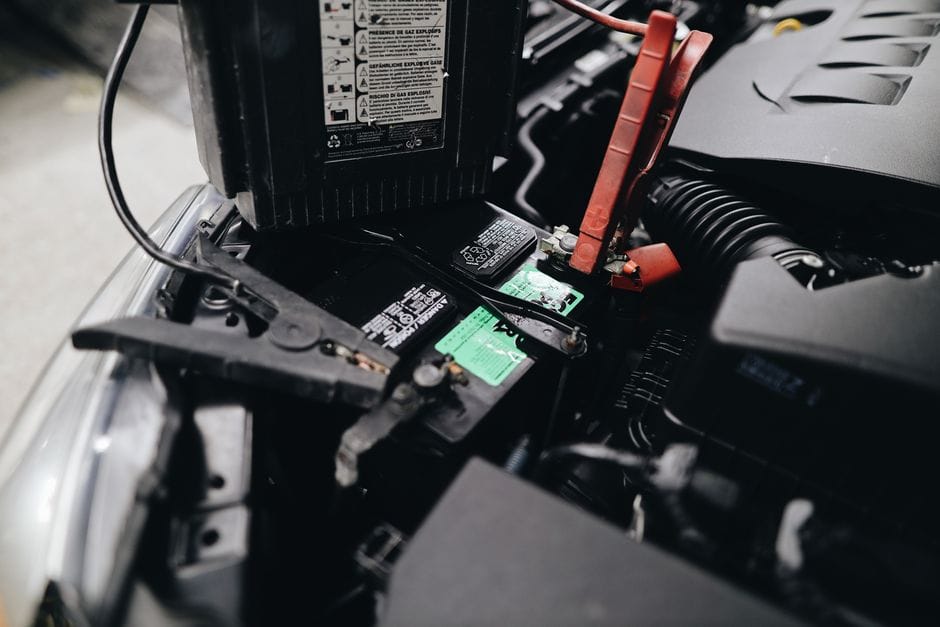
Once you have your jumper cables or portable jump starter ready, follow this exact safety sequence. Each step is ordered to minimize the risk of sparks near the battery and to protect your vehicle’s electrical system.
Step 1: Position the Vehicles Correctly (Do Not Touch)
Step 1: Details
Park the donor vehicle close enough to the dead one so the jumper cables reach both batteries without stretching. The cars should face each other or sit side by side—whatever allows the cables to reach comfortably.
Turn off both vehicles completely. Remove the keys from both ignitions. Engage the parking brakes on both cars to prevent any rolling.
The critical rule: the two vehicles must **not touch** each other. Metal-to-metal contact between the cars can create an unintended electrical path when you connect the cables. That path can cause severe sparking or damage to the electrical systems in either vehicle.
Open both hoods and locate both batteries. If either battery has a plastic cover or terminal caps, remove them now so you can access the terminals clearly.
Step 2: Identify Battery Terminals (Positive and Negative)
Step 2: Details
Look for the positive and negative terminals on the dead battery first. The positive terminal is marked with a **”+”** symbol and typically has a red plastic cover or red cable attached to it. The negative terminal is marked with a **”-“** symbol and usually has a black cable.
Inspect both terminals for corrosion. A white or bluish powdery buildup on the terminals can prevent a solid connection. If you see heavy corrosion, [HUMAN INPUT NEEDED: describe whether to attempt cleaning with a wire brush before jumping, and any safety precautions for that step].
Make sure you can identify the terminals clearly before you pick up any cable clamp. Connecting the positive cable to the negative terminal—or vice versa—will cause a dangerous short circuit.
Step 3: Connect the Jumper Cables in the Correct Order
Step 3: Details
The connection order is the most important part of the entire jump starting guide. Clamp the cables in this exact sequence:
1. Connect the **red positive cable** to the dead battery’s **positive terminal**.
2. Connect the other end of the **red positive cable** to the donor battery’s **positive terminal**.
3. Connect the **black negative cable** to the donor battery’s **negative terminal**.
4. Connect the **black negative cable** to a **ground point** on the dead vehicle—not to the dead battery’s negative terminal.
The ground point should be an unpainted metal bolt or bracket on the engine block or chassis, away from the battery, fuel lines, and moving parts. Many vehicles have a designated jump-start ground point marked with a label.
The reason for this final connection: the dead battery may emit hydrogen gas, which is explosive. Connecting the negative cable to the battery itself can create a spark right at the battery. Connecting to a ground point moves that final spark away from the battery.
Step 4: Start the Donor Vehicle and Wait
Step 4: Details
Start the donor vehicle and let it idle. Do not rev the engine. Let it run for two to three minutes so the alternator can charge the dead battery through the cables.
If the dead battery is completely drained, it may take longer. You can gently press the accelerator on the donor vehicle to raise the idle slightly, but do not hold it at high RPM.
During this wait, watch the cables. If any cable feels warm to the touch or you see smoke, stop immediately and disconnect everything. That indicates a poor connection or a short circuit.
Step 5: Start the Dead Vehicle
After the donor vehicle has run for a few minutes, try starting the dead vehicle. Turn the key and hold it for no more than five to ten seconds. If the engine does not turn over, wait thirty seconds and try again.
If the engine still will not start after two or three attempts, stop. The problem may not be the battery—it could be a failed starter motor, a seized engine, or a battery too damaged to hold a charge. Continuing to crank will drain the donor battery and can overheat the starter.
Step 6: Disconnect the Cables in Reverse Order
Step 6: Details
Once the dead vehicle starts, let both vehicles run for a minute. Then disconnect the cables in the exact reverse order of how you connected them:
1. Remove the **black negative cable** from the **ground point** on the previously dead vehicle.
2. Remove the **black negative cable** from the donor battery’s **negative terminal**.
3. Remove the **red positive cable** from the donor battery’s **positive terminal**.
4. Remove the **red positive cable** from the previously dead battery’s **positive terminal**.
Keep the clamps from touching each other or any metal surface while you disconnect them. After the cables are free, close the hoods and keep the jumped vehicle running. Do not shut it off right away—drive it for at least 15 to 20 minutes so the alternator can recharge the battery. If you turn it off immediately, it may not have enough charge to restart.
If you need to jump-start the vehicle again within a few hours, the battery is likely failing and needs replacement. For related safety practices around high-voltage equipment, see our [laser engraver safety guide](/laser-engraver-safety-guide) for general principles on working near electrical systems.
Critical Safety Warnings: What Can Go Wrong
Jump starting a car is a routine task, but it carries real risks. Most people complete it without incident, yet the safety warnings exist because the consequences of a mistake are severe. You are dealing with a lead-acid battery that stores a large amount of energy and produces flammable gas. Before you connect any clamps, understand what can go wrong and how to prevent it.
The Danger of Hydrogen Gas (Explosion Risk)
Explosion Risk from Hydrogen Gas
Car batteries, especially lead-acid types, release hydrogen gas during charging and normal operation. This gas is highly flammable. When you connect jumper cables, a small spark is often created at the connection point. If that spark ignites the hydrogen gas, the battery can explode, sending sulfuric acid and plastic shrapnel outward.
The explosion risk is highest when a battery is deeply discharged or being charged rapidly. A dead battery that has been sitting for weeks may have accumulated a significant amount of gas. This is why you should never smoke near a battery and why you should work in a well-ventilated area. Keep your face and body away from the battery when making the final connection. Do not lean over the battery while connecting clamps. If the battery case looks swollen, cracked, or is leaking fluid, do not attempt a jump start—the battery may be internally damaged and prone to failure. In that case, replace the battery or call a professional.
Why You Connect the Negative Cable to the Engine Block, Not the Battery
The standard procedure tells you to connect the final negative clamp to an unpainted metal surface on the engine block or chassis, not to the negative terminal of the dead battery. This is not a random rule. The reason is the explosion risk mentioned above. When you complete the circuit, a spark is likely to occur. If you make that final connection directly on the battery’s negative terminal, the spark happens right next to the vent where hydrogen gas escapes. Connecting to the engine block moves that spark several feet away from the gas source.
Choose a clean, bare metal surface. A bolt head or a bracket works well. Avoid moving parts like belts, pulleys, or the cooling fan. Also avoid fuel lines and the fuel rail. If the engine block is corroded or painted, find a different spot. The connection needs good metal-to-metal contact to carry the current.
Electrical Surge Risks: Modern Vehicles and Electronics
Modern cars are packed with sensitive electronics—engine control units, infotainment systems, safety sensors, and battery management modules. These components are designed to handle normal operating voltage, but a jump start can create an electrical surge that exceeds their tolerances. The risk is highest when the donor vehicle is running while you connect the cables, or when you connect the clamps in the wrong order.
The safest approach is to connect both sets of clamps before starting the donor vehicle. This allows the systems to equalize without a sudden spike. If you must start the donor vehicle first, wait a few seconds after starting it before cranking the dead vehicle. Some newer vehicles have designated jump start terminals under the hood, separate from the battery itself. These are designed to route power safely and protect the vehicle’s electronics. Check your owner’s manual. If your vehicle has a lithium-ion auxiliary battery or is a mild hybrid, the procedure may differ. When in doubt, consult the manual or use a portable jump starter instead of a donor vehicle.
What to Do If the Cables Spark or Get Hot
A small spark when you make the final connection is normal and expected. A large, continuous spark, or cables that become hot to the touch, indicate a problem. Stop immediately. Do not attempt to crank the engine until you have identified the issue.
First, check that the clamps are on correctly. A reversed connection—positive to negative—can cause severe damage to both vehicles’ electrical systems and may cause the cables to heat rapidly. If you suspect a reversed connection, disconnect everything immediately. Second, check that the clamps have a solid grip on the terminals. A loose connection creates resistance, which generates heat. Third, inspect the cables for damage. Cracked insulation or corroded clamps can cause shorting. If the cables are hot, allow them to cool completely before attempting another connection. If the dead vehicle does not start within a few attempts, stop. The problem may not be the battery—it could be a failed starter, a seized engine, or a fuel system issue. Continuing to crank will drain the donor battery and risk overheating the starter.
Key Safety Warnings Summary
Work in a ventilated area and keep flames away. Connect the negative clamp to the engine block, not the battery. Connect cables before starting the donor vehicle. Stop if you see heavy sparking or feel heat on the cables. If in doubt, call a professional.
For those working with other high-voltage equipment, the same discipline of verifying connections and respecting stored energy applies—see our [laser engraver safety guide](/laser-engraver-safety-guide) for related practices. The principles of isolation and controlled discharge translate across different tools.
Jump Starting a Car with a Portable Jump Starter (No Second Vehicle)
When no second vehicle is available, a portable jump starter pack offers a standalone solution. These devices contain a high-capacity lithium battery that delivers the surge needed to crank an engine, eliminating the need for a donor car entirely.
How a Portable Jump Starter Works
A portable jump starter stores electrical energy and releases it in a short, high-current burst. It uses heavy-duty battery clamps that connect directly to your car’s battery terminals. The key specification is **peak amps**—the maximum current the unit can output momentarily. Higher peak amps mean the device can start larger engines. A unit rated for 400 peak amps suits most four-cylinder cars, while trucks and V8s generally require 1000 peak amps or more. The device’s internal battery is recharged via a wall outlet or USB, and its **charge level** determines whether it can deliver a successful start.
Step-by-Step: Using a Jump Starter Pack
1. **Charge the unit.** Confirm the jump starter has sufficient **charge level** before you park yourself next to a dead battery. Most units show a battery indicator.
2. **Connect the clamps.** Attach the red clamp to the positive terminal. Attach the black clamp to a clean, unpainted metal surface on the engine block—not the negative battery terminal.
3. **Power on.** Turn on the jump starter pack. Many units have a built-in safety feature that prevents current flow if the clamps are reversed.
4. **Start the car.** Attempt to start the vehicle. If it doesn’t crank immediately, wait 30 seconds before trying again to allow the pack to recover.
5. **Disconnect.** Once the engine runs, turn off the unit and remove the clamps in reverse order.
Limitations of Portable Jump Starters (Temperature, Charge Level)
Portable jump starters have limits. Extreme cold reduces lithium battery performance, so a pack that works in summer may struggle at 0°F. A partially discharged pack may not deliver enough **peak amps** to turn over a large engine, even if the car battery is the only problem. Also, these units cannot charge a battery—they only provide enough energy to start the engine. After a successful start, drive the car for at least 20 minutes to let the alternator recharge the battery. If you work with other high-current devices, the same care with connections applies—see our [best portable laser engravers](/best-portable-laser-engravers) guide for related safety practices.
After the Jump Start: What to Do Next
Once the engine turns over and runs, the job isn’t finished. The battery is still low. The alternator now has to replace the energy you used during the jump start. How you drive in the next 20 to 30 minutes determines whether you’ll need a jump start again tomorrow.
Let the Alternator Charge the Battery
The alternator is a generator driven by the engine’s serpentine belt. It produces electricity to run the car’s systems and recharge the battery. But it doesn’t deliver full output at idle. At idle speed, the alternator may only produce a fraction of its rated amperage, especially with headlights, defroster, and wipers drawing current.
To maximize battery charging, do this:
1. **Turn off unnecessary loads.** Switch off the radio, heated seats, rear defroster, and blower fan. Every amp those systems draw is an amp that doesn’t go into the battery.
2. **Drive, don’t idle.** Idling in a parking lot charges slowly. Driving at highway speeds spins the alternator faster and produces more output.
3. **Keep the engine running for at least 20 minutes.** That’s the minimum time most alternators need to replace the energy lost during a jump start. A deeply discharged battery may need 45 minutes or more.
If you have a portable jump starter, the same advice applies. The pack only starts the engine—it does not charge the battery. The alternator does that work.
How Long to Drive Before Shutting Off the Engine
A common mistake is shutting the engine off after a short drive to the store. The battery may still be below 70% charge. The next start draws more current, and you’re back to square one.
As a rule, drive for at least 20 minutes without stopping. If your commute is shorter, take the long way home. On a highway, the alternator spins at higher RPM and charges faster than in stop-and-go traffic. If you drive mostly in the city, extend that to 30 minutes.
After you shut the engine off, wait 5 minutes, then try to restart the car. If it cranks normally, the battery accepted the charge. If it cranks slowly, the battery may not hold a charge—see below.
Signs Your Battery Needs Replacement
A jump start can revive a discharged battery, but it cannot restore a dying one. Watch for these signs over the next few days:
– **Slow crank.** The engine turns over sluggishly, even after a full charge. This is the most reliable sign of a weak battery.
– **Dim headlights.** At idle, headlights dim noticeably when you apply the brakes or turn the steering wheel.
– **Electrical issues.** Power windows move slowly, the radio resets, or the dashboard lights flicker.
– **Swollen or leaking case.** Heat damages batteries. A bulging case indicates internal damage—replace it immediately.
If you see these symptoms, plan for a battery replacement. Most car batteries last [VERIFY: average lifespan in years and miles for standard lead-acid batteries]. A battery that fails a load test will not recover with driving.
When to Test the Battery and Alternator
Don’t guess—test. A simple multimeter check gives you a baseline:
1. **Resting voltage.** With the engine off, the battery should read about 12.6 volts. Below 12.4 volts means it’s only partially charged. Below 12.0 volts means it’s significantly discharged.
2. **Charging voltage.** With the engine running, the voltage should read between 13.7 and 14.7 volts. Lower than that suggests a failing alternator. Higher than 14.7 volts indicates overcharging, which can damage the battery.
3. **Load test.** This is the definitive test. A professional load test applies a simulated cranking load and measures how the voltage holds. Most auto parts stores perform this test for free. A battery that passes a load test is healthy; one that fails needs replacement.
If the battery passes the load test but the charging voltage is low, the alternator is the problem. Alternator replacement is more involved than battery replacement and usually requires removing the serpentine belt. If you’re not comfortable with that job, a shop can diagnose it in under an hour.
Battery Charging After a Jump Start
Even after a successful jump start, the battery is not fully charged. The alternator needs 20–30 minutes of driving to replace the starting energy. If you shut the engine off too soon, you risk another dead battery. When in doubt, drive longer and test the battery before trusting it.
If your battery is old or fails a load test, a battery replacement is the reliable fix. And if you’re troubleshooting electrical issues that persist after a new battery, the problem may lie elsewhere in the charging system—similar to how a tool that won’t power on needs a systematic check of its components rather than a quick fix. For that kind of methodical diagnosis, see our guide on [laser engraver troubleshooting](/laser-engraver-troubleshooting) for a framework on isolating faults. For choosing the right equipment for your shop, our [laser engraver buying guide](/laser-engraver-buying-guide) covers comparable decision factors.
Jump Starting Different Vehicle Types (Motorcycles, Trucks, Hybrids)
Not every vehicle jumps the same way. The principles from the step-by-step section apply broadly, but motorcycles, trucks, and hybrids each demand specific adjustments. Ignoring these differences can damage electronics or cause injury.
12V vs. 24V Systems (Do Not Mix)
Most passenger cars, motorcycles, and light trucks use a **12V system**. Heavy-duty trucks, buses, and some commercial equipment run on a **24V system**. These are not interchangeable. Connecting a 12V vehicle to a 24V system can fry the 12V vehicle’s computer modules, alternator, and battery—often instantly. Likewise, using two 12V batteries in series to create 24V requires specific jump starting procedures that differ from standard practice.
Check the battery label or owner’s manual before connecting cables. If you are unsure whether the vehicle uses a 12V or 24V system, do not guess. A mismatch is one of the fastest ways to cause thousands of dollars in electrical damage. For a 24V system, you typically need a donor vehicle that also runs 24V, or a jump starter rated explicitly for 24V output. [VERIFY: specific voltage ratings for common 24V jump starters on the market]
Hybrid and Electric Vehicles: Special Precautions
A **hybrid vehicle** presents a unique situation. The high-voltage traction battery (typically 200–400V) is separate from the small 12V auxiliary battery that starts the control systems. You jump-start the 12V battery, not the high-voltage pack. The jump starting procedure is similar to a conventional car, but the 12V battery is often located in the trunk or under a rear seat rather than under the hood.
Locate the designated jump start terminals in the owner’s manual. Many hybrids have clearly marked remote positive and negative posts under the hood specifically for this purpose. Never connect cables to the orange high-voltage cables or components—these carry lethal voltage. If the hybrid’s 12V battery is completely dead, the vehicle may not shift out of park or release the electronic parking brake. Plan for towing if you cannot get power to the system. Also, some hybrids require the donor vehicle to be off during the jump to avoid voltage spikes. [VERIFY: specific hybrid models that require the donor vehicle to be off]
Jump Starting a Motorcycle or ATV
Jump starting a **motorcycle** or ATV is generally simpler but requires a lighter touch. Most use a 12V system, but the battery capacity is small—often 10–20 amp-hours compared to 60–80 in a car. A car’s alternator and battery can deliver far more current than a motorcycle needs, which can damage the motorcycle’s rectifier or regulator.
If you must use a car as a donor, keep the car’s engine off during the jump. With the car off, you only draw the small amount of current the motorcycle needs. Connect the cables, let the motorcycle battery charge for a minute or two, then start the motorcycle. Remove the cables in reverse order immediately after starting. A portable jump starter with a low-amperage setting is often the safest choice for bikes. For motorcycles with lithium-ion batteries, check the owner’s manual—some require a dedicated lithium charger and do not respond well to standard jump starting procedures. [HUMAN INPUT NEEDED: confirm whether any major motorcycle manufacturers prohibit jump starting lithium batteries from a running car]
Trucks with diesel engines often have two 12V batteries wired in parallel. Jump starting these works the same as a single battery—connect to the battery with the positive terminal marked, or to the designated jump post. The extra battery provides more cranking amps, but the procedure is identical. If the truck has a 24V electrical system, see the warning above and do not attempt a standard jump. For more on choosing the right equipment for your shop or garage, see our [laser engraver comparisons](/laser-engraver-comparisons) for a framework on evaluating tools by spec, not marketing.
Common Jump Starting Mistakes and How to Avoid Them
Most jump starting problems come down to a few repeatable errors. Knowing these mistakes before you connect the cables saves you time, money, and a possible trip to the parts store.
Connecting the Negative Cable to the Dead Battery (Wrong)
The classic error is clamping the black negative cable directly to the dead battery’s negative terminal. The correct method is to attach that clamp to an unpainted metal surface on the engine block or chassis, away from the battery. This reduces the risk of sparks igniting hydrogen gas that batteries emit. If you attach to the battery post and a spark jumps, you could ignite that gas. A good ground point is a bolt on the engine block or a metal bracket. Make sure the surface is clean and bare metal—paint or grease will block the connection.
Jump Starting a Frozen Battery
A frozen battery is a serious hazard. When the electrolyte inside freezes, it expands and can crack the case. Attempting to jump start a frozen battery can cause it to rupture or even explode. Signs of a frozen battery include a bulging case, cracks, or visible ice. If the battery is frozen, do not attempt a jump start. Thaw it in a warm area first and inspect it for damage. If the case is cracked, replace the battery. Jump starting a frozen battery is one of the few mistakes that can cause physical injury, not just a dead car.
Using Damaged or Corroded Cables
Cracked insulation, frayed wires, and corroded clamps all undermine a jump start. Damaged cables create resistance, which means less current reaches the dead battery. They also create a shock and fire hazard. Inspect your jumper cables before you need them. Look for exposed wire, brittle insulation, and clean, tight clamps. Corroded clamps can be cleaned with a wire brush, but if the cable is damaged, replace it. A cheap, damaged cable is not worth the risk of a short circuit or an electrical burn.
Attempting to Jump Start a Severely Damaged Battery
Not every dead battery should be jumped. If the battery case is cracked, swollen, or leaking fluid, do not connect cables to it. A damaged battery can short-circuit internally or release dangerous gases. Similarly, if the battery is old and has failed completely, a jump start will not fix it—it will only get you to the parts store. Jump starting is for a discharged battery, not a failed one. If the battery has visible damage or is past its expected service life, replace it. The cost of a new battery is far less than the cost of repairing electrical damage or dealing with a battery acid burn.
For more on maintaining equipment in your workspace, see our [laser engraver troubleshooting guide](/laser-engraver-troubleshooting).
FAQ: Jump Starting Questions You Didn’t Know to Ask
**Can jump starting damage the alternator of the donor car?**
Yes, it can. The alternator on the donor vehicle is not designed to deliver a full charge to a completely dead battery. When you rev the donor car’s engine during a jump start, the alternator works harder to supply current to both its own electrical system and the dead battery. In most cases, a single jump start is fine. But repeated jump starts from the same donor car can strain its alternator over time. If you regularly need to jump other vehicles, consider a portable jump starter instead. It removes the donor car from the equation entirely.
**How long should you drive after a jump start to recharge the battery?**
You need at least 30 minutes of driving at highway speeds to put a meaningful charge back into a depleted car battery. City driving with frequent stops does not give the alternator enough time at high RPM to replenish the charge. The alternator produces more current at higher engine speeds, so a steady highway cruise is the most efficient way to recharge. After a jump start, take the long way home. If the battery dies again on the next start, the battery itself is likely failing and needs replacement, not another charge.
**Why does the order of connecting battery terminals matter?**
The order controls where sparks can occur. When you connect the positive clamp to the dead battery first, then the positive to the donor battery, then the negative to the donor battery, and finally the negative to an engine ground on the dead car, you keep the final spark away from the battery itself. Car batteries emit hydrogen gas during charging, especially when they are deeply discharged. A spark near the battery terminals can ignite that gas. By connecting the last clamp to a metal engine bracket or bolt, you move the spark away from the battery. This is a simple habit, but it is the difference between a routine jump start and a battery explosion.
**Can a jump start fix a completely dead battery?**
No. Jump starting only provides enough current to crank the engine. It does not restore the battery’s internal capacity. If the battery is discharged because you left the lights on, a jump start and a good drive will likely recover it. If the battery is dead because it has reached the end of its service life, no amount of jump starting will bring it back. The battery will start the car, then fail again on the next restart. If this happens, test the battery at a parts store. Most stores offer free battery testing, and the results will tell you whether the battery holds a charge or needs replacement.
**Is it safe to jump start a car in the rain?**
Yes, with the correct procedure. Rain does not make jump starting dangerous because the voltage involved is only 12 volts, which is too low to arc through water. The real risk in wet conditions is slippery footing and reduced visibility, not electricity. Wipe the battery terminals dry before connecting the clamps to ensure good contact. Make sure the clamps are fully seated and not touching each other. As long as you follow the correct terminal order and keep the clamps separated, rain is not a safety issue. The bigger concern is standing water near the battery, which can hide corrosion or damage you might otherwise see.
**How do you know if the problem is the battery or the alternator?**
You can tell by how the car behaves after a jump start. If the car starts and runs, but the headlights dim and the dashboard lights flicker while you drive, the alternator is not charging the battery properly. If the car starts and runs normally but will not start again after you shut it off, the battery is not holding a charge. A simple test: with the engine running, check the voltage at the battery terminals with a multimeter. A healthy alternator should produce about [VERIFY: typical alternator output voltage range in volts] volts at the battery. If the reading is lower, the alternator is failing. If the reading is normal but the battery still dies overnight, the battery is the problem. For more on diagnosing electrical equipment issues, see our [laser engraver buying guide](/laser-engraver-buying-guide).
Frequently Asked Questions
Can I jump-start a car with a hybrid vehicle as the donor car?
[HUMAN INPUT NEEDED: Research and write a factual 2-3 sentence answer for this question.]
How long should I let the donor car run before trying to start the dead car?
[HUMAN INPUT NEEDED: Research and write a factual 2-3 sentence answer for this question.]
Is it safe to jump-start a car in the rain?
[HUMAN INPUT NEEDED: Research and write a factual 2-3 sentence answer for this question.]
What does it mean if my car starts but dies immediately after a jump start?
[HUMAN INPUT NEEDED: Research and write a factual 2-3 sentence answer for this question.]
Can a portable jump starter damage my car’s electronics?
[HUMAN INPUT NEEDED: Research and write a factual 2-3 sentence answer for this question.]
Final Verdict: Master the Jump-Start Process with Confidence
Jump-starting a car battery is a fundamental skill every driver should own — it is the process of using a secondary power source, typically booster cables connected to another vehicle’s battery or a portable jump starter, to deliver enough cranking amps to turn over a depleted starter motor. The central entity here is the jump-starting procedure itself, defined by its core attributes: safety sequence (correct cable order), connection integrity (clean, tight clamps), voltage compatibility (12-volt systems), and cranking power delivery (measured in peak amps). Mastery of these attributes separates a successful restart from a dangerous electrical mishap.
Our top recommendation is the step-by-step sequence outlined in this guide, executed with a high-quality set of 4-gauge booster cables or a portable jump starter rated at minimum 400 peak amps. Why? Because this approach prioritizes the two most critical attributes: safety (preventing sparks near the battery, which can ignite hydrogen gas) and connection reliability (ensuring sufficient current flow to the starter motor). A portable jump starter adds the attribute of independence — you don’t need a second vehicle — making it the superior choice for solo drivers or those in remote areas.
Use this simple decision framework:
- If you need maximum safety and zero risk of electrical damage, choose a smart portable jump starter with reverse-polarity protection, because it automatically prevents incorrect clamp placement.
- If you need a budget-friendly, universally available solution, choose booster cables (10-gauge or thicker), because they work with any second vehicle and cost under $30.
- If you need to jump-start in extreme cold, choose a lithium-ion portable unit with 800+ peak amps, because cold temperatures reduce battery cranking power by up to 60%, requiring higher current output.
- If you need a permanent emergency kit for multiple vehicles, choose a heavy-duty cable set with 25-foot length, because longer cables provide flexibility in tight parking situations.
Honest limitation: No jump-start method — cables or portable unit — can restart a battery that has suffered internal cell failure, a severely sulfated plate, or a completely frozen electrolyte. If your battery is older than five years and fails to hold a charge after a successful jump-start, the procedure will get you home, but the battery itself requires replacement. Similarly, a jump starter cannot fix a failing alternator; the vehicle will die again shortly after disconnection.
Final call to action: Take ten minutes today to review the step-by-step guide above and locate your battery terminals and engine ground point before you need them. Store a quality jump starter or cable set in your trunk, check its charge level monthly, and practice the connection sequence once. When the moment comes — and it will — you’ll execute the jump-start safely and confidently, getting back on the road in under five minutes.