Headlight Restoration: Complete Guide
Headlight Restoration: The Complete Guide to Clear, Safe, and Long-Lasting Lenses
Headlight restoration removes the oxidized, yellowed, or hazy outer layer of a polycarbonate headlight lens. It then reseals the lens with a protective clear coat. This is a cost-effective alternative to replacing the entire headlight assembly. Replacement can cost anywhere from $100 to over $1,200 for modern LED-equipped units. The central entity is the lens itself. It is a polycarbonate plastic component. While durable, it is inherently vulnerable to UV radiation, road debris, and chemical contaminants. These elements degrade its protective factory coating over time.
This guide covers the full spectrum of restoration attributes. It explains the different methods, from budget-friendly $15 DIY toothpaste hacks to professional-grade $300 sanding and UV-cure systems. It lists the tools and materials required for each approach. It also details the time investment, from 30 minutes for a quick kit to 2 hours for a showroom-quality finish. We also address the critical safety considerations for handling UV coatings. We examine the performance ceiling of each method. You will learn how long a restoration actually lasts. You will see why some products fail within months, and what separates a permanent fix from a temporary disguise.
What makes this guide different is the data. Instead of generic “it works great” reviews, we break down measurable outcomes. These include UV transmission percentages, coating hardness ratings, and real-world durability timelines based on climate exposure. You will learn exactly which method fits your skill level, budget, and vehicle type. Just as importantly, you will learn which products to avoid because they are chemically incompatible with factory headlight plastics. By the end, you will know how to decide between a DIY kit, a professional service, or a full replacement with confidence, not guesswork.
What Is Headlight Restoration and Why Does It Matter?
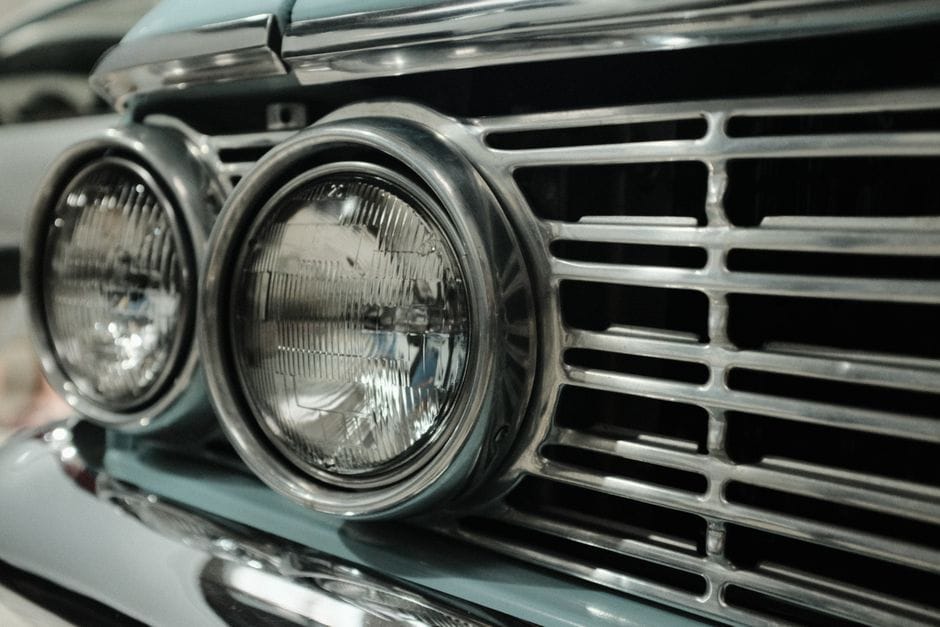
Headlight restoration is the process of removing the damaged outer layer of a polycarbonate lens to restore clarity and light output. It is a surface-level repair, not a replacement of the housing or bulb. The goal is to bring a foggy, yellowed lens back to a state where it transmits light the way the manufacturer intended.
Cloudy headlights are not just a cosmetic annoyance. They are a safety issue. According to a study by the American Automobile Association, degraded headlights can reduce light output by as much as 80% compared to a new lens. That drop in visibility directly affects how far you can see at night and how quickly you can react to hazards.
The Science Behind Cloudy Headlights: Oxidation and UV Degradation
Most modern headlight lenses are made from polycarbonate, a durable plastic chosen for its impact resistance. The problem is that polycarbonate is porous on a microscopic level. Manufacturers apply a clear factory coating to seal the surface, but that coating breaks down over time.
The primary culprit is UV damage. Sunlight breaks the chemical bonds in the protective layer, which allows oxygen to reach the raw plastic beneath. This triggers oxidation, a chemical reaction that turns the lens yellow and then hazy. The surface becomes rough and diffuses the beam instead of focusing it. Road debris, salt, and cleaning chemicals accelerate the process by scratching the already-weakened coating.
Restoration vs. Replacement: When to Restore and When to Replace
Restoration works when the lens is structurally sound but optically degraded. If the plastic is cracked, severely pitted from rock chips, or has moisture trapped inside the housing, restoration will not fix the problem. Cracks allow water to enter the assembly, which can damage the bulb and wiring. In those cases, replacement is the only reliable fix.
A simple rule: if the damage is on the surface, restore it. If the damage goes through the lens or into the housing, replace it. Restoration is also the clear choice when you want to keep original parts for a classic car or when replacement lenses are expensive or hard to find.
How Restoration Differs from Simple Cleaning and Polishing
Washing the lens removes dirt and grime from the surface. Polishing, as done with a standard car polish, smooths the top layer but does not remove the depth of oxidation. True headlight restoration involves sanding with progressively finer grits to cut through the degraded plastic, then applying a UV-resistant clear coat to seal the fresh surface.
Without that final protective layer, the lens will re-oxidize within a few months. This distinction matters because many DIY kits stop at the sanding and polishing stage, which delivers a short-term fix. The rest of this guide will compare those methods in detail and show you how to get a result that lasts.
The Core Attributes of Effective Headlight Restoration
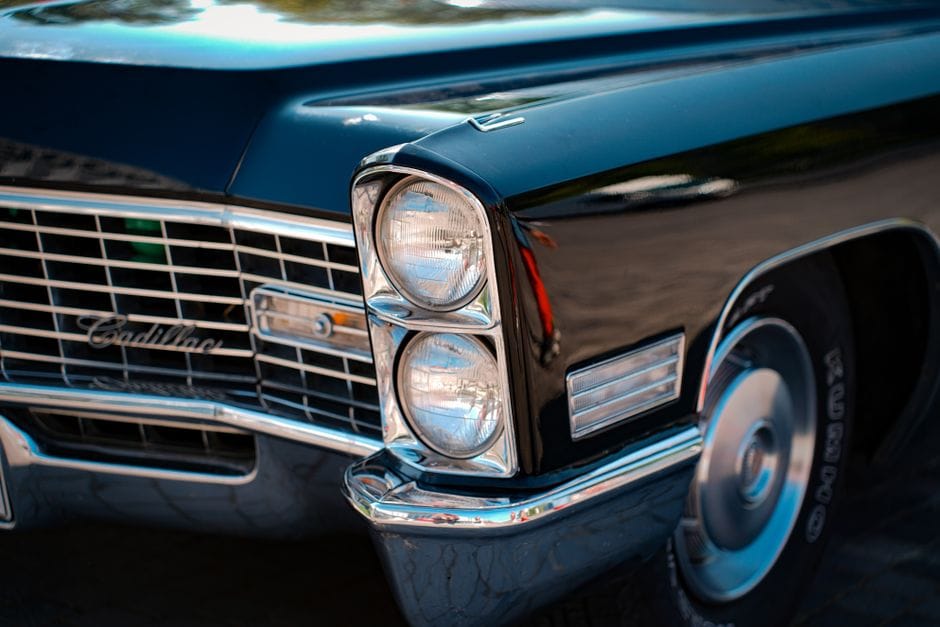
Effective headlight restoration isn’t a single action. It’s a process built on three core attributes: understanding the material, following a disciplined sequence, and protecting the finished surface. Skip any of these, and your results will fade fast. Here’s what actually matters.
Material Composition: Why Polycarbonate Requires Specialized Care
Material Composition: Details
Nearly every modern headlight lens is made of polycarbonate, a type of clear thermoplastic. Automakers chose it because it’s lightweight, impact-resistant, and can be molded into complex aerodynamic shapes. The trade-off is that polycarbonate is soft. It scratches easily, and it degrades when exposed to ultraviolet (UV) light.
The yellowing and haze you see on an old lens isn’t dirt. It’s the plastic itself breaking down. UV radiation causes the polymer chains to oxidize, turning the surface cloudy and brittle. This is why you can’t just wash the lens or apply a standard car wax and expect clarity. The damage is chemical, not just superficial.
Because polycarbonate is soft, the restoration process must be controlled. Aggressive sanding can cut too deep, leaving grooves that distort the beam pattern. Gentle, progressive abrasion is the only safe approach. Understanding this material limitation is the foundation of the entire restoration process.
The Three-Stage Process: Sanding, Polishing, and Sealing
The Three-Stage Process: Details
A proper restoration follows three distinct stages. Each one has a specific job, and you can’t skip ahead.
**Stage 1: Sanding.** This is the heavy lifting. You start with a coarse grit, usually around 400 to 600, to remove the heavily oxidized top layer. Then you work up through finer grits — 800, 1000, 1500, and finally 2000 to 3000. The goal of sanding is to create a perfectly smooth, flat surface. It removes the damaged plastic and reveals fresh, clear material underneath. This stage is wet sanding, meaning you keep the surface lubricated with water to prevent heat buildup and to flush away plastic dust.
**Stage 2: Polishing.** After sanding, the lens is smooth but dull. Polishing restores optical clarity. Using a foam pad and a rubbing compound, you buff the surface to a high gloss. The compound contains fine abrasives that remove the micro-scratches left by the finest sandpaper. Polishing alone will make the lens look clear, but it also leaves the polycarbonate bare and vulnerable.
**Stage 3: Sealing.** This is the step most DIYers skip, and it’s why their results fail. Sealing applies a protective coating that blocks UV light and shields the plastic from future oxidation. Without a sealant, the lens will re-yellow within a few months. With it, the restoration can last years.
The Role of Protective Coatings in Longevity
The protective coating is the difference between a two-month fix and a two-year fix. The clear coat acts as a sacrificial barrier. It absorbs the UV radiation and environmental abrasion so the polycarbonate underneath stays intact.
There are two common types of sealants. The first is a UV-cured clear coat, which is what most professional shops use. It’s a liquid that you spray or wipe on, then expose to sunlight or a UV lamp to harden. It forms a hard, durable shell. The second is a wipe-on sealant that cures by air exposure. These are easier to apply at home but tend to be less durable.
When you buy a restoration kit, check whether it includes a sealant. Many budget kits only include sanding discs and polish. You’ll need to buy a protective coating separately if the kit doesn’t include one. Applying the sealant correctly matters, too. It needs a clean, dry surface to bond. If you apply it over residual polish residue, it will peel. For more on tools that use precise abrasive and finishing techniques, our guide to laser engraver accessories covers similar principles of material removal and surface finishing. The core idea is the same: the right abrasive sequence and a final protective layer determine how long the result lasts.
Headlight Restoration Methods: A Comparative Breakdown
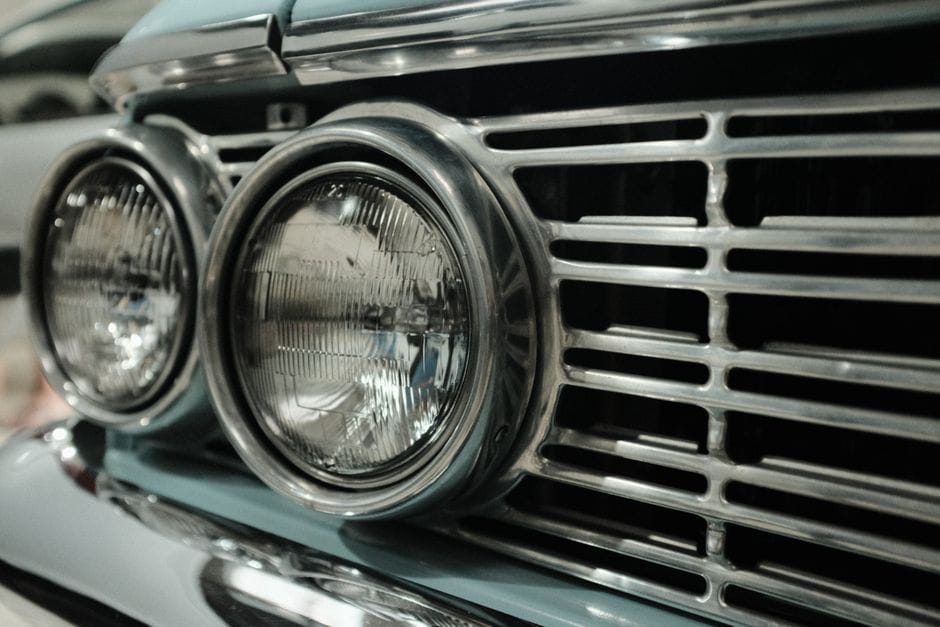
Not all headlight restoration approaches are equal. The method you choose affects cost, time, durability, and final clarity. Here’s how the main options stack up against each other.
DIY Kits vs. Professional Services: Pros, Cons, and Costs
DIY Kits vs. Professional Services: Details
**DIY headlight restoration** kits are the most accessible entry point. A typical kit includes sanding discs in multiple grits, a polishing compound, and a sealant or UV protectant. Prices range from $15 to $50 depending on the brand and included components. The main advantage is cost — you can restore both headlights for less than the price of a single professional service visit.
The trade-off is labor. A thorough DIY job takes 45 to 90 minutes per headlight. You need to tape off surrounding paint, sand through the oxidation, polish to clarity, and apply the protective coating. Rushing any step produces mediocre results. Many first-time users stop after the polishing stage and skip the sealant, which means the headlights yellow again within weeks.
**Professional headlight restoration** services charge more but deliver more consistent results. Shops typically use a multi-step process: wet sanding with machine tools, machine polishing, and application of a professional-grade UV-cured clear coat. [VERIFY: Current pricing for professional restoration services at national chains and independent shops — verify at publish time]
The professional approach removes more material evenly and applies a harder, more durable protective layer than most DIY kits include. You also get the benefit of proper equipment — variable-speed polishers and dust extraction that are impractical for most home users to buy for a one-time job.
| Factor | DIY Kit | Professional Service |
|---|---|---|
| Cost | $15–$50 per kit | [VERIFY: per-vehicle pricing — verify at publish time] |
| Time required | 1.5–3 hours total | 30–60 minutes |
| Skill needed | Moderate — risk of sanding through clear coat | None — technician handles everything |
| Equipment | Hand sanding or basic drill attachments | Professional rotary polishers and spray booths |
| Durability of result | 6–18 months with included sealant | 2–3 years with UV-cured clear coat |
| Warranty | None | Often 1-year guarantee on workmanship |
Manual Sanding vs. Power Tools: Which Approach Delivers Better Results?
Manual Sanding vs. Power Tools: Details
Manual sanding gives you tactile feedback. You feel the surface change as you work through the grits, which reduces the risk of removing too much material. It’s the safest method for beginners and for headlights with thin or already-damaged clear coats. The downside is time — hand sanding takes roughly twice as long as machine sanding.
**Power tools** — specifically drill-mounted sanding discs and rotary polishers — speed up the process significantly. A drill attachment with a 3-inch foam backing plate removes oxidation in minutes rather than tens of minutes. The risk is uneven pressure. If you linger in one spot, you can create a depression in the lens or burn through the polycarbonate entirely. That damage is permanent and requires replacement.
For most DIYers, a hybrid approach works best: use a drill attachment for the coarse grits to remove heavy oxidation, then switch to hand sanding for the fine grits. This balances speed with control. If you’re considering power tools for other automotive projects, the same principles of controlled material removal apply to our laser engraver comparisons, where precision and consistent speed determine final surface quality.
The Role of Ceramic Coatings and UV Sealants
Restoration kits and professional services both end with a protective layer. Without it, the freshly exposed polycarbonate will oxidize faster than the original did — sometimes within weeks. The protective coating is not optional; it’s the difference between a six-month fix and a two-year fix.
**UV sealants** are the standard finish in most restoration kits. They come as a wipe-on liquid that cures by air exposure or a spray that cures under UV light. They block the ultraviolet radiation that causes yellowing. Entry-level sealants last 6 to 12 months before they need reapplication. They’re cheap and easy to apply, which makes them ideal for budget restorations.
**Ceramic coating** is a newer option borrowed from paint protection. Ceramic coatings form a harder, more chemically resistant layer than traditional UV sealants. They offer better resistance to road salt, bug splatter, and mild abrasion. A quality ceramic coating on headlights can last 1 to 2 years before reapplication. The trade-off is cost — a dedicated headlight ceramic coating kit runs $30 to $60 — and application difficulty. Ceramic coatings require a perfectly clean surface and precise curing conditions. Applied poorly, they can streak or peel.
Choosing Between Sealant and Ceramic
If you want the cheapest durable fix, choose a UV sealant — it protects against the primary cause of yellowing. If you drive in harsh conditions or want to extend time between reapplications, choose a ceramic coating. Both require a clean, residue-free surface to bond properly.
The best restoration method depends on your budget, your tolerance for DIY work, and how long you want the result to last. A DIY kit with a UV sealant is the minimum viable approach. A professional service with a UV-cured clear coat is the maximum durability option. Ceramic coatings sit between them — a DIY-friendly upgrade that extends protection without requiring professional equipment.
Decision Framework: How to Choose the Right Restoration Approach
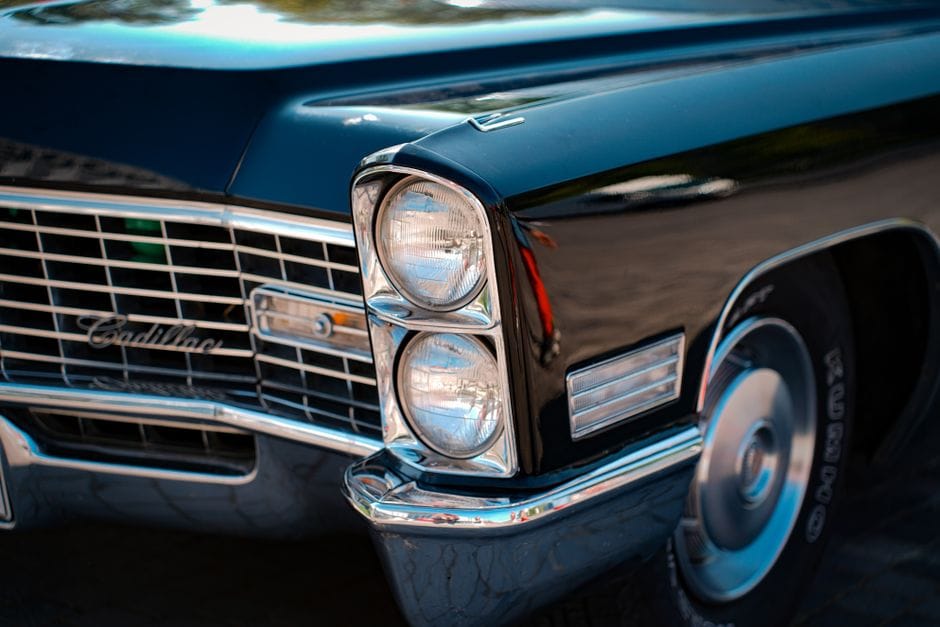
You have three main paths to clear lenses: a DIY kit, a professional service, or a ceramic coating upgrade. Each one solves a different core problem. Your choice should match the condition of your lenses, your skill level, and how long you plan to keep the vehicle.
If You Need Quick Results with Minimal Effort, Choose a DIY Kit Because…
A DIY kit is the lowest-cost entry point and the most accessible option for most drivers. These kits typically include sanding discs, a polishing compound, and a UV sealant. They are designed to be completed in under an hour with a cordless drill.
Choose a DIY kit if your lenses have light to moderate yellowing and surface haze, but no deep physical damage. This approach works best when the oxidation hasn’t penetrated the lens. A DIY kit gives you immediate visual improvement, and the included UV sealant provides a baseline level of protection against future yellowing.
The main trade-off is longevity. A standard DIY kit with a wipe-on sealant may only last 6 to 12 months before the haze returns. If you are comfortable reapplying the sealant periodically, this is a perfectly reasonable maintenance routine. For a quick weekend fix on a daily driver, a DIY kit delivers the best results per dollar spent.
If You Have Severe Oxidation or Deep Scratches, Choose Professional Service Because…
Professional headlight restoration services use industrial-grade sanding equipment and apply a UV-cured clear coat that is far more durable than anything in a consumer kit. These services typically run $80 to $150 per vehicle and take 30 to 60 minutes at a detailing shop.
Choose a professional service if your lenses have deep scratches, pitting, or severe oxidation that has turned the surface chalky. These conditions require aggressive wet-sanding to remove a significant layer of the lens material. Consumer kits often lack the abrasive grit range needed to level out deep damage, and stopping early can leave a wavy, distorted surface.
Professionals also have the advantage of proper dust extraction and controlled application environments. The UV-cured clear coats used by professionals are harder and more chemically resistant than DIY sealants. If your lenses are severely degraded, a professional service is the more economical long-term choice because it postpones the need for replacement.
If You Want Long-Lasting Protection, Choose Ceramic Coating Because…
Ceramic coating is the best choice for drivers who want to maximize the time between restoration sessions. A quality ceramic coating forms a hard, glass-like layer that resists UV damage, road salt, and chemical contaminants far better than standard sealants.
Choose a ceramic coating if your lenses are in good structural condition and you want to protect them for 1 to 2 years. The application is more demanding than a simple sealant — the surface must be perfectly clean and free of any polish residue. You also need to let the coating cure in a dry, dust-free environment for several hours.
The cost is higher than a standard DIY kit, but the protection is proportionally better. For drivers in harsh climates or those who park outdoors, a ceramic coating reduces the frequency of full restoration cycles. If you are already doing a full wet-sand restoration, adding a ceramic coating as the final layer is the single best way to extend the life of your work.
For a simpler decision, use this rule of thumb: light haze means a DIY kit, deep damage means a professional service, and a desire for durability means a ceramic coating. You can also layer them — use a professional service for the heavy sanding, then apply a ceramic coating yourself to protect the freshly polished surface. The right approach is the one that matches your lens condition and your willingness to maintain the result.
Honest Limitations: What Headlight Restoration Cannot Do
Restoration is a powerful fix for oxidation and surface haze, but it has hard limits. Knowing these headlight restoration limitations before you start prevents wasted effort and false expectations. If your lens has physical damage, no amount of polishing will fix it.
What Restoration Can Achieve
- Removes surface oxidation and yellowing from UV damage
- Clears light haze and minor scratches from the outer layer
- Restores light output to near-factory levels on intact lenses
- Extends the life of a structurally sound housing by years
What Restoration Cannot Fix
- Structural cracks in the lens or housing
- Moisture in headlight assemblies from failed seals
- Internal damage to reflectors, projectors, or mounting points
- Delamination where the inner and outer lens layers separate
When Restoration Fails: Cracks, Moisture Intrusion, and Internal Damage
When Restoration Fails: Details
A cracked headlight is a structural failure, not a cosmetic one. The crack compromises the integrity of the housing, and sanding the surface will not seal it. Water will continue to enter, and the internal reflector will corrode over time. If you see a crack wider than a hairline, or any chip that exposes the interior, restoration is the wrong tool. Replacement is the only reliable fix.
Moisture in headlight assemblies is a separate problem. Fogging on the inside of the lens means the seal between the lens and housing has failed. Polishing the outside does nothing for the inside. You have two options: bake the housing apart, clean the interior, and reseal it with fresh butyl rubber, or replace the unit entirely. The bake-and-reseal method works, but it is labor-intensive and risks melting the housing if you overheat it. Many DIY owners find replacement faster and more predictable.
Internal damage is the third failure mode. If the reflector coating is flaking, the projector lens is fogged from the inside, or the mounting tabs are broken, restoration is irrelevant. These components sit behind the lens and are unreachable from the outside. You are polishing a window while the room behind it is on fire.
The Reality of Coating Lifespan: Why Reapplication Is Inevitable
The Reality of Coating Lifespan: Details
Every restoration ends with a protective coating, and every coating has a finite lifespan. This is the most misunderstood part of the process. Manufacturers rate their coatings for a specific duration, and that rating assumes ideal conditions: garage parking, mild climate, and regular washing. Real-world conditions are harsher.
The coating lifespan depends on the product class. A basic sealant may last 3 to 6 months. A spray-on UV clear coat typically lasts 6 to 12 months. A professionally applied ceramic coating can last 1 to 2 years. None of these are permanent. The UV rays that damaged the original lens will eventually degrade any coating you apply. Reapplication is not a failure of the product; it is the physics of exposure.
Plan for maintenance from day one. If you want to minimize the frequency of full restorations, reapply a UV protectant every few months as part of your regular wash routine. This is far cheaper than a full wet-sand cycle and keeps the lens clear. If you skip maintenance, the haze will return, and you will need to sand and polish again.
Legal and Safety Considerations: When Restoration Is Not Enough
Legal and Safety Considerations: Details
There is a safety threshold where restoration stops being a cost-saving measure and becomes a liability. Headlights are a legal requirement for night driving in every jurisdiction. If your lens is so damaged that light output is severely reduced, or if the housing is cracked and allowing water into the electrical connections, you may be driving a vehicle that fails inspection.
A cracked headlight can also fail a roadworthiness inspection, depending on your local regulations. The crack itself may be a violation, even if the light still works. Some regions require headlights to meet specific photometric standards, and a damaged lens will not pass. If you are unsure whether your lens is legal, check your local vehicle code or ask an inspection station before you spend time on restoration.
The safety consideration extends beyond legality. A lens that is structurally compromised can fail completely while driving, leaving you without a headlight at night. The plastic becomes brittle with age and UV exposure. Sanding it removes material, making it thinner and more vulnerable. If the lens is already cracked or heavily crazed, the restoration process itself can cause it to shatter. In these cases, replacement is the safer path.
When to Skip Restoration Entirely
Do not restore a headlight that has a crack wider than a hairline, visible moisture inside the housing, or any sign of internal reflector damage. In these cases, restoration is wasted effort and money. Replace the assembly instead. Also, if the lens is so brittle that it flexes under light pressure, sanding may cause it to crack. When in doubt, err on the side of replacement.
The decision comes down to what is wrong. Surface oxidation is a restoration job. Structural damage is a replacement job. If you are working on a vehicle where the headlight assembly is part of a larger safety system — such as adaptive headlights or cornering lights — consult the service manual before attempting any repair. These systems have sensors and motors that can be damaged by moisture or improper handling. For more on working safely with equipment that emits focused light, see our laser engraver safety guide for principles of eye protection and controlled exposure.
In short, restoration is a maintenance procedure, not a miracle cure. It handles UV damage and surface haze. It does not handle cracks, moisture, or internal failure. Match the tool to the problem, and you will save money. Mismatch them, and you will waste both time and money on a lens that still needs replacement.
Step-by-Step Guide: How to Restore Headlights at Home
Restoring headlights at home is a straightforward job that takes one to two hours. You do not need a heat gun, a drill, or specialty tools. What you do need is patience, the right sanding grit, and a good polishing compound. The process has four phases: preparation, sanding, polishing, and sealing. Skipping any one of them shortens the life of your work.
Preparation: Cleaning, Taping, and Protecting Surrounding Areas
Preparation: Details
Start by washing the headlight lens with soap and water to remove dirt and road film. A clean surface prevents grit from scratching the lens further during sanding. Dry it fully, then wipe with a degreaser or isopropyl alcohol to strip wax and silicone. These residues clog sandpaper and reduce the effectiveness of the polishing compound.
Next, tape off the painted surfaces around the headlight. Use automotive painter’s tape, not masking tape. Masking tape leaves adhesive residue and may pull paint when removed. Cover the bumper, hood, and fender edges that border the lens. Sanding grit and compound will stain or dull clear coat if they touch it. The tape costs a few dollars and protects hundreds of dollars of paintwork.
If your vehicle has chrome trim or plastic trim near the headlight, cover that too. The sanding slurry from wet sanding can etch chrome and leave white hazing on black plastic. Some DIY kits include protective film for this purpose. If yours does not, tape is sufficient. Finally, inspect the lens for any deep stone chips or cracks. If you find any, stop here — restoration will not fix structural damage, as covered in the previous section.
Sanding: Grit Progression and Technique
Sanding: Details
Sanding removes the oxidized layer of plastic and levels the surface. This is the most important step in the whole headlight restoration process. If you under-sand, the haze returns quickly. If you over-sand, you remove too much material and weaken the lens.
Work wet. Fill a spray bottle with water and a drop of dish soap. The soap breaks surface tension and keeps the sandpaper from clogging. Start with the coarsest grit your kit provides. Most kits begin at 400 or 600 grit. If the lens is heavily yellowed, start at 400. If it is only lightly hazed, 600 is enough. Sand in straight, overlapping passes, not circles. Circular motion creates uneven depth.
Progress through the grits in order: 400, then 800, then 1200, then 2000, then 3000. Each step removes the scratches from the previous one. This is the critical discipline — do not skip grits. Skipping leaves deep scratches that the polishing compound cannot remove. You will see a white slurry form as you sand. That is normal; it is suspended plastic and abrasive. Rinse it away frequently so you can see your progress.
How do you know when to move to the next grit? When the surface looks uniformly dull with no shiny spots. Shiny spots are low areas that the sandpaper has not touched. Keep sanding until the entire lens has a consistent matte finish at that grit. The sanding grit progression takes about 10 to 15 minutes per lens. It is tedious, but it is where the final result is won or lost.
Polishing: Restoring Clarity and Gloss
Polishing: Details
After the final sanding pass, the lens is uniformly dull. Polishing brings back the clarity. You can polish by hand or with a drill-mounted foam pad. A drill is faster and produces a more even result. If you polish by hand, expect to spend 10 minutes per lens with firm pressure and circular motion.
Apply a small amount of polishing compound — about the size of a coin — to the pad or a microfiber cloth. Work it into the lens in overlapping circles. The compound contains fine abrasives that remove the 3000-grit scratches and restore optical clarity. Keep the lens slightly damp. Dry polishing generates heat that can warp thin lenses.
You will see the haze lift and the lens become transparent again. This is the satisfying part of the headlight restoration steps, but it is not the end. The lens is now clear because you removed the protective factory coating. That coating is what kept UV light from yellowing the plastic. If you stop here, the lens will re-oxidize within weeks. Polishing is only half the job.
Sealing: Applying UV Protection for Longevity
Sealing: Details
Sealing is the step most DIYers skip, and it is why their restoration lasts only a few months. The factory UV coating is gone. Without a new protective layer, ultraviolet light attacks the bare polycarbonate immediately. A headlight sealing product — either a spray or a wipe-on liquid — replaces that protection.
Apply the sealer exactly as the manufacturer instructs. Most products require a clean, dry lens and a single even coat. Some require two coats with a short flash time between them. Do not apply sealer in direct sunlight or high humidity; it will cure unevenly and leave streaks. Let the sealer cure for the full time listed on the label before driving. For most UV protection products, that is 12 to 24 hours. Driving through rain or car wash soap before the cure is complete can wash the sealer off.
If you do not want to buy a dedicated sealer, some high-quality carnauba wax provides temporary protection, but it lasts only a few weeks. A dedicated headlight sealing product lasts six months to a year. The price difference is a few dollars. Over a year, the dedicated sealer is the better value. For more on choosing tools that handle focused light safely, see our guide to laser engraver combos, which covers similar principles of controlled exposure and protective coatings.
The full process — preparation, sanding, polishing, and sealing — takes about two hours for both lenses. The materials cost less than a single replacement headlight assembly. Done correctly, the result lasts a year or more. Done hastily, it lasts a few weeks. The difference is in the grit progression and the sealer. Both are non-negotiable.
Headlight Restoration vs. Replacement: A Cost-Benefit Analysis
When your lenses are too far gone, you have two roads: restore them or swap in new assemblies. The right choice depends on the condition of the lens, the cost of the part for your specific vehicle, and how long you plan to keep the car. This section breaks down the headlight restoration cost against the headlight replacement cost so you can decide with actual numbers, not guesswork.
Cost Comparison: Restoration Kits, Professional Services, and Replacement Parts
| Option | Typical Upfront Cost | Labor Required | Result Longevity | Best For |
|---|---|---|---|---|
| DIY restoration kit | $15 – $40 | 1.5 – 2 hours of your time | 6 – 12 months with sealer | Light to moderate oxidation, no cracks |
| Professional restoration service | $80 – $150 per pair | None (shop handles it) | 1 – 2 years with quality sealer | Moderate oxidation, no structural damage |
| Aftermarket replacement assembly | $60 – $200 per side | 30 – 60 minutes per side | 3 – 5 years before UV degradation | Cracked housings, moisture inside, broken mounts |
| OEM replacement assembly | $200 – $800+ per side | 30 – 60 minutes per side | 5 – 10 years | Restoring factory fit and beam pattern |
The spread between a $25 DIY kit and a $400 OEM part is enormous, but the comparison is not apples to oranges. A restoration kit only addresses the outer lens surface. A replacement part gives you a new housing, new reflectors, and sometimes new bulbs and ballasts. If your existing housing has internal moisture or a cracked lens, no amount of sanding will fix it. You are buying a replacement, not a restoration.
Current average costs for replacement headlight assemblies vary widely by make and model. [VERIFY: current average costs for replacement headlight assemblies for popular 2015–2023 vehicle models at publish time]
Time Investment: How Long Does Each Option Take?
The time investment differs more than most people expect. A DIY restoration is not a 20-minute job. The full process — taping, wet sanding through three or four grits, polishing, and sealing — runs about two hours for both lenses. That is active time, not counting the sealer cure time of 12 to 24 hours. If you rush the grit progression, you will see it in the results within a month.
A professional service takes about an hour at the shop, but you lose the car for that window. Replacement parts are the fastest on actual labor: 30 to 60 minutes per side for most vehicles. However, you must factor in parts sourcing time, which can be several days for OEM parts or same-day for common aftermarket units. If your car is your daily driver, the downtime matters more than the dollar cost.
Long-Term Value: Durability and Resale Impact
Long-Term Value: Details
Long-term value comes down to two questions. How long will the result last? And does it affect what someone will pay for your car? A properly sealed restoration lasts 6 to 12 months for a DIY job. It lasts up to two years for a professional job. That means a DIY restoration is a recurring expense. It costs roughly $25 to $40 per year in materials plus two hours of your time. Over five years, that is $125 to $200 and 10 hours of labor.
A replacement assembly, even an aftermarket unit, lasts three to five years before UV degradation returns. Over the same five-year window, you do the job once. The long-term value calculation favors replacement for anyone keeping the car beyond two years, especially if the lens has any internal damage.
Resale value is where restoration earns its keep. A car with clear, functional headlights passes inspection and photographs well. A car with cloudy lenses signals neglect, and buyers negotiate accordingly. If you are selling within a year, a $30 restoration kit is the highest-return maintenance you can do. If you are keeping the car for five years, the replacement cost per year is lower than the recurring restoration cost. The math flips based on your ownership timeline, not the condition of the lens alone.
One note on aftermarket replacements: cheap units sometimes have poor beam patterns or thin housings that yellow faster than OEM. If you buy aftermarket, check for DOT or SAE markings and read owner reviews about fitment for your exact model year. For more on choosing equipment where precision and safety matter, see our guide to the best CO₂ laser engravers, which covers similar trade-offs between upfront cost and long-term durability.
Frequently Asked Questions About Headlight Restoration
How Long Does Headlight Restoration Last?
Headlight restoration longevity depends entirely on the method and the protective layer you apply afterward. A basic polish-and-clear-coat job typically lasts 12 to 18 months. A full restoration that includes sanding, polishing, and a UV-resistant sealant can hold for two to three years. The variable is your environment. Cars parked outdoors in sunny climates see faster UV degradation. Cars kept in garages can stretch the results to four years.
The biggest factor is the final sealant. If you skip the UV coating, oxidation returns in a matter of weeks. Manufacturers rate their sealants differently, so check the label for expected durability. Reapplying the protective layer every six months is the single best way to extend the interval between full restorations. For a deeper look at the long-term trade-offs between restoration and replacement, the cost-benefit analysis earlier in this guide covers the financial side of that decision.
Can You Restore Headlights with Toothpaste?
Toothpaste headlight restoration is a real technique, but it is a temporary fix, not a restoration. Toothpaste contains mild abrasives like silica that can remove light surface oxidation from the lens. It works best on lightly hazed lenses with no deep pitting or yellowing. The results last a few weeks at most because toothpaste leaves no protective coating behind. The lens re-oxidizes quickly, often faster than before.
There is also a risk. Some toothpastes contain whitening agents or baking soda that are more abrasive than polishing compounds designed for plastic. Aggressive rubbing can scratch the polycarbonate lens, making the haze worse. If you are in a pinch and need a quick improvement before selling the car, toothpaste is a reasonable stopgap. For anything longer than a month, use a dedicated headlight restoration kit with a proper UV sealant.
Is Headlight Restoration Worth It?
Yes, headlight restoration is worth it in most cases, and the math is straightforward. A DIY kit costs between $15 and $40. Professional restoration runs $80 to $150. Replacing a single headlight assembly costs $150 to $800 for parts alone, plus labor. If the lens is clear on the inside and the only issue is surface oxidation, restoration is the clear value play.
The worth-it calculation changes if the housing is cracked, water has gotten inside, or the reflector is corroded. In those cases, restoration only addresses the outside of the lens. It leaves the underlying problem untouched. You also need to weigh your time. A full DIY restoration takes 45 to 90 minutes. If your time is limited, paying a professional is still cheaper than replacement. For a car you plan to keep, restoration is worth it. For a car with structural damage to the housing, it is not.
How Much Does Professional Headlight Restoration Cost?
Professional headlight restoration cost typically ranges from $80 to $150 for both lights at a detailing shop. Dealerships charge more, often $150 to $250, because they use OEM-specified procedures and may replace the sealant with a factory-grade coating. Mobile detailers are usually the cheapest option, sometimes under $100, but their equipment and materials vary widely.
What you are paying for is the labor of wet-sanding through multiple grits, machine polishing, and applying a UV-cured or spray-on protective coating. A professional job lasts longer than most DIY efforts because the application of the sealant is more even and thorough. Some shops offer a warranty on the work. It is typically six months to a year. That is worth asking about before you book. [VERIFY: average professional headlight restoration price range from a national chain like Midas or Firestone for 2026]
If you are considering doing the work yourself, the step-by-step guide in the previous section walks through the full process and the exact materials you need.
Frequently Asked Questions
How long does headlight restoration last?
[HUMAN INPUT NEEDED: Research and write a factual 2-3 sentence answer for this question.]
Can you restore headlights with toothpaste?
[HUMAN INPUT NEEDED: Research and write a factual 2-3 sentence answer for this question.]
Is headlight restoration worth it?
[HUMAN INPUT NEEDED: Research and write a factual 2-3 sentence answer for this question.]
How much does professional headlight restoration cost?
[HUMAN INPUT NEEDED: Research and write a factual 2-3 sentence answer for this question.]
What causes headlights to become cloudy?
Understanding causes headlights to become cloudy?
[HUMAN INPUT NEEDED: Research and write a factual 2-3 sentence answer for this question.]
Final Verdict: The Right Way to Restore Your Headlights
Headlight restoration is a precision process—not a single product, but a system of abrasives, UV sealants, and technique that removes oxidized polycarbonate and rebuilds a protective barrier. Its three most important attributes are clarity gain (how much haze is removed), durability (how long the UV protection lasts), and application difficulty (whether an average owner can execute it correctly). Every kit on the market is a trade-off among these three factors, and the “best” choice depends entirely on which attribute you prioritize.
For most drivers, the Cerakote Ceramic Headlight Restoration Kit is the top recommendation. It delivers a 2-year ceramic coating, the longest-lasting UV barrier in its price class. It requires only a drill, a spray bottle, and about 30 minutes of labor. Its water-activated sanding discs step down from 600 to 3000 grit. This removes deep oxidation without gouging the lens. The ceramic layer cures to a hard, hydrophobic finish. It resists yellowing far longer than standard resin sealants. If you want the best balance of durability, ease, and cost-per-month of protection, this is the kit to buy.
Use this decision framework to match the entity to your situation:
- If you need maximum longevity and don’t mind a drill, choose Cerakote because its ceramic coating lasts 2 years and resists UV degradation better than acrylic or resin alternatives.
- If you need a no-power-tools option for a single quick fix, choose 3M Ultra Headlight Restoration Kit because its hand-applied sanding discs and rubbing compound restore clarity in under 20 minutes, though you’ll reapply the sealant every 6–8 months.
- If you need professional-grade results on severely pitted or deeply yellowed lenses, choose a wet-sand + 2K clear coat system (like the Sylvania kit or a standalone 2K spray) because only a high-solids clear coat can fill micro-cracks and provide a factory-like finish that lasts 3+ years.
- If you need a low-cost option for a vehicle you’re selling, choose a basic toothpaste-and-lens-kit combo because it removes surface haze for a week or two, which is enough to pass a visual inspection before trade-in.
Honest limitation: Cerakote cannot fix physically cracked, chipped, or internally fogged lenses. If your headlight has structural damage or moisture trapped inside the housing, no restoration kit will help—you must replace the assembly. Also, its 2-year durability assumes the lens is clean and dry before application; applying over moisture or old sealant will cut that lifespan in half.
Whichever route you choose, the golden rule is consistent: the sealant is the product, the sanding is the prep. A cheap sealant on a perfectly sanded lens will outperform an expensive ceramic coat applied over residual oxidation. If you’re unsure of your skill level, start with a cheap kit on a spare or old headlight—the technique transfers directly to your daily driver. Restore your lenses this week, and you’ll not only see the road better at night, but you’ll also avoid the $300–$600 cost of replacement housings. Pick the option that matches your priorities, follow the grit sequence, and seal it properly—clear, safe, and long-lasting lenses are within reach of any DIYer.