Control Arm Replacement: Step-by-Step Guide
Control Arm Replacement: A Complete DIY Guide to Symptoms, Parts, and Step-by-Step Installation
The control arm is the hinged suspension link that connects your vehicle’s frame or subframe to the wheel hub and steering knuckle, allowing the wheel to move up and down while keeping it firmly planted on the road. Every car, truck, and SUV has at least two per wheel — an upper and a lower — and they are the primary load-bearing components that maintain your wheel alignment, absorb road impact, and keep your tires in contact with the pavement. When a control arm fails, you are not just dealing with a noisy suspension; you are risking catastrophic loss of steering control and accelerated tire wear that can cost you hundreds in premature replacement.
In this complete DIY guide, we will cover every attribute you need to understand before tackling a control arm replacement: the symptoms of a failing arm (clunking noises, uneven tire wear, steering wander), the parts involved (bushings, ball joints, and the arm itself), the materials they are made from (stamped steel vs. forged aluminum vs. cast iron), the tools required, and the realistic price range — from $80 to $300 per arm for aftermarket parts, plus $150 to $400 for professional labor if you choose not to DIY. We will also break down the critical differences between upper and lower control arms, when you can replace just the bushings versus the entire assembly, and the exact torque specifications you cannot skip.
What sets this guide apart from the generic forum posts you will find elsewhere is the honest, data-driven approach: we have included a step-by-step installation sequence with torque specs, a comparison table of OEM versus aftermarket versus performance arms, and a decision framework that tells you exactly when a DIY replacement makes sense and when you should walk away and call a shop. You will also learn the common mistakes that even experienced home mechanics make — like failing to support the control arm with a jack before loosening the bolts, or reusing corroded hardware — so you can avoid the costly do-over.
What Is a Control Arm and How Does It Work?
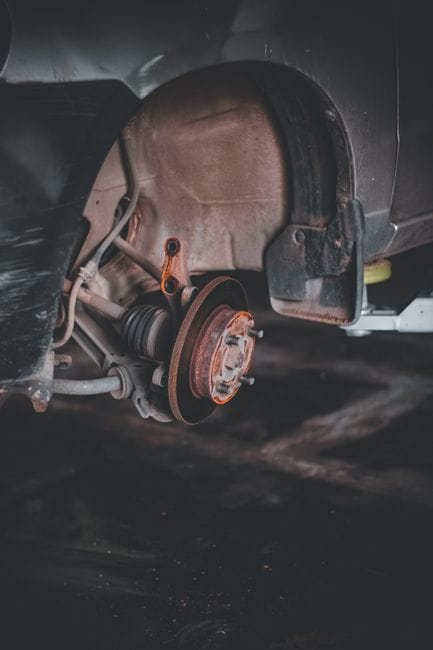
A control arm is the hinged suspension link that connects your vehicle’s frame or subframe to the wheel hub and steering knuckle. It’s the component that allows your wheels to move up and down with the road while keeping them laterally positioned under the car. Think of it as a pivoting lever that manages vertical wheel travel and maintains tire alignment through the suspension system’s range of motion.
Every control arm has two critical jobs. First, it locates the wheel assembly in space—holding it in the correct fore-aft and lateral position relative to the chassis. Second, it transfers braking, acceleration, and cornering forces from the tires up into the vehicle body. When a control arm fails, both of these functions degrade, which is why control arm replacement becomes necessary before the part causes tire wear or a dangerous loss of steering control.
Anatomy of a Control Arm: Bushings, Ball Joints, and Mounting Points
Anatomy of a Control Arm: Details
A control arm is a single metal forging, usually stamped steel or cast aluminum, with attachment points at both ends. The inboard end mounts to the frame or subframe through a **control arm bushing**—a rubber or polyurethane cylinder that absorbs vibration and allows controlled pivoting. The outboard end connects to the steering knuckle through a **ball joint**, which is a spherical bearing that lets the knuckle rotate for steering while still transferring vertical loads.
The control arm bushing is the wear item you’ll most often replace. It isolates road noise and vibration from the cabin, but over time the rubber cracks, splits, or delaminates from the metal sleeve. When that happens, the arm develops play and the wheel can shift fore-aft under braking. The ball joint is the second common failure point. It has a tapered stud that fits into the knuckle and a socket that wears with mileage. A worn ball joint produces a clunking noise over bumps and, in severe cases, can separate entirely—which is a catastrophic failure.
Upper vs Lower Control Arms: Which One Does Your Car Have?
Upper vs Lower Control Arms: Details
The suspension layout determines whether your vehicle uses an **upper control arm**, a **lower control arm**, or both. Here’s the breakdown:
– **Double-wishbone suspension:** Uses both an upper and lower control arm. Common on trucks, SUVs, and performance cars. The two arms work together to keep the tire perpendicular to the road through the suspension travel.
– **MacPherson strut suspension:** Uses only a **lower control arm**, with the strut assembly serving as the upper locating member. This is the most common layout on modern sedans and crossovers because it’s lighter and cheaper to manufacture.
– **Multi-link suspension:** Uses multiple arms, typically one or two lower arms and one upper arm, arranged in a complex geometry for precise wheel control.
Check your owner’s manual or a parts catalog for your specific make and model. A parts lookup tool will tell you whether you need one lower control arm or a complete set of upper and lower arms. [HUMAN INPUT NEEDED: Confirm which suspension layouts apply to the specific vehicle models this article’s audience most commonly owns.]
How Control Arms Differ from Struts, Tie Rods, and Sway Bars
Control arms are one component in a larger suspension system, and they’re often confused with adjacent parts. Here’s how to tell them apart:
– **Strut assembly:** A strut combines a shock absorber and coil spring into one structural unit. It replaces the upper control arm’s locating function in MacPherson setups. The control arm handles the lower pivot; the strut handles damping and the upper pivot.
– **Tie rod end:** A tie rod connects the steering rack to the steering knuckle. It transmits steering input, not vertical suspension loads. A worn tie rod causes steering wheel play and uneven tire wear, but it won’t produce the same clunking over bumps that a bad control arm bushing or ball joint does.
– **Sway bar (anti-roll bar):** A sway bar connects the left and right control arms to reduce body roll in corners. It’s a torsion spring, not a locating link. If your sway bar link is worn, you’ll hear a rattle over bumps—but the wheel alignment won’t change, which is the key diagnostic difference.
The relationship matters because a failing control arm can mask or mimic symptoms of these other components. When you hear a clunk, the diagnosis isn’t always obvious. That’s why the next section, on warning signs and diagnosis, walks through how to isolate a bad control arm from a worn tie rod or strut. Knowing which part does what is the first step in avoiding unnecessary control arm replacement on a car that actually needs a tie rod end instead.
7 Warning Signs Your Control Arm Needs Replacement
Your suspension doesn’t fail silently. When a control arm wears out, it sends clear signals through the steering wheel, the cabin, and the tire tread. The challenge is recognizing which symptom points to the control arm and which points to a neighboring part. Here are the seven most common control arm symptoms, ranked roughly by how often they appear in real shop visits.
Clunking or Popping Noises Over Bumps
The most distinctive control arm symptom is a metallic clunk, pop, or knock when you drive over speed bumps, potholes, or uneven pavement. You’ll hear it most clearly at low speeds with the windows down. The noise comes from the control arm’s ball joint or bushing moving beyond its designed range because the rubber has cracked or the joint has developed slack.
A clunking noise from the front suspension is often the first sign owners notice, and it’s also the easiest to confuse with a worn sway bar link or strut mount. The difference: a control arm clunk tends to be a single, solid “thunk” as the suspension loads and unloads, while a sway bar link rattle sounds sharper and more metallic. If you hear the clunk when turning at the same time as you hit a bump, the ball joint is the likely culprit.
Uneven or Cupped Tire Wear
A control arm locates the wheel fore and aft and controls its camber angle. When the bushings wear, the wheel’s alignment shifts slightly under load, and the tire starts wearing unevenly. Look for cupping—a scalloped, wavy pattern across the tread—or excessive wear on the inner or outer edge of the front tires.
Uneven tire wear from a bad control arm usually develops gradually over thousands of miles. If you catch it early, you might save the tires. If you ignore it, the tires will need replacement even after you fix the control arm. Check your front tires every oil change; if you see a repeating high-low pattern, measure the control arm bushings before you pay for an alignment.
Steering Wheel Vibration or Shimmy
A worn control arm bushing allows the wheel to move slightly fore and aft as it rotates. At highway speeds, this small movement translates into a vibration or shimmy you feel through the steering wheel. The vibration often appears around 50–60 mph and may fade at higher or lower speeds.
This symptom overlaps with wheel balance issues and warped brake rotors, so don’t jump straight to control arm replacement. A vibration that appears only when braking points to rotors. A vibration that appears at a specific speed and persists when you coast points to a balance issue or suspension wear. If the shimmy is accompanied by a clunk over bumps, the control arm moves to the top of the suspect list.
Vehicle Pulling to One Side
If your car drifts toward the shoulder even on a flat, straight road, the control arm may be allowing the wheel to sit at the wrong angle. A collapsed or cracked bushing changes the wheel’s toe and camber settings, which creates a constant pull. You’ll fight the steering wheel to keep the car centered, and the pull won’t go away when you correct it.
Pulling can also come from a seized brake caliper or mismatched tire pressures, so check those first—they’re cheaper to rule out. If the pull persists with good tires and free brakes, inspect the control arm bushings for tears or compression damage.
Loose or Wandering Steering
A control arm with excessive ball joint play creates a vague, loose feeling in the steering. The car feels like it’s wandering within its lane, and you make constant small corrections to keep it straight. On-center feel disappears; the steering wheel has a dead zone where you can move it slightly without the car responding.
This symptom is close to what a worn tie rod end produces, and the two often fail around the same time. The diagnostic difference: a worn tie rod usually creates play you can feel as a clunk in the steering wheel when you rock it side to side, while a worn control arm ball joint produces play you can feel when you jack up the wheel and rock it top to bottom.
Visible Bushing Cracking or Ball Joint Play
Some control arm symptoms you can see before you feel them. With the car on jack stands, inspect the control arm bushings—the rubber cylinders where the arm mounts to the frame. Cracks, tears, or bulging rubber mean the bushing is failing even if you haven’t noticed noise yet. The rubber should look solid and intact, with no separation from the metal sleeve.
Ball joint play is harder to spot visually but easy to check with a pry bar. With the wheel off the ground, place a pry bar under the tire and lift. Watch the ball joint where it meets the steering knuckle. If you see movement or hear a click, the joint has excessive play and the control arm needs replacement. A ball joint with visible play is a safety issue—if it separates completely, you lose steering control.
Failed Alignment That Won’t Hold
You paid for an alignment, and within a few weeks the car pulls again or the steering wheel sits off-center. That’s a classic sign of worn control arm bushings. An alignment sets the wheel angles, but if the bushings have too much compliance, the angles shift back as soon as the car rolls down the road. The alignment isn’t failing—the control arm is.
If your alignment shop tells you the camber or caster is out of spec and can’t be adjusted, worn control arms are often the reason. Many modern cars have no camber adjustment from the factory; the only way to correct the angle is to replace the control arm with a good one. This is also the point where control arm symptoms overlap with the diagnosis process covered in the next section, which walks through how to confirm the problem before you buy parts.
Don’t Ignore These Signs
A control arm with a severely worn ball joint can separate while you’re driving, causing the wheel to collapse into the fender and you to lose steering control. If you hear clunking suspension noise and also see uneven tire wear, inspect the control arm immediately. This isn’t a “wait and see” repair.
How to Diagnose a Bad Control Arm (Before You Buy Parts)
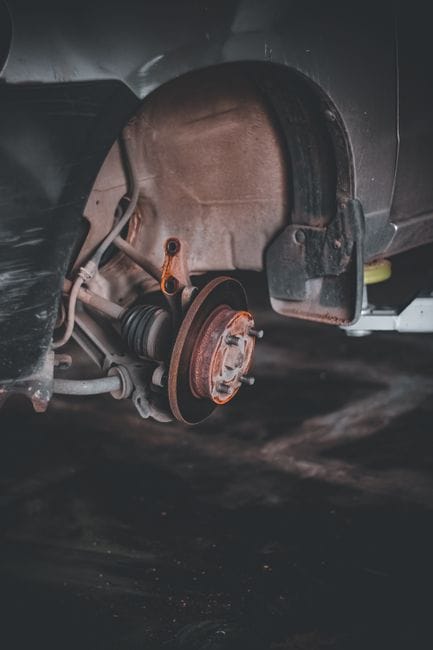
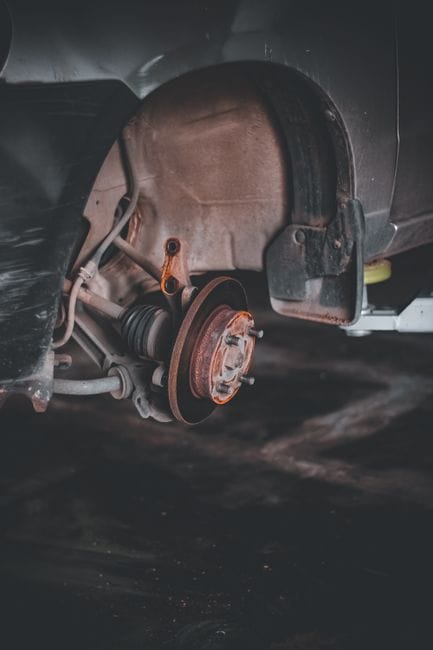
You can confirm a bad control arm in your driveway with a floor jack, a pry bar, and a flashlight. The goal is to isolate control arm movement from other suspension components so you don’t replace a part that’s still good. Work one wheel at a time, support the vehicle on jack stands, and shake down each pivot point in a specific order.
The Pry Bar Test for Ball Joint Play
The ball joint connects the control arm to the steering knuckle. To check for ball joint play, place a pry bar under the tire and lift upward while watching the joint. Some movement is normal in the tire itself, but you’re looking for vertical play at the ball joint socket. A small amount of play means the joint is worn but may still pass inspection. If you can see the stud move inside the socket, the joint is failing. You can also check for horizontal play by prying side to side at the knuckle. Compare both sides of the vehicle—if the passenger side has visible play and the driver side is tight, the loose side is your problem. A ball joint with excessive play needs replacement, and on most vehicles the control arm comes as a single assembly with the joint pre-installed.
Visual Inspection of Bushings for Cracks and Tears
Bushing inspection is the most reliable way to diagnose control arm wear because the rubber degrades visibly. Look at both ends of the control arm where it mounts to the subframe. A healthy bushing has smooth, continuous rubber with no cracks. A worn bushing shows surface cracking, chunks missing from the edge, or a torn section where the rubber has pulled away from the metal sleeve. If you see fluid weeping from the bushing, that’s a hydraulic bushing that has failed internally. Press on the bushing with your thumb—if it feels hard and brittle rather than slightly compliant, the rubber has aged out. One common pattern is a cracked bushing on the rearward mount while the forward mount looks fine, because the rearward bushing takes more torsional load during braking.
Checking for Movement at the Subframe Mounts
Control arm movement at the subframe mount is harder to spot because the bushing hides it. Use a pry bar to push the control arm forward and backward while watching the bushing’s outer sleeve. If the sleeve moves relative to the subframe bracket, the bushing has separated from its shell. You can also have an assistant rock the steering wheel side to side while you watch the mounts—this loads the bushings in a way that reveals slop. A control arm that moves at the mount but shows no visible bushing damage usually has an internal delamination, where the rubber has separated from the metal core. This condition produces a clunking noise over bumps but can pass a static visual check, so the pry bar test matters.
When to Use a Professional Alignment Rack
Some control arm problems only show up under load, and a professional alignment rack can measure angles that you can’t assess with a pry bar. If your bushings and ball joints pass inspection but the car still wanders or pulls, take it to a shop with a modern alignment machine. The rack will show camber and caster readings that reveal whether the control arm has shifted or bent. A control arm from a minor collision can be bent without visible damage, and the alignment readings will show it. An alignment rack also helps you confirm the diagnosis before you buy parts, because it tells you which corner has the out-of-spec angle. If the shop charges a diagnostic fee, it’s worth paying to avoid replacing the wrong side. For more on related safety checks, our guide on [laser-engraver-safety-guide] covers a different type of precision work but follows the same principle: verify the problem before you spend money on parts.
OEM vs Aftermarket Control Arms: What’s the Real Difference?
The decision between an OEM control arm and an aftermarket control arm comes down to budget, expected service life, and how you use the vehicle. OEM parts come from the vehicle manufacturer’s supply chain and match the original design exactly. Aftermarket parts are made by third-party companies and vary widely in quality. The right choice depends on whether you plan to keep the car for two years or ten.
Material Quality: Steel, Aluminum, and Forged Options
OEM control arms typically use the same material as the factory build—stamped steel for most economy cars, aluminum for many modern vehicles, and forged steel for trucks and heavy-duty applications. Aftermarket manufacturers offer the same range, but the quality control differs. A stamped steel aftermarket arm from a budget brand may use thinner gauge metal than the OEM version, which can flex under load and accelerate bushing wear.
Forged aluminum arms offer the best strength-to-weight ratio, but they cost more to produce. If your vehicle came with stamped steel arms, upgrading to an aluminum aftermarket control arm can reduce unsprung weight and improve ride quality, but you must verify that the geometry matches the factory spec. A control arm with slightly different dimensions will throw off your alignment angles and cause premature tire wear. Check the manufacturer’s stated material thickness and weight against the OEM part before you buy.
Bushing and Ball Joint Quality: Rubber vs Polyurethane
The bushing material is where OEM and aftermarket parts diverge most significantly. OEM control arms use rubber bushings that are tuned for comfort and noise isolation. They flex to absorb road vibration but wear out faster under aggressive driving or heavy loads. A polyurethane bushing is a common aftermarket upgrade that firms up the suspension, reduces deflection, and lasts longer than rubber. The tradeoff is increased road noise and vibration transfer into the cabin.
Ball joint quality also varies. A quality aftermarket control arm includes a ball joint with a sintered metal bearing surface and a sealed boot that keeps out dirt and moisture. Budget aftermarket arms often use a cheaper ball joint design that fails within [VERIFY: typical mileage range for budget aftermarket ball joint failure — verify at publish time]. If you plan to keep the vehicle long-term, pay the premium for a control arm with a replaceable ball joint, because that allows you to swap the joint without replacing the entire arm.
Price Comparison: OEM vs Aftermarket vs Rebuilt
The control arm price spread is significant. OEM control arms run [VERIFY: current OEM control arm price range across popular vehicle models — verify at publish time], while quality aftermarket arms typically cost [VERIFY: current aftermarket control arm price range — verify at publish time]. A rebuilt control arm, which is a remanufactured original arm with new bushings and ball joints, sits in the middle and can be a solid value if the rebuilder uses quality components.
A rebuilt control arm is not the same as a used arm. Rebuilt units are disassembled, inspected, and fitted with new wear items. The risk is that the rebuilder’s quality standards vary by company. Check whether the rebuilder replaces the ball joint or just the bushings, because a worn ball joint will still fail even with fresh bushings.
Warranty and Corrosion Resistance Considerations
Warranty coverage differs between OEM and aftermarket parts. An OEM control arm typically carries a one-year warranty through the dealership, while many quality aftermarket brands offer a lifetime warranty on the arm itself. However, the warranty often excludes wear items like bushings and ball joints, so read the terms carefully before assuming you are covered for the common failure points.
Corrosion resistance matters if you drive in regions that use road salt. OEM arms receive the manufacturer’s standard corrosion treatment, but aftermarket arms vary. Some budget brands skip the e-coating or use a thinner paint layer that chips easily and allows rust to start. Rust on a control arm weakens the structure and makes the ball joint housing brittle. Look for an aftermarket arm with a full e-coat or powder-coat finish, especially if you live in the salt belt. For more on how material quality affects long-term performance, our comparison of [laser-engraver-comparisons] applies a similar cost-per-use analysis to a different type of equipment purchase.
Control Arm Replacement Cost: Parts, Labor, and Hidden Fees
Before you commit to a repair, you need a realistic number. The total control arm replacement cost depends on your vehicle type, the shop’s labor rate, and whether you pay for extras like an alignment. Here is a breakdown of what you will actually pay.
Average Part Cost by Vehicle Type (Sedan, SUV, Truck)
Control arm parts pricing varies more by vehicle class than by brand. A sedan typically uses a stamped steel arm with a pressed-in ball joint. These are cheap to manufacture and cheap to buy. An SUV or truck usually needs a heavier forged arm, often with a larger ball joint and bigger bushings to handle the extra weight. That material difference shows up in the price.
| Vehicle Type | Typical Part Price (Per Arm) | Common Material |
|---|---|---|
| Compact Sedan | $40 – $120 | Stamped Steel |
| Midsize Sedan | $60 – $180 | Stamped or Cast Steel |
| SUV / Crossover | $100 – $350 | Cast Steel or Forged Aluminum |
| Full-Size Truck | $150 – $450 | Forged Steel or Aluminum |
| Luxury / Performance | $250 – $600+ | Aluminum or Fabricated Steel |
[VERIFY: Current part prices for popular models — verify at publish time]
These ranges cover a single arm. If you need both sides, double the part cost. Also, an arm that includes a new ball joint and bushings pre-installed costs more than a bare arm, but it saves you from buying those components separately.
Labor Time: How Many Hours Should a Shop Charge?
Labor Time: Details
Labor is where the bill jumps. A shop charges by book hours, not by the actual time the tech spends. The book time assumes the tech has the right tools and has done the job before. A straightforward front control arm on a sedan might book at 1.5 to 2.5 hours per side. An SUV or truck with a more complex suspension layout can book 3 to 4 hours per side. Multiply that by the shop’s hourly rate — typically $80 to $150 — and you see why labor often exceeds the part cost.
[VERIFY: Average labor hours for common vehicles — verify at publish time]
If you are doing this at home, your labor cost is zero, but your time is not. Plan for a full afternoon on your first attempt. You will spend extra time fighting rusted bolts and figuring out the correct torque sequence.
Why You Should Replace Both Sides (Even If Only One Is Bad)
You will hear this from most mechanics, and it is sound advice. When one control arm fails, the other side has endured the same mileage, the same road conditions, and the same wear. The bushings and ball joint on the opposite side are likely close to failure too. Replacing both sides now means you pay for one alignment and one labor setup instead of doing the job twice in six months. It also keeps the suspension balanced. A fresh arm on one side and a worn arm on the other can cause uneven ride height and inconsistent handling. The extra part cost is usually $50 to $300, which is far cheaper than a second trip to the shop.
Hidden Costs: Alignment, Hardware, and Special Tools
Hidden Costs: Details
The quoted price rarely covers everything. After any control arm replacement, you need a wheel alignment. The new arm changes the suspension geometry, and a bad alignment will chew through tires quickly. Alignment cost typically runs $80 to $120 for a standard two-wheel alignment. Factor that into your total.
Hardware is another line item. Many control arm bolts are torque-to-yield — they stretch when tightened and cannot be reused. New bolts and nuts add $15 to $40 per side. Some vehicles also need a new stabilizer bar link or a new ball joint nut that you will discover once the old arm is out.
Special tools can add cost if you are DIY. A ball joint press or a bushing removal tool may be required, depending on whether your new arm comes with the ball joint and bushings already installed. If you buy a bare arm, you need to press out the old bushings and press in the new ones. That tool rental runs $20 to $50 at an auto parts store. If you skip the tool and pay a shop to press the bushings, expect a small bench fee.
The spread is wide because vehicle class drives the price. A compact sedan with a good aftermarket arm and a small shop could land near the bottom. A full-size truck with OEM arms and a dealership labor rate will sit near the top. Knowing your vehicle type and the condition of the opposite side helps you budget before you start.
Step-by-Step Control Arm Replacement Guide
This is a physically demanding job. You will be on your back, under a heavy vehicle, dealing with corroded bolts and tight clearances. If you have any doubt about your ability to safely support the vehicle, stop and call a shop. The cost breakdown from the previous section shows that labor is a significant chunk, but your safety is worth more than the savings.
The full process, from lifting the car to torquing the final bolt, typically takes 3 to 5 hours for a first-timer working in a home garage. We will walk through the process for a typical double-wishbone or MacPherson-strut front suspension. The exact steps for your vehicle may vary slightly, so consult a factory service manual. This guide covers the mechanical logic, not the specific bolt sizes for every make and model.
Tools and Safety Equipment You’ll Need
Before you start, gather everything. Running to the parts store mid-job with a wheel off is a waste of time. You will need a solid floor jack and two heavy-duty jack stands. Never work under a car supported only by a jack. You also need a breaker bar, a torque wrench that covers your vehicle’s specifications, and a set of metric and standard sockets.
A ball joint separator (often called a pickle fork) or a ball joint press is essential for separating the tapered stud from the steering knuckle. You will also need penetrating oil, a wire brush, and anti-seize compound for reassembly. Safety glasses and mechanic’s gloves are non-negotiable. A pry bar helps coax the old arm out of its mounting points. Finally, have a torque specification chart for your specific year, make, and model handy.
Torque Specifications Are Non-Negotiable
Every bolt on a control arm has a specific torque specification. These are measured in foot-pounds (ft-lbs) or Newton-meters (Nm). The suspension bolts hold the wheel assembly in place. Under-torquing can cause the arm to shift and fail. Over-torquing can strip the threads or snap the bolt. Look up the exact torque specifications for your vehicle before you begin. Do not guess.
Step 1: Loosen Lug Nuts and Lift the Vehicle
Start on level ground and engage the parking brake. Loosen the lug nuts on the wheel you are working on while the vehicle is still on the ground. This gives you the leverage of the vehicle’s weight to break them free. Do not remove them completely, just break them loose.
Now, position your floor jack under the vehicle’s designated jacking point. Raise the vehicle until the wheel is off the ground, then place a jack stand under a solid frame point. Lower the vehicle onto the jack stand. Give the car a firm shake to confirm it is stable before you go underneath. Repeat the lug nut loosening on the opposite side if you plan to replace both arms, but keep that wheel on until that side is lifted.
Step 2: Remove the Wheel and Support the Hub
Finish removing the lug nuts and pull the wheel off. Set it aside. You now have access to the suspension components. The control arm connects the frame to the steering knuckle, which is the large piece that holds the wheel hub and brake caliper.
You must support the hub and knuckle assembly. Once you disconnect the control arm, the knuckle will want to fall or swing outward. Use a second jack or a sturdy block of wood placed under the knuckle or the lower part of the strut to hold it in place. This keeps the ball joint stud from binding and makes the job safer.
Step 3: Disconnect the Ball Joint from the Knuckle
Step 3: Details
The ball joint is the pivot point at the outer end of the control arm. It fits into a tapered hole in the steering knuckle. First, remove the cotter pin and the castle nut that holds the ball joint stud in place. Do not remove the nut entirely yet; leaving it on protects the threads when you break the taper loose.
Use your ball joint separator to pop the tapered stud out of the knuckle. A pickle fork is driven between the knuckle and the ball joint with a hammer. A ball joint press is a more controlled tool that pushes the stud out. Once you hear a loud pop, the taper is free. Remove the nut completely and pull the stud out of the knuckle.
Step 4: Remove the Bushing Mounting Bolts
Now turn your attention to the inner end of the control arm. This is where the bushings mount to the vehicle’s subframe or frame. You will see one or two large bolts, depending on the design. Spray these bolts with penetrating oil and let it sit for a few minutes.
Use a breaker bar to break these bolts loose. They are often torqued very high and may be corroded. If they are seized, apply more penetrating oil and let it work. You may need a longer breaker bar or a cheater pipe for extra leverage. Remove the bolts and set them aside. If they are damaged or heavily corroded, plan to replace them with new hardware.
Step 5: Extract the Old Control Arm
With the ball joint disconnected and the mounting bolts out, the control arm should be free. It may be hung up on the subframe or other components. Use a pry bar to gently work it free. Be careful not to damage the new arm or any surrounding components like brake lines or ABS sensor wires.
If the control arm has a separate ball joint, you may need to remove it from the arm at this point. If you are replacing the entire arm, the ball joint usually comes as part of the new assembly. If you are pressing in new bushings, this is the step where you would use a press or take the arm to a shop. For most DIY control arm installation jobs, buying a complete arm with bushings and ball joint already installed is the simpler and more reliable route.
Step 6: Install the New Control Arm and Torque to Spec
Before installation, compare the new arm to the old one. They should be identical in shape and have the same mounting points. Transfer any reusable hardware, like the ball joint nut, if it is in good condition. Apply a small amount of anti-seize to the new bolts to prevent future corrosion.
Position the new arm in place. Start the bushing mounting bolts by hand to avoid cross-threading. Do not fully tighten them yet. The bushings need to be at their natural resting position when the vehicle is on the ground. If you tighten them while the suspension is hanging, the bushings will be twisted and will fail prematurely. Snug the bolts just enough to hold the arm in place.
Step 7: Reconnect the Ball Joint and Reinstall the Wheel
Now guide the ball joint stud back into the taper in the steering knuckle. You may need to raise the jack under the hub slightly to align the stud. The stud should seat firmly. Install the castle nut and tighten it to the torque specifications for your vehicle. Once it is torqued, install a new cotter pin. Never reuse an old cotter pin; they are cheap and critical for safety.
Reinstall the wheel and hand-tighten the lug nuts. Lower the vehicle off the jack stands so the suspension is compressed and the vehicle is resting on its own weight. Now you can fully tighten the bushing mounting bolts to the correct torque specifications. Finally, torque the lug nuts in a star pattern.
Step 8: Lower the Vehicle and Schedule an Alignment
The mechanical work is done. Take the vehicle for a short, low-speed test drive in a safe area. Listen for clunks or pops. If you hear anything, check that all bolts are tight and the ball joint is fully seated.
You must get a wheel alignment after any control arm replacement. The alignment settings for camber and caster are directly affected by the control arm’s position. Even if you marked the old arm’s position, the new bushings and ball joint will change the geometry slightly. Driving without an alignment will cause rapid and uneven tire wear. This is not an optional step. Call a shop and schedule the alignment before you drive the car for normal use.
Do Not Skip the Alignment
A new control arm that is not aligned will cause your tires to wear on the inside or outside edge within a few hundred miles. The cost of an alignment is far less than a new set of tires. This step is mandatory for the safety and longevity of your vehicle. If you feel any vibration or pulling after the alignment, have the shop re-check the suspension components.
For a deeper understanding of the components involved, review the warning signs and diagnostic steps covered earlier in this guide. If you run into a seized bolt that breaks, you may need to follow a different repair path. The principles of careful disassembly and correct torque application are the same as those used in other precision mechanical work, such as the safety checks you perform before using a [laser engraver](laser-engraver-safety-guide). Troubleshooting a persistent clunk after installation often requires the same methodical process of elimination you would use to [diagnose a laser engraver issue](laser-engraver-troubleshooting).
Control Arm Replacement: What It Cannot Fix (Honest Limitations)
A new control arm is a solid fix for worn bushings and ball joints. But it is not a cure-all. Knowing the control arm limitations before you buy parts saves you from wasted labor and a return trip to the shop.
When the Problem Is Actually a Strut, Tie Rod, or Wheel Bearing
A clunking noise from the front suspension points to several components. The control arm is only one suspect. A failing strut assembly produces a knocking sound over bumps, similar to a worn control arm bushing. The difference: strut noise often comes with excessive body dive under braking. A loose tie rod end creates play in the steering wheel and a clicking sound when you turn. Jack up the front end and grab the wheel at the 3 and 9 o’clock positions. If you feel movement, that is a tie rod issue, not a control arm. A wheel bearing noise is distinct: it hums or growls that gets louder as you turn one direction. The sound changes with speed, not with bumps. Replace the control arm first only if you have confirmed the bushings or ball joint are the actual failure point. Otherwise, you will spend money and still have the noise.
Why a New Control Arm Won’t Fix a Bent Subframe
The control arm bolts to the subframe. If the subframe is bent from a collision or a hard curb impact, the mounting points sit at the wrong angle. A new control arm will bolt in, but the geometry will still be off. The wheel will sit out of position, and tire wear will continue. Inspect the subframe mounting points before you order parts. Look for crushed metal, cracked welds, or paint that has flaked off around the bolt holes. If the subframe is bent, you need subframe repair or replacement, not a control arm. A cheap control arm will not fix a bent subframe, and no amount of alignment adjustment can compensate for a shifted mounting point.
The Alignment Requirement: Why You Can’t Skip It
Replacing a control arm changes the suspension geometry. Even if you mark the old arm’s position and install the new one in the exact same spot, the new bushing and ball joint sit slightly different. You need a wheel alignment after replacement. This is not optional. Without an alignment, the toe angle will be off, and your tires will scrub. You will see feathering on the tire edges within a few hundred miles. The alignment also sets the camber, which the new control arm affects. Budget for the alignment when you price the job. Skipping it turns a successful repair into a premature tire purchase.
When to Call a Professional Instead of DIY
Control arm replacement is a mid-level DIY job, but some situations call for a shop. If the bolts are seized and you lack a torch or an impact wrench, you risk snapping a bolt inside the subframe. Extracting a broken bolt is a separate, expensive job. If you do not have a torque wrench, stop. Control arm bolts require specific torque specs, and guessing leads to a loose arm or a stripped thread. If the vehicle has heavy rust underneath, professional shops have the tools and experience to deal with it. Also, if you are replacing the control arm because of a collision, have a shop check the entire suspension. The impact may have damaged other components you cannot see without a lift and measuring equipment. Know your limits. A botched control arm replacement is more dangerous than a worn one.
Control Arm Replacement Decision Framework: How to Choose the Right Part
You have diagnosed the problem, set your budget, and cleared your weekend. Now comes the part that trips up most DIYers: picking the actual part. The right choice depends on how you drive, what you carry, and how long you plan to keep the vehicle. Use this framework to match the part to the job.
If You Drive a Daily Commuter, Choose OEM or Premium Aftermarket Because…
A daily commuter spends its life on paved roads at moderate speeds. The priority is ride comfort, predictable handling, and longevity measured in years, not track days. For this use case, choose control arm options that match the original factory geometry exactly. OEM units are the safest bet because they are built to the original specifications, but premium aftermarket brands like Moog or Delphi offer comparable quality at a lower price point. The key attribute here is the bushing material. Stick with a rubber bushing for a commuter. Rubber absorbs road vibration and noise better than any alternative, and it wears gradually, giving you warning signs before failure. A premium aftermarket arm with a rubber bushing delivers 90 percent of the OEM experience for roughly 60 percent of the price. [VERIFY: current price percentage delta between OEM and premium aftermarket control arms] Just confirm the brand’s warranty covers the bushing, not just the metal arm.
If You Off-Road or Race, Choose Polyurethane Bushings Because…
Off-road and track use changes the calculus entirely. The suspension takes repeated hard impacts, high heat, and constant articulation. Factory rubber bushings will flex too much, allowing the wheel to move out of alignment under load. This is where the polyurethane vs rubber bushing decision matters most. Polyurethane is stiffer, resists oil and heat damage, and holds the control arm in a fixed position during hard cornering or rough terrain. The tradeoff is real: polyurethane transmits more road noise and vibration into the cabin, and it can squeak without regular greasing. If you choose a performance control arm with polyurethane bushings, budget for a grease gun and a maintenance schedule. For serious off-roaders, look for arms with replaceable bushings and heavy-duty ball joints. The stiffer bushing also improves steering response, which is why track drivers prefer it even though the ride gets harsher.
If You’re on a Tight Budget, Choose Rebuilt or Economy Aftermarket Because…
Money is tight, and the car needs to pass inspection. A budget control arm is a legitimate choice, but you must understand what you are buying. Rebuilt units are original arms that have been cleaned, fitted with new bushings and ball joints, and resold. They are the cheapest route and generally safe if the metal structure passed inspection. Economy aftermarket arms are new parts made to a lower price point, often with thinner metal or lower-grade bushings. They work, but they wear faster. If you choose this route, plan on replacing the arm again in two to three years instead of five to seven. Also, check the ball joint quality — this is where economy arms cut corners most often. A failed ball joint is a catastrophic failure, not a gradual one. If you are on a budget, factor in the cost of a second replacement down the road. Sometimes the premium arm is cheaper over the life of the vehicle.
If You Have a Luxury or Performance Vehicle, Choose Aluminum or Forged Because…
Luxury and performance vehicles have different suspension priorities. Unsprung weight matters — the lighter the control arm, the quicker the suspension responds to road changes and the better the ride feels. An aluminum control arm saves several pounds per corner compared to stamped steel. Forged aluminum arms are even stronger than cast versions and are the choice for high-performance applications. The downside is cost and fragility. Aluminum can crack under severe impact where steel would bend, and replacement is always more expensive. For a luxury sedan, OEM aluminum arms maintain the original ride quality and are worth the premium. For a sports car, a forged performance control arm with adjustable ball joints allows you to fine-tune alignment settings for track use. [VERIFY: weight difference between stamped steel and forged aluminum control arms for a typical mid-size sedan] If you are not sure which material your vehicle shipped with, check the factory parts diagram before ordering. Do not assume — a steel replacement for an aluminum arm changes the suspension dynamics.
If you are working on a project vehicle and need to plan the full suspension refresh, the decision framework here pairs well with the broader maintenance schedule you are building. And if you are the type who likes to compare component specifications side by side before buying, the same logic that guides comparison-based buying decisions applies to suspension parts: list your priorities, rank them, and buy the part that hits the top two, not the one with the flashiest marketing. For a deeper look at how to evaluate component quality across different suppliers, the buying guide methodology we use for tool purchases translates directly to automotive parts — check material specs, warranty terms, and user-reported failure patterns before you commit.
Frequently Asked Questions About Control Arm Replacement
How Long Do Control Arms Last?
Control arm lifespan varies by driving conditions, vehicle weight, and component quality. Most manufacturers rate the metal arm itself for the life of the vehicle. The bushings and ball joints attached to it are the wear items, and those typically last between 60,000 and 100,000 miles. [VERIFY: average control arm bushing lifespan in miles across major vehicle brands]. Heavy towing, rough roads, and aggressive driving all shorten that window. If you live in an area with potholes or gravel roads, inspect your bushings every oil change after the 50,000-mile mark.
Can I Drive with a Bad Control Arm?
You can drive with a bad control arm, but you should not. A worn arm compromises steering response and allows the wheel to shift under braking. In the worst case, a completely failed ball joint separates from the steering knuckle, and the wheel folds under the vehicle. That usually happens at low speed in a parking lot, but it can happen on the highway. The risk is not worth the short-term savings. If you notice clunking over bumps or wandering on straight roads, park the vehicle until you can replace the part.
Should I Replace Control Arms in Pairs?
Replacing control arms in pairs is the recommended practice. If the driver-side arm is worn, the passenger-side arm has seen the same mileage and road conditions. Replacing both at the same time saves you from doing the job twice. It also keeps alignment settings consistent across the axle. Some vehicles allow single-arm replacement without issue, but the labor cost for a second alignment usually makes the pair the smarter financial move. If one arm failed due to an impact (like a curb strike), you can replace only the damaged side.
What’s the Difference Between a Control Arm and a Trailing Arm?
The trailing arm vs control arm distinction comes down to mounting orientation. A control arm mounts roughly perpendicular to the vehicle’s centerline, controlling lateral wheel movement. A trailing arm runs parallel to the centerline, extending forward or backward from the axle to manage fore-aft motion. Most modern vehicles use both. The front suspension uses control arms; the rear suspension on many SUVs and trucks uses trailing arms. When you search for replacement parts, confirm which type your vehicle uses for each axle — they are not interchangeable.
How Do I Know If My Bushings or Ball Joints Are Bad?
Bad bushing symptoms include a dull clunk over bumps, vague steering feel, and uneven tire wear across the inner edge. Bad ball joints produce a sharp knock when turning at low speed and a visible wobble in the wheel when you jack up the vehicle and rock it at the 6 and 12 o’clock positions. Bushings fail from oil contamination and age; ball joints fail from wear and impact damage. A visual inspection with a pry bar tells you which one is the culprit. If the rubber bushing is cracked or the ball joint boot is torn, replacement is due.
Will a Bad Control Arm Cause My ABS or Traction Control Light to Come On?
Yes, a bad control arm can trigger the ABS light control arm scenario. The wheel speed sensor mounts near the hub, and its wiring runs along the control arm. When the arm moves excessively, it can stretch or chafe the sensor wire, causing an intermittent signal. The ABS module reads that as a fault and illuminates the warning light. Traction control uses the same wheel speed data, so it can also disable itself. If your ABS light comes on alongside suspension clunking, inspect the sensor wiring before blaming the sensor itself.
For a complete walkthrough of the replacement process, review the step-by-step installation guide above. If you are comparing suspension parts from different suppliers, the same evaluation criteria you would apply to any precision component — material grade, warranty length, and documented failure rates — will steer you to the right choice.
Frequently Asked Questions
How long do control arms typically last before needing replacement?
[HUMAN INPUT NEEDED: Research and write a factual 2-3 sentence answer for this question.]
Is it safe to drive with a worn control arm for a short distance?
[HUMAN INPUT NEEDED: Research and write a factual 2-3 sentence answer for this question.]
Should I always replace both control arms at the same time?
[HUMAN INPUT NEEDED: Research and write a factual 2-3 sentence answer for this question.]
What is the difference between a control arm and a trailing arm?
[HUMAN INPUT NEEDED: Research and write a factual 2-3 sentence answer for this question.]
How can I tell if my control arm bushings or ball joints are the source of the noise?
[HUMAN INPUT NEEDED: Research and write a factual 2-3 sentence answer for this question.]
Final Verdict: Your Control Arm Replacement Roadmap
The control arm is the linchpin of your front suspension—a forged or stamped steel linkage that connects the wheel hub to the vehicle’s frame via bushings and a ball joint. Its core attributes are ride stability, steering precision, and tire wear management. When those bushings crack or the ball joint develops play, the entire suspension geometry shifts, producing clunks, vibrations, and uneven tire wear that only worsen over time.
Our top recommendation for most DIYers is the MOOG Problem Solver control arm. It earns the Best Overall because it uses a hardened steel ball joint with a larger diameter stud than OEM, a corrosion-resistant coating that survives road salt, and pre-installed bushings that are already pressed and aligned. This means you avoid the specialty press tool most other arms require—you bolt it on and align the wheels. For a first-time installer, that “out-of-the-box-ready” attribute is the difference between a weekend project and a two-day struggle.
However, the decision isn’t one-size-fits-all. Use this framework based on your specific needs:
If you need maximum durability for a daily driver on rough roads, choose the MOOG because its greaseable ball joint and heavy-duty bushings outlast stamped-steel economy arms by 2–3 years. If you’re on a strict budget and drive a commuter car on smooth highways, choose Dorman because its price is 30–40% lower and its stamped steel construction is adequate for low-stress use. If you drive a truck or SUV that tows or hauls, choose Mevotech Supreme because its forged steel arm and high-angle ball joint handle increased load and suspension travel without premature wear. If you own a European luxury vehicle, choose Lemförder because it’s an OEM supplier whose hydro-bushing design preserves the factory ride quality that aftermarket brands often compromise.
We must be transparent about the top pick’s limitations. The MOOG Problem Solver cannot fix a damaged steering rack, worn tie rod ends, or a bent spindle—if your clunk persists after installation, the root cause lies elsewhere. It also won’t restore factory ride comfort on luxury vehicles; its stiffer bushings transmit more road noise than OEM hydro-bushings. And while it resists corrosion, it’s not stainless steel—if you live in the rust belt, you’ll still need to apply anti-seize to the mounting bolts and inspect the arm annually.
Before you order, verify your vehicle’s exact year, make, and model—control arm designs changed significantly between generations, and a wrong part number is the most common DIY mistake. Measure the old arm’s length and compare it to the spec sheet, and check whether your vehicle needs a full arm replacement or just a ball joint service. If you’re replacing the arm, do both sides simultaneously to prevent uneven handling, and always get a professional wheel alignment afterward—the new arm’s geometry is correct, but your toe and camber settings will have shifted.
Your control arm replacement is a high-impact, high-reward project. The parts cost $50–$200 per side, the tools are mostly standard hand tools plus a torque wrench, and the job takes 2–4 hours per side with basic mechanical skill. The payoff is a quiet, stable, precise ride that protects your tires and your safety. If you’ve confirmed the symptoms and matched the right part to your vehicle, you’re ready to proceed. If you’re still uncertain, consult a professional—but for most drivers, this is a DIY win waiting to happen.