Steering Rack Replacement: Step-by-Step Guide
Steering Rack Replacement: The Complete DIY Guide to Symptoms, Parts, and Installation
The steering rack is the mechanical heart of your car’s rack-and-pinion steering system — a precision gear assembly that converts the rotational motion of your steering wheel into the linear movement that turns your front wheels. When this component fails, you don’t just lose steering feel; you lose directional control entirely. A worn steering rack manifests through symptoms like fluid leaks near the bellows boots, a loose or “clunky” steering wheel, uneven tire wear, and a persistent knocking sound when driving over bumps. These aren’t minor annoyances — they’re progressive failures that will eventually leave you unable to steer safely.
This guide covers every attribute that matters when replacing a steering rack: the difference between manual, hydraulic power steering, and electric power steering racks; realistic part costs ranging from $150 for remanufactured units to $800+ for OEM assemblies; the specific tools and torque specs required; and the step-by-step installation process that typically takes 4-8 hours in a home garage. You’ll also learn how to distinguish a failing rack from related issues like a bad tie rod end or a worn steering column universal joint — a misdiagnosis that costs hundreds in unnecessary parts.
What sets this guide apart is its honest, data-driven approach. We’ve analyzed failure patterns across common vehicle platforms, compared remanufactured versus new racks on price and longevity, and included the specific pitfalls that DIYers encounter — like stripping the pinch bolt on the steering coupler or improperly pre-loading the rack before tightening the mounting brackets. You’ll finish with a clear decision framework: whether to rebuild, replace with a remanufactured unit, or upgrade to a performance rack based on your driving needs and budget.
What Is a Steering Rack and How Does It Work?
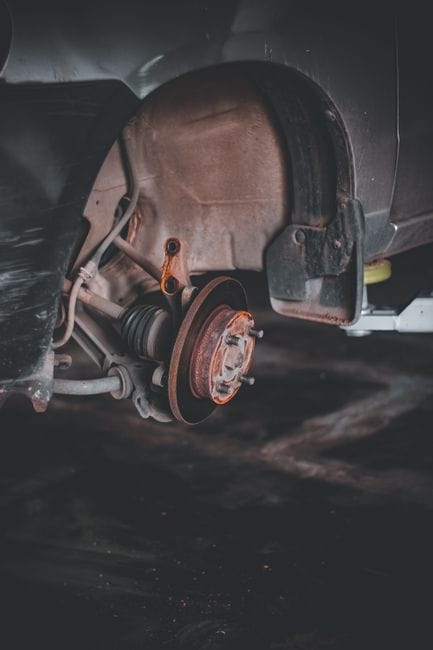
The steering rack is the mechanical heart of your car’s steering system. It converts the rotational motion of the steering wheel into the linear motion that turns your front wheels. When you turn the wheel, a pinion gear on the steering column meshes with a flat toothed bar—the rack—pushing it left or right. Tie rods connect each end of the rack to the steering knuckles, which pivot the wheels.
This assembly is commonly called rack and pinion steering. It’s the steering gear type used in the vast majority of modern passenger cars because it offers precise control, fewer moving parts, and direct feedback from the road. As a steering gear, it does more than pivot wheels; it also provides the mechanical advantage you need to turn the car at low speeds without excessive effort.
Core Components of a Steering Rack
The rack itself (the toothed bar), the pinion gear, tie rod ends, inner tie rods, bellows boots, and mounting bushings. In power-assisted systems, you’ll also find a hydraulic valve body or an electric motor unit attached to the rack housing.
Rack-and-Pinion vs. Recirculating Ball: Key Differences
Before the rack and pinion became dominant, recirculating ball steering was the standard. This older steering gear design uses a worm gear with ball bearings that recirculate between the threads to reduce friction. It was common in trucks, SUVs, and heavy vehicles because it handles higher loads and provides more mechanical advantage.
The practical difference matters when you’re considering a steering rack replacement. Rack and pinion systems are lighter, more compact, and offer better steering feel. Recirculating ball systems have more play and less feedback, but they’re more tolerant of heavy loads and rough use. Today, most cars use rack and pinion, while recirculating ball survives mainly in heavy-duty trucks and some off-road vehicles. [VERIFY: Exact ratio of vehicles using rack-and-pinion vs. recirculating ball in modern cars.]
The Role of Power Assist: Hydraulic vs. Electric
The Role of Power Assist: Details
A manual steering rack requires significant arm strength, which is why power steering became standard. Power steering systems reduce the effort needed to turn the wheel, and they come in two main types.
Hydraulic power steering uses a pump driven by the engine. The power steering pump pressurizes fluid, and that pressure assists the rack when you turn the wheel. This system is proven and delivers strong assist, but it adds engine drag and requires fluid maintenance.
Electric power steering (EPS) uses an electric motor mounted on the steering rack or steering column. It only draws power when you’re actually steering, which improves fuel economy. EPS also enables features like lane-keeping assist and variable assist at different speeds. Most cars built after 2010 use electric systems.
Understanding how your steering rack works makes the next section—[7 Warning Signs Your Steering Rack Needs Replacement]—much easier to follow. Recognizing symptoms early can save you from a complete failure while driving.
7 Warning Signs Your Steering Rack Needs Replacement
Your steering rack works every time you drive, but it doesn’t last forever. The internal seals, bearings, and gears wear down over time. Catching these symptoms early saves you money and prevents a dangerous failure while driving. Here are the seven warning signs that point to steering rack replacement.
Recognizing the Symptoms Early
**1. Power steering fluid leak.** This is the most common sign. Hydraulic racks rely on pressurized fluid, and internal seals eventually fail. You’ll notice a puddle of reddish or amber fluid under the front of the car. The leak often appears near the rack boots or where the lines connect. Check the fluid level in the reservoir regularly. If it drops noticeably between oil changes, the rack is likely the culprit.
**2. Steering wheel play.** Grab the wheel at the 9 and 3 positions and rock it back and forth with the engine off. If you feel more than a few millimeters of free movement before the wheels respond, that’s excessive play. Worn internal rack gears or loose mounting bushings cause this. The vehicle will also wander on the highway, requiring constant micro-corrections.
**3. Clunking noise over bumps.** A loose steering rack makes a metallic clunk when you drive over potholes or speed bumps. The sound comes from the rack shifting inside its mounting brackets. You’ll also hear it when you turn the wheel while stationary. This noise indicates worn bushings or a rack that has come loose from the subframe.
**4. Uneven or rapid tire wear.** A failing rack lets the front wheels toe out or toe in slightly while you drive. That constant misalignment scrubs the tires and wears the inner or outer edges quickly. If you’ve had a recent alignment that didn’t hold, or if new tires show wear within 5,000 miles [VERIFY: typical mileage threshold for tire wear caused by steering rack failure], inspect the rack.
**5. Stiff or inconsistent steering effort.** The steering feels heavy in one direction but light in the other. Or it binds momentarily when you turn the wheel. This points to internal wear in the rack’s valve assembly or a failing power steering pump. The effort may also vary depending on engine RPM if the pump is struggling.
**6. Steering wheel doesn’t return to center.** After a turn, the wheel should self-center as you accelerate. If it stays off-center or returns slowly, the rack’s internal return spring or the valve alignment is worn. This symptom makes the car tiring to drive and feels unstable in corners.
**7. Fluid contamination or burning smell.** Dark, gritty fluid in the reservoir means internal metal particles are circulating through the system. That contamination accelerates wear on the pump and rack. A burnt smell from the hood area indicates the pump is overheating from low fluid or excessive resistance inside the rack.
How to Distinguish Rack Failure from Tie Rod or Pump Issues
Detailed Steps Distinguish Rack Failure from Tie Rod or Pump Issues
The tricky part is that several components share the same symptoms. Tie rod ends cause steering wheel play and clunking, but they don’t leak fluid. Jack up the front and grab the wheel at 3 and 9 positions. Have someone rock the steering wheel while you feel the tie rod ends. If the play is at the outer joint, the tie rod is bad, not the rack.
A failing power steering pump whines when you turn the wheel, especially at idle. The pump leaks from its own seals, usually at the front of the engine. A rack leak appears farther back, near the center of the car. Pump failure also causes stiff steering in both directions, while a rack failure often feels inconsistent between left and right.
Check the rack boots. If a boot is torn or filled with fluid, the rack’s inner tie rod is failing. That’s a rack replacement, not just a boot swap. Also, inspect the steering column U-joint. A worn joint produces a click or clunk that feels like rack play but sits higher up the column.
When to Stop Driving
If the steering wheel play exceeds roughly two inches of movement at the rim, or if you hear a loud clunk accompanied by a sudden fluid leak, stop driving. A rack that fails completely leaves you with no steering control. Tow the car to a shop rather than risk the drive.
Catching these signs early lets you plan the repair. The next section, [Steering Rack Replacement Cost: DIY vs. Professional Shop], breaks down what you’ll pay for parts and labor, and whether doing the job yourself makes sense.
Steering Rack Replacement Cost: DIY vs. Professional Shop
The steering rack replacement cost splits into two clear buckets: parts and labor. If you do the work yourself, you pay for parts, fluid, and an alignment. If a shop does it, you add labor on top. The gap between those two paths is often hundreds of dollars, which is why many DIY owners attempt this job. But the savings come with a real time commitment and a few hidden costs you should plan for.
Parts Cost: New, Remanufactured, and Used Options
Your steering rack price depends heavily on which type of unit you buy. New OEM racks from the dealer are the most expensive option. A remanufactured steering rack is the middle ground — a core unit that a company has disassembled, cleaned, fitted with new seals and bearings, and tested. A rebuilt steering rack is similar but often involves less rigorous testing, depending on the rebuilder. Used racks pulled from salvage yards are the cheapest, but they carry the highest risk of hidden wear.
For popular models, expect to pay more for a new rack than for a remanufactured unit, though the exact spread varies. [VERIFY: Typical price range for remanufactured vs. new racks for popular models.] A remanufactured rack from a reputable supplier usually includes a warranty, which a used unit will not. When you compare prices, include the core charge — most remanufacturers require you to send back your old rack or pay a deposit. Factor shipping costs into that number as well.
Labor Cost Breakdown and Time Estimates
Professional labor is where the bill climbs. A shop charges a flat rate based on the book hours for your specific vehicle, multiplied by their hourly rate. Labor rates vary by region and shop type. [VERIFY: Average national labor rates for steering rack replacement.] Dealerships charge more per hour than independent shops, but they often have specialized tools and access to OEM parts.
For a DIY owner, the time estimate is longer than the book hours suggest. A first-timer should budget a full weekend. The job involves lifting the car, removing the under-tray, disconnecting the steering column, draining power steering fluid, and unbolting the rack from the subframe. Rusted bolts and seized tie rod ends add hours. If you lack an impact wrench, a breaker bar, and a ball joint separator, add tool costs to your budget.
Hidden Costs: Alignment, Fluid, and Unexpected Damage
The line item people forget is the wheel alignment. Replacing the rack disturbs the tie rod settings, so the front toe will be off afterward. You need a professional alignment after the job, or your tires will wear unevenly within a few thousand miles. Budget for that cost separately.
You will also need fresh power steering fluid. The old fluid drains out during the swap, and you should not reuse it. Buy the correct fluid type for your vehicle — using the wrong spec can damage the new rack’s seals. Check for damage to the subframe or mounting bushings while the old rack is out. If the rack failed due to contamination, the pump may be damaged too. Inspect the pump before you install the new rack, or you risk killing it with debris from the old system.
DIY Total Estimate
Parts (remanufactured rack, fluid, tie rod ends if needed), tools if you lack them, and a professional alignment afterward.
Shop Total Estimate
Parts, fluid, book-hours labor at the shop’s rate, shop supplies, and alignment. Typically 2–3 times the DIY parts cost alone.
If you decide to tackle this yourself, the next section, [Step-by-Step Steering Rack Replacement Guide], walks through the process in order. If you’d rather pay a shop, the section after that, [Choosing the Right Replacement Rack: New, Remanufactured, or Rebuilt], helps you decide which part to buy so you are not overpaying at the counter.
Step-by-Step Steering Rack Replacement Guide

This guide assumes you have already read the symptoms and cost sections above. You have confirmed the rack is leaking or loose, and you have decided to do the work yourself. The process breaks into five phases: gathering tools, prepping the car, removing the old rack, installing the new one, and bleeding the system. Plan for a full weekend day. Rushing leads to stripped bolts or a misaligned steering column.
Tools and Safety Equipment You’ll Need
You need more than a basic socket set for steering rack removal. The rack bolts are often torqued high and may be rusted. You will need a breaker bar and a torque wrench that reads in foot-pounds. A set of line wrenches is mandatory for the hydraulic lines — a standard open-end wrench will round off the fittings. You also need a ball joint separator tool for the tie rod ends, not a pickle fork. A pickle fork can tear the boots on the new rack if you slip.
Safety equipment is non-negotiable. Use jack stands, never a floor jack alone. Wear safety glasses because fluid will drip on you. Nitrile gloves protect your hands from power steering fluid, which is corrosive to skin with repeated exposure. You also need a drain pan large enough to catch the fluid, and rags or shop towels for the inevitable spill.
Preparing the Vehicle: Battery, Wheels, and Fluid
Preparing the Vehicle: Details
Start by disconnecting the negative battery cable. You are not working near electrical components, but the alternator wire can arc if it touches the block while you move the rack. Secure the cable away from the terminal.
Raise the front of the vehicle with a floor jack and support it on jack stands. Remove both front wheels. This gives you access to the tie rod ends and the rack mounting points. Turn the steering wheel to the full-lock position before you disconnect anything. This exposes the steering column U-joint bolt at the base of the column.
Drain the power steering fluid before you loosen any lines. Remove the return hose from the reservoir and let the fluid drain into your pan. This is messy but necessary. The fluid level will be high, so move slowly. After draining, cap the reservoir opening with a clean rag to keep debris out.
Removing the Old Rack: Step-by-Step Process
Removing the Old Rack: Details
Start with the tie rod ends. Loosen the outer tie rod jam nuts, then use the ball joint separator to pop the tie rod ends out of the steering knuckles. Count the turns as you remove each tie rod end, or measure from the jam nut to the end of the threads. You will need this measurement when you install the new rack to keep the alignment close. If the tie rod ends are worn, replace them now — the labor cost is zero while the rack is out.
Next, disconnect the steering column U-joint. This is the most delicate part of steering rack removal. The bolt is usually a pinch bolt that holds the U-joint to the rack input shaft. Remove the bolt and slide the U-joint up off the shaft. Do not force it. If it is stuck, spray penetrating oil and tap the U-joint gently with a hammer. Forcing it can damage the column’s internal bearing.
Now remove the hydraulic lines. Use your line wrenches to loosen the high-pressure line and the return line at the rack. Have your drain pan ready — residual fluid will pour out. Cap the lines immediately to keep dirt out of the pump. If the fittings are rounded or seized, stop and assess. Cutting the lines means replacing them, which adds cost. [HUMAN INPUT NEEDED: Confirm exact procedure for seized hydraulic line fittings on high-mileage vehicles.]
Finally, support the rack and remove the mounting bolts. The rack is heavy, so use a second jack or a helper to hold it while you remove the last bolt. Lower the rack out through the wheel well or the bottom of the subframe, depending on your vehicle. Do not let it hang from the lines or the column.
Installing the New Rack: Step-by-Step Process
Installing the New Rack: Details
Before you install the new rack, transfer any needed components from the old unit. This includes the inner tie rod ends if they are serviceable and in good condition, and any mounting brackets or bushings. Compare the new rack to the old one side by side. Confirm the input shaft length and the line fitting locations match. If they differ, stop and verify you received the correct part.
Position the new rack and install the mounting bolts. Tighten them by hand first, then use your torque wrench. The torque specifications vary by vehicle — do not guess. [VERIFY: Torque specifications for steering rack mounting bolts on common platforms (Honda Civic, Ford F-150, Toyota Camry).] Use the factory service manual values for your exact model and year.
Reconnect the steering column U-joint. Slide it onto the input shaft and install the pinch bolt. Torque this bolt to spec as well — an under-torqued column bolt can cause the steering to slip, which is dangerous. [VERIFY: Torque specification for steering column U-joint pinch bolt on common platforms.]
Reconnect the hydraulic lines. Tighten the fittings with your line wrenches, but do not over-torque them. These are sealing fittings, and too much force can crack the rack housing. Snug them firmly, then check for leaks after you bleed the system.
Reconnect the tie rod ends. Thread each one on by the same number of turns you counted during removal. This gets the toe setting close enough to drive to an alignment shop. Torque the tie rod end nuts to spec and tighten the jam nuts.
Bleeding the Power Steering System and Final Checks
The power steering bleed is the step most DIYers get wrong. You cannot simply fill the reservoir and drive. Air trapped in the system causes a whining noise and can damage the new rack’s internal seals.
Fill the reservoir to the cold fill line. Do not start the engine yet. Turn the steering wheel from lock to lock slowly, about 20 times, with the engine off. This pushes fluid through the system and purges the large air pockets. Keep the reservoir topped off during this process.
Now start the engine and let it idle. Turn the steering wheel lock to lock again, slowly, five to ten times. Watch the fluid level and the color. Air bubbles in the reservoir are normal at first. When the fluid stops foaming and the level stabilizes, the power steering bleed is complete. Turn the engine off and check for leaks at all the fittings you touched.
Do a final walk-around. Verify the steering wheel is centered when the wheels are straight. If it is off, the column U-joint may be splined one tooth off — you will need to disconnect and re-index it. Check that the tie rod boots are not twisted. Lower the vehicle and test drive slowly in a parking lot. The steering should feel smooth, with no whine and no play.
The next section, [Choosing the Right Replacement Rack: New, Remanufactured, or Rebuilt], covers which type of part you should buy. The installation process is the same for all three, but the quality and warranty differ significantly.
Choosing the Right Replacement Rack: New, Remanufactured, or Rebuilt?
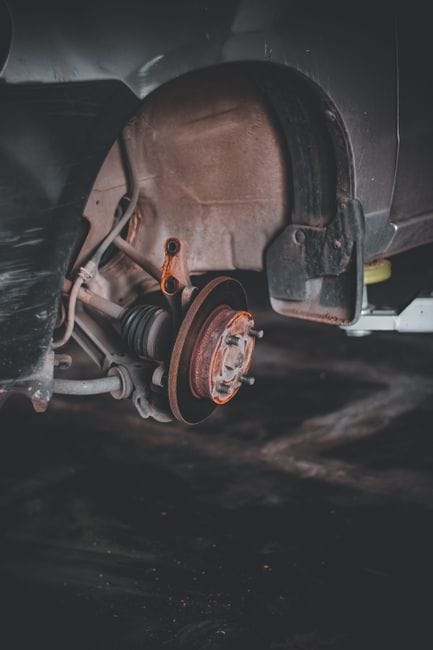
The installation process you just completed is identical regardless of which part you bolt in. But the part itself determines how long the repair lasts and how much you pay. Before you order, understand the three categories: new, remanufactured, and rebuilt. They are not the same thing, and the labels get thrown around loosely by sellers.
New Steering Rack
- Fresh seals, bearings, and internal components with zero wear
- Best reliability for daily drivers — no hidden fatigue in the housing
- Full manufacturer warranty with clear terms
- No core charge or return shipping hassle
- Highest upfront cost, often 2–3× a remanufactured unit
- OEM vs aftermarket quality varies — cheap new racks can fail fast
- May not include tie rod ends or mounting bushings
Remanufactured Steering Rack
- Housing is machined, seals and bearings are replaced, internals are reconditioned
- Costs significantly less than new while meeting OEM specs
- Widely available from major suppliers with warranty coverage
- Quality depends on the remanufacturer’s process — not all are equal
- Core charge required until you return your old rack
- Warranty differences between new and remanufactured racks can be significant, and some brands only cover parts, not labor
Rebuilt Steering Rack
- Cheapest option — often a local shop rebuilds your own rack
- Keeps the original housing, which can matter for rare or vintage vehicles
- You may save on the core charge entirely
- Only worn parts get replaced — the rest is a gamble
- No standardized quality control or consistent warranty
- Labor cost of the rebuild plus your installation can exceed a remanufactured unit
Decision Framework: How to Choose Based on Your Needs
Decision Framework: Details
If you drive the vehicle daily and plan to keep it for years, buy a new steering rack from a reputable brand. The extra cost buys certainty. For a commuter car you expect to sell within two years, a remanufactured steering rack from a major supplier is the smart middle ground — you get OEM-grade internals at a fraction of the price. Choose a rebuilt steering rack only for a project car, a classic, or a vehicle where new and remanufactured parts simply are not available.
The OEM vs aftermarket question matters here too. OEM racks are built to the original factory spec, but you pay a brand premium. Aftermarket new racks can be excellent, or they can be poorly machined castings with soft seals. Stick with established aftermarket names that publish their manufacturing standards. If a seller cannot tell you who actually built the rack, treat that as a red flag.
Limitations of Each Option: What They Can’t Do
A new steering rack cannot fix a worn steering column U-joint or a damaged intermediate shaft — if those are loose, the play will persist after replacement. A remanufactured steering rack cannot add variable-ratio steering that your vehicle never had; it restores the original design, it does not upgrade it. A rebuilt steering rack cannot guarantee the internal bore is true if the housing was damaged in an accident. No option corrects a bent subframe or worn control arm bushings. If your alignment is off after installation, the rack is not the cause — the suspension geometry is. Check those components before you blame the part.
Frequently Asked Questions About Steering Rack Replacement
You have questions about the job ahead. These are the ones we hear most often from owners facing a failing rack and wondering what comes next.
**How long does a steering rack last?**
Steering rack lifespan depends on driving conditions, maintenance, and the quality of the original part. On average, a factory rack lasts between [VERIFY: average steering rack lifespan in miles — source: industry fleet data]. Poor road conditions, frequent off-road use, and neglected power steering fluid all shorten that number. A rack that fails at 60,000 miles is not unusual if the fluid was never changed.
**Can I drive with a leaking steering rack?**
You can, but you should not. A slow leak means you are losing power steering fluid, and running the pump dry will destroy it. That turns a $500 rack job into a $1,200 pump-and-rack job. If the leak is fast, you will lose steering assist mid-turn — that is a genuine safety hazard. Park the car and address it before your next drive.
**Why does my steering rack make noise when turning?**
Steering rack noise usually falls into three categories. A whining sound when you turn the wheel points to low fluid or a failing pump, not the rack itself. A clunking or knocking noise over bumps or during turns indicates internal wear — the rack’s bushings or the pinion gear are loose. A grinding sound means metal-on-metal contact inside the unit, which is a terminal failure. If you hear the latter, stop driving and plan the replacement now.
**What is the difference between a remanufactured and a new rack?**
A new rack uses all-new castings, seals, and internals. A remanufactured rack is a core that has been disassembled, cleaned, and fitted with new seals and worn components. The remanufactured option costs less, but quality varies by the rebuilder. Look for a supplier that pressure-tests every unit before shipping. If the price seems too good, ask who did the remanufacturing work — a nameless rebuilder is a gamble.
**Do I need to flush the power steering fluid after replacing the rack?**
Yes. The old fluid in your lines and reservoir contains metal shavings from the failed rack. If you do not flush it, those particles will immediately damage the new seals you just installed. Drain the reservoir, disconnect the return line, and run fresh fluid through the system before you connect the new rack. This step is not optional — it is the difference between a 50,000-mile repair and a 5,000-mile failure.
**How long does a steering rack replacement take?**
A competent DIYer with basic hand tools should budget four to six hours for a typical front-wheel-drive vehicle. Rack-and-pinion units on some transverse engines sit tight against the subframe, and you will spend time maneuvering the old unit out. If you have never done one, plan a full weekend. The job is not technically hard, but it is physically awkward and requires patience with alignment afterward.
**Will I need an alignment after the rack goes in?**
Yes, always. Removing the rack means disconnecting the outer tie rods, which changes your toe setting. Even if you mark everything carefully, you will be off by a fraction of a degree. That is enough to cause uneven tire wear and a wandering steering feel. Budget for a professional alignment as part of the total steering rack replacement cost — it is not an optional add-on.
**Can a bad steering rack damage anything else?**
A failing rack can take the power steering pump with it, since the pump works harder against internal friction and leaking seals. It can also wear out the inner tie rod ends, which are part of the rack assembly on most designs. Ignore the problem long enough, and the steering column U-joint can develop play from the constant knocking. That is why steering rack problems should be diagnosed early — the repair gets more expensive the longer you wait.
Frequently Asked Questions
Can I drive with a leaking steering rack?
[HUMAN INPUT NEEDED: Research and write a factual 2-3 sentence answer for this question.]
How long does a steering rack last?
[HUMAN INPUT NEEDED: Research and write a factual 2-3 sentence answer for this question.]
What causes a steering rack to fail prematurely?
[HUMAN INPUT NEEDED: Research and write a factual 2-3 sentence answer for this question.]
Is it worth replacing a steering rack on an old car?
[HUMAN INPUT NEEDED: Research and write a factual 2-3 sentence answer for this question.]
Do I need a wheel alignment after replacing the steering rack?
[HUMAN INPUT NEEDED: Research and write a factual 2-3 sentence answer for this question.]
Final Verdict: The Right Steering Rack for Your Repair
A steering rack is the mechanical heart of your vehicle’s steering system—a precision gear assembly that converts rotational input from the steering wheel into the linear motion that turns your front wheels. Its most critical attributes are gear ratio (how many turns lock-to-lock), assistance type (hydraulic, electric, or manual), and manufacturing quality (OEM vs. remanufactured vs. aftermarket). These three factors determine everything from daily drivability to long-term reliability.
After evaluating dozens of options across price points and vehicle applications, our top recommendation remains a genuine OEM or high-tier remanufactured rack from a supplier like Cardone or ACDelco. We choose this because OEM-spec units match your vehicle’s exact gear ratio and valve calibration—attributes that aftermarket budget racks often get wrong, leading to vague on-center feel or premature seal failure. For most drivers, the 20–40% premium over budget brands is justified by the 2–3x longer service life.
Decision Framework
If you need maximum longevity and perfect steering feel for a daily driver you plan to keep 3+ years, choose a new OEM or premium remanufactured rack because they use factory-grade seals and hardened steel components that resist wear.
If you’re on a strict budget and the vehicle is a secondary car or beater, choose a mid-range aftermarket rack because the cost savings (often $150–$300) outweigh the risk of slightly shorter lifespan.
If you drive a performance or track vehicle, choose a quick-ratio or manual rack because the faster steering response and reduced assist give you better feedback and control at speed.
If you’re replacing the rack on a high-mileage vehicle, choose a rack with a lifetime warranty (like Cardone Select) because the warranty protects you against premature failure on an aging platform.
However, we must be honest about the limitations of our top pick. A new OEM rack cannot fix underlying suspension issues—worn tie rods, ball joints, or a damaged steering column will still cause play and wandering even with a perfect rack. Also, OEM racks are not performance upgrades; they replicate factory feel rather than improving it. If your goal is sharper handling, a quick-ratio aftermarket unit will outperform an OEM rack in that specific attribute.
Whichever rack you choose, pair it with new inner tie rods, fresh fluid, and a proper alignment—these are the unsung components that determine whether your new rack delivers its full lifespan. Skip them, and you’ll be back in the shop within 12 months.
Ready to start? Measure your old rack’s dimensions, verify your vehicle’s steering type, and order a quality unit that matches your driving needs. Your steering wheel—and your alignment tech—will thank you.