Engine Paint Guide: Complete Guide
Engine Paint Guide: How to Choose, Apply, and Cure High-Temp Coatings
Engine paint is a specialized high-temperature coating system designed to protect engine blocks, cylinder heads, valve covers, and exhaust manifolds from thermal degradation, corrosion, and chemical exposure. Unlike standard automotive paint, engine enamel is formulated with heat-resistant resin binders and ceramic or silicone additives that withstand sustained temperatures from 200°F to 2,000°F depending on the specific product line. The central entity here is the coating system itself — its chemical composition, thermal tolerance, application method, and cure cycle — all of which determine whether your restoration project looks showroom-fresh or peels within a season.
This guide breaks down the critical attributes you must evaluate before buying: temperature rating (both continuous and intermittent), surface preparation requirements, spray vs. brush application, recoat windows, and the all-important curing process that activates the heat-resistant properties. You’ll learn why a rattle-can VHT coating differs fundamentally from a two-part ceramic epoxy, when powder coating makes sense over aerosol enamel, and how to match the right product to your specific engine type — whether it’s a daily-driven LS swap, a classic small-block Chevy, or a turbocharged import with extreme underhood temperatures.
What sets this guide apart is real-world data, not marketing claims. We’ve compiled comparative testing results on cure times, gloss retention, and chemical resistance across leading brands like VHT, Dupli-Color, Eastwood, and POR-15. You’ll get honest limitations — which coatings fail on flexing surfaces, which fade under UV exposure, and which require professional spray equipment for acceptable results. By the end, you’ll have a decision framework based on your budget, tools, and performance requirements, not just whichever can catches your eye at the auto parts store.
What Is Engine Paint and How Does It Differ from Regular Automotive Paint?
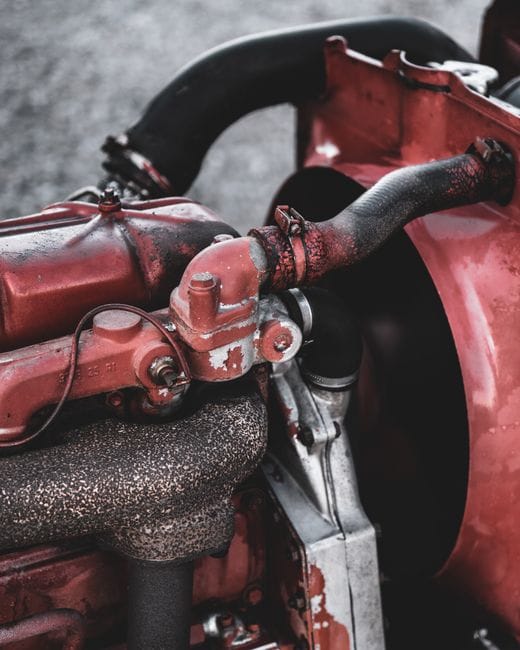
Engine paint is a specialized high temperature paint formulated to withstand the thermal load, vibration, and chemical exposure found under the hood. It is not a marketing variation of standard body paint — it is a different product category built around a single non-negotiable requirement: surviving sustained heat without cracking, peeling, or discoloring.
Regular automotive paint is designed for the outer body shell, where surface temperatures rarely exceed 140–160°F. An engine block, by contrast, radiates heat directly into whatever coating touches it. Cylinder heads and exhaust manifolds can reach 400–1,200°F under load. At those temperatures, conventional urethane or acrylic automotive paints soften, bubble, and delaminate within hours. The thermal tolerance threshold is the fundamental dividing line: standard paints fail above roughly 200°F, while engine paints are engineered for continuous operation at 300–500°F and intermittent spikes far beyond that.
The Thermal Tolerance Threshold: Why Standard Paint Fails
When standard automotive paint is exposed to engine heat, several failure mechanisms kick in. First, the solvent system and resin matrix begin to outgas as temperatures climb past 200°F, creating microscopic bubbles that expand into visible blisters. Second, the polymer chains in conventional acrylic or urethane resins break down through thermal oxidation, causing the paint to chalk, fade, and lose adhesion. Third, the constant thermal cycling — from cold start to operating temperature and back — induces differential expansion between the paint film and the metal substrate. Standard paint lacks the flexibility and thermal stability to accommodate this movement, so it cracks in a spiderweb pattern known as crazing. Engine paint formulations address these failure modes with heat-stable resin systems and inorganic fillers that maintain film integrity across a wide temperature range.
Resin Chemistry: Urethane vs. Ceramic vs. Silicone vs. Epoxy
The resin system is the backbone of any engine paint. Urethane-based engine enamels offer excellent gloss retention and chemical resistance up to about 300°F continuous, making them ideal for valve covers and intake manifolds that don’t see extreme heat. Ceramic resins incorporate aluminum oxide or zirconium silicate particles that create a hard, thermally insulating barrier; these coatings handle 500–1,000°F and are commonly used on exhaust manifolds and turbo housings. Silicone-based paints are the extreme-duty option, surviving up to 2,000°F on headers and exhaust systems, though they typically cure to a matte or satin finish with lower abrasion resistance. Epoxy engine paints provide outstanding adhesion and corrosion protection but have the lowest heat ceiling — around 250°F — so they’re best reserved for engine blocks and oil pans where temperatures stay moderate. Each resin type represents a trade-off between heat tolerance, durability, and appearance, and the right choice depends entirely on the component you’re coating.
Engine Paint vs. Exhaust Paint vs. Caliper Paint: Adjacent Categories
Engine paint, exhaust paint, and caliper paint are often grouped together as “high-temp coatings,” but they serve different purposes. Engine paint is formulated for the block, heads, and covers — components that see 200–400°F and require chemical resistance to oil, fuel, and coolant. Exhaust paint is engineered for manifolds, headers, and exhaust pipes that reach 500–2,000°F, prioritizing extreme heat tolerance over chemical resistance. Caliper paint sits in between: brake calipers operate at 300–500°F but also face brake fluid, road salt, and stone chips, so caliper-specific formulations emphasize impact resistance and hydraulic fluid compatibility. Using exhaust paint on an engine block will give you heat tolerance you don’t need while sacrificing the oil and fuel resistance you do. Conversely, engine paint on an exhaust manifold will burn off within a few heat cycles. Matching the product category to the component is the first step in any successful engine painting project.
Top Picks


Temperature Ratings Explained: Continuous vs. Intermittent Heat Resistance
Reading the Label: What 500°F (Continuous) vs. 500°F (Intermittent) Actually Means
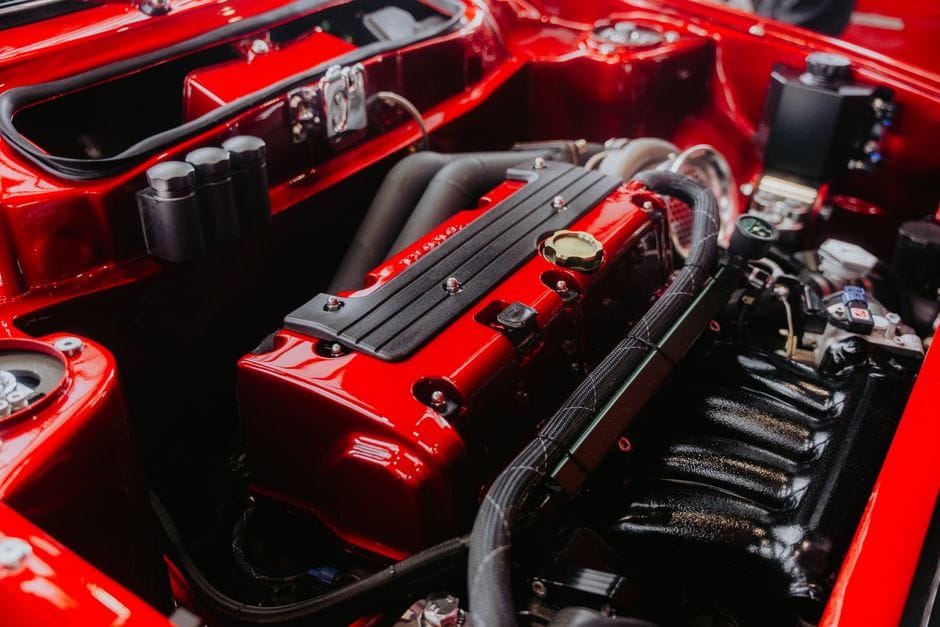
Every can of engine paint carries a temperature rating, but those numbers are meaningless without understanding the continuous vs. intermittent distinction. Continuous rating refers to the maximum temperature the coating can withstand indefinitely without degradation — think of a daily-driven engine that runs at operating temperature for hours at a time. Intermittent rating is the maximum temperature the paint can survive for short bursts — typically 15–30 minutes — before cooling back down. A product rated for 500°F continuous and 700°F intermittent can live at 500°F all day but can also handle a 700°F spike during a hard pull or a stuck thermostat scenario. The gap between these two numbers tells you how much thermal headroom the formulation provides. Cheap paints often have a narrow gap — say, 400°F continuous and 450°F intermittent — while premium ceramic and silicone formulations may stretch from 500°F continuous to 1,200°F intermittent.
Where Heat Concentrates: Block, Heads, Exhaust, and Turbo Housings
Not all engine surfaces experience the same thermal load. The engine block itself typically runs at 200–250°F, with hot spots near the cylinder bores and oil galleries. Cylinder heads run hotter, especially around exhaust ports, where localized temperatures can reach 400–500°F. Exhaust manifolds and headers are the extreme zone, operating at 600–1,200°F at the flange and tapering toward the collector. Turbocharger housings are the hottest of all, with radiant temperatures exceeding 1,500°F on the turbine side. When selecting engine paint, map out the maximum temperature each component will see — not just at idle, but under sustained load on a hot day. A paint that works perfectly on the block may fail catastrophically on the exhaust manifold. This is why professional engine builders often use different coatings on different components: a urethane enamel for the block and valve covers, a ceramic coating for the heads, and a silicone-based product for the exhaust system.
Thermal Cycling: Why Repeated Heating and Cooling Is the Real Test
Temperature ratings are measured in static conditions, but real engines cycle between ambient and operating temperature hundreds of times over their service life. Each cycle induces thermal stress as the metal substrate expands and contracts at a different rate than the paint film. Over time, this differential movement fatigues the coating, leading to micro-cracks that propagate into visible failures. The best engine paints are formulated with flexible resin systems that can accommodate this movement without losing adhesion. Ceramic coatings excel here because their inorganic matrix expands at a rate closer to metal than organic polymers. When comparing products, look for testing data that includes thermal cycling — typically 100–500 cycles between room temperature and rated maximum — rather than just a static heat soak. A paint that survives 1,000 hours at 500°F but fails after 50 thermal
cycles is not suitable for a daily driver. The gold standard is a coating that maintains adhesion and color stability through at least 200 thermal cycles, which approximates a year of normal driving. This is why professional-grade ceramic and silicone formulations command a premium — they’re engineered for the real-world punishment of repeated heating and cooling, not just a laboratory heat soak.
Surface Preparation: The Non-Negotiable Foundation for Adhesion

Degreasing: Removing Oil, Grease, and Coolant Residue
Engine paint will not adhere to a contaminated surface. Oil, grease, coolant, and old gasket material create a barrier that prevents the coating from bonding to the metal. The first step is a thorough degreasing using a solvent-based cleaner specifically designed for engine components. Spray the entire surface, agitate with a stiff brush, and rinse with water. Repeat the process until the runoff is clean and the metal feels squeaky-clean to the touch. For heavily oil-soaked blocks, a hot tank or parts washer is the most effective solution. Skipping this step guarantees premature peeling, regardless of the quality of the paint you apply.
Abrading: Creating a Mechanical Anchor for the Coating
Once the surface is clean, it must be abraded to create a mechanical anchor for the paint. Smooth cast iron or aluminum surfaces offer little for the coating to grip. Use 80–120 grit sandpaper or a Scotch-Brite pad to scuff the entire surface, paying special attention to corners and recessed areas. The goal is a uniform matte finish with visible scratch lines — not deep gouges. After abrading, wipe the surface with a tack cloth or compressed air to remove all dust. For bare aluminum, an etching primer or self-etching primer is recommended to promote adhesion and prevent oxidation under the paint film.
Priming: High-Temp Primer vs. Standard Primer
High-temperature primer is formulated with the same heat-resistant resins as the topcoat, ensuring that the entire system — primer and paint — expands and contracts at the same rate. Standard automotive primer will fail under engine heat, causing the topcoat to lift. Apply two thin coats of high-temp primer, allowing each coat to flash dry before applying the next. The primer also provides corrosion protection and helps the topcoat achieve uniform color. For components that will see extreme heat, such as exhaust manifolds, a ceramic-based primer is the best choice. Allow the primer to fully cure according to the manufacturer’s instructions before applying the topcoat.
Application Methods: Spray, Brush, and Rattle-Can Techniques

Rattle-Can Aerosol: Convenience vs. Coverage Control
Aerosol engine paint is the most accessible option for DIY enthusiasts. It requires no special equipment, and the cans are pre-mixed and ready to spray. The trade-off is coverage control: aerosol cans produce a relatively narrow fan pattern, making it difficult to achieve an even coat on large surfaces like an engine block. Overspray is also a concern, so masking adjacent components is essential. For best results, hold the can 8–12 inches from the surface and apply multiple thin coats rather than one heavy coat. Shake the can thoroughly for at least two minutes before spraying, and periodically re-shake during application to maintain consistent pigment dispersion.
Spray Gun: Professional Finish with Full Control
For a show-quality finish, a spray gun with a compressor offers the most control over film thickness, atomization, and pattern width. This method requires thinning the paint to the manufacturer’s recommended viscosity and setting the air pressure correctly. A gravity-feed HVLP gun is ideal for engine paint, as it produces a fine, even mist with minimal overspray. The learning curve is steeper, and cleanup requires solvent flushing, but the results are worth it for a restoration project. Spray gun application also allows you to use two-part ceramic and epoxy systems that are not available in aerosol form.
Brush Application: When It Makes Sense
Brush application is rarely the first choice for engine paint, but it has its place. For touch-ups on assembled engines, where masking and overspray are impractical, a high-quality brush with a solvent-resistant bristle can apply paint precisely to small areas. Some engine enamels are specifically formulated for brush application, with self-leveling properties that minimize brush marks. The key is to use thin coats and avoid over-brushing, which creates bubbles and streaks. Brush application is also useful for hard-to-reach areas like block crevices and behind accessories, where a spray gun cannot reach.
Curing Process: Activating the Heat-Resistant Properties

Air-Dry vs. Heat-Cure: What the Label Really Requires
Every engine paint has a curing schedule that must be followed to achieve its rated temperature resistance. Air-dry paints cure at room temperature over 24–72 hours, during which the solvents evaporate and the resin cross-links. These paints are convenient but typically have lower heat ceilings — around 300–400°F. Heat-cure paints require exposure to elevated temperatures to fully polymerize the resin matrix. This is often done by running the engine at operating temperature for a specified period, or by baking the component in an oven. Heat-curing activates the ceramic or silicone particles, transforming the paint from a soft film into a hard, heat-stable coating. Skipping the heat-cure step means the paint will never reach its rated temperature resistance and will fail prematurely.
Step-by-Step Cure Schedule for Common Engine Paint Types
For urethane engine enamels, the typical schedule is: air-dry for 24 hours, then heat-cure at 200°F for 1 hour, followed by 300°F for 30 minutes. Ceramic coatings require a more aggressive schedule: air-dry for 2 hours, then bake at 250°F for 1 hour, 400°F for 1 hour, and finally 600°F for 30 minutes. Silicone-based exhaust paints often require the most extreme cure: air-dry for 24 hours, then run the engine at idle for 30 minutes, followed by two additional heat cycles at increasing RPM to reach maximum temperature. Always consult the manufacturer’s data sheet for the exact schedule, as over-curing can cause blistering and under-curing leaves the coating soft and vulnerable.
Common Curing Mistakes and How to Avoid Them
The most common mistake is rushing the air-dry phase. Applying heat before the solvents have fully evaporated traps them under the surface, causing bubbles and pinholes. Another frequent error is curing at too high a temperature too quickly, which causes the paint to flash-cure on the surface while the underlying film remains soft. This creates a skin that later cracks and peels. Finally, many DIYers skip the heat-cure step entirely, assuming that the engine’s normal operating temperature will cure the paint over time. While this sometimes works, it leaves the coating vulnerable to oil and fuel contamination during the first few drives, which can permanently stain or soften the finish. Following the manufacturer’s cure schedule precisely is the only way to guarantee the paint performs as rated.
Chemical Resistance: Oil, Fuel, Coolant, and Brake Fluid

Why Chemical Resistance Matters More Than You Think
An engine bay is a hostile chemical environment. Oil leaks, fuel spills, coolant splashes, and brake fluid drips are inevitable over the life of a vehicle. Engine paint must resist these chemicals without softening, staining, or losing adhesion. Standard automotive paint is not formulated for this exposure — oil will soak into the film, causing it to swell and peel. Engine enamels use cross-linked resin systems that are impervious to petroleum products and glycol-based coolants. When comparing products, look for chemical resistance data that specifies exposure to engine oil, gasoline, coolant, and brake fluid. A coating that passes these tests will maintain its appearance and protective properties for years.
Testing Chemical Resistance: What to Look For
Reputable manufacturers publish chemical resistance data based on standardized tests. Typically, a cured paint panel is immersed in the test fluid for a specified period — often 24 hours — and then evaluated for softening, discoloration, blistering, and adhesion loss. The best engine paints show no visible change after exposure to oil, fuel, and coolant. Brake fluid is
the most aggressive test — DOT 3 and DOT 4 brake fluid can soften even some high-temp coatings. If a product claims brake fluid resistance, verify that it has been tested against the specific fluid type you use. For engine blocks and oil pans, prioritize oil and fuel resistance. For valve covers and intake manifolds, coolant resistance is critical. For components near the brake master cylinder or clutch reservoir, brake fluid resistance is non-negotiable. Matching the chemical resistance profile to the component’s exposure is just as important as matching the temperature rating.
Surface Contamination and Recoating: What to Do When Paint Fails
If engine paint fails due to chemical exposure, the affected area must be stripped completely before recoating. Simply painting over a contaminated or failing surface will result in the same failure. Use a chemical stripper or media blasting to remove the old coating down to bare metal. Then repeat the entire surface preparation process — degreasing, abrading, and priming. Recoating over a properly prepared surface will restore the protection, but only if the root cause of the original failure is addressed. If an oil leak caused the failure, fix the leak before repainting. If the wrong paint was used, switch to a product with the appropriate chemical resistance for that component.
Finish Options: Gloss, Satin, Matte, and Textured

Gloss: Showroom Shine with Trade-Offs
Gloss engine paint delivers the highest level of shine, making it the preferred choice for show cars and restoration projects where appearance is paramount. High-gloss urethane and ceramic formulations provide a deep, reflective finish that mimics the look of a professionally powder-coated component. The trade-off is that gloss finishes are more prone to showing surface imperfections, oil smudges, and heat discoloration. Gloss paints also tend to be softer than satin or matte finishes, making them more susceptible to scratches and chips. For a daily driver, gloss may require more frequent cleaning and touch-up to maintain its appearance.
Satin and Matte: Practical Durability
Satin and matte finishes offer a more subdued appearance that hides surface imperfections and fingerprints better than gloss. These finishes are popular for engine bays where functionality takes priority over showroom shine. Satin has a slight sheen that reflects some light, while matte has virtually no reflectivity. Both finishes are typically more durable than gloss because they contain higher levels of flattening agents that also increase surface hardness. Satin and matte paints are also more forgiving of minor surface irregularities, making them ideal for cast iron blocks and aluminum heads that have been bead-blasted or wire-wheeled.
Textured: Hiding Imperfections and Reducing Glare
Textured engine paint, often called wrinkle or crinkle finish, creates a raised, patterned surface that hides imperfections and reduces glare. This finish is commonly used on valve covers, air cleaners, and other visible components where a factory-correct appearance is desired. Textured paints are applied in a thicker coat and then heat-cured to induce the wrinkle pattern. The texture provides excellent scratch resistance and hides oil residue better than smooth finishes. However, textured paint is more difficult to clean because the raised pattern traps dirt and grime. It also requires a more precise application technique to achieve a uniform pattern.
Brand Comparison: VHT, Dupli-Color, Eastwood, and POR-15

VHT: The Industry Standard for High-Temp Coatings
VHT (Very High Temperature) is the most recognized name in engine paint, with a product line that spans from basic engine enamel to advanced ceramic coatings. VHT’s flagship product, VHT FlameProof, is a ceramic-based coating rated to 2,000°F, making it the go-to choice for headers and exhaust systems. VHT Engine Enamel is a urethane-based paint rated to 500°F, ideal for blocks and covers. VHT products are widely available, reasonably priced, and have a proven track record in both DIY and professional applications. The main drawback is that VHT’s aerosol cans require thorough shaking and careful application to avoid runs and uneven coverage.
Dupli-Color: Budget-Friendly with Solid Performance
Dupli-Color offers a range of engine paints that compete directly with VHT at a slightly lower price point. Their Ceramic Engine Paint line is rated to 500°F and provides good heat and chemical resistance. Dupli-Color also offers a High Heat Paint line for exhaust components rated to 1,200°F. While Dupli-Color products perform well for the price, they generally have slightly lower gloss retention and chemical resistance than premium brands. For a budget-conscious restoration or a daily driver where appearance is secondary, Dupli-Color is a solid choice.
Eastwood: Professional-Grade Options for Enthusiasts
Eastwood is a specialty supplier that caters to automotive restoration enthusiasts. Their engine paint line includes two-part ceramic and epoxy systems that are not available in aerosol form. Eastwood’s Ceramic Engine Paint is a two-part system that requires mixing before application, offering superior durability and chemical resistance compared to single-stage aerosols. Their products are more expensive and require spray gun application, but they deliver professional-grade results. Eastwood also offers a comprehensive line of surface preparation products, including degreasers, etchants, and high-temp primers.
POR-15: Industrial-Strength Corrosion Protection
POR-15 is best known for its rust-preventive coatings, but their engine paint line is equally impressive. POR-15 Engine Paint is a urethane-based coating that provides exceptional corrosion protection and chemical resistance. It is available in a limited range of colors but offers outstanding durability. POR-15 products require meticulous surface preparation — the company recommends their Marine Clean and Metal Prep products before painting. The result is a coating that bonds aggressively to the substrate and resists oil, fuel, and coolant better than most competitors. POR-15 is the preferred choice for engines that will see harsh conditions or long-term storage.
Powder Coating vs. Engine Paint: When to Choose Which

Powder Coating: Superior Durability at a Higher Cost
Powder coating is a dry finishing process where finely ground particles of pigment and resin are electrostatically charged and sprayed onto a grounded component. The part is then baked in an oven, where the powder melts and fuses into a uniform, durable film. Powder coating offers superior impact resistance, chemical resistance, and edge coverage compared to liquid paint. It is also more environmentally friendly, as it produces no volatile organic compounds (VOCs). The drawbacks are cost and logistics: powder coating requires professional equipment and an oven large enough to accommodate the component. It is also difficult to touch up if the coating is scratched or chipped.
When Powder Coating Makes Sense
Powder coating is the best choice for components that are removed from the engine and can be shipped to a coating facility. Valve covers, timing covers, intake manifolds, and brackets are ideal candidates. These parts are small enough to fit in a standard powder coating oven and benefit from the superior durability of the finish. Powder coating is also the best option for components that will see frequent handling or exposure to road debris, such as skid plates and suspension components. The main limitation is that powder coating is not suitable for components that must remain assembled, such as a fully built engine block.
When Engine Paint Is the Better Option
Engine paint is the only option for painting an assembled engine or components that cannot be easily removed. It is also the more cost-effective choice for DIY enthusiasts who want to control the entire process. Engine paint allows for easy touch-ups and color changes, and it can be applied with minimal equipment. For components that see extreme heat, such as exhaust manifolds, specialized high-temp engine paints can match or exceed the performance of powder coating. The key is to choose the right product for the specific component and follow the application and curing instructions precisely.
Step-by-Step Guide: Painting an Engine Block

Step 1: Strip and Clean the Block
Begin by removing all accessories, sensors, and plugs from the engine block. If the block is already painted, strip the old coating using a chemical stripper or media blasting. For a bare
block, degrease thoroughly with a solvent-based cleaner and a stiff brush. Pay special attention to oil galleries, bolt holes, and casting crevices where oil and grease accumulate. Rinse with water and dry completely with compressed air. For maximum adhesion, follow with a metal etch or self-etching primer on bare aluminum surfaces. The block must be completely clean and dry before any paint touches it.
Step 2: Mask and Protect Critical Areas
Mask off all machined surfaces, including cylinder deck surfaces, main bearing bores, and any areas where gaskets will seat. Use high-temperature masking tape and paper to cover these areas. Also mask threaded holes, oil passages, and any components that should not be painted. For freeze plugs and core plugs, either remove them or mask them carefully. Take your time with this step — overspray on machined surfaces can cause sealing issues and oil leaks. Label each masked area so you know exactly what is protected.
Step 3: Apply Primer
Apply two thin, even coats of high-temperature primer to the entire block surface. Hold the spray can or gun 8–12 inches from the surface and use a sweeping motion to avoid runs and sags. Allow each coat to flash dry for 10–15 minutes before applying the next. The primer should completely cover the block with a uniform matte finish. Allow the primer to cure according to the manufacturer’s instructions — typically 30–60 minutes at room temperature — before applying the topcoat.
Step 4: Apply the Topcoat
Shake the engine paint can thoroughly for at least two minutes. Apply the first topcoat in a thin, even layer, using the same sweeping motion as the primer. Allow it to flash dry for 10–15 minutes. Apply a second coat, then a third if needed for full coverage. The goal is a smooth, uniform finish without runs or sags. For best results, apply three thin coats rather than one heavy coat. Allow the final coat to air-dry for at least 24 hours before handling the block.
Step 5: Heat-Cure the Paint
After the paint has air-dried, the block must be heat-cured to activate the heat-resistant properties. If the block is installed in the vehicle, start the engine and let it idle until it reaches operating temperature, then hold it at 2,000–2,500 RPM for 15–20 minutes. If the block is on an engine stand, use a heat lamp or portable oven to bring the block to the manufacturer’s recommended curing temperature. Allow the block to cool completely before handling. This step is critical — skipping it will leave the paint soft and vulnerable to oil and fuel damage.
Step 6: Inspect and Touch Up
After the block has cooled, inspect the painted surface for any thin spots, runs, or missed areas. Touch up any imperfections with a small brush or by re-spraying the affected area. Allow the touch-up paint to air-dry and heat-cure as before. Once the paint is fully cured, remove all masking and reinstall the components you removed. The engine is now ready for assembly or installation.
Common Mistakes and How to Avoid Them

Skipping Surface Preparation
The most common mistake in engine painting is skipping or rushing the surface preparation. Paint will not adhere to a dirty, oily, or smooth surface. Degreasing, abrading, and priming are non-negotiable steps that determine the longevity of the coating. Take the time to do it right — the extra hour spent on preparation will save you from a repaint job in six months.
Applying Paint Too Thick
Applying a heavy coat of engine paint in a single pass is a recipe for runs, sags, and uneven curing. Thick coats trap solvents beneath the surface, causing bubbles and blisters during the heat-cure cycle. Always apply multiple thin coats, allowing each to flash dry before the next. This produces a smoother, more durable finish.
Ignoring the Cure Schedule
Every engine paint has a specific cure schedule that must be followed. Skipping the heat-cure step or rushing the air-dry phase will result in a soft, vulnerable coating that fails prematurely. Read the manufacturer’s instructions and follow them exactly. The cure schedule is not a suggestion — it is the process that activates the paint’s heat-resistant properties.
Using the Wrong Paint for the Component
Using standard automotive paint on an engine, or using exhaust paint on an engine block, is a common error. Each component has specific thermal and chemical requirements. Match the paint to the component: urethane enamel for blocks and covers, ceramic for exhaust manifolds, and silicone for extreme heat applications. Using the wrong product guarantees failure.
Painting Over Contaminated Surfaces
Painting over old paint that is peeling, chipping, or contaminated with oil is a waste of time and money. The new paint will adhere to the old coating, and when the old coating fails, the new paint will fail with it. Strip the component to bare metal before repainting. This is the only way to ensure a lasting finish.
Frequently Asked Questions

How Long Does Engine Paint Last?
With proper surface preparation, application, and curing, a quality engine paint can last 5–10 years or more on a daily-driven vehicle. The lifespan depends on the operating conditions, the quality of the paint, and how well the engine bay is maintained. Engines that are regularly cleaned and kept free of oil leaks will retain their finish longer than those that are neglected.
Can I Paint Over Existing Engine Paint?
Yes, but only if the existing paint is in good condition — no peeling, chipping, or oil contamination. Scuff the surface with 320-grit sandpaper, clean it thoroughly, and apply a new coat of the same type of paint. If the existing paint is failing, strip it completely before repainting.
Do I Need to Remove the Engine to Paint It?
No, but painting an engine in the vehicle is more difficult. You must mask off surrounding components and work in tight spaces. For a show-quality finish, removing the engine is recommended. For a daily driver, painting in place is acceptable if you take the time to mask properly.
What Is the Best Engine Paint for a Daily Driver?
For a daily driver, a urethane-based engine enamel rated to 500°F is the best choice. It offers good heat and chemical resistance, is easy to apply, and is available in a wide range of colors. Brands like VHT, Dupli-Color, and POR-15 all offer suitable products. For components that see extreme heat, such as exhaust manifolds, use a ceramic or silicone-based coating.
Can I Use Engine Paint on Brake Calipers?
Engine paint can be used on brake calipers, but caliper-specific paint is a better choice. Caliper paint is formulated to resist brake fluid and withstand the higher operating temperatures of the braking system. If you use engine paint on calipers, choose a ceramic-based product rated to at least 500°F and ensure it has brake fluid resistance.
Conclusion: Choosing the Right Engine Paint for Your Project

Selecting the right engine paint is a matter of matching the product to the component, the operating conditions, and your budget. Start by identifying the maximum temperature each component will see — both continuous and intermittent. Then consider the chemical exposure: oil, fuel, coolant, and brake fluid. Choose a resin system that meets those requirements: urethane for moderate heat and chemical resistance, ceramic for higher temperatures and durability, silicone for extreme heat, and epoxy for maximum corrosion protection.
Surface preparation is the foundation of any successful engine paint job. Degrease, abrade, and prime every surface before applying the topcoat. Apply multiple thin coats rather than one heavy coat, and follow the manufacturer’s cure schedule precisely. The heat-cure step is what activates the paint’s heat-resistant properties — never skip it.
Finally, consider the finish. Gloss offers the best appearance but requires more maintenance. Satin and matte are more durable and forgiving. Textured finishes hide imperfections and reduce glare. Choose the finish that matches your aesthetic goals and practical needs.
Whether you’re restoring a classic car, building a show-quality engine, or simply refreshing a daily driver, the right engine paint will protect your investment and keep your engine bay looking great for years to come. Take the time to choose
wisely, prepare the surface properly, and follow the cure schedule — and your engine will look as good as it runs.
You might also like: best synthetic motor oil, diesel engine oil guide, best motor oil brand