
Brake pedal feeling soft during traffic stops? Brake fluid probably holds moisture and air. Old fluid reduces stopping power and damages expensive brake components.
Many drivers ignore brake fluid until the pedal feels wrong. That mistake can destroy calipers, rust brake lines, and overheat the braking system during emergency stops.
A proper DIY brake fluid flush restores pedal feel and protects the hydraulic system. Most home mechanics can finish the job in 60 to 90 minutes with basic tools.
Why Should Drivers Flush Brake Fluid Regularly?
Brake fluid absorbs moisture over time. Moisture lowers boiling point, causes internal corrosion, and weakens braking performance during hard stops.
Most manufacturers recommend a brake fluid change interval of 2 to 3 years or every 30,000 to 45,000 miles. High humidity areas shorten fluid life faster.
Modern braking systems use sealed hydraulic pressure. Water contamination creates rust inside the master cylinder, ABS module, and brake calipers.
Here are common signs of contaminated brake fluid:
- Soft or spongy brake pedal
- Dark brown brake fluid
- Longer stopping distance
- ABS warning light
- Burning smell after heavy braking
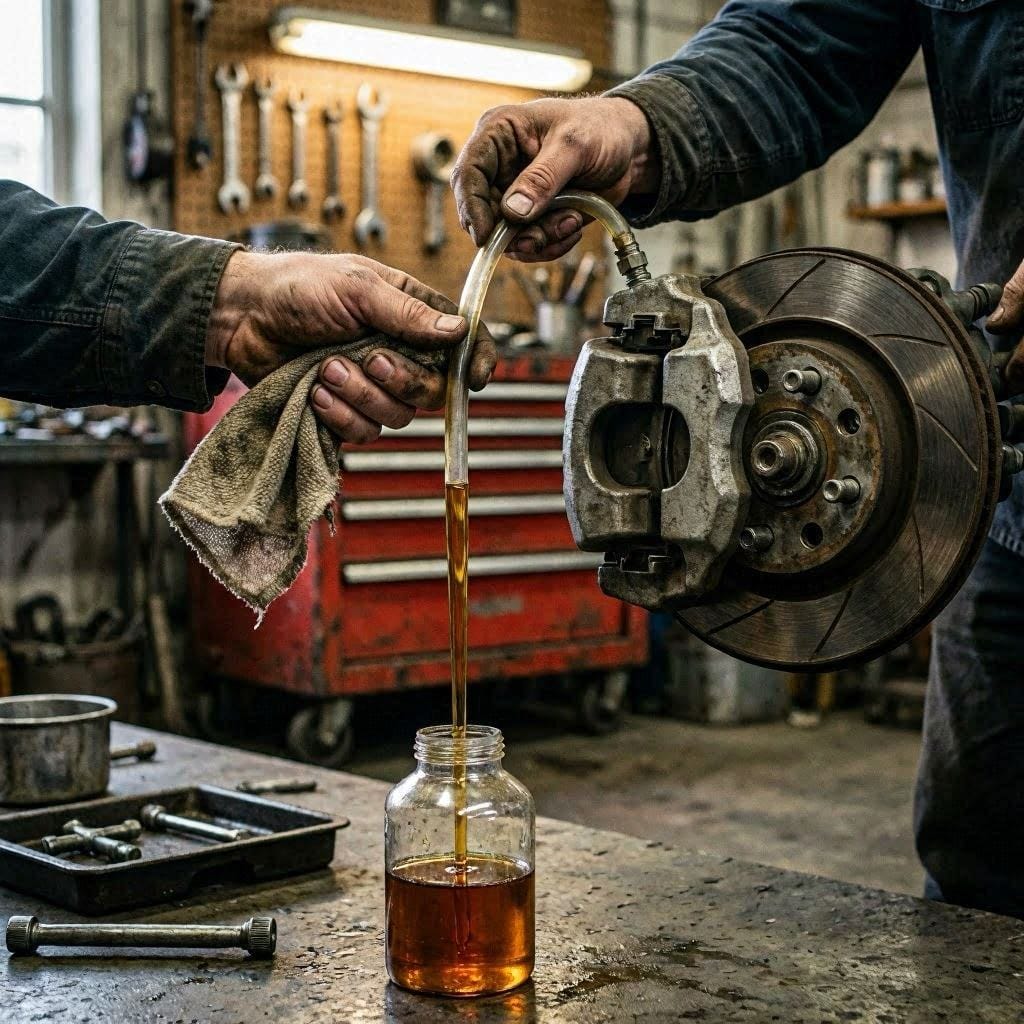
Never ignore dark brake fluid. Contaminated fluid can boil under heavy braking and cause sudden brake fade.
Insider Tip: Check fluid color with a flashlight. Fresh fluid looks light amber. Dirty fluid looks dark brown or black.
What Tools Do You Need to Flush Brake Fluid?
A complete brake fluid flush needs basic hand tools and the correct fluid type. Wrong fluid damages seals and ABS components.
Gather these tools before starting:
| Tool | Specification |
|---|---|
| Brake fluid | DOT 3, DOT 4, or DOT 5.1 |
| Box-end wrench | 8mm, 9mm, or 10mm |
| Clear vinyl hose | 3/16-inch inner diameter |
| Catch bottle | Chemical-resistant container |
| Floor jack | 2-ton minimum rating |
| Jack stands | 3-ton rated pair |
| Wheel chocks | Rubber or metal |
| Turkey baster | Fluid reservoir removal |
| Torque wrench | 20-100 lb-ft range |
| Safety gloves | Nitrile recommended |
Most passenger vehicles use DOT 3 or DOT 4 brake fluid. Always check the reservoir cap or owner’s manual first.
Never mix DOT 5 silicone fluid with glycol-based fluid. Mixing causes seal failure and unsafe braking.
Brake fluid damages paint within seconds. Cover painted surfaces with towels before opening the reservoir.
Insider Tip: Buy extra brake fluid. Most systems need 1 to 2 quarts for a full flush.
Which Brake Fluid Types Work Best for Different Vehicles?

Correct brake fluid types protect seals and maintain proper hydraulic pressure. Wrong fluid causes expensive brake system damage.
Here is a quick comparison:
| Brake Fluid | Dry Boiling Point | Common Use |
|---|---|---|
| DOT 3 | 401°F | Older passenger cars |
| DOT 4 | 446°F | Modern cars and SUVs |
| DOT 5 | 500°F | Military and classic cars |
| DOT 5.1 | 518°F | High-performance vehicles |
Most modern vehicles work best with DOT 4 fluid because it handles higher temperatures.
Avoid cheap no-name fluid brands. Quality fluid protects the ABS pump and seals longer.
Recommended trusted brands include:
- Bosch
- Prestone
- ATE
- Motul
Insider Tip: Open brake fluid only before use. Fluid absorbs moisture from air quickly after opening.
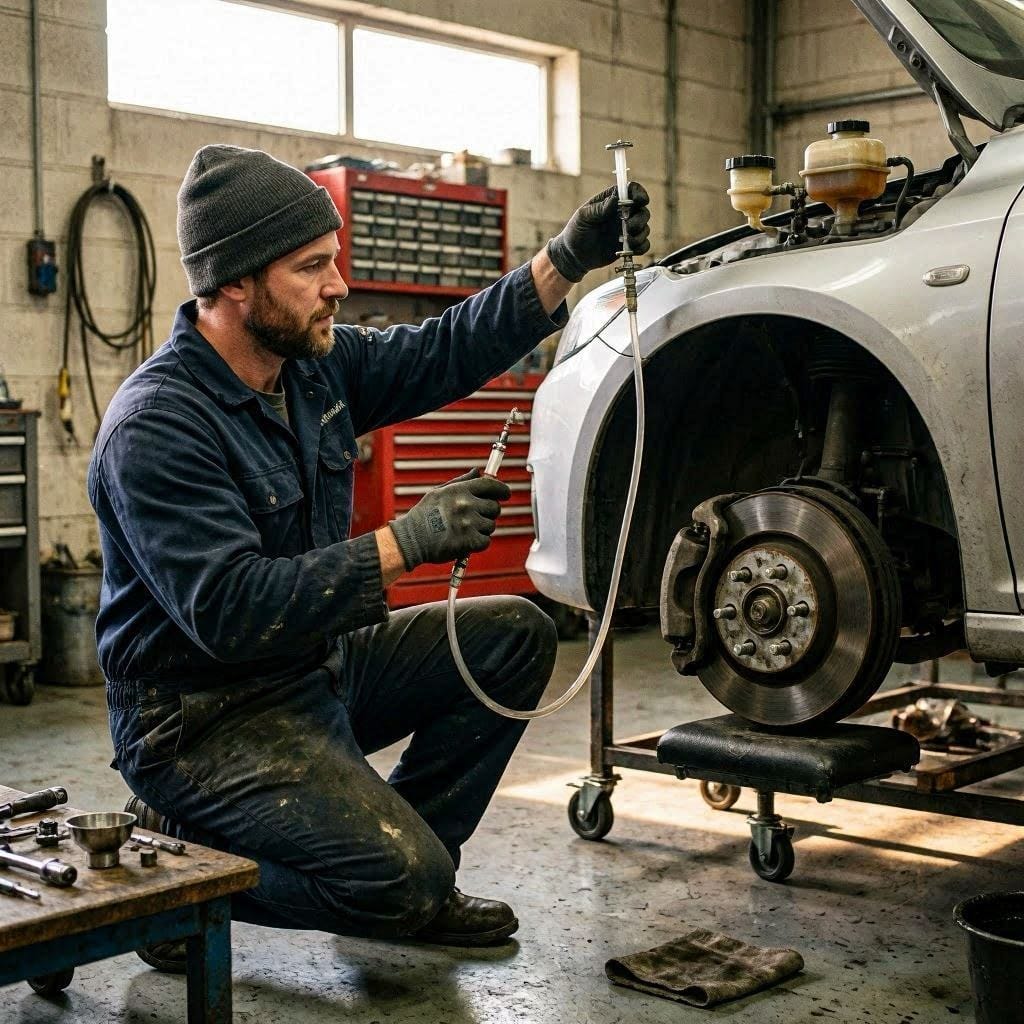
How Do You Prepare a Vehicle for a Brake Fluid Flush?

Safe vehicle setup prevents injuries and keeps air out of the brake system. Preparation also speeds up bleeding later.
Park on flat concrete before lifting the vehicle. Set the parking brake and place wheel chocks behind rear tires.
Lift the vehicle using factory jack points. Support the car with jack stands rated above vehicle weight.
Remove all four wheels for easy access to bleed screws.
Locate the brake fluid reservoir under the hood. Clean dirt around the cap before opening it.
Use a turkey baster to remove old fluid from the reservoir. Leave a small amount inside to prevent air entry.
Refill the reservoir with fresh brake fluid immediately.
Professional mechanics place a shop towel around the reservoir neck. The towel catches spills before paint damage starts.
Insider Tip: Spray penetrating oil on bleeder screws 15 minutes before loosening them.
What Is the Correct Brake Bleeding Order?
Correct bleeding order pushes old fluid out efficiently. Wrong order traps air inside the hydraulic system.
Most vehicles follow this sequence:
- Right rear wheel
- Left rear wheel
- Right front wheel
- Left front wheel
Vehicles with diagonal brake systems may differ. Check the repair manual for exact order.
The wheel farthest from the master cylinder usually comes first.
ABS-equipped vehicles sometimes require a scan tool to cycle the ABS pump during bleeding.
Insider Tip: Label each wheel with masking tape before starting. That step prevents confusion during reassembly.
How Do You Flush Brake Fluid Step by Step?
A proper brake fluid replacement removes old contaminated fluid completely. Clean fluid restores consistent brake pedal feel.
Follow these steps carefully.
Step 1: Connect the Bleeder Hose
Place the clear hose over the bleeder screw nipple. Put the other hose end inside the catch bottle.
Use the correct wrench size. Most bleed screws use 8mm or 10mm heads.
Step 2: Pump the Brake Pedal
Ask a helper to press the brake pedal slowly 3 to 5 times. Hold steady pressure on the last pump.
Never release the pedal with the bleeder open.
Step 3: Open the Bleeder Screw
Turn the bleeder screw about 1/4 turn counterclockwise. Old fluid and air bubbles will exit through the hose.
Close the bleeder before the helper releases the pedal.
Repeat the process until clean fluid appears.
Step 4: Monitor Reservoir Fluid Level
Check the reservoir after every few cycles. Never allow the fluid level below the MIN line.
Air entering the master cylinder creates extra bleeding work.
Step 5: Move to the Next Wheel
Repeat the same process following the correct wheel order.
Most vehicles require about 8 to 12 pedal cycles per wheel.
Step 6: Finish and Test
Fill the reservoir to the MAX line. Tighten bleed screws to manufacturer torque specifications.
Most bleed screws tighten between 80 and 120 in-lbs.
Reinstall wheels and torque lug nuts properly.
Pump the brake pedal several times before driving. The pedal should feel firm.
Never drive with a soft brake pedal after bleeding. Air still exists somewhere in the hydraulic system.
Insider Tip: Tap brake calipers lightly with a rubber mallet. Small trapped air bubbles rise faster afterward.
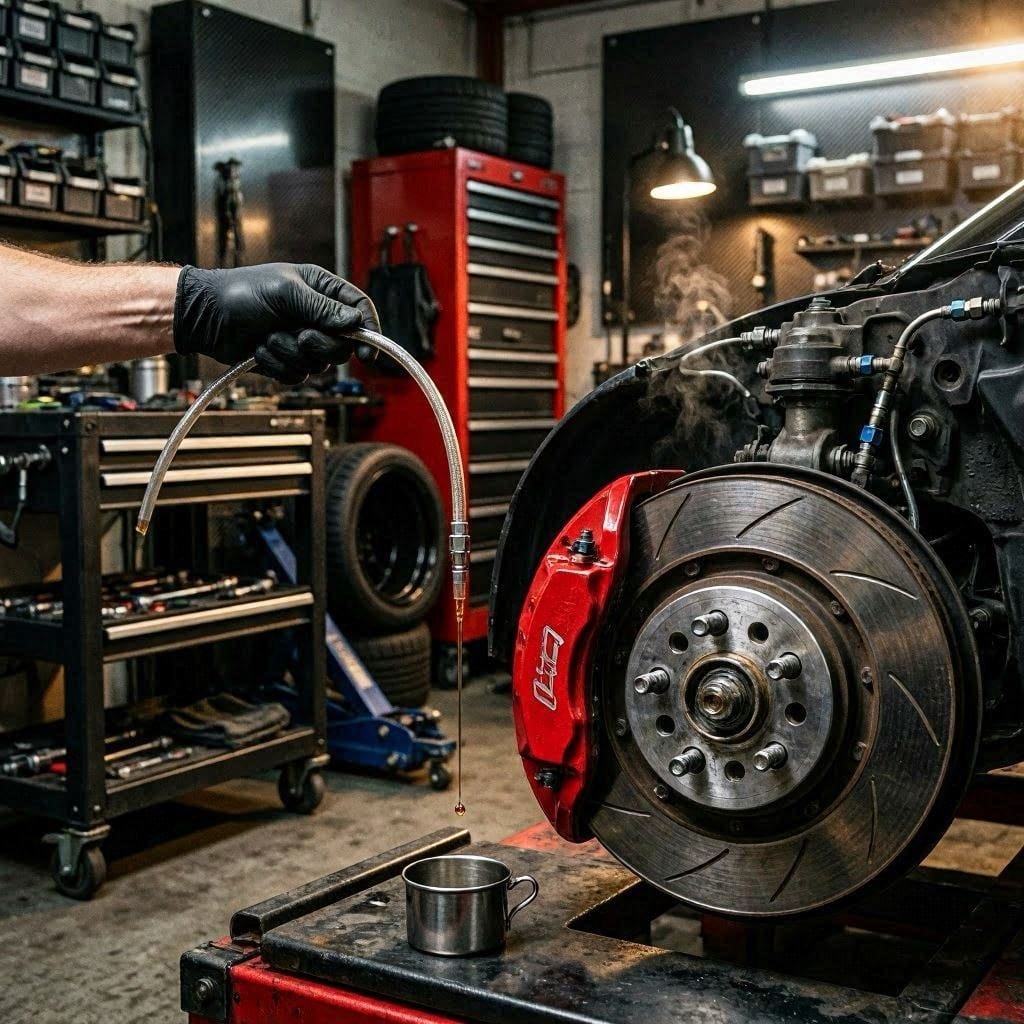
Can Gravity Bleeding Flush Brake Fluid Effectively?
Gravity bleeding works for light maintenance and simple brake jobs. The method uses natural fluid flow instead of pedal pressure.
Many home mechanics prefer gravity bleeding because it reduces master cylinder wear.
Here is the process:
- Fill the reservoir with fresh fluid
- Attach hose to bleed screw
- Open bleed screw slowly
- Allow fluid to drip naturally
- Refill reservoir constantly
Gravity bleeding usually takes 15 to 30 minutes per wheel.
The method works best on vehicles without complex ABS systems.
The main downside involves slower fluid movement. Some trapped air pockets may remain inside brake lines.
Related maintenance guides often compare pressure bleeding with gravity bleeding for different vehicle types.
Gravity bleeding works well after replacing brake pads or calipers. Stubborn ABS air pockets usually need pressure bleeding instead.
Insider Tip: Raise the fluid reservoir slightly with ramps. Increased height improves gravity flow speed.
What Common Mistakes Ruin a Brake Fluid Flush?
Small bleeding mistakes create dangerous braking problems. Many DIY failures happen from rushing the process.
Avoid these common errors:
| Mistake | Result |
|---|---|
| Letting reservoir run dry | Air enters system |
| Using wrong fluid type | Seal damage |
| Over-tightening bleeders | Broken screws |
| Reusing dirty fluid | Contamination |
| Ignoring ABS procedure | Soft pedal |
| Spilling fluid on paint | Paint damage |
Brake fluid contamination often starts from dirty tools or open containers.
Always use sealed fresh fluid from a new bottle.
Bleeder screws can snap easily from corrosion. Apply moderate pressure only.
Insider Tip: Use a six-point wrench instead of a twelve-point wrench. Six-point tools grip bleeder screws better.
How Much Does a Brake Fluid Flush Cost?
DIY brake fluid replacement saves significant money compared to shop service. Labor makes up most professional service costs.
Here is a typical cost breakdown:
| Service Type | Average Cost |
|---|---|
| DIY brake flush | $20 to $60 |
| Professional shop flush | $90 to $180 |
| Premium performance fluid | $25 to $80 |
| Pressure bleeder tool | $50 to $150 |
Luxury vehicles with electronic ABS systems cost more because specialized scan tools may be required.
A pressure bleeder speeds up future maintenance and reduces helper dependency.
Insider Tip: Buy brake fluid during cooler months. Summer prices often increase in performance shops.
How Can Drivers Tell If Brake Bleeding Worked Correctly?
A successful bleed brake system procedure creates a firm and responsive pedal. Brake response should feel immediate during light pressure.
Test the brake pedal with the engine off first. The pedal should feel solid after several pumps.
Start the engine afterward. Slight pedal drop is normal because of vacuum assist.
Drive slowly inside a safe empty area. Test gentle braking before highway driving.
Watch for these warning signs:
- Spongy pedal feel
- Brake warning light
- Fluid leaks near wheels
- Uneven braking
- Pedal sinking at stoplights
ABS systems sometimes trap air internally. Persistent softness may require professional pressure bleeding.
Insider Tip: Recheck the fluid level after the first test drive. Small trapped bubbles sometimes release afterward.
FAQ
How often should drivers flush brake fluid?
Most vehicles need a brake fluid flush every 2 to 3 years or 30,000 to 45,000 miles. Humid climates may require earlier service.
Can one person flush brake fluid alone?
Yes. A one-person brake bleed works using gravity bleeding or a pressure bleeder tool. Traditional pedal bleeding usually needs a helper.
What happens if air enters the brake lines?
Air compresses inside hydraulic lines and creates a soft pedal. Severe air contamination can reduce stopping power dangerously.
Should drivers replace brake fluid after changing brake pads?
Brake pad replacement does not always require fresh fluid. However, old or dark fluid should be replaced during brake service.
Conclusion
A proper DIY brake fluid flush improves braking performance and protects expensive hydraulic components. Fresh fluid keeps the pedal firm and prevents moisture-related corrosion inside the brake system.
Most drivers can complete the job at home with basic hand tools and patience. The process mainly involves removing old fluid, bleeding each wheel correctly, and keeping the reservoir full at all times.
Correct fluid type matters just as much as proper bleeding technique. Always match manufacturer specifications and avoid mixing incompatible brake fluids. Small mistakes can create serious safety risks later.
Brake fluid maintenance often gets ignored because drivers cannot see the fluid condition easily. That habit leads to internal rust, weak pedal feel, and costly ABS repairs over time.
Regular brake maintenance keeps stopping power consistent during daily driving and emergency situations. A clean hydraulic system also extends the life of calipers, master cylinders, seals, and ABS components.
Drivers who follow safe bleeding steps carefully can save money and build valuable DIY repair skills at home.