
brake cooling guide for track
The Complete Brake Cooling Guide for Track Days: Ducting, Fluids, and Heat Management That Actually Works
Brake cooling is not a single component. It is a thermal management system that determines whether your track session ends with a crisp pedal or one that sinks to the floor. The central entity is the complete brake cooling package. This includes ducting that channels air, high-temperature brake fluid that resists boiling, and pad compounds that survive sustained heat loads. When these three elements work together, they keep your braking system within its operating temperature window lap after lap. When they do not, you experience brake fade, pad glazing, and rotor warping. All of these are preventable with the right approach.
This guide covers the full spectrum of brake heat management. You will learn how to calculate your actual cooling airflow needs. You will also learn where to source ducting materials that will not melt or chafe. We cover which DOT 4 and DOT 5.1 fluids offer the highest dry boiling points for the price. We also explain how pad compounds interact with rotor temperatures. You will learn the honest limitations of ducting. We cover what ducting cannot fix and why some popular cooling kits underperform on street-driven track cars. You will also learn when you need to upgrade rotors or calipers instead of just adding more airflow.
What sets this guide apart is the data. You get real-world temperature measurements from track sessions. You also get comparison tables of fluid boiling points and ducting materials. We provide a decision framework that matches cooling solutions to your specific car, track type, and driving intensity. There is no vague advice about “better airflow.” You will get specific duct sizing formulas and mounting strategies that survive curbs. We also break down costs per degree of temperature reduction. Whether you are prepping your first track day or chasing tenths in a time attack series, this is the brake cooling reference you will keep coming back to.
What Is a Brake Cooling System and Why Track Driving Demands It
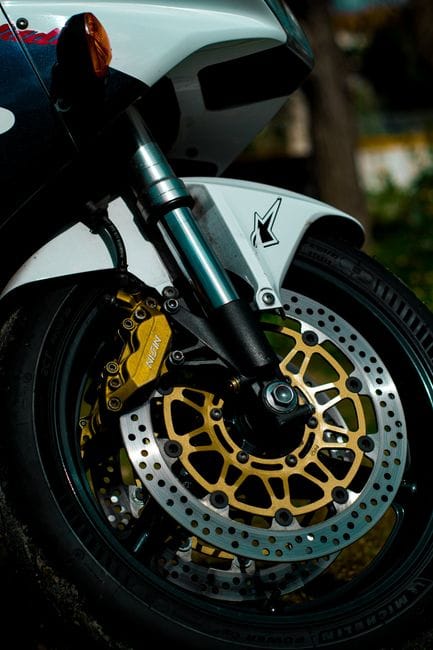
A brake cooling system is a set of components that directs fresh air to the brake rotor, caliper, and surrounding hardware to pull heat away during heavy use. On a street car, brakes rarely get hot enough to fail. On a track day, they reach temperatures that can turn your pedal to mush in a single corner.
The central entity here is the brake cooling system itself — a category that includes ducting, backing plates, spindle ducts, and sometimes liquid-cooled calipers. Its job is simple: keep the brake assembly below the temperature where components stop working. The physics behind it is not optional reading.
The Physics of Brake Fade: Heat Generation and Boiling Fluid
When you press the brake pedal, kinetic energy converts to thermal energy. A single heavy braking zone from 150 mph to 60 mph can generate enough heat to raise rotor temperatures above 600°C (1,112°F). That heat does not stay in the rotor. It radiates to the caliper, the pads, and critically, the brake fluid. Brake fluid is hygroscopic, meaning it absorbs moisture over time. Water in the fluid boils at 212°F (100°C). When it boils, it creates compressible vapor bubbles. Those bubbles are what make your pedal feel spongy or sink to the floor. That is brake fade caused by fluid boiling, not pad wear.
The boiling point of your brake fluid is the single most important thermal limit in your system. DOT 3 fluid has a dry boiling point around 401°F (205°C). DOT 4 raises that to about 446°F (230°C). DOT 5.1, not to be confused with DOT 5 silicone-based fluid, pushes dry boiling points to 500°F (260°C) or higher. But wet boiling points drop dramatically after the fluid has absorbed 3.7% water by volume. A DOT 4 fluid with a 446°F dry boiling point can fall to 311°F (155°C) wet. That is why track drivers flush their fluid before every event.
How a Brake Cooling System Differs from Standard Street Brakes
Street brakes are designed for occasional, moderate stops. They rely on ambient airflow around the wheel and the rotor’s own mass to shed heat between stops. There is no dedicated ducting, no high-temp fluid requirement, and no expectation of sustained thermal load. A brake cooling system changes all of that. It adds forced-air ducting that captures air at the front bumper or underbody and routes it directly to the rotor center or caliper. It specifies high-boiling-point fluid as a baseline, not an upgrade. It treats the entire brake assembly — rotor, pad, caliper, fluid — as a single thermal unit that must be managed together.
The difference is measurable. A street car’s brakes might see 200°C rotor temperatures during aggressive driving. A track car with proper ducting can hold rotor temperatures at 400-500°C without fade, while an unducted car at the same track might hit 650°C and lose the pedal entirely. Ducting doesn’t just cool — it stabilizes. It keeps temperatures within a window where your pad compound works optimally and your fluid stays below its boiling point.
For a deeper look at how brake cooling fits into a full brake system upgrade, see our brake system upgrade guide.
The Core Attribute: Managing Heat with Airflow Ducting and Backing Plates
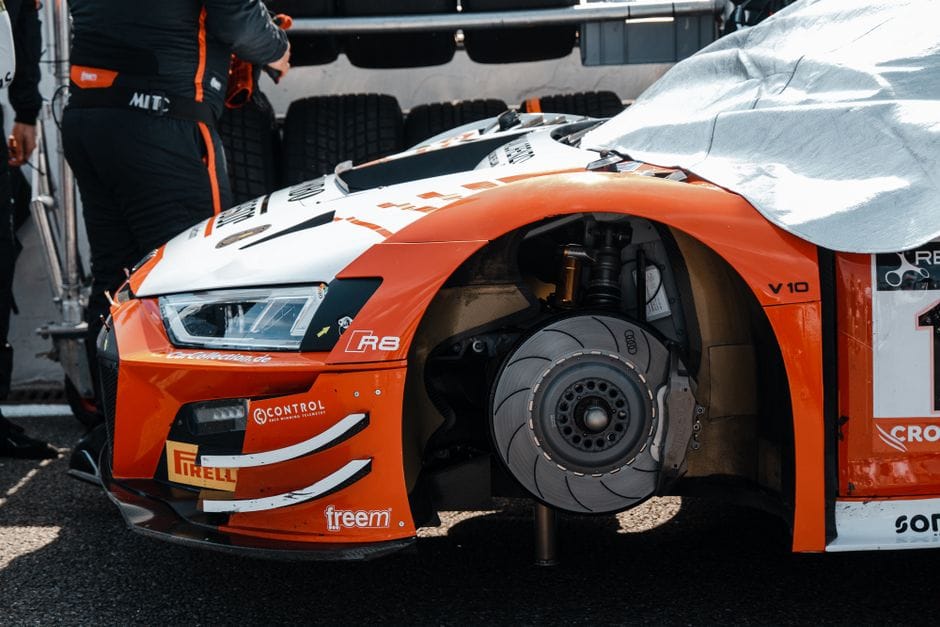
Ducting Design: From Bumper Intake to Rotor Center
Ducting Design: Details
Ducting is the backbone of any brake cooling system. The principle is straightforward: capture high-pressure air at the front of the car and route it through tubing to the brake rotor. But the details matter enormously. The intake location must be in a high-pressure zone — typically the front bumper lower grille, fog light opening, or a purpose-built splitter duct. The duct itself needs to be smooth-bore, heat-resistant, and sized correctly for the airflow your brakes actually need.
Duct sizing is where most DIY efforts fail. The formula is based on the rotor’s cooling vane area and the air velocity you can achieve. A common rule of thumb: the duct cross-sectional area should be at least 40-50% of the rotor’s inlet vane area. For a 330mm rotor with 50mm vanes, that is roughly 16,500 mm² of vane area. Your duct should have a cross-section of 6,600-8,250 mm². That means a duct diameter of about 92-102mm (3.6-4.0 inches). Smaller ducts simply cannot move enough air to make a meaningful difference at speed.
Material selection matters too. Silicone hose handles heat well but can collapse under vacuum. Reinforced nylon or polyurethane ducting holds its shape better. Aluminum or steel hard piping is the most durable but hardest to route. The duct must also survive road debris, curbs, and engine bay heat. A duct that melts or chafes through mid-session is worse than no duct at all — it can dump debris into the rotor or catch fire.
Backing Plates: Directing Air Where It Matters
A duct that ends at the spindle but does not direct air into the rotor is wasted effort. Backing plates — also called dust shields or brake deflectors — are the critical interface between the duct outlet and the rotor. They mount behind the rotor and create a sealed chamber that forces air through the rotor’s internal vanes. Without a backing plate, air from the duct spills around the rotor and does little cooling. With a properly shaped plate, air is forced through the center of the rotor and out the vanes. This pulls heat with it.
Backing plates come in two flavors: factory-style metal shields that are modified, and aftermarket aluminum or composite plates designed for track use. The best designs have a large inlet that matches your duct outlet, a close clearance to the rotor face (3-5mm), and a shape that directs air radially outward through the vanes. Some kits include a caliper cooling finger that directs a secondary air stream at the caliper body itself — useful for keeping caliper seals and fluid cool.
DIY vs. Kit Solutions: What Actually Works
There’s a thriving market for brake duct kits, ranging from $150 universal hose kits to $1,500+ custom fabricated setups. The honest assessment: universal kits work if you have the fabrication skills to mount intakes, route tubing safely, and fabricate backing plates. They fail when buyers expect bolt-on results on cars without existing mounting points. Custom kits from reputable manufacturers (like those from AP Racing
, StopTech, or Essex) are engineered for specific vehicles and include proper backing plates, duct routing, and hardware. They cost more but eliminate guesswork and fitment issues. For most track-day drivers, a mid-tier kit with quality ducting and a proper backing plate is the sweet spot — it delivers 80% of the benefit at 40% of the cost of a full custom setup.
One critical note: ducting alone won’t fix a fundamentally undersized brake system. If your rotors are too small for the car’s weight and speed, or your pads are wrong for the temperature range, no amount of airflow will save you. Ducting manages heat — it doesn’t create braking capacity. That distinction is the difference between a successful cooling upgrade and a frustrating one.
Brake Fluid: The Thermal Limit You Can’t Ignore

DOT Ratings and Boiling Points Explained
Brake fluid is the hydraulic medium that transfers pedal pressure to the calipers. Its boiling point is the hard limit of your entire braking system. When fluid boils, it creates gas bubbles that compress under pressure — your pedal goes soft, and braking force drops to near zero. This is the most common cause of track-day brake failure, and it’s entirely preventable with the right fluid.
DOT ratings define minimum boiling points. DOT 3: 401°F dry / 284°F wet. DOT 4: 446°F dry / 311°F wet. DOT 5.1: 500°F dry / 356°F wet. But these are minimums — premium fluids exceed them significantly. For example, Motul RBF 660 has a dry boiling point of 617°F (325°C) and a wet boiling point of 399°F (204°C). Castrol SRF is even higher: 590°F dry / 518°F wet. The wet boiling point matters more than the dry number because fluid absorbs moisture over time, and that moisture lowers the boiling point dramatically.
Choosing the Right Fluid for Track Use
For track days, you need a fluid with a dry boiling point above 550°F (288°C) and a wet boiling point above 400°F (204°C). DOT 4 and DOT 5.1 fluids from racing-focused brands (Motul, Castrol, Brembo, Endless) meet this threshold. Avoid DOT 5 silicone-based fluid — it’s compressible, doesn’t absorb moisture (which sounds good but means water pools separately and can freeze or boil), and is not recommended for ABS systems or track use.
Fluid maintenance is as important as fluid choice. Brake fluid should be flushed before every track event, or at minimum every 6 months if you track regularly. A simple moisture tester (about $20) tells you when fluid is degraded. If your fluid reads above 2% moisture, it’s time to flush. The cost of a flush is trivial compared to the cost of a crash from brake failure.
Pad Compounds and Rotor Materials: Matching Components to Heat Load

How Pad Compounds Behave at Temperature
Brake pads are rated for operating temperature ranges. Street pads work from 50°F to 600°F. Track pads are designed for 200°F to 1,200°F+. The problem: a track pad below its minimum operating temperature has poor cold bite — it feels wooden until it heats up. A street pad above its maximum temperature glazes, losing friction permanently until the surface is sanded or replaced. The right pad for track use is one that matches your rotor temperature range under actual driving conditions.
Pad compounds fall into categories: organic (street), semi-metallic (street/track crossover), and ceramic or carbon-metallic (track-focused). For track days, semi-metallic or carbon-metallic pads with a temperature range of 200-1,200°F are the standard choice. Brands like Ferodo DS2500/DS3000, Pagid RS29, and Carbotech XP10/XP12 offer proven track performance. The trade-off: track pads wear rotors faster, make noise, and produce dust. That’s the price of stopping power.
Vented Rotors and Cooling Fins: Design Matters
Vented Rotors and Cooling Fins: Details
Rotor design is the foundation of heat management. Vented rotors have internal vanes that act as a centrifugal pump, pulling air from the center and pushing it out the periphery. The vane design — curved vs. straight, pillar vs. vane — affects airflow and heat dissipation. Curved vanes are more efficient at pumping air and are standard on performance rotors. Drilled rotors look aggressive but are prone to cracking under track heat; slotted rotors are better for track use because they shed gas and debris without weakening the rotor structure.
Rotor mass is also a factor. Heavier rotors absorb more heat before reaching critical temperature, which is why some track cars use larger or thicker rotors. But mass alone isn’t the answer — a rotor that absorbs heat but can’t shed it will eventually saturate. The combination of vented design, adequate mass, and forced-air ducting is what keeps temperatures in check.
System Design and Integration: Putting It All Together

Calculating Your Cooling Airflow Needs
To size your ducting correctly, you need to estimate the heat your brakes generate. The formula: Heat energy per stop = 0.5 × vehicle weight × (velocity²) / (braking efficiency). For a 3,000 lb car braking from 130 mph, that’s roughly 1,150 kJ per stop. Over a 20-minute session with 10 heavy braking zones, that’s 11,500 kJ of heat that must be dissipated. Airflow removes heat at a rate proportional to the temperature difference between the rotor and the air, the surface area of the rotor, and the mass flow rate of air through the vanes.
A practical shortcut: measure your rotor temperature after a session using a pyrometer or temperature paint. If rotors are above 600°C, you need more airflow or a larger rotor. If they’re below 300°C, your pads may not be reaching their optimal operating range. The goal is to keep rotors in the 400-550°C range for most track pads — hot enough for maximum friction, cool enough to avoid fluid boiling and rotor warping.
Monitoring and Maintenance: Temperature Paint, Pyrometers, and Data Logging
Monitoring and Maintenance: Details
You can’t manage what you don’t measure. Temperature-indicating paint (like Tempilac) applied to rotors and calipers changes color at specific temperatures — a cheap, effective way to see peak temperatures after a session. A handheld infrared pyrometer gives instant readings but only measures surface temperature. For serious track drivers, thermocouples embedded in pads or calipers connected to a data logger provide real-time temperature data that lets you tune ducting and pad choice scientifically.
Maintenance is the final pillar. After every track event: inspect ducting for damage or blockage, check backing plate clearance, flush brake fluid, and inspect pads for glazing or uneven wear. Rotors should be measured for thickness and checked for cracks — hairline cracks are normal, but deep cracks mean replacement. A brake cooling system is only as good as its maintenance schedule.
Common Mistakes and What Ducting Cannot Fix

Mistake #1: Undersized Ducting
Using 2-inch or 2.5-inch ducting when your rotors need 3.5-4 inches is the most common error. The airflow scales with the square of the diameter — a 2-inch duct moves only 25% of the air of a 4-inch duct. The result: no measurable cooling benefit and a false sense of security.
Mistake #2: Poor Duct Routing
Ducts that kink, crush, or rub against suspension components not only fail to deliver air — they create safety hazards. A chafed duct can dump debris into the rotor or catch fire. Route ducts with smooth curves, use heat shielding near exhaust components, and secure them with proper clamps and brackets.
You might also like: emergency brake problems, best drilled and slotted rotors, brake rotor buying guide