Brake Master Cylinder Replacement: DIY Guide
Your brake pedal sinks to the floor. You pump it, and pressure returns for a second. That scary moment means your master cylinder could be failing. Don’t wait for total brake loss. This guide walks you through a safe, successful brake master cylinder replacement in your home garage.
What are the warning signs of master cylinder failure?
A spongy brake pedal, visible fluid leaks near the firewall bracket, dashboard brake warning light illumination, or increased stopping distances indicate internal seal wear or external leakage within the master cylinder assembly requiring immediate inspection and possible replacement to maintain safe braking performance.
Brake fluid should never pool under the dash. Check the firewall area for wetness. A dropping pedal under steady pressure signals internal bypass.
DOT 3 or DOT 4 fluid loses clarity when contaminated. Inspect reservoir fluid color monthly. Dark fluid means moisture absorption.
Insider tip: Check for master cylinder symptoms by applying steady pedal pressure with engine off. A slowly sinking pedal points to worn internal seals.
What tools and parts do you need for brake master cylinder replacement?
Essential tools include a 10mm line wrench for brake fittings, 12mm socket for mounting nuts, torque wrench set to 15-25 ft-lbs specification, complete brake bleeder kit, fresh DOT 4 brake fluid meeting manufacturer standards, and a master cylinder bench bleeding kit for proper air removal.
A bench bleeding kit prevents air traps. Keep shop towels and nitrile gloves handy for cleanup. Safety glasses protect eyes from fluid spray.
Most vehicles use M10x1.0 or M12x1.0 brake line fittings. Verify thread size before purchasing replacement lines. Torque specs range from 15-25 ft-lbs for mounting nuts.
Insider tip: Keep a dedicated brake fluid catch bottle. Never reuse fluid that has been exposed to air for more than 24 hours.
How do you safely remove the old master cylinder?
Disconnect the negative battery terminal first, then carefully remove brake lines using a 10mm line wrench while catching fluid with a drain pan to prevent paint damage, slip hazards, and contamination of the brake hydraulic system during master cylinder removal.
Loosen mounting nuts with a 12mm socket. Support the cylinder during final nut removal. Lift straight up to avoid damaging the brake booster pushrod.
Brake fluid damages paint instantly. Cover fenders with shop towels. Wear safety glasses and nitrile gloves during fluid handling.
Critical hazard: Brake fluid is corrosive and slippery. Clean spills immediately with water. Never allow fluid contact with eyes or skin.
Insider tip: Label brake lines before disconnecting. Use masking tape and a marker to prevent cross-threading during reassembly.
Why must you bench bleed a new master cylinder before installation?
Bench bleeding removes trapped air from the new master cylinder’s internal passages using short piston strokes and fluid recirculation through temporary tubes to ensure firm pedal feel, consistent braking performance, reliable hydraulic pressure, and safe operation after installation on the vehicle.
Mount the cylinder in a vise with soft jaws. Attach bench bleeding tubes from kit into reservoir. Fill with fresh DOT 4 brake fluid.
Use a 3/8-inch drive ratchet to push the piston slowly. Watch for air bubbles in the reservoir. Continue until bubbles stop appearing.
Common mistake: Skipping bench bleeding causes extended pedal pumping at the wheel. This wastes time and risks introducing more air into the system.
Insider tip: Use the master cylinder’s original plastic plugs to seal ports during bench bleeding. They provide a better seal than aftermarket kits.
How do you install and test the replacement master cylinder?
Position the bench-bled master cylinder onto the brake booster studs carefully, hand-tighten M10 mounting nuts, connect brake lines with a 10mm line wrench using proper thread engagement, then torque mounting nuts to 18 ft-lbs per factory specification for secure, leak-free installation.
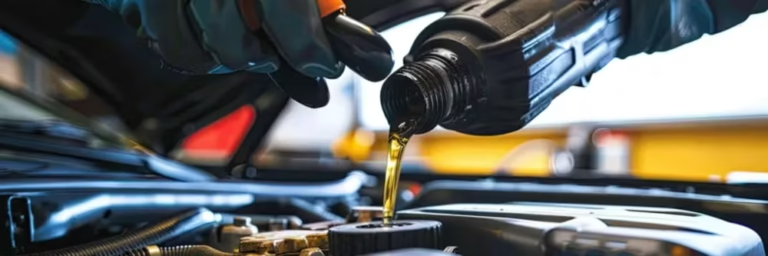
Reconnect the negative battery terminal. Fill reservoir to the MAX line with fresh DOT 4 brake fluid. Pump the brake pedal slowly 10-15 times to build pressure.
Check all line connections for leaks. Start the engine and verify pedal firmness. Test brakes at low speed in a safe area before normal driving.
Insider tip: After installation, bleed brakes starting with the wheel farthest from the master cylinder. This follows proper hydraulic bleeding sequence.
Should you DIY or hire a pro for brake master cylinder replacement?
DIY brake master cylinder replacement saves $150-$300 in professional labor costs but requires solid mechanical skill, proper specialty tools like a torque wrench, strict adherence to safety procedures, and correct brake bleeding techniques for reliable brake system performance and overall vehicle safety.
Professional shops charge $75-$150/hour for labor. Parts markup adds 15-30% over retail prices. Total pro cost ranges from $400-$700 depending on vehicle.
Insider tip: If your vehicle has ABS or stability control, factor in potential need for scan tool bleeding. This may tip the scale toward professional service.
Step-by-step brake master cylinder replacement checklist
Follow this sequence for safe brake master cylinder replacement:
- Disconnect negative battery terminal with 8mm wrench
- Remove old fluid from reservoir using turkey baster
- Loosen brake lines with 10mm line wrench; cap ends immediately
- Remove M10 mounting nuts with 12mm socket
- Lift old cylinder straight up; avoid booster pushrod damage
- Bench bleed new unit per kit instructions
- Install new cylinder; torque nuts to 18 ft-lbs
- Connect brake lines; torque fittings to 12 ft-lbs
- Fill reservoir with fresh DOT 4 brake fluid
- Bleed brakes starting at rear passenger wheel
- Test pedal firmness before road testing
Safety note: Always work on level ground with wheels chocked. Never rely solely on the parking brake during brake system repairs.
Master cylinder types: Which should you choose?
Master Cylinder Types: OEM vs Aftermarket
|
Feature
|
OEM Unit
|
Quality Aftermarket
|
Economy Aftermarket
|
|---|---|---|---|
|
Price
|
$150-$300
|
$80-$180
|
$40-$90
|
|
Seal Material
|
Fluoroelastomer
|
Nitrile Rubber
|
Standard Rubber
|
|
Warranty
|
12 months
|
24 months
|
90 days
|
|
Bench Bleeded
|
No
|
Sometimes
|
Never
|
|
Best For
|
Luxury/European
|
Daily Drivers
|
Budget Temporary Fix
|
Frequently asked questions about brake master cylinder replacement
How long does brake master cylinder replacement take?
A skilled DIYer completes this job in 2-4 hours. First-timers should allow 4-6 hours for careful work. Bench bleeding and brake bleeding add significant time.
Can I drive with a bad master cylinder?
Driving with master cylinder symptoms risks complete brake failure. Pull over safely if pedal feels spongy. Tow the vehicle for repair instead of risking an accident.
Do I need to bleed all four brakes after replacement?
Yes, bleed all four wheels after master cylinder installation. Air travels through the entire hydraulic system. Start with the wheel farthest from the master cylinder.
What brake fluid should I use for replacement?
Use the fluid type specified on your master cylinder reservoir cap. Most vehicles require DOT 3 or DOT 4. Never mix silicone-based DOT 5 with glycol-based fluids.
Final thoughts on brake master cylinder replacement
Brake master cylinder replacement demands precision and patience. Follow each step carefully without rushing. Use the correct tools and always fresh brake fluid. Bench bleeding saves hours of frustration during final brake bleeding. Torque specs matter significantly—overtightening cracks expensive fittings. Undertightening causes dangerous fluid leaks. Test brakes slowly in a safe, empty area first. Listen carefully for unusual noises. Feel for proper pedal firmness and travel. If anything seems off during testing, stop immediately and recheck your work. Brake systems tolerate zero errors whatsoever. This repair builds valuable mechanical confidence and saves significant money. But never sacrifice safety for speed or convenience. When in doubt about any step, consult a professional ASE-certified technician. Your life and your passengers’ lives depend entirely on reliable brakes. Keep your vehicle properly maintained. Check brake fluid levels monthly without fail. Address any warning signs immediately before they worsen. A well-serviced brake system provides complete peace of mind on every single drive. You now have the knowledge to tackle this critical repair safely. Work safely at all times. Work smart with proper procedures. Drive confidently knowing your brakes are ready.
You might also like: Sticky Brake Caliper Symptoms: Diagnosis Guide, Electronic Brake Force Distribution (EBD): Explained, ABS Sensor Cleaning: Remove Metal Shavings