Brake Rotor Damage from Grinding: Can It Be Fixed?
That metallic grinding noise isn’t just annoying. It’s your brake pads (or lack of them) chewing into your rotors. Ignore it, and you’ll turn a $50 rotor resurfacing job into a $400 replacement—or worse, lose braking power when you need it most.
I’ve seen drivers push their luck for weeks. Don’t be that person.
Can You Fix a Grinding Damaged Rotor?
Yes, but only if the rotor meets minimum thickness specs. Most passenger vehicles require rotors at least 20-22mm thick (check your service manual). If grinding has worn them below this, replacement is the only safe option. Resurfacing can restore a rotor with minor grooves or scoring under 0.5mm deep.
Insider Tip: Always measure rotor thickness with a micrometer—never guess. A 0.001-inch (0.025mm) variation can mean the difference between safe and unsafe.
How Do You Know If Your Rotor Is Damaged from Grinding?
Deep grooves, visible scoring, or a lip on the outer edge mean your rotor is compromised. Use a flashlight and a straightedge to check for uneven wear. If the straightedge rocks or you see grooves deeper than 1mm, the rotor needs attention.
Common Mistake: Many drivers assume new brake pads will stop the noise. If the rotor is already scored, new pads will wear unevenly and fail faster.
**Never ignore grinding noises.** Driving with a severely damaged rotor can overheat your brake system, warp the rotor permanently, or even cause brake failure. If the grinding is loud and constant, pull over and inspect immediately.
Is It Safe to Drive with a Grinding Rotor?
No. A grinding rotor means your brake pads are gone, and metal is scraping against metal. This reduces stopping power by up to 40% and can overheat your brake fluid, leading to total brake failure. Even short drives can cause permanent damage to the rotor and caliper.
Safety Note: If you hear grinding, check your brake pad thickness. If it’s below 3mm, replace the pads and inspect the rotors immediately.
Rotor Damage from Grinding: Repair vs. Replace
| Factor | Repair (Resurface) | Replace |
|---|---|---|
| Cost | $20-$50 per rotor | $100-$250 per rotor |
| Time Required | 30-60 minutes | 1-2 hours |
| Minimum Thickness | Must be above spec | Below spec |
| Groove Depth | <0.5mm | >1mm |
| Lateral Runout | <0.002 inches | >0.002 inches |
Pro Tip: If your rotor is warped (lateral runout >0.002 inches), resurfacing won’t fix it. Replace it.
Step-by-Step: How to Inspect and Fix a Grinding Damaged Rotor
Tools You’ll Need
- Torque wrench (100 ft-lbs max)
- Micrometer (0-25mm range)
- Brake cleaner spray
- Straightedge and feeler gauges
- Jack and jack stands (3-ton capacity)
- Socket set (10mm, 13mm, 15mm, 17mm)
Step 1: Lift the Vehicle Safely
Park on a flat surface and engage the parking brake. Loosen the lug nuts with a 17mm socket before lifting. Use the jack to raise the vehicle and secure it on jack stands. Never work under a car supported only by a jack.
Safety Note: Always chock the rear wheels if working on the front brakes (and vice versa).
Step 2: Remove the Wheel and Inspect the Rotor
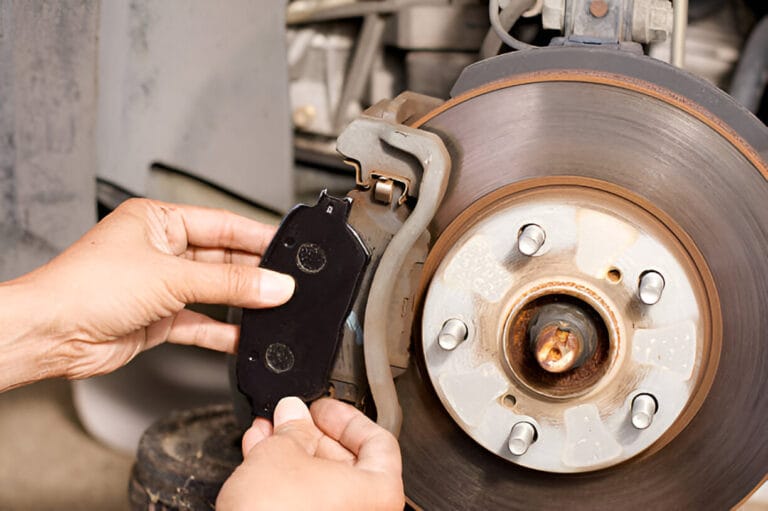
Take off the wheel and clean the rotor with brake cleaner. Look for:
- Grooves deeper than 1mm
- Cracks or heat spots
- Uneven wear (lip on the outer edge)
Insider Tip: Run your fingernail across the rotor surface. If it catches on grooves, the rotor needs resurfacing or replacement.
Step 3: Measure Rotor Thickness
Use a micrometer to measure the rotor at 3-4 points. Compare to your vehicle’s minimum thickness spec (usually stamped on the rotor or in the service manual). If below spec, replace the rotor.
Example: A 2015 Honda Accord rotor starts at 26mm and must be replaced if below 22mm.
Step 4: Check for Warping (Lateral Runout)
Mount a dial indicator on the suspension and spin the rotor. If the runout exceeds 0.002 inches (0.05mm), the rotor is warped and must be replaced.
Step 5: Resurface or Replace
Step 5: Details
- Resurface: If the rotor is above minimum thickness and has minor scoring, use a brake lathe to smooth the surface. Always resurface both rotors on the same axle to maintain balance.
- Replace: If the rotor is below spec or warped, install a new OEM or high-quality aftermarket rotor. Torque the lug nuts to 80-100 ft-lbs in a star pattern.
Pro Tip: Apply anti-seize compound to the wheel hub contact surface to prevent the rotor from sticking.
What Causes Rotor Damage from Grinding?
Worn-out brake pads are the #1 cause. When pads wear down to the metal backing plate, they score the rotor. Other causes:
- Debris (rocks, sand) trapped between the pad and rotor
- Improper brake job (uneven torque, dirty components)
- Overheating from aggressive driving or towing
Insider Tip: Always replace brake pads before they reach 3mm thickness to avoid rotor damage.
How Much Does It Cost to Fix a Grinding Damaged Rotor?
| Service | Cost (Parts + Labor) | Time Required |
|---|---|---|
| Rotor Resurfacing | $50-$150 (both rotors) | 1 hour |
| Rotor Replacement | $200-$500 (both rotors) | 1.5-2 hours |
| Brake Pad + Rotor Combo | $300-$700 (front or rear) | 2 hours |
Cost-Saving Tip: Buy rotor and pad kits together—often cheaper than purchasing separately.
**Prevent rotor damage:** Use **ceramic brake pads** for daily driving. They’re quieter, last longer, and produce less dust than metallic pads. Always bed in new pads and rotors by performing **5-6 moderate stops from 35-45 mph**, then let the brakes cool.
FAQs About Rotor Damage from Grinding
1. Can I Drive 100 Miles with a Grinding Rotor?
No. Every mile risks further rotor damage, brake fluid overheating, or total brake failure. Tow the car or replace the pads/rotors immediately.
2. Will New Brake Pads Stop the Grinding Noise?
Only if the rotor isn’t already scored. If the rotor has deep grooves, new pads will wear unevenly and the noise will return.
3. How Long Do Resurfaced Rotors Last?
12,000-20,000 miles if paired with quality brake pads. Resurfacing removes 0.5-1mm of material, so the rotor will wear out faster than a new one.
4. Can I Resurface a Rotor at Home?
Not safely. A brake lathe is required for precise resurfacing. DIY attempts with sandpaper or a drill can unbalance the rotor and cause vibrations.
Conclusion: Don’t Gamble with Grinding Rotors
Grinding noises are your car’s way of saying, “Fix me now or pay later.” A scored brake rotor can often be resurfaced if caught early, but waiting too long means a costly replacement—or worse, a brake failure at 60 mph.
Here’s your action plan:
- Inspect the rotors for grooves, cracks, or uneven wear.
- Measure thickness and runout with a micrometer and dial indicator.
- Resurface if above minimum specs; replace if not.
- Always use quality parts and torque everything to spec.
Final Tip: If you’re unsure, take it to a trusted mechanic. A $20 inspection can save you hundreds in repairs—and maybe even your life.
You might also like: Sticky Brake Caliper Symptoms: Diagnosis Guide, Electronic Brake Force Distribution (EBD): Explained, ABS Sensor Cleaning: Remove Metal Shavings