Brake Rotor Thickness Guide: How to Measure, Minimum Spec…
Brake rotors are the iron or carbon-ceramic discs that your brake pads clamp down on to convert your vehicle’s kinetic energy into heat, and their thickness is the single most critical measurement for determining whether they can still do that job safely. Every rotor leaves the factory with a specification known as the “minimum thickness” — a hard floor cast into the metal that represents the absolute thinnest the disc can be while still dissipating heat and resisting structural failure. Once a rotor wears past this number, its ability to shed heat drops dramatically, warping becomes far more likely, and in the worst case, the disc can crack or separate under hard braking.
This guide covers every attribute that matters when evaluating rotor condition: how to measure thickness accurately with a micrometer, where to find the minimum spec for your specific make and model, the difference between “minimum thickness” and “discard thickness,” and the warning signs that tell you replacement is overdue before a measurement is even needed. You’ll also learn why some rotors — like drilled and slotted designs — have different wear limits than plain blanks, and how factors like pad material and driving style accelerate the process of reaching that critical number.
Most DIY guides stop at “just measure it,” but this one goes further. You get a decision framework for borderline cases, the exact measurement points that manufactures use at the factory, and honest coverage of the tools that actually work versus the ones that waste your money. We also address a question most articles ignore: what happens when you measure a rotor that’s already below spec and you’re stuck far from a parts store. By the end, you’ll know not just how to measure, but exactly what the number means for your safety and your wallet.
What Is Brake Rotor Thickness and Why It Matters
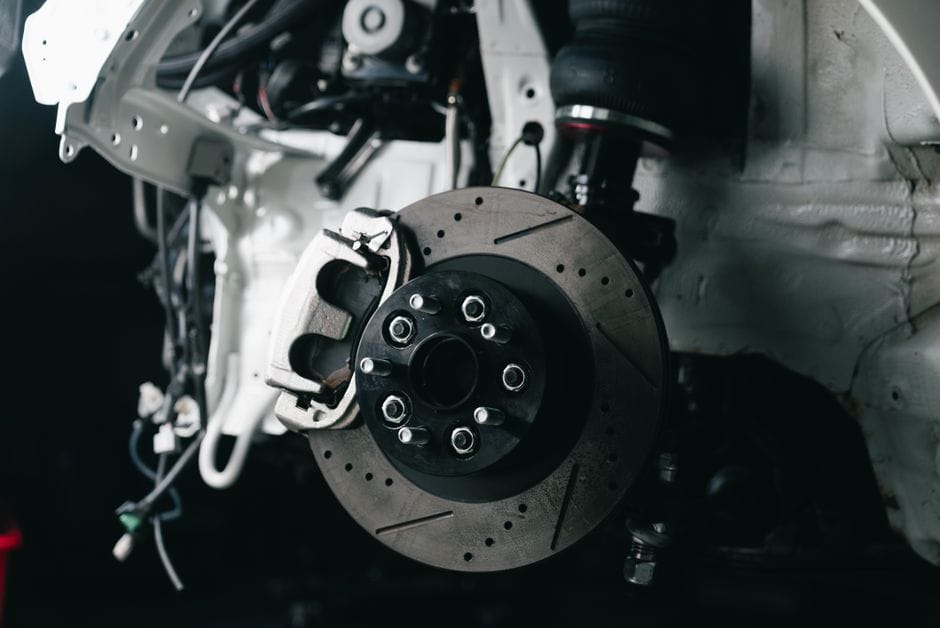
Brake rotor thickness is the measurement of the metal disc your brake pads clamp down on to stop your vehicle. It is a vertical dimension taken across the friction surface, usually expressed in millimeters. This number matters because it directly determines how much material remains to absorb and shed heat, and it sets the safety limit for when the part must be replaced.
Every rotor has a published minimum thickness specification from the manufacturer. Drop below that figure and the rotor can no longer handle the thermal load of braking safely. The part may crack, warp, or fail structurally. For most passenger cars, new rotors measure between 22 and 32 millimeters, with minimum specs often sitting 2 to 4 millimeters below that. [VERIFY: typical new and minimum rotor thickness range for mainstream passenger vehicles]
Defining Rotor Thickness vs. Rotor Diameter
Thickness and rotor diameter are two different dimensions, and confusing them leads to mistakes. Rotor diameter is the distance across the face of the disc — the width of the circle. It dictates how much surface area the brake pad contacts and how much braking torque the system can generate. A larger diameter gives more use and better stopping power.
Thickness, on the other hand, measures the depth of the metal between the two friction surfaces. It controls how much heat the rotor can absorb before it transfers that energy into the brake fluid and surrounding components. A rotor can have the correct diameter for your vehicle but still be dangerously thin. When you check specifications, you need both numbers: the diameter for fitment and the thickness for safety.
How Thickness Affects Heat Dissipation and Brake Fade
Braking converts kinetic energy into heat. That heat must go somewhere, and the rotor is the primary heat sink. A thicker rotor contains more mass, which means it can absorb more thermal energy before its temperature spikes. This is why heat dissipation is the core function of rotor thickness.
When a rotor gets too thin, it loses thermal mass. The metal heats up faster, and the brake system becomes prone to brake fade — the reduction in stopping power that occurs when components overheat. Fade can feel like a spongy pedal or a sudden loss of bite during repeated hard stops. Downhill driving, heavy loads, and aggressive braking all accelerate this condition. A rotor at or near minimum thickness simply cannot manage heat the way a new one can.
The Difference Between Solid, Vented, and Drilled Rotors
Rotor thickness is not uniform across all designs. Solid rotors are a single flat disc of metal. They are common on rear axles of lighter vehicles and are typically thinner, ranging from about 10 to 12 millimeters new. They have less thermal capacity, which is fine for the lighter braking loads they handle.
Vented rotors feature two friction surfaces separated by internal cooling vanes. Air passes through these vanes as the wheel spins, pulling heat away from the center. This design adds significant thickness — most vented rotors measure 22 millimeters or more when new. The extra material and airflow give them far better heat dissipation, which is why they appear on front axles and performance vehicles.
Drilled rotors take a vented or solid base and add holes through the friction surface. The holes help release gas and water that build up between pad and rotor, and they slightly reduce weight. But drilling also removes thermal mass, so a drilled rotor may run hotter than a solid vented rotor of the same thickness. If you are considering them, understand that the holes are a trade-off, not a pure upgrade.
Before you measure anything, identify which rotor type your vehicle uses. The type determines the starting thickness, the minimum spec, and how quickly the rotor wears. For a full breakdown of rotor types, materials, and selection criteria, see our brake rotor buying guide. The measurement process itself is covered in the next section, where we walk through the tools and technique step by step.
Top Picks


How to Measure Brake Rotor Thickness Correctly
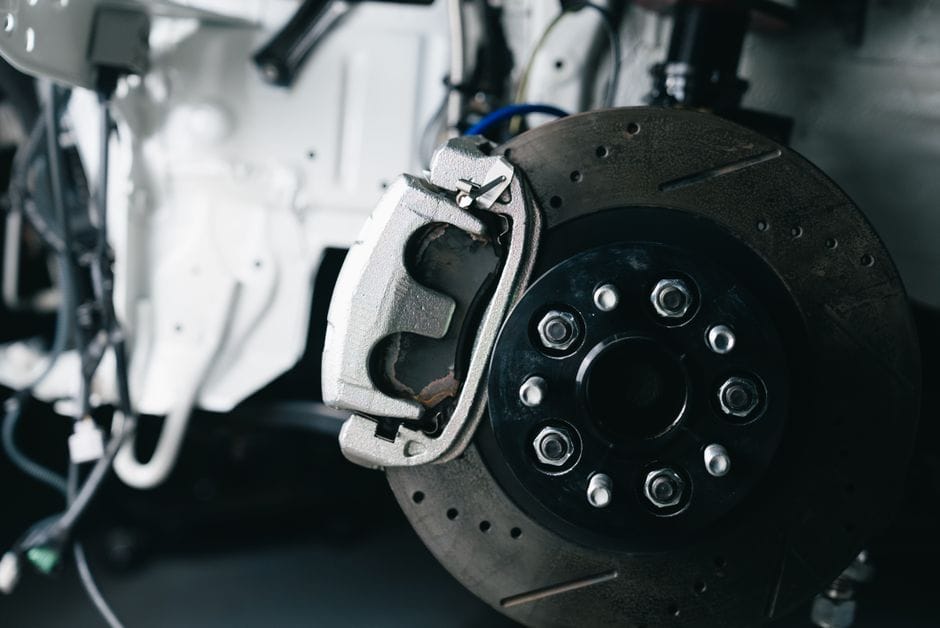
Measuring brake rotor thickness is a straightforward job, but only if you use the right tool and follow a consistent method. A quick check with a ruler won’t cut it. Rotor wear happens in fractions of a millimeter, and that difference decides whether a rotor is safe or scrap. Here’s how to get a number you can trust.
Tools You Need: Micrometer vs. Caliper
Tools You Need: Details
You have two main options for measuring brake rotor thickness: a micrometer and a caliper. They are not interchangeable in practice, and choosing the wrong one can give you a false sense of safety.
A **micrometer** is the correct tool for this job. It measures thickness with a resolution of 0.001 mm (0.0001 inch). The anvil and spindle press directly on the friction surface, giving you a precise reading of the actual material left. If you are serious about brake maintenance, buy a disc brake micrometer. It has a narrow anvil designed to reach the rotor’s swept area without hitting the rusted hub or the outer lip.
A **caliper** — digital or dial — is a good secondary tool, but it has a limitation. The jaws are flat and wide, so they often bridge across grooves or sit on the rust ridge at the rotor’s edge. This produces a reading that is thicker than reality. If a caliper is all you have, measure in the center of the friction surface, away from the lip, and subtract any visible groove depth from your reading. For a reliable number, though, the micrometer wins every time.
Why a Caliper Can Mislead You
Flat caliper jaws rest on the highest points of the rotor surface. On a worn rotor with grooves, that means you are measuring the peaks, not the valleys. The rotor can be at minimum thickness in the grooves while your caliper reads 1.5 mm thicker. A micrometer with a pointed spindle reaches into the grooves and measures the true minimum material.
Step-by-Step Measurement Process
Follow this sequence to measure brake rotor thickness accurately:
1. **Remove the wheel.** You cannot measure a rotor accurately with the wheel mounted. Jack up the vehicle, support it on jack stands, and pull the wheel. Never work under a car supported only by a jack.
2. **Clean the friction surface.** Use brake cleaner and a shop towel to remove dust, grease, and rust. Dirt between the micrometer anvil and the rotor will inflate your reading.
3. **Check for a rust lip.** Most rotors develop a raised edge at the outer circumference where the pad doesn’t contact. If the lip is severe, you may need to remove it with a file or grinder to get the micrometer anvil flat against the surface. Do not measure on the lip itself.
4. **Zero your tool.** Close the micrometer on air and check that it reads zero. If it doesn’t, adjust it or note the offset.
5. **Measure the rotor thickness.** Place the micrometer squarely on the friction surface, perpendicular to the rotor face. Apply light, consistent pressure until you feel the spindle touch. Rock the tool slightly to find the true minimum reading.
6. **Repeat at multiple points.** One measurement is never enough. Rotors wear unevenly, so you need a pattern of readings across the surface. Record each number.
Where to Measure: 8-Point Method for Accuracy
Where to Measure: Details
The accepted practice is the 8-point method. You take measurements in a pattern that covers the rotor’s friction surface systematically. Here is the layout:
– **4 points around the circumference.** Mark the rotor at 12, 3, 6, and 9 o’clock positions. Measure at each mark, about 10 mm inboard from the outer edge.
– **4 more points 45 degrees offset.** Rotate your marks by 45 degrees and measure again at the same radial position. This gives you 8 readings spread evenly around the rotor.
Why 8 points? Brake pads do not wear a rotor perfectly evenly. Caliper slide pins stick, pistons seize, and pad taper causes one side to wear faster. An 8-point pattern catches these problems. If you measure only one or two spots, you can miss a thin area that is already below minimum spec. Compare all 8 readings. The lowest number is the one that matters for safety decisions.
For rotors that still have plenty of material, you can move on to checking thickness variation across those 8 points. That is the topic of the next section, where we cover DTV and brake pulsation. And if your measurements show the rotor is close to the limit, you’ll want the decision framework later in this guide to decide between replacement and resurfacing. While you have the wheel off, it is also a good time to inspect your brake bleeder screws — a seized bleeder can turn a simple pad swap into a full brake line replacement, so a quality brake bleeder kit is worth having on hand.
Minimum Thickness Specs: Where to Find Them and What They Mean
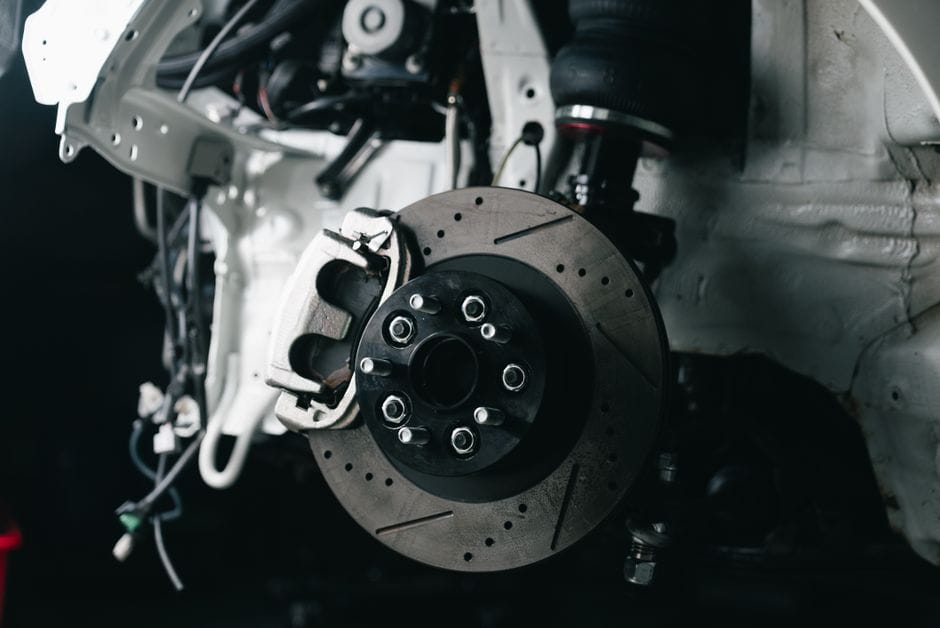
The minimum thickness specification is the lowest measurement at which a rotor can still safely dissipate heat and maintain structural integrity. Below that number, the rotor has lost too much metal to handle the thermal stress of braking. You should treat this figure as a hard limit, not a suggestion.
Locating the Minimum Thickness Cast Mark
Manufacturers stamp the minimum thickness specification directly onto the rotor. Look for it on the hub, the hat section, or the outer edge of the friction surface. The cast mark usually appears as “MIN TH” followed by a number in millimeters, or as a plain measurement like “22.4 MM.” Some rotors also list the original thickness alongside the minimum, which gives you a quick reference for how much material you started with.
The cast mark can be hard to spot on corroded or painted rotors. Clean the hub area with a wire brush and read it with a flashlight at an angle. If the stamp is worn away, check the manufacturer’s website or the rotor box if you still have it. A factory service manual for your vehicle will also list the specification. When you cannot find the number anywhere, treat that as a warning — do not guess. [VERIFY: confirm whether aftermarket rotors without legible cast marks are safe to install without a documented minimum thickness specification]
Why You Should Never Go Below Minimum Thickness
The minimum thickness specification exists for two reasons: heat management and structural integrity. Brake rotors shed heat through their mass. A thinner rotor holds less heat, so it runs hotter under the same braking load. That extra heat can cause brake fade, warping, and accelerated pad wear.
The structural risk is more serious. A rotor below its minimum thickness may not withstand the clamping force of the caliper under hard braking. In extreme cases, the friction surface can crack or separate from the hat. The safety margin built into the specification accounts for normal wear, corrosion, and the occasional hard stop — but only down to the stated limit. Once you cross it, you are relying on luck instead of engineering.
Typical Minimum Thickness Ranges by Rotor Type
Different rotor designs start with different thicknesses, so their minimums vary. Here are general ranges to expect:
– **Solid rotors** (common on rear axles of smaller cars): original thickness around 10–12 mm, minimum around 8–9 mm
– **Vented rotors** (front axles and most modern vehicles): original thickness around 22–30 mm, minimum around 18–26 mm
– **Drilled and slotted rotors**: same ranges as their solid or vented equivalents, but the holes and slots reduce thermal mass, so the margin between new and minimum is often tighter
These are typical figures, not universal rules. Your rotor’s cast mark overrides any general range. If you are shopping for replacements, a [brake rotor buying guide](https://example.com/brake-rotor-buying-guide) will help you match the right specs to your vehicle. For performance builds, [best drilled and slotted rotors](https://example.com/best-drilled-and-slotted-rotors) often have their minimums printed in the product documentation — check before you buy. [VERIFY: confirm typical minimum thickness ranges for solid, vented, and drilled rotors against manufacturer data at publish time]
When your measurement lands within 1 mm of the minimum, replacement is the correct call. Resurfacing a rotor that close to the limit will likely push it below spec, which brings you back to the replacement decision covered later in this guide.
Thickness Variation (DTV) — The Hidden Culprit Behind Brake Pulsation
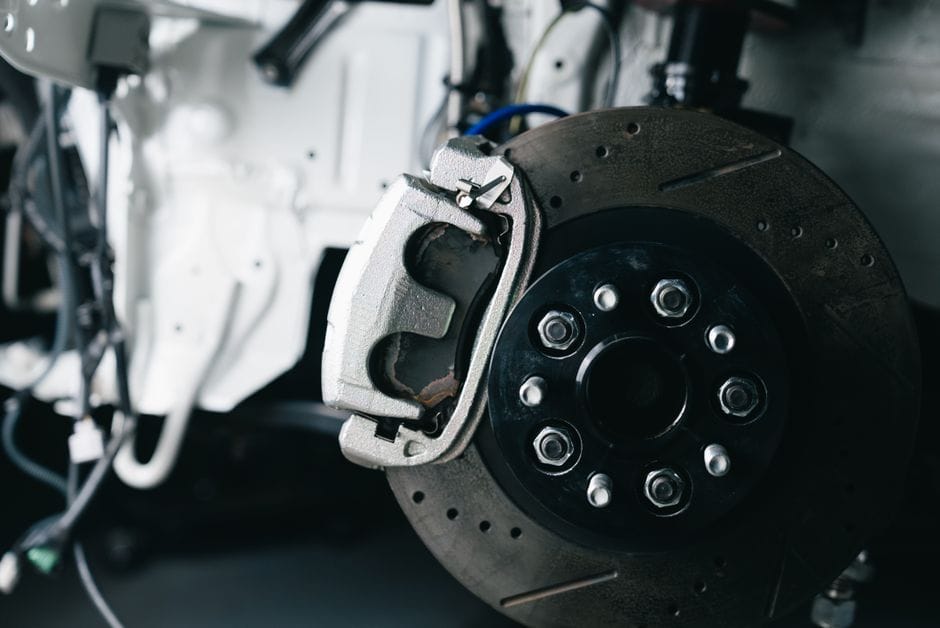
You measure thickness at several points, and the numbers all clear the minimum spec. Yet the pedal still shudders. This is where thickness variation, often called DTV, enters the picture. It is a separate measurement from the absolute minimum, and it explains many pulsation complaints that confuse DIY mechanics.
What is Disc Thickness Variation (DTV)?
Disc thickness variation is the difference between the thickest and thinnest points on the rotor’s friction surface. A rotor that measures 24.0 mm at one spot and 23.7 mm at another has 0.3 mm of DTV. The rotor is not warped in the traditional sense — it is simply uneven in thickness around its circumference.
DTV develops over time through normal wear. The brake pads contact the rotor unevenly, and the high spots wear faster than the low spots. Rust buildup, corrosion, and pad deposits also contribute. The result is a rotor that looks flat but is not, and this uneven surface creates problems every time the wheel turns.
How DTV Causes Pedal Pulsation and Steering Wheel Shimmy
Brake pulsation and DTV are directly linked. When you press the brake pedal, the caliper squeezes the rotor between the pads. If the rotor’s thickness varies, the pads must compress and release as they travel across the high and low spots. This rhythmic gripping creates a pulsing sensation in the brake pedal.
The frequency of the pulsation matches the wheel’s rotation speed. At low speeds, you feel a slow, rhythmic thump. At highway speeds, the pulses blend into a rapid vibration. If the DTV is severe, the vibration transfers through the suspension and appears as steering wheel shimmy. Front rotors cause steering wheel feedback; rear rotors often produce a pulsation you feel through the seat or the floorboard.
Measuring DTV: Acceptable vs. Dangerous Limits
Measuring DTV: Details
Measuring DTV requires a micrometer and multiple measurement points. Mark the rotor at four to six positions around its circumference, then measure at each mark on the same radial line — about 10 mm inward from the outer edge. The difference between your highest and lowest readings is the DTV.
Industry practice treats a DTV reading above 0.05 mm as the threshold where pulsation becomes noticeable. Readings above 0.10 mm generally produce strong, consistent pedal pulsation. [VERIFY: confirm acceptable DTV limits in mm against current industry standards at publish time]
DTV is a diagnosis, not a repair target. You cannot fix a rotor with high DTV by measuring it — you fix it by resurfacing or replacing. Resurfacing removes the high spots and restores a uniform thickness, but only if the rotor still has enough material above the minimum spec. If the rotor is near minimum thickness, replacement is the only option. When you replace, pairing new rotors with [best ceramic brake pads](https://example.com/best-ceramic-brake-pads) reduces the risk of uneven pad deposits that cause DTV to return quickly.
A rotor with high DTV but adequate thickness is a candidate for resurfacing. A rotor with high DTV and near-minimum thickness is scrap. Measure both numbers before deciding, because the minimum spec alone does not tell you the full story.
Scoring, Grooves, and Cracks: When Surface Damage Overrides Thickness
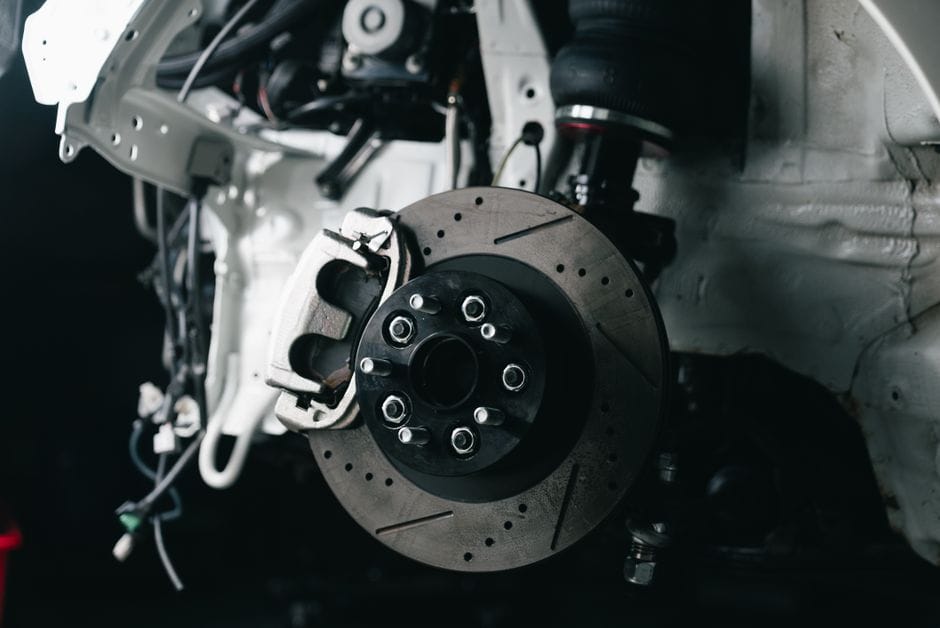
A rotor can be at a healthy thickness and still need replacement. Surface damage—rotor scoring, heat cracks, and stress fractures—can make a rotor unsafe long before it wears down to the minimum spec. Here’s when surface condition trumps the micrometer.
Maximum Scoring Depth Guidelines
Rotor scoring happens when worn brake pads expose their metal backing plates, which then gouge the rotor face. The result is a series of concentric grooves that reduce the contact area between pad and rotor. Less contact means less stopping power and longer stopping distances.
The industry generally treats a scoring depth of 1.5 mm as the replacement threshold. [VERIFY: confirm maximum scoring depth of 1.5 mm against current industry standards at publish time] You can measure this with a depth gauge or even a coin edge. If a groove catches your fingernail and the rotor face looks like a vinyl record, you’re likely near or past that limit.
Shallow scoring under 0.5 mm is often cosmetic. It will accelerate pad wear, but it won’t compromise braking performance immediately. Moderate scoring between 0.5 mm and 1.5 mm can sometimes be removed by resurfacing, provided the rotor retains enough thickness afterward. Deep scoring past 1.5 mm means the rotor’s friction surface is compromised, and resurfacing won’t restore it to a safe condition.
Signs Scoring Is Still Acceptable
- Grooves are shallow and uniform across the rotor face
- No vibration or pulsation felt during braking
- Rotor thickness remains well above the minimum spec
- Pad contact pattern covers most of the rotor surface
Signs Scoring Requires Replacement
- Grooves catch a fingernail or measure deeper than 1.5 mm
- Scoring is concentrated in one band, indicating a stuck caliper
- Thickness after resurfacing would fall below minimum spec
- Pad wear is uneven, with one pad worn far faster than the other
Heat Cracks and Stress Fractures: Visual Inspection
Heat Cracks and Stress Fractures: Details
Heat cracks form when a rotor gets hot enough to cause localized thermal expansion, then cools rapidly. They typically appear as thin lines radiating from the cooling holes or from the edge of the rotor face. Stress fractures are the same phenomenon at a more advanced stage—the cracks widen and deepen until the rotor structure weakens.
Not every crack is a death sentence. Hairline surface cracks that don’t reach the edges of the friction surface can sometimes be ignored. But any crack that extends to the outer edge of the rotor, connects two cooling holes, or shows visible darkening at the crack line is a structural failure waiting to happen. Rotors with these cracks can separate during heavy braking, which is a catastrophic failure mode.
Heat cracks and stress fractures also produce noise. A cracked rotor often emits a clicking or grinding sound when you brake, because the crack edges catch the pad material. If you hear that sound and see the crack on inspection, replacement is the correct move. Resurfacing a cracked rotor is dangerous—the resurfacing process removes material and can make the crack propagate faster.
The Interaction Between Pad Wear and Rotor Scoring
Pad wear and rotor scoring feed each other. A rotor with deep scoring will shred new pads quickly, because the grooves act like a file against the pad compound. Conversely, pads that are worn past their wear indicators will score a rotor that was otherwise healthy.
This is why you should replace pads and rotors as a matched set in most cases. Putting fresh pads on a scored rotor means the new pads will wear unevenly and may not bed in properly. Putting old pads on new rotors means the worn pad’s uneven surface will create hot spots on the fresh rotor face.
If you’re replacing scored rotors, pair them with quality pads that have consistent friction characteristics. Our guide to the [best budget brake pads](https://example.com/best-budget-brake-pads) covers options that balance pad life with rotor friendliness—softer compounds are generally gentler on rotor surfaces. A pad that’s too aggressive will accelerate rotor scoring even with perfect installation.
The practical takeaway: inspect the rotor face before you measure thickness. If you see deep rotor scoring, heat cracks, or stress fractures, skip the micrometer and order a replacement. Thickness only matters when the surface is otherwise healthy enough to continue braking safely.
Brake Rotor Thickness Decision Framework: Replace, Resurface, or Keep?
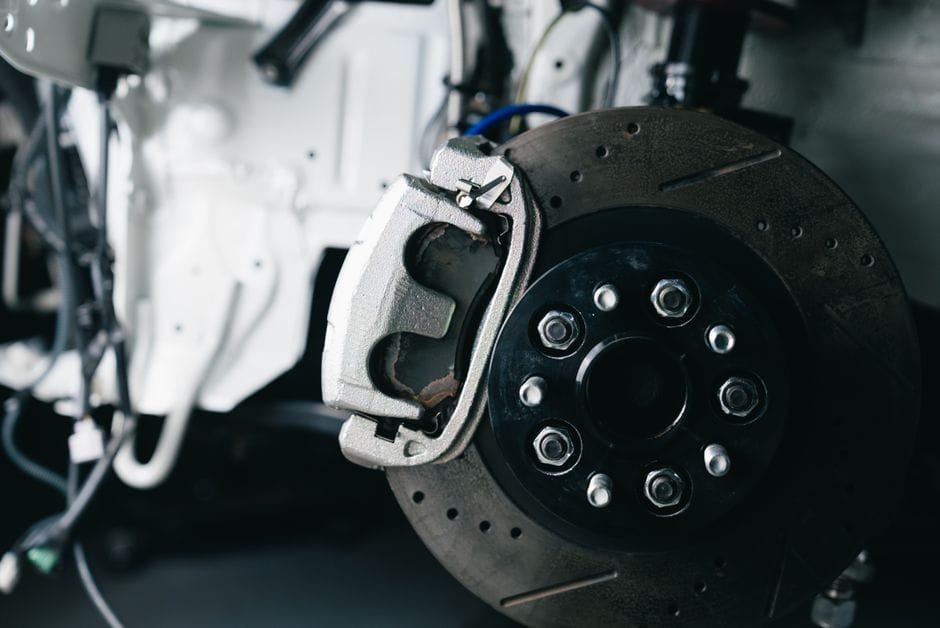
Once you have your micrometer reading and know the minimum thickness spec, you still face a choice. The measurement alone doesn’t tell you what to do next. You need a decision framework that weighs thickness against surface condition, cost, and how long you plan to keep the car.
H3: Decision Flowchart: If Thickness Is X, Then Do Y
Start with the raw numbers, then layer in the visual inspection you already did for scoring and cracks.
– **Below minimum thickness:** Replace. No exceptions. A rotor below spec cannot safely dissipate heat, and it may crack under hard braking. Rotor replacement is the only correct move here.
– **At or within 0.5 mm of minimum:** Replace. Even if the rotor measures legal today, it will wear past spec before the next pad change. You’ll be back in the same job sooner than you think.
– **Above minimum by more than 1 mm, with a smooth face:** Keep it. Clean the hub, install new pads, and bed them in properly.
– **Above minimum but with light scoring:** Measure thickness variation (DTV) with a dial indicator. If DTV is under the spec limit, resurfacing can restore a flat, smooth surface.
– **Above minimum but with deep grooves or heat cracks:** Replace. Resurfacing cannot remove deep cracks, and the rotor’s structural integrity is already compromised.
The decision framework hinges on one rule: thickness determines whether the rotor is *legal*, but surface condition determines whether it is *safe*. Both must pass.
H3: When Resurfacing Makes Sense vs. When It Doesn’t
H3: Details
Resurfacing (also called turning or machining) removes a thin layer of metal from the rotor face to eliminate scoring and restore flatness. It makes sense in three situations:
1. **The rotor has plenty of remaining thickness** — more than 1.5 mm above minimum after machining.
2. **The scoring is light to moderate** — shallow grooves that a brake lathe can cut below.
3. **The rotor is otherwise healthy** — no cracks, no blue heat spots, no excessive rust.
Resurfacing does not make sense when the rotor is already close to minimum thickness. Every machining pass removes material. If the rotor starts at 1 mm above minimum, a single resurfacing pass may push it below spec. You would pay for machining and still need rotor replacement.
Also, skip resurfacing on cheap rotors. A budget rotor that costs $30 to $50 each is often cheaper to replace than to machine, once you factor in labor. High-quality rotors from premium brands are better candidates for resurfacing because their metallurgy and heat treatment justify the additional service life.
H3: Cost-Benefit: Resurfacing vs. Replacing Rotors
H3: Details
The cost-benefit math is straightforward but depends on your labor situation.
– **Resurfacing cost:** [VERIFY: typical shop price for resurfacing a pair of rotors in current market] per rotor at a shop. If you DIY, you need access to a brake lathe, which most home mechanics don’t own.
– **Replacement cost:** Aftermarket rotors range from budget to premium.
If you pay a shop for labor, resurfacing rarely wins. The labor to remove, machine, and reinstall rotors is nearly identical to the labor for replacement. The only savings is the rotor cost itself, and that difference shrinks when you factor in machining fees.
If you DIY and own a lathe, resurfacing is cheaper — but only if the rotor has enough material. If you’re paying someone else, rotor replacement is usually the better value because you get a fresh friction surface with full thickness.
One more cost factor: brake fluid. Any time you open the hydraulic system to replace or resurface rotors, you should bleed the brakes. Factor in fresh fluid and a few extra minutes of labor. Our [brake fluid buying guide](https://example.com/brake-fluid-buying-guide) explains which DOT ratings match your system. The cost-benefit analysis only works if you account for the complete job, not just the rotor itself.
The practical answer for most DIY owners: replace. Modern rotors are inexpensive relative to labor, and the safety margin of a full-thickness rotor is worth the small premium over resurfacing. Keep the resurfacing option for premium rotors with plenty of material left — and even then, only if you have the equipment and skill to do it right.
Limitations of Thickness Measurement: What It Cannot Tell You
A micrometer gives you a number. That number tells you how much material remains, but it does not tell you whether that material is still sound. Thickness is a necessary check — it is not a sufficient one. The decision framework in the previous section relies on measurements, yet those measurements have blind spots you need to understand before you trust them.
Thickness Doesn’t Reveal Metallurgical Fatigue
Brake rotors are cast iron. Every thermal cycle — heat from braking, cooling from airflow — stresses the metal at a microscopic level. Over time, this creates metallurgical fatigue: micro-cracks that form inside the rotor structure without any visible surface sign. A rotor can measure perfectly within spec and still be structurally compromised. The metal has simply lost its ability to absorb thermal stress without propagating cracks. This is why a rotor that passes a thickness check can still fail catastrophically under hard braking.
Why a Rotor at Spec Thickness Can Still Be Unsafe
The minimum thickness number stamped on the rotor hat is a floor, not a guarantee. Manufacturers rate that spec for a rotor with normal heat history. If the rotor has been overheated — glazed, blued, or subjected to repeated heavy braking — the material properties degrade faster than the thickness does. A rotor at 10.8 mm with a 10.8 mm minimum can be unsafe if it has endured severe thermal abuse. The thickness measurement cannot detect this. It only confirms geometry, not integrity.
The Role of Heat History and Hard Spot Formation
Heat history is the record of thermal stress a rotor has accumulated. When a rotor gets hot enough, the cast iron can undergo localized phase changes. This creates hard spots — areas where the metal becomes harder and more brittle than the surrounding material. Hard spots resist wear, so the brake pads skip over them, causing pulsation and noise. They also crack more readily under load. A micrometer reading across a hard spot will show thickness within spec, because hard spots are a material change, not a dimensional one. The rotor can be at spec thickness and still vibrate, still crack, still fail.
What you cannot see in a thickness reading: internal delamination, heat-induced hardness variation, and fatigue cracks below the surface. These require either destructive testing or replacement. If a rotor has a known history of severe overheating — from towing, track use, or a stuck caliper — do not trust the thickness number alone. Replace it. The cost of a new rotor is far lower than the cost of a brake failure.
For rotors that survive multiple pad changes and accumulate heat history, the practical rule is simple: if you cannot verify the rotor’s thermal past, and it has more than one pad change on it, replacement is the conservative choice. This is especially true for performance-oriented vehicles where braking demands are higher. If you are considering upgraded components, our [best drilled and slotted rotors](https://example.com/best-drilled-and-slotted-rotors) guide covers options designed to manage heat more effectively — though even those rotors have the same metallurgical limits.
Frequently Asked Questions About Brake Rotor Thickness
Can I measure rotor thickness without removing the wheel?
Yes, but only if your wheels have large enough openings to reach the rotor’s friction surface. You need a caliper that fits between the wheel spokes and the rotor. A standard digital caliper often works on vehicles with open-spoke designs, but many factory alloy wheels block access. A dial caliper with a deep throat or a dedicated brake rotor micrometer gives you more reach.
For accurate rotor thickness measurement, you must measure at the thinnest point of the friction surface — usually the swept area where the pads contact. You cannot get a reliable reading through the wheel if the caliper jaws only reach the outer edge or the hat section. If you cannot position the caliper perpendicular to the rotor face and at least 10 mm inward from the outer edge, you need to remove the wheel. The extra 10 minutes of work beats a false reading that leads to an unsafe rotor.
How much does rotor thickness change over its lifetime?
The wear rate depends on pad material, driving style, and rotor metallurgy. A typical passenger car rotor starts around 22 to 28 mm thick and wears roughly 0.01 to 0.02 mm per 1,000 miles under normal driving. That translates to about 1 to 2 mm of total wear across a rotor’s service life. Aggressive braking, heavy vehicles, and frequent stop-and-go traffic accelerate this rate significantly.
Most rotors are discarded for thickness variation or surface damage long before they reach the minimum thickness spec. If you measure the same rotor at two pad changes, you typically see 0.5 to 1.5 mm of wear. A rotor that loses more than 1 mm per pad change is wearing abnormally fast — check caliper slide pins and pad material. For a precise wear rate figure on your specific vehicle, consult the factory service manual. [VERIFY: typical rotor wear rate in mm per 10,000 miles for a standard passenger car across major OEMs]
Is it safe to drive with rotors below minimum thickness?
No. Driving with rotors below minimum thickness is unsafe and should be avoided entirely. The minimum thickness number stamped on the rotor hat is the point at which the rotor no longer has enough material to absorb and dissipate heat safely. Below that number, the rotor can warp, crack, or fail structurally during hard braking.
There is no “just a little below spec” margin that is acceptable. Manufacturers set the minimum with a safety factor, but that factor exists to cover measurement error and uneven wear — not to give you extra driving miles. If your rotor thickness measurement shows the rotor at or below the minimum, replace it before driving. This is not a maintenance suggestion; it is a safety requirement. The cost of a rotor is trivial compared to the consequences of a brake failure at speed.
Do ceramic pads wear rotors differently than semi-metallic pads?
Ceramic pads generally produce less rotor wear than semi-metallic pads. The ceramic compound is softer than the iron rotor surface, so it transfers less abrasive material to the rotor during braking. Semi-metallic pads contain metal fibers that act as abrasives, increasing rotor wear rate and leaving a rougher surface finish. This is why vehicles with semi-metallic pads often need rotor replacement sooner.
Ceramic pads also run cooler and produce less brake dust, which reduces thermal cycling on the rotor. However, ceramic pads are not universally better — they can glaze under extreme heat and may not grip as aggressively when cold. If you are choosing between pad types, consider what matters more: rotor longevity or initial bite. For daily driving, ceramic pads are the better choice for rotor preservation. Our best ceramic brake pads guide covers top options, and if you are on a tight budget, our best budget brake pads list includes quality semi-metallic alternatives.
Final Verdict: Master Rotor Thickness Before You Replace
Brake rotor thickness is the single most reliable indicator of braking health. It’s not about how shiny the surface looks — it’s a precise engineering specification. Every rotor has two numbers that matter: the original thickness when new (typically 22–32 mm for front rotors) and the minimum thickness spec (usually 2–4 mm less), which is stamped or cast directly into the rotor’s hat. Your only job is to measure where you are between those two numbers using a micrometer or caliper, then decide whether to resurface or replace.
For most drivers, our top recommendation is the Bosch QuietCast Premium Rotor. It wins because it combines a 2–3 mm extra corrosion-resistant coating with precision-machined friction surfaces that exceed OE runout tolerances (under 0.002 inches). The alloy composition reduces heat fade while the vented design improves cooling under repeated braking. If you’re replacing rotors on a daily commuter, this is the balance of durability, noise suppression, and price you want.
Here’s your decision framework for rotor thickness and replacement:
If you need maximum heat dissipation for towing or mountain driving, choose slotted or drilled rotors like the Power Stop Z23 Evolution because their geometry releases gas and heat faster, preventing brake fade on long descents.
If you need a budget-friendly fix and your rotor is above minimum thickness, choose resurfacing (turning) instead of replacement because it restores a flat, true surface for 40–60% less cost than new rotors.
If you need minimal dust and noise in a luxury sedan, choose ceramic-composite rotors because the ceramic matrix reduces brake dust by up to 70% and eliminates the high-frequency squeal common in metallic pads.
If you’re tracking the car or doing repeated hard stops, choose cryogenically treated rotors because the deep-freeze process relieves internal stress, reducing warping and extending service life under extreme thermal loads.
Now the honest limitation: no rotor can fix a caliper problem. If your caliper is sticking, dragging, or leaking fluid, even a brand-new rotor will wear unevenly or warp within 5,000 miles. The Bosch QuietCast cannot compensate for seized slide pins or a collapsed brake hose. Always inspect caliper function and pad wear patterns before you spend money on rotors.
Also, thickness alone doesn’t tell the whole story. A rotor can be within spec but have severe scoring, heat cracks, or a blue-tinted surface from overheating — those warrant replacement regardless of measurement. And remember: when you replace rotors, replace pads too. New rotors with old pads create uneven contact that leads to pulsation and premature rotor failure.
Your move: grab a micrometer, measure at the thinnest point (usually 10–15 mm from the edge), and compare to the minimum spec cast into the hat. If you’re at or below minimum, replace. If you’re above but feel vibration, resurface. If you’re above and smooth, you’re good to drive. That’s the entire decision tree — measure, compare, act.
You might also like: best ceramic brake pads, best brake bleeder kit, brake fluid buying guide