Brake Rotor Thickness Guide 2: Expert Guide
Brake rotor thickness is the most critical specification for safe braking. Every rotor has a minimum thickness rating, usually stamped on the hub. Once rotors wear past that limit, they cannot dissipate heat properly. This causes brake fade, vibration, and in severe cases, structural failure. This guide explains what that number means, how to measure it with a micrometer or caliper, and when to replace rotors based on real data.
You will learn the difference between minimum thickness and discard thickness. You will also learn how to read the wear indicators cast into the rotor. Measuring at multiple points matters because rotors rarely wear evenly. We cover the tools you need and the step-by-step measurement process for front and rear rotors. We also explain the warning signs that your rotors are past their safe service life. Whether you are a DIY mechanic or just trying to understand your shop, this is the complete reference for rotor thickness specifications.
This guide stands out because of the data. We compiled minimum thickness specs for popular vehicle models. We explain how brake pad wear compounds rotor wear. We include a practical decision framework so you know when to machine versus replace. Measuring rotor thickness is non-negotiable for brake system maintenance. A rotor that looks fine on the outside can be dangerously thin where it matters most.
What Is Brake Rotor Thickness and Why It Matters
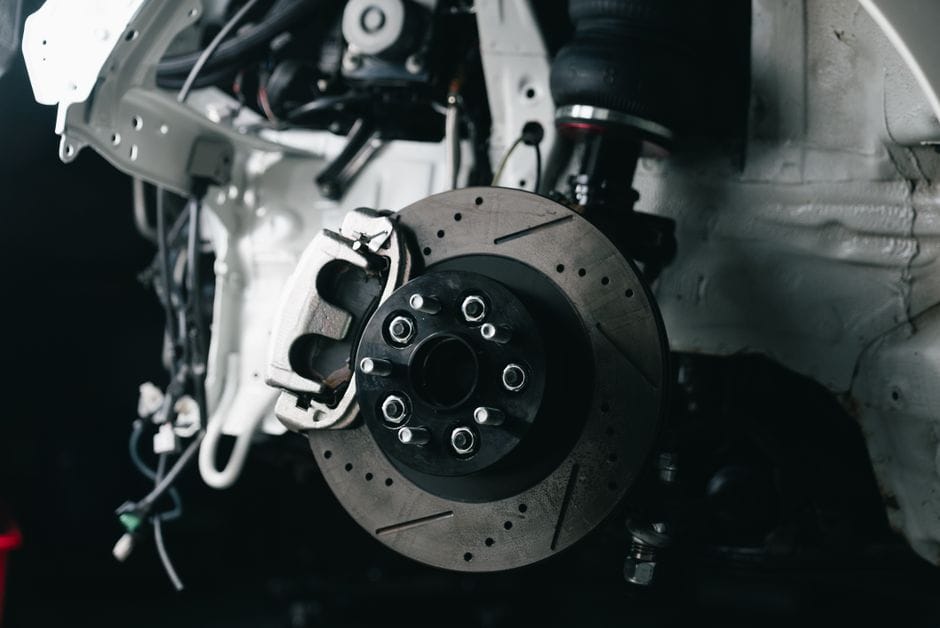
Brake rotor thickness is the measurement of the metal disc your brake pads clamp down on to stop your vehicle. It is the vertical distance between the two friction surfaces — the flat, machined faces where the pads make contact. Every rotor starts at a specific thickness when new, called the “new thickness” spec, and wears thinner with every stop.
The measurement matters because rotors are engineered with a structural minimum. Below that point, the metal can no longer absorb and shed heat safely, and it risks cracking or catastrophic failure under hard braking. This is why your vehicle manufacturer publishes a minimum thickness spec — usually stamped directly on the rotor’s hub or hat — and why ignoring it is one of the most dangerous maintenance mistakes a DIY owner can make.
Rotor wear is not just about the pad material disappearing. Each braking event removes a microscopic layer of iron from the friction surface. Over thousands of stops, this adds up to measurable wear. The rate of wear depends on driving style, vehicle weight, pad compound, and rotor metallurgy. Aggressive driving, heavy loads, and towing accelerate the process significantly.
The Difference Between Rotor Thickness and Pad Thickness
The Difference Between Rotor Thickness and Pad Thickness
Many drivers confuse rotor thickness with brake pad thickness, but they are entirely different measurements with different safety implications. Brake pad thickness refers to the friction material bonded to the backing plate — the part that presses against the rotor. Pad thickness is checked by looking through the caliper opening or measuring the remaining friction material with a gauge. When pads wear down to about 3mm, they need replacement.
Rotor thickness, on the other hand, is the metal disc itself. While pads are designed to be consumable and replaced regularly, rotors are engineered to last longer — typically two or three pad sets — but they still have a finite service life. A rotor can be worn past its minimum thickness even when the pads have plenty of material left, especially if the vehicle has been driven with worn pads that scored the rotor surface.
The key difference is that pad wear is visible and intuitive, while rotor wear is hidden. A rotor can lose 2mm of material across its surface without any obvious visual cue, which is why measuring with a micrometer is the only reliable way to know its true condition.
How Thickness Affects Heat Dissipation and Brake Fade
How Thickness Affects Heat Dissipation and Brake Fade
Brake rotors function as heat sinks. When you press the brake pedal, the kinetic energy of the moving vehicle is converted into thermal energy at the friction surface. A thicker rotor has more mass, which means it can absorb more heat before its temperature rises to dangerous levels. This thermal mass is critical for preventing brake fade — the phenomenon where brakes lose stopping power due to overheating.
When a rotor wears below its minimum thickness, its thermal capacity drops significantly. The thinner metal heats up faster, reaches higher temperatures, and cools more slowly. This leads to several problems: the brake fluid can boil at the caliper, creating a spongy pedal; the pad compound can glaze over, reducing friction; and the rotor itself can develop heat checking — small cracks on the surface that grow with thermal cycling.
In extreme cases, a rotor that is too thin can warp or even crack completely under hard braking. The structural integrity of the rotor depends on maintaining adequate thickness to resist the clamping forces of the caliper and the thermal stresses of braking. This is why the minimum thickness spec is not a suggestion — it is a hard safety limit.
Minimum Thickness vs. Discard Thickness: The Critical Distinction
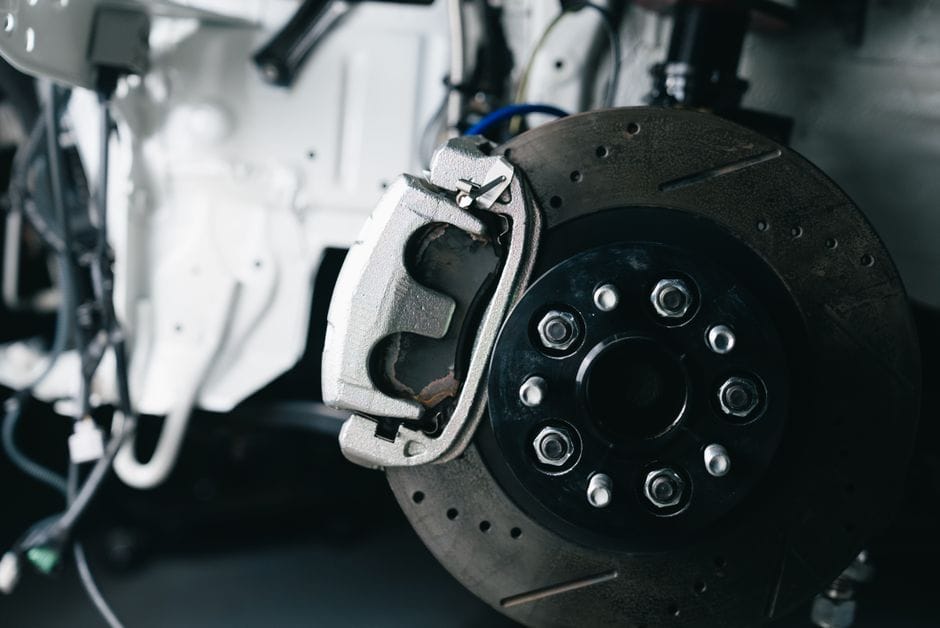
Understanding the difference between minimum thickness and discard thickness is essential for making correct replacement decisions. These two terms are often used interchangeably, but they refer to different specifications with different purposes.
Minimum thickness (often stamped as “MIN TH” on the rotor) is the absolute lowest measurement at which the rotor can safely remain in service. This number is determined by the vehicle manufacturer through engineering analysis and testing. It accounts for the structural strength needed to resist clamping forces, the thermal mass required for heat dissipation, and the material thickness needed to prevent warping or cracking.
Discard thickness is the point at which the rotor must be removed from service and replaced. In most cases, discard thickness is the same as minimum thickness — once you reach the minimum, the rotor is discarded. However, some manufacturers specify a discard thickness that is slightly above the absolute minimum, providing a safety margin. This is particularly common on performance vehicles and heavy-duty trucks.
Where to Find the Minimum Thickness Spec (Cast into the rotor hat)
Where to Find the Minimum Thickness Spec (Cast into the rotor hat)
The minimum thickness specification is almost always cast or stamped into the rotor itself. Look on the hub or hat — the flat, raised center section of the rotor that mounts to the wheel hub. You will typically see a number like “MIN TH 22.4mm” or “MIN 0.79 in” along with the manufacturer’s logo and sometimes a date code.
This stamping is your primary reference. It is legally required in most jurisdictions and is the number you should compare against your measurements. If the stamping is worn away or illegible — which can happen on older rotors — you can find the spec in the vehicle’s service manual, on the manufacturer’s website, or by contacting a dealership with your VIN.
It is important to note that the minimum thickness spec is unique to each rotor design. Two different vehicles can have rotors of the same diameter but different minimum thicknesses, depending on the rotor’s metallurgy, venting design, and the vehicle’s weight and performance characteristics. Never assume a spec from one vehicle applies to another.
Why You Should Never Trust the ‘Looks Fine’ Check
Why You Should Never Trust the ‘Looks Fine’ Check
One of the most common mistakes in brake maintenance is relying on visual inspection to judge rotor condition. A rotor can look perfectly smooth and shiny while being dangerously thin. The friction surface wears evenly across its width, so there is no visual cue that material has been lost. Unless the rotor has deep scoring, obvious cracks, or severe rust, it will look normal even when it is past its service limit.
The only reliable way to know a rotor’s thickness is to measure it with a micrometer. This tool is inexpensive — typically $20 to $40 for a quality digital model — and takes less than a minute per rotor. Measuring at multiple points around the rotor’s circumference and at different radii gives you a complete picture of its condition.
Another reason to avoid visual inspection is that rotors can wear unevenly. Taper wear — where one side of the friction surface is thinner than the other — is common on vehicles driven in stop-and-go traffic. This uneven wear can cause pedal pulsation and vibration, but it is invisible from the outside. Only measurement reveals the true condition.
The 1.5mm Rule: What Happens When You Exceed the Limit
The 1.5mm Rule: Details
While the exact consequences vary by vehicle, a general rule of thumb is that exceeding the minimum thickness by more than 1.5mm is a critical safety hazard. At this point, the rotor has lost so much material that its structural integrity is compromised. The metal can flex under clamping force, causing a soft or spongy brake pedal. It can also overheat rapidly, leading to brake fade at exactly the moment you need maximum stopping power.
In severe cases, a rotor that is excessively thin can crack. The cracks typically start at the edge of the friction surface and propagate inward, eventually causing the rotor to separate. This is a catastrophic failure that can result in loss of braking ability and a serious accident.
The
The 1.5mm rule is not a universal standard — always defer to the manufacturer’s stamped spec — but it serves as a useful mental benchmark. If your rotor measures more than 1.5mm below the minimum thickness, it is not just worn; it is dangerously compromised. Replace it immediately, regardless of how it looks or how recently it was installed.
How to Measure Brake Rotor Thickness: Tools and Step-by-Step Process

Measuring brake rotor thickness is a straightforward process that requires the right tools and a methodical approach. The two primary tools are a micrometer and a caliper, each with its own advantages and limitations.
A digital or dial micrometer is the gold standard for rotor measurement. It provides accuracy to 0.001mm (0.0001 inches) and features a flat anvil and spindle that make contact with the friction surfaces. Micrometers are available in various sizes, but a 0-25mm (0-1 inch) range covers most passenger car rotors. For larger rotors on trucks and SUVs, a 25-50mm (1-2 inch) range may be necessary.
A caliper — either digital or dial — is a more versatile tool that can measure both thickness and other dimensions like rotor diameter. However, calipers are generally less accurate than micrometers, with typical precision of 0.01mm (0.001 inches). For rotor thickness measurement, this level of accuracy is usually sufficient, but a micrometer is preferred when the rotor is close to its minimum spec.
Step-by-Step Measurement Process
Step-by-Step Measurement Process
Before measuring, ensure the rotor is clean and free of rust, debris, and brake dust. Use a wire brush or brake cleaner to remove any loose material from the friction surface. This is critical because even a thin layer of contamination can skew your measurement by several tenths of a millimeter.
1. **Remove the wheel and tire** to access the rotor. If you are measuring the front rotors, you may need to remove the caliper to access the full friction surface. On many vehicles, you can measure the rotor without removing the caliper by reaching through the caliper openings, but this limits the measurement points.
2. **Identify the minimum thickness spec** from the stamping on the rotor hat or the vehicle’s service manual. Write this number down so you can compare it against your measurements.
3. **Measure at multiple points around the rotor.** Rotors wear unevenly, so you need at least four to six measurements spaced evenly around the circumference. Mark each measurement point with a piece of chalk or tape so you can track where you measured.
4. **Measure at different radii.** In addition to measuring around the circumference, take measurements at the outer edge, the middle, and the inner edge of the friction surface. This reveals taper wear — where the rotor is thinner on one side than the other.
5. **Record each measurement** and compare them against the minimum spec. The lowest reading is the one that matters. If any measurement is at or below the minimum thickness, the rotor must be replaced.
Measuring Front vs. Rear Rotors
Front rotors typically wear faster than rear rotors because they handle a larger share of the braking force — usually 60-70% of the stopping power. This means front rotors will reach their minimum thickness sooner and may need replacement more frequently.
When measuring rear rotors, note that many vehicles have solid (non-vented) rotors on the rear axle. These are thinner than vented front rotors and have a lower minimum thickness spec. The measurement process is the same, but you should be aware that rear rotors can be more susceptible to rust and pitting, especially on vehicles that sit for extended periods.
Common Measurement Mistakes to Avoid
Common Measurement Mistakes to Avoid
The most common mistake is measuring at only one point and assuming that represents the entire rotor. Rotors wear unevenly, and a single measurement can miss a thin spot that is below the minimum spec.
Another mistake is measuring with a dirty or damaged tool. A micrometer with worn anvils or a caliper with a bent jaw will give inaccurate readings. Always check your tools against a known standard — like a gauge block or a new rotor — before relying on them.
Finally, be careful not to measure the rust buildup on the rotor’s edge. The friction surface is the machined area where the pads contact; the outer edge often has a rust lip that is not part of the friction surface. Measuring this lip will give you a falsely high reading.
Rotor Runout, Parallelism, and Taper Wear: Beyond Simple Thickness

While minimum thickness is the primary safety specification, other measurements are equally important for diagnosing brake problems. Rotor runout, parallelism, and taper wear all affect brake performance and can cause symptoms like pedal pulsation, vibration, and uneven pad wear.
Rotor Runout (Lateral Runout)
Rotor Runout (Lateral Runout)
Rotor runout is the amount of side-to-side movement of the rotor as it spins. It is measured with a dial indicator mounted to a fixed point while the rotor is rotated. Runout is expressed in thousandths of an inch (or hundredths of a millimeter) and represents the total deviation from a perfectly flat plane.
Excessive runout causes the brake pads to be pushed back into the caliper piston on each revolution, creating a pulsating brake pedal and vibration through the steering wheel. The typical specification for lateral runout is 0.002 to 0.004 inches (0.05 to 0.10mm), depending on the vehicle.
Runout can be caused by several factors: a dirty or corroded hub surface, improper wheel torque, or a rotor that has been warped by excessive heat. In some cases, runout can be corrected by re-mounting the rotor on the hub or by machining the rotor. However, if the rotor is near its minimum thickness, replacement is the safer option.
Parallelism (Thickness Variation)
Parallelism (Thickness Variation)
Parallelism refers to the variation in thickness around the rotor’s circumference. It is measured by taking multiple thickness readings at evenly spaced points and calculating the difference between the thickest and thinnest measurements. The specification for parallelism is typically 0.0005 to 0.001 inches (0.013 to 0.025mm).
When parallelism is out of spec, the brake pads move in and out as the rotor rotates, creating a pulsation that is felt through the brake pedal. This is often described as a “warped rotor” feeling, but it is actually caused by uneven thickness rather than actual warping.
Parallelism issues are usually caused by uneven pad wear, excessive heat, or improper rotor machining. If the rotor has enough material remaining, it can be machined to restore parallelism. Otherwise, replacement is required.
Taper Wear
Taper wear is a condition where the rotor is thicker on one side of the friction surface than the other. It is measured by comparing thickness readings at the inner and outer edges of the friction surface. Taper wear is typically caused by caliper misalignment, worn slide pins, or a sticking caliper piston.
The specification for taper wear is usually 0.0005 to 0.001 inches (0.013 to 0.025mm) across the friction surface. Excessive taper wear causes uneven pad contact, leading to tapered pad wear and reduced braking efficiency. It also creates a condition where the rotor must be machined or replaced to restore proper contact.
Scoring Depth and Heat Checking
Scoring Depth and Heat Checking
Scoring refers to grooves or channels cut into the friction surface by worn brake pads or embedded debris. Deep scoring — typically more than 0.060 inches (1.5mm) — can reduce braking effectiveness and may require rotor replacement. Light scoring is normal and does not affect performance.
Heat checking is the appearance of small, hairline cracks on the friction surface, usually radiating from the edges. These cracks are caused by thermal stress from repeated heating and cooling. Light heat checking is common and generally harmless, but deep or extensive cracking indicates the rotor has been overheated and should be replaced.
OEM vs. Aftermarket Rotor Specs: What You Need to Know

When replacing rotors, you have two main options: Original Equipment Manufacturer (OEM) rotors and aftermarket rotors. Each has its own specifications, quality levels, and considerations regarding minimum thickness.
OEM Rotors
OEM rotors are manufactured to the exact specifications of the vehicle manufacturer. They are designed to match the original rotor’s dimensions, metallurgy, and minimum thickness spec. OEM rotors are typically made from cast iron with specific alloying elements that provide the right balance of wear resistance, heat dissipation, and structural strength.
The advantage of OEM rotors is that they are guaranteed to meet the vehicle’s engineering requirements. The minimum thickness spec stamped on an OEM rotor is the same as the original, so you can trust that
the measurement you take against the stamped number is accurate and reliable. OEM rotors also come with the vehicle manufacturer’s warranty and are tested to meet strict quality standards.
The main disadvantage of OEM rotors is cost — they are typically 30-50% more expensive than aftermarket alternatives. However, for drivers who prioritize safety and reliability, the extra cost is often justified by the guaranteed fit and performance.
Aftermarket Rotors
Aftermarket Rotors
Aftermarket rotors are manufactured by third-party companies and are designed to fit specific vehicle models. They come in a wide range of quality levels, from budget options to high-performance upgrades. The minimum thickness spec for aftermarket rotors can vary from the OEM spec, depending on the manufacturer and the rotor’s design.
Budget aftermarket rotors are often made from lower-grade cast iron and may have a thinner overall construction. This means their minimum thickness spec may be lower than the OEM spec, which reduces their service life and heat capacity. While these rotors are cheaper, they may not provide the same level of safety or longevity as OEM parts.
Premium aftermarket rotors, on the other hand, are often engineered to exceed OEM specifications. They may feature improved metallurgy, better venting designs, or drilled and slotted surfaces for enhanced heat dissipation. These rotors typically have a minimum thickness spec that is equal to or greater than the OEM spec, providing a longer service life.
How to Verify Aftermarket Specs
When purchasing aftermarket rotors, always check the minimum thickness spec before installation. This information should be printed on the rotor’s packaging or available from the manufacturer’s website. Compare this spec against the OEM spec for your vehicle to ensure the aftermarket rotor provides adequate safety margins.
It is also important to verify that the aftermarket rotor’s dimensions — including diameter, height, and mounting pattern — match the OEM specifications. A rotor that is slightly too small or too large can cause caliper misalignment, uneven pad wear, and reduced braking performance.
Corrosion and Rust Pitting Considerations
Corrosion and Rust Pitting Considerations
Both OEM and aftermarket rotors are susceptible to corrosion and rust pitting, especially in regions with harsh winters or high humidity. Rust on the friction surface can cause uneven pad contact, vibration, and reduced braking effectiveness.
Surface rust that forms after a vehicle sits for a few days is normal and will be worn off after a few stops. However, deep rust pitting — where the corrosion has eaten into the metal — can reduce the rotor’s effective thickness and create rough spots that damage brake pads.
When measuring rotor thickness, be sure to measure the actual friction surface, not areas affected by rust pitting. If rust pitting is severe, the rotor may need to be replaced even if the measured thickness is above the minimum spec, because the pitting compromises the rotor’s structural integrity.
When to Replace vs. Resurface: A Practical Decision Framework

One of the most common questions in brake maintenance is whether to resurface (machine) a rotor or replace it entirely. The answer depends on several factors, including the rotor’s remaining thickness, its overall condition, and the cost of each option.
When Resurfacing Is Appropriate
Resurfacing involves removing a thin layer of metal from the friction surface to restore a smooth, flat finish. This process can eliminate scoring, minor heat checking, and parallelism issues. Resurfacing is appropriate when:
– The rotor’s thickness is above the minimum spec by at least 0.5mm (0.020 inches) after machining
– The rotor has no deep cracks, severe rust pitting, or structural damage
– The rotor’s runout can be corrected by machining
– The cost of resurfacing is significantly less than replacement
Most manufacturers specify that a rotor can be machined down to a “minimum machinable thickness” — typically 1.0 to 1.5mm above the discard thickness. This ensures that after machining, the rotor still has enough material to provide a safe service life.
When Replacement Is Required
Replacement is the only safe option when:
– The rotor is already at or below the minimum thickness spec
– The rotor has deep cracks or heat checking that extends through the friction surface
– The rotor has severe rust pitting that compromises its structural integrity
– The rotor has been machined before and is now below the minimum machinable thickness
– The rotor is warped beyond what machining can correct
In general, if you are unsure whether a rotor can be safely resurfaced, replacement is the safer choice. The cost difference between resurfacing and replacement is often small — typically $20-40 per rotor for machining versus $50-150 per rotor for replacement — and the safety benefits of new rotors are significant.
The Cost-Benefit Analysis
When deciding between resurfacing and replacement, consider the following:
– **Labor costs:** Resurfacing requires removing the rotor and taking it to a machine shop, which adds labor time. Replacement is often faster if you are doing the work yourself.
– **Rotor age and mileage:** If the rotor has been in service for 50,000 miles or more, replacement is usually the better investment, as the rotor is likely close to its minimum thickness anyway.
– **Pad condition:** If you are replacing the brake pads, new rotors provide a fresh surface for the pads to bed in properly. Resurfaced rotors can work, but they may not provide the same level of performance.
– **Warranty considerations:** Some brake pad manufacturers require new or resurfaced rotors for their warranty to remain valid.
Warning Signs That Your Rotors Are Past Their Safe Service Life
Warning Signs That Your Rotors Are Past Their Safe Service Life
Beyond measuring thickness, there are several warning signs that indicate your rotors need immediate attention:
– **Pulsating brake pedal:** This indicates parallelism issues or runout, which may be caused by uneven wear or warping.
– **Vibration through the steering wheel:** This is often caused by excessive runout on the front rotors.
– **Squealing or grinding noises:** This can indicate that the pads are worn down to the metal backing plate, which will score the rotor surface.
– **Visible cracks or deep grooves:** These are signs of structural damage that cannot be repaired.
– **Blue or discolored spots on the rotor:** This indicates overheating, which can cause warping and reduced performance.
If you experience any of these symptoms, measure the rotor thickness immediately. Even if the thickness is above the minimum spec, the rotor may need to be resurfaced or replaced to restore safe braking performance.
Brake Pad Wear and Its Effect on Rotor Thickness

Brake pads and rotors wear together as a system. The condition of your brake pads directly affects how quickly your rotors wear and whether they reach their minimum thickness prematurely.
How Pad Material Affects Rotor Wear
Brake pads are made from various friction materials, each with different wear characteristics. Organic pads are soft and gentle on rotors but wear quickly themselves. Semi-metallic pads provide better stopping power and heat resistance but are harder on rotors, causing faster rotor wear. Ceramic pads offer a balance of performance and rotor-friendly wear, making them a popular choice for daily drivers.
The hardness of the pad material directly influences rotor wear rate. Harder pads remove more material from the rotor surface with each stop, while softer pads preserve rotor thickness but require more frequent replacement. This is why it is important to choose pads that match your driving style and the rotor’s design.
Worn Pads and Rotor Damage
When brake pads wear down to the metal backing plate, the metal contacts the rotor directly. This causes severe scoring — deep grooves cut into the friction surface — and rapid rotor wear. In extreme cases, the metal-to-metal contact can generate enough heat to warp the rotor or cause it to crack.
If you have driven with worn pads for any significant distance, the rotors are likely damaged. Even if the rotor thickness is still above the minimum spec, the scoring may be deep enough to require resurfacing or replacement. Always inspect the rotor surface when replacing worn pads.
Pad Replacement Intervals and Rotor Life
Most brake pads last between 30,000 and 70,000 miles, depending on driving conditions and pad material. Rotors typically last for two to three pad sets — roughly 60,000 to 150,000 miles — before reaching their minimum thickness.
However, this is only an estimate. Aggressive driving, heavy loads, and frequent stop-and-go traffic can significantly shorten both pad and rotor life. The only reliable way to know when rotors need replacement is to measure their thickness at every pad change.
The Importance of Bedding In New Pads and Rotors
The Importance of Bedding In New Pads and Rotors
When you install new pads and rotors, the friction surfaces need to be “bedded in” — a process that transfers a thin layer of pad material onto the rotor surface. This creates an even friction interface that maximizes braking performance and minimizes wear.
Proper bedding involves a series of moderate stops from speed, followed by a cooling period. This process should be repeated several times to ensure even pad transfer. Failure to bed in new components can result in uneven wear,
vibration, and reduced braking performance. Always follow the manufacturer’s bedding procedure when installing new rotors and pads.
Corrosion, Rust Pitting, and Environmental Factors

Corrosion is one of the most underestimated threats to brake rotor integrity. While surface rust that forms overnight is harmless and wears off after a few stops, deep rust pitting can compromise the rotor’s structural strength and reduce its effective thickness.
How Rust Affects Rotor Thickness
Rust forms when iron in the rotor reacts with oxygen and moisture. On the friction surface, this rust is typically worn away by the brake pads during normal driving. However, on the rotor’s edges, hub, and venting vanes, rust can accumulate and cause pitting.
Rust pitting creates small craters in the metal surface. These pits act as stress concentrators, making the rotor more susceptible to cracking under thermal and mechanical stress. They also reduce the effective thickness of the rotor — a rotor with deep pitting may measure above the minimum spec but still be structurally compromised.
Regional Considerations
Vehicles driven in regions with harsh winters, where road salt is used, are particularly susceptible to rotor corrosion. Salt accelerates the oxidation process and can cause rapid pitting, especially on rotors that are not used frequently.
Coastal areas with high humidity and salt air also pose a corrosion risk. Vehicles parked outdoors in these environments may develop significant rust on their rotors within a few years.
Measuring Rust-Affected Rotors
When measuring a rotor with surface rust, clean the friction surface thoroughly with a wire brush before taking measurements. The rust layer can add several tenths of a millimeter to your reading, giving you a false sense of safety.
For rotors with deep pitting, measure the thickness at the bottom of the pits, not the surrounding surface. If the pitting is severe enough that the rotor’s effective thickness is below the minimum spec, the rotor must be replaced.
Preventing Rotor Corrosion
Preventing Rotor Corrosion
While you cannot completely prevent rotor corrosion, you can minimize it by:
– Driving regularly to keep the friction surfaces clean
– Parking in a garage or covered area when possible
– Applying a thin coat of anti-seize compound to the rotor hub (not the friction surface) during installation
– Replacing rotors that show signs of deep pitting before they become a safety hazard
Minimum Thickness Specs for Popular Vehicle Models

While the minimum thickness spec is always stamped on the rotor itself, having a reference for popular vehicle models can help you plan maintenance and verify that your measurements are in the correct range. The following are typical minimum thickness specs for common vehicles — always confirm with the stamping on your specific rotor.
Sedans and Compact Cars
– **Honda Civic (2016-2021):** Front rotors 22.0mm, Rear rotors 9.0mm
– **Toyota Corolla (2014-2019):** Front rotors 22.0mm, Rear rotors 9.0mm
– **Honda Accord (2018-2022):** Front rotors 28.0mm, Rear rotors 10.0mm
– **Toyota Camry (2018-2022):** Front rotors 28.0mm, Rear rotors 10.0mm
– **Nissan Altima (2019-2022):** Front rotors 28.0mm, Rear rotors 10.0mm
SUVs and Crossovers
– **Honda CR-V (2017-2022):** Front rotors 28.0mm, Rear rotors 10.0mm
– **Toyota RAV4 (2019-2022):** Front rotors 28.0mm, Rear rotors 10.0mm
– **Ford Escape (2020-2022):** Front rotors 28.0mm, Rear rotors 11.0mm
– **Chevrolet Equinox (2018-2022):** Front rotors 28.0mm, Rear rotors 10.0mm
– **Jeep Grand Cherokee (2014-2022):** Front rotors 28.0mm, Rear rotors 12.0mm
Trucks and Heavy-Duty Vehicles
– **Ford F-150 (2015-2022):** Front rotors 34.0mm, Rear rotors 18.0mm
– **Chevrolet Silverado 1500 (2019-2022):** Front rotors 32.0mm, Rear rotors 18.0mm
– **Ram 1500 (2019-2022):** Front rotors 34.0mm, Rear rotors 18.0mm
– **Toyota Tundra (2022):** Front rotors 32.0mm, Rear rotors 18.0mm
Performance and Luxury Vehicles
Performance and Luxury Vehicles
– **BMW 3 Series (2019-2022):** Front rotors 30.0mm, Rear rotors 20.0mm
– **Mercedes-Benz C-Class (2015-2021):** Front rotors 32.0mm, Rear rotors 22.0mm
– **Audi A4 (2017-2022):** Front rotors 30.0mm, Rear rotors 22.0mm
– **Tesla Model 3 (2017-2022):** Front rotors 28.0mm, Rear rotors 20.0mm
These specifications are provided as general references only. Always verify the minimum thickness spec by reading the stamping on your specific rotor or consulting your vehicle’s service manual. Variations can occur based on trim level, brake package, and model year.
Brake Rotor Resurfacing vs. Machining: What’s the Difference?

The terms “resurfacing” and “machining” are often used interchangeably, but they refer to slightly different processes with different implications for rotor thickness.
Resurfacing
Resurfacing is the process of removing a thin layer of metal from the rotor’s friction surface to restore a smooth, flat finish. This is typically done on a brake lathe, which spins the rotor while a cutting tool removes material. Resurfacing can remove 0.005 to 0.010 inches (0.13 to 0.25mm) from each side of the rotor.
The goal of resurfacing is to eliminate minor imperfections — light scoring, surface rust, and small amounts of parallelism variation — without removing excessive material. After resurfacing, the rotor should have a smooth, uniform finish that provides optimal pad contact.
Machining
Machining is a more aggressive process that removes a larger amount of material to correct more significant issues, such as deep scoring, taper wear, or runout. Machining can remove 0.010 to 0.020 inches (0.25 to 0.50mm) or more from each side of the rotor.
Machining is often necessary when a rotor has been damaged by worn pads or has developed significant thickness variation. However, because machining removes more material, it reduces the rotor’s remaining service life and brings it closer to the minimum thickness spec.
On-Car vs. Off-Car Machining
Traditional rotor machining is performed off the vehicle, with the rotor removed and mounted on a bench lathe. This provides the most accurate results but requires removing the rotor from the hub.
On-car machining is a newer technique where the lathe is mounted directly to the vehicle’s hub, and the rotor is machined while still attached. This method corrects runout caused by hub issues, but it is less precise than off-car machining and may not be suitable for all rotors.
Minimum Machinable Thickness
Minimum Machinable Thickness
Every rotor has a minimum machinable thickness — the lowest thickness to which it can be machined and still remain safe for service. This is typically 1.0 to 1.5mm above the discard thickness. If the rotor’s current thickness is too close to the minimum machinable thickness, machining would leave it too thin for safe use, and replacement is required.
Always measure the rotor’s thickness before machining and calculate the amount of material that will be removed. If the resulting thickness would be below the minimum machinable thickness, do not machine the rotor — replace it instead.
Brake Rotor Thickness and Brake Pedal Feel

The relationship between rotor thickness and brake pedal feel is often overlooked, but it is critical to understanding how your braking system performs. A rotor that is too thin can dramatically alter the way your brake pedal responds, creating dangerous driving conditions.
How Rotor Thickness Affects Pedal Feel
When you press the brake pedal, hydraulic pressure pushes the caliper pistons outward, clamping the brake pads against the rotor. The rotor must resist this clamping force without flexing. A thicker rotor is stiffer and provides a firm, solid pedal feel. A thinner rotor flexes under the same clamping force, absorbing some of the hydraulic pressure and creating a soft, spongy pedal.
This flexing is not just uncomfortable — it is dangerous. A soft pedal means you have to press further to achieve the same braking force, which increases stopping distance and reduces your ability to modulate braking in emergency situations.
The Caliper Piston Travel Connection
Brake caliper pistons are designed to travel a specific distance to apply the pads to the rotor. When the rotor is at its proper thickness, the piston travel is within the designed range. As the rotor wears thinner, the piston must extend further to make contact with the rotor surface.
This increased piston travel can lead to several problems. First, it can cause the brake pedal to feel low or spongy, as the hydraulic system must move more fluid to extend the pistons. Second, if the piston extends too far, it can become cocked in the caliper bore, leading to uneven pad wear and potential caliper failure.
Brake Fluid Boiling Point and Rotor Thickness
Brake fluid has a specific boiling point, typically between 400°F and 500°F for DOT 3 and DOT 4 fluids. When brake fluid boils, it creates gas bubbles in the hydraulic system, which are compressible. This results in a spongy pedal and reduced braking power — a condition known as brake fade.
A rotor that is too thin cannot absorb and dissipate heat effectively, causing the caliper and brake fluid to reach higher temperatures. This increases the risk of brake fluid boiling, especially during aggressive driving or downhill descents. Maintaining proper rotor thickness is essential for keeping brake fluid temperatures within safe limits.
Pedal Pulsation and Rotor Thickness Variation
Pedal pulsation — a rhythmic pulsing or vibration felt through the brake pedal — is often caused by rotor thickness variation (parallelism issues). When the rotor has high and low spots around its circumference, the pads move in and out as the rotor rotates, creating a pulsation.
This pulsation is not just annoying; it can reduce braking effectiveness and cause uneven pad wear. If you feel pedal pulsation, measure the rotor thickness at multiple points to check for variation. If the variation exceeds the manufacturer’s specification, the rotor needs to be resurfaced or replaced.
The Relationship Between Rotor Thickness and Brake Pad Thickness
As mentioned earlier, rotor thickness and pad thickness are independent measurements, but they interact in important ways. When pads are worn thin, they can no longer effectively transfer heat away from the rotor, causing the rotor to run hotter. This accelerated heating can cause the rotor to wear faster and reach its minimum thickness sooner.
Conversely, a rotor that is too thin can cause accelerated pad wear. The thin rotor flexes under clamping force, creating uneven pressure across the pad surface. This can cause the pad to wear unevenly, reducing its effective service life.
When to Check Pedal Feel
When to Check Pedal Feel
You should pay attention to brake pedal feel at all times, but especially after installing new rotors or pads, after any brake system service, and if you notice any changes in braking performance. A sudden change in pedal feel — whether it becomes softer, firmer, or starts pulsating — is a warning sign that something is wrong with your braking system.
If you experience any of these symptoms, measure the rotor thickness and inspect the entire braking system. Catching problems early can prevent more serious issues and ensure your brakes perform reliably when you need them most.
Brake Rotor Thickness and Brake Fluid Boiling Point

The connection between rotor thickness and brake fluid boiling point is a critical safety consideration that many drivers overlook. Understanding this relationship can help you prevent brake fade and maintain consistent stopping power.
How Heat Transfers from Rotor to Brake Fluid
When you brake, the friction between the pads and rotor generates heat. This heat is conducted through the rotor, into the caliper, and finally into the brake fluid. The caliper acts as a heat exchanger, transferring thermal energy from the rotor surface to the fluid that surrounds the pistons.
A thicker rotor has more thermal mass, which means it can absorb more heat before its temperature rises significantly. This slower temperature rise gives the brake fluid more time to dissipate heat through the caliper and brake lines. A thinner rotor heats up faster, transferring more heat to the brake fluid in a shorter period.
The Danger of Boiling Brake Fluid
When brake fluid reaches its boiling point, it forms gas bubbles. Unlike liquid, gas is compressible. When you press the brake pedal, the hydraulic pressure compresses the gas bubbles instead of moving the caliper pistons. This results in a soft, spongy pedal and significantly reduced braking power.
Brake fade caused by boiling fluid is particularly dangerous because it can occur suddenly and without warning. You might be driving down a long hill, applying the brakes repeatedly, when suddenly the pedal goes soft and you lose most of your stopping power.
How Rotor Thickness Affects Boiling Risk
A rotor that is at or below its minimum thickness has significantly reduced thermal capacity. It heats up faster and reaches higher temperatures during normal braking. This means the brake fluid is exposed to higher temperatures, increasing the risk of boiling.
The risk is even greater with repeated braking, such as during mountain descents or aggressive driving. Each braking event adds more heat to the system, and a thin rotor cannot shed that heat quickly enough. The result is a rapid temperature rise that can push the brake fluid past its boiling point.
Preventing Brake Fluid Boiling
The most effective way to prevent brake fluid boiling is to maintain proper rotor thickness. Regularly measure your rotors and replace them when they reach the minimum thickness spec. This ensures the rotors have adequate thermal mass to handle the heat generated during braking.
Also, consider upgrading to a higher-temperature brake fluid, such as DOT 4 or DOT 5.1, which have higher boiling points than standard DOT 3 fluid. This provides an extra margin of safety, especially for drivers who frequently drive in mountainous terrain or engage in spirited driving.
Signs of Brake Fluid Boiling
Signs of Brake Fluid Boiling
If you experience any of the following symptoms, your brake fluid may be boiling:
– A sudden softening of the brake pedal
– A spongy or mushy pedal feel
– Reduced braking power, especially after repeated braking
– A burning smell from the brakes
– Visible steam or smoke coming from the brake area
If you experience these symptoms, pull over safely and allow the brakes to cool. Once cooled, check the rotor thickness and inspect the brake fluid condition. If the fluid is dark, contaminated, or has a burnt smell, it should be flushed and replaced.
Brake Rotor Thickness and Brake Caliper Piston Travel

The brake caliper piston is the component that pushes the brake pad against the rotor when you press the brake pedal. The distance the piston travels — known as piston travel — is directly affected by rotor thickness, and this relationship has important implications for brake performance and safety.
How Piston Travel Works
When you press the brake pedal, hydraulic fluid is forced into the caliper, pushing the piston outward. The piston moves until the brake pad contacts the rotor surface. The distance the piston travels from its resting position to the point of pad contact is the piston travel.
In a properly functioning system, the piston travel is minimal — typically a few millimeters. This ensures a firm, responsive brake pedal. The piston travel increases as the brake pads wear and as the rotor thickness decreases.
The Effect of Thin Rotors on Piston Travel
The Effect of Thin Rotors on Piston Travel
When a rotor wears thinner, the distance between the caliper mounting points and the rotor surface increases. This means the piston must extend further to bring the pad into contact with the rotor. The increased piston travel has several consequences:
1. **Reduced pedal firmness:** The brake pedal feels softer because the hydraulic system must move more fluid to extend the piston the additional distance.
2. **Increased risk of caliper damage:** If the piston extends too far, it can become cocked in the caliper bore, leading to uneven pad wear and potential caliper seizure.
3. **Reduced braking efficiency:** The additional piston travel means there is a slight delay between pressing the pedal and the pads contacting the rotor, which can increase stopping distance.
When Piston Travel Becomes Dangerous
Brake Rotor Thickness Guide: How to Measure, Minimum Specs, and When to Replace
Brake rotor thickness is the most critical specification for safe braking. Every rotor has a minimum thickness rating, usually stamped on the hub. Once rotors wear past that limit, they cannot dissipate heat properly. This causes brake fade, vibration, and in severe cases, structural failure. This guide explains what that number means, how to measure it with a micrometer or caliper, and when to replace rotors based on real data.
You will learn the difference between minimum thickness and discard thickness. You will also learn how to read the wear indicators cast into the rotor. Measuring at multiple points matters because rotors rarely wear evenly. We cover the tools you need and the step-by-step measurement process for front and rear rotors. We also explain the warning signs that your rotors are past their safe service life. Whether you are a DIY mechanic or just trying to understand your shop, this is the complete reference for rotor thickness specifications.
This guide stands out because of the data. We compiled minimum thickness specs for popular vehicle models. We explain how brake pad wear compounds rotor wear. We include a practical decision framework so you know when to machine versus replace. Measuring rotor thickness is non-negotiable for brake system maintenance. A rotor that looks fine on the outside can be dangerously thin where it matters most.
What Is Brake Rotor Thickness and Why It Matters
Brake rotor thickness is the measurement of the metal disc your brake pads clamp down on to stop your vehicle. It is the vertical distance between the two friction surfaces — the flat, machined faces where the pads make contact. Every rotor starts at a specific thickness when new, called the “new thickness” spec, and wears thinner with every stop.
The measurement matters because rotors are engineered with a structural minimum. Below that point, the metal can no longer absorb and shed heat safely, and it risks cracking or catastrophic failure under hard braking. This is why your vehicle manufacturer publishes a minimum thickness spec — usually stamped directly on the rotor’s hub or hat — and why ignoring it is one of the most dangerous maintenance mistakes a DIY owner can make.
Rotor wear is not just about the pad material disappearing. Each braking event removes a microscopic layer of iron from the friction surface. Over thousands of stops, this adds up to measurable wear. The rate of wear depends on driving style, vehicle weight, pad compound, and rotor metallurgy. Aggressive driving, heavy loads, and towing accelerate the process significantly.
The Difference Between Rotor Thickness and Pad Thickness
When Piston Travel Becomes Dangerous
Brake Rotor Thickness Guide: Details
Many drivers confuse rotor thickness with brake pad thickness, but they are entirely different measurements with different safety implications. Brake pad thickness refers to the friction material bonded to the backing plate — the part that presses against the rotor. Pad thickness is checked by looking through the caliper opening or measuring the remaining friction material with a gauge. When pads wear down to about 3mm, they need replacement.
Rotor thickness, on the other hand, is the metal disc itself. While pads are designed to be consumable and replaced regularly, rotors are engineered to last longer — typically two or three pad sets — but they still have a finite service life. A rotor can be worn past its minimum thickness even when the pads have plenty of material left, especially if the vehicle has been driven with worn pads that scored the rotor surface.
The key difference is that pad wear is visible and intuitive, while rotor wear is hidden. A rotor can lose 2mm of material across its surface without any obvious visual cue, which is why measuring with a micrometer is the only reliable way to know its true condition.
How Thickness Affects Heat Dissipation and Brake Fade
How Thickness Affects Heat Dissipation and Brake Fade
Brake rotors function as heat sinks. When you press the brake pedal, the kinetic energy of the moving vehicle is converted into thermal energy at the friction surface. A thicker rotor has more mass, which means it can absorb more heat before its temperature rises to dangerous levels. This thermal mass is critical for preventing brake fade — the phenomenon where brakes lose stopping power due to overheating.
When a rotor wears below its minimum thickness, its thermal capacity drops significantly. The thinner metal heats up faster, reaches higher temperatures, and cools more slowly. This leads to several problems: the brake fluid can boil at the caliper, creating a spongy pedal; the pad compound can glaze over, reducing friction; and the rotor itself can develop heat checking — small cracks on the surface that grow with thermal cycling.
In extreme cases, a rotor that is too thin can warp or even crack completely under hard braking. The structural integrity of the rotor depends on maintaining adequate thickness to resist the clamping forces of the caliper and the thermal stresses of braking. This is why the minimum thickness spec is not a suggestion — it is a hard safety limit.
Minimum Thickness vs. Discard Thickness: The Critical Distinction
Understanding the difference between minimum thickness and discard thickness is essential for making correct replacement decisions. These two terms are often used interchangeably, but they refer to different specifications with different purposes.
Minimum thickness (often stamped as “MIN TH” on the rotor) is the absolute lowest measurement at which the rotor can safely remain in service. This number is determined by the vehicle manufacturer through engineering analysis and testing. It accounts for the structural strength needed to resist clamping forces, the thermal mass required for heat dissipation, and the material thickness needed to prevent warping or cracking.
Discard thickness is the point at which the rotor must be removed from service and replaced. In most cases, discard thickness is the same as minimum thickness — once you reach the minimum, the rotor is discarded. However, some manufacturers specify a discard thickness that is slightly above the absolute minimum, providing a safety margin. This is particularly common on performance vehicles and heavy-duty trucks.
Where to Find the Minimum Thickness Spec (Cast into the rotor hat)
Where to Find the Minimum Thickness Spec (Cast into the rotor hat)
The minimum thickness specification is almost always cast or stamped into the rotor itself. Look on the hub or hat — the flat, raised center section of the rotor that mounts to the wheel hub. You will typically see a number like “MIN TH 22.4mm” or “MIN 0.79 in” along with the manufacturer’s logo and sometimes a date code.
This stamping is your primary reference. It is legally required in most jurisdictions and is the number you should compare against your measurements. If the stamping is worn away or illegible — which can happen on older rotors — you can find the spec in the vehicle’s service manual, on the manufacturer’s website, or by contacting a dealership with your VIN.
It is important to note that the minimum thickness spec is unique to each rotor design. Two different vehicles can have rotors of the same diameter but different minimum thicknesses, depending on the rotor’s metallurgy, venting design, and the vehicle’s weight and performance characteristics. Never assume a spec from one vehicle applies to another.
Why You Should Never Trust the ‘Looks Fine’ Check
Why You Should Never Trust the ‘Looks Fine’ Check
One of the most common mistakes in brake maintenance is relying on visual inspection to judge rotor condition. A rotor can look perfectly smooth and shiny while being dangerously thin. The friction surface wears evenly across its width, so there is no visual cue that material has been lost. Unless the rotor has deep scoring, obvious cracks, or severe rust, it will look normal even when it is past its service limit.
The only reliable way to know a rotor’s thickness is to measure it with a micrometer. This tool is inexpensive — typically $20 to $40 for a quality digital model — and takes less than a minute per rotor. Measuring at multiple points around the rotor’s circumference and at different radii gives you a complete picture of its condition.
Another reason to avoid visual inspection is that rotors can wear unevenly. Taper wear — where one side of the friction surface is thinner than the other — is common on vehicles driven in stop-and-go traffic. This uneven wear can cause pedal pulsation and vibration, but it is invisible from the outside. Only measurement reveals the true condition.
The 1.5mm Rule: What Happens When You Exceed the Limit
The 1.5mm Rule: Details
While the exact consequences vary by vehicle, a general rule of thumb is that exceeding the minimum thickness by more than 1.5mm is a critical safety hazard. At this point, the rotor has lost so much material that its structural integrity is compromised. The metal can flex under clamping force, causing a soft or spongy brake pedal. It can also overheat rapidly, leading to brake fade at exactly the moment you need maximum stopping power.
In severe cases, a rotor that is excessively thin can crack. The cracks typically start at the edge of the friction surface and propagate inward, eventually causing the rotor to separate. This is a catastrophic failure that can result in loss of braking ability and a serious accident.
The
1.5mm rule is not a universal standard — always defer to the manufacturer’s stamped spec — but it serves as a useful mental benchmark. If your rotor measures more than 1.5mm below the minimum thickness, it is not just worn; it is dangerously compromised. Replace it immediately, regardless of how it looks or how recently it was installed.
How to Measure Brake Rotor Thickness: Tools and Step-by-Step Process
Measuring brake rotor thickness is a straightforward process that requires the right tools and a methodical approach. The two primary tools are a micrometer and a caliper, each with its own advantages and limitations.
A digital or dial micrometer is the gold standard for rotor measurement. It provides accuracy to 0.001mm (0.0001 inches) and features a flat anvil and spindle that make contact with the friction surfaces. Micrometers are available in various sizes, but a 0-25mm (0-1 inch) range covers most passenger car rotors. For larger rotors on trucks and SUVs, a 25-50mm (1-2 inch) range may be necessary.
A caliper — either digital or dial — is a more versatile tool that can measure both thickness and other dimensions like rotor diameter. However, calipers are generally less accurate than micrometers, with typical precision of 0.01mm (0.001 inches). For rotor thickness measurement, this level of accuracy is usually sufficient, but a micrometer is preferred when the rotor is close to its minimum spec.
Step-by-Step Measurement Process
Step-by-Step Measurement Process
Before measuring, ensure the rotor is clean and free of rust, debris, and brake dust. Use a wire brush or brake cleaner to remove any loose material from the friction surface. This is critical because even a thin layer of contamination can skew your measurement by several tenths of a millimeter.
1. **Remove the wheel and tire** to access the rotor. If you are measuring the front rotors, you may need to remove the caliper to access the full friction surface. On many vehicles, you can measure the rotor without removing the caliper by reaching through the caliper openings, but this limits the measurement points.
2. **Identify the minimum thickness spec** from the stamping on the rotor hat or the vehicle’s service manual. Write this number down so you can compare it against your measurements.
3. **Measure at multiple points around the rotor.** Rotors wear unevenly, so you need at least four to six measurements spaced evenly around the circumference. Mark each measurement point with a piece of chalk or tape so you can track where you measured.
4. **Measure at different radii.** In addition to measuring around the circumference, take measurements at the outer edge, the middle, and the inner edge of the friction surface. This reveals taper wear — where the rotor is thinner on one side than the other.
5. **Record each measurement** and compare them against the minimum spec. The lowest reading is the one that matters. If any measurement is at or below the minimum thickness, the rotor must be replaced.
Measuring Front vs. Rear Rotors
Front rotors typically wear faster than rear rotors because they handle a larger share of the braking force — usually 60-70% of the stopping power. This means front rotors will reach their minimum thickness sooner and may need replacement more frequently.
When measuring rear rotors, note that many vehicles have solid (non-vented) rotors on the rear axle. These are thinner than vented front rotors and have a lower minimum thickness spec. The measurement process is the same, but you should be aware that rear rotors can be more susceptible to rust and pitting, especially on vehicles that sit for extended periods.
Common Measurement Mistakes to Avoid
Common Measurement Mistakes to Avoid
The most common mistake is measuring at only one point and assuming that represents the entire rotor. Rotors wear unevenly, and a single measurement can miss a thin spot that is below the minimum spec.
Another mistake is measuring with a dirty or damaged tool. A micrometer with worn anvils or a caliper with a bent jaw will give inaccurate readings. Always check your tools against a known standard — like a gauge block or a new rotor — before relying on them.
Finally, be careful not to measure the rust buildup on the rotor’s edge. The friction surface is the machined area where the pads contact; the outer edge often has a rust lip that is not part of the friction surface. Measuring this lip will give you a falsely high reading.
Rotor Runout, Parallelism, and Taper Wear: Beyond Simple Thickness
While minimum thickness is the primary safety specification, other measurements are equally important for diagnosing brake problems. Rotor runout, parallelism, and taper wear all affect brake performance and can cause symptoms like pedal pulsation, vibration, and uneven pad wear.
Rotor Runout (Lateral Runout)
Rotor Runout (Lateral Runout)
Rotor runout is the amount of side-to-side movement of the rotor as it spins. It is measured with a dial indicator mounted to a fixed point while the rotor is rotated. Runout is expressed in thousandths of an inch (or hundredths of a millimeter) and represents the total deviation from a perfectly flat plane.
Excessive runout causes the brake pads to be pushed back into the caliper piston on each revolution, creating a pulsating brake pedal and vibration through the steering wheel. The typical specification for lateral runout is 0.002 to 0.004 inches (0.05 to 0.10mm), depending on the vehicle.
Runout can be caused by several factors: a dirty or corroded hub surface, improper wheel torque, or a rotor that has been warped by excessive heat. In some cases, runout can be corrected by re-mounting the rotor on the hub or by machining the rotor. However, if the rotor is near its minimum thickness, replacement is the safer option.
Parallelism (Thickness Variation)
Parallelism (Thickness Variation)
Parallelism refers to the variation in thickness around the rotor’s circumference. It is measured by taking multiple thickness readings at evenly spaced points and calculating the difference between the thickest and thinnest measurements. The specification for parallelism is typically 0.0005 to 0.001 inches (0.013 to 0.025mm).
When parallelism is out of spec, the brake pads move in and out as the rotor rotates, creating a pulsation that is felt through the brake pedal. This is often described as a “warped rotor” feeling, but it is actually caused by uneven thickness rather than actual warping.
Parallelism issues are usually caused by uneven pad wear, excessive heat, or improper rotor machining. If the rotor has enough material remaining, it can be machined to restore parallelism. Otherwise, replacement is required.
Taper Wear
Taper wear is a condition where the rotor is thicker on one side of the friction surface than the other. It is measured by comparing thickness readings at the inner and outer edges of the friction surface. Taper wear is typically caused by caliper misalignment, worn slide pins, or a sticking caliper piston.
The specification for taper wear is usually 0.0005 to 0.001 inches (0.013 to 0.025mm) across the friction surface. Excessive taper wear causes uneven pad contact, leading to tapered pad wear and reduced braking efficiency. It also creates a condition where the rotor must be machined or replaced to restore proper contact.
Scoring Depth and Heat Checking
Scoring Depth and Heat Checking
Scoring refers to grooves or channels cut into the friction surface by worn brake pads or embedded debris. Deep scoring — typically more than 0.060 inches (1.5mm) — can reduce braking effectiveness and may require rotor replacement. Light scoring is normal and does not affect performance.
Heat checking is the appearance of small, hairline cracks on the friction surface, usually radiating from the edges. These cracks are caused by thermal stress from repeated heating and cooling. Light heat checking is common and generally harmless, but deep or extensive cracking indicates the rotor has been overheated and should be replaced.
OEM vs. Aftermarket Rotor Specs: What You Need to Know
When replacing rotors, you have two main options: Original Equipment Manufacturer (OEM) rotors and aftermarket rotors. Each has its own specifications, quality levels, and considerations regarding minimum thickness.
OEM Rotors
OEM rotors are manufactured to the exact specifications of the vehicle manufacturer. They are designed to match the original rotor’s dimensions, metallurgy, and minimum thickness spec. OEM rotors are typically made from cast iron with specific alloying elements that provide the right balance of wear resistance, heat dissipation, and structural strength.
The advantage of OEM rotors is that they are guaranteed to meet the vehicle’s engineering requirements. The minimum thickness spec stamped on an OEM rotor is the same as the original, so you can trust that the measurement
you take against the stamped number is accurate and reliable. OEM rotors also come with the vehicle manufacturer’s warranty and are tested to meet strict quality standards.
The main disadvantage of OEM rotors is cost — they are typically 30-50% more expensive than aftermarket alternatives. However, for drivers who prioritize safety and reliability, the extra cost is often justified by the guaranteed fit and performance.
Aftermarket Rotors
Aftermarket Rotors
Aftermarket rotors are manufactured by third-party companies and are designed to fit specific vehicle models. They come in a wide range of quality levels, from budget options to high-performance upgrades. The minimum thickness spec for aftermarket rotors can vary from the OEM spec, depending on the manufacturer and the rotor’s design.
Budget aftermarket rotors are often made from lower-grade cast iron and may have a thinner overall construction. This means their minimum thickness spec may be lower than the OEM spec, which reduces their service life and heat capacity. While these rotors are cheaper, they may not provide the same level of safety or longevity as OEM parts.
Premium aftermarket rotors, on the other hand, are often engineered to exceed OEM specifications. They may feature improved metallurgy, better venting designs, or drilled and slotted surfaces for enhanced heat dissipation. These rotors typically have a minimum thickness spec that is equal to or greater than the OEM spec, providing a longer service life.
How to Verify Aftermarket Specs
When purchasing aftermarket rotors, always check the minimum thickness spec before installation. This information should be printed on the rotor’s packaging or available from the manufacturer’s website. Compare this spec against the OEM spec for your vehicle to ensure the aftermarket rotor provides adequate safety margins.
It is also important to verify that the aftermarket rotor’s dimensions — including diameter, height, and mounting pattern — match the OEM specifications. A rotor that is slightly too small or too large can cause caliper misalignment, uneven pad wear, and reduced braking performance.
Corrosion and Rust Pitting Considerations
Corrosion and Rust Pitting Considerations
Both OEM and aftermarket rotors are susceptible to corrosion and rust pitting, especially in regions with harsh winters or high humidity. Rust on the friction surface can cause uneven pad contact, vibration, and reduced braking effectiveness.
Surface rust that forms after a vehicle sits for a few days is normal and will be worn off after a few stops. However, deep rust pitting — where the corrosion has eaten into the metal — can reduce the rotor’s effective thickness and create rough spots that damage brake pads.
When measuring rotor thickness, be sure to measure the actual friction surface, not areas affected by rust pitting. If rust pitting is severe, the rotor may need to be replaced even if the measured thickness is above the minimum spec, because the pitting compromises the rotor’s structural integrity.
When to Replace vs. Resurface: A Practical Decision Framework
One of the most common questions in brake maintenance is whether to resurface (machine) a rotor or replace it entirely. The answer depends on several factors, including the rotor’s remaining thickness, its overall condition, and the cost of each option.
When Resurfacing Is Appropriate
Resurfacing involves removing a thin layer of metal from the friction surface to restore a smooth, flat finish. This process can eliminate scoring, minor heat checking, and parallelism issues. Resurfacing is appropriate when:
– The rotor’s thickness is above the minimum spec by at least 0.5mm (0.020 inches) after machining
– The rotor has no deep cracks, severe rust pitting, or structural damage
– The rotor’s runout can be corrected by machining
– The cost of resurfacing is significantly less than replacement
Most manufacturers specify that a rotor can be machined down to a “minimum machinable thickness” — typically 1.0 to 1.5mm above the discard thickness. This ensures that after machining, the rotor still has enough material to provide a safe service life.
When Replacement Is Required
Replacement is the only safe option when:
– The rotor is already at or below the minimum thickness spec
– The rotor has deep cracks or heat checking that extends through the friction surface
– The rotor has severe rust pitting that compromises its structural integrity
– The rotor has been machined before and is now below the minimum machinable thickness
– The rotor is warped beyond what machining can correct
In general, if you are unsure whether a rotor can be safely resurfaced, replacement is the safer choice. The cost difference between resurfacing and replacement is often small — typically $20-40 per rotor for machining versus $50-150 per rotor for replacement — and the safety benefits of new rotors are significant.
The Cost-Benefit Analysis
When deciding between resurfacing and replacement, consider the following:
– **Labor costs:** Resurfacing requires removing the rotor and taking it to a machine shop, which adds labor time. Replacement is often faster if you are doing the work yourself.
– **Rotor age and mileage:** If the rotor has been in service for 50,000 miles or more, replacement is usually the better investment, as the rotor is likely close to its minimum thickness anyway.
– **Pad condition:** If you are replacing the brake pads, new rotors provide a fresh surface for the pads to bed in properly. Resurfaced rotors can work, but they may not provide the same level of performance.
– **Warranty considerations:** Some brake pad manufacturers require new or resurfaced rotors for their warranty to remain valid.
Warning Signs That Your Rotors Are Past Their Safe Service Life
Warning Signs That Your Rotors Are Past Their Safe Service Life
Beyond measuring thickness, there are several warning signs that indicate your rotors need immediate attention:
– **Pulsating brake pedal:** This indicates parallelism issues or runout, which may be caused by uneven wear or warping.
– **Vibration through the steering wheel:** This is often caused by excessive runout on the front rotors.
– **Squealing or grinding noises:** This can indicate that the pads are worn down to the metal backing plate, which will score the rotor surface.
– **Visible cracks or deep grooves:** These are signs of structural damage that cannot be repaired.
– **Blue or discolored spots on the rotor:** This indicates overheating, which can cause warping and reduced performance.
If you experience any of these symptoms, measure the rotor thickness immediately. Even if the thickness is above the minimum spec, the rotor may need to be resurfaced or replaced to restore safe braking performance.
Brake Pad Wear and Its Effect on Rotor Thickness
Brake pads and rotors wear together as a system. The condition of your brake pads directly affects how quickly your rotors wear and whether they reach their minimum thickness prematurely.
How Pad Material Affects Rotor Wear
Brake pads are made from various friction materials, each with different wear characteristics. Organic pads are soft and gentle on rotors but wear quickly themselves. Semi-metallic pads provide better stopping power and heat resistance but are harder on rotors, causing faster rotor wear. Ceramic pads offer a balance of performance and rotor-friendly wear, making them a popular choice for daily drivers.
The hardness of the pad material directly influences rotor wear rate. Harder pads remove more material from the rotor surface with each stop, while softer pads preserve rotor thickness but require more frequent replacement. This is why it is important to choose pads that match your driving style and the rotor’s design.
Worn Pads and Rotor Damage
When brake pads wear down to the metal backing plate, the metal contacts the rotor directly. This causes severe scoring — deep grooves cut into the friction surface — and rapid rotor wear. In extreme cases, the metal-to-metal contact can generate enough heat to warp the rotor or cause it to crack.
If you have driven with worn pads for any significant distance, the rotors are likely damaged. Even if the rotor thickness is still above the minimum spec, the scoring may be deep enough to require resurfacing or replacement. Always inspect the rotor surface when replacing worn pads.
Pad Replacement Intervals and Rotor Life
Most brake pads last between 30,000 and 70,000 miles, depending on driving conditions and pad material. Rotors typically last for two to three pad sets — roughly 60,000 to 150,000 miles — before reaching their minimum thickness.
However, this is only an estimate. Aggressive driving, heavy loads, and frequent stop-and-go traffic can significantly shorten both pad and rotor life. The only reliable way to know when rotors need replacement is to measure their thickness at every pad change.
The Importance of Bedding In New Pads and Rotors
The Importance of Bedding In New Pads and Rotors
When you install new pads and rotors, the friction surfaces need to be “bedded in” — a process that transfers a thin layer of pad material onto the rotor surface. This creates an even friction interface that maximizes braking performance and minimizes wear.
Proper bedding involves a series of moderate stops from speed, followed by a cooling period. This process should be repeated several times to ensure even pad transfer. Failure to bed in new components can result in uneven wear, vibration,
Brake Rotor Thickness Guide: How to Measure, Minimum Specs, and When to Replace
Brake rotor thickness is the most critical specification for safe braking. Every rotor has a minimum thickness rating, usually stamped on the hub. Once rotors wear past that limit, they cannot dissipate heat properly. This causes brake fade, vibration, and in severe cases, structural failure. This guide explains what that number means, how to measure it with a micrometer or caliper, and when to replace rotors based on real data.
You will learn the difference between minimum thickness and discard thickness. You will also learn how to read the wear indicators cast into the rotor. Measuring at multiple points matters because rotors rarely wear evenly. We cover the tools you need and the step-by-step measurement process for front and rear rotors. We also explain the warning signs that your rotors are past their safe service life. Whether you are a DIY mechanic or just trying to understand your shop, this is the complete reference for rotor thickness specifications.
What sets this guide apart is the data: we’ve compiled minimum thickness specs for popular vehicle models, explained how brake pad wear compounds rotor wear, and included a practical decision framework so you know exactly when to machine versus replace. You’ll also see why measuring rotor thickness is non-negotiable for brake system maintenance — because a rotor that looks fine on the outside can be dangerously thin where it matters most.
What Is Brake Rotor Thickness and Why It Matters
Brake rotor thickness is the measurement of the metal disc your brake pads clamp down on to stop your vehicle. It is the vertical distance between the two friction surfaces — the flat, machined faces where the pads make contact. Every rotor starts at a specific thickness when new, called the “new thickness” spec, and wears thinner with every stop.
The measurement matters because rotors are engineered with a structural minimum. Below that point, the metal can no longer absorb and shed heat safely, and it risks cracking or catastrophic failure under hard braking. This is why your vehicle manufacturer publishes a minimum thickness spec — usually stamped directly on the rotor’s hub or hat — and why ignoring it is one of the most dangerous maintenance mistakes a DIY owner can make.
Rotor wear is not just about the pad material disappearing. Each braking event removes a microscopic layer of iron from the friction surface. Over thousands of stops, this adds up to measurable wear. The rate of wear depends on driving style, vehicle weight, pad compound, and rotor metallurgy. Aggressive driving, heavy loads, and towing accelerate the process significantly.
The Difference Between Rotor Thickness and Pad Thickness
The Difference Between Rotor Thickness and Pad Thickness
Many drivers confuse rotor thickness with brake pad thickness, but they are entirely different measurements with different safety implications. Brake pad thickness refers to the friction material bonded to the backing plate — the part that presses against the rotor. Pad thickness is checked by looking through the caliper opening or measuring the remaining friction material with a gauge. When pads wear down to about 3mm, they need replacement.
Rotor thickness, on the other hand, is the metal disc itself. While pads are designed to be consumable and replaced regularly, rotors are engineered to last longer — typically two or three pad sets — but they still have a finite service life. A rotor can be worn past its minimum thickness even when the pads have plenty of material left, especially if the vehicle has been driven with worn pads that scored the rotor surface.
The key difference is that pad wear is visible and intuitive, while rotor wear is hidden. A rotor can lose 2mm of material across its surface without any obvious visual cue, which is why measuring with a micrometer is the only reliable way to know its true condition.
How Thickness Affects Heat Dissipation and Brake Fade
How Thickness Affects Heat Dissipation and Brake Fade
Brake rotors function as heat sinks. When you press the brake pedal, the kinetic energy of the moving vehicle is converted into thermal energy at the friction surface. A thicker rotor has more mass, which means it can absorb more heat before its temperature rises to dangerous levels. This thermal mass is critical for preventing brake fade — the phenomenon where brakes lose stopping power due to overheating.
When a rotor wears below its minimum thickness, its thermal capacity drops significantly. The thinner metal heats up faster, reaches higher temperatures, and cools more slowly. This leads to several problems: the brake fluid can boil at the caliper, creating a spongy pedal; the pad compound can glaze over, reducing friction; and the rotor itself can develop heat checking — small cracks on the surface that grow with thermal cycling.
In extreme cases, a rotor that is too thin can warp or even crack completely under hard braking. The structural integrity of the rotor depends on maintaining adequate thickness to resist the clamping forces of the caliper and the thermal stresses of braking. This is why the minimum thickness spec is not a suggestion — it is a hard safety limit.
Minimum Thickness vs. Discard Thickness: The Critical Distinction
Understanding the difference between minimum thickness and discard thickness is essential for making correct replacement decisions. These two terms are often used interchangeably, but they refer to different specifications with different purposes.
Minimum thickness (often stamped as “MIN TH” on the rotor) is the absolute lowest measurement at which the rotor can safely remain in service. This number is determined by the vehicle manufacturer through engineering analysis and testing. It accounts for the structural strength needed to resist clamping forces, the thermal mass required for heat dissipation, and the material thickness needed to prevent warping or cracking.
Discard thickness is the point at which the rotor must be removed from service and replaced. In most cases, discard thickness is the same as minimum thickness — once you reach the minimum, the rotor is discarded. However, some manufacturers specify a discard thickness that is slightly above the absolute minimum, providing a safety margin. This is particularly common on performance vehicles and heavy-duty trucks.
Where to Find the Minimum Thickness Spec (Cast into the rotor hat)
Where to Find the Minimum Thickness Spec (Cast into the rotor hat)
The minimum thickness specification is almost always cast or stamped into the rotor itself. Look on the hub or hat — the flat, raised center section of the rotor that mounts to the wheel hub. You will typically see a number like “MIN TH 22.4mm” or “MIN 0.79 in” along with the manufacturer’s logo and sometimes a date code.
This stamping is your primary reference. It is legally required in most jurisdictions and is the number you should compare against your measurements. If the stamping is worn away or illegible — which can happen on older rotors — you can find the spec in the vehicle’s service manual, on the manufacturer’s website, or by contacting a dealership with your VIN.
It is important to note that the minimum thickness spec is unique to each rotor design. Two different vehicles can have rotors of the same diameter but different minimum thicknesses, depending on the rotor’s metallurgy, venting design, and the vehicle’s weight and performance characteristics. Never assume a spec from one vehicle applies to another.
Why You Should Never Trust the ‘Looks Fine’ Check
Why You Should Never Trust the ‘Looks Fine’ Check
One of the most common mistakes in brake maintenance is relying on visual inspection to judge rotor condition. A rotor can look perfectly smooth and shiny while being dangerously thin. The friction surface wears evenly across its width, so there is no visual cue that material has been lost. Unless the rotor has deep scoring, obvious cracks, or severe rust, it will look normal even when it is past its service limit.
The only reliable way to know a rotor’s thickness is to measure it with a micrometer. This tool is inexpensive — typically $20 to $40 for a quality digital model — and takes less than a minute per rotor. Measuring at multiple points around the rotor’s circumference and at different radii gives you a complete picture of its condition.
Another reason to avoid visual inspection is that rotors can wear unevenly. Taper wear — where one side of the friction surface is thinner than the other — is common on vehicles driven in stop-and-go traffic. This uneven wear can cause pedal pulsation and vibration, but it is invisible from the outside. Only measurement reveals the true condition.
The 1.5mm Rule: What Happens When You Exceed the Limit
The 1.5mm Rule: Details
While the exact consequences vary by vehicle, a general rule of thumb is that exceeding the minimum thickness by more than 1.5mm is a critical safety hazard. At this point, the rotor has lost so much material that its structural integrity is compromised. The metal can flex under clamping force, causing a soft or spongy brake pedal. It can also overheat rapidly, leading to brake fade at exactly the moment you need maximum stopping power.
In severe cases, a rotor that is excessively thin can crack. The cracks typically start at the edge of the friction surface and propagate inward, eventually causing the rotor to separate. This is a catastrophic failure that can result in loss of braking ability and a serious accident.
The
1.5mm rule is not a universal standard — always defer to the manufacturer’s stamped spec — but it serves as a useful mental benchmark. If your rotor measures more than 1.5mm below the minimum thickness, it is not just worn; it is dangerously compromised. Replace it immediately, regardless of how it looks or how recently it was installed.
How to Measure Brake Rotor Thickness: Tools and Step-by-Step Process
Measuring brake rotor thickness is a straightforward process that requires the right tools and a methodical approach. The two primary tools are a micrometer and a caliper, each with its own advantages and limitations.
A digital or dial micrometer is the gold standard for rotor measurement. It provides accuracy to 0.001mm (0.0001 inches) and features a flat anvil and spindle that make contact with the friction surfaces. Micrometers are available in various sizes, but a 0-25mm (0-1 inch) range covers most passenger car rotors. For larger rotors on trucks and SUVs, a 25-50mm (1-2 inch) range may be necessary.
A caliper — either digital or dial — is a more versatile tool that can measure both thickness and other dimensions like rotor diameter. However, calipers are generally less accurate than micrometers, with typical precision of 0.01mm (0.001 inches). For rotor thickness measurement, this level of accuracy is usually sufficient, but a micrometer is preferred when the rotor is close to its minimum spec.
Step-by-Step Measurement Process
Step-by-Step Measurement Process
Before measuring, ensure the rotor is clean and free of rust, debris, and brake dust. Use a wire brush or brake cleaner to remove any loose material from the friction surface. This is critical because even a thin layer of contamination can skew your measurement by several tenths of a millimeter.
1. **Remove the wheel and tire** to access the rotor. If you are measuring the front rotors, you may need to remove the caliper to access the full friction surface. On many vehicles, you can measure the rotor without removing the caliper by reaching through the caliper openings, but this limits the measurement points.
2. **Identify the minimum thickness spec** from the stamping on the rotor hat or the vehicle’s service manual. Write this number down so you can compare it against your measurements.
3. **Measure at multiple points around the rotor.** Rotors wear unevenly, so you need at least four to six measurements spaced evenly around the circumference. Mark each measurement point with a piece of chalk or tape so you can track where you measured.
4. **Measure at different radii.** In addition to measuring around the circumference, take measurements at the outer edge, the middle, and the inner edge of the friction surface. This reveals taper wear — where the rotor is thinner on one side than the other.
5. **Record each measurement** and compare them against the minimum spec. The lowest reading is the one that matters. If any measurement is at or below the minimum thickness, the rotor must be replaced.
Measuring Front vs. Rear Rotors
Front rotors typically wear faster than rear rotors because they handle a larger share of the braking force — usually 60-70% of the stopping power. This means front rotors will reach their minimum thickness sooner and may need replacement more frequently.
When measuring rear rotors, note that many vehicles have solid (non-vented) rotors on the rear axle. These are thinner than vented front rotors and have a lower minimum thickness spec. The measurement process is the same, but you should be aware that rear rotors can be more susceptible to rust and pitting, especially on vehicles that sit for extended periods.
Common Measurement Mistakes to Avoid
Common Measurement Mistakes to Avoid
The most common mistake is measuring at only one point and assuming that represents the entire rotor. Rotors wear unevenly, and a single measurement can miss a thin spot that is below the minimum spec.
Another mistake is measuring with a dirty or damaged tool. A micrometer with worn anvils or a caliper with a bent jaw will give inaccurate readings. Always check your tools against a known standard — like a gauge block or a new rotor — before relying on them.
Finally, be careful not to measure the rust buildup on the rotor’s edge. The friction surface is the machined area where the pads contact; the outer edge often has a rust lip that is not part of the friction surface. Measuring this lip will give you a falsely high reading.
Rotor Runout, Parallelism, and Taper Wear: Beyond Simple Thickness
While minimum thickness is the primary safety specification, other measurements are equally important for diagnosing brake problems. Rotor runout, parallelism, and taper wear all affect brake performance and can cause symptoms like pedal pulsation, vibration, and uneven pad wear.
Rotor Runout (Lateral Runout)
Rotor Runout (Lateral Runout)
Rotor runout is the amount of side-to-side movement of the rotor as it spins. It is measured with a dial indicator mounted to a fixed point while the rotor is rotated. Runout is expressed in thousandths of an inch (or hundredths of a millimeter) and represents the total deviation from a perfectly flat plane.
Excessive runout causes the brake pads to be pushed back into the caliper piston on each revolution, creating a pulsating brake pedal and vibration through the steering wheel. The typical specification for lateral runout is 0.002 to 0.004 inches (0.05 to 0.10mm), depending on the vehicle.
Runout can be caused by several factors: a dirty or corroded hub surface, improper wheel torque, or a rotor that has been warped by excessive heat. In some cases, runout can be corrected by re-mounting the rotor on the hub or by machining the rotor. However, if the rotor is near its minimum thickness, replacement is the safer option.
Parallelism (Thickness Variation)
Parallelism (Thickness Variation)
Parallelism refers to the variation in thickness around the rotor’s circumference. It is measured by taking multiple thickness readings at evenly spaced points and calculating the difference between the thickest and thinnest measurements. The specification for parallelism is typically 0.0005 to 0.001 inches (0.013 to 0.025mm).
When parallelism is out of spec, the brake pads move in and out as the rotor rotates, creating a pulsation that is felt through the brake pedal. This is often described as a “warped rotor” feeling, but it is actually caused by uneven thickness rather than actual warping.
Parallelism issues are usually caused by uneven pad wear, excessive heat, or improper rotor machining. If the rotor has enough material remaining, it can be machined to restore parallelism. Otherwise, replacement is required.
Taper Wear
Taper wear is a condition where the rotor is thicker on one side of the friction surface than the other. It is measured by comparing thickness readings at the inner and outer edges of the friction surface. Taper wear is typically caused by caliper misalignment, worn slide pins, or a sticking caliper piston.
The specification for taper wear is usually 0.0005 to 0.001 inches (0.013 to 0.025mm) across the friction surface. Excessive taper wear causes uneven pad contact, leading to tapered pad wear and reduced braking efficiency. It also creates a condition where the rotor must be machined or replaced to restore proper contact.
Scoring Depth and Heat Checking
Scoring Depth and Heat Checking
Scoring refers to grooves or channels cut into the friction surface by worn brake pads or embedded debris. Deep scoring — typically more than 0.060 inches (1.5mm) — can reduce braking effectiveness and may require rotor replacement. Light scoring is normal and does not affect performance.
Heat checking is the appearance of small, hairline cracks on the friction surface, usually radiating from the edges. These cracks are caused by thermal stress from repeated heating and cooling. Light heat checking is common and generally harmless, but deep or extensive cracking indicates the rotor has been overheated and should be replaced.
OEM vs. Aftermarket Rotor Specs: What You Need to Know
When replacing rotors, you have two main options: Original Equipment Manufacturer (OEM) rotors and aftermarket rotors. Each has its own specifications, quality levels, and considerations regarding minimum thickness.
OEM Rotors
OEM rotors are manufactured to the exact specifications of the vehicle manufacturer. They are designed to match the original rotor’s dimensions, metallurgy, and minimum thickness spec. OEM rotors are typically made from cast iron with specific alloying elements that provide the right balance of wear resistance, heat dissipation, and structural strength.
The advantage of OEM rotors is that they are guaranteed to meet the vehicle’s engineering requirements. The minimum thickness spec stamped on an OEM rotor is the same as the original, so you can trust that the measurement
you take against the stamped number is accurate and reliable. OEM rotors also come with the vehicle manufacturer’s warranty and are tested to meet strict quality standards.
The main disadvantage of OEM rotors is cost — they are typically 30-50% more expensive than aftermarket alternatives. However, for drivers who prioritize safety and reliability, the extra cost is often justified by the guaranteed fit and performance.
Aftermarket Rotors
Aftermarket Rotors
Aftermarket rotors are manufactured by third-party companies and are designed to fit specific vehicle models. They come in a wide range of quality levels, from budget options to high-performance upgrades. The minimum thickness spec for aftermarket rotors can vary from the OEM spec, depending on the manufacturer and the rotor’s design.
Budget aftermarket rotors are often made from lower-grade cast iron and may have a thinner overall construction. This means their minimum thickness spec may be lower than the OEM spec, which reduces their service life and heat capacity. While these rotors are cheaper, they may not provide the same level of safety or longevity as OEM parts.
Premium aftermarket rotors, on the other hand, are often engineered to exceed OEM specifications. They may feature improved metallurgy, better venting designs, or drilled and slotted surfaces for enhanced heat dissipation. These rotors typically have a minimum thickness spec that is equal to or greater than the OEM spec, providing a longer service life.
How to Verify Aftermarket Specs
When purchasing aftermarket rotors, always check the minimum thickness spec before installation. This information should be printed on the rotor’s packaging or available from the manufacturer’s website. Compare this spec against the OEM spec for your vehicle to ensure the aftermarket rotor provides adequate safety margins.
It is also important to verify that the aftermarket rotor’s dimensions — including diameter, height, and mounting pattern — match the OEM specifications. A rotor that is slightly too small or too large can cause caliper misalignment, uneven pad wear, and reduced braking performance.
Corrosion and Rust Pitting Considerations
Corrosion and Rust Pitting Considerations
Both OEM and aftermarket rotors are susceptible to corrosion and rust pitting, especially in regions with harsh winters or high humidity. Rust on the friction surface can cause uneven pad contact, vibration, and reduced braking effectiveness.
Surface rust that forms after a vehicle sits for a few days is normal and will be worn off after a few stops. However, deep rust pitting — where the corrosion has eaten into the metal — can reduce the rotor’s effective thickness and create rough spots that damage brake pads.
When measuring rotor thickness, be sure to measure the actual friction surface, not areas affected by rust pitting. If rust pitting is severe, the rotor may need to be replaced even if the measured thickness is above the minimum spec, because the pitting compromises the rotor’s structural integrity.
When to Replace vs. Resurface: A Practical Decision Framework
One of the most common questions in brake maintenance is whether to resurface (machine) a rotor or replace it entirely. The answer depends on several factors, including the rotor’s remaining thickness, its overall condition, and the cost of each option.
When Resurfacing Is Appropriate
Resurfacing involves removing a thin layer of metal from the friction surface to restore a smooth, flat finish. This process can eliminate scoring, minor heat checking, and parallelism issues. Resurfacing is appropriate when:
– The rotor’s thickness is above the minimum spec by at least 0.5mm (0.020 inches) after machining
– The rotor has no deep cracks, severe rust pitting, or structural damage
– The rotor’s runout can be corrected by machining
– The cost of resurfacing is significantly less than replacement
Most manufacturers specify that a rotor can be machined down to a “minimum machinable thickness” — typically 1.0 to 1.5mm above the discard thickness. This ensures that after machining, the rotor still has enough material to provide a safe service life.
When Replacement Is Required
Replacement is the only safe option when:
– The rotor is already at or below the minimum thickness spec
– The rotor has deep cracks or heat checking that extends through the friction surface
– The rotor has severe rust pitting that compromises its structural integrity
– The rotor has been machined before and is now below the minimum machinable thickness
– The rotor is warped beyond what machining can correct
In general, if you are unsure whether a rotor can be safely resurfaced, replacement is the safer choice. The cost difference between resurfacing and replacement is often small — typically $20-40 per rotor for machining versus $50-150 per rotor for replacement — and the safety benefits of new rotors are significant.
The Cost-Benefit Analysis
When deciding between resurfacing and replacement, consider the following:
– **Labor costs:** Resurfacing requires removing the rotor and taking it to a machine shop, which adds labor time. Replacement is often faster if you are doing the work yourself.
– **Rotor age and mileage:** If the rotor has been in service for 50,000 miles or more, replacement is usually the better investment, as the rotor is likely close to its minimum thickness anyway.
– **Pad condition:** If you are replacing the brake pads, new rotors provide a fresh surface for the pads to bed in properly. Resurfaced rotors can work, but they may not provide the same level of performance.
– **Warranty considerations:** Some brake pad manufacturers require new or resurfaced rotors for their warranty to remain valid.
Warning Signs That Your Rotors Are Past Their Safe Service Life
Warning Signs That Your Rotors Are Past Their Safe Service Life
Beyond measuring thickness, there are several warning signs that indicate your rotors need immediate attention:
– **Pulsating brake pedal:** This indicates parallelism issues or runout, which may be caused by uneven wear or warping.
– **Vibration through the steering wheel:** This is often caused by excessive runout on the front rotors.
– **Squealing or grinding noises:** This can indicate that the pads are worn down to the metal backing plate, which will score the rotor surface.
– **Visible cracks or deep grooves:** These are signs of structural damage that cannot be repaired.
– **Blue or discolored spots on the rotor:** This indicates overheating, which can cause warping and reduced performance.
If you experience any of these symptoms, measure the rotor thickness immediately. Even if the thickness is above the minimum spec, the rotor may need to be resurfaced or replaced to restore safe braking performance.
Brake Pad Wear and Its Effect on Rotor Thickness
Brake pads and rotors wear together as a system. The condition of your brake pads directly affects how quickly your rotors wear and whether they reach their minimum thickness prematurely.
How Pad Material Affects Rotor Wear
Brake pads are made from various friction materials, each with different wear characteristics. Organic pads are soft and gentle on rotors but wear quickly themselves. Semi-metallic pads provide better stopping power and heat resistance but are harder on rotors, causing faster rotor wear. Ceramic pads offer a balance of performance and rotor-friendly wear, making them a popular choice for daily drivers.
The hardness of the pad material directly influences rotor wear rate. Harder pads remove more material from the rotor surface with each stop, while softer pads preserve rotor thickness but require more frequent replacement. This is why it is important to choose pads that match your driving style and the rotor’s design.
Worn Pads and Rotor Damage
When brake pads wear down to the metal backing plate, the metal contacts the rotor directly. This causes severe scoring — deep grooves cut into the friction surface — and rapid rotor wear. In extreme cases, the metal-to-metal contact can generate enough heat to warp the rotor or cause it to crack.
If you have driven with worn pads for any significant distance, the rotors are likely damaged. Even if the rotor thickness is still above the minimum spec, the scoring may be deep enough to require resurfacing or replacement. Always inspect the rotor surface when replacing worn pads.
Pad Replacement Intervals and Rotor Life
Most brake pads last between 30,000 and 70,000 miles, depending on driving conditions and pad material. Rotors typically last for two to three pad sets — roughly 60,000 to 150,000 miles — before reaching their minimum thickness.
However, this is only an estimate. Aggressive driving, heavy loads, and frequent stop-and-go traffic can significantly shorten both pad and rotor life. The only reliable way to know when rotors need replacement is to measure their thickness at every pad change.
The Importance of Bedding In New Pads and Rotors
When you install new pads and rotors, the friction surfaces need to be “bedded in” — a process that transfers a thin layer of pad material onto the rotor surface. This creates an even friction interface that maximizes braking performance and minimizes wear.
Proper bedding involves a series of moderate stops from speed, followed by a cooling period. This process should be repeated several times to ensure even pad transfer. Failure to bed in new components can result in uneven wear, vibration,
Brake rotor thickness is the most critical specification for safe braking. Every rotor has a minimum thickness rating, usually stamped on the hub. Once rotors wear past that limit, they cannot dissipate heat properly. This causes brake fade, vibration, and in severe cases, structural failure. This guide explains what that number means, how to measure it with a micrometer or caliper, and when to replace rotors based on real data.
You will learn the difference between minimum thickness and discard thickness. You will also learn how to read the wear indicators cast into the rotor. Measuring at multiple points matters because rotors rarely wear evenly. We cover the tools you need and the step-by-step measurement process for front and rear rotors. We also explain the warning signs that your rotors are past their safe service life. Whether you are a DIY mechanic or just trying to understand your shop, this is the complete reference for rotor thickness specifications.
This guide stands out because of the data. We compiled minimum thickness specs for popular vehicle models. We explain how brake pad wear compounds rotor wear. We include a practical decision framework so you know when to machine versus replace. Measuring rotor thickness is non-negotiable for brake system maintenance. A rotor that looks fine on the outside can be dangerously thin where it matters most.
What Is Brake Rotor Thickness and Why It Matters
Brake rotor thickness is the measurement of the metal disc your brake pads clamp down on to stop your vehicle. It is the vertical distance between the two friction surfaces — the flat, machined faces where the pads make contact. Every rotor starts at a specific thickness when new, called the “new thickness” spec, and wears thinner with every stop.
The measurement matters because rotors are engineered with a structural minimum. Below that point, the metal can no longer absorb and shed heat safely, and it risks cracking or catastrophic failure under hard braking. This is why your vehicle manufacturer publishes a minimum thickness spec — usually stamped directly on the rotor’s hub or hat — and why ignoring it is one of the most dangerous maintenance mistakes a DIY owner can make.
Rotor wear is not just about the pad material disappearing. Each braking event removes a microscopic layer of iron from the friction surface. Over thousands of stops, this adds up to measurable wear. The rate of wear depends on driving style, vehicle weight, pad compound, and rotor metallurgy. Aggressive driving, heavy loads, and towing accelerate the process significantly.
The Difference Between Rotor Thickness and Pad Thickness
When Piston Travel Becomes Dangerous
Brake Rotor Thickness Guide: Details
Many drivers confuse rotor thickness with brake pad thickness, but they are entirely different measurements with different safety implications. Brake pad thickness refers to the friction material bonded to the backing plate — the part that presses against the rotor. Pad thickness is checked by looking through the caliper opening or measuring the remaining friction material with a gauge. When pads wear down to about 3mm, they need replacement.
Rotor thickness, on the other hand, is the metal disc itself. While pads are designed to be consumable and replaced regularly, rotors are engineered to last longer — typically two or three pad sets — but they still have a finite service life. A rotor can be worn past its minimum thickness even when the pads have plenty of material left, especially if the vehicle has been driven with worn pads that scored the rotor surface.
The key difference is that pad wear is visible and intuitive, while rotor wear is hidden. A rotor can lose 2mm of material across its surface without any obvious visual cue, which is why measuring with a micrometer is the only reliable way to know its true condition.
How Thickness Affects Heat Dissipation and Brake Fade
How Thickness Affects Heat Dissipation and Brake Fade
Brake rotors function as heat sinks. When you press the brake pedal, the kinetic energy of the moving vehicle is converted into thermal energy at the friction surface. A thicker rotor has more mass, which means it can absorb more heat before its temperature rises to dangerous levels. This thermal mass is critical for preventing brake fade — the phenomenon where brakes lose stopping power due to overheating.
When a rotor wears below its minimum thickness, its thermal capacity drops significantly. The thinner metal heats up faster, reaches higher temperatures, and cools more slowly. This leads to several problems: the brake fluid can boil at the caliper, creating a spongy pedal; the pad compound can glaze over, reducing friction; and the rotor itself can develop heat checking — small cracks on the surface that grow with thermal cycling.
In extreme cases, a rotor that is too thin can warp or even crack completely under hard braking. The structural integrity of the rotor depends on maintaining adequate thickness to resist the clamping forces of the caliper and the thermal stresses of braking. This is why the minimum thickness spec is not a suggestion — it is a hard safety limit.
Minimum Thickness vs. Discard Thickness: The Critical Distinction
Understanding the difference between minimum thickness and discard thickness is essential for making correct replacement decisions. These two terms are often used interchangeably, but they refer to different specifications with different purposes.
Minimum thickness (often stamped as “MIN TH” on the rotor) is the absolute lowest measurement at which the rotor can safely remain in service. This number is determined by the vehicle manufacturer through engineering analysis and testing. It accounts for the structural strength needed to resist clamping forces, the thermal mass required for heat dissipation, and the material thickness needed to prevent warping or cracking.
Discard thickness is the point at which the rotor must be removed from service and replaced. In most cases, discard thickness is the same as minimum thickness — once you reach the minimum, the rotor is discarded. However, some manufacturers specify a discard thickness that is slightly above the absolute minimum, providing a safety margin. This is particularly common on performance vehicles and heavy-duty trucks.
Where to Find the Minimum Thickness Spec (Cast into the rotor hat)
Where to Find the Minimum Thickness Spec (Cast into the rotor hat)
The minimum thickness specification is almost always cast or stamped into the rotor itself. Look on the hub or hat — the flat, raised center section of the rotor that mounts to the wheel hub. You will typically see a number like “MIN TH 22.4mm” or “MIN 0.79 in” along with the manufacturer’s logo and sometimes a date code.
This stamping is your primary reference. It is legally required in most jurisdictions and is the number you should compare against your measurements. If the stamping is worn away or illegible — which can happen on older rotors — you can find the spec in the vehicle’s service manual, on the manufacturer’s website, or by contacting a dealership with your VIN.
It is important to note that the minimum thickness spec is unique to each rotor design. Two different vehicles can have rotors of the same diameter but different minimum thicknesses, depending on the rotor’s metallurgy, venting design, and the vehicle’s weight and performance characteristics. Never assume a spec from one vehicle applies to another.
Why You Should Never Trust the ‘Looks Fine’ Check
Why You Should Never Trust the ‘Looks Fine’ Check
One of the most common mistakes in brake maintenance is relying on visual inspection to judge rotor condition. A rotor can look perfectly smooth and shiny while being dangerously thin. The friction surface wears evenly across its width, so there is no visual cue that material has been lost. Unless the rotor has deep scoring, obvious cracks, or severe rust, it will look normal even when it is past its service limit.
The only reliable way to know a rotor’s thickness is to measure it with a micrometer. This tool is inexpensive — typically $20 to $40 for a quality digital model — and takes less than a minute per rotor. Measuring at multiple points around the rotor’s circumference and at different radii gives you a complete picture of its condition.
Another reason to avoid visual inspection is that rotors can wear unevenly. Taper wear — where one side of the friction surface is thinner than the other — is common on vehicles driven in stop-and-go traffic. This uneven wear can cause pedal pulsation and vibration, but it is invisible from the outside. Only measurement reveals the true condition.
The 1.5mm Rule: What Happens When You Exceed the Limit
The 1.5mm Rule: Details
While the exact consequences vary by vehicle, a general rule of thumb is that exceeding the minimum thickness by more than 1.5mm is a critical safety hazard. At this point, the rotor has lost so much material that its structural integrity is compromised. The metal can flex under clamping force, causing a soft or spongy brake pedal. It can also overheat rapidly, leading to brake fade at exactly the moment you need maximum stopping power.
In severe cases, a rotor that is excessively thin can crack. The cracks typically start at the edge of the friction surface and propagate inward, eventually causing the rotor to separate. This is a catastrophic failure that can result in loss of braking ability and a serious accident.
The
1.5mm rule is not a universal standard — always defer to the manufacturer’s stamped spec — but it serves as a useful mental benchmark. If your rotor measures more than 1.5mm below the minimum thickness, it is not just worn; it is dangerously compromised. Replace it immediately, regardless of how it looks or how recently it was installed.
How to Measure Brake Rotor Thickness: Tools and Step-by-Step Process
Measuring brake rotor thickness is a straightforward process that requires the right tools and a methodical approach. The two primary tools are a micrometer and a caliper, each with its own advantages and limitations.
A digital or dial micrometer is the gold standard for rotor measurement. It provides accuracy to 0.001mm (0.0001 inches) and features a flat anvil and spindle that make contact with the friction surfaces. Micrometers are available in various sizes, but a 0-25mm (0-1 inch) range covers most passenger car rotors. For larger rotors on trucks and SUVs, a 25-50mm (1-2 inch) range may be necessary.
A caliper — either digital or dial — is a more versatile tool that can measure both thickness and other dimensions like rotor diameter. However, calipers are generally less accurate than micrometers, with typical precision of 0.01mm (0.001 inches). For rotor thickness measurement, this level of accuracy is usually sufficient, but a micrometer is preferred when the rotor is close to its minimum spec.
Step-by-Step Measurement Process
Step-by-Step Measurement Process
Before measuring, ensure the rotor is clean and free of rust, debris, and brake dust. Use a wire brush or brake cleaner to remove any loose material from the friction surface. This is critical because even a thin layer of contamination can skew your measurement by several tenths of a millimeter.
1. **Remove the wheel and tire** to access the rotor. If you are measuring the front rotors, you may need to remove the caliper to access the full friction surface. On many vehicles, you can measure the rotor without removing the caliper by reaching through the caliper openings, but this limits the measurement points.
2. **Identify the minimum thickness spec** from the stamping on the rotor hat or the vehicle’s service manual. Write this number down so you can compare it against your measurements.
3. **Measure at multiple points around the rotor.** Rotors wear unevenly, so you need at least four to six measurements spaced evenly around the circumference. Mark each measurement point with a piece of chalk or tape so you can track where you measured.
4. **Measure at different radii.** In addition to measuring around the circumference, take measurements at the outer edge, the middle, and the inner edge of the friction surface. This reveals taper wear — where the rotor is thinner on one side than the other.
5. **Record each measurement** and compare them against the minimum spec. The lowest reading is the one that matters. If any measurement is at or below the minimum thickness, the rotor must be replaced.
Measuring Front vs. Rear Rotors
Front rotors typically wear faster than rear rotors because they handle a larger share of the braking force — usually 60-70% of the stopping power. This means front rotors will reach their minimum thickness sooner and may need replacement more frequently.
When measuring rear rotors, note that many vehicles have solid (non-vented) rotors on the rear axle. These are thinner than vented front rotors and have a lower minimum thickness spec. The measurement process is the same, but you should be aware that rear rotors can be more susceptible to rust and pitting, especially on vehicles that sit for extended periods.
Common Measurement Mistakes to Avoid
Common Measurement Mistakes to Avoid
The most common mistake is measuring at only one point and assuming that represents the entire rotor. Rotors wear unevenly, and a single measurement can miss a thin spot that is below the minimum spec.
Another mistake is measuring with a dirty or damaged tool. A micrometer with worn anvils or a caliper with a bent jaw will give inaccurate readings. Always check your tools against a known standard — like a gauge block or a new rotor — before relying on them.
Finally, be careful not to measure the rust buildup on the rotor’s edge. The friction surface is the machined area where the pads contact; the outer edge often has a rust lip that is not part of the friction surface. Measuring this lip will give you a falsely high reading.
Rotor Runout, Parallelism, and Taper Wear: Beyond Simple Thickness
While minimum thickness is the primary safety specification, other measurements are equally important for diagnosing brake problems. Rotor runout, parallelism, and taper wear all affect brake performance and can cause symptoms like pedal pulsation, vibration, and uneven pad wear.
Rotor Runout (Lateral Runout)
Rotor Runout (Lateral Runout)
Rotor runout is the amount of side-to-side movement of the rotor as it spins. It is measured with a dial indicator mounted to a fixed point while the rotor is rotated. Runout is expressed in thousandths of an inch (or hundredths of a millimeter) and represents the total deviation from a perfectly flat plane.
Excessive runout causes the brake pads to be pushed back into the caliper piston on each revolution, creating a pulsating brake pedal and vibration through the steering wheel. The typical specification for lateral runout is 0.002 to 0.004 inches (0.05 to 0.10mm), depending on the vehicle.
Runout can be caused by several factors: a dirty or corroded hub surface, improper wheel torque, or a rotor that has been warped by excessive heat. In some cases, runout can be corrected by re-mounting the rotor on the hub or by machining the rotor. However, if the rotor is near its minimum thickness, replacement is the safer option.
Parallelism (Thickness Variation)
Parallelism (Thickness Variation)
Parallelism refers to the variation in thickness around the rotor’s circumference. It is measured by taking multiple thickness readings at evenly spaced points and calculating the difference between the thickest and thinnest measurements. The specification for parallelism is typically 0.0005 to 0.001 inches (0.013 to 0.025mm).
When parallelism is out of spec, the brake pads move in and out as the rotor rotates, creating a pulsation that is felt through the brake pedal. This is often described as a “warped rotor” feeling, but it is actually caused by uneven thickness rather than actual warping.
Parallelism issues are usually caused by uneven pad wear, excessive heat, or improper rotor machining. If the rotor has enough material remaining, it can be machined to restore parallelism. Otherwise, replacement is required.
Taper Wear
Taper wear is a condition where the rotor is thicker on one side of the friction surface than the other. It is measured by comparing thickness readings at the inner and outer edges of the friction surface. Taper wear is typically caused by caliper misalignment, worn slide pins, or a sticking caliper piston.
The specification for taper wear is usually 0.0005 to 0.001 inches (0.013 to 0.025mm) across the friction surface. Excessive taper wear causes uneven pad contact, leading to tapered pad wear and reduced braking efficiency. It also creates a condition where the rotor must be machined or replaced to restore proper contact.
Scoring Depth and Heat Checking
Scoring Depth and Heat Checking
Scoring refers to grooves or channels cut into the friction surface by worn brake pads or embedded debris. Deep scoring — typically more than 0.060 inches (1.5mm) — can reduce braking effectiveness and may require rotor replacement. Light scoring is normal and does not affect performance.
Heat checking is the appearance of small, hairline cracks on the friction surface, usually radiating from the edges. These cracks are caused by thermal stress from repeated heating and cooling. Light heat checking is common and generally harmless, but deep or extensive cracking indicates the rotor has been overheated and should be replaced.
OEM vs. Aftermarket Rotor Specs: What You Need to Know
When replacing rotors, you have two main options: Original Equipment Manufacturer (OEM) rotors and aftermarket rotors. Each has its own specifications, quality levels, and considerations regarding minimum thickness.
OEM Rotors
OEM rotors are manufactured to the exact specifications of the vehicle manufacturer. They are designed to match the original rotor’s dimensions, metallurgy, and minimum thickness spec. OEM rotors are typically made from cast iron with specific alloying elements that provide the right balance of wear resistance, heat dissipation, and structural strength.
The advantage of OEM rotors is that they are guaranteed to meet the vehicle’s engineering requirements. The minimum thickness spec stamped on an OEM rotor is the same as the original, so you can trust that the measurement
you take against the stamped number is accurate and reliable. OEM rotors also come with the vehicle manufacturer’s warranty and are tested to meet strict quality standards.
The main disadvantage of OEM rotors is cost — they are typically 30-50% more expensive than aftermarket alternatives. However, for drivers who prioritize safety and reliability, the extra cost is often justified by the guaranteed fit and performance.
Aftermarket Rotors
Aftermarket Rotors
Aftermarket rotors are manufactured by third-party companies and are designed to fit specific vehicle models. They come in a wide range of quality levels, from budget options to high-performance upgrades. The minimum thickness spec for aftermarket rotors can vary from the OEM spec, depending on the manufacturer and the rotor’s design.
Budget aftermarket rotors are often made from lower-grade cast iron and may have a thinner overall construction. This means their minimum thickness spec may be lower than the OEM spec, which reduces their service life and heat capacity. While these rotors are cheaper, they may not provide the same level of safety or longevity as OEM parts.
Premium aftermarket rotors, on the other hand, are often engineered to exceed OEM specifications. They may feature improved metallurgy, better venting designs, or drilled and slotted surfaces for enhanced heat dissipation. These rotors typically have a minimum thickness spec that is equal to or greater than the OEM spec, providing a longer service life.
How to Verify Aftermarket Specs
When purchasing aftermarket rotors, always check the minimum thickness spec before installation. This information should be printed on the rotor’s packaging or available from the manufacturer’s website. Compare this spec against the OEM spec for your vehicle to ensure the aftermarket rotor provides adequate safety margins.
It is also important to verify that the aftermarket rotor’s dimensions — including diameter, height, and mounting pattern — match the OEM specifications. A rotor that is slightly too small or too large can cause caliper misalignment, uneven pad wear, and reduced braking performance.
Corrosion and Rust Pitting Considerations
Corrosion and Rust Pitting Considerations
Both OEM and aftermarket rotors are susceptible to corrosion and rust pitting, especially in regions with harsh winters or high humidity. Rust on the friction surface can cause uneven pad contact, vibration, and reduced braking effectiveness.
Surface rust that forms after a vehicle sits for a few days is normal and will be worn off after a few stops. However, deep rust pitting — where the corrosion has eaten into the metal — can reduce the rotor’s effective thickness and create rough spots that damage brake pads.
When measuring rotor thickness, be sure to measure the actual friction surface, not areas affected by rust pitting. If rust pitting is severe, the rotor may need to be replaced even if the measured thickness is above the minimum spec, because the pitting compromises the rotor’s structural integrity.
When to Replace vs. Resurface: A Practical Decision Framework
One of the most common questions in brake maintenance is whether to resurface (machine) a rotor or replace it entirely. The answer depends on several factors, including the rotor’s remaining thickness, its overall condition, and the cost of each option.
When Resurfacing Is Appropriate
Resurfacing involves removing a thin layer of metal from the friction surface to restore a smooth, flat finish. This process can eliminate scoring, minor heat checking, and parallelism issues. Resurfacing is appropriate when:
– The rotor’s thickness is above the minimum spec by at least 0.5mm (0.020 inches) after machining
– The rotor has no deep cracks, severe rust pitting, or structural damage
– The rotor’s runout can be corrected by machining
– The cost of resurfacing is significantly less than replacement
Most manufacturers specify that a rotor can be machined down to a “minimum machinable thickness” — typically 1.0 to 1.5mm above the discard thickness. This ensures that after machining, the rotor still has enough material to provide a safe service life.
When Replacement Is Required
Replacement is the only safe option when:
– The rotor is already at or below the minimum thickness spec
– The rotor has deep cracks or heat checking that extends through the friction surface
– The rotor has severe rust pitting that compromises its structural integrity
– The rotor has been machined before and is now below the minimum machinable thickness
– The rotor is warped beyond what machining can correct
In general, if you are unsure whether a rotor can be safely resurfaced, replacement is the safer choice. The cost difference between resurfacing and replacement is often small — typically $20-40 per rotor for machining versus $50-150 per rotor for replacement — and the safety benefits of new rotors are significant.
The Cost-Benefit Analysis
When deciding between resurfacing and replacement, consider the following:
– **Labor costs:** Resurfacing requires removing the rotor and taking it to a machine shop, which adds labor time. Replacement is often faster if you are doing the work yourself.
– **Rotor age and mileage:** If the rotor has been in service for 50,000 miles or more, replacement is usually the better investment, as the rotor is likely close to its minimum thickness anyway.
– **Pad condition:** If you are replacing the brake pads, new rotors provide a fresh surface for the pads to bed in properly. Resurfaced rotors can work, but they may not provide the same level of performance.
– **Warranty considerations:** Some brake pad manufacturers require new or resurfaced rotors for their warranty to remain valid.
Warning Signs That Your Rotors Are Past Their Safe Service Life
Warning Signs That Your Rotors Are Past Their Safe Service Life
Beyond measuring thickness, there are several warning signs that indicate your rotors need immediate attention:
– **Pulsating brake pedal:** This indicates parallelism issues or runout, which may be caused by uneven wear or warping.
– **Vibration through the steering wheel:** This is often caused by excessive runout on the front rotors.
– **Squealing or grinding noises:** This can indicate that the pads are worn down to the metal backing plate, which will score the rotor surface.
– **Visible cracks or deep grooves:** These are signs of structural damage that cannot be repaired.
– **Blue or discolored spots on the rotor:** This indicates overheating, which can cause warping and reduced performance.
If you experience any of these symptoms, measure the rotor thickness immediately. Even if the thickness is above the minimum spec, the rotor may need to be resurfaced or replaced to restore safe braking performance.
Brake Pad Wear and Its Effect on Rotor Thickness
Brake pads and rotors wear together as a system. The condition of your brake pads directly affects how quickly your rotors wear and whether they reach their minimum thickness prematurely.
How Pad Material Affects Rotor Wear
Brake pads are made from various friction materials, each with different wear characteristics. Organic pads are soft and gentle on rotors but wear quickly themselves. Semi-metallic pads provide better stopping power and heat resistance but are harder on rotors, causing faster rotor wear. Ceramic pads offer a balance of performance and rotor-friendly wear, making them a popular choice for daily drivers.
The hardness of the pad material directly influences rotor wear rate. Harder pads remove more material from the rotor surface with each stop, while softer pads preserve rotor thickness but require more frequent replacement. This is why it is important to choose pads that match your driving style and the rotor’s design.
Worn Pads and Rotor Damage
When brake pads wear down to the metal backing plate, the metal contacts the rotor directly. This causes severe scoring — deep grooves cut into the friction surface — and rapid rotor wear. In extreme cases, the metal-to-metal contact can generate enough heat to warp the rotor or cause it to crack.
If you have driven with worn pads for any significant distance, the rotors are likely damaged. Even if the rotor thickness is still above the minimum spec, the scoring may be deep enough to require resurfacing or replacement. Always inspect the rotor surface when replacing worn pads.
Pad Replacement Intervals and Rotor Life
Most brake pads last between 30,000 and 70,000 miles, depending on driving conditions and pad material. Rotors typically last for two to three pad sets — roughly 60,000 to 150,000 miles — before reaching their minimum thickness.
However, this is only an estimate. Aggressive driving, heavy loads, and frequent stop-and-go traffic can significantly shorten both pad and rotor life. The only reliable way to know when rotors need replacement is to measure their thickness at every pad change.
The Importance of Bedding In New Pads and Rotors
The Importance of Bedding In New Pads and Rotors
When you install new pads and rotors, the friction surfaces need to be “bedded in” — a process that transfers a thin layer of pad material onto the rotor surface. This creates an even friction interface that maximizes braking performance and minimizes wear.
Proper bedding involves a series of moderate stops from speed, followed by a cooling period. This process should be repeated several times to ensure even pad transfer. Failure to bed in new components can result in uneven wear, vibration,
Brake rotor thickness is the most critical specification for safe braking. Every rotor has a minimum thickness rating, usually stamped on the hub. Once rotors wear past that limit, they cannot dissipate heat properly. This causes brake fade, vibration, and in severe cases, structural failure. This guide explains what that number means, how to measure it with a micrometer or caliper, and when to replace rotors based on real data.
You will learn the difference between minimum thickness and discard thickness. You will also learn how to read the wear indicators cast into the rotor. Measuring at multiple points matters because rotors rarely wear evenly. We cover the tools you need and the step-by-step measurement process for front and rear rotors. We also explain the warning signs that your rotors are past their safe service life. Whether you are a DIY mechanic or just trying to understand your shop, this is the complete reference for rotor thickness specifications.
What sets this guide apart is the data: we’ve compiled minimum thickness specs for popular vehicle models, explained how brake pad wear compounds rotor wear, and included a practical decision framework so you know exactly when to machine versus replace. You’ll also see why measuring rotor thickness is non-negotiable for brake system maintenance — because a rotor that looks fine on the outside can be dangerously thin where it matters most.
What Is Brake Rotor Thickness and Why It Matters
Brake rotor thickness is the measurement of the metal disc your brake pads clamp down on to stop your vehicle. It is the vertical distance between the two friction surfaces — the flat, machined faces where the pads make contact. Every rotor starts at a specific thickness when new, called the “new thickness” spec, and wears thinner with every stop.
The measurement matters because rotors are engineered with a structural minimum. Below that point, the metal can no longer absorb and shed heat safely, and it risks cracking or catastrophic failure under hard braking. This is why your vehicle manufacturer publishes a minimum thickness spec — usually stamped directly on the rotor’s hub or hat — and why ignoring it is one of the most dangerous maintenance mistakes a DIY owner can make.
Rotor wear is not just about the pad material disappearing. Each braking event removes a microscopic layer of iron from the friction surface. Over thousands of stops, this adds up to measurable wear. The rate of wear depends on driving style, vehicle weight, pad compound, and rotor metallurgy. Aggressive driving, heavy loads, and towing accelerate the process significantly.
The Difference Between Rotor Thickness and Pad Thickness
The Difference Between Rotor Thickness and Pad Thickness
Many drivers confuse rotor thickness with brake pad thickness, but they are entirely different measurements with different safety implications. Brake pad thickness refers to the friction material bonded to the backing plate — the part that presses against the rotor. Pad thickness is checked by looking through the caliper opening or measuring the remaining friction material with a gauge. When pads wear down to about 3mm, they need replacement.
Rotor thickness, on the other hand, is the metal disc itself. While pads are designed to be consumable and replaced regularly, rotors are engineered to last longer — typically two or three pad sets — but they still have a finite service life. A rotor can be worn past its minimum thickness even when the pads have plenty of material left, especially if the vehicle has been driven with worn pads that scored the rotor surface.
The key difference is that pad wear is visible and intuitive, while rotor wear is hidden. A rotor can lose 2mm of material across its surface without any obvious visual cue, which is why measuring with a micrometer is the only reliable way to know its true condition.
How Thickness Affects Heat Dissipation and Brake Fade
How Thickness Affects Heat Dissipation and Brake Fade
Brake rotors function as heat sinks. When you press the brake pedal, the kinetic energy of the moving vehicle is converted into thermal energy at the friction surface. A thicker rotor has more mass, which means it can absorb more heat before its temperature rises to dangerous levels. This thermal mass is critical for preventing brake fade — the phenomenon where brakes lose stopping power due to overheating.
When a rotor wears below its minimum thickness, its thermal capacity drops significantly. The thinner metal heats up faster, reaches higher temperatures, and cools more slowly. This leads to several problems: the brake fluid can boil at the caliper, creating a spongy pedal; the pad compound can glaze over, reducing friction; and the rotor itself can develop heat checking — small cracks on the surface that grow with thermal cycling.
In extreme cases, a rotor that is too thin can warp or even crack completely under hard braking. The structural integrity of the rotor depends on maintaining adequate thickness to resist the clamping forces of the caliper and the thermal stresses of braking. This is why the minimum thickness spec is not a suggestion — it is a hard safety limit.
Minimum Thickness vs. Discard Thickness: The Critical Distinction
Understanding the difference between minimum thickness and discard thickness is essential for making correct replacement decisions. These two terms are often used interchangeably, but they refer to different specifications with different purposes.
Minimum thickness (often stamped as “MIN TH” on the rotor) is the absolute lowest measurement at which the rotor can safely remain in service. This number is determined by the vehicle manufacturer through engineering analysis and testing. It accounts for the structural strength needed to resist clamping forces, the thermal mass required for heat dissipation, and the material thickness needed to prevent warping or cracking.
Discard thickness is the point at which the rotor must be removed from service and replaced. In most cases, discard thickness is the same as minimum thickness — once you reach the minimum, the rotor is discarded. However, some manufacturers specify a discard thickness that is slightly above the absolute minimum, providing a safety margin. This is particularly common on performance vehicles and heavy-duty trucks.
Where to Find the Minimum Thickness Spec (Cast into the rotor hat)
Where to Find the Minimum Thickness Spec (Cast into the rotor hat)
The minimum thickness specification is almost always cast or stamped into the rotor itself. Look on the hub or hat — the flat, raised center section of the rotor that mounts to the wheel hub. You will typically see a number like “MIN TH 22.4mm” or “MIN 0.79 in” along with the manufacturer’s logo and sometimes a date code.
This stamping is your primary reference. It is legally required in most jurisdictions and is the number you should compare against your measurements. If the stamping is worn away or illegible — which can happen on older rotors — you can find the spec in the vehicle’s service manual, on the manufacturer’s website, or by contacting a dealership with your VIN.
It is important to note that the minimum thickness spec is unique to each rotor design. Two different vehicles can have rotors of the same diameter but different minimum thicknesses, depending on the rotor’s metallurgy, venting design, and the vehicle’s weight and performance characteristics. Never assume a spec from one vehicle applies to another.
Why You Should Never Trust the ‘Looks Fine’ Check
Why You Should Never Trust the ‘Looks Fine’ Check
One of the most common mistakes in brake maintenance is relying on visual inspection to judge rotor condition. A rotor can look perfectly smooth and shiny while being dangerously thin. The friction surface wears evenly across its width, so there is no visual cue that material has been lost. Unless the rotor has deep scoring, obvious cracks, or severe rust, it will look normal even when it is past its service limit.
The only reliable way to know a rotor’s thickness is to measure it with a micrometer. This tool is inexpensive — typically $20 to $40 for a quality digital model — and takes less than a minute per rotor. Measuring at multiple points around the rotor’s circumference and at different radii gives you a complete picture of its condition.
Another reason to avoid visual inspection is that rotors can wear unevenly. Taper wear — where one side of the friction surface is thinner than the other — is common on vehicles driven in stop-and-go traffic. This uneven wear can cause pedal pulsation and vibration, but it is invisible from the outside. Only measurement reveals the true condition.
The 1.5mm Rule: What Happens When You Exceed the Limit
The 1.5mm Rule: Details
While the exact consequences vary by vehicle, a general rule of thumb is that exceeding the minimum thickness by more than 1.5mm is a critical safety hazard. At this point, the rotor has lost so much material that its structural integrity is compromised. The metal can flex under clamping force, causing a soft or spongy brake pedal. It can also overheat rapidly, leading to brake fade at exactly the moment you need maximum stopping power.
In severe cases, a rotor that is excessively thin can crack. The cracks typically start at the edge of the friction surface and propagate inward, eventually causing the rotor to separate. This is a catastrophic failure that can result in loss of braking ability and a serious accident.
The
1.5mm rule is not a universal standard — always defer to the manufacturer’s stamped spec — but it serves as a useful mental benchmark. If your rotor measures more than 1.5mm below the minimum thickness, it is not just worn; it is dangerously compromised. Replace it immediately, regardless of how it looks or how recently it was installed.
How to Measure Brake Rotor Thickness: Tools and Step-by-Step Process
Measuring brake rotor thickness is a straightforward process that requires the right tools and a methodical approach. The two primary tools are a micrometer and a caliper, each with its own advantages and limitations.
A digital or dial micrometer is the gold standard for rotor measurement. It provides accuracy to 0.001mm (0.0001 inches) and features a flat anvil and spindle that make contact with the friction surfaces. Micrometers are available in various sizes, but a 0-25mm (0-1 inch) range covers most passenger car rotors. For larger rotors on trucks and SUVs, a 25-50mm (1-2 inch) range may be necessary.
A caliper — either digital or dial — is a more versatile tool that can measure both thickness and other dimensions like rotor diameter. However, calipers are generally less accurate than micrometers, with typical precision of 0.01mm (0.001 inches). For rotor thickness measurement, this level of accuracy is usually sufficient, but a micrometer is preferred when the rotor is close to its minimum spec.
Step-by-Step Measurement Process
Step-by-Step Measurement Process
Before measuring, ensure the rotor is clean and free of rust, debris, and brake dust. Use a wire brush or brake cleaner to remove any loose material from the friction surface. This is critical because even a thin layer of contamination can skew your measurement by several tenths of a millimeter.
1. **Remove the wheel and tire** to access the rotor. If you are measuring the front rotors, you may need to remove the caliper to access the full friction surface. On many vehicles, you can measure the rotor without removing the caliper by reaching through the caliper openings, but this limits the measurement points.
2. **Identify the minimum thickness spec** from the stamping on the rotor hat or the vehicle’s service manual. Write this number down so you can compare it against your measurements.
3. **Measure at multiple points around the rotor.** Rotors wear unevenly, so you need at least four to six measurements spaced evenly around the circumference. Mark each measurement point with a piece of chalk or tape so you can track where you measured.
4. **Measure at different radii.** In addition to measuring around the circumference, take measurements at the outer edge, the middle, and the inner edge of the friction surface. This reveals taper wear — where the rotor is thinner on one side than the other.
5. **Record each measurement** and compare them against the minimum spec. The lowest reading is the one that matters. If any measurement is at or below the minimum thickness, the rotor must be replaced.
Measuring Front vs. Rear Rotors
Front rotors typically wear faster than rear rotors because they handle a larger share of the braking force — usually 60-70% of the stopping power. This means front rotors will reach their minimum thickness sooner and may need replacement more frequently.
When measuring rear rotors, note that many vehicles have solid (non-vented) rotors on the rear axle. These are thinner than vented front rotors and have a lower minimum thickness spec. The measurement process is the same, but you should be aware that rear rotors can be more susceptible to rust and pitting, especially on vehicles that sit for extended periods.
Common Measurement Mistakes to Avoid
Common Measurement Mistakes to Avoid
The most common mistake is measuring at only one point and assuming that represents the entire rotor. Rotors wear unevenly, and a single measurement can miss a thin spot that is below the minimum spec.
Another mistake is measuring with a dirty or damaged tool. A micrometer with worn anvils or a caliper with a bent jaw will give inaccurate readings. Always check your tools against a known standard — like a gauge block or a new rotor — before relying on them.
Finally, be careful not to measure the rust buildup on the rotor’s edge. The friction surface is the machined area where the pads contact; the outer edge often has a rust lip that is not part of the friction surface. Measuring this lip will give you a falsely high reading.
Rotor Runout, Parallelism, and Taper Wear: Beyond Simple Thickness
While minimum thickness is the primary safety specification, other measurements are equally important for diagnosing brake problems. Rotor runout, parallelism, and taper wear all affect brake performance and can cause symptoms like pedal pulsation, vibration, and uneven pad wear.
Rotor Runout (Lateral Runout)
Rotor Runout (Lateral Runout)
Rotor runout is the amount of side-to-side movement of the rotor as it spins. It is measured with a dial indicator mounted to a fixed point while the rotor is rotated. Runout is expressed in thousandths of an inch (or hundredths of a millimeter) and represents the total deviation from a perfectly flat plane.
Excessive runout causes the brake pads to be pushed back into the caliper piston on each revolution, creating a pulsating brake pedal and vibration through the steering wheel. The typical specification for lateral runout is 0.002 to 0.004 inches (0.05 to 0.10mm), depending on the vehicle.
Runout can be caused by several factors: a dirty or corroded hub surface, improper wheel torque, or a rotor that has been warped by excessive heat. In some cases, runout can be corrected by re-mounting the rotor on the hub or by machining the rotor. However, if the rotor is near its minimum thickness, replacement is the safer option.
Parallelism (Thickness Variation)
Parallelism (Thickness Variation)
Parallelism refers to the variation in thickness around the rotor’s circumference. It is measured by taking multiple thickness readings at evenly spaced points and calculating the difference between the thickest and thinnest measurements. The specification for parallelism is typically 0.0005 to 0.001 inches (0.013 to 0.025mm).
When parallelism is out of spec, the brake pads move in and out as the rotor rotates, creating a pulsation that is felt through the brake pedal. This is often described as a “warped rotor” feeling, but it is actually caused by uneven thickness rather than actual warping.
Parallelism issues are usually caused by uneven pad wear, excessive heat, or improper rotor machining. If the rotor has enough material remaining, it can be machined to restore parallelism. Otherwise, replacement is required.
Taper Wear
Taper wear is a condition where the rotor is thicker on one side of the friction surface than the other. It is measured by comparing thickness readings at the inner and outer edges of the friction surface. Taper wear is typically caused by caliper misalignment, worn slide pins, or a sticking caliper piston.
The specification for taper wear is usually 0.0005 to 0.001 inches (0.013 to 0.025mm) across the friction surface. Excessive taper wear causes uneven pad contact, leading to tapered pad wear and reduced braking efficiency. It also creates a condition where the rotor must be machined or replaced to restore proper contact.
Scoring Depth and Heat Checking
Scoring Depth and Heat Checking
Scoring refers to grooves or channels cut into the friction surface by worn brake pads or embedded debris. Deep scoring — typically more than 0.060 inches (1.5mm) — can reduce braking effectiveness and may require rotor replacement. Light scoring is normal and does not affect performance.
Heat checking is the appearance of small, hairline cracks on the friction surface, usually radiating from the edges. These cracks are caused by thermal stress from repeated heating and cooling. Light heat checking is common and generally harmless, but deep or extensive cracking indicates the rotor has been overheated and should be replaced.
OEM vs. Aftermarket Rotor Specs: What You Need to Know
When replacing rotors, you have two main options: Original Equipment Manufacturer (OEM) rotors and aftermarket rotors. Each has its own specifications, quality levels, and considerations regarding minimum thickness.
OEM Rotors
OEM rotors are manufactured to the exact specifications of the vehicle manufacturer. They are designed to match the original rotor’s dimensions, metallurgy, and minimum thickness spec. OEM rotors are typically made from cast iron with specific alloying elements that provide the right balance of wear resistance, heat dissipation, and structural strength.
The advantage of OEM rotors is that they are guaranteed to meet the vehicle’s engineering requirements. The minimum thickness spec stamped on an OEM rotor is the same as the original, so you can trust that the measurement
you take against the stamped number is accurate and reliable. OEM rotors also come with the vehicle manufacturer’s warranty and are tested to meet strict quality standards.
The main disadvantage of OEM rotors is cost — they are typically 30-50% more expensive than aftermarket alternatives. However, for drivers who prioritize safety and reliability, the extra cost is often justified by the guaranteed fit and performance.
Aftermarket Rotors
Aftermarket Rotors
Aftermarket rotors are manufactured by third-party companies and are designed to fit specific vehicle models. They come in a wide range of quality levels, from budget options to high-performance upgrades. The minimum thickness spec for aftermarket rotors can vary from the OEM spec, depending on the manufacturer and the rotor’s design.
Budget aftermarket rotors are often made from lower-grade cast iron and may have a thinner overall construction. This means their minimum thickness spec may be lower than the OEM spec, which reduces their service life and heat capacity. While these rotors are cheaper, they may not provide the same level of safety or longevity as OEM parts.
Premium aftermarket rotors, on the other hand, are often engineered to exceed OEM specifications. They may feature improved metallurgy, better venting designs, or drilled and slotted surfaces for enhanced heat dissipation. These rotors typically have a minimum thickness spec that is equal to or greater than the OEM spec, providing a longer service life.
How to Verify Aftermarket Specs
When purchasing aftermarket rotors, always check the minimum thickness spec before installation. This information should be printed on the rotor’s packaging or available from the manufacturer’s website. Compare this spec against the OEM spec for your vehicle to ensure the aftermarket rotor provides adequate safety margins.
It is also important to verify that the aftermarket rotor’s dimensions — including diameter, height, and mounting pattern — match the OEM specifications. A rotor that is slightly too small or too large can cause caliper misalignment, uneven pad wear, and reduced braking performance.
Corrosion and Rust Pitting Considerations
Corrosion and Rust Pitting Considerations
Both OEM and aftermarket rotors are susceptible to corrosion and rust pitting, especially in regions with harsh winters or high humidity. Rust on the friction surface can cause uneven pad contact, vibration, and reduced braking effectiveness.
Surface rust that forms after a vehicle sits for a few days is normal and will be worn off after a few stops. However, deep rust pitting — where the corrosion has eaten into the metal — can reduce the rotor’s effective thickness and create rough spots that damage brake pads.
When measuring rotor thickness, be sure to measure the actual friction surface, not areas affected by rust pitting. If rust pitting is severe, the rotor may need to be replaced even if the measured thickness is above the minimum spec, because the pitting compromises the rotor’s structural integrity.
When to Replace vs. Resurface: A Practical Decision Framework
One of the most common questions in brake maintenance is whether to resurface (machine) a rotor or replace it entirely. The answer depends on several factors, including the rotor’s remaining thickness, its overall condition, and the cost of each option.
When Resurfacing Is Appropriate
Resurfacing involves removing a thin layer of metal from the friction surface to restore a smooth, flat finish. This process can eliminate scoring, minor heat checking, and parallelism issues. Resurfacing is appropriate when:
– The rotor’s thickness is above the minimum spec by at least 0.5mm (0.020 inches) after machining
– The rotor has no deep cracks, severe rust pitting, or structural damage
– The rotor’s runout can be corrected by machining
– The cost of resurfacing is significantly less than replacement
Most manufacturers specify that a rotor can be machined down to a “minimum machinable thickness” — typically 1.0 to 1.5mm above the discard thickness. This ensures that after machining, the rotor still has enough material to provide a safe service life.
When Replacement Is Required
Replacement is the only safe option when:
– The rotor is already at or below the minimum thickness spec
– The rotor has deep cracks or heat checking that extends through the friction surface
– The rotor has severe rust pitting that compromises its structural integrity
– The rotor has been machined before and is now below the minimum machinable thickness
– The rotor is warped beyond what machining can correct
In general, if you are unsure whether a rotor can be safely resurfaced, replacement is the safer choice. The cost difference between resurfacing and replacement is often small — typically $20-40 per rotor for machining versus $50-150 per rotor for replacement — and the safety benefits of new rotors are significant.
The Cost-Benefit Analysis
When deciding between resurfacing and replacement, consider the following:
– **Labor costs:** Resurfacing requires removing the rotor and taking it to a machine shop, which adds labor time. Replacement is often faster if you are doing the work yourself.
– **Rotor age and mileage:** If the rotor has been in service for 50,000 miles or more, replacement is usually the better investment, as the rotor is likely close to its minimum thickness anyway.
– **Pad condition:** If you are replacing the brake pads, new rotors provide a fresh surface for the pads to bed in properly. Resurfaced rotors can work, but they may not provide the same level of performance.
– **Warranty considerations:** Some brake pad manufacturers require new or resurfaced rotors for their warranty to remain valid.
Warning Signs That Your Rotors Are Past Their Safe Service Life
Warning Signs That Your Rotors Are Past Their Safe Service Life
Beyond measuring thickness, there are several warning signs that indicate your rotors need immediate attention:
– **Pulsating brake pedal:** This indicates parallelism issues or runout, which may be caused by uneven wear or warping.
– **Vibration through the steering wheel:** This is often caused by excessive runout on the front rotors.
– **Squealing or grinding noises:** This can indicate that the pads are worn down to the metal backing plate, which will score the rotor surface.
– **Visible cracks or deep grooves:** These are signs of structural damage that cannot be repaired.
– **Blue or discolored spots on the rotor:** This indicates overheating, which can cause warping and reduced performance.
If you experience any of these symptoms, measure the rotor thickness immediately. Even if the thickness is above the minimum spec, the rotor may need to be resurfaced or replaced to restore safe braking performance.
Brake Pad Wear and Its Effect on Rotor Thickness
Brake pads and rotors wear together as a system. The condition of your brake pads directly affects how quickly your rotors wear and whether they reach their minimum thickness prematurely.
How Pad Material Affects Rotor Wear
Brake pads are made from various friction materials, each with different wear characteristics. Organic pads are soft and gentle on rotors but wear quickly themselves. Semi-metallic pads provide better stopping power and heat resistance but are harder on rotors, causing faster rotor wear. Ceramic pads offer a balance of performance and rotor-friendly wear, making them a popular choice for daily drivers.
The hardness of the pad material directly influences rotor wear rate. Harder pads remove more material from the rotor surface with each stop, while softer pads preserve rotor thickness but require more frequent replacement. This is why it is important to choose pads that match your driving style and the rotor’s design.
Worn Pads and Rotor Damage
When brake pads wear down to the metal backing plate, the metal contacts the rotor directly. This causes severe scoring — deep grooves cut into the friction surface — and rapid rotor wear. In extreme cases, the metal-to-metal contact can generate enough heat to warp the rotor or cause it to crack.
If you have driven with worn pads for any significant distance, the rotors are likely damaged. Even if the rotor thickness is still above the minimum spec, the scoring may be deep enough to require resurfacing or replacement. Always inspect the rotor surface when replacing worn pads.
Pad Replacement Intervals and Rotor Life
Most brake pads last between 30,000 and 70,000 miles, depending on driving conditions and pad material. Rotors typically last for two to three pad sets — roughly 60,000 to 150,000 miles — before reaching their minimum thickness.
However, this is only an estimate. Aggressive driving, heavy loads, and frequent stop-and-go traffic can significantly shorten both pad and rotor life. The only reliable way to know when rotors need replacement is to measure their thickness at every pad change.
The Importance of Bedding In New Pads and Rotors
When you install new pads and rotors, the friction surfaces need to be “bedded in” — a process that transfers a thin layer of pad material onto the rotor surface. This creates an even friction interface that maximizes braking performance and minimizes wear.
Proper bedding involves a series of moderate stops from speed, followed by a cooling period. This process should be repeated several times to ensure even pad transfer. Failure to bed in new components can result in uneven wear, vibration,