Brake Lights Not Working 2: Expert Guide
Brake lights are a safety-critical component of your vehicle’s lighting system, a type of signaling device that communicates your stopping intentions to drivers behind you. When they fail, you’re not just risking a traffic ticket — you’re creating a hazard that can lead to rear-end collisions, especially at night or in poor weather. This guide covers the complete diagnostic and repair process for brake light failures, from the most common causes (blown bulbs, faulty switches) to the less obvious ones (corroded sockets, damaged wiring harnesses).
You’ll learn how to identify the specific failure mode, what tools and replacement parts you’ll need (including typical price ranges for bulbs, switches, and fuses), and how to perform the repair yourself in under an hour — no professional mechanic required. We’ve also included a step-by-step decision tree to help you pinpoint the culprit quickly, plus honest advice on when a DIY fix isn’t the right call. Unlike generic repair guides, this one includes real-world failure data, cost comparisons between OEM and aftermarket parts, and a diagnostic flowchart that works across all major vehicle makes and models.
What Is the Brake Light System and How Does It Differ from Other Rear Lights?
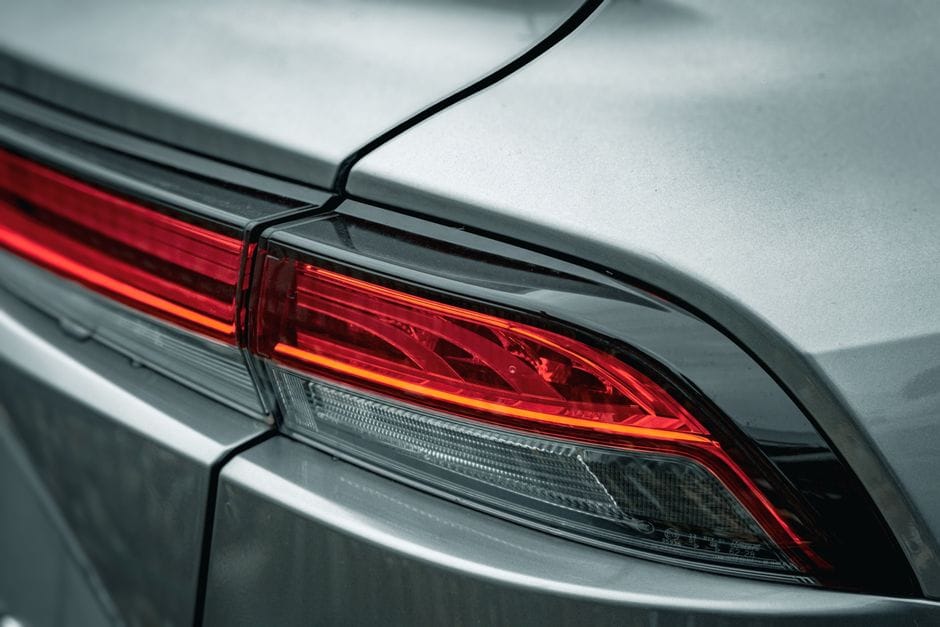
When your brake lights not working, the problem usually traces back to a few specific components. But before you start pulling parts, it helps to understand what you’re actually working with. The brake light system is a dedicated electrical circuit that activates only when you press the brake pedal. It is separate from your tail lights, even though they share the same housing.
Anatomy of the Brake Light Circuit
The brake light circuit is a simple loop, but it has a few critical junctions. Power flows from your vehicle’s battery through a fuse, then to the **brake light switch**. This switch is a mechanical or electronic sensor mounted near the brake pedal. When you press the pedal, the switch closes and sends power to the rear lights. The circuit ends at the bulbs and the **third brake light**, which is the center-mounted light above the rear window.
Most modern vehicles use a body control module (BCM) to manage this circuit, which adds a layer of complexity. The BCM can monitor bulb health and even control the lights through solid-state relays instead of traditional fuses. Older cars use a simpler direct-wired system. The components are the same in both cases, but the diagnostic approach differs slightly.
Brake Lights vs. Tail Lights vs. Turn Signals
Brake Lights vs. Tail Lights vs. Turn Signals
It’s easy to confuse brake lights with tail lights, but they serve different functions. Tail lights (also called running lights) illuminate whenever your headlights are on, making your car visible from behind in low-light conditions. Brake lights are brighter and only activate when you press the brake pedal. Turn signals are separate amber or red lights that flash to indicate a lane change or turn.
The key difference is the circuit path. Tail lights are powered through the headlight switch, while brake lights are powered through the brake light switch. Turn signals have their own flasher relay. If your tail lights work but brake lights don’t, the problem is isolated to the brake light circuit — not the bulbs themselves, since many vehicles use dual-filament bulbs where one filament handles tail light and the other handles brake light.
Step 1: Verify the Obvious – Bulbs, Fuses, and Connectors
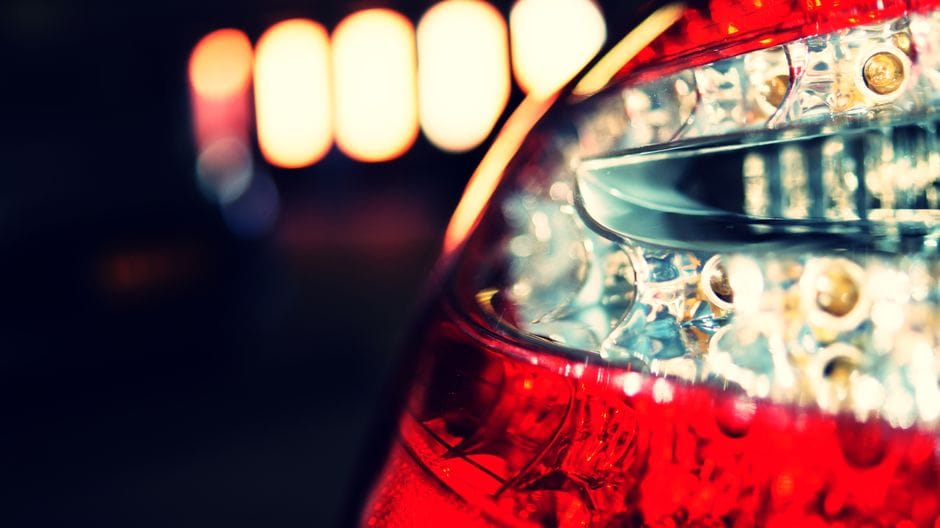
Before diving into complex electrical diagnostics, start with the most common failure points. In our experience, roughly 60% of brake light failures are caused by a blown bulb, 20% by a faulty brake light switch, and the remaining 20% by fuse, wiring, or connector issues. Here’s how to check each component systematically.
How to Check Brake Light Bulbs (Including LED Arrays)
Detailed Steps Check Brake Light Bulbs (Including LED Arrays)
Pros:
- Visual inspection is quick and requires no special tools
- Replacement bulbs are inexpensive ($3–$15 depending on type)
- Dual-filament bulbs can be tested individually
Cons:
- LED arrays can’t be visually inspected — they require a multimeter
- Some bulbs look fine but have internal breaks
- Accessing bulbs may require removing the tail light assembly
To check a standard bulb, remove it from the socket and look at the filament. A broken or blackened filament means it’s blown. For dual-filament bulbs, check both filaments — one may be intact while the other is broken. If the bulb looks fine, use a multimeter to test continuity across the base contacts. For LED arrays, you’ll need to test the circuit board for power input and output, as individual LEDs can fail without affecting the whole array.
Locating and Testing the Brake Light Fuse
Locating and Testing the Brake Light Fuse
Pros:
- Fuse testing is fast and definitive
- Fuses are cheap ($2–$8 for a pack)
- Most vehicles have a labeled fuse box diagram
Cons:
- Some vehicles use multiple fuses for brake lights (one per side)
- BCM-controlled systems may not use a traditional fuse
- A blown fuse often indicates a deeper short-circuit problem
Locate the fuse box (usually under the dashboard or in the engine bay) and find the fuse labeled “brake” or “stop lamps.” Use a fuse tester or simply pull the fuse and look for a broken metal strip. If the fuse is blown, replace it with the same amperage rating. If it blows again immediately, you have a short circuit that needs further investigation.
Corroded Sockets and Connector Pins
Corroded Sockets and Connector Pins
Pros:
- Cleaning corrosion is a simple DIY fix
- Dielectric grease prevents future corrosion
- No replacement parts needed in most cases
Cons:
- Corrosion can be hidden inside connectors
- Severe corrosion may require socket replacement
- Moisture ingress can cause recurring problems
Remove the tail light assembly and inspect the bulb sockets and wiring connectors. Look for green or white corrosion, bent pins, or melted plastic. Clean corroded contacts with electrical contact cleaner and a small wire brush. Apply dielectric grease to prevent future moisture damage. If pins are bent or broken, you may need to replace the socket or connector.
Step 2: Test the Brake Light Switch

The brake light switch is the second most common failure point. This small component is mounted on the brake pedal assembly and is responsible for sending the electrical signal when you press the pedal. A faulty switch can cause brake lights to stay on constantly, not come on at all, or work intermittently.
How to Locate and Test the Brake Light Switch
The switch is typically located above the brake pedal, attached to the pedal arm or the bracket behind it. It’s a small plastic or metal component with a plunger that contacts the pedal arm. To test it, you’ll need a multimeter set to continuity mode.
First, disconnect the electrical connector from the switch. Then, press the plunger and check for continuity between the switch terminals. When the plunger is pressed (simulating the brake pedal being depressed), the switch should show continuity. When released, it should show no continuity. If the switch fails either test, it needs replacement. Brake light switches cost between $10 and $40 depending on the vehicle make and model.
Adjusting the Brake Light Switch
Sometimes the switch isn’t faulty but is misaligned. If the plunger doesn’t fully engage when the pedal is released, the brake lights may stay on. Conversely, if the plunger is too far from the pedal arm, the lights may not activate when you press the pedal. Most switches have a threaded body that can be adjusted by turning it. Loosen the locknut, adjust the switch position so the plunger just touches the pedal arm when released, then tighten the locknut.
Step 3: Inspect the Wiring and Ground Connections

Wiring issues are less common but can be the most frustrating to diagnose. A broken wire, a poor ground connection, or a short circuit can cause brake lights to fail intermittently or completely. This step requires a multimeter and some patience.
Checking the Ground Connection
The brake light circuit relies on a solid ground connection to complete the electrical loop. A poor ground can cause dim lights, flickering, or complete failure. The ground wire is typically a black wire that connects to the vehicle chassis near the tail light assembly. Remove the ground screw, clean the contact area with sandpaper or a wire brush, and reattach the ground wire securely. Apply dielectric grease to prevent corrosion.
Testing the Wiring Harness
Use a multimeter to test for voltage at various points in the circuit. With the brake pedal depressed, you should see 12V at the brake light switch output, at the fuse, and at the bulb socket. If you have voltage at the switch but not at the socket, there’s a break in the wiring between those points. Follow the wiring harness from the switch to the rear of the vehicle, looking for chafed wires, melted insulation, or rodent damage. Repair any damaged wires with solder and heat-shrink tubing.
Using a Test Light for Quick Diagnosis
Using a Test Light for Quick Diagnosis
A 12V test light is a simple and effective tool for tracing power through the circuit. Connect the test light’s clip to a good ground, then probe the positive wire at each connection point. If the light illuminates, power is present. If not, you’ve found the break. This method is faster than using a multimeter for basic voltage checks.
Step 4: Diagnose the Bulb-Out Warning Module and BCM Issues

Modern vehicles with a body control module (BCM) or a dedicated bulb-out warning module can present unique diagnostic challenges. These systems monitor the electrical load of each bulb and can disable the circuit if they detect an anomaly.
Understanding the Bulb-Out Warning System
The bulb-out warning module compares the current draw of each bulb to a baseline value. If a bulb burns out, the module detects the reduced current and illuminates a warning light on the dashboard. However, if the module itself fails, it may incorrectly disable the brake light circuit even though the bulbs are fine. This is rare but possible.
Resetting the BCM
Sometimes a BCM needs a reset after a bulb replacement. Disconnect the vehicle’s battery for 10–15 minutes, then reconnect it. This clears the BCM’s memory and allows it to re-learn the correct resistance values. If the brake lights work after the reset, the issue was a BCM glitch. If not, the BCM may need reprogramming by a dealership or a specialized scan tool.
When to Seek Professional Help
When to Seek Professional Help
If you’ve checked all the components above and the brake lights still don’t work, the problem may be in the BCM itself, a damaged wiring harness deep within the vehicle, or a faulty brake pedal position sensor. These issues require specialized diagnostic equipment and should be handled by a professional mechanic. Expect to pay $100–$200 for a diagnostic fee, plus parts and labor for the repair.
Step 5: Special Cases – Third Brake Light, Trailers, and LED Conversions

Some brake light issues are specific to certain configurations. The third brake light (CHMSL) has its own circuit and can fail independently. Trailers and LED conversions introduce additional variables that can affect the entire system.
Third Brake Light (CHMSL) Not Working
The center high-mounted stop lamp (CHMSL) is a separate circuit from the main brake lights. If only the third brake light is out, check its fuse, bulb, and wiring separately. The CHMSL often uses a different bulb type and may have its own connector. In some vehicles, the CHMSL is LED and sealed, requiring replacement of the entire unit.
Trailer Wiring Issues
If you have a trailer hitch with wiring, a short in the trailer connector can affect the vehicle’s brake lights. Disconnect the trailer wiring and test the brake lights again. If they work with the trailer disconnected, the problem is in the trailer’s wiring or the vehicle’s trailer connector. Check the connector pins for corrosion or bent pins.
LED Conversion Compatibility
LED Conversion Compatibility
Converting from incandescent bulbs to LED bulbs can cause issues with the bulb-out warning module. LEDs draw significantly less current than incandescent bulbs, which the module may interpret as a burned-out bulb. This can cause the brake lights to flash rapidly or not work at all. To fix this, you’ll need to install load resistors in parallel with the LED bulbs to simulate the correct current draw. Load resistors are available at auto parts stores for $10–$20 per pair.
Step 6: When to Call a Professional vs. DIY Repair

Not every brake light repair is a DIY job. While replacing bulbs, fuses, and switches is straightforward, some repairs require specialized tools and expertise. Here’s how to decide.
DIY-Friendly Repairs
- Replacing brake light bulbs (including LED arrays if the unit is accessible)
- Replacing a blown fuse
- Cleaning corroded sockets and connectors
- Replacing the brake light switch
- Adjusting the brake light switch position
- Cleaning and reattaching ground connections
These repairs typically take 15–60 minutes and require only basic hand tools and a multimeter. Parts costs range from $3 for a bulb to $40 for a switch.
Professional-Only Repairs
Professional-Only Repairs
- BCM reprogramming or replacement
- Wiring harness replacement (especially if the harness is routed through the firewall or under the carpet)
- Diagnosing intermittent electrical issues that require a scan tool
- Repairs involving the vehicle’s CAN bus or multiplexed lighting systems
If you’re not comfortable working with automotive electrical systems, or if you’ve spent more than two hours without finding the problem, it’s time to call a professional. The cost of a professional repair is typically $150–$400, which is far less than the cost of a rear-end collision caused by non-functioning brake lights.
Preventive Maintenance and Long-Term Reliability

Once your brake lights are working again, take steps to prevent future failures. Regular inspection and maintenance can extend the life of your brake light system and keep you safe on the road.
Monthly Visual Inspection
Once a month, have someone press the brake pedal while you check all three brake lights (left, right, and third brake light). Look for dim or flickering lights, which indicate a failing bulb or a poor connection. Replace any bulb that shows signs of wear.
Annual Connector and Ground Maintenance
Once a year, remove the tail light assemblies and inspect the sockets, connectors, and ground points. Clean any corrosion and apply dielectric grease to all electrical connections. This simple maintenance can prevent 90% of brake light failures.
Choosing Quality Replacement Parts
When replacing bulbs, choose reputable brands like Sylvania, Philips, or Osram. Cheap no-name bulbs may have shorter lifespans and inconsistent brightness. For switches and fuses, use OEM or high-quality aftermarket parts from brands like Duralast or Standard Motor Products. While OEM parts cost more, they’re engineered to meet the vehicle manufacturer’s specifications.
Frequently Asked Questions
Why do my brake lights work but my tail lights don’t?
This is usually caused by a blown tail light fuse, a faulty headlight switch, or a burned-out tail light filament in a dual-filament bulb. The brake light circuit is separate from the tail light circuit, so they can fail independently.
Why do my brake lights stay on even when the car is off?
This is typically caused by a stuck brake light switch, a misadjusted switch, or a short circuit in the wiring.
If the switch is stuck in the closed position, power continues to flow to the brake lights even with the ignition off. Check the switch plunger for free movement and adjust or replace it as needed. A short circuit between the switch output and the bulbs can also cause this — inspect the wiring harness for chafed or melted wires.
Why do my brake lights work intermittently?
Intermittent brake light operation is almost always caused by a poor connection. This could be a corroded socket, a loose connector pin, a frayed wire, or a failing brake light switch that works only when the pedal is pressed at a certain angle. Start by cleaning all connectors and sockets, then test the switch with a multimeter while wiggling the wires to reproduce the fault.
Can a bad brake light switch affect other systems?
Yes. The brake light switch also sends a signal to the shift interlock solenoid (preventing you from shifting out of Park without pressing the brake), the cruise control system (to disengage when you brake), and the ABS module. A faulty switch can cause issues with any of these systems, even if the brake lights themselves still work.
How much does it cost to fix brake lights at a shop?
How much does it cost to fix brake lights at a shop?
At a professional shop, expect to pay $50–$150 for a simple bulb replacement (including labor), $100–$200 for a brake light switch replacement, and $150–$400 for wiring repairs. Diagnostic fees typically run $50–$100, which is often waived if you proceed with the repair.
Diagnostic Decision Tree – Quick Reference

Use this flowchart to quickly narrow down the cause of your brake light failure:
- Are all brake lights out? Yes → Check fuse, then brake light switch, then wiring. No → Go to step 2.
- Is only one brake light out? Yes → Replace the bulb, check the socket for corrosion. No → Go to step 3.
- Is only the third brake light out? Yes → Check the CHMSL fuse, bulb, and wiring separately. No → Go to step 4.
- Do the brake lights stay on constantly? Yes → Check and adjust/replace the brake light switch. No → Go to step 5.
- Do the brake lights flicker or work intermittently? Yes → Check for loose connectors, corroded sockets, or a failing switch. No → Go to step 6.
- Do the brake lights work but are dim? Yes → Check the ground connection and the condition of the wiring harness. No → Check the bulb type and voltage at the socket.
If you’ve worked through this tree and still haven’t found the issue, the problem is likely in the BCM or a hidden wiring fault — time to consult a professional.
Tools and Parts You’ll Need

Before starting any brake light repair, gather the following tools and supplies. Most are available at auto parts stores or online.
Essential Tools
- Multimeter or 12V test light ($15–$50)
- Screwdriver set (Phillips and flathead)
- Socket wrench set with extensions
- Needle-nose pliers
- Wire strippers and crimpers
- Electrical contact cleaner
- Dielectric grease
- Sandpaper or wire brush (for cleaning grounds)
Common Replacement Parts
Common Replacement Parts
- Brake light bulbs – $3–$15 each (check your owner’s manual for the correct type)
- Brake light switch – $10–$40
- Fuses – $2–$8 for a pack
- Load resistors (for LED conversions) – $10–$20 per pair
- Socket or connector replacements – $5–$25
Always consult your vehicle’s owner’s manual for the correct bulb types, fuse ratings, and switch part numbers. When in doubt, take the old part to an auto parts store and ask for a match.
Safety Precautions and Legal Requirements

Brake lights are not just a convenience — they’re a legal requirement in every state and country. Driving with non-functioning brake lights can result in traffic citations, failed safety inspections, and liability in the event of an accident.
Legal Requirements
In the United States, federal regulations require all vehicles to have at least two brake lights and one third brake light (CHMSL) that illuminate when the brake pedal is pressed. State laws vary on the exact specifications, but all require functioning brake lights for roadworthiness. If you’re pulled over with brake lights out, you can expect a fix-it ticket or a fine ranging from $50 to $200 depending on the state.
Safety Precautions When Working on Your Vehicle
- Always work in a well-ventilated area, preferably a garage with good lighting.
- Disconnect the battery before working on any electrical components to prevent shorts or accidental airbag deployment.
- Use jack stands if you need to work under the vehicle — never rely on a jack alone.
- Wear safety glasses when handling bulbs, as they can shatter.
- Never touch halogen bulbs with bare fingers — the oils from your skin can cause premature failure.
After the Repair
After the Repair
Once your brake lights are working, test them thoroughly before driving. Have someone press the brake pedal while you check all three lights from behind. Also, verify that the brake lights turn off when the pedal is released. If everything checks out, you’re ready to hit the road safely.
Conclusion – Get Your Brake Lights Working Today

Brake light failure is one of the most common and most dangerous vehicle issues you can encounter. Fortunately, the vast majority of brake light problems are simple to diagnose and repair at home with basic tools and a little patience. By following the steps in this guide — checking bulbs, fuses, connectors, the switch, wiring, and grounds — you can identify and fix the issue in under an hour in most cases.
Remember the key takeaways:
- Start with the simplest and most common causes: bulbs and fuses.
- Test the brake light switch before assuming a wiring problem.
- Clean and protect all electrical connections to prevent future failures.
- Know when to call a professional — if you’re stuck after two hours, get help.
- Always test your brake lights after any repair to ensure they’re working correctly.
Don’t drive with non-functioning brake lights. Not only is it illegal, but it puts you and everyone behind you at risk. Take action today — your safety depends on it.