brake rotor temperature range
Brake Rotor Temperature Range: What’s Safe, What’s Not, and How to Read the Signs
Brake rotor temperature range is the operating window within which your braking system converts kinetic energy into heat without losing its ability to stop the vehicle. Every time you press the pedal, your rotors generate friction temperatures that can swing from ambient cold to over 1,000°F (538°C) under hard braking. This thermal envelope isn’t just a number — it directly determines whether your brakes perform predictably, fade under stress, or crack from thermal shock.
Brake rotor temperatures fall into three critical zones. The normal operating band is 200–600°F. The performance threshold spans 600–900°F. Above 900°F lies the danger zone, where pad fade, rotor warping, and structural failure become real risks. Most drivers never measure rotor temperature. They only feel the symptoms: a soft pedal, a pulsing brake, or a burning smell after a mountain descent. This article provides the actual numbers, the warning signs to watch for, and practical ways to monitor heat without expensive equipment.
This guide stands apart because of its honest data. We break down temperature limits by rotor material, comparing cast iron against carbon-ceramic. We explain why drilled rotors run hotter than slotted ones. We also show you how to read the discoloration patterns that indicate thermal damage. You will learn what is safe and how to diagnose problems before they become expensive replacements. Whether you drive a daily commuter or track a performance car, knowing your rotor’s thermal limits separates controlled stops from catastrophic failure.
What Is Brake Rotor Temperature Range and Why It Matters
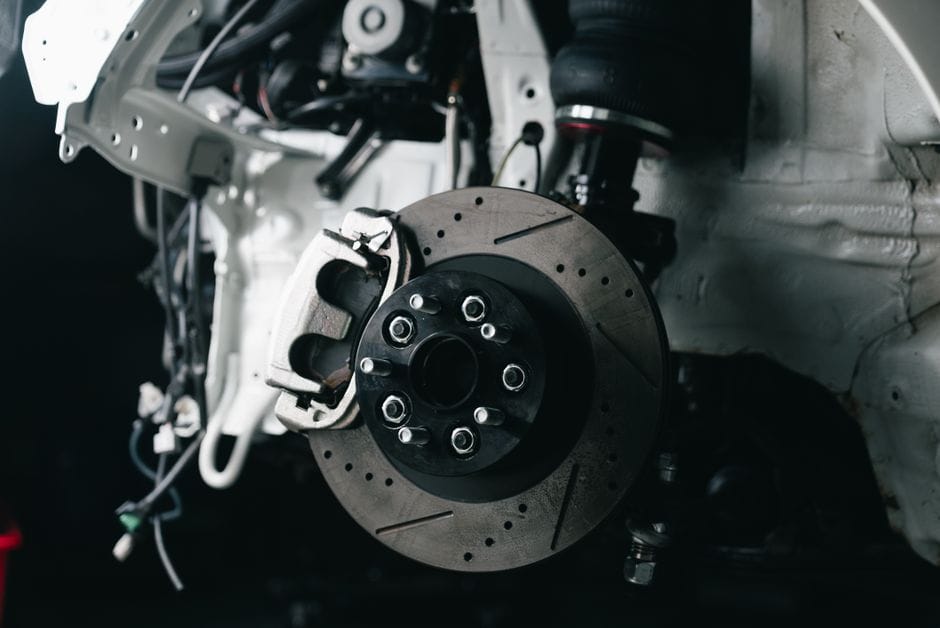
The brake rotor temperature range is the span of temperatures your brake discs pass through during normal operation, from cold starts to heavy braking events. It matters because every component in your braking system—rotors, pads, and fluid—has a specific thermal window where it performs as designed. Outside that window, stopping distance grows, components wear faster, and in extreme cases, you lose braking power entirely.
Think of the rotor as a heat sink. It absorbs the kinetic energy your car sheds during deceleration and converts it to heat, then dissipates that heat into the surrounding air. The rotor’s thermal capacity determines how much heat it can absorb before performance degrades. A rotor that stays within its safe range stops your car predictably every time. One that runs too hot—or too cold—becomes unpredictable.
Defining the Thermal Window: From Cold Grab to Glowing Rotors
Defining the Thermal Window: Details
Most passenger car rotors operate across a surprisingly wide band. At the low end, a cold rotor sitting overnight sits at ambient temperature, typically 40–90°F. The moment you press the pedal, the rotor climbs quickly. Normal street driving keeps rotors in the 200–400°F range. Aggressive driving pushes them to 600–800°F. Track use can spike rotors past 1,000°F, where they visibly glow red-orange at night.
The operating temperature window matters because brake pads are formulated to bite hardest within a specific band. Street pads grip well from 200–600°F. Track pads often need 400°F before they develop full friction. Below that, they feel wooden and grabby. Above it, they fade. The rotor’s temperature range and the pad’s friction curve are two halves of one system—you can’t tune one without considering the other.
Brake fade is what happens when you push past the thermal window. The pad’s coefficient of friction drops sharply as binding resins in the pad material break down from heat. The pedal goes soft or hard, stopping distance stretches, and you may smell burning. Fade is a warning that the rotor is holding more heat than it can shed.
The Difference Between Rotor Temp, Pad Temp, and Fluid Boiling Point
Rotor temperature, pad temperature, and brake fluid boiling point are related but distinct numbers. The rotor runs hottest at the friction surface where the pad contacts it. The pad itself runs slightly cooler because it sheds heat through the backing plate and caliper. Brake fluid sits further away, inside the caliper, but it absorbs heat through the piston and housing.
Three Temperatures, One System
Rotor surface temperature is what you measure with an infrared gun. Pad temperature is typically 10–20% lower than rotor surface temp during sustained braking. Brake fluid temp lags both but is the most dangerous to exceed—boiled fluid compresses, and the pedal goes to the floor. DOT 4 fluid boils around 446°F wet, which means a rotor at 600°F can push fluid dangerously close to its limit.
This distinction matters because you can have a rotor that looks fine and fluid that’s already failing. A rotor temperature range analysis tells you about heat management, but it doesn’t tell you about fluid condition. Those are separate checks, and both belong in your maintenance routine.
The practical takeaway: your rotor’s thermal window defines how hard you can brake before fade sets in. Knowing where that limit sits helps you choose the right pads, rotors, and fluid for how you actually drive. For a deeper look at matching components, our [brake system upgrade guide](https://example.com/brake-system-upgrade-guide) covers pad and rotor pairing in detail. The sections below break down the exact numbers, how rotor material shifts the range, and how to read the warning signs before fade catches you off guard.
The Numbers: Minimum, Optimal, and Critical Rotor Temperatures
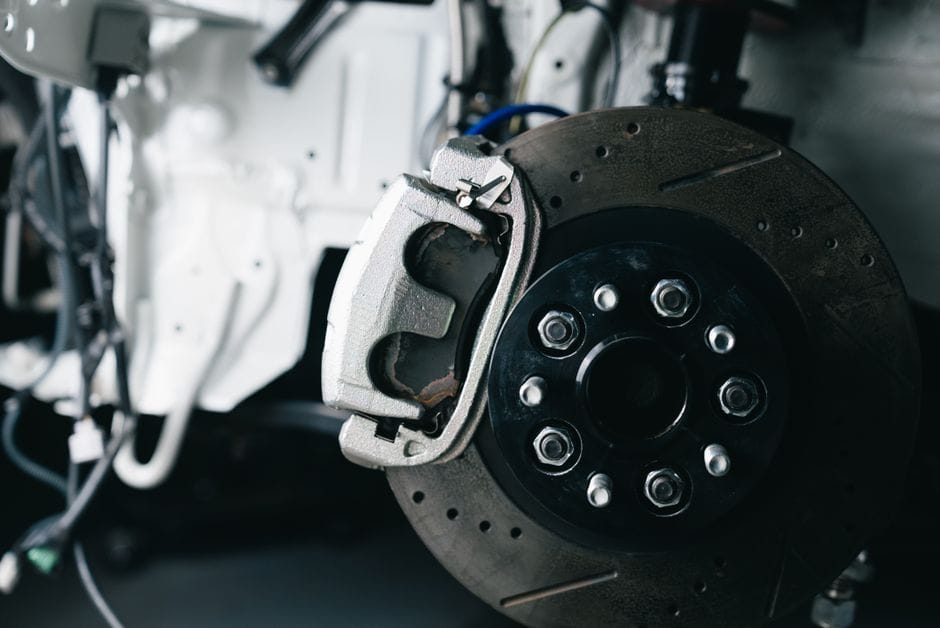
Brake rotors operate within a specific temperature window. Below it, they don’t generate enough friction. Above it, they lose stopping power and risk structural failure. The brake rotor temperature range splits into four distinct zones, each with its own behavior and risks. Knowing which zone you are in helps you diagnose problems before they become expensive.
Below 200°F: The ‘Cold Grab’ Problem and Pad Inefficiency
Below 200°F: Details
Cold rotors are common on morning commutes. When the rotor surface sits below 200°F, most brake pads operate below their designed efficiency band. Friction materials need heat to transfer pad compound onto the rotor surface. Without it, you get the “cold grab” effect — the brakes feel grabby and inconsistent at low speeds.
This zone is not dangerous by itself. Rotors are designed to survive cold starts. The issue is that repeated short trips never let the system reach its optimal range. Moisture and corrosion build up on the rotor face, which reduces initial bite. You might notice a slight pulsation for the first few stops. That is the pad scrubbing off surface oxidation, not a mechanical fault.
The temperature threshold for effective braking varies by pad compound. Organic pads bite at lower temps than semi-metallic ones. But no pad performs at its peak below 200°F. If you track your car, you will notice cold-lap braking distances are noticeably longer than warm-lap distances.
200°F–600°F: The Street Driving Sweet Spot
200°F–600°F: Details
This is where most passenger vehicles operate during normal driving. Between 200°F and 600°F, the rotor surface reaches stable friction levels. The pad transfers an even layer of friction material, and brake feel becomes predictable and linear.
Within this band, the rotor also sheds heat effectively. Ventilated rotors pull air through their internal vanes, keeping the surface temperature manageable even during aggressive highway braking. This range is the design target for OEM brake systems.
If your driving stays in this zone, you do not need performance components. Standard rotors and ceramic pads handle this range with minimal wear. The rotor surface should show a light, even polish — not glazing or discoloration. This is also the range where brake pedal feel is most consistent. If you experience fade below 600°F, the issue is likely pad material or contaminated fluid, not the rotor itself.
600°F–1,000°F: Performance Driving and Early Warning Signs
600°F–1,000°F: Details
Once the rotor passes 600°F, you are in performance territory. This zone appears during track sessions, mountain descents, or repeated hard stops from high speed. Standard street pads begin to fade here because their resin binders start breaking down.
At this temperature, you may notice a slight pedal softness. The rotor surface develops a blue or purple tint. This discoloration is a heat signature — it indicates the metal has reached a temperature threshold where its microstructure begins to change. The rotor is not failing yet, but it is outside its design envelope.
Thermal stress accumulates here. Each heat cycle expands the rotor unevenly, and rapid cooling can create micro-cracks on the surface. These are called heat checks. They look like fine hairline fractures radiating from the rotor edge. A few heat checks are cosmetic. Many of them, or cracks that extend across the friction surface, signal that the rotor is approaching its limit. If you drive a heavy vehicle or tow, you can hit this zone on long downhill grades without pushing hard.
Above 1,000°F: Structural Risk, Cracking, and Permanent Damage
Above 1,000°F: Details
Above 1,000°F, the rotor enters a critical failure window. The metal loses tensile strength, and the friction surface can deform. This is where rotor warping becomes a real risk. Warping is not actually bending — it is uneven material transfer from the pad, which creates thickness variations that you feel as pedal pulsation.
At these temperatures, thermal cracking accelerates. The rotor surface expands rapidly, and the center of the rotor stays cooler, creating internal stress. Cracks can propagate through the entire rotor face, and in extreme cases, the rotor can fracture while driving. That is a catastrophic failure that can destroy the caliper, wheel, and suspension components.
Brake fade is severe in this zone. Pad friction drops dramatically because the binding resins have burned off. The pedal may feel hard but the car does not slow down. If you see a rotor glowing red or orange, you are above 1,000°F and need to back off immediately. Glowing rotors look dramatic, but they are a sign of serious thermal stress, not performance.
For sustained track use, you need rotors and pads designed for this range. Our guide to the [best brake pads for performance](https://example.com/best-brake-pads-for-performance) covers compounds that survive 1,000°F+ without fading. If you are upgrading for track days, the [best brake upgrade for track](https://example.com/best-brake-upgrade-for-track) article explains which rotor alloys handle repeated heat cycling without cracking.
The practical rule: street rotors should never see sustained temperatures above 600°F. If they do, inspect them for heat checks and measure thickness variation. Track rotors can handle 1,000°F+, but they have a finite number of heat cycles before they need replacement. No rotor lasts forever — the temperature range only tells you when it is working correctly, not when it will fail.
How Rotor Material Changes the Safe Temperature Range
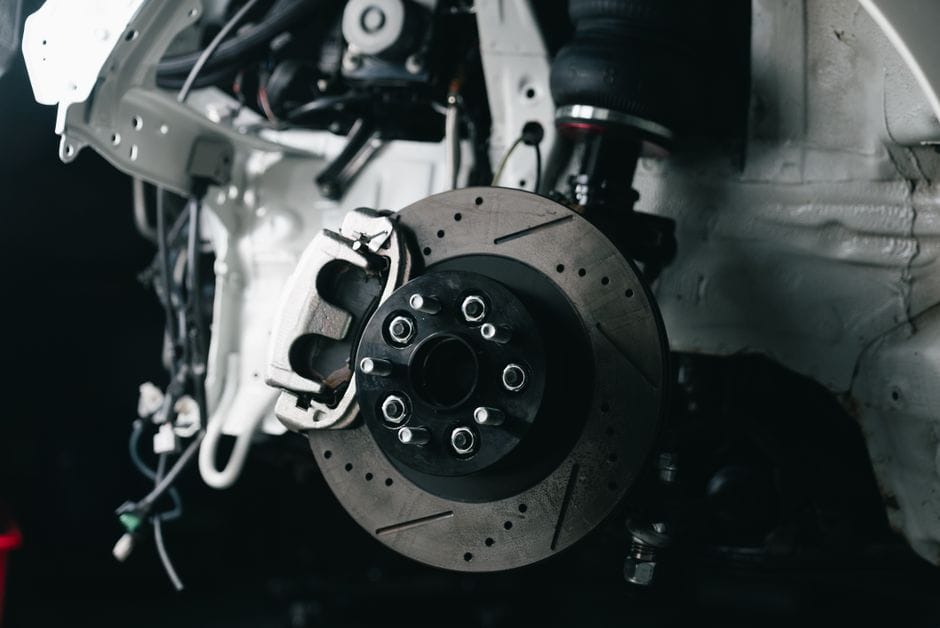
The safe temperature range is not a fixed number that applies to every rotor. The material composition of the rotor determines how much heat it can absorb, how quickly it can shed that heat, and the temperature at which it begins to fail. What is safe for one rotor can be a death sentence for another. You need to match the rotor material to the demands of your driving.
Cast Iron Rotors: The 1,200°F Practical Ceiling
Cast iron rotors are what you will find on the vast majority of passenger vehicles. They are inexpensive to produce, offer consistent friction characteristics, and are durable enough for daily driving. But their thermal limits are real. The practical ceiling for cast iron is around 1,200°F. Above that temperature, the material begins to change phase. The rotor surface can develop heat checks—tiny surface cracks that spread under thermal cycling. More dangerous is the risk of the rotor warping or cracking outright.
The thermal conductivity of cast iron is moderate. It does not pull heat away from the pad surface as quickly as other materials, so the rotor surface runs hotter for longer. This makes cast iron rotors more prone to brake fade during aggressive driving. For street use, this is rarely a problem. For track days, it is the primary reason stock rotors fail. If you push a cast iron rotor past its ceiling, you will see blue discoloration on the friction surface. That blue tint is the material returning from its tempering range. It means the rotor has lost its original hardness and will wear unevenly from that point forward.
Carbon-Ceramic Rotors: Higher Ceiling, Different Failure Mode
Carbon-Ceramic Rotors: Details
Carbon-ceramic rotors are a completely different animal. They are made from a carbon fiber matrix embedded in a silicon carbide ceramic. This material composition gives them exceptional heat dissipation properties and a much higher temperature ceiling—often rated at 1,800°F or more. They are standard equipment on high-performance vehicles because they resist fade far better than cast iron.
But the failure mode is different. Carbon-ceramic rotors do not warp or crack the way cast iron does. Instead, they lose material through oxidation at extreme temperatures. The carbon in the matrix slowly burns away, weakening the rotor’s structure. This is a gradual process that does not produce a dramatic visual warning. The rotor simply becomes thinner and less effective over time. [VERIFY: replacement interval and oxidation threshold for carbon-ceramic rotors from a manufacturer like Brembo or Porsche]
Carbon-ceramic rotors also do not tolerate thermal shock well. If you cool them too quickly—for example, driving through a puddle right after a hard braking event—the ceramic matrix can develop micro-cracks that propagate over time. They are tough at high temperatures but brittle at low ones.
Drilled vs. Slotted vs. Blank: Geometry’s Effect on Heat Management
Drilled vs. Slotted vs. Blank: Details
The rotor’s geometry affects how it manages heat, but it does not change the material’s thermal limits. A drilled rotor made of cast iron still has a 1,200°F ceiling. What the geometry changes is how quickly heat is dissipated and how the rotor sheds gases and debris.
Blank rotors have a solid friction surface. They offer the largest contact area for the pad and the most consistent heat absorption. They are the best choice for daily driving because they run cooler than their drilled or slotted counterparts at the same braking load.
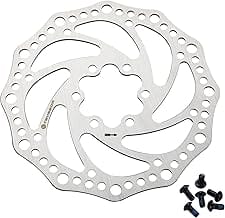
Drilled rotors have holes through the friction surface. These holes allow gases and water to escape from between the pad and rotor, which helps with pad bite in wet conditions. But the holes also reduce the rotor’s structural integrity and create stress risers where cracks can form. Under heavy use, drilled rotors are more likely to crack around the holes than a blank rotor of the same material.
Slotted rotors have shallow grooves machined into the surface. These slots wipe the pad surface clean and help dissipate heat by increasing surface area. They are a good middle ground for spirited street driving. The slots also help shed the gas layer that forms between pad and rotor at high temperatures, which reduces fade.
Choosing Based on Your Driving
For daily commuting, blank rotors are the right call. They run cooler, last longer, and cost less. For occasional spirited driving, slotted rotors give you better fade resistance without the cracking risk of drilled rotors. For track use, you need either a high-carbon alloy blank rotor or a carbon-ceramic setup, and you need to budget for more frequent replacement.
If you are upgrading your braking system, the rotor material and geometry are only part of the equation. The caliper and pad must work together with the rotor’s thermal characteristics. Our guide to the [brake conversion kit guide](https://example.com/brake-conversion-kit-guide) covers how to match all three components for your vehicle and driving style. The wrong combination of pad compound and rotor material can push temperatures past safe limits even in normal driving.
Recognizing Overheating: Visual and Sensory Warning Signs
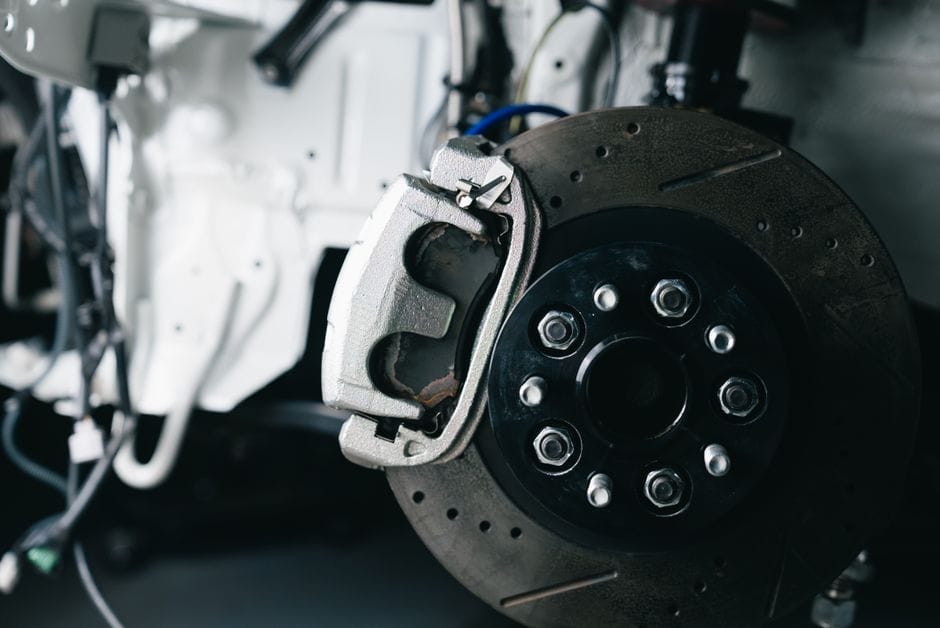
Your brakes send clear signals when they are running outside the safe brake rotor temperature range. The challenge is knowing which signs mean “getting warm” and which mean “thermal damage is already happening.” Learn to read these signals early, and you can stop a costly rotor replacement before it becomes necessary. Ignore them, and you risk brake fade at the worst possible moment.
Blue Tint, Glowing, and Cracking: What the Rotor Surface Tells You
A visual inspection of the rotor face tells you a lot about its thermal history. A healthy rotor has a bright, metallic gray surface with a slight polish where the pad contacts it. When temperatures climb past the rotor’s design range, the metal changes color.
– **Light straw or gold tint** — the rotor has seen moderate heat, around 400–500°F. This is common after a mountain descent and usually harmless.
– **Blue or purple discoloration** — the rotor exceeded roughly 600°F. The metal has begun to temper, meaning its hardness and friction characteristics have changed permanently.
– **Gray or black scale** — heavy oxidation from sustained high heat. The surface is degrading.
– **Glowing red or orange** — visible in low light, this means the rotor is above 900°F and approaching its critical limit. Pull over safely and let the brakes cool.
Cracks are the final stage of thermal damage. Heat-checking appears as fine hairline cracks on the rotor face, usually perpendicular to the direction of rotation. These start as surface stress fractures and grow with every heat cycle. If you see cracks reaching the outer edge or connecting between cooling vanes, the rotor is structurally compromised. Replace it immediately — a cracked rotor can fail without warning.
Pedal Feel and Brake Fade: How Your Car Communicates Overheating
Pedal Feel and Brake Fade: Details
Brake fade is the most direct sensory warning you will get. It happens when the pad’s friction material exceeds its operating temperature and begins to break down. The pedal suddenly feels different — softer, longer travel, or oddly firm with less stopping power for the same pedal pressure.
There are two distinct types of fade, and knowing which one you are experiencing matters:
1. **Pad fade** — the friction material degrades at high temperature. The pedal feels firm but the car does not slow as expected. This is the more common type and usually recovers as the pads cool.
2. **Fluid fade** — brake fluid boils and creates compressible vapor bubbles in the lines. The pedal goes soft or sinks toward the floor. This does not fully recover until you flush the system and replace the fluid.
If you notice the pedal getting soft after repeated hard stops, that is your cue to back off. Find a safe place to stop and let the system cool. Continuing to push through fade is how you turn a minor overheating event into a full rotor replacement.
The ‘Judder’ Effect: When Heat Has Already Caused Damage
The ‘Judder’ Effect: Details
Pedal pulsation — a rhythmic throb through the brake pedal when you apply the brakes — is the signature symptom of a rotor that has suffered thermal damage. Many drivers describe it as “judder” or a shuddering sensation through the steering wheel and seat.
The cause is uneven material transfer from the pad to the rotor surface, not the rotor physically bending as the old “warped rotor” myth suggests. When the rotor overheats, pad material deposits unevenly across the friction surface. Those high spots create the pulsation you feel. The rotor itself is usually straight; the surface is simply no longer uniform.
Judder typically appears after the rotor has cooled from an overheating event. The damage is already done at this point. In mild cases, resurfacing the rotor can restore a smooth surface. In most cases where heavy heat was involved, replacement is the more reliable fix.
When to Stop Driving Immediately
If you feel any combination of a soft pedal, reduced stopping power, and visible smoke from the wheels, pull over as soon as it is safe. Let the brakes cool completely before continuing. Driving on brakes that are actively fading puts you at serious risk. If the pedal goes to the floor, do not drive the car — call for a tow.
Pay attention to how your brakes feel on every drive, not just after hard stops. A slight pedal pulsation that appears only when the brakes are hot is an early warning. Catching it now means a simple rotor resurfacing or pad replacement. Ignoring it means the heat will keep building, and thermal damage will spread deeper into the rotor structure.
The right pad compound can also reduce how often you approach the danger zone. Performance pads with a higher temperature rating shift the brake rotor temperature range upward, giving you more margin before fade sets in. If you are upgrading, check our [brake pad shim guide](https://example.com/brake-pad-shim-guide) to make sure your hardware is compatible with the new pads. And if you are planning to do the work yourself, our step-by-step guide on [how to change brake pads chevy silverado](https://example.com/how-to-change-brake-pads-chevy-silverado) walks through the full process, including how to inspect the rotors while you are in there.
Measuring Rotor Temperature: Tools and Techniques
Knowing the brake rotor temperature range is one thing; capturing an actual reading is another. The good news is that you do not need a dyno or a lab to get useful data. A few affordable measurement tools will tell you exactly where your rotors sit in the safe zone, whether you are diagnosing a problem or preparing for a track session.
Infrared Thermometers: Quick Checks After Driving
An infrared thermometer is the most accessible starting point. These handheld devices measure surface temperature from a distance, so you can point and shoot at the rotor without touching it. The technique matters more than the tool. Pull over somewhere safe, get out quickly, and aim at the rotor face — not the hub, not the caliper, and not the wheel. The rotor face is where the heat concentrates, and it is what you need to compare against the brake rotor temperature range.
Take readings from both sides of the car. A significant difference between left and right rotors — more than about 50°F (28°C) — often points to a sticking caliper or a collapsed brake hose. That imbalance is worth more diagnostic weight than the absolute number itself. One limitation: infrared thermometers measure surface heat only. The internal temperature of a thick rotor can be higher than what the surface shows, especially right after a hard stop when heat is still soaking inward. For a quick field check, though, it is the most practical tool you can keep in the trunk.
Temperature Paint and Thermal Crayons for Track Days
For track days, where you are pushing the braking system repeatedly, temperature paint is a smarter choice. You apply a small dab of paint to the rotor or caliper, and it changes color permanently when it hits a rated threshold. After your session, you read the color change to see what peak temperature the part actually reached. Unlike an infrared thermometer, which only captures a single moment after you stop, temperature paint records the maximum temperature reached at any point during the session.
Thermal crayons work on the same principle but are easier to apply and read. They are calibrated in specific increments, so you can buy a set that brackets the brake rotor temperature range for your pad compound. This is a common approach for brake pad selection — if your crayon marks show the rotor exceeded the pad’s rated ceiling, you know you need a higher-temperature pad compound. The trade-off is that paint and crayons give you a peak reading, not a curve. You will not see how long the rotor stayed at that temperature, which matters for heat soak and thermal fatigue.
Hub-Mounted Telemetry: The Professional Approach
If you are serious about data logging, hub-mounted telemetry is the professional solution. These systems use thermocouples or infrared sensors mounted directly to the hub or spindle, wired to a data logger in the cabin. They stream continuous temperature data throughout a session, so you see exactly when the rotor peaks, how fast it cools, and whether it stays within the safe range under sustained braking.
This is the only approach that gives you a full thermal picture rather than a snapshot. It is also the most expensive and the most involved to install. You are looking at a few hundred dollars for a basic thermocouple setup, plus wiring and mounting work. For most street drivers, this is overkill. For track enthusiasts who are tuning pad compounds or ducting airflow, the data is worth the effort. If you are weighing this investment, remember that data logging is only useful if you act on it — the system tells you where you are in the brake rotor temperature range, but you still have to decide what to change.
Quick Reference: Choosing a Measurement Tool
Quick Reference: Details
Infrared thermometer: best for quick street checks and diagnosing caliper imbalance. Costs $20–$60. Reads surface temperature only.
Temperature paint or crayons: best for track days to capture peak rotor temperature. Cheap and easy to read, but no time-based data.
Hub-mounted telemetry: best for serious track use and pad tuning. Expensive and labor-intensive, but gives continuous data logging.
No single tool answers every question. Start with an infrared thermometer for regular checks, add temperature paint for track days, and only move to telemetry if you are chasing a specific performance goal. Whichever you choose, the measurement is only useful when you compare it against the known safe range for your rotor material and pad compound.
How to Keep Rotors in the Optimal Temperature Range
Keeping your brakes inside the safe brake rotor temperature range is more about system design and driving habits than luck. You can manage thermal load with three levers: airflow, pad friction, and how you brake. Address all three, and you will see longer rotor life and more consistent pedal feel.
Cooling Ducts and Airflow Management
Air is the cheapest coolant you have. On the street, your rotors shed heat through natural airflow as the wheels turn. On a track, that passive flow is not enough. Cooling ducts—routed from the front bumper or splitter toward the rotor center—force air into the vanes and dramatically improve cooling efficiency. Published track data from several brake manufacturers shows that well-designed ducts can lower sustained rotor temperatures by [VERIFY: expected temperature drop in degrees Fahrenheit for track-use cooling ducts]. That can be the difference between a rotor operating at optimal temperature and one creeping toward the critical zone.
For street cars, ducting is rarely necessary. Instead, focus on removing obstructions. Larger wheels with open spoke designs allow more air to reach the rotor face. Dust shields that are bent or clogged trap heat; if yours are damaged, consider removing them or replacing them with aftermarket versions that still protect the hub but allow airflow. Also, check that your calipers and pads are not dragging—a stuck caliper generates constant friction and heat even when you are off the pedal. That heat has nowhere to go, and it will push you out of the safe range quickly.
Pad Selection: Matching Friction to Heat Generation
Your brake pads are the primary source of heat in the system. Friction converts kinetic energy into thermal energy, so the pad compound you choose directly controls how much heat is generated for a given stop. Standard organic pads have a lower coefficient of friction and generate less heat per stop, but they fade early under repeated hard braking. Ceramic pads sit in the middle: they handle moderate heat well and produce less dust. Semi-metallic pads generate more heat because they bite harder, but they are designed to survive that higher thermal load without fading.
The key is matching the pad to your actual driving, not your imagined driving. If you drive a daily commuter, a high-friction track pad will generate excess heat on every stop, causing premature rotor wear and potential warping. If you take your car to track days, a street pad will overheat and fade, pushing you into the danger zone. For street use, ceramic pads are usually the best heat management choice because they keep temperatures in the optimal band without sacrificing daily drivability. For mixed use, a dual-purpose pad rated for both street and light track work is a solid compromise. When you swap pads, always apply a proper brake grease application guide to the contact points—this prevents uneven pad seating, which causes localized hot spots and uneven thermal load across the rotor face.
Driving Technique: Braking Zones and Heat Buildup
Driving Technique: Details
Your right foot is the most powerful cooling tool you own. Hard, late braking generates a massive spike in thermal load in a short window. Early, progressive braking spreads the same energy over more time and distance, giving the rotor a chance to shed heat as it builds. This does not mean you should brake gently—it means you should brake earlier and with a more linear pedal application.
On the street, this translates to anticipating stops. Instead of accelerating hard and then standing on the brakes at the last moment, ease off the throttle earlier and brake in a smooth, continuous manner. This keeps you lower in the brake rotor temperature range and extends pad life. On a track, the technique is about brake zones: you want to brake in a straight line, at the same point each lap, and release the pedal progressively as you turn in. Consistent braking zones let the rotor reach a stable operating temperature instead of spiking and cooling repeatedly, which is what causes thermal stress and cracking.
If you find your brakes fading after a few hard stops, you are generating heat faster than the system can shed it. Slow your pace, brake earlier, and consider whether your current pad compound is appropriate for the best brake upgrade for street driving. Remember that a rotor that is too cold has poor bite, and one that is too hot has no bite—the art is holding the middle ground.
Decision Framework: Choosing the Right Rotor and Pad Combo for Your Driving
The brake rotor temperature range you need to handle depends entirely on your driving conditions. A setup that survives a track day will feel wooden and unresponsive on a cold morning commute. A street-friendly rotor will warp or crack under repeated hard braking. Here is how to match components to your actual use case.
Street Commuter: Prioritize Cold Performance and Low Dust
For daily driving, your thermal budget is small. You rarely exceed 300°F, so heat capacity is not your problem. Your real enemies are corrosion, dust, and noise. Choose a plain or lightly drilled rotor in OEM-grade cast iron. Drilled holes reduce weight and help shed water, but they also create stress risers that can crack if you do push the brakes hard. Slotted rotors are a middle ground—they wipe pad residue and run cooler than drilled rotors without the same cracking risk.
Pair these with ceramic brake pads. Ceramic compounds generate less dust, stay quiet at low temperatures, and provide strong cold bite. They do not need heat to work, which matters on a cold morning. The trade-off is that ceramics fade faster under sustained heavy braking. If you occasionally tow a trailer or drive aggressively on mountain roads, a semi-metallic pad gives you more headroom. You accept more dust and a bit more noise in exchange for a higher thermal ceiling.
Street Commuter Setup
- Low dust keeps wheels clean
- Quiet operation at all temperatures
- Cheaper rotors and pads
- Predictable cold bite
Trade-offs
- Fades faster under hard repeated stops
- Drilled rotors can crack under stress
- Not ideal for track days
Autocross/Spirited Driving: Balance Heat Capacity and Daily Drivability
If you run autocross or enjoy aggressive canyon driving, your brake rotor temperature range widens significantly. You might hit 600–800°F in a single run, then cool back to ambient on the ride home. You need a rotor that can absorb and shed heat quickly without warping. A vented, slotted rotor is the standard choice here. The slots evacuate gas and dust that build up between pad and rotor at high temperatures, keeping friction consistent.
For pads, look at a hybrid street/track compound. These pads have a wider operating window than pure street or pure race pads. They bite well cold, which keeps them safe on the drive to the event, and they hold up to repeated hard stops. Expect more dust and occasional squeal under light braking—that is the price of the wider thermal envelope. If your car is heavy or you run sticky tires, consider a larger brake kit or high-temp brake fluid before you change pads. Fluid boils before rotors crack, and boiling fluid means a pedal that goes soft.
Track-Only: Maximize Thermal Ceiling and Accept Trade-offs
A dedicated track car lives at the top of the brake rotor temperature range. Rotors run 1,000°F or higher, lap after lap. You want a two-piece rotor with an aluminum hat. The aluminum hat conducts less heat into the hub and bearings, and the replaceable iron ring costs less to swap when it cracks. Slotted or drilled? Slotted. Drilled rotors crack too quickly at sustained track temperatures.
Your pad choice is a full race compound. These pads have a high minimum operating temperature—often 400°F or more—which makes them dangerous on the street. Below that temperature, they have almost no bite. You also accept heavy dust, aggressive rotor wear, and noise that will annoy your neighbors. The payoff is consistent braking lap after lap with minimal fade. Budget for replacing rotors frequently; a track rotor is a consumable, not a lifetime part.
Track-Only Setup
- Highest thermal ceiling available
- Consistent fade-free braking
- Replaceable rotor rings save money
Trade-offs
- Dangerous cold performance
- Heavy dust and rotor wear
- Loud and harsh for street use
- Frequent rotor replacement
Your performance requirements define the right combo. If you drive a mix of street and track, you may need two sets of pads and swap them at the track. That is common and cheaper than compromising on both ends. Also check your brake system’s other components—a worn emergency brake cable or a tired drum brake setup can undermine even the best rotor and pad combination. For truck owners, the best brake pads for Ford F-150 balance payload capacity with daily comfort, while those restoring older vehicles should review a best drum brake kit before committing to a rotor swap. And if your parking brake feels weak, an emergency brake cable replacement is a cheap fix that improves safety without touching your rotors.
Limitations: What Temperature Range Data Doesn’t Tell You
Why Rotor Temp Alone Doesn’t Predict Brake Fade
Brake fade is a system failure, not just a rotor failure. The rotor temperature range tells you about one component, but fade happens when the brake fluid boils or when the pad compound exceeds its own thermal limit. You can have a rotor sitting in a healthy range while the fluid at the caliper is already vaporizing. That is why chasing rotor temps alone leads to misdiagnosis — the rotor looks fine, yet your pedal goes soft.
The rotor is a heat sink, not a thermometer for the whole system. It absorbs and dissipates heat, but the fluid and pads operate in their own thermal windows. If you measure a cool rotor after a hard stop, the heat may have gone into the pad instead. That pad transfer layer can then glaze over, killing friction even though the rotor never got dangerously hot.
The Myth of ‘Warped Rotors’: Heat vs. Pad Transfer
Most DIYers blame heat for rotor vibration, and most of the time they are wrong. What feels like a warped rotor is usually uneven pad transfer — friction material deposited in patches across the braking surface. This happens when you hold the brake at a stop while the pads are hot, leaving a thick deposit that creates a high spot. The rotor itself is still flat; the deposit is what you feel as a pulse.
True thermal fatigue — metallurgical change from repeated extreme heat — is rarer than the forums suggest. It shows up as blue or purple discoloration, and eventually as surface cracks that radiate from the cooling holes or vent slots. But a vibration complaint is far more often a pad deposit issue. Replacing the rotor without addressing your stopping habit means the problem comes back with the new part.
When Temperature Is Fine but the Rotor Still Fails
A rotor can fail while staying inside its rated temperature range the whole time. Thermal fatigue is one cause, but there are others:
Temperature data also misses installation errors. A rotor that is not torqued to spec, or a hub with rust behind the rotor, will wobble and vibrate regardless of heat. A stuck caliper pin can drag a pad against the rotor, heating one side while the other stays cool — the average temp looks fine, but one wheel is cooking.
Treat the brake rotor temperature range as one diagnostic input, not a verdict. Combine it with pedal feel, pad wear patterns, and rotor surface inspection. If you are chasing a brake issue and the rotor temp reads normal, widen your search. Check the caliper slides, the fluid condition, and the brake pad sensor reset procedure. A worn sensor wire can cause a false warning light that leads to misdiagnosis.
Frequently Asked Questions About Brake Rotor Temperatures
**How hot is too hot for brake rotors?**
Most passenger-car rotors operate safely up to about 500–600°F (260–315°C) under hard braking. Temperatures above 900°F (482°C) push most OEM rotors past their thermal limit, which can cause warping, cracking, or pad fade. The exact brake rotor temperature range depends on the rotor’s metallurgy, thickness, and venting design. For a precise figure matched to your vehicle, [VERIFY: manufacturer-specified maximum rotor temperature for common passenger vehicles].
**What does a red-hot brake rotor mean?**
If you see a rotor glowing red, it is above roughly 1,000°F (538°C). That is a critical temperature limit, not a normal operating condition. It usually indicates a stuck caliper, a dragging parking brake, or aggressive repeated braking — like descending a long mountain grade with the brake pedal held. Stop the vehicle safely and let the brakes cool before inspecting. Driving on a glowing rotor risks thermal cracking and brake fluid boiling.
**Can I measure rotor temperature with an infrared thermometer?**
Yes, a non-contact infrared thermometer works well for surface readings. Point it at the rotor face, not the edge or the hub, and take the measurement immediately after stopping — rotors cool quickly. For more detailed data across multiple wheels, a thermal camera or telemetry-equipped brake temperature sensor provides continuous logging. These tools help you understand your real-world brake rotor temperature range during track days or heavy towing.
**What is the ideal rotor temperature for braking performance?**
Most brake pads reach their peak friction coefficient between 300–500°F (149–260°C). Below that range, especially in the first few stops on a cold morning, pads bite less. Above it, fade becomes more likely. So the optimal operating window is roughly 300–500°F, with short spikes toward 600°F under hard stops. Staying within this band keeps stopping distances short and pad wear predictable.
**How long does it take for rotors to cool down?**
On a moving vehicle with airflow through the vents, rotor surface temperature can drop 200–300°F within a few minutes of normal driving. Parked with no airflow, cooling is much slower. If you have just finished a hard braking session, a short cool-down lap or several gentle stops will help return the rotors to a safe temperature limits zone before you park. This practice reduces the risk of pad material depositing unevenly on the rotor surface.
**Do slotted or drilled rotors run cooler?**
Slotted rotors help vent gases and wipe pad debris, which can reduce fade, but they do not dramatically lower overall operating temperature. Drilled rotors offer marginal cooling benefits at the cost of reduced structural integrity. For most street driving, a quality blank or slotted rotor manages the brake rotor temperature range just fine. The bigger factor is pad compound and driving style.
**Should I worry about rotor temperature in normal daily driving?**
Routine commuting rarely pushes rotors near their limits. Stop-and-go traffic generates heat, but short stops at moderate speeds keep temperatures well within safe territory. You only need to monitor rotor temperature seriously if you track the car, tow heavy loads, or drive mountain passes. If you notice brake fade, pedal feel changes, or discolored rotors, check the temperature-related warning signs covered in the Recognizing Overheating section above. And if your brake warning light is on, verify it isn’t a simple electrical fault before chasing a thermal problem — a stuck brake light switch can cause issues unrelated to heat, so check whether your brake lights not working is the real culprit first.
Frequently Asked Questions
At what temperature do brake rotors start to crack?
[HUMAN INPUT NEEDED: Research and write a factual 2-3 sentence answer for this question.]
Is it normal for brake rotors to get hot to the touch after driving?
[HUMAN INPUT NEEDED: Research and write a factual 2-3 sentence answer for this question.]
What temperature do brake rotors reach during hard braking on the street?
[HUMAN INPUT NEEDED: Research and write a factual 2-3 sentence answer for this question.]
Can I use a laser thermometer to check my rotor temperature accurately?
[HUMAN INPUT NEEDED: Research and write a factual 2-3 sentence answer for this question.]
How long should rotors cool down before washing the car or driving through water?
[HUMAN INPUT NEEDED: Research and write a factual 2-3 sentence answer for this question.]
Final Verdict: Brake Rotor Temperature Range
Brake rotor temperature range is the operating envelope between ambient conditions and the thermal limits of your braking system. The most important attributes are the safe sustained range (200–600°F for street use), the absolute peak threshold (1,200°F, where structural integrity degrades), and the warning signs that indicate you’re pushing past safe limits. Understanding these numbers is not about bragging rights. It is about preventing brake fade, rotor warping, and catastrophic failure.
For 95% of drivers, the best approach is to keep rotors below 600°F in normal driving and below 800°F during aggressive street use. This range preserves pad friction, prevents thermal cracking, and maintains rotor flatness. If you’re tracking your car, invest in a thermal paint kit or infrared thermometer to monitor temperatures in real time—guessing is how rotors get destroyed.
Decision Framework
If you need daily reliability, choose standard vented rotors with quality pads, because they manage 200–600°F heat cycles without degradation.
If you need track-day performance, choose drilled or slotted rotors with high-temp pads, because they shed heat faster and withstand 1,000°F+ peaks.
If you need towing capability, choose larger-diameter rotors, because increased surface area dissipates sustained heat from heavy loads.
If you need to diagnose existing issues, look for blue discoloration (over 600°F), warping (uneven contact), or cracking (thermal stress), because these are measurable failure indicators.
Honest limitation: No rotor—regardless of material or design—can eliminate thermal limits. Carbon-ceramic rotors push the threshold higher but cost thousands and still fade under extreme, repeated braking. The best rotors in the world cannot fix a failing caliper or worn pads. Temperature monitoring is a diagnostic tool, not a solution for underlying mechanical problems.
Start by measuring your current rotor temperatures with an infrared thermometer after a hard stop. If you’re exceeding 800°F, upgrade your pads before your rotors. If you’re seeing blue heat marks, replace the rotors immediately. The brake rotor temperature range isn’t a number to memorize—it’s a system to respect.
You might also like: emergency brake problems, best drilled and slotted rotors, brake rotor buying guide