Fuel Pressure Regulator Test: Steps and Tools Needed
The three main testing methods are:
- Static pressure test (engine off)
- Running pressure test (engine at idle)
- Vacuum test (checking pressure changes with vacuum applied)
Normal fuel pressure typically ranges from 35-65 PSI depending on your vehicle,
but always check your specific fuel pressure specs for accurate readings.
It was a sweltering Tuesday in July when a 2007 Honda Accord with 127,000 miles rolled into my bay.
The customer, a frustrated teacher named Sarah, complained that her car was hesitating during acceleration
and her fuel economy had dropped by nearly 30%. My husband thinks it’s the fuel pump, she said,
wiping sweat from her brow, but that’s going to cost a fortune, right?
I smiled, knowing that in my 15 years as an ASE-certified technician, I’ve seen these symptoms countless times,
and often the culprit isn’t the expensive fuel pump but a much simpler component: the fuel pressure regulator.
This $40-$120 part (depending on the vehicle) can cause all sorts of drivability issues when it fails,
and learning how to test fuel pressure regulator function is a skill that can save you hundreds in unnecessary repairs.
Pro Tip: Before testing your FPR, make sure you have a basic understanding of
FPR problems,
fuel pump testing,
fuel system troubleshooting,
vacuum leak testing.
This knowledge will help you interpret your test results accurately.
Understanding Fuel Pressure Regulator Function
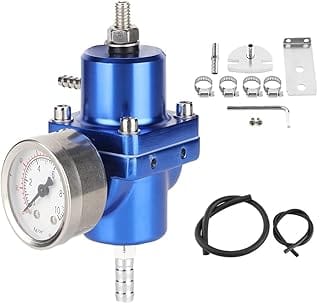
The fuel pressure regulator is essentially a spring-loaded diaphragm that balances against fuel pressure.
On most vehicles, it’s located on the fuel rail, though some designs place it near the fuel tank.
The regulator has a fuel inlet, a fuel return line, and a vacuum reference port.
When engine vacuum is applied to the reference port, it helps the diaphragm open,
allowing excess fuel to return to the tank. When vacuum drops (during acceleration),
the diaphragm closes more, increasing fuel pressure to meet the engine’s demands.
There are three main types of fuel pressure regulators you might encounter:
- Vacuum-Operated Regulators: Most common in port fuel injection systems. These use engine vacuum to adjust fuel pressure.
- Returnless Systems: Found in many modern vehicles (post-2005). These don’t have a return line and typically use an electronic regulator integrated with the fuel pump module.
- Mechanical Regulators: Used in older vehicles with throttle body injection. These are less sophisticated and don’t use vacuum reference.
Understanding which type your vehicle has is crucial because testing methods differ slightly.
For this guide, we’ll focus primarily on vacuum-operated regulators, as they’re the most common type you’ll encounter in DIY scenarios.
Essential Tools for FPR Testing
Before you begin testing your fuel pressure regulator, you’ll need to gather some tools.
Having the right equipment not only makes the job easier but also ensures accurate readings and safety.
Tool List and Estimated Costs
| Tool | Purpose | Estimated Cost |
|---|---|---|
| Fuel Pressure Gauge Kit | Measures fuel pressure accurately | $40-$80 |
| Basic Hand Tools | Wrenches, screwdrivers, pliers | Varies |
| Hand Vacuum Pump | Tests vacuum reference port | $60 |
| Safety Equipment | Glasses, gloves, fire extinguisher | Varies |
| Shop Rags | Absorbs spilled fuel | Minimal |
| Fuel Line Disconnect Tools | For quick-connect fittings | $20 |
Fuel Pressure Gauge Kit: This is non-negotiable. A good kit costs $40-$80 and includes various adapters for different fuel systems.
I recommend the OTC 5609 or Actron CP7838—both are quality kits I’ve used for years.
Make sure it has a long enough hose (at least 3 feet) to keep the gauge away from hot engine components.
Critical Safety Warning: Working with fuel systems is inherently dangerous.
Fuel is highly flammable and its vapors can ignite with just a spark.
Always work in a well-ventilated area, away from open flames or sparks.
Never smoke while working on fuel systems.
Disconnect the battery’s negative terminal before beginning any fuel system work to prevent accidental fuel pump activation.
Method 1: Static Fuel Pressure Test
The static fuel pressure test measures pressure with the engine off but the fuel system primed.
This test helps determine if your fuel pump can generate adequate pressure and if the regulator is holding pressure when the engine is off.
- Relieve Fuel System Pressure:
Before connecting your gauge, you must relieve the system pressure.
The easiest method is to remove the fuel pump fuse or relay, start the engine, and let it run until it stalls.
Then crank the engine for 3-5 seconds to ensure all pressure is relieved.
For most vehicles, the fuel pump fuse is located in the under-hood fuse box—consult your owner’s manual for the exact location. - Locate the Fuel Pressure Test Port:
Most fuel-injected vehicles have a Schrader valve (similar to a tire valve) on the fuel rail for testing purposes.
It typically has a black or blue plastic cap that says “Fuel Pressure.”
If your vehicle doesn’t have one, you’ll need to connect the gauge inline by disconnecting a fuel line. - Connect the Fuel Pressure Gauge:
Remove the cap from the test port and connect your gauge.
The connection should be tight but don’t overtighten—you’re dealing with soft metal components that can easily strip. - Reconnect the Fuel Pump and Prime the System:
Reinstall the fuel pump fuse or relay. Turn the key to the ON position (not start) for 2-3 seconds to prime the system.
You should hear the fuel pump run briefly. - Record the Static Pressure:
Read the pressure on your gauge. This is your static pressure reading.
Compare it to your vehicle’s specifications (more on this later). - Check for Pressure Drop:
Monitor the gauge for 5-10 minutes. The pressure should remain relatively stable.
A drop of more than 5-10 PSI typically indicates a leaking injector, faulty check valve in the fuel pump, or a faulty regulator.
Technical Note: Static pressure for most vehicles should be 5-10 PSI higher than running pressure at idle.
For example, if your vehicle specifies 45 PSI at idle, static pressure should be around 50-55 PSI.
Always verify with your vehicle’s specific fuel pressure specs.
Method 2: Running Fuel Pressure Test
This test measures fuel pressure with the engine running at various conditions.
It’s the most comprehensive test for evaluating overall fuel pressure regulator performance.
- Start the Engine:
With the fuel pressure gauge still connected (from Method 1), start the engine and let it idle for 2-3 minutes to stabilize. - Record Idle Pressure:
Note the fuel pressure at idle. This is your baseline reading.
For most vehicles, this should be in the 35-45 PSI range, but it varies significantly between manufacturers. - Check Vacuum Reference:
Locate the vacuum hose connected to the fuel pressure regulator.
With the engine still idling, disconnect this hose.
The fuel pressure should increase by approximately 5-10 PSI.
This increase confirms that the vacuum reference is working correctly. - Test Under Load:
With the help of an assistant, have them briefly rev the engine to 2,000-2,500 RPM while you watch the gauge.
The pressure should increase slightly (by 2-5 PSI) and then stabilize.
If pressure drops significantly during acceleration, the regulator may be failing or the fuel pump may be weak. - Pinch the Return Line:
Caution: This step should be done briefly and carefully.
Using appropriate fuel-line-safe pliers, gently pinch the fuel return line for 2-3 seconds while watching the gauge.
The pressure should spike significantly (often doubling).
If it doesn’t, either the regulator is stuck open or there’s a restriction in the fuel line before the regulator. - Shut Down and Observe:
Turn off the engine and watch the pressure gauge for 5 minutes.
As mentioned in Method 1, the pressure should hold relatively steady.
A rapid pressure drop indicates a problem in the system.
Pro Tip: Take a picture of your gauge readings at each step with your phone.
This creates a record you can reference later and helps you notice subtle changes in pressure that you might otherwise miss.
Related Guides
- Cold Air Intake Installation: Complete Guide & Benefits
- MAF Sensor Replacement Guide: Symptoms and DIY Steps
- Carburetor Rebuild Kit Guide: How to Choose the Right Kit
- Carburetor Adjustment: How to Tune for Best Performance
- Carburetor Cleaning: Complete Guide for Classic Cars
- Fuel Injector Cleaning Cost: What to Expect in 2026
- Best Cold Air Intakes 2025: Top Brands Tested
- 10 Best Brake Rotors 2026
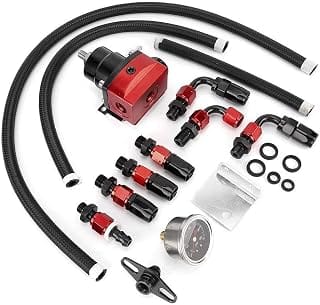
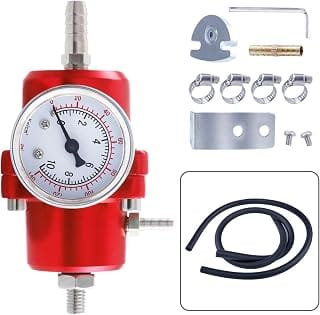
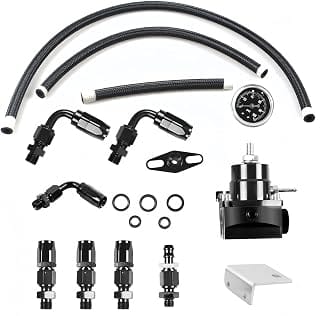
Top Fuel Pressure Regulator Test – Our Picks
Frequently Asked Questions
How long does this job take for a beginner?
Plan for two to three times a professional’s book time on your first attempt. Working slowly and verifying each step prevents the rework that actually costs the most time.
What tools do I need?
A basic metric socket set, jack and stands, torque wrench, and drain pan cover most of this job. Confirm any model-specific tools in the procedure before you begin.
What is the most common mistake?
Rushing reassembly and skipping torque values. Most DIY failures and comebacks trace back to under- or over-tightened fasteners, not the repair itself.
When should I let a shop handle it instead?
If the job involves safety-critical systems, pressurized components, or you lack a safe way to lift and support the vehicle, delegate it. The labor savings are not worth an injury or a dangerous failure.
![Fuel Filter Location by Make and Model [200+ Vehicles]](https://vehiclebar.com/wp-content/uploads/2026/01/Yanmar_Fuel_Filter.jpg)