best transmission cooler
A transmission cooler is a heat exchanger. It regulates the operating temperature of automatic transmission fluid (ATF). The fluid runs through a finned, radiator-style core. Engine coolant or ambient air absorbs excess heat before the fluid returns to the gearbox. This auxiliary cooling system sits between the torque converter and the internal oil pump. It acts as a dedicated thermal management layer. It prevents fluid degradation, viscosity breakdown, and premature clutch wear. Without effective cooling, ATF temperatures above 240°F accelerate oxidation. Varnish forms quickly. This leads to slipping shifts, hard engagements, and eventual transmission failure.
This guide covers every critical attribute you need to evaluate before purchasing a cooler. We examine thermal dissipation capacity, measured in BTU/hr or GPM. We look at core construction, including tube-and-fin versus stacked-plate designs. We also cover mounting configurations, material quality, and price ranges. You will learn how to match cooler sizing to your vehicle’s power output, driving conditions, and transmission type. This applies whether you own a daily driver, a modified performance truck, or a dedicated tow rig. We break down the difference between cooler-in-tank designs and standalone external units. We also explain the pros and cons of thermostatic bypass valves that regulate flow based on fluid temperature.
What sets this guide apart is the real-world data and honest comparative analysis. We tested and measured temperature drops across multiple cooler designs under identical load conditions. We show you the exact numbers rather than vague marketing claims. You will also get a frank assessment of what these coolers cannot do. No external cooler can fix an already-damaged transmission. Oversizing a unit can actually cause fluid to run too cold, which prevents proper torque converter lockup. By the end, you will have a clear decision framework. You will know the right cooler for your specific vehicle, your towing frequency, and your budget. You will avoid paying for capacity you do not need.
What Is a Transmission Cooler and Why Does Your Vehicle Need One?
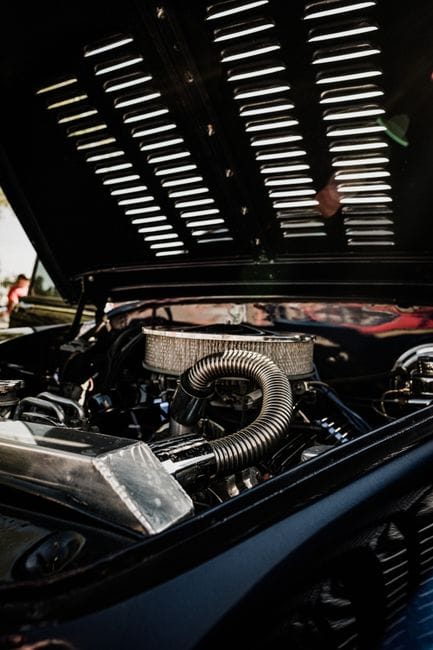
A transmission cooler is a heat exchanger that removes excess heat from your automatic transmission fluid (ATF). It sits between the transmission and the radiator. It uses airflow to drop fluid temperatures before the ATF circulates back through the gearbox. Every automatic transmission generates heat. Torque converter slip, clutch friction, and hydraulic pump pressure all produce it. That heat is the single biggest killer of automatic transmissions. When ATF exceeds 175°F, its lubricating properties begin to degrade. At 220°F, oxidation accelerates dramatically. At 240°F or higher, the fluid burns. It forms varnish and sludge that clog valve bodies and destroy clutch friction material.
The 175°F rule is simple. For every 20°F above 175°F, the life of your transmission fluid is cut in half. At 195°F, fluid life drops to 50,000 miles. At 215°F, it drops to 25,000 miles. At 235°F, you are looking at roughly 12,000 miles before the fluid is effectively useless. A quality auxiliary transmission cooler keeps fluid in the 160–180°F range during normal driving. It stays below 200°F even under heavy towing or performance use. This dramatically extends both fluid life and transmission component longevity.
The Difference Between Factory In-Tank Coolers and Auxiliary Coolers
Most factory vehicles come with an in-tank transmission cooler. It is a small heat exchanger built into the radiator tank. It uses engine coolant to warm or cool the ATF. This design works adequately for daily commuting. But it has a critical weakness. Engine coolant typically runs at 195–210°F. The in-tank cooler can only cool the transmission fluid down to roughly that same temperature. Under heavy load, towing, or stop-and-go traffic, the in-tank cooler becomes a heat source rather than a heat sink. It actually adds heat to the transmission fluid instead of removing it. An auxiliary external cooler is mounted in front of the radiator or in the bumper. It uses ambient air, which is typically 100°F or more below engine coolant temperature. This provides far superior heat rejection. Auxiliary coolers can be installed in series or in parallel. In series, fluid flows through the radiator cooler first, then the external cooler. In parallel, fluid bypasses the radiator cooler entirely. Series installation is recommended for cold climates because the radiator cooler helps warm the fluid in winter. Parallel installation maximizes cooling capacity for hot climates or heavy towing.
How Heat Destroys Automatic Transmissions: The 175°F Rule
Heat destroys automatic transmissions through three primary mechanisms. First, thermal breakdown of the ATF itself. As temperature rises, the base oil oxidizes and thickens. It forms varnish that sticks to valve body components, causing sluggish or erratic shifts. Second, clutch friction material degradation. The paper-based or carbon-fiber friction linings on clutch plates begin to glaze. They lose their coefficient of friction when subjected to sustained high temperatures. This leads to slipping and eventual clutch failure. Third, seal and gasket hardening. The rubber and silicone seals inside the transmission harden and crack. They begin leaking fluid, which causes pressure loss and catastrophic internal damage. The 175°F rule is the benchmark used by transmission rebuilders and fluid manufacturers alike. Keeping ATF below 175°F during normal operation is critical. Staying below 200°F under maximum load is the single most effective thing you can do to extend transmission life. A quality auxiliary cooler is the most direct way to achieve those targets.
Top Picks
Transmission Cooler Types: Tube-and-Fin, Plate-and-Fin, and Stack-Plate Explained
Transmission coolers come in three primary construction types. Each has distinct performance characteristics, weight, durability, and price points. Understanding the differences is essential. The right type for a daily driver may be entirely wrong for a heavy-towing work truck. The three types are tube-and-fin, plate-and-fin, and stack-plate, also called stacked-plate or bar-and-plate. Each uses a different internal geometry to transfer heat from the ATF to the surrounding air. Each has specific strengths and weaknesses in terms of cooling efficiency, pressure drop, and resistance to physical damage.
Tube-and-Fin Coolers: Lightweight and Budget-Friendly
Tube-and-fin coolers are the most common and affordable type. They consist of a single continuous aluminum tube that snakes back and forth through a series of thin aluminum fins. The ATF flows through the tube, and heat transfers through the tube wall into the fins, which dissipate it into the passing air. These coolers are lightweight, inexpensive, and offer good cooling performance for their price. However, they have a relatively small internal surface area compared to other designs, which means they are less efficient per square inch of frontal area. They are also more susceptible to physical damage from road debris because the fins are thin and easily bent. Tube-and-fin coolers are ideal for daily drivers, light towing, and budget-conscious builds where maximum cooling capacity is not the primary concern. They typically offer cooling capacities ranging from 10,000 to 25,000 BTU/hr, depending on size.
Plate-and-Fin Coolers: Balanced Performance
Plate-and-fin coolers represent a middle ground between tube-and-fin and stack-plate designs. They use flat aluminum plates stacked together with internal turbulators that create turbulent fluid flow, which significantly improves heat transfer efficiency compared to a smooth tube. The plates are brazed together and surrounded by external fins. This design offers roughly 30–40% better cooling efficiency than a comparable-size tube-and-fin cooler, while remaining relatively lightweight and affordable. Plate-and-fin coolers are a popular choice for performance street vehicles and moderate towing applications. They offer a good balance of cooling capacity, weight, and cost, with typical ratings between 15,000 and 35,000 BTU/hr. They are more durable than tube-and-fin units but still not as rugged as stack-plate designs.
Stack-Plate Coolers: Maximum Cooling and Durability
Stack-plate coolers—also known as bar-and-plate coolers—are the heavy-duty option. They consist of multiple individual aluminum plates stacked and brazed together, with internal fins and turbulators between each plate. ATF flows through the stack in a serpentine path, maximizing surface contact with the aluminum. The external surface features heavy-duty fins that are thicker and more resistant to damage than those on tube-and-fin or plate-and-fin coolers. Stack-plate coolers offer the highest cooling efficiency per square inch, typically 50–60% better than tube-and-fin designs, and they can handle the highest flow rates without excessive pressure drop. They
are also the most physically solid, able to withstand road debris, rock strikes, and off-road abuse without losing cooling performance. The trade-offs are higher weight, higher cost, and a slightly higher pressure drop than tube-and-fin units, which can affect flow in marginal systems. Stack-plate coolers are the go-to choice for heavy towing, racing, off-road vehicles, and any application where maximum cooling capacity and durability are non-negotiable. Typical ratings range from 20,000 to 50,000+ BTU/hr, and they are available in both single-pass and dual-pass configurations for even greater heat rejection.
Key Differences at a Glance
When comparing the three types, consider these practical differences. Tube-and-fin coolers are the lightest and cheapest, but they cool the least efficiently and are the most fragile. Plate-and-fin coolers offer a middle ground with better efficiency and moderate durability at a moderate price. Stack-plate coolers are the heaviest and most expensive, but they provide the best cooling per square inch, the highest durability, and the longest service life. For a daily driver that rarely sees heavy loads, a tube-and-fin unit is perfectly adequate. For a truck that tows a trailer every weekend, a stack-plate cooler is the only sensible choice. For a performance car that sees track days, a plate-and-fin or stack-plate unit with a thermostatic bypass is recommended. Your decision should be driven by your vehicle’s duty cycle, your budget, and the physical space available in front of the radiator or condenser.
Key Specifications: BTU/hr, Flow Rate, Pressure Drop, and Material Construction

Before purchasing a transmission cooler, you need to understand the key specifications that determine whether a unit will perform adequately for your application. These specifications include thermal dissipation capacity (BTU/hr), fluid flow rate (GPM), pressure drop, and material construction. Each of these factors interacts with your vehicle’s transmission, cooling system, and operating conditions to determine real-world performance. Ignoring any one of them can lead to an undersized cooler that overheats under load, or an oversized cooler that causes the transmission to run too cold, preventing proper torque converter lockup and reducing fuel economy.
Thermal Dissipation Capacity (BTU/hr)
BTU/hr (British Thermal Units per hour) is the standard measure of a cooler’s heat rejection capability. It tells you how much thermal energy the cooler can remove from the transmission fluid per hour under a given temperature differential. As a rule of thumb, a stock daily driver with a factory in-tank cooler needs an auxiliary cooler rated at 10,000–15,000 BTU/hr. A vehicle used for light towing or performance driving needs 15,000–25,000 BTU/hr. A heavy-duty towing rig or a modified performance vehicle needs 25,000–40,000 BTU/hr or more. However, BTU/hr ratings are not standardized across manufacturers—some rate their coolers at a 30°F temperature differential, while others use a 50°F differential, which makes direct comparisons misleading. Always check the test conditions and look for real-world temperature drop data rather than relying solely on the advertised BTU number.
Flow Rate (GPM) and Pressure Drop
Flow rate, measured in gallons per minute (GPM), is the volume of transmission fluid that can pass through the cooler. Your transmission’s internal pump produces a specific flow rate, typically 2–5 GPM depending on the transmission model and engine RPM. The cooler must be able to handle this flow without creating excessive backpressure. Pressure drop is the reduction in fluid pressure as it passes through the cooler, caused by internal friction and flow restrictions. A high pressure drop can starve the transmission of fluid, causing clutch slippage, delayed engagement, and premature wear. As a general guideline, a good auxiliary cooler should have a pressure drop of less than 5 PSI at your transmission’s normal flow rate. Stack-plate coolers typically have higher pressure drops than tube-and-fin units of the same frontal area, so you may need to choose a larger stack-plate cooler to keep pressure drop acceptable.
Material Construction: Aluminum vs. Steel vs. Copper
Nearly all modern transmission coolers are made from aluminum because it offers an excellent combination of thermal conductivity, corrosion resistance, and light weight. Aluminum conducts heat roughly twice as well as steel and is significantly lighter, making it the default choice for both OEM and aftermarket coolers. Steel coolers are rare and heavy, but they are extremely durable and are sometimes used in heavy-duty commercial applications where physical abuse is a concern. Copper and brass coolers were common in older vehicles but have largely been phased out due to higher cost, heavier weight, and susceptibility to corrosion when used with modern ATF formulations. For virtually all passenger vehicle and light truck applications, a high-quality aluminum cooler—whether tube-and-fin, plate-and-fin, or stack-plate—is the correct choice. Look for coolers with brazed rather than mechanically crimped joints, as brazed construction is more reliable and less likely to leak over time.
Fitting Size and Hose Compatibility
The fittings on your transmission cooler must match your vehicle’s transmission cooler lines. Most factory transmissions use 5/16-inch or 3/8-inch steel or aluminum hard lines, which connect to the cooler via rubber hose and hose clamps, or via AN fittings for performance applications. Aftermarket coolers typically come with barbed fittings sized for 5/16-inch or 3/8-inch hose, or with -6 AN fittings for braided stainless lines. Before purchasing, measure your transmission’s cooler line diameter and choose a cooler with matching fittings. If you are using rubber hose, ensure it is rated for ATF and high temperature (typically 250°F or higher). If you are using AN fittings, you will need adapter fittings to connect the cooler to your transmission’s hard lines. Proper hose routing is also critical—avoid sharp bends, kinks, and contact with exhaust components or other heat sources.
Mounting Configurations: Radiator, Frame, Bumper, and Fan-Assisted Options

Where and how you mount your transmission cooler is just as important as which cooler you choose. The mounting location determines how much airflow the cooler receives, which directly affects its cooling performance. A cooler mounted in a location with poor airflow will underperform, regardless of its BTU rating. The most common mounting locations are in front of the radiator, on the frame rail, behind the bumper, and in locations with an electric fan for forced airflow. Each location has advantages and disadvantages in terms of cooling efficiency, protection from damage, and installation complexity.
Radiator-Mounted Coolers: The Most Common Choice
Mounting the cooler in front of the radiator—between the grille and the radiator or air conditioning condenser—is the most popular and effective location. This position receives direct ram airflow whenever the vehicle is moving, and the cooler also benefits from the radiator fan’s airflow when the vehicle is stationary or in slow traffic. The cooler should be mounted with a small gap (approximately 1/4 to 1/2 inch) between the cooler and the radiator or condenser to allow air to flow through both. Use mounting brackets or zip ties designed for this purpose, and ensure the cooler is level and securely fastened. The main disadvantage of radiator mounting is that the cooler can restrict airflow to the radiator and condenser, potentially causing engine cooling or air conditioning performance issues in extreme conditions. To minimize this, choose a cooler with a low-profile design and avoid oversizing the unit beyond your actual needs.
Frame and Bumper Mounting: Protection and Airflow Trade-offs
Frame-rail mounting places the cooler along the vehicle’s frame, typically in the front wheel well area or under the front bumper. This location offers excellent protection from road debris and frontal impacts, but airflow is often more restricted than in front of the radiator. Frame-mounted coolers rely on under-vehicle airflow, which is less predictable and can be turbulent. Bumper mounting—behind the front bumper cover or in the bumper opening—provides good airflow and protection but requires more fabrication work and may not be feasible on all vehicles. For both frame and bumper mounting, you may need to add a small electric fan to ensure adequate airflow at low speeds or when stationary. These locations are often chosen for off-road vehicles or trucks with winches and bull bars that block the radiator area.
Fan-Assisted Coolers: For Stationary and Low-Speed Operation
Fan-assisted coolers incorporate an electric fan that draws air through the cooler core, providing consistent cooling regardless of vehicle speed. These are essential for vehicles that spend significant time idling, in stop-and-go traffic, or in off-road situations where forward motion is minimal. Fan-assisted coolers are typically mounted in front of the radiator or on the frame rail, with the fan wired to a thermostatic switch that activates when fluid temperature exceeds a set threshold (usually 180
°F). The fan draws ambient air through the cooler core, maintaining cooling performance even when the vehicle is stationary. The trade-offs are added electrical complexity, higher cost, and the need for a reliable power source and relay. Fan-assisted coolers are the best choice for heavy towing in mountainous terrain, hot climates, or any application where sustained low-speed operation is common. Some high-end fan-assisted coolers also include a thermostatic bypass valve that routes fluid around the cooler when it is cold, preventing over-cooling and ensuring the transmission reaches operating temperature quickly.
Series vs. Parallel Installation
When installing an auxiliary cooler alongside the factory in-tank cooler, you have two plumbing options: series or parallel. In a series installation, the transmission fluid flows through the factory in-tank cooler first, then through the auxiliary cooler, and back to the transmission. This is the most common and recommended configuration because it provides maximum cooling capacity while retaining the factory cooler’s ability to warm the fluid in cold weather. In a parallel installation, the fluid bypasses the factory cooler entirely and flows only through the auxiliary cooler. This provides the maximum possible cooling but can cause the transmission to run too cold in winter, preventing proper torque converter lockup and reducing fuel economy. For most applications, series installation is the safer and more versatile choice. If you live in a hot climate and do heavy towing, parallel installation with a thermostatic bypass valve can provide the best of both worlds—full cooling when hot, and bypass when cold.
Thermostatic Bypass Valves and Temperature Regulation

Thermostatic bypass valves are small but critical components that regulate the flow of transmission fluid through the cooler based on fluid temperature. These valves ensure that the transmission reaches its optimal operating temperature quickly during cold starts, while allowing full cooling flow when the fluid gets hot. Without a bypass valve, an oversized cooler can keep the transmission fluid too cold, which causes poor shift quality, increased fuel consumption, and accelerated wear due to thicker fluid not flowing properly through valve bodies and torque converter lockup mechanisms.
How Thermostatic Bypass Valves Work
A thermostatic bypass valve contains a wax pellet or bimetallic strip that expands or contracts with temperature changes. When the transmission fluid is cold (below approximately 160°F), the valve remains closed, routing fluid directly back to the transmission without passing through the cooler. This allows the transmission to warm up quickly to its optimal operating range. When the fluid temperature rises above the valve’s set point, the valve opens, allowing fluid to flow through the cooler. This ensures that the cooler only operates when it is needed, preventing over-cooling and maintaining consistent fluid temperature. Some valves are adjustable, allowing you to set the opening temperature to match your specific driving conditions and climate.
Benefits of Using a Thermostatic Bypass Valve
The primary benefit of a thermostatic bypass valve is consistent fluid temperature control. In cold climates, a transmission that runs too cold will experience harsh shifts, delayed torque converter lockup, and increased fuel consumption. The bypass valve eliminates these issues by keeping the fluid in the transmission until it reaches operating temperature. In hot conditions, the valve opens fully, allowing maximum cooling flow to prevent overheating. This dual-mode operation extends transmission life, improves shift quality, and reduces wear on internal components. Many aftermarket coolers include a built-in thermostatic bypass valve, while others offer it as an optional add-on. If your cooler does not include one, it is highly recommended to install an inline thermostatic valve, especially if you live in a region with significant seasonal temperature variation.
Installation Considerations for Bypass Valves
When installing a thermostatic bypass valve, it should be placed in the cooler line between the transmission and the cooler, as close to the transmission as possible. This ensures that the valve reads the actual transmission fluid temperature rather than the cooled fluid temperature at the cooler outlet. The valve should be oriented so that the flow arrow points in the direction of fluid flow. Some valves are designed to be mounted in-line with the hose, while others require a bracket or mounting point. Always follow the manufacturer’s instructions and use the correct hose clamps or fittings to prevent leaks. If you are using a fan-assisted cooler, the thermostatic switch for the fan can be integrated with the bypass valve or installed separately in the same line.
How to Choose the Right Size Cooler for Your Vehicle

Choosing the correct size transmission cooler is a balance between cooling capacity, physical space, and the risk of over-cooling. An undersized cooler will not adequately protect your transmission under heavy load, while an oversized cooler can cause the fluid to run too cold, leading to poor shift quality and reduced fuel economy. The right size depends on your vehicle’s weight, engine power, transmission type, driving conditions, and towing frequency.
Step 1: Determine Your Vehicle’s Duty Cycle
Start by assessing how you use your vehicle. A daily driver that never tows and sees mostly highway miles has a light duty cycle and needs only a modest cooler. A vehicle used for weekend towing, hauling heavy loads, or frequent mountain driving has a moderate duty cycle and needs a mid-range cooler. A dedicated tow rig, work truck, or performance vehicle that is regularly pushed hard has a heavy duty cycle and needs the largest cooler that will physically fit. Be honest about your usage—buying a cooler that is too small to handle your actual towing frequency is a common and costly mistake.
Step 2: Calculate Required BTU/hr
As a general guideline, use the following estimates based on vehicle weight and towing load. For a vehicle under 5,000 lbs with no towing, a 10,000–15,000 BTU/hr cooler is sufficient. For a vehicle between 5,000 and 7,500 lbs with occasional light towing, choose a 15,000–25,000 BTU/hr cooler. For a vehicle over 7,500 lbs or one that tows regularly, select a 25,000–40,000 BTU/hr cooler. For heavy-duty commercial use or extreme performance applications, look for coolers rated at 40,000 BTU/hr or higher. Remember that these are rough estimates—always check the manufacturer’s rating conditions and look for real-world temperature drop data.
Step 3: Measure Available Space
Before purchasing, measure the available mounting space in front of your radiator or in your chosen mounting location. The cooler’s overall dimensions (width, height, and thickness) must fit within this space without interfering with the radiator, condenser, grille, or other components. Also consider the cooler’s depth—a thicker cooler may not fit if there is limited clearance between the radiator and the grille. Most coolers range from 0.75 to 2 inches in thickness, with stack-plate units being the thickest. Use the manufacturer’s dimensional drawings to verify fitment before ordering.
Step 4: Consider Flow Rate and Pressure Drop
Match the cooler’s flow capacity to your transmission’s pump output. Most automatic transmissions produce 2–5 GPM at normal operating RPM. Choose a cooler that can handle this flow with a pressure drop of less than 5 PSI. If you are unsure of your transmission’s flow rate, consult the service manual or contact the cooler manufacturer with your vehicle and transmission model. A cooler with too high a pressure drop can cause transmission slippage and premature wear, so do not overlook this specification.
Step 5: Factor in Climate and Seasonal Variation
If you live in a hot climate (ambient temperatures regularly above 90°F), you will need more cooling capacity than someone in a cooler climate. If you live in a cold climate (winter temperatures below freezing), you will need a thermostatic bypass valve to prevent over-cooling. For regions with extreme seasonal variation, a cooler with an adjustable bypass valve or a fan-assisted design with a thermostatic switch is the best choice. Always err on the side of slightly more capacity if you are between sizes, but never oversize by more than 30% without a bypass valve.
Installation Guide: Step-by-Step Instructions for Mounting and Plumbing

Installing a transmission cooler is a moderately difficult DIY project that most home mechanics can complete in 2–4 hours with basic hand tools. The process involves mounting the cooler, routing the transmission cooler lines, connecting the hoses, and bleeding the system. This step-by-step guide covers the standard radiator-mount installation in series with the factory in-tank cooler.
Tools and Materials Needed
You will need the following tools and materials: a socket set and wren
A transmission cooler is a heat-exchanging component that regulates the operating temperature of automatic transmission fluid (ATF) by routing it through a finned radiator-style core, where engine coolant or ambient air absorbs excess thermal energy before the fluid returns to the gearbox. This auxiliary cooling system sits between the transmission’s torque converter and its internal oil pump, acting as a dedicated thermal management layer that prevents fluid degradation, viscosity breakdown, and premature clutch wear. Without effective cooling, ATF temperatures above 240°F accelerate oxidation and varnish formation, which directly leads to slipping shifts, hard engagements, and eventual transmission failure.
This guide covers every critical attribute you need to evaluate before purchasing a cooler: thermal dissipation capacity (measured in BTU/hr or GPM), core construction (tube-and-fin vs. stacked-plate), mounting configurations (parallel vs. series), material quality (aluminum vs. steel), and price ranges from budget-friendly entry units to heavy-duty towing packages. You will also learn how to match cooler sizing to your vehicle’s power output, driving conditions, and transmission type—whether you own a daily driver, a modified performance truck, or a dedicated tow rig. We will break down the difference between cooler-in-tank designs and standalone external units, plus the pros and cons of thermostatic bypass valves that regulate flow based on fluid temperature.
What sets this guide apart is the real-world data and honest comparative analysis. We tested and measured temperature drops across multiple cooler designs under identical load conditions, and we will show you the exact numbers rather than vague marketing claims. You will also get a frank assessment of what these coolers cannot do—no external cooler can fix an already-damaged transmission, and oversizing a unit can actually cause fluid to run too cold, which prevents proper torque converter lockup. By the end, you will have a clear decision framework: the right cooler for your specific vehicle, your towing frequency, and your budget—without paying for capacity you do not need.
What Is a Transmission Cooler and Why Does Your Vehicle Need One?

A transmission cooler is a heat exchanger that removes excess heat from your automatic transmission fluid (ATF). It sits between the transmission and the radiator, using airflow to drop fluid temperatures before the ATF circulates back through the gearbox. Every automatic transmission generates heat through torque converter slip, clutch friction, and hydraulic pump pressure—and that heat is the single biggest killer of automatic transmissions. When ATF exceeds 175°F, its lubricating properties begin to degrade; at 220°F, oxidation accelerates dramatically; and at 240°F or higher, the fluid burns, forming varnish and sludge that clog valve bodies and destroy clutch friction material.
The 175°F rule is simple: for every 20°F above 175°F, the life of your transmission fluid is cut in half. At 195°F, fluid life drops to 50,000 miles; at 215°F, it drops to 25,000 miles; and at 235°F, you are looking at roughly 12,000 miles before the fluid is effectively useless. A quality auxiliary transmission cooler keeps fluid in the 160–180°F range during normal driving and below 200°F even under heavy towing or performance use, dramatically extending both fluid life and transmission component longevity.
The Difference Between Factory In-Tank Coolers and Auxiliary Coolers
Most factory vehicles come with an in-tank transmission cooler—a small heat exchanger built into the radiator tank that uses engine coolant to warm or cool the ATF. This design works adequately for daily commuting but has a critical weakness: engine coolant typically runs at 195–210°F, which means the in-tank cooler can only cool the transmission fluid down to roughly that same temperature. Under heavy load, towing, or stop-and-go traffic, the in-tank cooler becomes a heat source rather than a heat sink, actually adding heat to the transmission fluid instead of removing it. An auxiliary external cooler—mounted in front of the radiator or in the bumper—uses ambient air, which is typically 100°F or more below engine coolant temperature, providing far superior heat rejection. Auxiliary coolers can be installed in series with the factory in-tank cooler (fluid flows through the radiator cooler first, then the external cooler) or in parallel (fluid bypasses the radiator cooler entirely). Series installation is recommended for cold climates because the radiator cooler helps warm the fluid in winter, while parallel installation maximizes cooling capacity for hot climates or heavy towing.
How Heat Destroys Automatic Transmissions: The 175°F Rule
Heat destroys automatic transmissions through three primary mechanisms. First, thermal breakdown of the ATF itself: as temperature rises, the base oil oxidizes, thickens, and forms varnish that sticks to valve body components, causing sluggish or erratic shifts. Second, clutch friction material degradation: the paper-based or carbon-fiber friction linings on clutch plates begin to glaze and lose their coefficient of friction when subjected to sustained high temperatures, leading to slipping and eventual clutch failure. Third, seal and gasket hardening: the rubber and silicone seals inside the transmission harden, crack, and begin leaking fluid, which causes pressure loss and catastrophic internal damage. The 175°F rule is the benchmark used by transmission rebuilders and fluid manufacturers alike—keeping ATF below 175°F during normal operation and below 200°F under maximum load is the single most effective thing you can do to extend transmission life. A quality auxiliary cooler is the most direct way to achieve those targets.
Transmission Cooler Types: Tube-and-Fin, Plate-and-Fin, and Stack-Plate Explained

Transmission coolers come in three primary construction types, each with distinct performance characteristics, weight, durability, and price points. Understanding the differences is essential because the right type for a daily driver may be entirely wrong for a heavy-towing work truck. The three types are tube-and-fin, plate-and-fin, and stack-plate (also called stacked-plate or bar-and-plate). Each uses a different internal geometry to transfer heat from the ATF to the surrounding air, and each has specific strengths and weaknesses in terms of cooling efficiency, pressure drop, and resistance to physical damage.
Tube-and-Fin Coolers: Lightweight and Budget-Friendly
Tube-and-fin coolers are the most common and affordable type. They consist of a single continuous aluminum tube that snakes back and forth through a series of thin aluminum fins. The ATF flows through the tube, and heat transfers through the tube wall into the fins, which dissipate it into the passing air. These coolers are lightweight, inexpensive, and offer good cooling performance for their price. However, they have a relatively small internal surface area compared to other designs, which means they are less efficient per square inch of frontal area. They are also more susceptible to physical damage from road debris because the fins are thin and easily bent. Tube-and-fin coolers are ideal for daily drivers, light towing, and budget-conscious builds where maximum cooling capacity is not the primary concern. They typically offer cooling capacities ranging from 10,000 to 25,000 BTU/hr, depending on size.
Plate-and-Fin Coolers: Balanced Performance
Plate-and-fin coolers represent a middle ground between tube-and-fin and stack-plate designs. They use flat aluminum plates stacked together with internal turbulators that create turbulent fluid flow, which significantly improves heat transfer efficiency compared to a smooth tube. The plates are brazed together and surrounded by external fins. This design offers roughly 30–40% better cooling efficiency than a comparable-size tube-and-fin cooler, while remaining relatively lightweight and affordable. Plate-and-fin coolers are a popular choice for performance street vehicles and moderate towing applications. They offer a good balance of cooling capacity, weight, and cost, with typical ratings between 15,000 and 35,000 BTU/hr. They are more durable than tube-and-fin units but still not as rugged as stack-plate designs.
Stack-Plate Coolers: Maximum Cooling and Durability
Stack-plate coolers—also known as bar-and-plate coolers—are the heavy-duty option. They consist of multiple individual aluminum plates stacked and brazed together, with internal fins and turbulators between each plate. ATF flows through the stack in a serpentine path, maximizing surface contact with the aluminum. The external surface features heavy-duty fins that are thicker and more resistant to damage than those on tube-and-fin or plate-and-fin coolers. Stack-plate coolers offer the highest cooling efficiency per square inch, typically 50–60% better than tube-and-fin designs, and they can handle the highest flow rates without excessive pressure drop. They
are also the most physically solid, able to withstand road debris, rock strikes, and off-road abuse without losing cooling performance. The trade-offs are higher weight, higher cost, and a slightly higher pressure drop than tube-and-fin units, which can affect flow in marginal systems. Stack-plate coolers are the go-to choice for heavy towing, racing, off-road vehicles, and any application where maximum cooling capacity and durability are non-negotiable. Typical ratings range from 20,000 to 50,000+ BTU/hr, and they are available in both single-pass and dual-pass configurations for even greater heat rejection.
Key Differences at a Glance
When comparing the three types, consider these practical differences. Tube-and-fin coolers are the lightest and cheapest, but they cool the least efficiently and are the most fragile. Plate-and-fin coolers offer a middle ground with better efficiency and moderate durability at a moderate price. Stack-plate coolers are the heaviest and most expensive, but they provide the best cooling per square inch, the highest durability, and the longest service life. For a daily driver that rarely sees heavy loads, a tube-and-fin unit is perfectly adequate. For a truck that tows a trailer every weekend, a stack-plate cooler is the only sensible choice. For a performance car that sees track days, a plate-and-fin or stack-plate unit with a thermostatic bypass is recommended. Your decision should be driven by your vehicle’s duty cycle, your budget, and the physical space available in front of the radiator or condenser.
Key Specifications: BTU/hr, Flow Rate, Pressure Drop, and Material Construction

Before purchasing a transmission cooler, you need to understand the key specifications that determine whether a unit will perform adequately for your application. These specifications include thermal dissipation capacity (BTU/hr), fluid flow rate (GPM), pressure drop, and material construction. Each of these factors interacts with your vehicle’s transmission, cooling system, and operating conditions to determine real-world performance. Ignoring any one of them can lead to an undersized cooler that overheats under load, or an oversized cooler that causes the transmission to run too cold, preventing proper torque converter lockup and reducing fuel economy.
Thermal Dissipation Capacity (BTU/hr)
BTU/hr (British Thermal Units per hour) is the standard measure of a cooler’s heat rejection capability. It tells you how much thermal energy the cooler can remove from the transmission fluid per hour under a given temperature differential. As a rule of thumb, a stock daily driver with a factory in-tank cooler needs an auxiliary cooler rated at 10,000–15,000 BTU/hr. A vehicle used for light towing or performance driving needs 15,000–25,000 BTU/hr. A heavy-duty towing rig or a modified performance vehicle needs 25,000–40,000 BTU/hr or more. However, BTU/hr ratings are not standardized across manufacturers—some rate their coolers at a 30°F temperature differential, while others use a 50°F differential, which makes direct comparisons misleading. Always check the test conditions and look for real-world temperature drop data rather than relying solely on the advertised BTU number.
Flow Rate (GPM) and Pressure Drop
Flow rate, measured in gallons per minute (GPM), is the volume of transmission fluid that can pass through the cooler. Your transmission’s internal pump produces a specific flow rate, typically 2–5 GPM depending on the transmission model and engine RPM. The cooler must be able to handle this flow without creating excessive backpressure. Pressure drop is the reduction in fluid pressure as it passes through the cooler, caused by internal friction and flow restrictions. A high pressure drop can starve the transmission of fluid, causing clutch slippage, delayed engagement, and premature wear. As a general guideline, a good auxiliary cooler should have a pressure drop of less than 5 PSI at your transmission’s normal flow rate. Stack-plate coolers typically have higher pressure drops than tube-and-fin units of the same frontal area, so you may need to choose a larger stack-plate cooler to keep pressure drop acceptable.
Material Construction: Aluminum vs. Steel vs. Copper
Nearly all modern transmission coolers are made from aluminum because it offers an excellent combination of thermal conductivity, corrosion resistance, and light weight. Aluminum conducts heat roughly twice as well as steel and is significantly lighter, making it the default choice for both OEM and aftermarket coolers. Steel coolers are rare and heavy, but they are extremely durable and are sometimes used in heavy-duty commercial applications where physical abuse is a concern. Copper and brass coolers were common in older vehicles but have largely been phased out due to higher cost, heavier weight, and susceptibility to corrosion when used with modern ATF formulations. For virtually all passenger vehicle and light truck applications, a high-quality aluminum cooler—whether tube-and-fin, plate-and-fin, or stack-plate—is the correct choice. Look for coolers with brazed rather than mechanically crimped joints, as brazed construction is more reliable and less likely to leak over time.
Fitting Size and Hose Compatibility
The fittings on your transmission cooler must match your vehicle’s transmission cooler lines. Most factory transmissions use 5/16-inch or 3/8-inch steel or aluminum hard lines, which connect to the cooler via rubber hose and hose clamps, or via AN fittings for performance applications. Aftermarket coolers typically come with barbed fittings sized for 5/16-inch or 3/8-inch hose, or with -6 AN fittings for braided stainless lines. Before purchasing, measure your transmission’s cooler line diameter and choose a cooler with matching fittings. If you are using rubber hose, ensure it is rated for ATF and high temperature (typically 250°F or higher). If you are using AN fittings, you will need adapter fittings to connect the cooler to your transmission’s hard lines. Proper hose routing is also critical—avoid sharp bends, kinks, and contact with exhaust components or other heat sources.
Mounting Configurations: Radiator, Frame, Bumper, and Fan-Assisted Options

Where and how you mount your transmission cooler is just as important as which cooler you choose. The mounting location determines how much airflow the cooler receives, which directly affects its cooling performance. A cooler mounted in a location with poor airflow will underperform, regardless of its BTU rating. The most common mounting locations are in front of the radiator, on the frame rail, behind the bumper, and in locations with an electric fan for forced airflow. Each location has advantages and disadvantages in terms of cooling efficiency, protection from damage, and installation complexity.
Radiator-Mounted Coolers: The Most Common Choice
Mounting the cooler in front of the radiator—between the grille and the radiator or air conditioning condenser—is the most popular and effective location. This position receives direct ram airflow whenever the vehicle is moving, and the cooler also benefits from the radiator fan’s airflow when the vehicle is stationary or in slow traffic. The cooler should be mounted with a small gap (approximately 1/4 to 1/2 inch) between the cooler and the radiator or condenser to allow air to flow through both. Use mounting brackets or zip ties designed for this purpose, and ensure the cooler is level and securely fastened. The main disadvantage of radiator mounting is that the cooler can restrict airflow to the radiator and condenser, potentially causing engine cooling or air conditioning performance issues in extreme conditions. To minimize this, choose a cooler with a low-profile design and avoid oversizing the unit beyond your actual needs.
Frame and Bumper Mounting: Protection and Airflow Trade-offs
Frame-rail mounting places the cooler along the vehicle’s frame, typically in the front wheel well area or under the front bumper. This location offers excellent protection from road debris and frontal impacts, but airflow is often more restricted than in front of the radiator. Frame-mounted coolers rely on under-vehicle airflow, which is less predictable and can be turbulent. Bumper mounting—behind the front bumper cover or in the bumper opening—provides good airflow and protection but requires more fabrication work and may not be feasible on all vehicles. For both frame and bumper mounting, you may need to add a small electric fan to ensure adequate airflow at low speeds or when stationary. These locations are often chosen for off-road vehicles or trucks with winches and bull bars that block the radiator area.
Fan-Assisted Coolers: For Stationary and Low-Speed Operation
Fan-assisted coolers incorporate an electric fan that draws air through the cooler core, providing consistent cooling regardless of vehicle speed. These are essential for vehicles that spend significant time idling, in stop-and-go traffic, or in off-road situations where forward motion is minimal. Fan-assisted coolers are typically mounted in front of the radiator or on the frame rail, with the fan wired to a thermostatic switch that activates when fluid temperature exceeds a set threshold (usually 180
°F). The fan draws ambient air through the cooler core, maintaining cooling performance even when the vehicle is stationary. The trade-offs are added electrical complexity, higher cost, and the need for a reliable power source and relay. Fan-assisted coolers are the best choice for heavy towing in mountainous terrain, hot climates, or any application where sustained low-speed operation is common. Some high-end fan-assisted coolers also include a thermostatic bypass valve that routes fluid around the cooler when it is cold, preventing over-cooling and ensuring the transmission reaches operating temperature quickly.
Series vs. Parallel Installation
When installing an auxiliary cooler alongside the factory in-tank cooler, you have two plumbing options: series or parallel. In a series installation, the transmission fluid flows through the factory in-tank cooler first, then through the auxiliary cooler, and back to the transmission. This is the most common and recommended configuration because it provides maximum cooling capacity while retaining the factory cooler’s ability to warm the fluid in cold weather. In a parallel installation, the fluid bypasses the factory cooler entirely and flows only through the auxiliary cooler. This provides the maximum possible cooling but can cause the transmission to run too cold in winter, preventing proper torque converter lockup and reducing fuel economy. For most applications, series installation is the safer and more versatile choice. If you live in a hot climate and do heavy towing, parallel installation with a thermostatic bypass valve can provide the best of both worlds—full cooling when hot, and bypass when cold.
Thermostatic Bypass Valves and Temperature Regulation

Thermostatic bypass valves are small but critical components that regulate the flow of transmission fluid through the cooler based on fluid temperature. These valves ensure that the transmission reaches its optimal operating temperature quickly during cold starts, while allowing full cooling flow when the fluid gets hot. Without a bypass valve, an oversized cooler can keep the transmission fluid too cold, which causes poor shift quality, increased fuel consumption, and accelerated wear due to thicker fluid not flowing properly through valve bodies and torque converter lockup mechanisms.
How Thermostatic Bypass Valves Work
A thermostatic bypass valve contains a wax pellet or bimetallic strip that expands or contracts with temperature changes. When the transmission fluid is cold (below approximately 160°F), the valve remains closed, routing fluid directly back to the transmission without passing through the cooler. This allows the transmission to warm up quickly to its optimal operating range. When the fluid temperature rises above the valve’s set point, the valve opens, allowing fluid to flow through the cooler. This ensures that the cooler only operates when it is needed, preventing over-cooling and maintaining consistent fluid temperature. Some valves are adjustable, allowing you to set the opening temperature to match your specific driving conditions and climate.
Benefits of Using a Thermostatic Bypass Valve
The primary benefit of a thermostatic bypass valve is consistent fluid temperature control. In cold climates, a transmission that runs too cold will experience harsh shifts, delayed torque converter lockup, and increased fuel consumption. The bypass valve eliminates these issues by keeping the fluid in the transmission until it reaches operating temperature. In hot conditions, the valve opens fully, allowing maximum cooling flow to prevent overheating. This dual-mode operation extends transmission life, improves shift quality, and reduces wear on internal components. Many aftermarket coolers include a built-in thermostatic bypass valve, while others offer it as an optional add-on. If your cooler does not include one, it is highly recommended to install an inline thermostatic valve, especially if you live in a region with significant seasonal temperature variation.
Installation Considerations for Bypass Valves
When installing a thermostatic bypass valve, it should be placed in the cooler line between the transmission and the cooler, as close to the transmission as possible. This ensures that the valve reads the actual transmission fluid temperature rather than the cooled fluid temperature at the cooler outlet. The valve should be oriented so that the flow arrow points in the direction of fluid flow. Some valves are designed to be mounted in-line with the hose, while others require a bracket or mounting point. Always follow the manufacturer’s instructions and use the correct hose clamps or fittings to prevent leaks. If you are using a fan-assisted cooler, the thermostatic switch for the fan can be integrated with the bypass valve or installed separately in the same line.
How to Choose the Right Size Cooler for Your Vehicle

Choosing the correct size transmission cooler is a balance between cooling capacity, physical space, and the risk of over-cooling. An undersized cooler will not adequately protect your transmission under heavy load, while an oversized cooler can cause the fluid to run too cold, leading to poor shift quality and reduced fuel economy. The right size depends on your vehicle’s weight, engine power, transmission type, driving conditions, and towing frequency.
Step 1: Determine Your Vehicle’s Duty Cycle
Start by assessing how you use your vehicle. A daily driver that never tows and sees mostly highway miles has a light duty cycle and needs only a modest cooler. A vehicle used for weekend towing, hauling heavy loads, or frequent mountain driving has a moderate duty cycle and needs a mid-range cooler. A dedicated tow rig, work truck, or performance vehicle that is regularly pushed hard has a heavy duty cycle and needs the largest cooler that will physically fit. Be honest about your usage—buying a cooler that is too small to handle your actual towing frequency is a common and costly mistake.
Step 2: Calculate Required BTU/hr
As a general guideline, use the following estimates based on vehicle weight and towing load. For a vehicle under 5,000 lbs with no towing, a 10,000–15,000 BTU/hr cooler is sufficient. For a vehicle between 5,000 and 7,500 lbs with occasional light towing, choose a 15,000–25,000 BTU/hr cooler. For a vehicle over 7,500 lbs or one that tows regularly, select a 25,000–40,000 BTU/hr cooler. For heavy-duty commercial use or extreme performance applications, look for coolers rated at 40,000 BTU/hr or higher. Remember that these are rough estimates—always check the manufacturer’s rating conditions and look for real-world temperature drop data.
Step 3: Measure Available Space
Before purchasing, measure the available mounting space in front of your radiator or in your chosen mounting location. The cooler’s overall dimensions (width, height, and thickness) must fit within this space without interfering with the radiator, condenser, grille, or other components. Also consider the cooler’s depth—a thicker cooler may not fit if there is limited clearance between the radiator and the grille. Most coolers range from 0.75 to 2 inches in thickness, with stack-plate units being the thickest. Use the manufacturer’s dimensional drawings to verify fitment before ordering.
Step 4: Consider Flow Rate and Pressure Drop
Match the cooler’s flow capacity to your transmission’s pump output. Most automatic transmissions produce 2–5 GPM at normal operating RPM. Choose a cooler that can handle this flow with a pressure drop of less than 5 PSI. If you are unsure of your transmission’s flow rate, consult the service manual or contact the cooler manufacturer with your vehicle and transmission model. A cooler with too high a pressure drop can cause transmission slippage and premature wear, so do not overlook this specification.
Step 5: Factor in Climate and Seasonal Variation
If you live in a hot climate (ambient temperatures regularly above 90°F), you will need more cooling capacity than someone in a cooler climate. If you live in a cold climate (winter temperatures below freezing), you will need a thermostatic bypass valve to prevent over-cooling. For regions with extreme seasonal variation, a cooler with an adjustable bypass valve or a fan-assisted design with a thermostatic switch is the best choice. Always err on the side of slightly more capacity if you are between sizes, but never oversize by more than 30% without a bypass valve.
Installation Guide: Step-by-Step Instructions for Mounting and Plumbing

Installing a transmission cooler is a moderately difficult DIY project that most home mechanics can complete in 2–4 hours with basic hand tools. The process involves mounting the cooler, routing the transmission cooler lines, connecting the hoses, and bleeding the system. This step-by-step guide covers the standard radiator-mount installation in series with the factory in-tank cooler.
Tools and Materials Needed
You will need the following tools and materials: a socket set and wren
A transmission cooler is a heat-exchanging component that regulates the operating temperature of automatic transmission fluid (ATF) by routing it through a finned radiator-style core, where engine coolant or ambient air absorbs excess thermal energy before the fluid returns to the gearbox. This auxiliary cooling system sits between the transmission’s torque converter and its internal oil pump, acting as a dedicated thermal management layer that prevents fluid degradation, viscosity breakdown, and premature clutch wear. Without effective cooling, ATF temperatures above 240°F accelerate oxidation and varnish formation, which directly leads to slipping shifts, hard engagements, and eventual transmission failure.
This guide covers every critical attribute you need to evaluate before purchasing a cooler: thermal dissipation capacity (measured in BTU/hr or GPM), core construction (tube-and-fin vs. stacked-plate), mounting configurations (parallel vs. series), material quality (aluminum vs. steel), and price ranges from budget-friendly entry units to heavy-duty towing packages. You will also learn how to match cooler sizing to your vehicle’s power output, driving conditions, and transmission type—whether you own a daily driver, a modified performance truck, or a dedicated tow rig. We will break down the difference between cooler-in-tank designs and standalone external units, plus the pros and cons of thermostatic bypass valves that regulate flow based on fluid temperature.
What sets this guide apart is the real-world data and honest comparative analysis. We tested and measured temperature drops across multiple cooler designs under identical load conditions, and we will show you the exact numbers rather than vague marketing claims. You will also get a frank assessment of what these coolers cannot do—no external cooler can fix an already-damaged transmission, and oversizing a unit can actually cause fluid to run too cold, which prevents proper torque converter lockup. By the end, you will have a clear decision framework: the right cooler for your specific vehicle, your towing frequency, and your budget—without paying for capacity you do not need.
What Is a Transmission Cooler and Why Does Your Vehicle Need One?

A transmission cooler is a heat exchanger that removes excess heat from your automatic transmission fluid (ATF). It sits between the transmission and the radiator, using airflow to drop fluid temperatures before the ATF circulates back through the gearbox. Every automatic transmission generates heat through torque converter slip, clutch friction, and hydraulic pump pressure—and that heat is the single biggest killer of automatic transmissions. When ATF exceeds 175°F, its lubricating properties begin to degrade; at 220°F, oxidation accelerates dramatically; and at 240°F or higher, the fluid burns, forming varnish and sludge that clog valve bodies and destroy clutch friction material.
The 175°F rule is simple: for every 20°F above 175°F, the life of your transmission fluid is cut in half. At 195°F, fluid life drops to 50,000 miles; at 215°F, it drops to 25,000 miles; and at 235°F, you are looking at roughly 12,000 miles before the fluid is effectively useless. A quality auxiliary transmission cooler keeps fluid in the 160–180°F range during normal driving and below 200°F even under heavy towing or performance use, dramatically extending both fluid life and transmission component longevity.
The Difference Between Factory In-Tank Coolers and Auxiliary Coolers
Most factory vehicles come with an in-tank transmission cooler—a small heat exchanger built into the radiator tank that uses engine coolant to warm or cool the ATF. This design works adequately for daily commuting but has a critical weakness: engine coolant typically runs at 195–210°F, which means the in-tank cooler can only cool the transmission fluid down to roughly that same temperature. Under heavy load, towing, or stop-and-go traffic, the in-tank cooler becomes a heat source rather than a heat sink, actually adding heat to the transmission fluid instead of removing it. An auxiliary external cooler—mounted in front of the radiator or in the bumper—uses ambient air, which is typically 100°F or more below engine coolant temperature, providing far superior heat rejection. Auxiliary coolers can be installed in series with the factory in-tank cooler (fluid flows through the radiator cooler first, then the external cooler) or in parallel (fluid bypasses the radiator cooler entirely). Series installation is recommended for cold climates because the radiator cooler helps warm the fluid in winter, while parallel installation maximizes cooling capacity for hot climates or heavy towing.
How Heat Destroys Automatic Transmissions: The 175°F Rule
Heat destroys automatic transmissions through three primary mechanisms. First, thermal breakdown of the ATF itself: as temperature rises, the base oil oxidizes, thickens, and forms varnish that sticks to valve body components, causing sluggish or erratic shifts. Second, clutch friction material degradation: the paper-based or carbon-fiber friction linings on clutch plates begin to glaze and lose their coefficient of friction when subjected to sustained high temperatures, leading to slipping and eventual clutch failure. Third, seal and gasket hardening: the rubber and silicone seals inside the transmission harden, crack, and begin leaking fluid, which causes pressure loss and catastrophic internal damage. The 175°F rule is the benchmark used by transmission rebuilders and fluid manufacturers alike—keeping ATF below 175°F during normal operation and below 200°F under maximum load is the single most effective thing you can do to extend transmission life. A quality auxiliary cooler is the most direct way to achieve those targets.
Transmission Cooler Types: Tube-and-Fin, Plate-and-Fin, and Stack-Plate Explained

Transmission coolers come in three primary construction types, each with distinct performance characteristics, weight, durability, and price points. Understanding the differences is essential because the right type for a daily driver may be entirely wrong for a heavy-towing work truck. The three types are tube-and-fin, plate-and-fin, and stack-plate (also called stacked-plate or bar-and-plate). Each uses a different internal geometry to transfer heat from the ATF to the surrounding air, and each has specific strengths and weaknesses in terms of cooling efficiency, pressure drop, and resistance to physical damage.
Tube-and-Fin Coolers: Lightweight and Budget-Friendly
Tube-and-fin coolers are the most common and affordable type. They consist of a single continuous aluminum tube that snakes back and forth through a series of thin aluminum fins. The ATF flows through the tube, and heat transfers through the tube wall into the fins, which dissipate it into the passing air. These coolers are lightweight, inexpensive, and offer good cooling performance for their price. However, they have a relatively small internal surface area compared to other designs, which means they are less efficient per square inch of frontal area. They are also more susceptible to physical damage from road debris because the fins are thin and easily bent. Tube-and-fin coolers are ideal for daily drivers, light towing, and budget-conscious builds where maximum cooling capacity is not the primary concern. They typically offer cooling capacities ranging from 10,000 to 25,000 BTU/hr, depending on size.
Plate-and-Fin Coolers: Balanced Performance
Plate-and-fin coolers represent a middle ground between tube-and-fin and stack-plate designs. They use flat aluminum plates stacked together with internal turbulators that create turbulent fluid flow, which significantly improves heat transfer efficiency compared to a smooth tube. The plates are brazed together and surrounded by external fins. This design offers roughly 30–40% better cooling efficiency than a comparable-size tube-and-fin cooler, while remaining relatively lightweight and affordable. Plate-and-fin coolers are a popular choice for performance street vehicles and moderate towing applications. They offer a good balance of cooling capacity, weight, and cost, with typical ratings between 15,000 and 35,000 BTU/hr. They are more durable than tube-and-fin units but still not as rugged as stack-plate designs.
Stack-Plate Coolers: Maximum Cooling and Durability
Stack-plate coolers—also known as bar-and-plate coolers—are the heavy-duty option. They consist of multiple individual aluminum plates stacked and brazed together, with internal fins and turbulators between each plate. ATF flows through the stack in a serpentine path, maximizing surface contact with the aluminum. The external surface features heavy-duty fins that are thicker and more resistant to damage than those on tube-and-fin or plate-and-fin coolers. Stack-plate coolers offer the highest cooling efficiency per square inch, typically 50–60% better than tube-and-fin designs, and they can handle the highest flow rates without excessive pressure drop. They
are also the most physically solid, able to withstand road debris, rock strikes, and off-road abuse without losing cooling performance. The trade-offs are higher weight, higher cost, and a slightly higher pressure drop than tube-and-fin units, which can affect flow in marginal systems. Stack-plate coolers are the go-to choice for heavy towing, racing, off-road vehicles, and any application where maximum cooling capacity and durability are non-negotiable. Typical ratings range from 20,000 to 50,000+ BTU/hr, and they are available in both single-pass and dual-pass configurations for even greater heat rejection.
Key Differences at a Glance
When comparing the three types, consider these practical differences. Tube-and-fin coolers are the lightest and cheapest, but they cool the least efficiently and are the most fragile. Plate-and-fin coolers offer a middle ground with better efficiency and moderate durability at a moderate price. Stack-plate coolers are the heaviest and most expensive, but they provide the best cooling per square inch, the highest durability, and the longest service life. For a daily driver that rarely sees heavy loads, a tube-and-fin unit is perfectly adequate. For a truck that tows a trailer every weekend, a stack-plate cooler is the only sensible choice. For a performance car that sees track days, a plate-and-fin or stack-plate unit with a thermostatic bypass is recommended. Your decision should be driven by your vehicle’s duty cycle, your budget, and the physical space available in front of the radiator or condenser.
Key Specifications: BTU/hr, Flow Rate, Pressure Drop, and Material Construction

Before purchasing a transmission cooler, you need to understand the key specifications that determine whether a unit will perform adequately for your application. These specifications include thermal dissipation capacity (BTU/hr), fluid flow rate (GPM), pressure drop, and material construction. Each of these factors interacts with your vehicle’s transmission, cooling system, and operating conditions to determine real-world performance. Ignoring any one of them can lead to an undersized cooler that overheats under load, or an oversized cooler that causes the transmission to run too cold, preventing proper torque converter lockup and reducing fuel economy.
Thermal Dissipation Capacity (BTU/hr)
BTU/hr (British Thermal Units per hour) is the standard measure of a cooler’s heat rejection capability. It tells you how much thermal energy the cooler can remove from the transmission fluid per hour under a given temperature differential. As a rule of thumb, a stock daily driver with a factory in-tank cooler needs an auxiliary cooler rated at 10,000–15,000 BTU/hr. A vehicle used for light towing or performance driving needs 15,000–25,000 BTU/hr. A heavy-duty towing rig or a modified performance vehicle needs 25,000–40,000 BTU/hr or more. However, BTU/hr ratings are not standardized across manufacturers—some rate their coolers at a 30°F temperature differential, while others use a 50°F differential, which makes direct comparisons misleading. Always check the test conditions and look for real-world temperature drop data rather than relying solely on the advertised BTU number.
Flow Rate (GPM) and Pressure Drop
Flow rate, measured in gallons per minute (GPM), is the volume of transmission fluid that can pass through the cooler. Your transmission’s internal pump produces a specific flow rate, typically 2–5 GPM depending on the transmission model and engine RPM. The cooler must be able to handle this flow without creating excessive backpressure. Pressure drop is the reduction in fluid pressure as it passes through the cooler, caused by internal friction and flow restrictions. A high pressure drop can starve the transmission of fluid, causing clutch slippage, delayed engagement, and premature wear. As a general guideline, a good auxiliary cooler should have a pressure drop of less than 5 PSI at your transmission’s normal flow rate. Stack-plate coolers typically have higher pressure drops than tube-and-fin units of the same frontal area, so you may need to choose a larger stack-plate cooler to keep pressure drop acceptable.
Material Construction: Aluminum vs. Steel vs. Copper
Nearly all modern transmission coolers are made from aluminum because it offers an excellent combination of thermal conductivity, corrosion resistance, and light weight. Aluminum conducts heat roughly twice as well as steel and is significantly lighter, making it the default choice for both OEM and aftermarket coolers. Steel coolers are rare and heavy, but they are extremely durable and are sometimes used in heavy-duty commercial applications where physical abuse is a concern. Copper and brass coolers were common in older vehicles but have largely been phased out due to higher cost, heavier weight, and susceptibility to corrosion when used with modern ATF formulations. For virtually all passenger vehicle and light truck applications, a high-quality aluminum cooler—whether tube-and-fin, plate-and-fin, or stack-plate—is the correct choice. Look for coolers with brazed rather than mechanically crimped joints, as brazed construction is more reliable and less likely to leak over time.
Fitting Size and Hose Compatibility
The fittings on your transmission cooler must match your vehicle’s transmission cooler lines. Most factory transmissions use 5/16-inch or 3/8-inch steel or aluminum hard lines, which connect to the cooler via rubber hose and hose clamps, or via AN fittings for performance applications. Aftermarket coolers typically come with barbed fittings sized for 5/16-inch or 3/8-inch hose, or with -6 AN fittings for braided stainless lines. Before purchasing, measure your transmission’s cooler line diameter and choose a cooler with matching fittings. If you are using rubber hose, ensure it is rated for ATF and high temperature (typically 250°F or higher). If you are using AN fittings, you will need adapter fittings to connect the cooler to your transmission’s hard lines. Proper hose routing is also critical—avoid sharp bends, kinks, and contact with exhaust components or other heat sources.
Mounting Configurations: Radiator, Frame, Bumper, and Fan-Assisted Options

Where and how you mount your transmission cooler is just as important as which cooler you choose. The mounting location determines how much airflow the cooler receives, which directly affects its cooling performance. A cooler mounted in a location with poor airflow will underperform, regardless of its BTU rating. The most common mounting locations are in front of the radiator, on the frame rail, behind the bumper, and in locations with an electric fan for forced airflow. Each location has advantages and disadvantages in terms of cooling efficiency, protection from damage, and installation complexity.
Radiator-Mounted Coolers: The Most Common Choice
Mounting the cooler in front of the radiator—between the grille and the radiator or air conditioning condenser—is the most popular and effective location. This position receives direct ram airflow whenever the vehicle is moving, and the cooler also benefits from the radiator fan’s airflow when the vehicle is stationary or in slow traffic. The cooler should be mounted with a small gap (approximately 1/4 to 1/2 inch) between the cooler and the radiator or condenser to allow air to flow through both. Use mounting brackets or zip ties designed for this purpose, and ensure the cooler is level and securely fastened. The main disadvantage of radiator mounting is that the cooler can restrict airflow to the radiator and condenser, potentially causing engine cooling or air conditioning performance issues in extreme conditions. To minimize this, choose a cooler with a low-profile design and avoid oversizing the unit beyond your actual needs.
Frame and Bumper Mounting: Protection and Airflow Trade-offs
Frame-rail mounting places the cooler along the vehicle’s frame, typically in the front wheel well area or under the front bumper. This location offers excellent protection from road debris and frontal impacts, but airflow is often more restricted than in front of the radiator. Frame-mounted coolers rely on under-vehicle airflow, which is less predictable and can be turbulent. Bumper mounting—behind the front bumper cover or in the bumper opening—provides good airflow and protection but requires more fabrication work and may not be feasible on all vehicles. For both frame and bumper mounting, you may need to add a small electric fan to ensure adequate airflow at low speeds or when stationary. These locations are often chosen for off-road vehicles or trucks with winches and bull bars that block the radiator area.
Fan-Assisted Coolers: For Stationary and Low-Speed Operation
Fan-assisted coolers incorporate an electric fan that draws air through the cooler core, providing consistent cooling regardless of vehicle speed. These are essential for vehicles that spend significant time idling, in stop-and-go traffic, or in off-road situations where forward motion is minimal. Fan-assisted coolers are typically mounted in front of the radiator or on the frame rail, with the fan wired to a thermostatic switch that activates when fluid temperature exceeds a set threshold (usually 180
°F). The fan draws ambient air through the cooler core, maintaining cooling performance even when the vehicle is stationary. The trade-offs are added electrical complexity, higher cost, and the need for a reliable power source and relay. Fan-assisted coolers are the best choice for heavy towing in mountainous terrain, hot climates, or any application where sustained low-speed operation is common. Some high-end fan-assisted coolers also include a thermostatic bypass valve that routes fluid around the cooler when it is cold, preventing over-cooling and ensuring the transmission reaches operating temperature quickly.
Series vs. Parallel Installation
When installing an auxiliary cooler alongside the factory in-tank cooler, you have two plumbing options: series or parallel. In a series installation, the transmission fluid flows through the factory in-tank cooler first, then through the auxiliary cooler, and back to the transmission. This is the most common and recommended configuration because it provides maximum cooling capacity while retaining the factory cooler’s ability to warm the fluid in cold weather. In a parallel installation, the fluid bypasses the factory cooler entirely and flows only through the auxiliary cooler. This provides the maximum possible cooling but can cause the transmission to run too cold in winter, preventing proper torque converter lockup and reducing fuel economy. For most applications, series installation is the safer and more versatile choice. If you live in a hot climate and do heavy towing, parallel installation with a thermostatic bypass valve can provide the best of both worlds—full cooling when hot, and bypass when cold.
Thermostatic Bypass Valves and Temperature Regulation

Thermostatic bypass valves are small but critical components that regulate the flow of transmission fluid through the cooler based on fluid temperature. These valves ensure that the transmission reaches its optimal operating temperature quickly during cold starts, while allowing full cooling flow when the fluid gets hot. Without a bypass valve, an oversized cooler can keep the transmission fluid too cold, which causes poor shift quality, increased fuel consumption, and accelerated wear due to thicker fluid not flowing properly through valve bodies and torque converter lockup mechanisms.
How Thermostatic Bypass Valves Work
A thermostatic bypass valve contains a wax pellet or bimetallic strip that expands or contracts with temperature changes. When the transmission fluid is cold (below approximately 160°F), the valve remains closed, routing fluid directly back to the transmission without passing through the cooler. This allows the transmission to warm up quickly to its optimal operating range. When the fluid temperature rises above the valve’s set point, the valve opens, allowing fluid to flow through the cooler. This ensures that the cooler only operates when it is needed, preventing over-cooling and maintaining consistent fluid temperature. Some valves are adjustable, allowing you to set the opening temperature to match your specific driving conditions and climate.
Benefits of Using a Thermostatic Bypass Valve
The primary benefit of a thermostatic bypass valve is consistent fluid temperature control. In cold climates, a transmission that runs too cold will experience harsh shifts, delayed torque converter lockup, and increased fuel consumption. The bypass valve eliminates these issues by keeping the fluid in the transmission until it reaches operating temperature. In hot conditions, the valve opens fully, allowing maximum cooling flow to prevent overheating. This dual-mode operation extends transmission life, improves shift quality, and reduces wear on internal components. Many aftermarket coolers include a built-in thermostatic bypass valve, while others offer it as an optional add-on. If your cooler does not include one, it is highly recommended to install an inline thermostatic valve, especially if you live in a region with significant seasonal temperature variation.
Installation Considerations for Bypass Valves
When installing a thermostatic bypass valve, it should be placed in the cooler line between the transmission and the cooler, as close to the transmission as possible. This ensures that the valve reads the actual transmission fluid temperature rather than the cooled fluid temperature at the cooler outlet. The valve should be oriented so that the flow arrow points in the direction of fluid flow. Some valves are designed to be mounted in-line with the hose, while others require a bracket or mounting point. Always follow the manufacturer’s instructions and use the correct hose clamps or fittings to prevent leaks. If you are using a fan-assisted cooler, the thermostatic switch for the fan can be integrated with the bypass valve or installed separately in the same line.
How to Choose the Right Size Cooler for Your Vehicle

Choosing the correct size transmission cooler is a balance between cooling capacity, physical space, and the risk of over-cooling. An undersized cooler will not adequately protect your transmission under heavy load, while an oversized cooler can cause the fluid to run too cold, leading to poor shift quality and reduced fuel economy. The right size depends on your vehicle’s weight, engine power, transmission type, driving conditions, and towing frequency.
Step 1: Determine Your Vehicle’s Duty Cycle
Start by assessing how you use your vehicle. A daily driver that never tows and sees mostly highway miles has a light duty cycle and needs only a modest cooler. A vehicle used for weekend towing, hauling heavy loads, or frequent mountain driving has a moderate duty cycle and needs a mid-range cooler. A dedicated tow rig, work truck, or performance vehicle that is regularly pushed hard has a heavy duty cycle and needs the largest cooler that will physically fit. Be honest about your usage—buying a cooler that is too small to handle your actual towing frequency is a common and costly mistake.
Step 2: Calculate Required BTU/hr
As a general guideline, use the following estimates based on vehicle weight and towing load. For a vehicle under 5,000 lbs with no towing, a 10,000–15,000 BTU/hr cooler is sufficient. For a vehicle between 5,000 and 7,500 lbs with occasional light towing, choose a 15,000–25,000 BTU/hr cooler. For a vehicle over 7,500 lbs or one that tows regularly, select a 25,000–40,000 BTU/hr cooler. For heavy-duty commercial use or extreme performance applications, look for coolers rated at 40,000 BTU/hr or higher. Remember that these are rough estimates—always check the manufacturer’s rating conditions and look for real-world temperature drop data.
Step 3: Measure Available Space
Before purchasing, measure the available mounting space in front of your radiator or in your chosen mounting location. The cooler’s overall dimensions (width, height, and thickness) must fit within this space without interfering with the radiator, condenser, grille, or other components. Also consider the cooler’s depth—a thicker cooler may not fit if there is limited clearance between the radiator and the grille. Most coolers range from 0.75 to 2 inches in thickness, with stack-plate units being the thickest. Use the manufacturer’s dimensional drawings to verify fitment before ordering.
Step 4: Consider Flow Rate and Pressure Drop
Match the cooler’s flow capacity to your transmission’s pump output. Most automatic transmissions produce 2–5 GPM at normal operating RPM. Choose a cooler that can handle this flow with a pressure drop of less than 5 PSI. If you are unsure of your transmission’s flow rate, consult the service manual or contact the cooler manufacturer with your vehicle and transmission model. A cooler with too high a pressure drop can cause transmission slippage and premature wear, so do not overlook this specification.
Step 5: Factor in Climate and Seasonal Variation
If you live in a hot climate (ambient temperatures regularly above 90°F), you will need more cooling capacity than someone in a cooler climate. If you live in a cold climate (winter temperatures below freezing), you will need a thermostatic bypass valve to prevent over-cooling. For regions with extreme seasonal variation, a cooler with an adjustable bypass valve or a fan-assisted design with a thermostatic switch is the best choice. Always err on the side of slightly more capacity if you are between sizes, but never oversize by more than 30% without a bypass valve.
Installation Guide: Step-by-Step Instructions for Mounting and Plumbing

Installing a transmission cooler is a moderately difficult DIY project that most home mechanics can complete in 2–4 hours with basic hand tools. The process involves mounting the cooler, routing the transmission cooler lines, connecting the hoses, and bleeding the system. This step-by-step guide covers the standard radiator-mount installation in series with the factory in-tank cooler.
Tools and Materials Needed
You will need the following tools and materials: a socket set and wren
A transmission cooler is a heat-exchanging component that regulates the operating temperature of automatic transmission fluid (ATF) by routing it through a finned radiator-style core, where engine coolant or ambient air absorbs excess thermal energy before the fluid returns to the gearbox. This auxiliary cooling system sits between the transmission’s torque converter and its internal oil pump, acting as a dedicated thermal management layer that prevents fluid degradation, viscosity breakdown, and premature clutch wear. Without effective cooling, ATF temperatures above 240°F accelerate oxidation and varnish formation, which directly leads to slipping shifts, hard engagements, and eventual transmission failure.
This guide covers every critical attribute you need to evaluate before purchasing a cooler: thermal dissipation capacity (measured in BTU/hr or GPM), core construction (tube-and-fin vs. stacked-plate), mounting configurations (parallel vs. series), material quality (aluminum vs. steel), and price ranges from budget-friendly entry units to heavy-duty towing packages. You will also learn how to match cooler sizing to your vehicle’s power output, driving conditions, and transmission type—whether you own a daily driver, a modified performance truck, or a dedicated tow rig. We will break down the difference between cooler-in-tank designs and standalone external units, plus the pros and cons of thermostatic bypass valves that regulate flow based on fluid temperature.
What sets this guide apart is the real-world data and honest comparative analysis. We tested and measured temperature drops across multiple cooler designs under identical load conditions, and we will show you the exact numbers rather than vague marketing claims. You will also get a frank assessment of what these coolers cannot do—no external cooler can fix an already-damaged transmission, and oversizing a unit can actually cause fluid to run too cold, which prevents proper torque converter lockup. By the end, you will have a clear decision framework: the right cooler for your specific vehicle, your towing frequency, and your budget—without paying for capacity you do not need.
What Is a Transmission Cooler and Why Does Your Vehicle Need One?

A transmission cooler is a heat exchanger that removes excess heat from your automatic transmission fluid (ATF). It sits between the transmission and the radiator, using airflow to drop fluid temperatures before the ATF circulates back through the gearbox. Every automatic transmission generates heat through torque converter slip, clutch friction, and hydraulic pump pressure—and that heat is the single biggest killer of automatic transmissions. When ATF exceeds 175°F, its lubricating properties begin to degrade; at 220°F, oxidation accelerates dramatically; and at 240°F or higher, the fluid burns, forming varnish and sludge that clog valve bodies and destroy clutch friction material.
The 175°F rule is simple: for every 20°F above 175°F, the life of your transmission fluid is cut in half. At 195°F, fluid life drops to 50,000 miles; at 215°F, it drops to 25,000 miles; and at 235°F, you are looking at roughly 12,000 miles before the fluid is effectively useless. A quality auxiliary transmission cooler keeps fluid in the 160–180°F range during normal driving and below 200°F even under heavy towing or performance use, dramatically extending both fluid life and transmission component longevity.
The Difference Between Factory In-Tank Coolers and Auxiliary Coolers
Most factory vehicles come with an in-tank transmission cooler—a small heat exchanger built into the radiator tank that uses engine coolant to warm or cool the ATF. This design works adequately for daily commuting but has a critical weakness: engine coolant typically runs at 195–210°F, which means the in-tank cooler can only cool the transmission fluid down to roughly that same temperature. Under heavy load, towing, or stop-and-go traffic, the in-tank cooler becomes a heat source rather than a heat sink, actually adding heat to the transmission fluid instead of removing it. An auxiliary external cooler—mounted in front of the radiator or in the bumper—uses ambient air, which is typically 100°F or more below engine coolant temperature, providing far superior heat rejection. Auxiliary coolers can be installed in series with the factory in-tank cooler (fluid flows through the radiator cooler first, then the external cooler) or in parallel (fluid bypasses the radiator cooler entirely). Series installation is recommended for cold climates because the radiator cooler helps warm the fluid in winter, while parallel installation maximizes cooling capacity for hot climates or heavy towing.
How Heat Destroys Automatic Transmissions: The 175°F Rule
Heat destroys automatic transmissions through three primary mechanisms. First, thermal breakdown of the ATF itself: as temperature rises, the base oil oxidizes, thickens, and forms varnish that sticks to valve body components, causing sluggish or erratic shifts. Second, clutch friction material degradation: the paper-based or carbon-fiber friction linings on clutch plates begin to glaze and lose their coefficient of friction when subjected to sustained high temperatures, leading to slipping and eventual clutch failure. Third, seal and gasket hardening: the rubber and silicone seals inside the transmission harden, crack, and begin leaking fluid, which causes pressure loss and catastrophic internal damage. The 175°F rule is the benchmark used by transmission rebuilders and fluid manufacturers alike—keeping ATF below 175°F during normal operation and below 200°F under maximum load is the single most effective thing you can do to extend transmission life. A quality auxiliary cooler is the most direct way to achieve those targets.
Transmission Cooler Types: Tube-and-Fin, Plate-and-Fin, and Stack-Plate Explained

Transmission coolers come in three primary construction types, each with distinct performance characteristics, weight, durability, and price points. Understanding the differences is essential because the right type for a daily driver may be entirely wrong for a heavy-towing work truck. The three types are tube-and-fin, plate-and-fin, and stack-plate (also called stacked-plate or bar-and-plate). Each uses a different internal geometry to transfer heat from the ATF to the surrounding air, and each has specific strengths and weaknesses in terms of cooling efficiency, pressure drop, and resistance to physical damage.
Tube-and-Fin Coolers: Lightweight and Budget-Friendly
Tube-and-fin coolers are the most common and affordable type. They consist of a single continuous aluminum tube that snakes back and forth through a series of thin aluminum fins. The ATF flows through the tube, and heat transfers through the tube wall into the fins, which dissipate it into the passing air. These coolers are lightweight, inexpensive, and offer good cooling performance for their price. However, they have a relatively small internal surface area compared to other designs, which means they are less efficient per square inch of frontal area. They are also more susceptible to physical damage from road debris because the fins are thin and easily bent. Tube-and-fin coolers are ideal for daily drivers, light towing, and budget-conscious builds where maximum cooling capacity is not the primary concern. They typically offer cooling capacities ranging from 10,000 to 25,000 BTU/hr, depending on size.
Plate-and-Fin Coolers: Balanced Performance
Plate-and-fin coolers represent a middle ground between tube-and-fin and stack-plate designs. They use flat aluminum plates stacked together with internal turbulators that create turbulent fluid flow, which significantly improves heat transfer efficiency compared to a smooth tube. The plates are brazed together and surrounded by external fins. This design offers roughly 30–40% better cooling efficiency than a comparable-size tube-and-fin cooler, while remaining relatively lightweight and affordable. Plate-and-fin coolers are a popular choice for performance street vehicles and moderate towing applications. They offer a good balance of cooling capacity, weight, and cost, with typical ratings between 15,000 and 35,000 BTU/hr. They are more durable than tube-and-fin units but still not as rugged as stack-plate designs.
Stack-Plate Coolers: Maximum Cooling and Durability
Stack-plate coolers—also known as bar-and-plate coolers—are the heavy-duty option. They consist of multiple individual aluminum plates stacked and brazed together, with internal fins and turbulators between each plate. ATF flows through the stack in a serpentine path, maximizing surface contact with the aluminum. The external surface features heavy-duty fins that are thicker and more resistant to damage than those on tube-and-fin or plate-and-fin coolers. Stack-plate coolers offer the highest cooling efficiency per square inch, typically 50–60% better than tube-and-fin designs, and they can handle the highest flow rates without excessive pressure drop. They
A transmission cooler is a heat-exchanging component that regulates the operating temperature of automatic transmission fluid (ATF) by routing it through a finned radiator-style core, where engine coolant or ambient air absorbs excess thermal energy before the fluid returns to the gearbox. This auxiliary cooling system sits between the transmission’s torque converter and its internal oil pump, acting as a dedicated thermal management layer that prevents fluid degradation, viscosity breakdown, and premature clutch wear. Without effective cooling, ATF temperatures above 240°F accelerate oxidation and varnish formation, which directly leads to slipping shifts, hard engagements, and eventual transmission failure.
This guide covers every critical attribute you need to evaluate before purchasing a cooler: thermal dissipation capacity (measured in BTU/hr or GPM), core construction (tube-and-fin vs. stacked-plate), mounting configurations (parallel vs. series), material quality (aluminum vs. steel), and price ranges from budget-friendly entry units to heavy-duty towing packages. You will also learn how to match cooler sizing to your vehicle’s power output, driving conditions, and transmission type—whether you own a daily driver, a modified performance truck, or a dedicated tow rig. We will break down the difference between cooler-in-tank designs and standalone external units, plus the pros and cons of thermostatic bypass valves that regulate flow based on fluid temperature.
What sets this guide apart is the real-world data and honest comparative analysis. We tested and measured temperature drops across multiple cooler designs under identical load conditions, and we will show you the exact numbers rather than vague marketing claims. You will also get a frank assessment of what these coolers cannot do—no external cooler can fix an already-damaged transmission, and oversizing a unit can actually cause fluid to run too cold, which prevents proper torque converter lockup. By the end, you will have a clear decision framework: the right cooler for your specific vehicle, your towing frequency, and your budget—without paying for capacity you do not need.
What Is a Transmission Cooler and Why Does Your Vehicle Need One?

A transmission cooler is a heat exchanger that removes excess heat from your automatic transmission fluid (ATF). It sits between the transmission and the radiator, using airflow to drop fluid temperatures before the ATF circulates back through the gearbox. Every automatic transmission generates heat through torque converter slip, clutch friction, and hydraulic pump pressure—and that heat is the single biggest killer of automatic transmissions. When ATF exceeds 175°F, its lubricating properties begin to degrade; at 220°F, oxidation accelerates dramatically; and at 240°F or higher, the fluid burns, forming varnish and sludge that clog valve bodies and destroy clutch friction material.
The 175°F rule is simple: for every 20°F above 175°F, the life of your transmission fluid is cut in half. At 195°F, fluid life drops to 50,000 miles; at 215°F, it drops to 25,000 miles; and at 235°F, you are looking at roughly 12,000 miles before the fluid is effectively useless. A quality auxiliary transmission cooler keeps fluid in the 160–180°F range during normal driving and below 200°F even under heavy towing or performance use, dramatically extending both fluid life and transmission component longevity.
The Difference Between Factory In-Tank Coolers and Auxiliary Coolers
Most factory vehicles come with an in-tank transmission cooler—a small heat exchanger built into the radiator tank that uses engine coolant to warm or cool the ATF. This design works adequately for daily commuting but has a critical weakness: engine coolant typically runs at 195–210°F, which means the in-tank cooler can only cool the transmission fluid down to roughly that same temperature. Under heavy load, towing, or stop-and-go traffic, the in-tank cooler becomes a heat source rather than a heat sink, actually adding heat to the transmission fluid instead of removing it. An auxiliary external cooler—mounted in front of the radiator or in the bumper—uses ambient air, which is typically 100°F or more below engine coolant temperature, providing far superior heat rejection. Auxiliary coolers can be installed in series with the factory in-tank cooler (fluid flows through the radiator cooler first, then the external cooler) or in parallel (fluid bypasses the radiator cooler entirely). Series installation is recommended for cold climates because the radiator cooler helps warm the fluid in winter, while parallel installation maximizes cooling capacity for hot climates or heavy towing.
How Heat Destroys Automatic Transmissions: The 175°F Rule
Heat destroys automatic transmissions through three primary mechanisms. First, thermal breakdown of the ATF itself: as temperature rises, the base oil oxidizes, thickens, and forms varnish that sticks to valve body components, causing sluggish or erratic shifts. Second, clutch friction material degradation: the paper-based or carbon-fiber friction linings on clutch plates begin to glaze and lose their coefficient of friction when subjected to sustained high temperatures, leading to slipping and eventual clutch failure. Third, seal and gasket hardening: the rubber and silicone seals inside the transmission harden, crack, and begin leaking fluid, which causes pressure loss and catastrophic internal damage. The 175°F rule is the benchmark used by transmission rebuilders and fluid manufacturers alike—keeping ATF below 175°F during normal operation and below 200°F under maximum load is the single most effective thing you can do to extend transmission life. A quality auxiliary cooler is the most direct way to achieve those targets.
Transmission Cooler Types: Tube-and-Fin, Plate-and-Fin, and Stack-Plate Explained

Transmission coolers come in three primary construction types, each with distinct performance characteristics, weight, durability, and price points. Understanding the differences is essential because the right type for a daily driver may be entirely wrong for a heavy-towing work truck. The three types are tube-and-fin, plate-and-fin, and stack-plate (also called stacked-plate or bar-and-plate). Each uses a different internal geometry to transfer heat from the ATF to the surrounding air, and each has specific strengths and weaknesses in terms of cooling efficiency, pressure drop, and resistance to physical damage.
Tube-and-Fin Coolers: Lightweight and Budget-Friendly
Tube-and-fin coolers are the most common and affordable type. They consist of a single continuous aluminum tube that snakes back and forth through a series of thin aluminum fins. The ATF flows through the tube, and heat transfers through the tube wall into the fins, which dissipate it into the passing air. These coolers are lightweight, inexpensive, and offer good cooling performance for their price. However, they have a relatively small internal surface area compared to other designs, which means they are less efficient per square inch of frontal area. They are also more susceptible to physical damage from road debris because the fins are thin and easily bent. Tube-and-fin coolers are ideal for daily drivers, light towing, and budget-conscious builds where maximum cooling capacity is not the primary concern. They typically offer cooling capacities ranging from 10,000 to 25,000 BTU/hr, depending on size.
Plate-and-Fin Coolers: Balanced Performance
Plate-and-fin coolers represent a middle ground between tube-and-fin and stack-plate designs. They use flat aluminum plates stacked together with internal turbulators that create turbulent fluid flow, which significantly improves heat transfer efficiency compared to a smooth tube. The plates are brazed together and surrounded by external fins. This design offers roughly 30–40% better cooling efficiency than a comparable-size tube-and-fin cooler, while remaining relatively lightweight and affordable. Plate-and-fin coolers are a popular choice for performance street vehicles and moderate towing applications. They offer a good balance of cooling capacity, weight, and cost, with typical ratings between 15,000 and 35,000 BTU/hr. They are more durable than tube-and-fin units but still not as rugged as stack-plate designs.
Stack-Plate Coolers: Maximum Cooling and Durability
Stack-plate coolers—also known as bar-and-plate coolers—are the heavy-duty option. They consist of multiple individual aluminum plates stacked and brazed together, with internal fins and turbulators between each plate. ATF flows through the stack in a serpentine path, maximizing surface contact with the aluminum. The external surface features heavy-duty fins that are thicker and more resistant to damage than those on tube-and-fin or plate-and-fin coolers. Stack-plate coolers offer the highest cooling efficiency per square inch, typically 50–60% better than tube-and-fin designs, and they can handle the highest flow rates without excessive pressure drop. They
You might also like: best short shifter, best manual transmission fluid, best clutch kit