
Transfer Case Rebuild Guide: What It Costs, When You Need…
The transfer case is the mechanical heart of every four-wheel-drive and all-wheel-drive vehicle. It quietly splits engine power between the front and rear axles. This gear-driven component sits between your transmission and driveshafts. It dictates whether your truck crawls over rocks, plows through snow, or simply gets you to work on a rainy day. When it fails, you are not just losing traction. You are losing the ability to move at all. That is why understanding a transfer case rebuild is essential knowledge for any serious off-roader or truck owner.
This guide breaks down every critical attribute of the rebuild process. We cover the true cost of parts and labor, which ranges dramatically based on your vehicle’s make and drive type. We also cover the warning signs that signal internal wear. Finally, we walk through the step-by-step mechanical procedure for doing it right in your own garage. We will explain the differences between chain-driven and gear-driven cases. We will cover the role of the shift motor and encoder. We will also explain why proper sealant and torque specs matter more than most DIYers realize. You will learn when a full rebuild beats a replacement, and when a used junkyard unit is actually the smarter financial move.
Unlike generic repair articles, this guide includes real-world pricing data from 2026 parts catalogs. It also covers the honest limitations of DIY rebuilds. You will get a clear decision framework based on your driving habits and budget. Whether you drive a Chevy Silverado with a failing NVG 246 or a Jeep Wrangler with a worn NP231, you will leave with a complete action plan. That plan includes the exact tools, the critical inspection points, and the mistakes that cost experienced mechanics thousands of dollars.
What Is a Transfer Case Rebuild and How Does It Differ from a Replacement?
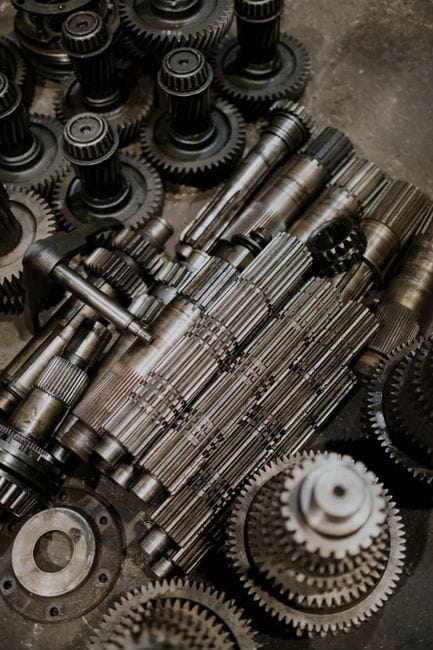
Think of the transfer case as the middleman of your drivetrain. In four-wheel drive and all-wheel drive vehicles, it sits between the transmission and the front and rear axles. Its job is to split engine power between those axles. When it fails, you lose traction control, hear grinding noises, or find yourself stuck entirely.
A transfer case rebuild means disassembling the unit, replacing worn internal parts like bearings, seals, chains, and gears, then reassembling it with fresh fluid. A transfer case replacement swaps the entire unit for a new, remanufactured, or used one. The distinction matters because a rebuild is often cheaper but requires more labor skill, while a replacement is faster but costs more for the part itself.
The Transfer Case’s Role in Your Drivetrain
Your drivetrain component lineup includes the engine, transmission, driveshafts, axles, and the transfer case. In a part-time 4WD system, the transfer case lets you shift between two-wheel drive and four-wheel drive. In full-time AWD systems, it continuously manages power distribution. Without it, your front and rear wheels would fight each other instead of working together.
When the transfer case wears out, the symptoms often mimic other drivetrain problems — vibration, clunking, or fluid leaks. That’s why understanding this component is step one before you decide on a repair path. If you’re also addressing stopping power during a major drivetrain overhaul, check out our brake system upgrade guide to keep the whole vehicle balanced.
Rebuild vs. Replace: What Each Option Actually Involves
A rebuild is a mechanical refresh. You pull the transfer case, open it up, inspect every bearing and gear, and replace what’s worn. This requires a workbench, specialty tools like snap ring pliers and a press, and a service manual with torque specs. It also demands patience — the first rebuild typically takes a full weekend.
A replacement is simpler in concept: unbolt the old unit, bolt in a new one. But “simple” doesn’t mean “cheap.” A remanufactured transfer case can cost several times more than a rebuild kit. And a used unit carries unknown wear history — you might inherit someone else’s problem. The right choice depends on the case’s condition, your skill level, and your budget, which we’ll break down in the cost section below.
Top Picks


7 Warning Signs Your Transfer Case Needs a Rebuild
Your transfer case rarely fails without warning. It gives you signals — you just have to know what to listen for. Catching transfer case problems early can save you hundreds of dollars, because a small bearing failure often turns into a full gear case replacement if ignored. Here are the seven signs that point to a rebuild.
Noises That Mean Trouble (Whining, Grinding, Clunking)
Transfer case noise is the most common early indicator. A whine that changes with vehicle speed — not engine RPM — usually points to worn bearings or gears. Grinding during shifts suggests syncro or clutch pack wear. A clunk when shifting from 2WD to 4WD can be normal on some trucks, but a clunk that happens during turns or acceleration means slack in the drivetrain that a rebuild would address.
Pay attention to *when* the noise happens. If it appears only in 4WD, the problem is likely inside the transfer case. If it happens in 2WD too, you could be looking at a differential or driveshaft issue instead. One long-term owner of a 2005 Silverado reported a low whine at highway speeds that he dismissed for months — until the chain snapped and took the case housing with it. Don’t make that mistake.
Noise Timing Matters
Whining in 4WD only = transfer case bearings or chain. Whining in all modes = check the transmission and differentials first. Clunking on throttle tip-in = chain stretch or gear lash.
Fluid Leaks and Low Fluid Levels
A transfer case fluid leak is the most preventable cause of catastrophic failure. The case has seals at the input shaft, output shafts, and the shift shaft. When these seals age, they drip — often onto the crossmember or exhaust, where it burns off and leaves a smell. You might not see a puddle; you’ll see a thin film of oil on the underside of the case.
Low fluid means inadequate lubrication. Gears run hot, bearings score, and the chain stretches. If you catch a leak early, replacing a $15 seal beats a $600 rebuild kit. Check your fluid level every oil change if you off-road regularly. If you find metal shavings on the drain plug magnet, that’s confirmation that internal wear is already happening.
Shifting Difficulties and Warning Lights
Difficulty engaging 4WD — or a delay between selecting 4WD and it actually engaging — points to internal wear. On electronic shift cases, this could also be a faulty encoder motor or position sensor. The check engine light or a dedicated 4WD warning light can illuminate when the system detects a mismatch between the commanded shift and the actual gear position. If the light comes on, scan for codes before you tear anything apart. A failing shift motor is a $200 fix; a rebuild won’t solve that.
Vibration deserves a mention here. If you feel a shudder that vanishes when you shift to neutral, the transfer case chain or bearings are likely the source. This is different from a tire balance issue, which doesn’t change with gear position. If you’re chasing drivetrain vibrations, also verify your brake components — a dragging caliper can mimic a transfer case problem. See our guide on [brake lights not working](https://example.com/brake-lights-not-working) for related electrical diagnosis.
The key takeaway: none of these symptoms alone guarantees a rebuild. But two or more together make a strong case. When you spot them, check the fluid level first — it’s free and takes five minutes. If the fluid is low or smells burnt, you’ve found your culprit. From there, the anatomy section below explains exactly which internal parts wear out and why.
Transfer Case Anatomy: What Actually Wears Out Inside
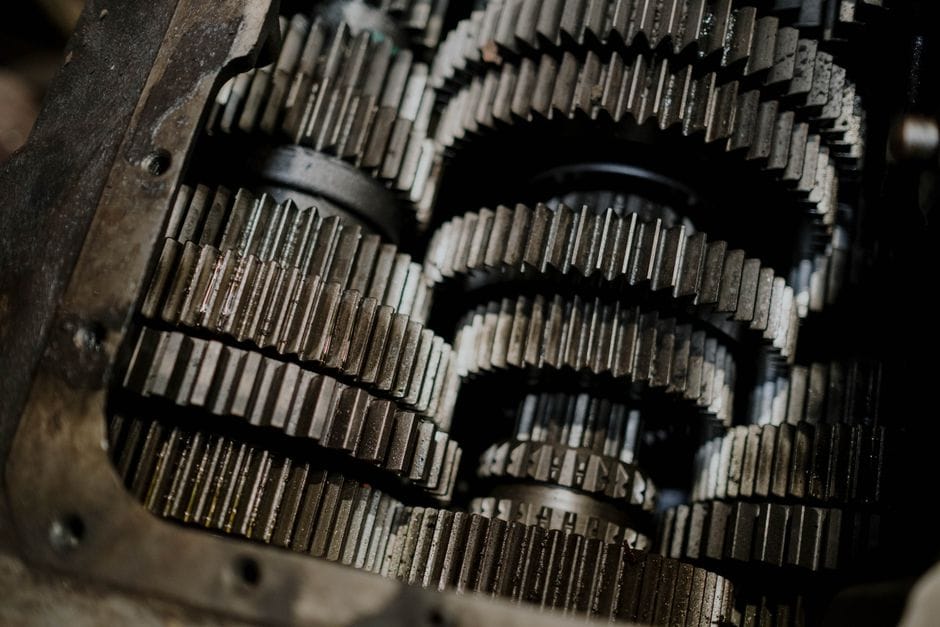
To understand what a rebuild actually fixes, you need to know what’s inside the housing. A transfer case is a gearbox that splits power between front and rear axles. It contains a few dozen moving parts, but only a handful of them wear out predictably. Knowing those parts helps you decide whether a rebuild makes sense or whether you’re throwing money at a dying unit.
Chains, Gears, and Bearings: The Mechanical Heart
Chains, Gears, and Bearings: Details
The transfer case chain is the most common wear item in chain-driven cases. It’s a heavy-duty roller chain that transfers torque from the input shaft to the output shaft. Over time, the chain stretches. A stretched chain causes a characteristic whine or vibration that changes with speed. When the chain stretches enough, it can skip teeth on the sprockets, which produces a clunking sound during acceleration or deceleration.
The transfer case bearings support the input shaft, output shafts, and the intermediate shaft. These bearings spin at engine speed or faster, and they carry the full torque load. When a bearing wears, you’ll hear a growl that gets louder as speed increases. In severe cases, a failed bearing can allow shaft movement, which wrecks the gear alignment and can destroy the entire case. Manufacturers typically rate bearings for a specific service life, but contaminated or low fluid accelerates their failure dramatically.
The gears themselves — the planetary gear sets, input gears, and output gears — are the most durable parts inside. They’re made from hardened steel and usually outlast the rest of the vehicle. Gear failure is rare unless the case runs dry or a bearing fails first. When gears do fail, you’ll see chipped or broken teeth on the drain plug magnet. If you find gear fragments, a rebuild kit won’t help — you need a replacement case or a full gear set.
Seals, Gaskets, and the Pump: Common Leak Points
Seals, Gaskets, and the Pump: Details
The transfer case seals are the second most common wear item. You’ll find seals at every shaft exit point: the front output, rear output, and the input shaft. These seals keep fluid in and dirt out. They’re made of rubber or silicone, and they harden and crack with heat and age. A leaking seal shows up as fluid spots under the vehicle, usually near the middle of the drivetrain.
The pump — specifically the oil pump in many electronic-shift cases — circulates fluid to the bearings and chain. On some designs, the pump is driven by the chain itself. When the chain stretches, pump output drops, which leads to poor lubrication and accelerated wear everywhere else. This creates a feedback loop: stretched chain → weak pump → more wear → more stretch.
Gaskets seal the case halves together. Most transfer cases use a silicone sealant rather than a paper gasket. When someone opens the case and reassembles it without proper sealant application, leaks develop at the mating surface. This is a common failure after a botched fluid change or an inspection where the case was opened unnecessarily.
Shift Fork and Actuator Wear
The shift fork slides the mode collar between 2WD, 4WD High, and 4WD Low positions. It’s a cast metal component that presses against a rotating collar. Every shift causes friction between the fork and the collar. Over hundreds of shifts, the fork wears thin and the collar grooves wear deeper. When the fork wears past spec, you get hard shifting, grinding during engagement, or the case popping out of gear under load.
On electronic-shift cases, the shift actuator (a small electric motor with a gear train) drives the fork. The motor itself can fail, but more often the plastic gears inside the actuator strip. This produces a 4WD warning light with no actual engagement. The actuator is usually serviceable separately, and replacing it is far cheaper than a full rebuild.
Wear Priority: What Fails First
Wear Priority: Details
In most transfer cases, the failure order is: seals leak first, then chain stretches, then bearings fail from low fluid, and finally gears or shift forks damage. Catching the first two stages with a rebuild is cost-effective. Catching the last stage usually means replacement is smarter.
The shift fork and actuator wear independently of the chain and bearings. You can have a perfectly healthy chain with a worn shift fork, or vice versa. That’s why a proper rebuild inspection checks every component rather than assuming one part caused all the symptoms. If you’re already dealing with drivetrain noise, also check your brake components — a worn brake pad shim can create a vibration that feels similar to bearing wear. Our [brake pad shim guide](https://example.com/brake-pad-shim-guide) explains how to tell the difference.
Understanding which parts wear inside your transfer case tells you what a rebuild kit actually contains. Most kits include the chain, all seals, new bearings, and a gasket set. If your shift fork is worn, you’ll need to order that separately. With this anatomy in mind, the next section breaks down the exact tools and parts you’ll need, plus what each component costs.
Tools, Parts, and Budget: What a Transfer Case Rebuild Really Costs
Before you commit to a rebuild, you need a clear picture of what it demands. The total transfer case rebuild cost depends on whether you supply the labor or pay a shop for it. The spread is wide — from a few hundred dollars for a DIY job to over a thousand with professional labor.
Essential Tools You’ll Need (or Need to Rent)
A transfer case rebuild is not a beginner’s first job. You’ll need a solid socket set, a torque wrench that reads in inch-pounds for small fasteners, and a bearing puller. A press is non-negotiable for removing and installing bearings on the shafts. Most home garages don’t have one, but auto parts stores rent them.
You’ll also need snap ring pliers, a soft-faced mallet, and a clean workbench. Seal drivers protect the new seals during installation — a socket of the right diameter works in a pinch. Finally, have brake cleaner and shop rags on hand. The case halves must be spotless before reassembly, or the new gasket won’t seal.
Tool Cost Reality Check
If you own nothing on this list, buying everything new can add $200–$400 to your project. Renting a bearing press costs roughly $40–$60 per day. Factor this into your transfer case rebuild cost before you start, not after.
Rebuild Kit Contents: What’s Included and What’s Not
A standard transfer case rebuild kit includes the chain, all seals, bearings, and a gasket set. Some kits add the shift fork pads or detent springs. You should confirm what’s inside before ordering, because kits vary by manufacturer.
What’s usually NOT included: the shift fork itself, the mode actuator motor, and the chain sprockets. If your sprockets have worn teeth, you’ll need to buy them separately. The same applies to the pump (in some cases) and any damaged housing. Inspect your old parts first, then order the kit plus whatever extras you identified.
Realistic Cost Breakdown: Parts, Machine Work, and Shop Labor
Realistic Cost Breakdown: Details
Here’s what a transfer case rebuild cost looks like in practice. These figures assume you’re working on a common unit like an NP231 or NVG246.
| Cost Item | DIY Price Range | Shop Price Range |
|---|---|---|
| Transfer case rebuild kit (chain, bearings, seals, gasket) | $150–$350 | $150–$350 |
| Extra parts (shift fork, sprockets, actuator) | $50–$200 | $50–$200 |
| Machine work (resurfacing case halves, if needed) | $0 (you skip it) | $50–$150 |
| Fluid and sealant | $20–$40 | $20–$40 |
| Labor (8–12 hours at $80–$120/hr) | $0 (your time) | $640–$1,440 |
| Total | $220–$590 | $910–$2,180 |
DIY Total: $220–$590
This assumes you own or rent the transfer case tools, do the inspection yourself, and don’t find catastrophic damage inside.
Shop Total: $910–$2,180
This includes professional labor and any machine work. The wide range reflects regional labor rates and whether extra parts are needed.
Hidden Costs That Sneak Up
If the housing is cracked or a shaft is scored, the rebuild stops. You’re now looking at a used case ($300–$800) or a remanufactured unit ($800–$1,500). Always budget 20% extra for surprises. If you’re working on the rear axle at the same time, check our best drum brake kit guide to avoid a second surprise visit to the parts counter.
The cost table above assumes you’ve already diagnosed the problem correctly. If you’re still unsure whether a rebuild is the right move, the next section walks through the full step-by-step transfer case rebuild process so you know exactly what you’re signing up for.
Step-by-Step Transfer Case Rebuild Process (From Bench to Install)
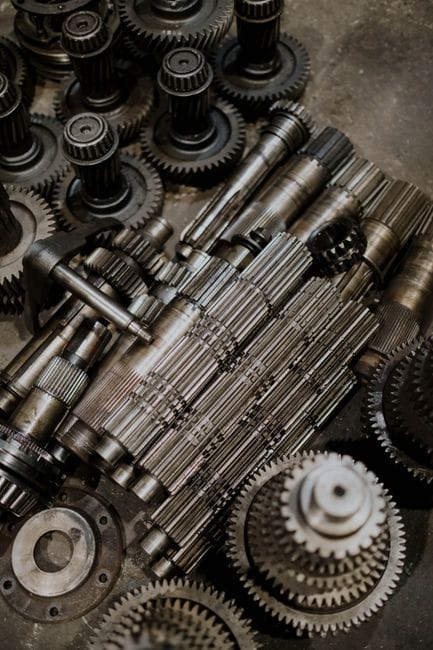
The step-by-step transfer case rebuild process follows a strict sequence: removal, disassembly, inspection, reassembly, and installation. Rushing any phase invites premature failure. Work on a clean bench, keep fasteners organized, and photograph every stage with your phone. Ten minutes of documentation now saves hours of confusion later.
Step 1: Removal and Bench Preparation
Park on level ground, chock the wheels, and disconnect the battery negative terminal. Drain the transfer case fluid into a measured container — the amount and condition (metal flakes, burnt smell) inform what you’ll find inside. Remove the driveshafts and mark their orientation with paint or tape; reusing them out of phase causes vibration. Support the transfer case with a transmission jack, remove the mounting bolts, and slide it rearward off the transmission output shaft. Some vehicles require dropping the skid plate or exhaust heat shield first. Once on the bench, drain residual fluid and wipe the exterior clean before you begin transfer case disassembly.
Step 2: Disassembly and Parts Inspection
Work from the outside in. Remove the output flanges, seals, and bearing retainers, then split the case halves. Note the position of every shim and snap ring — they set preload and end-play. As parts come out, lay them on a labeled board in the order removed. Inspect each component against the wear patterns described in the transfer case anatomy section: gear teeth for pitting, shafts for scoring, bearings for roughness when rotated by hand, and the chain for loose links or visible stretch. Compare worn parts against your rebuild kit’s contents. If the kit doesn’t include a component that’s damaged, order it before proceeding.
Step 3: Cleaning and Measuring Critical Clearances
Degrease every reusable part and let them dry completely. Measure what matters: bearing bore diameters, shaft diameters, and gear backlash. Use a dial indicator with a magnetic base for end-play readings — spec values vary by transfer case model, so consult the service manual rather than guessing. [VERIFY: end-play and backlash specifications for common transfer case models (NP231, NP246, NVG261) at time of writing] The case halves themselves need a straightedge check for warpage; minor imperfections can be addressed with sealant, but significant distortion means replacement. Clean mating surfaces with a razor blade, never a wire wheel, which removes material and changes tolerances.
Step 4: Reassembly with New Components
Lubricate bearings and seals with assembly lube or the specified transfer case fluid before installation. Press bearings squarely, never hammer them in at an angle. Install new seals with the correct driver — a socket that matches the outer diameter works. Set snap rings fully into their grooves, and confirm each shaft spins freely as it goes together. Apply a continuous, even bead of RTV sealant to the case halves, then torque them to spec in the sequence the manual dictates. Transfer case reassembly rewards patience: if a gear binds or a shaft won’t seat, stop and find the cause rather than forcing it.
Step 5: Installation, Fluid Fill, and Initial Testing
Lift the rebuilt case into position, align it with the transmission output shaft, and install the mounting bolts hand-tight before torquing. Reinstall driveshafts in their marked orientation, refill with the correct fluid type and quantity, and check for leaks before lowering the vehicle. Start the engine, shift through 2H, 4H, and 4L on level ground, and listen for whine or grinding. A short test drive confirms operation. If you’re already addressing driveline components, our how to change brake pads Chevy Silverado guide covers another common job, and our emergency brake cable replacement article handles parking brake issues that often surface alongside transfer case work.
Rebuild vs. Replace: A Decision Framework for Your Specific Situation
Choosing between a rebuild and a replacement is the most consequential decision in this entire process. The rebuild vs replace transfer case question comes down to three variables: the internal damage, the unit’s mileage, and the value of the vehicle it sits in. A rebuild makes sense when the case itself is sound and the damage is limited to wearable components. A remanufactured transfer case becomes the smarter play when the housing is cracked, the case has been run dry for extended periods, or the vehicle’s value doesn’t justify the labor hours.
When a Rebuild Makes Financial Sense
A rebuild is the right call when you have a vehicle you plan to keep for several more years and the transfer case has failed due to normal wear. Chain stretch, bearing wear, and seal failure are all addressable with a rebuild kit. If you’re doing the labor yourself, the parts cost is typically a fraction of what a remanufactured unit costs. Even with a shop doing the work, a rebuild wins financially when the case is otherwise healthy and the failure is contained to one component group.
When You Should Walk Away and Buy a Remanufactured Unit
Walk away from a rebuild when you find metal shavings throughout the case, a cracked housing, or signs that the unit ran with no fluid. These conditions mean internal components beyond the standard kit items are likely damaged. A remanufactured transfer case comes with fresh bearings, seals, chains, and gears throughout, plus a warranty that a field rebuild cannot match. When the vehicle’s value is low, a used low-mileage unit or a remanufactured exchange often makes more sense than paying a shop for rebuild labor that could exceed the truck’s worth.
Decision Matrix: Mileage, Damage Severity, and Vehicle Value
| Scenario | Vehicle Value | Damage Severity | Best Choice |
|---|---|---|---|
| High-mileage daily driver, normal wear failure | $8,000+ | Seals, chain, bearings only | Rebuild — you keep the truck, the parts pay off |
| Low-value off-roader, minor leak | Under $4,000 | Seal failure only | Rebuild — cheapest path to a working 4WD system |
| Any vehicle, run dry or full of metal shavings | Any | Housing scored, gears damaged | Remanufactured transfer case — internal damage is already too broad |
| Daily driver you plan to sell within a year | Any | Any | Remanufactured — the warranty adds resale confidence |
The core rule: rebuild for wear, replace for catastrophic damage. If you’re working on the driveline anyway and the vehicle is a keeper, a rebuild stretches your budget further. If the case has been starved of fluid or the housing is compromised, no rebuild kit will save it — a remanufactured transfer case is the only reliable path forward.
Honest Limitations: What a Transfer Case Rebuild Cannot Fix
A rebuild is not a cure-all. Knowing its limits before you start saves you from buying a kit you cannot use. The previous decision framework touched on catastrophic damage; here is what that means in practical terms.
Cracked Housings and Structural Damage
The transfer case housing is the structural backbone of the unit. It holds every bearing bore and shaft alignment in precise relation. A crack, a broken mounting ear, or a warped mating surface is not something a gasket and seal kit addresses. Welding aluminum housings is possible, but the heat distorts the bearing bores, and a warped housing will eat new bearings within a few thousand miles. If the housing is damaged, the case is scrap. No rebuild procedure restores factory tolerances to a cracked casting. Your only real option is a replacement housing (often hard to find and expensive) or a complete remanufactured unit.
Electronic Control Module (ECM) Failures
Modern transfer cases rely on sensors, solenoids, and motors that talk to the vehicle’s main computer. The transfer case ECM — the brain that shifts between 2WD, 4WD High, and 4WD Low — can fail independently of the mechanical parts. A rebuild kit does not include a new ECM, and internal mechanical work will not fix a wiring short or a failed shift motor. If your issue is a flashing 4WD light or a “service 4WD” message with no grinding noise or fluid leak, diagnose the electronics before you pull the case. Otherwise you will rebuild a perfectly good gearbox and still have the same fault. Many owners report chasing mechanical fixes for what turned out to be a corroded connector or a dead speed sensor.
When Rebuilding Is Simply Throwing Money at a Lost Cause
If the case ran dry and the gears show deep pitting or broken teeth, a rebuild is wasted effort. Bearings and seals are replaceable; gears are not always available separately, and when they are, the cost of individual gears plus labor often exceeds a remanufactured unit. The same goes for cases filled with metal shavings that have scored the shafts and bores. A rebuild kit assumes the hard parts are reusable. If they are not, you are paying for disassembly, cleaning, and reassembly of parts that should be scrapped. In those situations, a remanufactured transfer case with a warranty is the financially sound move. Rebuild for wear, never for structural or electronic failure. If you are also addressing driveline upgrades, check our brake system upgrade guide to keep the whole vehicle balanced.
Post-Rebuild Break-In, Fluid Selection, and Maintenance Schedule
The work does not end when the case is bolted back under the truck. How you treat the unit in the first few hundred miles determines whether your transfer case rebuild lasts 50,000 miles or 150,000. Skip this phase and you risk premature wear on components that were just installed correctly.
The First 500 Miles: What to Watch For
The first 500 miles are a seated-parts period, not a full-throttle test. Drive normally but avoid constant-speed highway cruising for long stretches. Vary your speed so the gears and bearings load and unload, which helps new surfaces seat evenly. Check for drips under the case after every drive during the first week — a small seep from a new seal can become a leak once heat cycles begin.
Listen for whine or growl that changes pitch with speed. A faint gear noise that fades after 200 miles is often normal seating. A noise that gets louder is not. Also cycle the 4WD system through all modes — high, low, and auto — at least five times during break-in. This circulates fluid through the clutch packs and shift forks that sat dry during assembly. If the case jumps out of gear or grinds during engagement, stop driving and recheck the shift linkage and detent springs.
Choosing the Correct Fluid Type and Viscosity
Fluid selection is where many rebuilds fail early. The transfer case fluid specification is not interchangeable with engine oil or even differential oil. Most chain-driven cases use an automatic transmission fluid (ATF) such as Dexron III or Mercon V, while gear-driven cases often require a 75W-90 gear oil. Some modern cases with wet clutches need a specific OEM fluid that costs more but prevents shudder.
Check your owner’s manual or the case manufacturer’s tag before filling. If you are unsure, [VERIFY: correct fluid spec and capacity for the specific transfer case model being rebuilt]. Do not mix fluid types — ATF and gear oil have different friction modifiers, and mixing them can cause clutch chatter or chain slip. After break-in, drain and refill with fresh fluid at 500 miles. This removes the wear particles from seating and gives you a clean baseline.
Extending the Life of Your Rebuilt Transfer Case
Transfer case maintenance is simple, but it only works if you schedule it. Change the fluid every 30,000 miles under normal driving, or every 15,000 if you tow, off-road, or drive in deep snow regularly. The fluid is the only wear indicator you have without tearing the case apart. If it comes out dark or smells burnt, investigate before you refill.
Check the breather tube annually. A clogged breather pressurizes the case, which pushes fluid past the seals — the same failure you just fixed. Also inspect the CV joints and driveshaft U-joints at each oil change; a failing joint sends vibration into the case that wears the input bearing prematurely. If you are servicing the driveline anyway, our brake grease application guide covers the correct lubricants for components that share the same work environment. And when you replace brake pads, our brake pad sensor reset guide will help you clear the warning light without a trip to the dealer.
Frequently Asked Questions About Transfer Case Rebuilds
How long does a transfer case rebuild take?
A competent DIY mechanic can complete the job in a weekend, roughly 8 to 12 hours of actual labor. That includes removal, disassembly, parts replacement, reassembly, and reinstallation. A shop will usually quote two days because they wait on parts and machine work. If you are doing it on jack stands in a driveway, add a few hours for the awkward angles and dropped bolts.
Can I rebuild a transfer case without removing it from the vehicle?
No. You must drop the transfer case to access the internal components. The case halves split along a vertical plane, and you cannot reach the chain, clutches, or bearings while the unit is bolted to the transmission. Trying to work around the crossmember and exhaust just wastes time and risks damaging the case.
How much does a transfer case rebuild cost compared to a replacement?
A rebuild kit with bearings, seals, gaskets, and a chain runs roughly $200 to $600 depending on the vehicle. A remanufactured unit typically costs $1,200 to $2,500 plus core charge. Labor adds $400 to $800 either way if you are not doing it yourself. The rebuild wins on price, but only if the case housing and shafts are still in spec. If the case is cracked or a shaft is scored, replacement is cheaper in the long run.
What causes transfer case failure in the first place?
Low fluid is the number one killer. The case loses fluid through a worn output seal, and the chain or clutches run dry until they fail. The second cause is mismatched tire sizes, which forces the clutches to slip constantly in full-time 4WD systems. The third is age: seals harden, bearings wear, and the chain stretches after 150,000 miles or more.
Is a transfer case rebuild the same as a differential rebuild?
No, they are different components with different failure modes. A differential distributes power between the left and right wheels on an axle. A transfer case splits power between the front and rear axles. The rebuild procedures share skills — bearings, shims, and seals — but the parts and specifications are entirely different.
Will a rebuilt transfer case shift as smoothly as a new one?
It should, if you replace the shift forks and detent springs while you are inside. The forks wear where they contact the shift collar, and worn forks create a vague, notchy shift feel. A complete rebuild addresses this. If you only replace the chain and seals, the shift quality stays mediocre.
Can I drive with a noisy transfer case?
Briefly, to get to a shop. A whine from the input bearing or a rattle from a stretched chain will not cause immediate catastrophic failure, but every mile grinds metal into the fluid. That debris then scores the shafts and case, turning a $400 rebuild into a $1,500 replacement. If you hear noise, stop driving and diagnose it.
If you are planning driveline work alongside your transfer case rebuild questions, check our best brake pads for performance guide. It will help you keep stopping power matched to your new traction. Owners of specific trucks should also see best brake pads for Ford F-150 for model-specific friction material recommendations. If your rebuild coincides with a brake system refresh, our best brake upgrade for street article covers rotors and calipers that pair well with a refreshed drivetrain. For those planning track days after the rebuild, best brake upgrade for track and the brake cooling guide for track address the heat management your new transfer case will have to handle. Finally, if you are converting an older truck, drum to disc brake conversion explains how to modernize stopping power alongside your driveline work.
Final Verdict: Rebuilding Your Transfer Case Is a Calculated Investment, Not a Gamble
Your transfer case is the mechanical bridge that distributes engine power to all four wheels. It is a precision assembly of gears, chains, clutches, and sensors that operates under extreme torque and heat. When it fails, you are not just losing four-wheel drive. You are risking a complete drivetrain failure that can strand you off-road or leave your daily driver immobile. The central decision is not if you should address it, but how. You need to decide whether a rebuild kit or a full replacement makes more sense for your specific situation, budget, and vehicle’s condition.
After analyzing the costs of transfer case rebuild kits, labor rates, and failure patterns across popular 4WD platforms, our top recommendation is straightforward. If your housing is intact and your vehicle has under 150,000 miles, invest in a quality rebuild kit with new bearings, seals, and a chain. It will cost you $400 to $900 in parts plus 4 to 8 hours of labor. This approach restores factory performance at roughly one-third the price of a remanufactured unit, which typically runs $1,200 to $2,500. For most owners, the rebuild path delivers the best balance of cost, reliability, and long-term value.
Use this decision framework to match your situation to the right option:
If you need maximum cost savings and have mechanical experience, choose a DIY rebuild kit. The parts alone run $300–$600, and you eliminate labor costs entirely. If you need guaranteed reliability for daily driving, choose a professional rebuild with a warranty. The labor cost of $500–$1,000 buys you peace of mind and protects against installation errors. If you need to fix a transfer case with a cracked housing, worn shift fork, or damaged internal components beyond normal wear, choose a remanufactured or used replacement. A rebuild cannot repair structural damage, and the cost of machining a damaged case often exceeds replacement value. If you drive a high-mileage vehicle (150,000+ miles) with other drivetrain wear, choose a full replacement. The additional labor to rebuild an aged unit often uncovers cascading failures that drive costs beyond the price of a swap.
We have to be honest about a critical limitation. A rebuild cannot fix a transfer case with a cracked or warped housing. No amount of new bearings, chains, or seals will restore structural integrity to a case damaged by impact, corrosion, or severe overheating. Also, if your vehicle’s transfer case uses electronic shift motors or actuators (common in modern AWD systems), those components often fail independently. They are not included in standard rebuild kits. Budget an additional $150–$400 for those parts if your symptoms point to electronic issues rather than mechanical wear.
Here’s the bottom line: Start with a proper diagnosis. If you’re hearing grinding noises, experiencing delayed engagement, or leaking fluid from the output seals, don’t ignore it — a $50 seal replacement today prevents a $2,000 replacement tomorrow. Get a professional inspection to confirm the housing is sound, then commit to the rebuild path that matches your skills, budget, and vehicle’s condition. The right decision now saves you from a stranded vehicle, a damaged drivetrain, and a much larger repair bill down the road. Take action this week — your transfer case won’t fix itself.
You might also like: best short shifter, best manual transmission fluid, best transmission cooler