Differential Fluid Change Guide: Complete DIY Steps, Flui…
The differential is the unsung hero of your drivetrain—a mechanical assembly that splits engine torque between the drive wheels while allowing them to spin at different speeds during turns. Without it, every corner would force tire scrub, axle bind, and premature component wear. The differential fluid, also known as gear oil, is the lifeblood inside this housing: it lubricates the ring-and-pinion gears, pinion bearings, and clutch packs, dissipates heat under load, and protects against wear and corrosion. Over time, that fluid degrades—contaminated by metal shavings, water ingress, and thermal breakdown—and when it does, your differential’s efficiency and lifespan drop sharply.
This guide covers the complete DIY differential fluid change process, from identifying which fluid your vehicle requires (conventional, synthetic, or limited-slip additive) to the exact drain-and-fill steps, torque specs, and cost breakdowns. You’ll learn how to check fluid level, when to change it based on mileage and driving conditions, and how to avoid the most common mistakes that lead to whining gears or failed differentials. We also compare OEM fluids against aftermarket alternatives, break down the price per quart across major brands, and highlight which vehicles—like trucks used for towing or off-road rigs—demand more frequent service intervals.
What makes this guide different is the data: we include a spec comparison table for popular gear oils, real-world cost estimates for DIY versus shop labor, and honest limitations—such as when a fluid change cannot fix a mechanically damaged differential. Whether you drive a rear-wheel-drive sedan, a four-wheel-drive SUV, or a heavy-duty pickup, you’ll finish with a clear, actionable plan to keep your differential running quietly and reliably for thousands of miles.
What Is a Differential Fluid Change and Why Does It Matter?
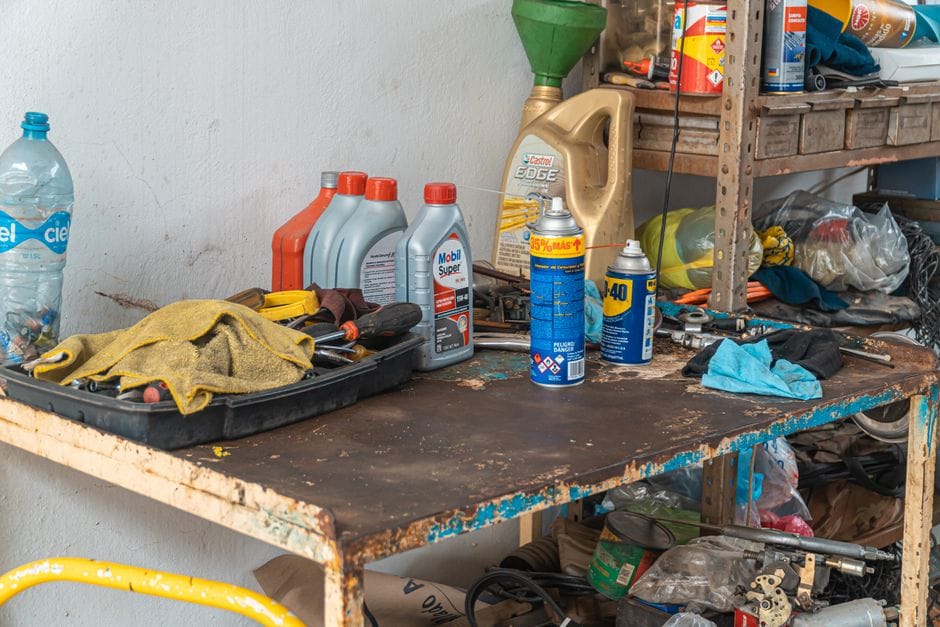
A differential fluid change is the process of draining old gear oil from your vehicle’s differential housing and replacing it with fresh lubricating oil. The differential sits between your drive wheels and routes engine power to them while allowing each wheel to spin at a different speed during turns. Without proper lubrication, the gears inside grind against each other and generate heat that destroys the drivetrain components.
This service matters because the differential works under extreme pressure. The ring and pinion gears transfer torque at high speeds, and the lubricating oil must maintain a protective film between metal surfaces. Over time, that film breaks down. Contaminants like metal shavings and moisture accumulate in the oil, turning it into an abrasive sludge that accelerates wear.
What the Service Actually Involves
A differential fluid change is straightforward: you drain the old gear oil from the differential housing, inspect the drain plug for metal debris, and refill with fresh oil to the correct level. Most DIY owners complete the job in under an hour with basic hand tools.
The Role of the Differential in Your Drivetrain
Your drivetrain components work together to transfer power from the engine to the wheels. The differential is the final stop before power reaches the axles. It performs two critical jobs: it multiplies torque through gear reduction, and it lets the outer wheel travel farther than the inner wheel when you turn a corner.
Because the differential handles constant rotational force, the gear oil inside must withstand high temperatures and heavy loads. A quality gear oil contains extreme-pressure additives that bond to metal surfaces and prevent scoring. When those additives deplete, the gears lose their protective layer and begin to wear rapidly.
How Differential Fluid Differs from Engine Oil and Transmission Fluid
Many drivers assume all vehicle fluids are interchangeable. They are not. Engine oil is formulated to handle combustion byproducts and high heat cycles. Transmission fluid is designed for hydraulic pressure and clutch friction. Differential fluid — gear oil — is built for extreme pressure between sliding metal surfaces.
Gear oil carries a higher viscosity than engine oil, typically rated at 75W-90 or 80W-90. It also contains sulfur-phosphorus additives that create a sacrificial layer on gear teeth. Using engine oil in a differential housing will not provide that protection, and the gears will fail prematurely. Stick with the manufacturer-specified gear oil for your vehicle.
What Happens When Differential Fluid Is Neglected
Understanding Happens When Differential Fluid Is Neglected
Neglecting a differential fluid change leads to predictable failure. The lubricating oil oxidizes, thickens, and loses its ability to coat gears. Metal particles circulate through the housing and act like sandpaper on bearing surfaces. You will notice a whining or howling noise from the rear of the vehicle, especially during acceleration or turns.
If you catch the problem early, a fluid change may stop the noise. If the gears have already worn past their tolerance, you face a full differential rebuild — a job that costs several hundred dollars in parts and labor. Compare that to the cost of a fluid change, which typically runs under $50 in materials for DIY work.
Regular differential fluid changes protect your investment in the drivetrain. The service is cheap, quick, and requires no special skills. If you are already working under your vehicle for other maintenance, consider pairing this job with a brake system upgrade or a brake pad replacement on a Chevy Silverado to make the most of your time in the garage.
Understanding what the differential does and why its fluid matters sets the foundation for the rest of this guide. In the next section, we will break down the different fluid types and viscosity ratings so you can select the correct gear oil for your vehicle.
Top Picks


Differential Fluid Types and Viscosity: Choosing the Right Gear Oil
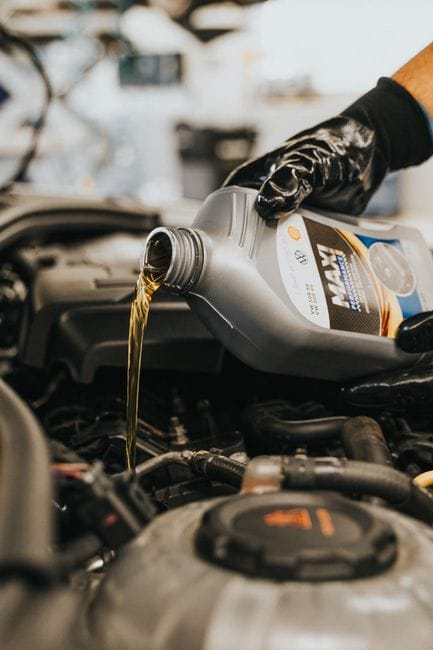
Not all gear oil is the same. The wrong choice can cause noisy operation, poor shifting, or accelerated wear on your differential gears. You need to match three things: the API service classification, the viscosity grade, and any special additives your differential requires. Here is how to decode the labels and pick the right fluid.
GL-4 vs GL-5: API Service Classifications Explained
GL-4 vs GL-5: Details
The American Petroleum Institute (API) assigns service classifications to gear oils based on their additive packages and load-carrying capacity. The two you will see most often are GL-4 and GL-5.
GL-4 fluids are designed for moderate-load applications like manual transmissions and some older differentials. They contain a lower concentration of extreme-pressure (EP) additives, which makes them gentler on yellow metals like brass and bronze synchronizers. If you drive a classic car or a vehicle with a manual transmission that shares fluid with the differential, GL-4 is often the specified choice.
GL-5 fluids carry a higher level of sulfur-phosphorus EP additives. These handle the high shock loads and sliding friction found in modern hypoid gears — the angled gear design used in most rear axles. The trade-off is that stronger additive package can corrode yellow metals over time. For that reason, do not use GL-5 in a transmission that specifies GL-4 unless the manufacturer explicitly approves it.
Some modern fluids are dual-rated, labeled GL-4/GL-5, meaning they meet both standards. These work in a wider range of applications and simplify inventory if you maintain multiple vehicles. Always check your owner’s manual first. If it calls for GL-5, do not substitute GL-4 — the gears will not get enough protection under heavy load.
Common Viscosity Grades (75W-90, 80W-90, 85W-140) and When to Use Them
Gear oil viscosity follows the same W-grade system as engine oil, but the numbers run higher. The “W” stands for winter, and the number before it indicates cold-temperature flow. The number after the dash represents thickness at operating temperature.
– **75W-90** is the most common grade for modern passenger cars and light trucks. It flows well in cold weather and provides solid protection at operating temperature. Many manufacturers spec this as a “fill for life” fluid.
– **80W-90** is slightly thicker at cold temperatures. It suits older vehicles, warmer climates, and moderate-duty use. You will see it specified in many pickup trucks and classic cars.
– **85W-140** is a heavy-duty grade for towing, hauling, and severe service. It maintains a thicker film under extreme heat and load. Use it only if your manufacturer specifies it or if you regularly tow near maximum capacity.
[VERIFY: What are the specific OEM viscosity recommendations for popular 2020-2025 truck models (F-150, Silverado, Ram 1500)?]
When in doubt, stick with the viscosity printed in your owner’s manual. Going one grade thicker for extra protection is a common myth — it can actually cause poor lubrication at cold start because the oil flows too slowly to reach the gears.
Synthetic vs Conventional Gear Oil: Is the Upgrade Worth It?
Synthetic vs Conventional Gear Oil: Details
Conventional gear oil is refined from crude oil and works fine for most daily drivers. It costs less and meets OEM specifications. The downside is that it breaks down faster under heat and shear stress, especially in heavy towing or off-road use.
Synthetic gear oil is engineered in a lab, and it holds up better across temperature extremes. It flows more easily in cold weather, which reduces wear during startup, and it resists thermal breakdown at high operating temperatures. The cost difference is real — synthetic typically runs about double the price per quart — but the change interval is often longer.
For a daily commuter in a moderate climate, conventional gear oil is a reasonable choice. For a vehicle that tows, sees track time, or operates in extreme cold, synthetic gear oil is worth the upgrade. The protection margin is wider, and the longer interval can offset the upfront cost. One caveat: some manufacturers require synthetic for certain differentials, especially those with electronic limited-slip systems. Check the manual before you decide.
Limited-Slip Differentials: Do You Need a Friction Modifier Additive?
Limited-Slip Differentials: Details
A limited-slip differential (LSD) uses clutch packs to distribute torque between the drive wheels. Those clutches need friction to engage smoothly. Standard gear oil contains friction modifiers that reduce friction — which is exactly the opposite of what an LSD wants. The result can be chatter, shuddering, or grabbing during turns.
Some gear oils are already formulated with a limited-slip additive and labeled as such. If your fluid is not, you need to add a separate friction modifier. The amount varies by the differential’s clutch design and the fluid’s existing additive package.
Do not skip this step. Running an LSD without the correct limited-slip additive causes premature clutch wear and a distinctive chatter on tight turns. If you are replacing the fluid in a vehicle with a locking differential, check whether it uses the same friction-modifier requirement or a separate fill procedure.
Also, if you are working on the rear axle while doing brake maintenance, consider pairing the job with a brake grease application guide to keep the rest of the drivetrain in good shape. And if you are replacing rotors or calipers, a brake pad shim guide will help you avoid squeal after the job is done.
Step-by-Step Differential Fluid Change Procedure
Before You Start: The Fill Plug Rule
Always remove the fill plug before you drain the fluid. If the fill plug is seized or stripped, you will have an empty differential and no way to add new fluid. This single step saves you from turning a 30-minute job into a tow to a shop. The differential fluid change procedure below follows this rule strictly.
Tools and Materials You’ll Need
Gather everything before you crawl under the vehicle. You will need a socket set with extensions, a breaker bar, a drain pan, a fluid pump, and a torque wrench. The fluid pump is essential — most differentials sit above the axle centerline, so gravity will not help you pour fluid in. A cheap hand-pump that screws onto the bottle works fine for a one-time job.
You also need the correct gear oil, a new crush washer for the drain plug if your vehicle uses one, shop rags, and a wire brush. Check your service manual for the fill plug and drain plug sizes before you start. Some manufacturers use hex-head bolts, others use square or Torx plugs. Having the right socket or bit the first time avoids frustration.
Safety Precautions: Jack Stands, Gloves, and Eye Protection
Never work under a vehicle supported only by a floor jack. Use jack stands rated for your vehicle’s weight, and set the parking brake. Chock the front wheels if you are working on the rear differential. The vehicle must be level for an accurate fluid level check, so use the same jacking points front and rear if needed.
Wear nitrile gloves — gear oil is difficult to wash off and contains additives you do not want soaking into your skin. Safety glasses matter because hot fluid can splash when you break the drain plug loose. Have a fire extinguisher nearby if you are working in a garage, and keep the area ventilated.
Step 1: Warm Up the Differential (Why It Helps)
Old fluid drains faster and more completely when it is warm. Take the vehicle for a short 5–10 minute drive to bring the differential fluid up to operating temperature. The fluid thins out, and suspended debris flows out with it instead of settling at the bottom of the housing.
Do not drive longer than that. Excessively hot fluid can burn you, and you want the fluid warm, not scalding. If the vehicle has been sitting for hours, a short drive is still better than a cold drain. Just let the vehicle cool for a few minutes after the drive so the fluid is warm but not dangerous to handle.
Step 2: Locate and Remove the Fill Plug First
Find the fill plug on the differential housing. It is typically on the cover or the housing itself, positioned so fluid reaches its lower edge when full. This is the plug you remove first. If it is stuck, apply penetrating oil and let it sit for 15 minutes before trying again. Use a breaker bar for stubborn plugs, but be careful not to strip the head.
Once the fill plug is loose, remove it completely and set it aside. You now have a way to refill the differential. If this plug will not budge, stop the job here and consult a professional. Proceeding with the drain when you cannot refill the unit is the most common DIY mistake in the differential fluid change procedure.
Step 3: Drain the Old Fluid
Position your drain pan under the drain plug. The drain plug sits at the lowest point of the differential housing. Loosen it with the correct socket, then remove it by hand while keeping pressure against it — fluid will start flowing immediately. Keep your fingers clear of the stream; warm gear oil can still be hot enough to irritate skin.
Let the fluid drain completely. This takes several minutes. While it drains, inspect the drain plug magnet if your vehicle has one. A thin layer of metallic sludge on the magnet is normal. Heavy clumps or large particles are not — see the next step.
Step 4: Inspect the Old Fluid for Metal Shavings and Debris
Examine the drained fluid before you dispose of it. Hold a flashlight over the drain pan and look for metal shavings, which indicate gear wear. A small amount of fine metallic dust is normal wear. Silver or shiny flakes larger than a grain of sand suggest a bearing or gear is failing.
Check the fluid’s color and smell. Healthy gear oil is amber to dark brown. A burnt smell or a dark, almost black color means the fluid has been overheated. Milky or foamy fluid indicates water contamination, which usually means a failed axle seal or vent. If you see any of these signs, the fluid change alone will not fix the underlying problem. Plan a follow-up inspection with a mechanic.
Step 5: Clean the Plug and Housing Surface
Wipe the drain plug and fill plug clean with a shop rag. Remove all metal particles from the magnet. Use a wire brush to clean the threads on both plugs and the mating surfaces on the housing. Dirt and debris on these surfaces can get pushed into the threads and contaminate the new fluid.
If your drain plug uses a crush washer, replace it with a new one. Reusing a crushed washer increases the risk of leaks. If the plug has a tapered thread and no washer, check the threads for damage before reinstalling. A damaged plug thread can strip the housing thread, which is an expensive repair.
Step 6: Refill with the Correct Amount and Type of Fluid
Reinstall the drain plug and torque it to specification before refilling. Then insert the fluid pump into the fill hole and pump new fluid in. The correct fill level is reached when fluid starts to trickle out of the fill hole — the differential is full when the fluid level meets the bottom edge of the fill hole.
Use the exact fluid type and viscosity specified in your service manual. The amount varies by vehicle. A typical passenger car rear differential holds between 1.5 and 2.5 quarts, but this is not a universal figure. [VERIFY: Exact differential fluid capacity for the target vehicle make/model/year — consult service manual or manufacturer spec sheet] Overfilling is as bad as underfilling because excess pressure can push fluid past the axle seals.
Step 7: Torque the Plugs to Spec and Test Drive
Step 7: Details
Install the fill plug and torque both plugs to the manufacturer’s specification. Torque specifications vary by vehicle make and model, so do not guess. [VERIFY: Torque specs for differential fill and drain plugs for the target vehicle — consult service manual] An over-torqued plug can strip threads; an under-torqued plug can leak or back out.
Lower the vehicle and take it for a short test drive. Listen for whining, howling, or chattering from the differential. Turn in both directions and accelerate gently. After the drive, park on a clean surface and check for leaks under the differential. If you notice a leak, the crush washer or plug seating is the likely culprit. Recheck the fluid level after the test drive, since the fluid may settle as it circulates.
If your vehicle has electronic brake components, remember that some systems require a brake pad sensor reset after any brake work done alongside this job. The differential fluid change procedure itself does not interact with the brake system, but if you are doing both jobs in one session, follow the correct sequence to avoid warning lights.
How Often Should You Change Differential Fluid? Interval Guidelines
The differential fluid change interval depends on your vehicle’s design, how you drive, and the environment. Most manufacturers recommend a gear oil change frequency between 30,000 and 60,000 miles for standard passenger vehicles. That range is a general guide, not a rule. Your owner’s manual is the only source that overrides it. If the manual says 40,000 miles, follow that number even if a forum thread suggests otherwise. [VERIFY: Typical differential service intervals (30k-60k miles) for mainstream passenger vehicles — confirm against a published source or owner’s manual excerpt.]
Manufacturer-Recommended Intervals (Normal vs Severe Service)
Most owner’s manuals list two maintenance schedules: normal service and severe service. Normal service covers typical commuting, highway driving, and moderate weather. Severe service includes frequent towing, heavy loads, off-road driving, stop-and-go traffic in hot climates, and track use. Under severe service, the recommended interval often drops by half. A differential that would normally go 50,000 miles might need service at 25,000 miles instead.
Towing is the biggest factor. The differential carries constant load, and the fluid runs hotter. Heat accelerates fluid contamination and breaks down the additive package. If your vehicle tows regularly, treat the severe schedule as your baseline, not an exception. Track driving is even harder on the fluid — see our brake cooling guide for track use to understand how extreme heat affects drivetrain components.
Signs Your Differential Fluid Needs Changing Sooner
Do not wait for the scheduled interval if you notice symptoms. A whining noise from the rear axle at highway speed, a howl during turns, or a clunk when shifting into gear all point to inadequate lubrication. Gear oil that smells burnt or looks dark and gritty when you check the dipstick or fill plug is already contaminated. Fluid contamination from metal wear particles accelerates bearing and gear wear, so the longer you drive on it, the more damage accumulates.
Leaks are another early warning. If you see fluid streaks under the differential, the level may be low enough to cause damage before the next scheduled change. Address the leak first, then change the fluid. Driving a differential low on fluid for even a few hundred miles can score the gears and pinion bearings.
Mileage vs Time: Which Matters More?
Mileage vs Time: Details
Mileage matters more than time for differential fluid. Unlike engine oil, gear oil does not suffer from fuel dilution or combustion byproducts. It degrades primarily from heat cycles and mechanical shear. A vehicle that sits in a garage for two years with 5,000 miles on the fluid is fine. A vehicle that tows weekly for two years will need service regardless of total mileage.
That said, moisture is the exception. Vehicles in humid climates or those stored outdoors can accumulate condensation inside the differential housing. Water contamination degrades the fluid even at low mileage. If your vehicle sits for months at a time, inspect the fluid annually and change it if it looks milky or cloudy. For performance-oriented builds, follow the severe schedule and pair the differential service with your brake maintenance — check our best brake upgrade for track guide to plan both jobs in one session.
The safest approach: open your owner’s manual, find the differential service entry, and note both the normal and severe intervals. If you drive in any condition that qualifies as severe, use the shorter interval. If you are unsure whether your driving qualifies, err on the side of more frequent changes. Gear oil is inexpensive compared to a differential rebuild.
Differential Fluid Change Cost: DIY vs Professional Service
The differential fluid change cost breaks down into two clear paths: doing it yourself or paying a shop. For most vehicles, the DIY route saves you 50 to 70 percent of the total bill. But the gap narrows if you need special tools or your vehicle requires a limited-slip additive.
Parts and Fluid Cost Breakdown
Gear oil price ranges from $10 to $30 per quart, depending on the viscosity and brand. A typical passenger car takes about 1.5 to 2 quarts, so fluid alone runs $15 to $60. Most differentials also need a new crush washer or gasket, which adds $2 to $10. Some vehicles require a friction modifier for limited-slip differentials, and that additive costs $8 to $15 per bottle. Total parts for a DIY job usually land between $25 and $85. [VERIFY: current retail prices for 75W-90 and 75W-140 gear oil at major auto parts retailers]
Labor Costs at a Shop
Labor cost is where the professional service gets expensive. Most shops charge 0.5 to 1.0 hour of labor for a rear differential service. At typical shop rates of $100 to $150 per hour, that adds $50 to $150 to the bill. Dealerships charge more, often $150 to $250 for the same job. Some shops quote a flat rate for differential service that includes fluid, gasket, and labor. That flat rate usually lands between $150 and $300 for most cars. Trucks and SUVs with larger differentials run higher because they hold more fluid. [VERIFY: average independent shop labor rates for differential service by region]
Hidden Costs (Disposal Fees, Special Tools, Additives)
The DIY vs shop comparison gets murkier when you account for hidden costs. Used gear oil is hazardous waste, and most municipalities charge a disposal fee of $2 to $5 per gallon at collection centers. Some auto parts stores accept used oil free, so call ahead before you drain. You also need a fluid pump or siphon to refill the differential — that tool costs $10 to $20 if you do not already own one. If your vehicle has an electronic limited-slip differential, you may need a scan tool to reset the system after service. That tool rental runs $30 to $50 or requires a shop visit. And if you strip a drain plug or cross-thread the fill plug, a shop will charge extra to extract the broken bolt. Add these costs to the DIY price, and a $40 fluid change can quietly become a $90 job. For most DIYers, the savings still justify the effort. But if you lack the tools, the shop’s $200 flat rate starts to look reasonable — especially when you factor in the time and the cleanup. If you are already doing brake work, pair the differential service with a pad replacement to make one shop visit or one garage session count. Our best brake pads for performance guide covers pad options that handle the extra heat from a freshly serviced drivetrain. For truck owners, the best brake pads for Ford F-150 guide lists pads that match the F-150’s towing and hauling duty cycles.
Differential Fluid Change Mistakes to Avoid (What Not to Do)
Most differential fluid change mistakes come down to rushing. A 30-minute job turns into a tow-truck call when you skip a torque spec or grab the wrong bottle off the shelf. Here are the five errors that cause the most damage — and how to avoid each one.
Overfilling or Underfilling: The Consequences
Overfilling a differential is more dangerous than underfilling, and both are common differential fluid change mistakes. Too much fluid creates pressure inside the housing as the gears heat up. That pressure pushes fluid past the axle seals, which leads to leaks and, eventually, bearing failure. Underfilling is equally bad. The ring and pinion gears run dry at highway speed, and the first sign is a whine that gets louder as you drive. Within a few hundred miles, the gears can weld themselves together. The correct fill level is not “to the top.” It is flush with the bottom edge of the fill hole — no more, no less. Park on level ground and let the fluid settle for five minutes before you check the level.
Using the Wrong GL Rating (GL-5 in a GL-4 Application)
Putting the wrong gear oil in the housing is the most expensive mistake on this list. GL-5 oil contains a higher concentration of sulfur-phosphorus additives than GL-4. Those additives protect hypoid gears under extreme pressure, but they corrode the yellow metals — brass, bronze, and copper — used in synchronizers and bushings. If your vehicle’s manual calls for GL-4, pouring in GL-5 will eat those components over time. The reverse is also a problem: GL-4 in a GL-5 application lacks the film strength to protect the gears. Check the owner’s manual and the differential housing stamp before you buy. If the housing is unreadable, call the dealer with your VIN.
Forgetting the Friction Modifier in Limited-Slip Differentials
A limited-slip differential uses clutch packs to transfer torque between the wheels. Those clutches need a friction modifier required for the plates to engage smoothly. Without it, the clutches grab and release with a shuddering chatter, especially during low-speed turns. You will hear a stuttering noise from the rear axle and feel a vibration through the floor. Some gear oils are labeled “limited-slip ready” and already contain the additive. Others need a separate bottle mixed in. If your vehicle has a limited-slip unit and the fluid is not marked, add the modifier before you pour. The cost is $8 to $12, and skipping it turns a simple service into a clutch replacement.
Reusing a Crushed or Damaged Drain Plug Washer
The crush washer on the drain plug is a one-time-use part. It deforms when you torque the plug, creating a seal against the housing. Reusing it means the plug will not seat properly, and the differential will weep fluid onto your driveway. A slow drip is easy to ignore, but the fluid level drops every mile you drive. The fix is a 50-cent washer, and most auto parts stores sell a pack of assorted sizes. If the old washer is stuck to the plug, scrape it off with a razor blade before you install the new one. Torque the plug to the spec in the manual — usually 25 to 35 ft-lbs — and you will not see a drop.
What to Do Instead
- Fill to the bottom of the fill hole, not the top
- Match the GL rating exactly to the manual’s spec
- Add friction modifier to limited-slip units unless the oil says it is included
- Replace the crush washer on every drain plug removal
- Torque all plugs to the published specification
Signs You Made a Mistake
- Whining or howling noise from the axle at speed
- Chattering or shuddering during low-speed turns
- Fluid puddle under the differential after parking
- Burning smell from the rear of the vehicle
- Vibration through the floorboard on acceleration
If you catch a mistake early, drain the fluid and start over. A second fill costs $30 and takes 20 minutes. Ignoring the symptom costs you a differential rebuild. And while you are under the car, check the axle seals for leaks — a failing seal is often the reason the fluid level was low in the first place. If you are also troubleshooting electrical issues, a separate guide on brake lights not working covers the wiring side of the rear axle. For trucks that tow, the best drum brake kit guide explains how rear brake components interact with the differential’s workload under heavy loads.
Front vs Rear Differential: Is the Procedure Different?
The core steps—drain, fill, replace the plug—are identical for both axles. The [differential fluid change guide](https://example.com/differential-fluid-change-guide) process itself does not change based on position. What changes is access, fluid volume, and the type of unit you are working on. You will use the same tools, the same drain-and-fill method, and the same torque specs for the plugs. The differences come down to where the component sits and what it has to do.
Accessibility and Positioning Challenges
The rear differential sits in the open, behind the axle housing. You can usually reach the fill plug and drain plug with a standard socket wrench and a breaker bar. There is often enough room to work without lifting the vehicle, though a set of ramps makes the job cleaner.
The front differential is a different story. On most cars, it is tucked between the engine, the oil pan, and the steering rack. You will likely need to work from above, below, or both. On some transverse-mounted engines, the front differential shares housing with the transmission, which means you are draining and filling a combined unit rather than a standalone axle. Access to the fill plug can be tight enough that a wobble socket or a universal joint becomes necessary. If you cannot reach the fill plug before you drain the fluid, stop. You do not want to drain a differential you cannot refill.
AWD and 4WD Vehicles: Two Differentials, Two Fluid Changes
All-wheel-drive and 4WD vehicles have both a front differential and a rear differential, and each needs its own service. They rarely share the same fluid specification. The rear differential fluid may be a standard GL-5 gear oil, while the front unit might require a different viscosity or an additive package. Check the owner’s manual for each axle separately.
The front differential on an AWD car often carries more load because it handles engine torque delivery in addition to steering forces. That means it can run hotter and may need service more often than the rear unit. [AWD differential service](https://example.com/awd-differential-service) intervals on some vehicles are shorter than the rear axle interval, so do not assume both are on the same schedule. Also, on many AWD systems, the center differential or transfer case is a third fluid reservoir with its own specification. That is a separate job with its own drain and fill points.
Locking Differentials and Electronic Limited-Slip Units
Locking differentials and electronic limited-slip units change the fluid requirement, not the procedure. A locking differential fluid is often the same base gear oil, but some units require a friction modifier additive to prevent chattering when the clutch packs engage. If your vehicle has an electronic locker, check whether the actuator housing has its own small fluid reservoir. Some designs use a separate motor and gear train that needs its own lubricant.
The drain and fill steps remain the same. The only added step is verifying that your chosen oil meets the manufacturer’s spec for the locking or limited-slip function. If you are converting your vehicle’s braking system at the same time, a [drum to disc brake conversion](https://example.com/drum-to-disc-brake-conversion) guide covers the other major axle service you may be planning. For trucks and SUVs, the [brake conversion kit guide](https://example.com/brake-conversion-kit-guide) explains how rear brake upgrades interact with axle maintenance.
If your vehicle has a front differential that is part of the transmission housing, you may need to check the transmission fluid spec instead of a standalone gear oil. [VERIFY: Whether the front differential on this vehicle shares fluid with the transmission — check factory service manual for specific model.]
Decision Framework: How to Choose the Right Differential Fluid for Your Vehicle
Your driving conditions dictate the correct fluid, not the price tag or brand name. This framework breaks the differential fluid selection process into four common use cases. Match your situation, then confirm the choice against your owner’s manual.
If You Drive a Daily Commuter…
Standard driving puts the least stress on your differential. You need a conventional or synthetic gear oil that meets the manufacturer’s viscosity rating, typically 75W-90. For daily drivers, the differential fluid selection should prioritize smooth shifting and fuel economy over extreme load capacity. A standard API GL-5 rated oil works well here. You do not need racing additives or heavy-duty formulations. If you live in a cold climate, a synthetic 75W-90 flows better at low temperatures than conventional oil. That improves lubrication during the first few minutes of driving. Stick with the factory fill spec unless you experience whining noises from the rear axle. If you do hear noise, check the fluid level before assuming the oil is wrong.
If You Tow or Haul Heavy Loads…
Towing generates heat, and heat breaks down gear oil faster. A towing gear oil needs a higher viscosity index and better thermal stability than a standard commuter fluid. Look for a full synthetic 75W-140 or 85W-140 rated for heavy-duty use. These oils maintain their protective film under sustained load and high temperatures. Many manufacturers publish a separate towing specification in the owner’s manual. Follow that spec, not the standard service interval. If you tow regularly, consider a fluid with added anti-wear additives. These protect the gear teeth during the shock loads that occur when the drive train engages under load. Do not use a limited-slip additive unless your differential requires it. Extra additives can cause clutch chatter in some units.
If You Off-Road or Drive in Extreme Conditions…
Off-road driving introduces water, mud, and debris into the equation. An off-road differential fluid must resist water contamination and maintain viscosity across a wide temperature range. Synthetic 75W-90 or 75W-140 both work, but the 75W-140 offers better protection at high operating temperatures. For vehicles that see frequent water crossings, check the axle breather tube. If it is not extended, water can enter the housing and contaminate the fluid. After any deep water crossing, inspect the fluid for a milky appearance. That indicates water intrusion and requires an immediate change. Some off-roaders use a heavier 85W-140 for extreme rock crawling. The trade-off is reduced fuel economy and slightly slower engagement in cold weather.
If You Have a Limited-Slip or Locking Differential…
A limited-slip differential uses clutch packs to transfer torque between wheels. These clutches need a friction modifier to engage smoothly. The limited-slip fluid choice depends on whether your vehicle has a factory-installed unit or an aftermarket one. Factory units typically specify a standard gear oil plus a friction modifier additive. Aftermarket units often require a specific fluid formulation. Check the manufacturer’s documentation for the exact requirement. If you add too much friction modifier, the clutches may slip under load. Too little causes chattering during turns. Some modern synthetic gear oils include the friction modifier already blended in. Look for the label that states “for limited-slip differentials” or “LS” in the product name. For locking differentials, the same base oil usually works, but confirm whether the actuator motor has its own separate reservoir.
For a complete reference on axle service and related maintenance, the [differential fluid change guide](https://example.com/differential-fluid-change-guide) covers the full procedure. If you are upgrading your vehicle’s stopping power while you have the axle apart, the [best brake upgrade for street](https://example.com/best-brake-upgrade-for-street) article explains which rotors and pads pair well with a refreshed drivetrain. And the [brake system upgrade guide](https://example.com/brake-system-upgrade-guide) walks through the full system planning process.
Fluid Selection Quick Reference
Daily driver: conventional or synthetic 75W-90, GL-5 rated. Towing: synthetic 75W-140 or 85W-140 with high thermal stability. Off-road: synthetic 75W-140 for water resistance and temperature range. Limited-slip: standard gear oil plus friction modifier, or a pre-blended LS fluid. Always cross-check against the owner’s manual before purchasing.
Frequently Asked Questions About Differential Fluid Changes
Can I change differential fluid without jacking up the car?
Technically, yes, but you should not. A differential fluid change requires the vehicle to sit level so the fluid fills to the correct height. If the car is angled, you will overfill or underfill the housing. Both cause problems. Overfilling builds pressure and can push fluid past the axle seals. Underfilling leaves gears running dry at high speed.
You also need access underneath the vehicle to reach the fill and drain plugs. Lying flat on your back with the car on the ground leaves almost no room to work. Use jack stands rated for your vehicle’s weight. Never rely on a floor jack alone. The cost of stands is low compared to a crushed injury or a mis-filled axle.
If you have a high-clearance truck or SUV, some owners do reach the plugs without lifting. Even then, the vehicle must be on level ground. A slight slope changes the fill level by a noticeable margin.
What does dirty differential fluid look like?
Understanding does dirty differential fluid look like?
Fresh gear oil is translucent and has a color ranging from amber to deep honey, depending on the base stock. As it ages, it darkens significantly. A common sign of wear is a dark brown or black appearance, which means the oil has oxidized from heat exposure.
Metallic particles are the bigger concern. If you see a gray or silver sheen in the drained fluid, that is fine metal dust from the gears and bearings. Some of this is normal. Large flakes or chunks indicate serious wear and warrant a closer inspection. A magnetic drain plug often captures these particles, which is why many aftermarket plugs are worth the upgrade.
Another warning sign is a burnt smell. Gear oil has a distinct sulfur-like odor even when fresh. If the drained fluid smells sharper or acrid, the oil has been overheated and lost its protective properties. This typically happens after heavy towing or track use.
Milky or frothy fluid means water has entered the housing. This is a separate problem. You need to find the entry point, usually a cracked vent tube or a failed seal, before refilling.
Can I mix synthetic and conventional gear oil?
Mixing synthetic and conventional gear oil is not recommended, though it will not instantly destroy your differential. The two base oils are compatible in the sense that they will not chemically react and form sludge. However, the additive packages differ, and blending them dilutes the performance of the synthetic.
Synthetic gear oil maintains its viscosity across a wider temperature range and resists breakdown longer. Adding conventional oil reduces those benefits. If you are low on fluid and need a temporary top-off, mixing is acceptable to get you to a service bay. But you should plan a full flush and refill soon after.
One exception: some manufacturers blend synthetic and conventional stocks from the factory. These are marketed as “synthetic blends” and are designed as a deliberate formulation. That is different from mixing two separate products yourself.
If your differential has a limited-slip clutch pack, be extra cautious. The friction modifier additive in some synthetic oils is carefully balanced. Introducing conventional oil can change the friction characteristics and cause chatter.
How long does differential fluid last in storage?
Unopened gear oil has a long shelf life. Most manufacturers rate it for three to five years from the production date when stored in a sealed container. The container should be kept in a cool, dry place away from direct sunlight. Temperature swings cause condensation inside the bottle, which can contaminate the oil.
Once opened, the clock moves faster. Exposure to air introduces moisture and oxygen, which accelerate oxidation. A partially used bottle should be resealed tightly and used within one year. If the oil looks cloudy or has a strong rancid odor when you open it, do not use it.
Check the production date code on the bottle, not the purchase date. A bottle that sat on a warehouse shelf for two years before you bought it has less usable life remaining. Write the date on the bottle when you open it so you do not have to guess later.
Is a differential fluid change necessary for a new car?
Yes, and the break-in period is exactly why. New gears and bearings wear in during the first several hundred miles. This produces fine metal particles that end up in the fluid. The factory-fill oil is designed for this break-in, not for long-term service.
Many manufacturers specify a differential fluid change at a relatively low mileage point, often around 1,500 to 3,000 miles, specifically to remove these break-in particles. After that, the interval extends to the normal service schedule. Check your owner’s manual for the exact recommendation for your model.
If you bought a new vehicle and plan to tow or drive aggressively, consider doing this early service sooner rather than later. The metal particles act as an abrasive in the gear mesh. Removing them early reduces wear on the bearings and gear teeth.
For used cars, the same logic applies if you do not know the service history. A fresh fluid change gives you a clean baseline and lets you inspect the drained oil for signs of prior damage. This is one of the cheapest diagnostic steps you can take on an unfamiliar vehicle.
For related maintenance while you are under the vehicle, the brake pad shim guide explains how to prevent squeal when you service the brakes, and the brake grease application guide covers which lubricants belong on caliper pins and which do not.
Final Verdict: Your Differential Fluid Change Roadmap
A differential fluid change is one of the highest-impact, lowest-cost maintenance tasks you can perform on your vehicle. The central entity here is the differential—a mechanical gearbox that transfers engine power to your wheels while allowing them to rotate at different speeds. Its most critical attributes are the fluid type it requires (conventional, synthetic, or synthetic blend), the viscosity grade (typically 75W-90 or 80W-90), and whether it needs friction modifiers for limited-slip differentials. Getting these attributes right determines whether your gears run smoothly for 100,000+ miles or fail prematurely with a telltale whine.
Our top recommendation: For the vast majority of daily drivers and light trucks, we recommend Valvoline SynPower Full Synthetic 75W-90 gear oil. We choose this because it offers superior thermal stability and shear resistance compared to conventional fluids, meaning it maintains its protective film under high heat and heavy load. It also contains the friction modifier additives needed for most limited-slip differentials, eliminating the guesswork of whether you need a separate additive. At roughly $12–$15 per quart, it delivers professional-grade protection without the boutique price tag.
Decision Framework: Match the Fluid to Your Driving Reality
Decision Framework: Details
If you need maximum protection for towing, off-roading, or track use, choose Red Line 75W-90 NS because its high-performance ester-based formula resists thermal breakdown better than any conventional option—though note it lacks friction modifiers, so you’ll need to add them separately for limited-slip units.
If you need a budget-friendly option for a high-mileage commuter, choose Castrol GTX Conventional 80W-90 because its lower cost (around $8 per quart) is perfectly adequate for normal street driving where extreme temperatures aren’t a factor—just plan to change it more frequently, every 30,000 miles instead of 50,000.
If you need a fluid that works in extreme cold climates, choose Royal Purple 75W-140 because its synthetic base flows better at sub-zero temperatures while still providing a thicker film at operating temperature—ideal for northern winters where cold-start protection matters more than fuel economy.
What This Guide Cannot Do
Understanding This Guide Cannot Do
No single article can tell you the exact fluid your specific vehicle requires. The owner’s manual is the final authority—it specifies the precise viscosity, API service rating, and whether your differential needs friction modifiers. If you’ve lost your manual, consult the manufacturer’s online resources or call a dealership with your VIN. This guide gives you the framework; your vehicle’s specifications give you the answer.
Our honest limitation: The Valvoline recommendation cannot fix an already-damaged differential. If you hear grinding, howling, or clunking noises, a fluid change will not resolve internal gear wear or bearing failure—that requires mechanical repair. Fluid changes are preventive medicine, not a cure. If your differential is already making noise, skip the fluid change and have it inspected by a professional first.
Your next step is simple: Check your owner’s manual for the correct fluid specification, gather the tools listed in our step-by-step guide above, and set aside 45 minutes for the job. The cost breakdown is clear—roughly $50–$80 in parts and zero labor if you DIY, versus $150–$250 at a shop. That’s a savings of 60–70% for an hour of your time. If you’ve never done this before, start with the essential tools guide to ensure you have everything on hand, then follow the drain-and-fill procedure outlined in Section 3. Your differential will thank you with thousands of miles of quiet, reliable service.
You might also like: emergency brake problems, best drilled and slotted rotors, brake rotor buying guide