brake pad glazing
Brake Pad Glazing: Causes, Fixes, and How to Prevent It
Brake pad glazing is the formation of a hard, glassy, crystalline layer on the friction surface of a brake pad. This occurs when the pad material is heated beyond its designed operating temperature, causing the resin binders to melt, spread, and then re-harden into a smooth, shiny deposit. The result is a pad that cannot generate the necessary friction coefficient to stop your vehicle effectively, often accompanied by a characteristic squealing or grinding noise and a noticeable loss of braking power.
This condition is not a manufacturing defect; it is a symptom of how the braking system is being used. Understanding the key attributes of glazing—its causes, the visual and auditory signs, and the mechanical remedies—is essential for any driver, DIY mechanic, or professional technician. The fix can range from a simple surface sanding to a complete pad and rotor replacement, depending on the severity of the deposit and the condition of the rotor. This article will break down the exact conditions that trigger glazing, provide a clear diagnostic process to confirm it, and offer a step-by-step guide to restore your brakes to full performance.
Unlike generic brake guides, this article focuses on the material science behind the glaze, the specific temperature thresholds that cause it, and the honest limitations of home remedies versus professional resurfacing. You will learn not just how to fix a glazed pad, but how to adjust your driving habits and component selection to prevent the problem from recurring. We will also cover the critical difference between light glazing, which is recoverable, and deep thermal degradation, which requires component replacement for safety.
What Is Brake Pad Glazing?
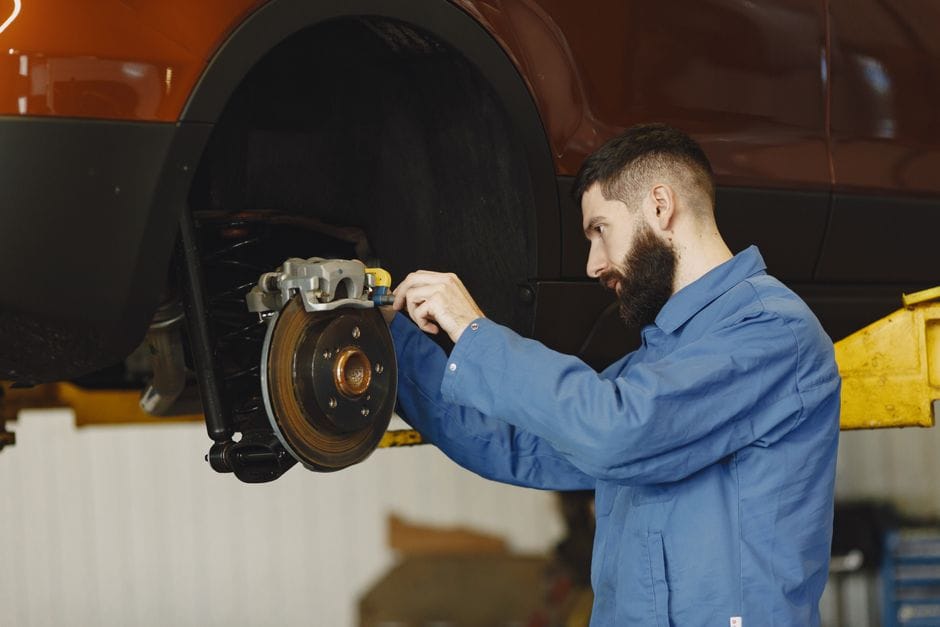
Brake pad glazing is a condition where the surface of your brake pads becomes hard, smooth, and shiny from excessive heat. Instead of providing strong friction to stop your vehicle, a glazed pad acts more like glass sliding against the rotor. The result is reduced stopping power, longer braking distances, and often a persistent squealing noise that standard pad compounds cannot eliminate.
Glazing happens to the **friction material** itself. When brake pads get too hot, the resin binders that hold the pad compound together begin to melt and flow across the surface. As this material cools, it re-hardens into a smooth, crystallized surface rather than the rough, porous texture a functional pad needs. Once that crystallized layer forms, the pad loses its ability to generate the friction needed to slow your car effectively.
Why Glazing
Why does this matter? Because a glazed pad is a safety hazard. The friction coefficient can drop by as much as 30-50% compared to a healthy pad, meaning your vehicle will take significantly longer to stop. This is especially dangerous in emergency braking situations where every foot of stopping distance counts.
The Science Behind Glazing: How Heat Transforms Friction Material
Brake pads are composite materials made of fibers, fillers, and friction modifiers held together by a heat-cured resin binder. Under normal operating conditions, this binder maintains its structural integrity, providing a rough surface that grips the rotor. However, when the pad surface temperature exceeds approximately 400-500°F (200-260°C) for organic and semi-metallic pads, or 600°F+ for ceramic pads, the resin begins to soften and flow. At these temperatures, the binder migrates to the surface, filling the microscopic pores and valleys that create friction. When the system cools, this flowed resin hardens into a smooth, glass-like film—the glaze.
This transformation is not merely cosmetic. The crystallized surface has a much lower coefficient of friction than the original pad material. It also creates a thermal barrier that prevents heat from dissipating effectively, leading to a vicious cycle: the glazed surface generates more heat, which further hardens the glaze, making the problem progressively worse.
Glazing vs. Brake Fade: Understanding the Difference
Glazing vs. Brake Fade: Details
Brake pad glazing and brake fade are often confused, but they are distinct phenomena. Brake fade is a temporary loss of braking power that occurs when the brake system overheats, causing the brake fluid to boil or the pad material to lose friction temporarily. Once the system cools down, braking performance returns to normal. Glazing, on the other hand, is a permanent physical change to the pad surface. A glazed pad does not recover its friction properties simply by cooling down; it requires mechanical intervention (sanding, resurfacing, or replacement) to restore performance.
In practice, the two conditions often occur together. Severe overheating can cause both fade (during the event) and glazing (as a lasting consequence). Understanding the difference is critical for diagnosis: if your brakes feel weak only after heavy use but recover after cooling, you are experiencing fade. If the weakness persists even after the system cools, glazing is the likely culprit.
The Root Causes of Brake Pad Glazing
Overheating: The Primary Culprit
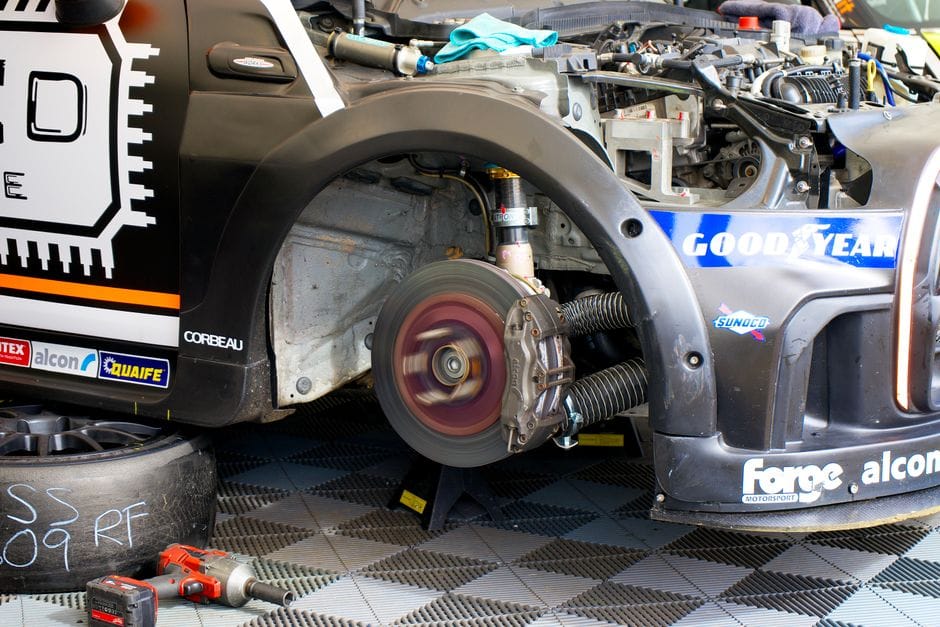
Overheating is the single most common cause of brake pad glazing. This can happen in several scenarios: descending a long, steep mountain grade while riding the brakes; repeated hard stops from high speeds (such as aggressive driving on a track or in heavy traffic); or towing a heavy trailer that exceeds the vehicle’s braking capacity. In each case, the brake pads are subjected to sustained or repeated temperatures beyond their design limits, causing the resin binder to melt and re-harden into a glaze.
The temperature threshold for glazing varies by pad compound. Organic pads are most susceptible, glazing at temperatures above 400°F. Semi-metallic pads can withstand slightly higher temperatures (around 500-600°F) before glazing, while ceramic pads are the most heat-resistant, typically glazing only above 600°F. However, even ceramic pads will glaze if subjected to extreme, sustained heat.
Improper Bedding-In Procedure
Bedding-in (also called burnishing) is the process of transferring an even layer of pad material onto the rotor surface during the first few hundred miles of use. This process creates a uniform friction interface and helps the pads reach their full braking potential. If bedding-in is skipped or done incorrectly—for example, by making a series of hard stops without allowing the brakes to cool between them—the pad surface can overheat and glaze before it has a chance to properly transfer material to the rotor.
A proper bedding-in procedure involves a series of moderate to firm stops from 30-40 mph, followed by a cooling period, repeated several times. This gradually brings the pads up to temperature and allows the friction material to deposit evenly. Skipping this step is one of the most common causes of premature glazing on new brake pads.
Aggressive Driving Habits and Heavy Loads
Aggressive driving—frequent hard braking, high-speed stops, and tailgating—generates excessive heat in the brake system. Each hard stop from 60 mph can raise pad surface temperature by several hundred degrees. When these stops are repeated in quick succession, the pads do not have time to cool between events, and the heat accumulates. Over time, this repeated thermal cycling causes the pad surface to glaze.
Heavy loads compound the problem. A vehicle carrying a full load of passengers, cargo, or towing a trailer requires more braking force to stop, which generates more heat. If the vehicle’s braking system is not upgraded to handle the additional load (e.g., with heavier-duty pads or larger rotors), glazing becomes much more likely.
Sticking Calipers and Dragging Brakes
A sticking caliper or a seized brake caliper slide pin can cause the brake pad to remain in constant contact with the rotor, even when the brake pedal is released. This creates continuous friction and heat generation, even during normal driving. Over time, this constant dragging can raise the pad temperature high enough to cause glazing, even without any aggressive braking.
Signs of a sticking caliper include a burning smell after driving, excessive heat radiating from one wheel, uneven pad wear, and reduced fuel economy. If you suspect a sticking caliper, it must be addressed immediately—not only to prevent glazing but also to avoid rotor damage and potential brake failure.
Symptoms and Diagnosis: How to Identify Glazed Brake Pads

Reduced Braking Power and Longer Stopping Distances
The most obvious
symptom of glazed brake pads is a noticeable reduction in braking power. The vehicle will take longer to stop, and the brake pedal may feel “hard” or unresponsive, requiring more force to achieve the same deceleration. This is because the glazed surface cannot generate the friction needed to effectively grip the rotor. In severe cases, the vehicle may pull to one side during braking, indicating uneven glazing across the axle.
High-Pitched Squeal or Grinding Noise
A glazed pad often produces a persistent, high-pitched squeal or squeak when the brakes are applied. This noise is caused by the hard, smooth surface vibrating against the rotor at high frequency. Unlike the noise from worn-out pads (which is caused by the wear indicator scraping against the rotor), the squeal from glazing is present even with plenty of pad material remaining. In more advanced cases, the glaze can create a grinding or groaning sound, especially at low speeds.
Pedal Vibration and Pulsation
While pedal vibration is more commonly associated with warped rotors, glazed pads can also contribute to a pulsating brake pedal. The uneven glaze deposit on the pad surface can create a high and low spot pattern that transfers to the rotor, causing a rhythmic vibration through the pedal when braking. This is often a sign that the glazing has also caused thermal damage to the rotor surface.
Visual Inspection: What to Look For
Diagnosing glazed brake pads requires a visual inspection. Remove the wheel and examine the friction surface of the pad. A healthy pad should have a rough, matte, slightly porous texture. A glazed pad will appear smooth, shiny, and glassy, often with a dark, polished look. You may also notice a color change—glazed pads can take on a bluish or brownish tint due to the heat exposure. Run your fingernail across the surface; if it slides smoothly without catching, glazing is likely present.
Performance Testing and Confirmation
To confirm the diagnosis, perform a controlled braking test in a safe, empty area. Accelerate to 30 mph and apply firm, steady pressure to the brakes. A healthy system should bring the vehicle to a smooth, predictable stop. If the vehicle shudders, pulls, or requires excessive pedal pressure, glazing is confirmed. Also, check the rotors for signs of heat damage—blue or purple discoloration, or a shiny, polished appearance—which often accompanies pad glazing.
How to Fix Glazed Brake Pads

Resurfacing: Sanding the Glaze Off
For light to moderate glazing, resurfacing the pad is a viable option. Remove the brake pads from the caliper and place them on a flat, stable surface. Use a piece of coarse sandpaper (80-120 grit) laid flat on a workbench. Rub the pad surface back and forth across the sandpaper in a circular motion, applying even pressure. The goal is to remove the shiny glaze layer and expose the fresh, porous friction material underneath. Continue sanding until the entire surface has a uniform, matte appearance. Be careful not to remove too much material—you only need to take off the glaze, not the pad itself.
After sanding, clean the pads with brake cleaner to remove any dust or debris. Also, lightly sand the rotor surface with fine sandpaper (220 grit) to remove any transferred glaze and create a fresh surface for the pads to grip. Reinstall the pads and perform a proper bedding-in procedure to restore full braking performance.
Replacement: When Resurfacing Isn’t Enough
If the glazing is severe—if the pad surface is deeply crystallized, cracked, or the pad material has been significantly degraded by heat—replacement is the only safe option. Deep thermal degradation can compromise the structural integrity of the pad, making it prone to delamination or crumbling under stress. Also, if the rotors are warped, deeply scored, or have heat cracks, they should be resurfaced or replaced as well. Installing new pads on damaged rotors will only lead to premature wear and potential glazing of the new pads.
When replacing pads, always inspect the calipers and brake hardware. A sticking caliper that caused the glazing in the first place must be repaired or replaced, or the new pads will glaze just as quickly. Lubricate the caliper slide pins and ensure the caliper moves freely.
Re-Bedding: Restoring the Friction Surface
Re-Bedding: Details
After resurfacing or installing new pads, a proper bedding-in procedure is essential. Find a safe, empty road or parking lot. Accelerate to 30-40 mph and apply firm, steady pressure to bring the vehicle to a near-stop (but not a complete stop). Repeat this 5-6 times, allowing a minute or two of cool-down driving between each stop. Then, accelerate to 50-60 mph and perform 3-4 harder stops, again allowing cooling time between each. This process transfers an even layer of pad material onto the rotor and creates the rough, porous friction surface needed for optimal braking.
After bedding-in, avoid heavy braking for the next 200 miles to allow the pads to fully cure. If you notice any vibration or noise after bedding-in, the process may need to be repeated or the pads may need further resurfacing.
How to Prevent Brake Pad Glazing

Proper Bedding-In for New Pads
The single most effective way to prevent glazing is to properly bed in new brake pads. Follow the manufacturer’s recommended procedure, which typically involves a series of controlled stops from moderate speeds with cooling periods in between. This ensures the pad material transfers evenly to the rotor and creates a stable friction interface. Skipping this step is the most common cause of premature glazing on new pads.
Adjusting Driving Habits
Adopting smoother driving habits can dramatically reduce the risk of glazing. Anticipate stops and brake gradually rather than slamming on the brakes at the last moment. When descending long grades, use engine braking (downshifting) to control speed instead of riding the brakes continuously. This reduces the heat load on the brake system and prevents the pads from reaching glazing temperatures. Also, avoid carrying unnecessary weight in the vehicle, as extra mass increases the braking force required.
Component Selection: Choosing the Right Pads
Selecting the correct brake pad compound for your driving style and vehicle usage is crucial. If you frequently drive in mountainous terrain, tow heavy loads, or engage in spirited driving, consider upgrading to a semi-metallic or ceramic pad with a higher temperature rating. These pads are more resistant to glazing and can handle the additional heat. Conversely, if you drive mostly in stop-and-go city traffic, a standard organic pad may be sufficient, but be aware of its lower heat tolerance.
Also, ensure your braking system is in good condition. Regularly inspect calipers, slide pins, and brake fluid. A sticking caliper or contaminated brake fluid can cause uneven heat distribution and lead to glazing. Replace brake fluid according to the manufacturer’s recommended interval to maintain proper boiling point and performance.
Regular Maintenance and Inspection
Incorporate brake inspections into your regular vehicle maintenance routine. Check the pads for signs of glazing, uneven wear, or contamination. If you notice any of the symptoms described earlier, address them immediately before they worsen. Catching glazing early—when it’s still light—allows for simple resurfacing rather than costly replacement. Also, ensure the brake system is free of contamination from oil, grease, or brake fluid, as these can cause the pad to glaze or lose friction.
Glazing vs. Contamination: A Critical Distinction

Brake pad glazing is often confused with brake pad contamination, but they are distinct conditions with different causes and remedies. Contamination occurs when foreign substances—such as oil, grease, brake fluid, or road salt—soak into the pad material. This reduces friction and can cause noise, but the pad surface does not become hard and shiny. Instead, it may appear dark, oily, or stained. Contaminated pads cannot be resurfaced; they must be replaced, as the contaminant has penetrated the entire pad material.
Glazing, on the other hand, is a thermal phenomenon. The pad surface becomes hard and shiny due to heat, but the underlying material remains intact. Light glazing can be sanded off, while severe glazing requires replacement. Understanding this distinction is critical for proper diagnosis and repair. If
you suspect contamination, look for a greasy or oily film on the pad surface, often accompanied by a burning smell. If the pad is glazed, the surface will be smooth and shiny but dry to the touch. This distinction will guide your repair strategy: sanding for glazing, replacement for contamination.
Brake Pad Glazing vs. Brake Rotor Warping

Brake pad glazing and brake rotor warping are two separate issues that often occur together due to the same underlying cause: excessive heat. Rotor warping is a distortion of the rotor surface, causing it to be no longer perfectly flat. This results in a pulsating brake pedal and vibration through the steering wheel when braking. While glazing affects the pad surface, warping affects the rotor itself.
When a rotor warps, it creates high and low spots that the pads must conform to. This uneven contact can accelerate pad wear and contribute to glazing, as the high spots generate concentrated heat. Conversely, a glazed pad can transfer its hard, crystallized surface to the rotor, creating a shiny, polished area that reduces friction and promotes further heat buildup. In many cases, both conditions are present simultaneously, requiring a comprehensive repair that addresses both the pads and the rotors.
To diagnose rotor warping, use a dial indicator to measure runout, or simply feel for pedal pulsation during braking. If warping is confirmed, the rotors must be resurfaced (if within minimum thickness specifications) or replaced. Installing new pads on warped rotors will only lead to rapid pad wear and potential glazing of the new pads.
Brake Pad Wear Indicators: Knowing When to Act

Brake pad wear indicators are designed to alert you when the pad material has worn down to a critical level. There are two types: mechanical and electronic. Mechanical indicators are small metal tabs that scrape against the rotor when the pad is worn, producing a high-pitched squeal. Electronic indicators use a sensor that completes a circuit when the pad wears down, triggering a warning light on the dashboard.
While wear indicators are not directly related to glazing, they are an important part of brake maintenance. A pad that is worn down to the indicator has less material to absorb and dissipate heat, making it more susceptible to glazing. Also, a worn pad can cause the caliper piston to extend further, reducing braking efficiency and increasing heat generation. Regularly checking your pad thickness and responding to wear indicators promptly can prevent the conditions that lead to glazing.
If your wear indicator is squealing, inspect the pads immediately. If they are glazed as well as worn, replacement is the only option—resurfacing a worn pad is unsafe and ineffective.
Frequently Asked Questions About Brake Pad Glazing

Can I drive with glazed brake pads?
Driving with glazed brake pads is not recommended. While the vehicle may still stop, the reduced friction significantly increases stopping distances, which is a serious safety risk. In an emergency situation, glazed pads may not provide enough braking force to avoid a collision. If you suspect glazing, have the brakes inspected and repaired as soon as possible.
How long does it take for brake pads to glaze?
The time it takes for brake pads to glaze depends on the severity of the heat exposure. A single severe overheating event—such as a long mountain descent with continuous braking—can cause glazing in minutes. Repeated moderate overheating, such as aggressive city driving, may take weeks or months to produce visible glazing. The key factor is the temperature reached and the duration of exposure.
Can glazed brake pads be fixed without removing them?
In some cases, a process called “re-bedding” can be performed without removing the pads. This involves driving at moderate speed and applying firm, steady braking to generate enough heat to burn off the glaze. However, this is only effective for very light glazing. For moderate to severe glazing, the pads must be removed and sanded or replaced. Attempting to burn off heavy glaze can cause further heat damage to the pads and rotors.
Are ceramic brake pads immune to glazing?
No brake pad is completely immune to glazing. Ceramic pads have a higher heat tolerance than organic or semi-metallic pads, but they can still glaze if subjected to extreme temperatures. The threshold for ceramic pads is higher—typically above 600°F—but sustained or repeated exposure beyond this limit will cause the same crystallized surface formation. Ceramic pads are more resistant, not invincible.
What is the cost to fix glazed brake pads?
Understanding is the cost to fix glazed brake pads?
The cost depends on the repair method. Resurfacing the pads yourself costs only a few dollars for sandpaper and brake cleaner. Professional resurfacing or re-bedding services may cost $50-$100. Replacing the pads and rotors is more expensive, typically $200-$500 per axle for parts and labor, depending on the vehicle and component quality. Addressing the root cause—such as a sticking caliper—adds to the cost but is essential to prevent recurrence.
Conclusion: Restoring and Maintaining Brake Performance

Brake pad glazing is a preventable and often reversible condition that affects braking performance and safety. By understanding the science behind glazing—how heat transforms the friction material into a hard, crystallized surface—you can take proactive steps to prevent it. Proper bedding-in, smooth driving habits, appropriate component selection, and regular maintenance are the cornerstones of glazing prevention.
When glazing does occur, early diagnosis is key. Recognizing the symptoms—reduced braking power, squealing, pedal vibration, and the characteristic shiny pad surface—allows you to address the problem before it worsens. Light glazing can be remedied with simple resurfacing, while severe glazing requires replacement. In all cases, addressing the underlying cause, whether it’s a sticking caliper, improper bedding-in, or excessive heat from aggressive driving, is essential to prevent recurrence.
Your brakes are the most critical safety system on your vehicle. Taking the time to understand and maintain them not only protects you and your passengers but also extends the life of your braking components. Whether you’re a DIY enthusiast or rely on a professional technician, the knowledge of how to identify, fix, and prevent brake pad glazing empowers you to keep your vehicle stopping safely and reliably for years to come.
Remember: if you’re ever in doubt about the condition of your brakes, consult a qualified professional. The cost of a professional inspection is far less than the cost of a brake failure.
Related Topics and Further Reading
For more information on brake systems and maintenance, explore these related topics:
- Brake Pad Buying Guide: How to Choose the Right Pads
- Brake Fade: Causes, Symptoms, and Prevention
- Brake Rotor Warping: Diagnosis and Repair
- Brake Pad Contamination: How to Identify and Fix
- Understanding Brake Pad Wear Indicators
You might also like: emergency brake problems, best drilled and slotted rotors, brake rotor buying guide