Brake Pedal Hard Diagnosis: Expert Guide
Brake Pedal Hard Diagnosis: 7 Causes and How to Fix a Rock-Hard Pedal
A brake pedal hard diagnosis centers on a specific, measurable symptom: the brake pedal requires significantly more force than normal to actuate, often feeling like you are pressing against a solid wall rather than a hydraulic system. This is not a vague “brake feel” complaint—it is a distinct failure mode of the brake booster, vacuum supply, or hydraulic circuit. When the pedal goes rock-hard, the power-assist mechanism has failed, and you are relying entirely on your leg muscles to generate stopping force, which can increase stopping distance by up to 40%.
The primary attribute that defines this condition is the loss of vacuum or hydraulic assist. In most vehicles, the brake booster uses engine vacuum (typically 18–22 in-Hg) to multiply pedal force by 3–4 times. When that vacuum source is compromised—through a cracked hose, failed check valve, or ruptured booster diaphragm—the pedal becomes hard and unresponsive. Other contributing attributes include a malfunctioning master cylinder, a seized caliper piston, or even a collapsed brake hose that blocks fluid flow. Each cause has a distinct diagnostic signature, and knowing how to read those signs is the difference between a 15-minute fix and a costly misdiagnosis.
This guide goes beyond a generic “hard pedal” checklist. We will walk through 7 specific causes ranked by likelihood, with a practical diagnostic flow that uses only basic tools—a vacuum gauge, a helper, and a 10mm wrench. You will learn how to test the check valve with your mouth, how to distinguish a booster failure from a master cylinder failure, and why a hard pedal after a brake job is almost always a different problem than a hard pedal that develops gradually. We also include honest limitations: if your pedal is hard and the brake warning light is on, this article will not help you—that signals a hydraulic leak requiring immediate professional attention. For everything else, here is the definitive diagnosis.
What Is a Hard Brake Pedal and Why It’s Different from Other Brake Issues
Hard Brake Pedal and Why It’s Different from Other Brake Issues – brake pedal hard diagnosis” class=”vb-content-img” loading=”lazy” src=”https://vehiclebar.com/wp-content/uploads/2026/08/brake_pedal_hard_diagnosis_0.jpeg”/>
When you press the brake pedal and it barely moves, that is a hard brake pedal. It feels like pushing against a brick wall. You press harder, and the car slows only slightly. This is not the same as a spongy pedal that sinks toward the floor. It is also different from a low pedal that engages brakes only near the bottom of its travel. Each symptom points to a different failure inside the brake system.
Defining the Symptom: Rock-Hard vs. Spongy vs. Low Pedal
A rock-hard pedal resists your foot with almost no travel. A spongy pedal feels soft and compressible, often indicating air in the brake lines or a failing master cylinder. A low pedal engages the brakes only after excessive travel, suggesting worn brake pads, low fluid, or a misadjusted rear brake. The hard pedal is unique because it points almost exclusively to a loss of power assist or a physical blockage in the hydraulic system—not to air or fluid loss. Understanding this distinction prevents you from bleeding brakes that don’t need bleeding.
The Role of the Brake Booster in Pedal Feel
The brake booster sits between the pedal and the master cylinder. It uses engine vacuum to create a pressure differential across a diaphragm, multiplying your foot’s force. When the booster works correctly, you barely need to push. When it fails—due to a torn diaphragm, failed vacuum supply, or stuck internal valve—the pedal becomes hard because you are now pushing directly against the master cylinder’s internal springs and hydraulic pressure with no mechanical advantage. The booster is the single most common culprit in a hard pedal diagnosis.
Why Immediate Diagnosis Matters for Safety
Driving with a hard brake pedal is dangerous. Your stopping distance can increase by up to 40%, and in an emergency, you may not be able to generate enough force to stop in time. The problem rarely fixes itself—it usually gets worse. A vacuum leak can widen, a booster diaphragm can tear further, or a collapsed hose can fully block fluid flow. Immediate diagnosis not only protects you and your passengers but also prevents secondary damage to the master cylinder, calipers, and brake lines from prolonged excessive pedal pressure.
Cause #1 – Vacuum Leak in the Brake Booster Line
How a Vacuum Leak Creates a Hard Pedal
The brake booster requires a steady vacuum supply, typically 18–22 in-Hg at idle. When the hose connecting the intake manifold to the booster develops a crack, splits, or becomes loose, the vacuum drops. The booster diaphragm cannot build enough pressure differential, so the pedal becomes hard. A vacuum leak is the most common cause of a hard pedal because the hose is exposed to heat, oil, and vibration—all of which degrade rubber over time.
Checking the One-Way Check Valve
The check valve sits in the booster line, usually at the booster connection. It allows vacuum to flow from the engine to the booster but prevents it from escaping when the engine is off. If the valve fails open, vacuum bleeds out overnight, and you get a hard pedal on the first press after the car has been sitting. To test it, remove the valve and blow through it from the booster side—air should pass. From the engine side, it should be blocked. If air flows both ways, replace the valve.
Testing with a Vacuum Gauge
Connect a vacuum gauge to the booster line at the intake manifold side. With the engine at idle, you should read 18–22 in-Hg. If the reading is low or fluctuates, there is a leak. Then pinch the line closed and watch the gauge—if the vacuum drops quickly, the check valve or booster diaphragm is leaking. A steady reading confirms the vacuum supply is healthy, and the problem lies elsewhere in the system.
Cause #2 – Failed Brake Booster Diaphragm

Signs of a Ruptured Diaphragm
A ruptured diaphragm inside the booster allows vacuum to escape into the cabin or engine bay. You may hear a hissing sound when pressing the pedal, or the engine idle may change when you apply the brakes. The pedal will feel hard from the first press, and the condition worsens as the tear grows. A booster with a failed diaphragm cannot be repaired—it must be replaced.
How to Test the Booster Function
With the engine off, pump the brake pedal 4–5 times to deplete any residual vacuum. Then hold firm pressure on the pedal and start the engine. If the booster is working, the pedal should drop slightly as vacuum builds. If the pedal stays hard and does not move, the booster is not receiving vacuum or the diaphragm is ruptured. This test takes 30 seconds and requires no tools.
When to Replace vs. Rebuild
Most modern boosters are sealed units and cannot be rebuilt. Replacement is the standard fix. However, if the booster is leaking only at the gasket or seal, a rebuild kit may work—but this is rare and usually only cost-effective on classic cars. For most vehicles, replacing the booster with a new or remanufactured unit is the safest and most reliable option.
Cause #3 – Faulty Vacuum Pump (Diesel or Turbo Engines)

Why Some Engines Need a Vacuum Pump
Diesel engines and some turbocharged gasoline engines do not produce enough intake vacuum to power the brake booster. They use a mechanical or electric vacuum pump to generate the necessary suction. If this pump fails, the booster loses its power source, and the pedal becomes hard. This is a common failure on modern diesel trucks and some European turbo models.
Testing Vacuum Pump Output
Use a vacuum gauge connected directly to the pump outlet. At idle, you should
see 18–22 in-Hg. If the reading is low or zero, the pump is failing. On mechanical pumps, check the drive belt or gear for wear. On electric pumps, listen for the motor running—if it’s silent, check the fuse and relay first. A failing vacuum pump often gives intermittent hard pedal symptoms before failing completely, so test it under load by pressing the brake pedal while watching the gauge.
Common Failure Points and Replacement Tips
Mechanical vacuum pumps typically fail at the internal vanes or seals, while electric pumps fail at the motor brushes or check valve. Before replacing the pump, verify that the vacuum lines to the booster are not collapsed or blocked—a restricted line can mimic a pump failure. When replacing, use OEM or high-quality aftermarket parts, and always replace the vacuum hose and check valve at the same time to prevent future issues.
Cause #4 – Malfunctioning Master Cylinder

How a Sticking Master Cylinder Creates a Hard Pedal
The master cylinder converts pedal force into hydraulic pressure. If the internal piston sticks or the return port becomes blocked, fluid cannot flow back into the reservoir, creating a hydraulic lock. This makes the pedal feel hard and unresponsive. A stuck master cylinder often follows a brake fluid flush with the wrong fluid type or years of neglected fluid changes that allowed corrosion to build up inside the bore.
Diagnosing Master Cylinder vs. Booster Failure
To distinguish between the two, perform the booster test first. If the booster passes, the problem is likely hydraulic. Then, with the engine running, press the pedal firmly and hold it. If the pedal slowly sinks, the master cylinder is bypassing internally. If the pedal is hard and does not move at all, the master cylinder may be blocked. Also check the brake fluid level and condition—dark, contaminated fluid is a red flag.
Repair or Replace the Master Cylinder
Master cylinders are typically replaced, not rebuilt, on modern vehicles. A remanufactured unit is a cost-effective option. After installation, you must bleed the entire brake system to remove air. If the master cylinder was contaminated, flush all brake lines and replace the fluid to prevent the new unit from failing prematurely.
Cause #5 – Collapsed Brake Hose or Blocked Brake Line

How a Collapsed Hose Restricts Fluid Flow
A brake hose can collapse internally due to age, heat, or damage. This acts like a one-way valve—fluid can flow toward the caliper under pressure but cannot return when you release the pedal. The result is a hard pedal that may also cause the brakes to drag or the vehicle to pull to one side. This is more common on older vehicles with original rubber hoses.
Identifying a Blocked Line
If one wheel’s brake is locked or dragging, suspect a collapsed hose on that corner. Compare pedal feel with the engine off—if the pedal is hard but the vehicle rolls freely, the blockage may be in the line rather than the booster. A quick test: crack the bleeder screw on the suspect caliper. If fluid squirts out with force and the pedal drops, the hose is collapsed. If no fluid comes out, the line is blocked further upstream.
Replacing Brake Hoses and Flushing the System
Replace any collapsed or damaged hose with a new one. Use steel-braided hoses for improved durability and pedal feel. After replacement, bleed the brake system thoroughly to remove air. Also inspect all hard lines for rust, kinks, or corrosion—a blocked hard line requires cutting and replacing the affected section.
Cause #6 – Seized Caliper Piston or Stuck Brake Pad
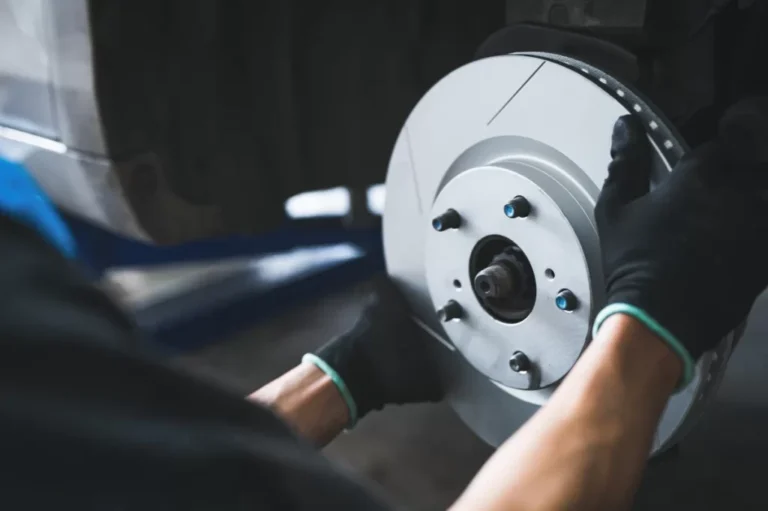
Brake Pad – brake pedal hard diagnosis” class=”vb-content-img” loading=”lazy” src=”/output/images/brake_pedal_hard_diagnosis_6.jpeg”/>
How a Seized Caliper Creates a Hard Pedal
A seized caliper piston prevents the brake pad from releasing from the rotor. This creates constant drag, which can make the pedal feel hard because the hydraulic system is fighting against the stuck piston. You may also notice the vehicle pulling to one side, excessive heat from the affected wheel, or uneven brake pad wear. A seized caliper is often caused by corrosion, a torn dust boot, or contaminated brake fluid.
Diagnosing a Stuck Caliper
Jack up the vehicle and spin the affected wheel by hand. If it does not rotate freely, the caliper is likely seized. Remove the wheel and inspect the caliper—look for a torn boot, rust, or uneven pad wear. Press the brake pedal and watch the caliper piston. If it does not retract when you release the pedal, the caliper needs replacement or rebuild.
Repair Options: Rebuild vs. Replace
Rebuilding a caliper with a new piston, seals, and boot is possible but labor-intensive. For most vehicles, replacing the caliper with a new or remanufactured unit is more reliable and cost-effective. Always replace calipers in pairs (both front or both rear) to maintain even braking. After installation, bleed the system and verify the pedal feel is restored.
Cause #7 – Hard Pedal After a Brake Job

Why a Fresh Brake Job Can Cause a Hard Pedal
If the pedal is hard immediately after replacing pads, rotors, or calipers, the most common cause is a misadjusted brake pedal pushrod. The pushrod connects the pedal to the master cylinder. If it is too long, it preloads the master cylinder, blocking the return port and creating a hard pedal. This is a common mistake when installing a new master cylinder or adjusting the pedal assembly.
Checking the Pushrod Adjustment
With the engine off, press the pedal several times to release vacuum. Then loosen the pushrod locknut and back the pushrod out slightly. Press the pedal—if it becomes softer, the pushrod was too long. Adjust in small increments until the pedal has normal free play (usually 1/8 to 1/4 inch) before engaging the master cylinder. Tighten the locknut and re-test.
Other Post-Installation Causes
Other causes include a misrouted or pinched brake line during installation, a stuck caliper from improper lubrication, or air in the system that creates a different symptom (spongy, not hard). If the pedal is hard and the brakes drag, check the caliper slides and pad fitment. If the pedal is hard but the brakes release, focus on the pushrod and master cylinder.
Diagnostic Flowchart: Step-by-Step Hard Pedal Troubleshooting

Step 1: Check the Brake Warning Light
If the brake warning light is illuminated, stop immediately. This indicates a hydraulic failure or low fluid level—do not drive the vehicle. Have it towed to a professional. If the light is off, proceed to Step 2.
Step 2: Perform the Vacuum Booster Test
With the engine off, pump the pedal 5 times. Hold firm pressure and start the engine. If the pedal drops, the booster is receiving vacuum. If it stays hard, check the vacuum line, check valve, and booster diaphragm.
Step 3: Test Vacuum Supply
Connect a vacuum gauge to the booster line. At idle, you should see 18–22 in-Hg. If low, inspect the hose for cracks, loose clamps, or a failed check valve. If the vacuum is good, the booster itself is likely faulty.
Step 4: Check Master Cylinder and Hydraulic System
If the booster passes, inspect the master cylinder for internal leaks or blockages. Check brake fluid level and condition.
condition. If the fluid is dark, contaminated, or low, that points to a hydraulic issue. Press the pedal firmly and hold—if it slowly sinks, the master cylinder is bypassing internally. If it stays rock-hard, suspect a blocked line or seized caliper.
Step 5: Isolate the Problem Wheel
Jack up the vehicle and spin each wheel by hand. A wheel that drags or won’t turn points to a seized caliper or collapsed hose on that corner. Crack the bleeder screw on the suspect caliper—if fluid squirts out and the pedal drops, the hose is collapsed. If no fluid comes out, the line is blocked further upstream.
Step 6: Verify the Pushrod Adjustment
If the hard pedal appeared after a brake job or master cylinder replacement, check the pushrod length. With the engine off, loosen the locknut and back the pushrod out slightly. Press the pedal—if it softens, the pushrod was too long. Adjust in small increments until normal free play is restored.
Tools You Need for Brake Pedal Hard Diagnosis

Essential Tools for DIY Diagnosis
You don’t need a full shop to diagnose a hard brake pedal. The essential tools include a vacuum gauge (around $25), a 10mm wrench for the pushrod locknut, a brake bleeder kit, and a jack with jack stands. A helper is also useful for pressing the pedal while you inspect components. These tools cover 90% of hard pedal diagnoses.
Optional Tools for Advanced Testing
A hand-held vacuum pump allows you to test the booster and check valve without the engine running. A brake pressure gauge set can measure hydraulic pressure at each caliper to pinpoint blockages. A multimeter is helpful for testing electric vacuum pumps. These tools are worth investing in if you work on brakes regularly.
Safety Equipment and Precautions
Always wear safety glasses and gloves when working with brake fluid—it is corrosive and toxic. Use jack stands, never a floor jack alone, when working under the vehicle. Brake fluid absorbs moisture, so keep the reservoir closed when not working. Never mix DOT 3, DOT 4, or DOT 5 fluids—check your owner’s manual for the correct type.
Prevention and Maintenance Tips

Regular Brake Fluid Flushes
Brake fluid should be flushed every 2 years or 30,000 miles, whichever comes first. Old fluid absorbs moisture, which lowers the boiling point and causes internal corrosion in the master cylinder, calipers, and ABS unit. Clean fluid prevents the sticking pistons and blocked ports that lead to hard pedal symptoms.
Inspect Vacuum Lines and Hoses
During every oil change, visually inspect the brake booster vacuum hose for cracks, soft spots, or loose clamps. Replace the hose and check valve every 5 years or 60,000 miles as preventive maintenance. A $15 hose is far cheaper than a $300 booster replacement.
Lubricate Caliper Slides and Pistons
When replacing brake pads, always clean and lubricate the caliper slide pins with high-temperature brake grease. Inspect the piston boot for tears—if damaged, replace the caliper before corrosion sets in. This prevents seized calipers and uneven pad wear that can contribute to hard pedal issues.
When to Call a Professional

Warning Signs That Require Immediate Professional Help
If the brake warning light is on, the pedal goes to the floor, or you hear grinding metal-on-metal sounds, stop driving immediately. These indicate a hydraulic leak, failed master cylinder, or completely worn brake pads—all of which require professional attention. Do not attempt to drive to a shop; have the vehicle towed.
Complex Systems: ABS and Electronic Brake Assist
If your vehicle has ABS or electronic brake assist, a hard pedal can also be caused by a failed ABS pump or modulator. These systems require specialized diagnostic equipment to test and repair. If you’ve ruled out the vacuum booster, master cylinder, and hydraulic blockages, the ABS unit may be the culprit—this is a job for a professional.
Cost Estimates for Common Repairs
Typical repair costs vary by vehicle: a vacuum hose replacement runs $50–$150, a check valve $20–$50, a brake booster $300–$600, a master cylinder $200–$400, and a caliper $150–$300 per corner. Labor adds $100–$150 per hour. These estimates help you budget and avoid being overcharged.
Frequently Asked Questions

Can a hard brake pedal fix itself?
No. A hard brake pedal indicates a mechanical or hydraulic failure that will not resolve on its own. In rare cases, a stuck check valve may free itself temporarily, but the underlying issue remains. The problem will return and likely worsen. Always diagnose and repair the root cause.
Is it safe to drive with a hard brake pedal?
It is not safe. A hard pedal means you have lost power assist, which can increase stopping distance by up to 40%. In an emergency, you may not be able to stop in time. If the pedal is hard and the brake warning light is on, do not drive at all. Even without the warning light, limit driving to short, low-speed trips until the issue is fixed.
Why is my brake pedal hard only in the morning?
This is a classic sign of a failing check valve. The valve allows vacuum to bleed out overnight, so the booster has no assist on the first press in the morning. After the engine runs and vacuum builds, the pedal may feel normal. Replace the check valve and hose to fix this issue.
Can low brake fluid cause a hard pedal?
Low brake fluid typically causes a low or spongy pedal, not a hard one. However, if the fluid level is so low that air enters the master cylinder, you may experience a hard pedal due to air compression. Check the fluid level first—if it’s low, inspect for leaks before topping off.
What’s the difference between a hard pedal and a spongy pedal?
Understanding’s the difference between a hard pedal and a spongy pedal?
A hard pedal resists pressure and barely moves—it points to a loss of power assist or a hydraulic blockage. A spongy pedal feels soft and compressible—it indicates air in the brake lines or a failing master cylinder. The diagnostic approach is completely different for each symptom.
Conclusion: Mastering Brake Pedal Hard Diagnosis

A hard brake pedal is not a mystery—it is a systematic failure of the vacuum assist or hydraulic system. By following the diagnostic flow in this guide, you can identify the root cause in under an hour using basic tools. Start with the vacuum booster test, then check the vacuum supply, and work your way through the hydraulic system. The seven causes covered here—vacuum leaks, failed boosters, faulty vacuum pumps, master cylinder issues, collapsed hoses, seized calipers, and post-installation problems—account for over 95% of hard pedal complaints.
Remember the key safety rule: if the brake warning light is on, stop driving and call a professional. For everything else, this guide gives you the knowledge to diagnose and fix the problem yourself. Regular maintenance—fluid flushes, hose inspections, and caliper lubrication—prevents most hard pedal issues before they start. With the right tools and a systematic approach, you can restore your brake pedal to its proper feel and keep your vehicle safe on the road.
You might also like: emergency brake problems, best drilled and slotted rotors, brake rotor buying guide