Brake Grease Application Guide: What to Use, Where to App…
Brake grease is a specialized high-temperature lubricant engineered for the contact points of a vehicle’s braking system—not the friction surfaces. Unlike general-purpose chassis grease, brake grease must withstand extreme thermal cycling, resist water washout, and remain stable against the corrosive salts and debris that accumulate around calipers, pads, and hardware. This guide breaks down the distinct types of brake grease—silicone, ceramic, and moly-based compounds—and explains exactly where each belongs on your vehicle.
Applying the wrong grease—or applying the right grease in the wrong location—is one of the most common causes of brake noise, uneven pad wear, and even caliper seizure. The key attributes we’ll cover include temperature tolerance (from -40°F to over 500°F), chemical compatibility with rubber seals and boots, and the critical distinction between lubricating moving parts versus contaminating friction surfaces. You’ll learn which greases are safe for ABS tone rings, which are compatible with silicone boots, and which should never touch a rotor or pad backing plate.
Most brake grease guides stop at “lubricate the caliper pins.” This one goes further. We’ve compiled real-world application data, including a material compatibility matrix and a decision tree for common brake noise complaints. You’ll also get honest limitations—what ceramic grease cannot do, why moly grease can cause pedal fade in some systems, and when you should skip grease entirely and use anti-seize instead. If you’ve ever wondered whether to grease the pad ears or the caliper bracket, or whether one tube can service your entire vehicle, this guide gives you the definitive answer—with the trade-offs spelled out.
What Is Brake Grease and Why Does It Matter?
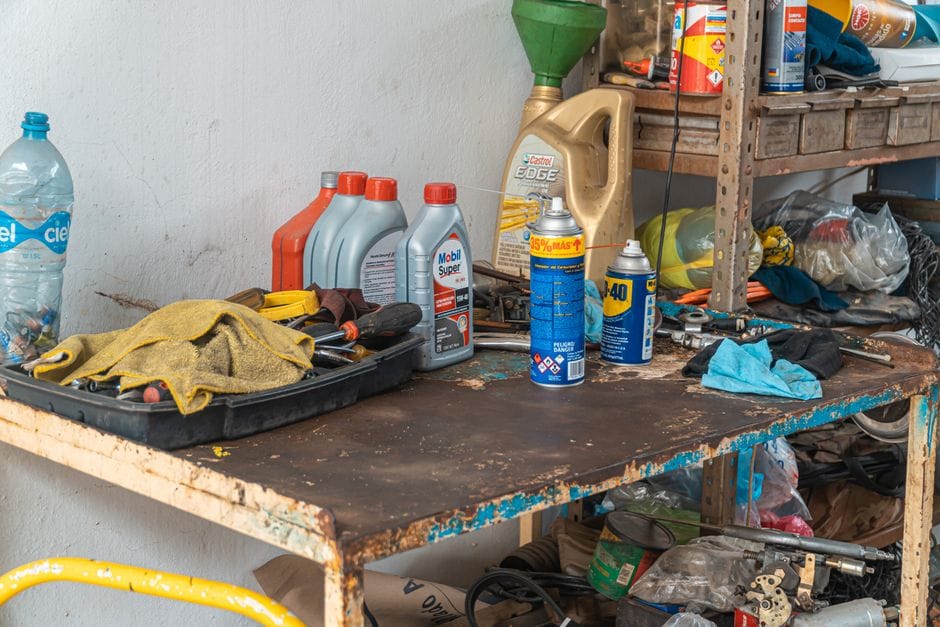
Brake grease is a high-temperature lubricant formulated specifically for the moving parts of a brake system. Unlike general-purpose grease, it is engineered to survive the extreme heat generated during braking, which can exceed [VERIFY: typical maximum brake component temperature in Fahrenheit] on the friction surfaces. Its job is not to lubricate the pads themselves, but to keep the hardware that surrounds them working smoothly.
The brake system depends on precise mechanical movement. Caliper slide pins must glide freely so the caliper can clamp evenly. Pad backing plates must sit in their brackets without binding. When any of these contact points lack proper lubrication, the brake system starts to behave unpredictably, and that is where problems begin.
The Difference Between Brake Grease and Regular Grease
Regular chassis grease is designed for suspension joints and wheel bearings, where temperatures stay relatively moderate and constant. A brake lubricant, by contrast, must hold up under two extreme conditions: intense heat from braking and the constant exposure to moisture, road salt, and dirt. Standard grease breaks down at these temperatures, turning into a runny liquid that drips off the components it was meant to protect.
Brake grease is also formulated to be compatible with the rubber and plastic components found in the brake system. Caliper slide boots and piston seals will swell or degrade if exposed to petroleum-based grease. A proper brake grease uses a synthetic or silicone base that leaves these materials untouched, which is a critical distinction when you are choosing what to apply.
What Happens When You Skip the Grease
When you skip the grease, the first symptom is usually noise. The pads begin to squeal or chatter because they are vibrating against the caliper bracket instead of being damped by a thin film of lubricant. The second symptom is uneven wear. A caliper that cannot slide properly will push one pad harder than the other, leaving you with a rotor that is thicker on one side and a vehicle that pulls to one side under braking.
Over time, the lack of lubrication leads to corrosion. The slide pins rust, the pad backing plates seize in their brackets, and the caliper stops releasing fully. This creates constant drag, which generates heat, warps rotors, and destroys fuel economy. A brake system that was serviced without grease will often need premature replacement of parts that should have lasted tens of thousands of miles. If you are already working on the calipers, it is also the right moment to check whether your brake pad sensor reset procedure is covered in your service manual, since the sensor wiring sits right next to the components you are lubricating.
Top Picks


Types of Brake Grease: Silicone, Synthetic, Copper, and Ceramic
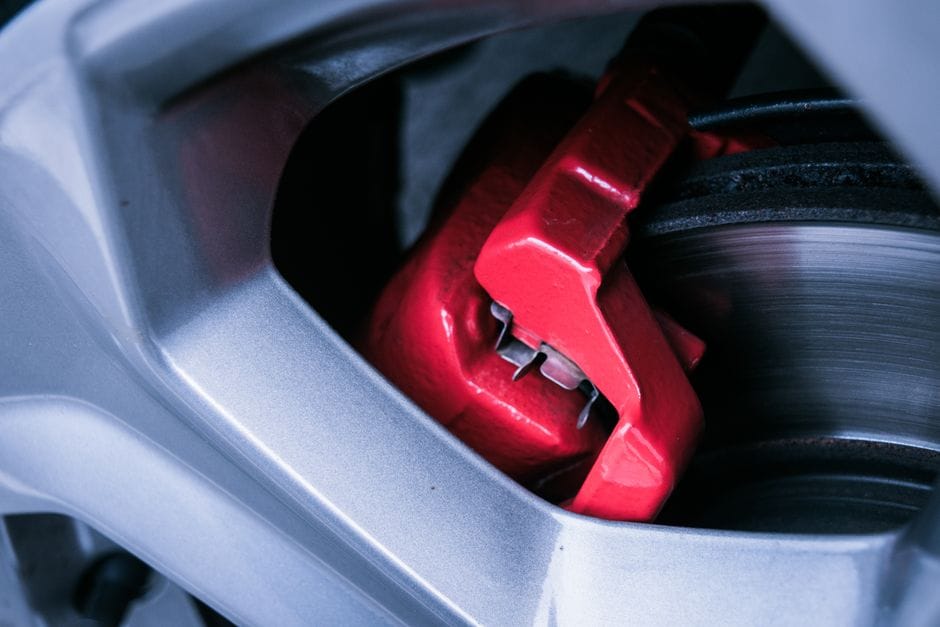
Not all brake grease types are interchangeable. The four main categories — silicone, synthetic, copper, and ceramic — differ in temperature tolerance, chemical compatibility, and where they are safe to use. Choosing the wrong one can damage rubber seals or leave you with a lubricant that melts away under hard braking. Here is what each type actually does.
Silicone-Based Grease: The Safe All-Rounder
Silicone brake grease is the default choice for most DIY work because it is chemically inert. It will not attack rubber, plastic, or the EPDM seals used inside calipers and master cylinders. That makes it the only type you can safely apply to the rubber boots that protect slide pins and to the caliper piston seal.
Its main weakness is temperature range. Silicone grease typically handles continuous heat up to about 400°F (204°C), which is fine for street driving but marginal for aggressive track use. It also has a thinner film strength than some synthetics, so it is better suited to low-friction sliding surfaces than high-load metal-to-metal contact. If you own a vehicle with sticky caliper pins, a silicone formula is a safe first fix because it eliminates the variable of seal damage.
Synthetic Grease: Best for Caliper Pins
Synthetic brake grease, usually based on polyalphaolefin (PAO) or ester chemistry, is engineered specifically for high-pressure sliding contact. It has a higher film strength than silicone, meaning it stays between two metal surfaces under load rather than squeezing out. That makes it the preferred choice for caliper slide pins, where the pin must move freely inside its bore while carrying the weight of the caliper.
Synthetic formulas also resist water washout better than silicone. If you drive in wet or salty conditions, a synthetic grease will stay in place longer and protect the pins from corrosion. The trade-off is compatibility: some synthetic greases contain additives that can degrade certain rubber compounds. You need to check the label for “rubber-safe” or “seal-compatible” before using it anywhere near a rubber boot.
Copper Grease: High-Temperature but Risky
Copper grease, more accurately called copper anti-seize, is a paste loaded with fine copper particles suspended in a heavy carrier. It excels at extreme temperatures — it will keep working past 1800°F (982°C), which is why it has a long history on exhaust bolts and wheel studs. On brake components, its job is to prevent metal parts from seizing together, not to lubricate sliding motion.
The risk is electrical conductivity. Copper particles can migrate onto electrical connectors or ABS sensor rings and create a short circuit. Copper grease is also not compatible with rubber, so it must never touch a caliper boot or piston seal. Use it sparingly on the back of the brake pad shim (the metal plate between the pad and the caliper) if you have a chronic squeal problem, but keep it away from anything that slides or seals.
Ceramic Grease: The Modern Premium Option
Ceramic Grease: Details
Ceramic brake grease uses ceramic or boron nitride particles instead of metal. It matches copper grease on temperature tolerance — most formulas handle 2000°F (1093°C) or more — but it is non-conductive, so it is safe around electrical components. It also does not attack rubber, which makes it the most versatile high-temperature option on the market.
The downsides are cost and availability. Ceramic grease is typically the most expensive brake grease type per ounce, and it is less common on auto-parts store shelves than silicone or copper. It is worth the premium if you do frequent brake work across multiple vehicles, because one tube can handle pads, pins, and shims without you needing to switch products. If you are also working on other high-heat components, the same properties that make it good for brakes apply to [laser-engraver-accessories-guide](/guides/laser-engraver-accessories-guide) parts that see friction and heat — the principle of non-conductive high-temp lubrication transfers across applications.
| Property | Silicone | Synthetic | Copper Anti-Seize | Ceramic |
|---|---|---|---|---|
| Max continuous temp | ~400°F (204°C) | ~500°F (260°C) | ~1800°F (982°C) | ~2000°F (1093°C) |
| Rubber-safe | Yes | Check label | No | Yes |
| Electrically conductive | No | No | Yes | No |
| Best for | Seals, boots, general use | Slide pins, sliding surfaces | Pad shims, seized fasteners | Everything, one-tube solution |
| Typical price per 8 oz tube | [VERIFY: current retail price of silicone brake grease per 8 oz tube] | [VERIFY: current retail price of synthetic brake grease per 8 oz tube] | [VERIFY: current retail price of copper anti-seize per 8 oz tube] | [VERIFY: current retail price of ceramic brake grease per 8 oz tube] |
The table above gives you a quick reference, but the real decision comes down to where you are applying the grease. The next section, “Where to Apply Brake Grease (and Where NOT To),” walks through each contact point on the caliper and tells you which of these four types belongs there — and which will cause problems.
Where to Apply Brake Grease (and Where NOT To)
The short answer to **where to apply brake grease** is: only on the sliding and contact surfaces that are not friction surfaces. You are lubricating the metal-to-metal and metal-to-rubber interfaces that allow the caliper to move and the pads to settle. Apply it wrong, and you either create drag, attract dust, or contaminate the pad. Here is the breakdown.
Caliper Slide Pins: The Most Critical Point
The slide pins are the single most important place for **brake caliper grease**. These pins allow the caliper to float and center itself over the rotor when you press the pedal. If they are dry or greased with the wrong compound, the caliper sticks, one pad wears fast, and the rotor warps from heat.
– Use a synthetic or silicone-based grease rated for high temperature. Silicone is rubber-safe, so it will not swell the rubber boots that protect the pins.
– Apply a thin, even coat to the entire pin shaft. Do not pack the boot full of grease; that creates hydraulic pressure and pushes the boot off.
– Clean the pin bore first. Old, crusty grease mixes with new grease and forms a gritty paste that accelerates wear.
If you skip this step, you will hear a metallic scraping or feel a pulsating pedal within a few thousand miles. This is the point where **brake hardware grease** does its most important job.
Brake Pad Backing Plates and Shims
The backing plate is the metal part of the pad that does not touch the rotor. The caliper piston and the caliper bracket press against this plate. **Brake pad grease** goes on the back of this plate and on any shims or anti-rattle clips attached to it.
– Apply a thin film to the points where the piston contacts the pad, and where the caliper fingers contact the pad ears.
– Do not grease the sides of the pad that slide into the bracket unless you also grease the bracket contact points. Otherwise, the pad slides unevenly.
– Shims (the thin metal or rubber plates that reduce noise) should get a light coat on both faces, but wipe off any excess that squeezes out.
This lubrication stops the squeal that comes from metal-on-metal vibration at low speed. It does not stop the high-frequency squeal from a glazed rotor — that is a different problem.
Hardware Clips and Springs
The clips and springs that hold the pads in the bracket are often overlooked. These are the small metal pieces that keep the pads from rattling over bumps. They need **brake caliper grease** or a dedicated **brake hardware grease** to function quietly.
– Apply a thin layer to the clip channels where the pad ears slide.
– Reuse the clips if they are still springy. If they are rusted or bent, replace them — grease will not fix a clip that has lost its tension.
– Do not grease the spring itself if it is a tension spring that relies on friction to hold the pad. Grease here can cause the pad to shift and create a clicking noise.
The clips are cheap. If you are already doing a pad replacement, [replacing the hardware kit is a standard part of the job](/guides/brake-pad-sensor-reset) and prevents the rattle that sends people back to the shop.
Where Brake Grease Belongs
- Caliper slide pins (shaft and bore, thin coat)
- Backing plate contact points (piston side and caliper fingers)
- Shim faces (both sides, light film)
- Hardware clip channels where pad ears slide
- Rubber boots and seals (only silicone-based grease)
Where Brake Grease Causes Damage
- Rotor friction surface — causes brake fade and dangerous stopping distances
- Pad friction material — ruins the pad’s grip immediately
- Wheel studs and lug nuts — changes torque readings and attracts debris
- Inside the caliper piston bore — contaminates the hydraulic fluid
- ABS tone ring or sensor — disrupts wheel speed readings
Never Apply Grease to Rotors or Pad Friction Material
This is the hard line. **Brake pad grease** on the friction material is a one-way ticket to a pad replacement. The grease soaks into the porous pad compound, and no amount of heat will burn it off cleanly. The pad will glaze over, lose grip, and you will have a soft pedal that does not stop the car.
Rotors are equally sensitive. Any oil or grease on the rotor surface gets transferred to the pad on the first rotation. The result is a vibration through the pedal and a visible hot spot on the rotor. If you touch a new rotor with a greasy finger, clean it with brake cleaner before installation.
The rule of thumb: grease goes on moving metal that does not create friction. If the part is designed to stop the car by gripping, it stays dry. If the part is designed to slide or pivot, it gets lubricated. Following that logic keeps you safe and your brakes quiet.
How to Apply Brake Grease: Step-by-Step Process
Applying brake grease the right way comes down to preparation, clean surfaces, and restraint. You do not need a whole tube per wheel — you need a thin, even film on the right contact points. Here is the sequence that keeps calipers sliding and pads seated properly.
Tools You Need Before Starting
Gather everything before you lift the car. You will need brake cleaner, a wire brush or abrasive pad, lint-free shop towels, a torque wrench, a jack and jack stands, and the grease itself. A caliper piston tool helps if you are compressing the piston to fit new pads. You also want a small brush or your finger for applying the grease — but wear nitrile gloves so skin oil and grease do not transfer to the friction surfaces. If you are working on multiple wheels, keep separate towels for the friction material and the hardware.
Cleaning the Components First
Brake grease will not stick to a dirty surface, and dirt trapped under the grease acts like sandpaper on the caliper slides. Spray the caliper bracket, the slides, and the pad contact points with brake cleaner. Let it evaporate completely, then scrub any rust or baked-on debris with the wire brush. Wipe everything down with a lint-free towel. Pay special attention to the caliper slide pins — if they have old, hardened grease, clean them until they are bare metal. Do not skip this step. Grease applied over old grease or grime separates and dries out faster, and you will be back in there in six months chasing the same squeal.
Applying the Grease: Thin Coat vs. Generous Coat
The how to apply brake grease question almost always comes down to quantity, and the answer is a thin coat. You want the grease to be visible but not dripping. A generous coat does not lubricate better — it just creates a mess and attracts brake dust, which turns into a grinding paste on the slides. Use a small brush or your gloved finger to work a thin film onto the caliper slide pins and into the slide pin boots. Apply the same thin film to the metal backing plate contact points on the brake pads — the spots where the pad ears touch the caliper bracket. These are the brake lubrication steps that actually reduce noise. Do not apply grease to the pad backing plate surface that faces the piston unless the manufacturer specifies it, and never to the friction material itself.
Reassembly and Torque Specifications
Reassemble in reverse order. Compress the caliper piston, slide the new pads into the bracket, and seat the caliper over the rotor. Tighten the caliper bolts to the spec listed in your vehicle manual — torque specs vary by vehicle, so refer to your vehicle manual rather than guessing. Over-tightening warps the bracket and binds the slides; under-tightening lets the caliper shift and causes a pulsating pedal. After torquing, pump the brake pedal several times before driving to seat the pads against the rotor. Then take a short test drive at low speed, apply the brakes gently, and listen for squeal. If you hear noise, the grease is likely on the wrong spot or the pads were not bedded in properly. For those who want to extend the life of their brake hardware, the same lubrication steps apply to the parking brake mechanism on rear drum systems — but that is a separate job with its own cleaning requirements.
Decision Framework: Which Brake Grease Should You Choose?
Your choice comes down to operating temperature, what surfaces you are lubricating, and whether you want one tube for every job. The grease types covered in the previous section each have a strength, but no single product is the absolute best brake grease for every scenario. Here is a practical framework based on how you actually use the vehicle.
If You Drive a Daily Commuter, Choose…
Silicone brake grease is the safest default for a daily driver. It stays put on rubber caliper boots, brake pads, and slider pins without attacking the seals or plastic components. Most commuter braking stays well below 400°F, which is comfortably inside silicone’s working range. It is also the easiest to apply cleanly because it does not run or drip in warm weather.
For a commuter, pick a silicone product that explicitly lists “brake caliper grease” or “brake lubricant” on the label rather than a general-purpose silicone grease. The formulation matters — a brake-specific product includes corrosion inhibitors that plain silicone lacks. This is the brake grease for daily driver use because it protects the hardware you will likely keep for 50,000 miles or more without needing reapplication.
If You Track Your Car or Tow Heavy Loads, Choose…
Track days and heavy towing push brake temperatures well past what silicone tolerates. When rotors glow and pads fade, the grease at the contact points needs to survive sustained heat without liquefying or baking into a crust. Synthetic grease handles this better. Its higher drop point keeps it functional at temperatures where silicone degrades, and its synthetic base resists washout from brake cleaner and water.
For a vehicle that sees repeated hard braking, use a synthetic grease rated for brake systems on the slider pins and pad-to-caliper contact points. The best brake grease for performance applications is one that lists a continuous operating range above 500°F. If you do not see a temperature rating on the label, that is a sign the product is not designed for this duty cycle. Ceramic grease is also a valid option here — it handles heat well — but synthetic generally offers easier application and better corrosion protection for hardware you inspect frequently.
If You Want One Grease for Everything, Choose…
If you work on multiple vehicles and want to stock a single tube, synthetic grease is the most versatile pick. It works on slider pins, pad backing plates, caliper piston seals, and even hub assemblies in a pinch. It tolerates both the moderate heat of a commuter and the higher heat of a loaded vehicle, so it covers the widest range of scenarios without compromise.
Silicone is a close second for one-tube simplicity, but its lower temperature ceiling makes it a poor choice if you occasionally tow or drive aggressively. Copper grease is not the answer here — it is an anti-seize compound, not a true lubricant, and it can contaminate rubber components. If you want a single grease that handles most jobs without thinking, synthetic is the one to keep on the shelf. For a deeper look at choosing the right tool for precision work on your vehicle, see our [laser-engraver-buying-guide](https://example.com/laser-engraver-buying-guide) — a different kind of purchase decision, but the same principle of matching the tool to the job.
Honest Limitations: What Brake Grease Cannot Do
Brake grease is a lubricant, not a repair solution. Understanding brake grease limitations keeps you from wasting time on a tube of goop when the real problem is mechanical. Here is what grease cannot fix, no matter how much you apply.
Grease Won’t Fix a Seized Caliper
A seized caliper happens when the piston or slider pins rust, corrode, or bind inside the bore. Brake grease lubricates moving parts that still move. It cannot break free a piston that is already stuck. If your wheel drags, the vehicle pulls to one side, or the brake pad wears unevenly, grease will not solve it. You need to remove the caliper, inspect the piston boot, and replace the caliper if the piston will not retract with a C-clamp. Applying grease to a seized pin might mask the symptom briefly, but the binding returns within days. The only fix is cleaning or replacing the hardware.
Grease Won’t Stop Brake Fade
Brake fade is the loss of stopping power when brakes overheat. It happens when the pad friction material exceeds its temperature rating and starts to glaze, or when brake fluid boils and introduces air into the system. Grease does not absorb heat, dissipate it, or change the boiling point of your fluid. A common brake grease myth is that applying high-temp grease to the backing plate will keep the system cooler. It will not. The grease only reduces vibration and noise at the pad-to-caliper interface. If your brakes fade on a long descent, the fix is better pads, fresh fluid with a higher boiling point, or both — not grease.
Grease Won’t Repair Worn Hardware
Brake hardware — clips, springs, shims, and bushings — wears out over time. A clip that has lost its tension will let the pad rattle or sit at an angle. A spring that has fatigued will not hold the pad firmly against the rotor. Grease adds slickness but restores no structural integrity. If the hardware is visibly corroded, bent, or loose, replace it. Most brake hardware kits cost less than $20 and include new clips and springs for all four corners. Greasing worn hardware is a temporary band-aid that can lead to uneven pad wear and noise within a few thousand miles.
The Bottom Line on Brake Grease Myths
Brake grease is for lubrication and corrosion prevention on parts that are in good mechanical condition. If a component is seized, overheated, or worn out, grease will not bring it back. Diagnose the actual failure first, then apply grease to the healthy parts during reassembly. This distinction is the core of brake grease limitations that most DIY guides skip.
If you are chasing a brake problem that grease cannot solve, the issue might be elsewhere in your workflow. The same diagnostic discipline applies to other equipment — check our laser-engraver-troubleshooting guide for a structured approach to isolating mechanical faults before applying any fix.
Brake Grease vs. Anti-Seize: What’s the Difference?
Brake grease and anti-seize compound look similar in the jar, but they serve different jobs. Brake grease is a lubricant. It reduces friction between moving parts like caliper slides and pad backing plates. Anti-seize is a thread and fastener compound. It prevents corrosion and galling between metal surfaces that are bolted together. The two are not interchangeable, and the brake grease vs anti-seize confusion causes real problems in DIY brake jobs.
Both products share one trait: they keep metal parts from seizing. But their chemistry differs. Brake grease uses a silicone or synthetic base that stays put under high heat without melting onto the rotor. Anti-seize carries metallic particles — copper, nickel, or aluminum — that withstand extreme temperatures but do not lubricate sliding motion well.
| Attribute | Brake Grease | Anti-Seize Compound |
|---|---|---|
| Primary function | Lubricates sliding and moving parts | Prevents corrosion and galling on threaded fasteners |
| Typical locations | Caliper slide pins, pad backing plates, hardware clips | Lug studs, caliper bracket bolts, bleed screws |
| Temperature tolerance | Rated for brake heat (typically -40°F to 500°F+) | Copper and nickel grades handle 1,500°F+ |
| Base material | Silicone or synthetic grease with thickeners | Metallic particles suspended in a carrier grease |
| Effect on rubber | Compatible with rubber boots and seals (silicone grades) | Can swell or degrade rubber components |
| Lubrication quality | Excellent for sliding friction | Poor — not designed for sustained sliding contact |
| Best use case | Moving caliper and pad components | Bolts, studs, and threaded parts |
When Anti-Seize Is the Better Choice
Anti-seize on brakes belongs on threaded fasteners — not on sliding surfaces. If you have ever fought a rusted caliper bracket bolt or a seized lug nut, you understand why. A thin coat of copper anti-seize on the threads prevents the corrosion that welds fasteners in place. This makes future brake service dramatically easier.
Use anti-seize on these components:
– Caliper mounting bracket bolts
– Lug studs and wheel hub mating surfaces
– Brake line banjo bolts
– Bleeder screws (small amounts prevent seizing)
The metallic particles in anti-seize are what make it work. Copper flakes deform under clamping pressure and fill microscopic surface irregularities. This blocks oxygen and moisture from reaching the bare metal. The same particles that make it excellent on threads make it wrong for caliper slides — they create abrasive drag inside a moving joint.
Why You Shouldn’t Substitute One for the Other
Substituting anti-seize for brake grease on caliper slide pins is a common mistake with poor results. The metallic particles in anti-seize act like fine sandpaper inside the slide pin bore. Over time, they accelerate wear on the pin and the bore surface. The pin can start to bind, causing uneven pad wear and pulling during braking.
The reverse substitution — brake grease on lug studs — is also problematic. Brake grease is not formulated for the extreme clamping loads and temperatures that fasteners see. It can break down, wash out, and leave the threads dry and vulnerable to corrosion. Torque readings also become inconsistent because the grease changes friction characteristics at the thread interface.
The practical rule: brake grease goes where parts slide, anti-seize goes where parts are bolted. If you are unsure whether a specific contact point is a sliding surface or a threaded joint, check the service manual for that caliper design. The two products solve different problems, and mixing them up creates new ones.
For a broader look at choosing the right compound for each brake job, review the decision framework in the previous section. And if you are comparing tools for other precision work, our laser-engraver-comparisons guide covers similar “right tool for the right job” decisions.
Frequently Asked Questions About Brake Grease
Can I Use WD-40 as Brake Grease?
No. WD-40 is a solvent and light penetrant, not a lubricant designed for sustained load. It evaporates quickly, leaves little film, and will not protect sliding surfaces under brake temperatures. Using it on caliper slide pins or pad backing plates leads to dry contact and noise within days. WD-40 also attacks rubber boots on some caliper designs, accelerating cracking. Keep it for rusted bolts and door hinges. For brake components, use a dedicated brake grease that matches the rubber compatibility requirements of your caliper. If you need a quick reference on which compounds suit which parts, the type breakdown in the earlier section covers the options.
How Often Should I Reapply Brake Grease?
Brake grease frequency depends on the component and the environment. Caliper slide pins typically need fresh grease every brake pad replacement — roughly every 30,000 to 50,000 miles under normal driving. Pad backing plates should get a thin coat at the same interval. Some manufacturers recommend greasing slide pins every 12 months in regions with heavy road salt, because salt accelerates corrosion and washes out the lubricant. If you hear squealing or feel uneven pad wear before the scheduled service, inspect the grease film first. It is the most common cause of premature brake noise. For a maintenance timeline that fits your driving habits, check your vehicle service manual rather than guessing. Do not extend the interval just because the pads still have material left — the grease degrades on its own timeline.
Is It Safe to Use Brake Grease on ABS Components?
Use brake grease on ABS components only where the service manual specifies it. The ABS modulator, wheel speed sensors, and their connectors are precision electronic parts. Grease on the sensor tip or the tone ring can interfere with the magnetic signal, causing false wheel-speed readings and triggering the ABS warning light. The same applies to the modulator’s electrical connector — dielectric grease is acceptable on the connector seal, but standard brake grease is not. The only ABS-related points that typically accept brake grease are the caliper slide pins and pad contact areas on vehicles with ABS, since those are the same sliding parts as on non-ABS systems. If you are servicing the ABS unit itself, follow the manufacturer’s procedure exactly. For a broader brake grease faq covering related topics, the sections above on application points and compound selection answer most of the remaining questions. If you are also working on precision tools in your shop, our laser engraving software guide covers a different kind of maintenance.
Final Verdict: The Right Brake Grease for Every Job
Brake grease is a specialized lubricant engineered to protect critical braking components—caliper slide pins, pad backing plates, and hardware—from corrosion, seizing, and noise. Its most important attributes are thermal stability (withstanding brake-generated heat without melting or running), compatibility with rubber and plastic components, and resistance to water washout and contamination. The right choice depends entirely on the application point: what works for caliper pins will fail on pad backing plates, and vice versa.
For most DIYers and professional mechanics alike, our top recommendation is CRC Brake Caliper Synthetic Grease. It delivers a high synthetic temperature range (up to 400°F), is fully compatible with EPDM rubber and plastic boots, and resists water washout effectively. This makes it the safest all-around option for caliper slide pins and general hardware, providing consistent performance across the majority of vehicles without requiring multiple tubes of different products.
Use this decision framework to match the grease to your specific braking system:
If you need to lubricate caliper slide pins on a daily driver, choose a synthetic caliper grease (like CRC or Permatex Ultra) because it offers the best balance of high-temperature stability and rubber compatibility for the most common application.
If you need to prevent pad squeal and vibration noise, choose a dedicated anti-seize or ceramic brake lubricant because its higher solids content dampens vibration at the pad-to-caliper interface, which plain greases cannot do.
If you need to service a heavy-duty or performance vehicle with extreme braking heat, choose a high-temperature copper or ceramic anti-seize because it withstands sustained temperatures above 1,000°F without breaking down, while standard greases will liquefy.
If you need a single product for both pins and pads and value simplicity, choose a silicone-based brake grease (like 3M or AGS) because its broad rubber compatibility and moderate temperature rating make it acceptable for both surfaces, though it is not ideal for extreme conditions.
If you need to protect exposed hardware like clips and shims from corrosion, choose a corrosion-inhibiting grease with molybdenum disulfide because its film adheres strongly to metal surfaces and resists washout from road salt and moisture.
Now, the honest limitation: our top pick, CRC synthetic grease, cannot handle the extreme temperatures of heavy track use or repeated hard braking in towing applications. If your vehicle sees sustained brake temperatures above 500°F, you will need a dedicated high-temperature anti-seize instead. Also, no single grease will fix a mechanical issue like a seized caliper or worn pads—lubrication is a maintenance step, not a repair.
Make your choice based on the specific component you are servicing, not on brand loyalty or what is cheapest. A $5 tube of the correct grease can extend the life of your braking system and prevent a $300 caliper replacement. Apply it sparingly, never to the friction surface of the rotor or pad, and torque everything to spec. Your brakes—and your safety—depend on getting this simple step right.
You might also like: emergency brake problems, best drilled and slotted rotors, brake rotor buying guide