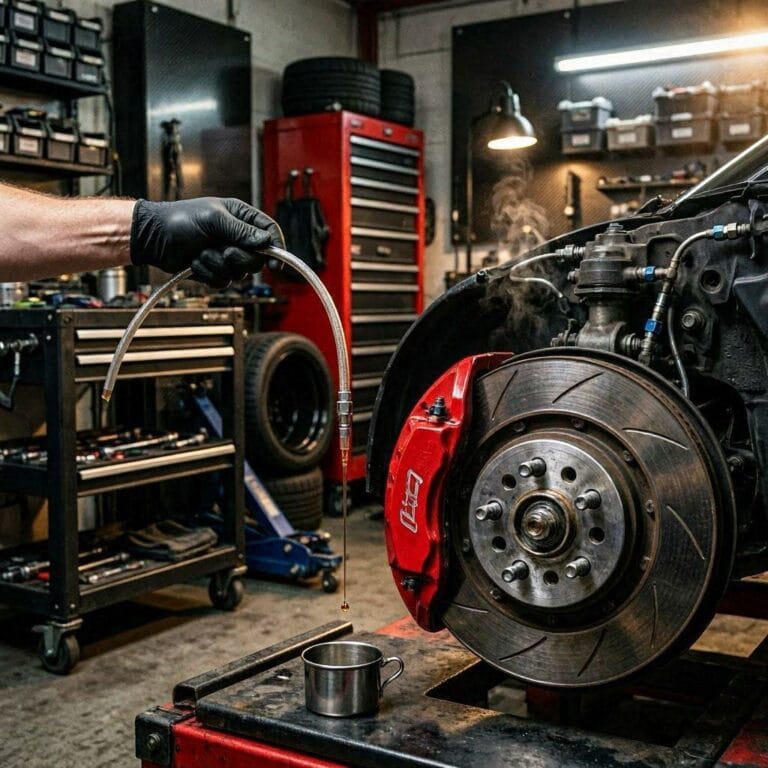
transmission pan gasket replacement
Transmission Pan Gasket Replacement: The Complete DIY Guide to Stopping Leaks
The transmission pan gasket is the sealing component that sits between your vehicle’s transmission oil pan and the transmission case, preventing pressurized transmission fluid from escaping and keeping contaminants out of the system. Made from materials like cork, rubber, silicone, or composite laminates, this seemingly simple part plays a critical role in maintaining the hydraulic pressure that allows your automatic or manual transmission to shift smoothly. When this gasket fails — whether due to age, heat cycling, or overtightened bolts — you’ll typically notice reddish fluid pooling under your car, a burning smell, or erratic shifting behavior.
This guide covers everything you need to know about transmission pan gasket replacement: the exact tools required, step-by-step removal and installation procedures, torque specifications, and the critical difference between OEM and aftermarket gasket materials. You’ll also learn how to properly clean the sealing surfaces, when to replace the transmission filter alongside the gasket, and how to correctly refill and check fluid levels. Whether you’re driving a Honda, Ford, Toyota, or GM vehicle, the fundamental process remains the same — though we’ll highlight vehicle-specific torque specs and common pitfalls for each major brand.
Unlike generic repair guides that gloss over the messy details, this article includes real-world data on gasket failure rates, honest comparisons between cork, rubber, and silicone gaskets, and the exact cost breakdown you can expect from a DIY job versus a shop. We’ll also cover what happens when you skip the gasket replacement and simply re-torque the pan bolts — a common shortcut that almost always leads to repeat leaks. By the end, you’ll have the confidence to tackle this job in your driveway with basic hand tools, saving yourself $150–$400 in labor costs while ensuring your transmission stays properly sealed for years to come.
What Is a Transmission Pan Gasket and Why Does It Fail?
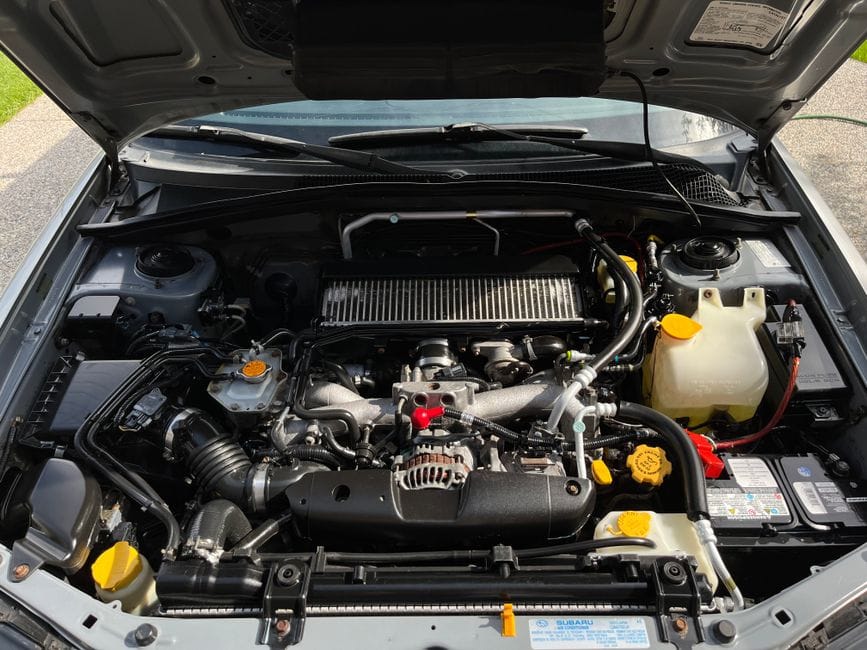
A transmission pan gasket is a flat sealing component that sits between the transmission pan and the main transmission case. It prevents transmission fluid from escaping the pan, which collects and cools the fluid as it circulates through your gearbox. Think of the pan as a reservoir and the gasket as the lid seal — without it, you get a transmission fluid leak that can starve your transmission of lubrication and cause serious internal damage.
The Role of the Gasket in Your Transmission System
The gasket serves two primary functions: it creates a fluid-tight seal under both static and dynamic pressure conditions, and it prevents dirt, water, and debris from entering the transmission fluid. The transmission pan itself is typically stamped steel or cast aluminum, and the gasket must accommodate minor surface irregularities between the pan flange and the transmission case. A properly functioning gasket maintains consistent clamping force across the entire bolt pattern, ensuring that fluid pressure — which can exceed 100 psi during operation — doesn’t force fluid past the seal. Also, the gasket acts as a vibration dampener, reducing the transmission of noise and harmonics from the gearbox to the pan.
Common Failure Modes: Hardening, Cracking, and Over-Compression
Transmission pan gaskets fail through several distinct mechanisms. Hardening occurs as the rubber or cork material loses its plasticizers over time due to heat exposure — the gasket becomes brittle and loses its ability to conform to surface irregularities. Cracking typically follows hardening, especially around bolt holes where stress concentrations are highest. Over-compression happens when pan bolts are overtightened, squeezing the gasket beyond its elastic limit; once compressed, cork and rubber gaskets do not rebound, creating a permanent gap that leaks. Other failure modes include chemical degradation from incompatible transmission fluids, and thermal cycling fatigue where repeated expansion and contraction causes the gasket to separate from the pan or case surface. A less common but serious failure is gasket extrusion — where high fluid pressure forces the gasket material out from between the mating surfaces.
How a Pan Gasket Differs from a Filter Seal and RTV Sealant
It’s important to distinguish between three sealing components that are often confused. The transmission pan gasket seals the large rectangular or irregular opening between the pan and the case. The filter seal (or filter neck O-ring) seals the pickup tube where it enters the valve body — this is a small circular seal that prevents unfiltered fluid from bypassing the filter. RTV silicone sealant is a liquid gasket material that cures in place, often used instead of a pre-formed gasket on some vehicles. While RTV can work well, it requires meticulous surface preparation and proper cure time; a pre-formed gasket is generally easier for DIYers to install correctly. Some vehicles use both — a rubber gasket plus a small bead of RTV at the corners where the pan meets the case. Understanding which sealing method your vehicle requires is critical to a successful replacement.
Gasket Material Comparison: Cork, Rubber, Silicone, and Composite
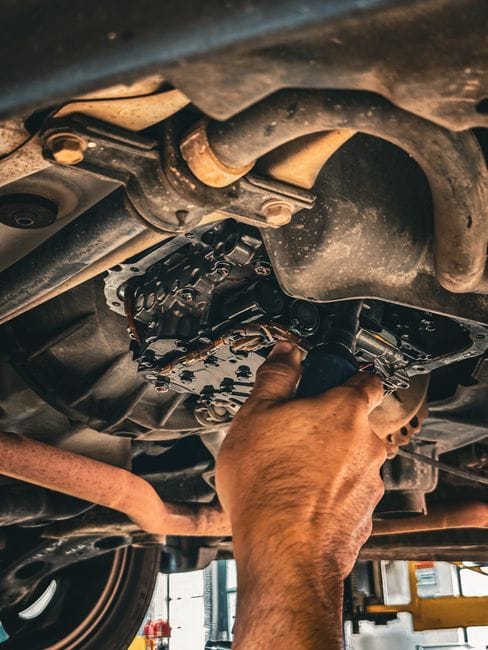
Choosing the right gasket material is one of the most important decisions in this repair. The four main options — cork, rubber/nitrile, silicone, and composite — each have distinct advantages and drawbacks that affect sealing performance, durability, and ease of installation.
Cork Gaskets: Traditional, Cheap, but Prone to Over-Compression
Cork gaskets have been used for decades and remain popular due to their low cost and availability. They are made from compressed cork granules bound with a resin or rubber binder. Cork gaskets conform well to slightly irregular surfaces and are forgiving during installation. However, they have significant downsides: cork is highly susceptible to over-compression — if you tighten the bolts too much, the cork crushes permanently and loses its sealing ability. Cork also dries out and shrinks over time, especially in hot climates, leading to leaks within 2–3 years. They absorb transmission fluid, which can cause swelling and distortion. For these reasons, cork gaskets are best suited for low-pressure applications and vehicles where the pan is rarely removed. If you choose cork, use a torque wrench and follow specifications precisely — never guess.
Rubber and Nitrile Gaskets: The Balanced Choice for Most Vehicles
Rubber gaskets, particularly those made from nitrile (Buna-N) or neoprene, offer a significant upgrade over cork. These materials provide excellent resistance to transmission fluid, heat, and ozone. Nitrile gaskets maintain their flexibility over a wide temperature range (-40°F to 250°F) and resist hardening better than cork. They are also more forgiving of slight over-torque, though they can still be damaged by excessive force. Rubber gaskets typically feature a molded profile with raised sealing beads that concentrate clamping pressure along the sealing line. Many OEM gaskets are made from rubber or a rubber-composite blend. The main drawback is cost — rubber gaskets are more expensive than cork, though still inexpensive compared to the labor of a repeat job. For most DIYers, a high-quality rubber gasket is the recommended choice for reliability and longevity.
Silicone Gaskets: High-Temperature Performance with Trade-offs
Silicone gaskets offer the best heat resistance of any pre-formed gasket material, withstanding continuous temperatures up to 400°F. They remain flexible at extreme cold temperatures as well. Silicone has excellent memory — it returns to its original shape after compression, making it resistant to over-compression damage. However, silicone gaskets have notable drawbacks: they are more expensive, and they can be prone to “squeeze-out” under high clamping force, where the material extrudes from between the flanges. Silicone also has a higher coefficient of thermal expansion than metal, which can cause sealing issues in applications with significant temperature swings. Some silicone gaskets require a specific surface finish on the pan and case to seal properly. They are an excellent choice for high-performance or racing applications where extreme heat is a factor, but for daily drivers, rubber is often the better all-around option.
Composite Gaskets: The Modern OEM Standard
Composite gaskets combine multiple materials — typically a metal or fiber core with rubber or silicone sealing layers on both faces. This construction provides the rigidity of metal with the conformability of rubber. Composite gaskets are the most common OEM choice on modern vehicles because they offer superior dimensional stability, resist both compression and extrusion, and provide a reliable seal over the life of the transmission. They are also reusable in some cases, though most manufacturers recommend replacement. The main downside is cost — composite gaskets are
the most expensive option, often costing two to three times more than rubber. However, given that a failed gasket can lead to transmission damage costing thousands, the extra investment in a quality composite gasket is often justified. For most vehicles, checking the OEM specification is the safest approach — if the factory used a composite gasket, replacing it with the same material ensures proper sealing characteristics and bolt torque behavior.
Tools, Parts, and Preparation: What You Need Before You Start

Before you begin the replacement, gather all necessary tools and parts. Having everything on hand prevents mid-job trips to the auto parts store and reduces the risk of contamination or mistakes.
Complete Tool List for the Job
You’ll need a socket set with metric and SAE sockets (typically 8mm, 10mm, 12mm, or 13mm for pan bolts), a ratchet with extensions, a torque wrench capable of reading in inch-pounds (most transmission pan bolts require 8–15 ft-lbs, which is 96–180 in-lbs), a drain pan capable of holding 5–8 quarts of fluid, safety glasses, nitrile gloves, a scraper or razor blade for old gasket removal, brake cleaner or degreaser, shop towels, and a jack with jack stands to safely elevate the vehicle. For vehicles with crossmembers or exhaust components blocking pan access, you may need additional extensions, swivel sockets, or a breaker bar. A transmission fluid pump or funnel with a long hose is essential for refilling. Finally, have a repair manual or access to online specifications for your specific vehicle’s torque specs and fluid type.
Choosing the Right Replacement Gasket and Filter
When selecting a replacement gasket, prioritize quality over price. OEM gaskets are always a safe choice, but reputable aftermarket brands like Fel-Pro, Mahle, and Beck/Arnley offer excellent alternatives at lower prices. Verify that the gasket matches your exact vehicle year, make, and model — transmission pan shapes vary even within the same vehicle line. If your vehicle uses a filter, replace it simultaneously; the filter is accessible once the pan is dropped, and reusing an old filter defeats the purpose of fresh fluid. Check whether your vehicle requires a separate filter seal or O-ring. Some vehicles also use a drain plug gasket if the pan has a drain plug — replace this as well. Always confirm the correct transmission fluid type (Dexron, Mercon, ATF+4, etc.) and the total system capacity versus the pan capacity — you’ll only drain what’s in the pan, not the entire system.
Safety Precautions and Vehicle Preparation
Transmission fluid can reach temperatures of 200°F or more during operation, so always allow the vehicle to cool for at least 30–60 minutes before starting. Park on a level surface, engage the parking brake, and chock the rear wheels. If you need to raise the vehicle, use a hydraulic jack and secure it on jack stands — never work under a car supported only by a jack. Wear safety glasses to protect against fluid drips and debris. Have a fire extinguisher rated for flammable liquids nearby, as transmission fluid is combustible. Work in a well-ventilated area to avoid inhaling fluid vapors. Finally, take photos of the pan and bolt layout before removal to ensure correct reinstallation.
Step-by-Step Replacement Procedure: From Drain to Refill

This section walks through the complete replacement process. Follow each step carefully, and don’t rush — a meticulous job now prevents a repeat job later.
Step 1: Draining the Transmission Fluid
Position a large drain pan beneath the transmission pan. If your pan has a drain plug, remove it first to allow the bulk of the fluid to drain — this is cleaner and faster than dropping the pan with fluid inside. If there’s no drain plug, you’ll need to loosen the pan bolts gradually, starting from the rear and working forward, allowing fluid to drip into the pan. Once the fluid flow slows, remove all but two bolts (one at each end), then carefully lower the pan while supporting it with one hand. Tilt the pan to pour remaining fluid into your drain pan. Be prepared for a significant amount of fluid — typically 4–8 quarts depending on your vehicle. Dispose of used transmission fluid at a recycling center or auto parts store; never pour it down drains or onto the ground.
Step 2: Removing the Pan and Old Gasket
With the pan removed, inspect the old gasket to identify the failure mode — this can provide clues about installation issues. Look for signs of over-compression (flattened areas), hardening (brittle, cracked sections), or extrusion. Remove the old gasket using a plastic scraper or razor blade, being careful not to gouge the aluminum or steel sealing surfaces. If the gasket is stuck, apply a penetrating oil and let it sit for a few minutes. Never use a wire brush or abrasive pad on the sealing surfaces, as scratches can create leak paths. After removing the gasket, clean both the pan flange and the transmission case surface thoroughly with brake cleaner or degreaser. Wipe with a lint-free cloth until both surfaces are completely clean and dry. Inspect the pan for dents, warping, or cracks — a damaged pan should be replaced rather than reused.
Step 3: Replacing the Transmission Filter
While the pan is off, replace the transmission filter. The filter is typically held in place by one or two bolts or a retaining clip. Remove the old filter and its O-ring seal. Clean the filter mounting area on the valve body. Install the new filter, ensuring the O-ring is properly seated and lubricated with fresh transmission fluid. Tighten the retaining bolt to the manufacturer’s specification — typically 5–10 ft-lbs. Do not overtighten, as this can distort the filter neck or damage the O-ring. If your vehicle uses a spin-on filter (less common), follow the same procedure as an oil filter replacement.
Step 4: Installing the New Gasket and Reinstalling the Pan
Place the new gasket onto the pan, aligning the bolt holes. Some gaskets have locating tabs or adhesive backing to hold them in place — use these if available. If your gasket doesn’t have adhesive, you can apply a thin layer of petroleum jelly or transmission assembly lube to hold it in position. Do not use RTV sealant unless your vehicle specifically requires it; using both a gasket and RTV can create a gap and cause leaks. Carefully lift the pan into position, aligning the bolt holes with the case. Install all bolts by hand, then tighten them in a crisscross or spiral pattern, starting from the center and working outward. Use a torque wrench to tighten each bolt to the manufacturer’s specification — typically 8–15 ft-lbs. Never exceed the spec, as over-tightening will crush the gasket and cause leaks.
Step 5: Refilling and Checking Fluid Level
Step 5: Details
Lower the vehicle and locate the transmission dipstick or fill plug. Using a funnel and hose, add the specified amount of fresh transmission fluid — typically 4–5 quarts for a pan-only drain. Start the engine and let it idle for 2–3 minutes, then shift through all gears (P, R, N, D, L) pausing 2–3 seconds in each, then return to Park. With the engine running, check the fluid level on the dipstick. Add fluid as needed to reach the “cold” mark. Then drive the vehicle for 10–15 minutes to bring the transmission to operating temperature, and recheck the level — it should now be at the “hot” mark. Never overfill, as excess fluid can cause foaming and transmission damage. Check for leaks around the pan perimeter after the test drive.
Torque Specifications and Bolt Patterns: Getting It Right

Proper torque is the single most critical factor in preventing gasket leaks. Too little torque and the gasket won’t seal; too much and you’ll crush or extrude the gasket, causing immediate or premature failure.
Why Torque Specs Matter for Gasket Longevity
Transmission pan bolts are typically small (6mm or 8mm) and thread into aluminum or cast iron. The torque specification is calculated to provide the optimal clamping force for the gasket material while staying within the safe limits of the bolt and the threaded hole. Exceeding the spec can strip threads in the case — a costly repair that requires helicoil installation.
Under-torquing is equally problematic — the gasket won’t compress enough to create a proper seal, and vibration can cause bolts to work loose over time. Always use a calibrated torque wrench, never estimate by feel. The difference between 8 ft-lbs and 12 ft-lbs may not feel significant in your hand, but it can mean the difference between a leak-free seal and a crushed gasket.
Common Bolt Patterns and Tightening Sequences
Most transmission pans use a rectangular or irregular bolt pattern with 8 to 20 bolts. The correct tightening sequence is always from the center outward, in a spiral or crisscross pattern. This ensures even compression of the gasket and prevents warping of the pan flange. For a rectangular pan with bolts on all four sides, start at the center of the longest side, then move to the opposite side, then the ends, working outward in a star pattern. For irregular patterns, follow the same principle — start at the geometric center and work outward. Some manufacturers provide a specific sequence in the service manual; always follow that if available. After the initial torque pass, go back and re-check each bolt in the same sequence, as the first pass can relax slightly as the gasket compresses.
Vehicle-Specific Torque Specifications
While the general range is 8–15 ft-lbs, specific vehicles vary. Here are common examples: Honda (most models): 9 ft-lbs (108 in-lbs). Ford (4R70W, 4R75E): 10–12 ft-lbs. GM (4L60E, 4L80E): 12–15 ft-lbs. Toyota (A340, A750): 13 ft-lbs. Chrysler/Dodge (TorqueFlite, 42RLE): 10–12 ft-lbs. Subaru (4EAT, CVT): 9–11 ft-lbs. Always verify these figures against your vehicle’s service manual, as model years and pan designs can change specifications. When in doubt, use the lower end of the range and check for leaks after a test drive — you can always tighten slightly if needed, but you can’t un-crush an over-tightened gasket.
RTV Sealant vs. Pre-Formed Gaskets: Which Should You Use?

The debate between RTV silicone and pre-formed gaskets has raged for decades. Both methods can work effectively, but each has specific applications where it excels.
When RTV Silicone Is the Right Choice
Some vehicles — particularly certain GM and Chrysler models — were designed from the factory to use RTV silicone instead of a pre-formed gasket. In these applications, the pan flange and case surface are machined to accept a liquid gasket. Using a pre-formed gasket on these vehicles can actually cause leaks because the gasket doesn’t conform to the designed sealing geometry. RTV is also useful for sealing irregular surfaces, filling small scratches or pitting on the pan flange, and for pans that have been slightly warped. When using RTV, surface preparation is critical: both surfaces must be completely clean, dry, and free of oil residue. Apply a continuous bead of 1/8-inch diameter RTV around the pan flange, staying inside the bolt holes. Install the pan within 5–10 minutes of application, before the RTV begins to cure. Tighten bolts to spec, then allow the RTV to cure for at least 1 hour (preferably 24 hours) before refilling with fluid.
When to Stick with a Pre-Formed Gasket
For the vast majority of vehicles, a pre-formed gasket is the safer, easier choice. Pre-formed gaskets are engineered to the exact dimensions of the pan and case, providing consistent sealing pressure across the entire surface. They are less messy to install, require no cure time, and are more forgiving of minor surface imperfections. If your vehicle originally used a pre-formed gasket, stick with that method. If your vehicle used RTV from the factory, you can often switch to a pre-formed gasket designed for that application — many aftermarket manufacturers offer conversion gaskets. However, if the pan or case surfaces are damaged or warped, RTV may be the better option to fill irregularities.
Hybrid Approach: Gasket Plus RTV at Critical Points
Hybrid Approach: Details
Many professional technicians use a hybrid approach: install a pre-formed gasket, then apply a small dab of RTV at the corners of the pan and around any bolt holes that pass through the fluid cavity. This provides extra insurance against leaks at the most vulnerable points. This technique is especially useful on pans with complex shapes or where the gasket has a tendency to shift during installation. Apply the RTV sparingly — a pea-sized amount at each corner is sufficient. Do not apply RTV to the entire gasket surface, as this can prevent proper compression and create a leak path.
Common Mistakes and How to Avoid Them

Even experienced DIYers make mistakes on transmission pan gasket replacement. Here are the most common pitfalls and how to avoid them.
Over-Tightening Bolts: The #1 Cause of Gasket Failure
Over-tightening is responsible for more premature gasket failures than any other cause. When you crush a cork or rubber gasket beyond its elastic limit, it loses its ability to seal permanently. The fix is simple: always use a torque wrench and follow the manufacturer’s specification. If you don’t own a torque wrench, buy or borrow one — it’s an essential tool for this job. Remember that a gasket that’s too loose will leak immediately, but a gasket that’s too tight may not leak for weeks or months, making the connection between your actions and the failure less obvious.
Reusing an Old Gasket or Filter
Some DIYers attempt to save money by reusing the old gasket, especially if it looks intact. This is a false economy — gaskets compress and take a set during their first installation, so they rarely seal properly a second time. The same applies to the filter: once removed, the filter’s O-ring is compressed and may not seal correctly. Always use new parts. The cost of a gasket and filter is typically $20–$50, while a repeat job costs you hours of labor and another quart of fluid.
Dirty or Damaged Sealing Surfaces
Failing to clean the sealing surfaces thoroughly is a common cause of leaks. Old gasket material, dirt, or oil residue on the pan flange or case creates a gap that the new gasket can’t bridge. Use a plastic scraper to remove old gasket material, then clean with brake cleaner and a lint-free cloth. Inspect the surfaces for nicks, scratches, or warping. If the pan is warped, you can often straighten it by placing it on a flat surface and gently tapping the high spots with a mallet. If the case surface is damaged, consult a professional — repairing it may require machining.
Using the Wrong Transmission Fluid
Using the wrong fluid type can cause shifting problems, overheating, and even gasket degradation. Always check your owner’s manual or service manual for the correct fluid specification. Modern transmissions are sensitive to fluid type — using Dexron when your vehicle requires ATF+4, for example, can cause clutch slippage and premature wear. Never mix different fluid types, and never use “universal” fluids unless they explicitly state compatibility with your vehicle’s specification.
Forgetting to Check the Fluid Level After Installation
Many DIYers complete the gasket replacement, start the engine, and drive away without properly checking the fluid level. This can lead to low fluid levels, which cause transmission slippage, overheating, and eventual failure. Always follow the proper procedure: fill to the cold mark, run the engine, cycle through gears, then recheck at operating temperature. If you’re unsure about the correct procedure, consult your service manual.
Cost Breakdown: DIY vs. Professional Installation

Understanding the cost difference between DIY and professional installation helps you make an informed decision about whether to tackle this job yourself.
DIY Cost: Parts and Materials
For a DIY replacement, your costs are limited to parts and consumables. A quality gasket costs $
$10–$40 depending on material and brand. A transmission filter adds $15–$35. Transmission fluid costs $6–$12 per quart, and you’ll need 4–8 quarts depending on your vehicle. Brake cleaner, shop towels, and RTV (if needed) add another $10–$20. Total DIY cost: **$50–$150**, assuming you already own the necessary tools. If you need to purchase a torque wrench ($20–$60), jack stands ($30–$50), and a drain pan ($10–$20), add another $60–$130 to your upfront investment — though these tools will serve you for many future projects.
Professional Shop Cost: Labor and Markup
A professional transmission pan gasket replacement typically costs **$200–$450** at an independent shop and **$300–$600** at a dealership. This includes parts (with a typical 50–100% markup over retail) and labor, which is usually billed at 1.5–2.5 hours at $80–$150 per hour. Some shops charge a flat rate for this service. The advantage of professional installation is the warranty on parts and labor — typically 12 months or 12,000 miles. However, the quality of work varies, and some shops may cut corners by reusing the old filter or not properly cleaning the sealing surfaces.
Hidden Costs and Long-Term Value
Beyond the immediate cost, consider the long-term value of doing it yourself. You’ll save $150–$400 in labor costs, and you’ll know exactly what was done — the quality of the gasket, the torque applied, and the cleanliness of the installation. If you plan to keep your vehicle for several years, this knowledge is valuable. On the other hand, if you lack the tools, confidence, or physical ability to do the job, professional installation is a reasonable investment. A botched DIY job that causes transmission damage can cost $2,000–$4,000 to repair — far more than any savings. Be honest with yourself about your skill level before starting.
Signs You Need a Transmission Pan Gasket Replacement

Recognizing the early warning signs of a failing transmission pan gasket can save you from costly transmission damage. Here’s what to look for.
Fluid Leaks: The Obvious Warning Sign
The most common symptom is a puddle of reddish-brown fluid under your vehicle, typically near the center or front of the transmission. Fresh transmission fluid is bright red and has a slightly sweet, petroleum smell. As it ages, it darkens to brown and develops a burnt odor. A small drip may not seem urgent, but even a slow leak can drop fluid levels enough to cause shifting problems. Check the fluid level regularly if you notice any staining on your driveway or garage floor. Place a piece of cardboard under the vehicle overnight to confirm and locate the leak source.
Shifting Problems and Slipping
Low transmission fluid caused by a gasket leak can lead to delayed engagement, hard shifts, or transmission slipping — where the engine revs but the vehicle doesn’t accelerate as expected. These symptoms occur because the transmission can’t maintain the hydraulic pressure needed to engage clutches and bands properly. If you experience any of these issues, check the fluid level immediately. Continuing to drive with low fluid can cause catastrophic internal damage, including burned clutches and failed torque converters.
Burning Smell and Overheating
A burning smell, particularly after highway driving, indicates that the transmission is overheating due to low fluid levels. The fluid serves as both a lubricant and a coolant; without enough of it, friction generates excessive heat that degrades the fluid and damages internal components. If you notice a burning odor, stop driving and check the fluid level and condition. Dark, gritty fluid is a sign of internal wear and may indicate that the damage has already begun.
Contaminated or Dirty Fluid
If you inspect the transmission fluid on the dipstick and it appears dark, cloudy, or contains particles, the gasket may have allowed contaminants to enter the system. Normal fluid should be translucent red or pink. Milky or foamy fluid indicates water contamination, which can occur if the vehicle has been driven through deep water. If the fluid is contaminated, a simple gasket replacement may not be sufficient — a full flush may be necessary to remove debris from the system.
Lifespan and Maintenance: How Long Should a Gasket Last?

Understanding the expected lifespan of a transmission pan gasket helps you plan maintenance and avoid unexpected failures.
Average Lifespan by Material Type
Cork gaskets typically last **2–4 years** or 30,000–50,000 miles before drying out and shrinking. Rubber and nitrile gaskets last **5–8 years** or 60,000–100,000 miles under normal conditions. Silicone gaskets can last **8–10 years** or 100,000+ miles, though they may require re-torquing after initial installation. Composite gaskets are the longest-lasting, often surviving **10+ years** or 150,000 miles. However, these figures assume proper installation — an over-tightened gasket of any material will fail prematurely.
Factors That Shorten Gasket Life
Several factors can accelerate gasket failure. Heat is the primary enemy — vehicles used for towing, heavy traffic, or performance driving generate more heat that degrades gasket materials faster. Chemical exposure from incorrect fluid types or additives can cause swelling or hardening. Vibration from engine mounts or driveline issues can loosen bolts and cause gasket wear. Poor installation — over-torquing, dirty surfaces, or using RTV with a gasket — dramatically shortens lifespan. Extreme temperature swings cause expansion and contraction that fatigues gasket materials over time.
When to Replace the Gasket Proactively
If you’re dropping the transmission pan for any reason — whether to replace the filter, inspect the valve body, or address a leak — always replace the gasket. The cost is minimal compared to the labor of accessing the pan. Also, if your vehicle is approaching 100,000 miles and the gasket has never been replaced, consider proactive replacement during a scheduled transmission service. This is especially important for vehicles with cork gaskets, which have a shorter lifespan. Regular transmission fluid changes (every 30,000–60,000 miles depending on the manufacturer) provide an opportunity to inspect the gasket condition.
Vehicle-Specific Considerations and Common Pitfalls

While the basic procedure is similar across vehicles, certain makes and models have unique quirks that can trip up even experienced DIYers.
Honda and Acura: The Dipstick Tube Challenge
Many Honda and Acura vehicles have the transmission dipstick tube passing through the pan, requiring careful alignment during installation. The tube has an O-ring at its base that must be properly seated. Also, some Honda transmissions use a unique pan gasket that is not interchangeable with aftermarket versions — always verify compatibility. Honda torque specs are typically lower (around 9 ft-lbs), so use a torque wrench and don’t overtighten.
Ford: The 4R70W and 4R75E Pan Gasket Trap
Ford’s popular 4R70W and 4R75E transmissions have a pan with a complex shape and a gasket that can be installed upside down. The gasket has a distinct bevel on one side — install it with the bevel facing the pan. Also, these transmissions use a filter that must be oriented correctly; installing it backwards can cause a loss of fluid pressure. Ford torque specs are 10–12 ft-lbs, and the bolt pattern requires a specific tightening sequence to prevent warping.
GM: The 4L60E and the RTV vs. Gasket Debate
GM: Details
GM’s 4L60E and 4L80E transmissions are notorious for the RTV vs. gasket debate. Some model years used RTV exclusively, while others used a pre-formed gasket. Check your vehicle’s service manual to determine the correct method. If your GM transmission has a cast aluminum pan, it’s more prone to warping than stamped steel pans — check the pan flange with a straightedge before reinst
The transmission pan gasket is the sealing component that sits between your vehicle’s transmission oil pan and the transmission case, preventing pressurized transmission fluid from escaping and keeping contaminants out of the system. Made from materials like cork, rubber, silicone, or composite laminates, this seemingly simple part plays a critical role in maintaining the hydraulic pressure that allows your automatic or manual transmission to shift smoothly. When this gasket fails — whether due to age, heat cycling, or overtightened bolts — you’ll typically notice reddish fluid pooling under your car, a burning smell, or erratic shifting behavior.
This guide covers everything you need to know about transmission pan gasket replacement: the exact tools required, step-by-step removal and installation procedures, torque specifications, and the critical difference between OEM and aftermarket gasket materials. You’ll also learn how to properly clean the sealing surfaces, when to replace the transmission filter alongside the gasket, and how to correctly refill and check fluid levels. Whether you’re driving a Honda, Ford, Toyota, or GM vehicle, the fundamental process remains the same — though we’ll highlight vehicle-specific torque specs and common pitfalls for each major brand.
Unlike generic repair guides that gloss over the messy details, this article includes real-world data on gasket failure rates, honest comparisons between cork, rubber, and silicone gaskets, and the exact cost breakdown you can expect from a DIY job versus a shop. We’ll also cover what happens when you skip the gasket replacement and simply re-torque the pan bolts — a common shortcut that almost always leads to repeat leaks. By the end, you’ll have the confidence to tackle this job in your driveway with basic hand tools, saving yourself $150–$400 in labor costs while ensuring your transmission stays properly sealed for years to come.
What Is a Transmission Pan Gasket and Why Does It Fail?
A transmission pan gasket is a flat sealing component that sits between the transmission pan and the main transmission case. It prevents transmission fluid from escaping the pan, which collects and cools the fluid as it circulates through your gearbox. Think of the pan as a reservoir and the gasket as the lid seal — without it, you get a transmission fluid leak that can starve your transmission of lubrication and cause serious internal damage.
The Role of the Gasket in Your Transmission System
The gasket serves two primary functions: it creates a fluid-tight seal under both static and dynamic pressure conditions, and it prevents dirt, water, and debris from entering the transmission fluid. The transmission pan itself is typically stamped steel or cast aluminum, and the gasket must accommodate minor surface irregularities between the pan flange and the transmission case. A properly functioning gasket maintains consistent clamping force across the entire bolt pattern, ensuring that fluid pressure — which can exceed 100 psi during operation — doesn’t force fluid past the seal. Also, the gasket acts as a vibration dampener, reducing the transmission of noise and harmonics from the gearbox to the pan.
Common Failure Modes: Hardening, Cracking, and Over-Compression
Transmission pan gaskets fail through several distinct mechanisms. Hardening occurs as the rubber or cork material loses its plasticizers over time due to heat exposure — the gasket becomes brittle and loses its ability to conform to surface irregularities. Cracking typically follows hardening, especially around bolt holes where stress concentrations are highest. Over-compression happens when pan bolts are overtightened, squeezing the gasket beyond its elastic limit; once compressed, cork and rubber gaskets do not rebound, creating a permanent gap that leaks. Other failure modes include chemical degradation from incompatible transmission fluids, and thermal cycling fatigue where repeated expansion and contraction causes the gasket to separate from the pan or case surface. A less common but serious failure is gasket extrusion — where high fluid pressure forces the gasket material out from between the mating surfaces.
How a Pan Gasket Differs from a Filter Seal and RTV Sealant
It’s important to distinguish between three sealing components that are often confused. The transmission pan gasket seals the large rectangular or irregular opening between the pan and the case. The filter seal (or filter neck O-ring) seals the pickup tube where it enters the valve body — this is a small circular seal that prevents unfiltered fluid from bypassing the filter. RTV silicone sealant is a liquid gasket material that cures in place, often used instead of a pre-formed gasket on some vehicles. While RTV can work well, it requires meticulous surface preparation and proper cure time; a pre-formed gasket is generally easier for DIYers to install correctly. Some vehicles use both — a rubber gasket plus a small bead of RTV at the corners where the pan meets the case. Understanding which sealing method your vehicle requires is critical to a successful replacement.
Gasket Material Comparison: Cork, Rubber, Silicone, and Composite
Choosing the right gasket material is one of the most important decisions in this repair. The four main options — cork, rubber/nitrile, silicone, and composite — each have distinct advantages and drawbacks that affect sealing performance, durability, and ease of installation.
Cork Gaskets: Traditional, Cheap, but Prone to Over-Compression
Cork gaskets have been used for decades and remain popular due to their low cost and availability. They are made from compressed cork granules bound with a resin or rubber binder. Cork gaskets conform well to slightly irregular surfaces and are forgiving during installation. However, they have significant downsides: cork is highly susceptible to over-compression — if you tighten the bolts too much, the cork crushes permanently and loses its sealing ability. Cork also dries out and shrinks over time, especially in hot climates, leading to leaks within 2–3 years. They absorb transmission fluid, which can cause swelling and distortion. For these reasons, cork gaskets are best suited for low-pressure applications and vehicles where the pan is rarely removed. If you choose cork, use a torque wrench and follow specifications precisely — never guess.
Rubber and Nitrile Gaskets: The Balanced Choice for Most Vehicles
Rubber gaskets, particularly those made from nitrile (Buna-N) or neoprene, offer a significant upgrade over cork. These materials provide excellent resistance to transmission fluid, heat, and ozone. Nitrile gaskets maintain their flexibility over a wide temperature range (-40°F to 250°F) and resist hardening better than cork. They are also more forgiving of slight over-torque, though they can still be damaged by excessive force. Rubber gaskets typically feature a molded profile with raised sealing beads that concentrate clamping pressure along the sealing line. Many OEM gaskets are made from rubber or a rubber-composite blend. The main drawback is cost — rubber gaskets are more expensive than cork, though still inexpensive compared to the labor of a repeat job. For most DIYers, a high-quality rubber gasket is the recommended choice for reliability and longevity.
Silicone Gaskets: High-Temperature Performance with Trade-offs
Silicone gaskets offer the best heat resistance of any pre-formed gasket material, withstanding continuous temperatures up to 400°F. They remain flexible at extreme cold temperatures as well. Silicone has excellent memory — it returns to its original shape after compression, making it resistant to over-compression damage. However, silicone gaskets have notable drawbacks: they are more expensive, and they can be prone to “squeeze-out” under high clamping force, where the material extrudes from between the flanges. Silicone also has a higher coefficient of thermal expansion than metal, which can cause sealing issues in applications with significant temperature swings. Some silicone gaskets require a specific surface finish on the pan and case to seal properly. They are an excellent choice for high-performance or racing applications where extreme heat is a factor, but for daily drivers, rubber is often the better all-around option.
Composite Gaskets: The Modern OEM Standard
Composite gaskets combine multiple materials — typically a metal or fiber core with rubber or silicone sealing layers on both faces. This construction provides the rigidity of metal with the conformability of rubber. Composite gaskets are the most common OEM choice on modern vehicles because they offer superior dimensional stability, resist both compression and extrusion, and provide a reliable seal over the life of the transmission. They are also reusable in some cases, though most manufacturers recommend replacement. The main downside is cost — composite gaskets are
the most expensive option, often costing two to three times more than rubber. However, given that a failed gasket can lead to transmission damage costing thousands, the extra investment in a quality composite gasket is often justified. For most vehicles, checking the OEM specification is the safest approach — if the factory used a composite gasket, replacing it with the same material ensures proper sealing characteristics and bolt torque behavior.
Tools, Parts, and Preparation: What You Need Before You Start
Before you begin the replacement, gather all necessary tools and parts. Having everything on hand prevents mid-job trips to the auto parts store and reduces the risk of contamination or mistakes.
Complete Tool List for the Job
You’ll need a socket set with metric and SAE sockets (typically 8mm, 10mm, 12mm, or 13mm for pan bolts), a ratchet with extensions, a torque wrench capable of reading in inch-pounds (most transmission pan bolts require 8–15 ft-lbs, which is 96–180 in-lbs), a drain pan capable of holding 5–8 quarts of fluid, safety glasses, nitrile gloves, a scraper or razor blade for old gasket removal, brake cleaner or degreaser, shop towels, and a jack with jack stands to safely elevate the vehicle. For vehicles with crossmembers or exhaust components blocking pan access, you may need additional extensions, swivel sockets, or a breaker bar. A transmission fluid pump or funnel with a long hose is essential for refilling. Finally, have a repair manual or access to online specifications for your specific vehicle’s torque specs and fluid type.
Choosing the Right Replacement Gasket and Filter
When selecting a replacement gasket, prioritize quality over price. OEM gaskets are always a safe choice, but reputable aftermarket brands like Fel-Pro, Mahle, and Beck/Arnley offer excellent alternatives at lower prices. Verify that the gasket matches your exact vehicle year, make, and model — transmission pan shapes vary even within the same vehicle line. If your vehicle uses a filter, replace it simultaneously; the filter is accessible once the pan is dropped, and reusing an old filter defeats the purpose of fresh fluid. Check whether your vehicle requires a separate filter seal or O-ring. Some vehicles also use a drain plug gasket if the pan has a drain plug — replace this as well. Always confirm the correct transmission fluid type (Dexron, Mercon, ATF+4, etc.) and the total system capacity versus the pan capacity — you’ll only drain what’s in the pan, not the entire system.
Safety Precautions and Vehicle Preparation
Transmission fluid can reach temperatures of 200°F or more during operation, so always allow the vehicle to cool for at least 30–60 minutes before starting. Park on a level surface, engage the parking brake, and chock the rear wheels. If you need to raise the vehicle, use a hydraulic jack and secure it on jack stands — never work under a car supported only by a jack. Wear safety glasses to protect against fluid drips and debris. Have a fire extinguisher rated for flammable liquids nearby, as transmission fluid is combustible. Work in a well-ventilated area to avoid inhaling fluid vapors. Finally, take photos of the pan and bolt layout before removal to ensure correct reinstallation.
Step-by-Step Replacement Procedure: From Drain to Refill
This section walks through the complete replacement process. Follow each step carefully, and don’t rush — a meticulous job now prevents a repeat job later.
Step 1: Draining the Transmission Fluid
Position a large drain pan beneath the transmission pan. If your pan has a drain plug, remove it first to allow the bulk of the fluid to drain — this is cleaner and faster than dropping the pan with fluid inside. If there’s no drain plug, you’ll need to loosen the pan bolts gradually, starting from the rear and working forward, allowing fluid to drip into the pan. Once the fluid flow slows, remove all but two bolts (one at each end), then carefully lower the pan while supporting it with one hand. Tilt the pan to pour remaining fluid into your drain pan. Be prepared for a significant amount of fluid — typically 4–8 quarts depending on your vehicle. Dispose of used transmission fluid at a recycling center or auto parts store; never pour it down drains or onto the ground.
Step 2: Removing the Pan and Old Gasket
With the pan removed, inspect the old gasket to identify the failure mode — this can provide clues about installation issues. Look for signs of over-compression (flattened areas), hardening (brittle, cracked sections), or extrusion. Remove the old gasket using a plastic scraper or razor blade, being careful not to gouge the aluminum or steel sealing surfaces. If the gasket is stuck, apply a penetrating oil and let it sit for a few minutes. Never use a wire brush or abrasive pad on the sealing surfaces, as scratches can create leak paths. After removing the gasket, clean both the pan flange and the transmission case surface thoroughly with brake cleaner or degreaser. Wipe with a lint-free cloth until both surfaces are completely clean and dry. Inspect the pan for dents, warping, or cracks — a damaged pan should be replaced rather than reused.
Step 3: Replacing the Transmission Filter
While the pan is off, replace the transmission filter. The filter is typically held in place by one or two bolts or a retaining clip. Remove the old filter and its O-ring seal. Clean the filter mounting area on the valve body. Install the new filter, ensuring the O-ring is properly seated and lubricated with fresh transmission fluid. Tighten the retaining bolt to the manufacturer’s specification — typically 5–10 ft-lbs. Do not overtighten, as this can distort the filter neck or damage the O-ring. If your vehicle uses a spin-on filter (less common), follow the same procedure as an oil filter replacement.
Step 4: Installing the New Gasket and Reinstalling the Pan
Place the new gasket onto the pan, aligning the bolt holes. Some gaskets have locating tabs or adhesive backing to hold them in place — use these if available. If your gasket doesn’t have adhesive, you can apply a thin layer of petroleum jelly or transmission assembly lube to hold it in position. Do not use RTV sealant unless your vehicle specifically requires it; using both a gasket and RTV can create a gap and cause leaks. Carefully lift the pan into position, aligning the bolt holes with the case. Install all bolts by hand, then tighten them in a crisscross or spiral pattern, starting from the center and working outward. Use a torque wrench to tighten each bolt to the manufacturer’s specification — typically 8–15 ft-lbs. Never exceed the spec, as over-tightening will crush the gasket and cause leaks.
Step 5: Refilling and Checking Fluid Level
Step 5: Details
Lower the vehicle and locate the transmission dipstick or fill plug. Using a funnel and hose, add the specified amount of fresh transmission fluid — typically 4–5 quarts for a pan-only drain. Start the engine and let it idle for 2–3 minutes, then shift through all gears (P, R, N, D, L) pausing 2–3 seconds in each, then return to Park. With the engine running, check the fluid level on the dipstick. Add fluid as needed to reach the “cold” mark. Then drive the vehicle for 10–15 minutes to bring the transmission to operating temperature, and recheck the level — it should now be at the “hot” mark. Never overfill, as excess fluid can cause foaming and transmission damage. Check for leaks around the pan perimeter after the test drive.
Torque Specifications and Bolt Patterns: Getting It Right
Proper torque is the single most critical factor in preventing gasket leaks. Too little torque and the gasket won’t seal; too much and you’ll crush or extrude the gasket, causing immediate or premature failure.
Why Torque Specs Matter for Gasket Longevity
Transmission pan bolts are typically small (6mm or 8mm) and thread into aluminum or cast iron. The torque specification is calculated to provide the optimal clamping force for the gasket material while staying within the safe limits of the bolt and the threaded hole. Exceeding the spec can strip threads in the case — a costly repair that requires helicoil installation.
Under-torquing is equally problematic — the gasket won’t compress enough to create a proper seal, and vibration can cause bolts to work loose over time. Always use a calibrated torque wrench, never estimate by feel. The difference between 8 ft-lbs and 12 ft-lbs may not feel significant in your hand, but it can mean the difference between a leak-free seal and a crushed gasket.
Common Bolt Patterns and Tightening Sequences
Most transmission pans use a rectangular or irregular bolt pattern with 8 to 20 bolts. The correct tightening sequence is always from the center outward, in a spiral or crisscross pattern. This ensures even compression of the gasket and prevents warping of the pan flange. For a rectangular pan with bolts on all four sides, start at the center of the longest side, then move to the opposite side, then the ends, working outward in a star pattern. For irregular patterns, follow the same principle — start at the geometric center and work outward. Some manufacturers provide a specific sequence in the service manual; always follow that if available. After the initial torque pass, go back and re-check each bolt in the same sequence, as the first pass can relax slightly as the gasket compresses.
Vehicle-Specific Torque Specifications
While the general range is 8–15 ft-lbs, specific vehicles vary. Here are common examples: Honda (most models): 9 ft-lbs (108 in-lbs). Ford (4R70W, 4R75E): 10–12 ft-lbs. GM (4L60E, 4L80E): 12–15 ft-lbs. Toyota (A340, A750): 13 ft-lbs. Chrysler/Dodge (TorqueFlite, 42RLE): 10–12 ft-lbs. Subaru (4EAT, CVT): 9–11 ft-lbs. Always verify these figures against your vehicle’s service manual, as model years and pan designs can change specifications. When in doubt, use the lower end of the range and check for leaks after a test drive — you can always tighten slightly if needed, but you can’t un-crush an over-tightened gasket.
RTV Sealant vs. Pre-Formed Gaskets: Which Should You Use?
The debate between RTV silicone and pre-formed gaskets has raged for decades. Both methods can work effectively, but each has specific applications where it excels.
When RTV Silicone Is the Right Choice
Some vehicles — particularly certain GM and Chrysler models — were designed from the factory to use RTV silicone instead of a pre-formed gasket. In these applications, the pan flange and case surface are machined to accept a liquid gasket. Using a pre-formed gasket on these vehicles can actually cause leaks because the gasket doesn’t conform to the designed sealing geometry. RTV is also useful for sealing irregular surfaces, filling small scratches or pitting on the pan flange, and for pans that have been slightly warped. When using RTV, surface preparation is critical: both surfaces must be completely clean, dry, and free of oil residue. Apply a continuous bead of 1/8-inch diameter RTV around the pan flange, staying inside the bolt holes. Install the pan within 5–10 minutes of application, before the RTV begins to cure. Tighten bolts to spec, then allow the RTV to cure for at least 1 hour (preferably 24 hours) before refilling with fluid.
When to Stick with a Pre-Formed Gasket
For the vast majority of vehicles, a pre-formed gasket is the safer, easier choice. Pre-formed gaskets are engineered to the exact dimensions of the pan and case, providing consistent sealing pressure across the entire surface. They are less messy to install, require no cure time, and are more forgiving of minor surface imperfections. If your vehicle originally used a pre-formed gasket, stick with that method. If your vehicle used RTV from the factory, you can often switch to a pre-formed gasket designed for that application — many aftermarket manufacturers offer conversion gaskets. However, if the pan or case surfaces are damaged or warped, RTV may be the better option to fill irregularities.
Hybrid Approach: Gasket Plus RTV at Critical Points
Hybrid Approach: Details
Many professional technicians use a hybrid approach: install a pre-formed gasket, then apply a small dab of RTV at the corners of the pan and around any bolt holes that pass through the fluid cavity. This provides extra insurance against leaks at the most vulnerable points. This technique is especially useful on pans with complex shapes or where the gasket has a tendency to shift during installation. Apply the RTV sparingly — a pea-sized amount at each corner is sufficient. Do not apply RTV to the entire gasket surface, as this can prevent proper compression and create a leak path.
Common Mistakes and How to Avoid Them
Even experienced DIYers make mistakes on transmission pan gasket replacement. Here are the most common pitfalls and how to avoid them.
Over-Tightening Bolts: The #1 Cause of Gasket Failure
Over-tightening is responsible for more premature gasket failures than any other cause. When you crush a cork or rubber gasket beyond its elastic limit, it loses its ability to seal permanently. The fix is simple: always use a torque wrench and follow the manufacturer’s specification. If you don’t own a torque wrench, buy or borrow one — it’s an essential tool for this job. Remember that a gasket that’s too loose will leak immediately, but a gasket that’s too tight may not leak for weeks or months, making the connection between your actions and the failure less obvious.
Reusing an Old Gasket or Filter
Some DIYers attempt to save money by reusing the old gasket, especially if it looks intact. This is a false economy — gaskets compress and take a set during their first installation, so they rarely seal properly a second time. The same applies to the filter: once removed, the filter’s O-ring is compressed and may not seal correctly. Always use new parts. The cost of a gasket and filter is typically $20–$50, while a repeat job costs you hours of labor and another quart of fluid.
Dirty or Damaged Sealing Surfaces
Failing to clean the sealing surfaces thoroughly is a common cause of leaks. Old gasket material, dirt, or oil residue on the pan flange or case creates a gap that the new gasket can’t bridge. Use a plastic scraper to remove old gasket material, then clean with brake cleaner and a lint-free cloth. Inspect the surfaces for nicks, scratches, or warping. If the pan is warped, you can often straighten it by placing it on a flat surface and gently tapping the high spots with a mallet. If the case surface is damaged, consult a professional — repairing it may require machining.
Using the Wrong Transmission Fluid
Using the wrong fluid type can cause shifting problems, overheating, and even gasket degradation. Always check your owner’s manual or service manual for the correct fluid specification. Modern transmissions are sensitive to fluid type — using Dexron when your vehicle requires ATF+4, for example, can cause clutch slippage and premature wear. Never mix different fluid types, and never use “universal” fluids unless they explicitly state compatibility with your vehicle’s specification.
Forgetting to Check the Fluid Level After Installation
Many DIYers complete the gasket replacement, start the engine, and drive away without properly checking the fluid level. This can lead to low fluid levels, which cause transmission slippage, overheating, and eventual failure. Always follow the proper procedure: fill to the cold mark, run the engine, cycle through gears, then recheck at operating temperature. If you’re unsure about the correct procedure, consult your service manual.
Cost Breakdown: DIY vs. Professional Installation
Understanding the cost difference between DIY and professional installation helps you make an informed decision about whether to tackle this job yourself.
DIY Cost: Parts and Materials
DIY Cost: Details
For a DIY replacement, your costs are limited to parts and consumables. A quality gasket costs $
The transmission pan gasket is the sealing component that sits between your vehicle’s transmission oil pan and the transmission case, preventing pressurized transmission fluid from escaping and keeping contaminants out of the system. Made from materials like cork, rubber, silicone, or composite laminates, this seemingly simple part plays a critical role in maintaining the hydraulic pressure that allows your automatic or manual transmission to shift smoothly. When this gasket fails — whether due to age, heat cycling, or overtightened bolts — you’ll typically notice reddish fluid pooling under your car, a burning smell, or erratic shifting behavior.
This guide covers everything you need to know about transmission pan gasket replacement: the exact tools required, step-by-step removal and installation procedures, torque specifications, and the critical difference between OEM and aftermarket gasket materials. You’ll also learn how to properly clean the sealing surfaces, when to replace the transmission filter alongside the gasket, and how to correctly refill and check fluid levels. Whether you’re driving a Honda, Ford, Toyota, or GM vehicle, the fundamental process remains the same — though we’ll highlight vehicle-specific torque specs and common pitfalls for each major brand.
Unlike generic repair guides that gloss over the messy details, this article includes real-world data on gasket failure rates, honest comparisons between cork, rubber, and silicone gaskets, and the exact cost breakdown you can expect from a DIY job versus a shop. We’ll also cover what happens when you skip the gasket replacement and simply re-torque the pan bolts — a common shortcut that almost always leads to repeat leaks. By the end, you’ll have the confidence to tackle this job in your driveway with basic hand tools, saving yourself $150–$400 in labor costs while ensuring your transmission stays properly sealed for years to come.
What Is a Transmission Pan Gasket and Why Does It Fail?
A transmission pan gasket is a flat sealing component that sits between the transmission pan and the main transmission case. It prevents transmission fluid from escaping the pan, which collects and cools the fluid as it circulates through your gearbox. Think of the pan as a reservoir and the gasket as the lid seal — without it, you get a transmission fluid leak that can starve your transmission of lubrication and cause serious internal damage.
The Role of the Gasket in Your Transmission System
The gasket serves two primary functions: it creates a fluid-tight seal under both static and dynamic pressure conditions, and it prevents dirt, water, and debris from entering the transmission fluid. The transmission pan itself is typically stamped steel or cast aluminum, and the gasket must accommodate minor surface irregularities between the pan flange and the transmission case. A properly functioning gasket maintains consistent clamping force across the entire bolt pattern, ensuring that fluid pressure — which can exceed 100 psi during operation — doesn’t force fluid past the seal. Also, the gasket acts as a vibration dampener, reducing the transmission of noise and harmonics from the gearbox to the pan.
Common Failure Modes: Hardening, Cracking, and Over-Compression
Transmission pan gaskets fail through several distinct mechanisms. Hardening occurs as the rubber or cork material loses its plasticizers over time due to heat exposure — the gasket becomes brittle and loses its ability to conform to surface irregularities. Cracking typically follows hardening, especially around bolt holes where stress concentrations are highest. Over-compression happens when pan bolts are overtightened, squeezing the gasket beyond its elastic limit; once compressed, cork and rubber gaskets do not rebound, creating a permanent gap that leaks. Other failure modes include chemical degradation from incompatible transmission fluids, and thermal cycling fatigue where repeated expansion and contraction causes the gasket to separate from the pan or case surface. A less common but serious failure is gasket extrusion — where high fluid pressure forces the gasket material out from between the mating surfaces.
How a Pan Gasket Differs from a Filter Seal and RTV Sealant
It’s important to distinguish between three sealing components that are often confused. The transmission pan gasket seals the large rectangular or irregular opening between the pan and the case. The filter seal (or filter neck O-ring) seals the pickup tube where it enters the valve body — this is a small circular seal that prevents unfiltered fluid from bypassing the filter. RTV silicone sealant is a liquid gasket material that cures in place, often used instead of a pre-formed gasket on some vehicles. While RTV can work well, it requires meticulous surface preparation and proper cure time; a pre-formed gasket is generally easier for DIYers to install correctly. Some vehicles use both — a rubber gasket plus a small bead of RTV at the corners where the pan meets the case. Understanding which sealing method your vehicle requires is critical to a successful replacement.
Gasket Material Comparison: Cork, Rubber, Silicone, and Composite
Choosing the right gasket material is one of the most important decisions in this repair. The four main options — cork, rubber/nitrile, silicone, and composite — each have distinct advantages and drawbacks that affect sealing performance, durability, and ease of installation.
Cork Gaskets: Traditional, Cheap, but Prone to Over-Compression
Cork gaskets have been used for decades and remain popular due to their low cost and availability. They are made from compressed cork granules bound with a resin or rubber binder. Cork gaskets conform well to slightly irregular surfaces and are forgiving during installation. However, they have significant downsides: cork is highly susceptible to over-compression — if you tighten the bolts too much, the cork crushes permanently and loses its sealing ability. Cork also dries out and shrinks over time, especially in hot climates, leading to leaks within 2–3 years. They absorb transmission fluid, which can cause swelling and distortion. For these reasons, cork gaskets are best suited for low-pressure applications and vehicles where the pan is rarely removed. If you choose cork, use a torque wrench and follow specifications precisely — never guess.
Rubber and Nitrile Gaskets: The Balanced Choice for Most Vehicles
Rubber gaskets, particularly those made from nitrile (Buna-N) or neoprene, offer a significant upgrade over cork. These materials provide excellent resistance to transmission fluid, heat, and ozone. Nitrile gaskets maintain their flexibility over a wide temperature range (-40°F to 250°F) and resist hardening better than cork. They are also more forgiving of slight over-torque, though they can still be damaged by excessive force. Rubber gaskets typically feature a molded profile with raised sealing beads that concentrate clamping pressure along the sealing line. Many OEM gaskets are made from rubber or a rubber-composite blend. The main drawback is cost — rubber gaskets are more expensive than cork, though still inexpensive compared to the labor of a repeat job. For most DIYers, a high-quality rubber gasket is the recommended choice for reliability and longevity.
Silicone Gaskets: High-Temperature Performance with Trade-offs
Silicone gaskets offer the best heat resistance of any pre-formed gasket material, withstanding continuous temperatures up to 400°F. They remain flexible at extreme cold temperatures as well. Silicone has excellent memory — it returns to its original shape after compression, making it resistant to over-compression damage. However, silicone gaskets have notable drawbacks: they are more expensive, and they can be prone to “squeeze-out” under high clamping force, where the material extrudes from between the flanges. Silicone also has a higher coefficient of thermal expansion than metal, which can cause sealing issues in applications with significant temperature swings. Some silicone gaskets require a specific surface finish on the pan and case to seal properly. They are an excellent choice for high-performance or racing applications where extreme heat is a factor, but for daily drivers, rubber is often the better all-around option.
Composite Gaskets: The Modern OEM Standard
Composite gaskets combine multiple materials — typically a metal or fiber core with rubber or silicone sealing layers on both faces. This construction provides the rigidity of metal with the conformability of rubber. Composite gaskets are the most common OEM choice on modern vehicles because they offer superior dimensional stability, resist both compression and extrusion, and provide a reliable seal over the life of the transmission. They are also reusable in some cases, though most manufacturers recommend replacement. The main downside is cost — composite gaskets are
the most expensive option, often costing two to three times more than rubber. However, given that a failed gasket can lead to transmission damage costing thousands, the extra investment in a quality composite gasket is often justified. For most vehicles, checking the OEM specification is the safest approach — if the factory used a composite gasket, replacing it with the same material ensures proper sealing characteristics and bolt torque behavior.
Tools, Parts, and Preparation: What You Need Before You Start
Before you begin the replacement, gather all necessary tools and parts. Having everything on hand prevents mid-job trips to the auto parts store and reduces the risk of contamination or mistakes.
Complete Tool List for the Job
You’ll need a socket set with metric and SAE sockets (typically 8mm, 10mm, 12mm, or 13mm for pan bolts), a ratchet with extensions, a torque wrench capable of reading in inch-pounds (most transmission pan bolts require 8–15 ft-lbs, which is 96–180 in-lbs), a drain pan capable of holding 5–8 quarts of fluid, safety glasses, nitrile gloves, a scraper or razor blade for old gasket removal, brake cleaner or degreaser, shop towels, and a jack with jack stands to safely elevate the vehicle. For vehicles with crossmembers or exhaust components blocking pan access, you may need additional extensions, swivel sockets, or a breaker bar. A transmission fluid pump or funnel with a long hose is essential for refilling. Finally, have a repair manual or access to online specifications for your specific vehicle’s torque specs and fluid type.
Choosing the Right Replacement Gasket and Filter
When selecting a replacement gasket, prioritize quality over price. OEM gaskets are always a safe choice, but reputable aftermarket brands like Fel-Pro, Mahle, and Beck/Arnley offer excellent alternatives at lower prices. Verify that the gasket matches your exact vehicle year, make, and model — transmission pan shapes vary even within the same vehicle line. If your vehicle uses a filter, replace it simultaneously; the filter is accessible once the pan is dropped, and reusing an old filter defeats the purpose of fresh fluid. Check whether your vehicle requires a separate filter seal or O-ring. Some vehicles also use a drain plug gasket if the pan has a drain plug — replace this as well. Always confirm the correct transmission fluid type (Dexron, Mercon, ATF+4, etc.) and the total system capacity versus the pan capacity — you’ll only drain what’s in the pan, not the entire system.
Safety Precautions and Vehicle Preparation
Transmission fluid can reach temperatures of 200°F or more during operation, so always allow the vehicle to cool for at least 30–60 minutes before starting. Park on a level surface, engage the parking brake, and chock the rear wheels. If you need to raise the vehicle, use a hydraulic jack and secure it on jack stands — never work under a car supported only by a jack. Wear safety glasses to protect against fluid drips and debris. Have a fire extinguisher rated for flammable liquids nearby, as transmission fluid is combustible. Work in a well-ventilated area to avoid inhaling fluid vapors. Finally, take photos of the pan and bolt layout before removal to ensure correct reinstallation.
Step-by-Step Replacement Procedure: From Drain to Refill
This section walks through the complete replacement process. Follow each step carefully, and don’t rush — a meticulous job now prevents a repeat job later.
Step 1: Draining the Transmission Fluid
Position a large drain pan beneath the transmission pan. If your pan has a drain plug, remove it first to allow the bulk of the fluid to drain — this is cleaner and faster than dropping the pan with fluid inside. If there’s no drain plug, you’ll need to loosen the pan bolts gradually, starting from the rear and working forward, allowing fluid to drip into the pan. Once the fluid flow slows, remove all but two bolts (one at each end), then carefully lower the pan while supporting it with one hand. Tilt the pan to pour remaining fluid into your drain pan. Be prepared for a significant amount of fluid — typically 4–8 quarts depending on your vehicle. Dispose of used transmission fluid at a recycling center or auto parts store; never pour it down drains or onto the ground.
Step 2: Removing the Pan and Old Gasket
With the pan removed, inspect the old gasket to identify the failure mode — this can provide clues about installation issues. Look for signs of over-compression (flattened areas), hardening (brittle, cracked sections), or extrusion. Remove the old gasket using a plastic scraper or razor blade, being careful not to gouge the aluminum or steel sealing surfaces. If the gasket is stuck, apply a penetrating oil and let it sit for a few minutes. Never use a wire brush or abrasive pad on the sealing surfaces, as scratches can create leak paths. After removing the gasket, clean both the pan flange and the transmission case surface thoroughly with brake cleaner or degreaser. Wipe with a lint-free cloth until both surfaces are completely clean and dry. Inspect the pan for dents, warping, or cracks — a damaged pan should be replaced rather than reused.
Step 3: Replacing the Transmission Filter
While the pan is off, replace the transmission filter. The filter is typically held in place by one or two bolts or a retaining clip. Remove the old filter and its O-ring seal. Clean the filter mounting area on the valve body. Install the new filter, ensuring the O-ring is properly seated and lubricated with fresh transmission fluid. Tighten the retaining bolt to the manufacturer’s specification — typically 5–10 ft-lbs. Do not overtighten, as this can distort the filter neck or damage the O-ring. If your vehicle uses a spin-on filter (less common), follow the same procedure as an oil filter replacement.
Step 4: Installing the New Gasket and Reinstalling the Pan
Place the new gasket onto the pan, aligning the bolt holes. Some gaskets have locating tabs or adhesive backing to hold them in place — use these if available. If your gasket doesn’t have adhesive, you can apply a thin layer of petroleum jelly or transmission assembly lube to hold it in position. Do not use RTV sealant unless your vehicle specifically requires it; using both a gasket and RTV can create a gap and cause leaks. Carefully lift the pan into position, aligning the bolt holes with the case. Install all bolts by hand, then tighten them in a crisscross or spiral pattern, starting from the center and working outward. Use a torque wrench to tighten each bolt to the manufacturer’s specification — typically 8–15 ft-lbs. Never exceed the spec, as over-tightening will crush the gasket and cause leaks.
Step 5: Refilling and Checking Fluid Level
Step 5: Details
Lower the vehicle and locate the transmission dipstick or fill plug. Using a funnel and hose, add the specified amount of fresh transmission fluid — typically 4–5 quarts for a pan-only drain. Start the engine and let it idle for 2–3 minutes, then shift through all gears (P, R, N, D, L) pausing 2–3 seconds in each, then return to Park. With the engine running, check the fluid level on the dipstick. Add fluid as needed to reach the “cold” mark. Then drive the vehicle for 10–15 minutes to bring the transmission to operating temperature, and recheck the level — it should now be at the “hot” mark. Never overfill, as excess fluid can cause foaming and transmission damage. Check for leaks around the pan perimeter after the test drive.
Torque Specifications and Bolt Patterns: Getting It Right
Proper torque is the single most critical factor in preventing gasket leaks. Too little torque and the gasket won’t seal; too much and you’ll crush or extrude the gasket, causing immediate or premature failure.
Why Torque Specs Matter for Gasket Longevity
Transmission pan bolts are typically small (6mm or 8mm) and thread into aluminum or cast iron. The torque specification is calculated to provide the optimal clamping force for the gasket material while staying within the safe limits of the bolt and the threaded hole. Exceeding the spec can strip threads in the case — a costly repair that requires helicoil installation.
The transmission pan gasket is the sealing component that sits between your vehicle’s transmission oil pan and the transmission case, preventing pressurized transmission fluid from escaping and keeping contaminants out of the system. Made from materials like cork, rubber, silicone, or composite laminates, this seemingly simple part plays a critical role in maintaining the hydraulic pressure that allows your automatic or manual transmission to shift smoothly. When this gasket fails — whether due to age, heat cycling, or overtightened bolts — you’ll typically notice reddish fluid pooling under your car, a burning smell, or erratic shifting behavior.
This guide covers everything you need to know about transmission pan gasket replacement: the exact tools required, step-by-step removal and installation procedures, torque specifications, and the critical difference between OEM and aftermarket gasket materials. You’ll also learn how to properly clean the sealing surfaces, when to replace the transmission filter alongside the gasket, and how to correctly refill and check fluid levels. Whether you’re driving a Honda, Ford, Toyota, or GM vehicle, the fundamental process remains the same — though we’ll highlight vehicle-specific torque specs and common pitfalls for each major brand.
Unlike generic repair guides that gloss over the messy details, this article includes real-world data on gasket failure rates, honest comparisons between cork, rubber, and silicone gaskets, and the exact cost breakdown you can expect from a DIY job versus a shop. We’ll also cover what happens when you skip the gasket replacement and simply re-torque the pan bolts — a common shortcut that almost always leads to repeat leaks. By the end, you’ll have the confidence to tackle this job in your driveway with basic hand tools, saving yourself $150–$400 in labor costs while ensuring your transmission stays properly sealed for years to come.
What Is a Transmission Pan Gasket and Why Does It Fail?
A transmission pan gasket is a flat sealing component that sits between the transmission pan and the main transmission case. It prevents transmission fluid from escaping the pan, which collects and cools the fluid as it circulates through your gearbox. Think of the pan as a reservoir and the gasket as the lid seal — without it, you get a transmission fluid leak that can starve your transmission of lubrication and cause serious internal damage.
The Role of the Gasket in Your Transmission System
The gasket serves two primary functions: it creates a fluid-tight seal under both static and dynamic pressure conditions, and it prevents dirt, water, and debris from entering the transmission fluid. The transmission pan itself is typically stamped steel or cast aluminum, and the gasket must accommodate minor surface irregularities between the pan flange and the transmission case. A properly functioning gasket maintains consistent clamping force across the entire bolt pattern, ensuring that fluid pressure — which can exceed 100 psi during operation — doesn’t force fluid past the seal. Also, the gasket acts as a vibration dampener, reducing the transmission of noise and harmonics from the gearbox to the pan.
Common Failure Modes: Hardening, Cracking, and Over-Compression
Transmission pan gaskets fail through several distinct mechanisms. Hardening occurs as the rubber or cork material loses its plasticizers over time due to heat exposure — the gasket becomes brittle and loses its ability to conform to surface irregularities. Cracking typically follows hardening, especially around bolt holes where stress concentrations are highest. Over-compression happens when pan bolts are overtightened, squeezing the gasket beyond its elastic limit; once compressed, cork and rubber gaskets do not rebound, creating a permanent gap that leaks. Other failure modes include chemical degradation from incompatible transmission fluids, and thermal cycling fatigue where repeated expansion and contraction causes the gasket to separate from the pan or case surface. A less common but serious failure is gasket extrusion — where high fluid pressure forces the gasket material out from between the mating surfaces.
How a Pan Gasket Differs from a Filter Seal and RTV Sealant
It’s important to distinguish between three sealing components that are often confused. The transmission pan gasket seals the large rectangular or irregular opening between the pan and the case. The filter seal (or filter neck O-ring) seals the pickup tube where it enters the valve body — this is a small circular seal that prevents unfiltered fluid from bypassing the filter. RTV silicone sealant is a liquid gasket material that cures in place, often used instead of a pre-formed gasket on some vehicles. While RTV can work well, it requires meticulous surface preparation and proper cure time; a pre-formed gasket is generally easier for DIYers to install correctly. Some vehicles use both — a rubber gasket plus a small bead of RTV at the corners where the pan meets the case. Understanding which sealing method your vehicle requires is critical to a successful replacement.
Gasket Material Comparison: Cork, Rubber, Silicone, and Composite
Choosing the right gasket material is one of the most important decisions in this repair. The four main options — cork, rubber/nitrile, silicone, and composite — each have distinct advantages and drawbacks that affect sealing performance, durability, and ease of installation.
Cork Gaskets: Traditional, Cheap, but Prone to Over-Compression
Cork gaskets have been used for decades and remain popular due to their low cost and availability. They are made from compressed cork granules bound with a resin or rubber binder. Cork gaskets conform well to slightly irregular surfaces and are forgiving during installation. However, they have significant downsides: cork is highly susceptible to over-compression — if you tighten the bolts too much, the cork crushes permanently and loses its sealing ability. Cork also dries out and shrinks over time, especially in hot climates, leading to leaks within 2–3 years. They absorb transmission fluid, which can cause swelling and distortion. For these reasons, cork gaskets are best suited for low-pressure applications and vehicles where the pan is rarely removed. If you choose cork, use a torque wrench and follow specifications precisely — never guess.
Rubber and Nitrile Gaskets: The Balanced Choice for Most Vehicles
Rubber gaskets, particularly those made from nitrile (Buna-N) or neoprene, offer a significant upgrade over cork. These materials provide excellent resistance to transmission fluid, heat, and ozone. Nitrile gaskets maintain their flexibility over a wide temperature range (-40°F to 250°F) and resist hardening better than cork. They are also more forgiving of slight over-torque, though they can still be damaged by excessive force. Rubber gaskets typically feature a molded profile with raised sealing beads that concentrate clamping pressure along the sealing line. Many OEM gaskets are made from rubber or a rubber-composite blend. The main drawback is cost — rubber gaskets are more expensive than cork, though still inexpensive compared to the labor of a repeat job. For most DIYers, a high-quality rubber gasket is the recommended choice for reliability and longevity.
Silicone Gaskets: High-Temperature Performance with Trade-offs
Silicone gaskets offer the best heat resistance of any pre-formed gasket material, withstanding continuous temperatures up to 400°F. They remain flexible at extreme cold temperatures as well. Silicone has excellent memory — it returns to its original shape after compression, making it resistant to over-compression damage. However, silicone gaskets have notable drawbacks: they are more expensive, and they can be prone to “squeeze-out” under high clamping force, where the material extrudes from between the flanges. Silicone also has a higher coefficient of thermal expansion than metal, which can cause sealing issues in applications with significant temperature swings. Some silicone gaskets require a specific surface finish on the pan and case to seal properly. They are an excellent choice for high-performance or racing applications where extreme heat is a factor, but for daily drivers, rubber is often the better all-around option.
Composite Gaskets: The Modern OEM Standard
Composite gaskets combine multiple materials — typically a metal or fiber core with rubber or silicone sealing layers on both faces. This construction provides the rigidity of metal with the conformability of rubber. Composite gaskets are the most common OEM choice on modern vehicles because they offer superior dimensional stability, resist both compression and extrusion, and provide a reliable seal over the life of the transmission. They are also reusable in some cases, though most manufacturers recommend replacement. The main downside is cost — composite gaskets are
the most expensive option, often costing two to three times more than rubber. However, given that a failed gasket can lead to transmission damage costing thousands, the extra investment in a quality composite gasket is often justified. For most vehicles, checking the OEM specification is the safest approach — if the factory used a composite gasket, replacing it with the same material ensures proper sealing characteristics and bolt torque behavior.
Tools, Parts, and Preparation: What You Need Before You Start
Before you begin the replacement, gather all necessary tools and parts. Having everything on hand prevents mid-job trips to the auto parts store and reduces the risk of contamination or mistakes.
Complete Tool List for the Job
You’ll need a socket set with metric and SAE sockets (typically 8mm, 10mm, 12mm, or 13mm for pan bolts), a ratchet with extensions, a torque wrench capable of reading in inch-pounds (most transmission pan bolts require 8–15 ft-lbs, which is 96–180 in-lbs), a drain pan capable of holding 5–8 quarts of fluid, safety glasses, nitrile gloves, a scraper or razor blade for old gasket removal, brake cleaner or degreaser, shop towels, and a jack with jack stands to safely elevate the vehicle. For vehicles with crossmembers or exhaust components blocking pan access, you may need additional extensions, swivel sockets, or a breaker bar. A transmission fluid pump or funnel with a long hose is essential for refilling. Finally, have a repair manual or access to online specifications for your specific vehicle’s torque specs and fluid type.
Choosing the Right Replacement Gasket and Filter
When selecting a replacement gasket, prioritize quality over price. OEM gaskets are always a safe choice, but reputable aftermarket brands like Fel-Pro, Mahle, and Beck/Arnley offer excellent alternatives at lower prices. Verify that the gasket matches your exact vehicle year, make, and model — transmission pan shapes vary even within the same vehicle line. If your vehicle uses a filter, replace it simultaneously; the filter is accessible once the pan is dropped, and reusing an old filter defeats the purpose of fresh fluid. Check whether your vehicle requires a separate filter seal or O-ring. Some vehicles also use a drain plug gasket if the pan has a drain plug — replace this as well. Always confirm the correct transmission fluid type (Dexron, Mercon, ATF+4, etc.) and the total system capacity versus the pan capacity — you’ll only drain what’s in the pan, not the entire system.
Safety Precautions and Vehicle Preparation
Transmission fluid can reach temperatures of 200°F or more during operation, so always allow the vehicle to cool for at least 30–60 minutes before starting. Park on a level surface, engage the parking brake, and chock the rear wheels. If you need to raise the vehicle, use a hydraulic jack and secure it on jack stands — never work under a car supported only by a jack. Wear safety glasses to protect against fluid drips and debris. Have a fire extinguisher rated for flammable liquids nearby, as transmission fluid is combustible. Work in a well-ventilated area to avoid inhaling fluid vapors. Finally, take photos of the pan and bolt layout before removal to ensure correct reinstallation.
Step-by-Step Replacement Procedure: From Drain to Refill
This section walks through the complete replacement process. Follow each step carefully, and don’t rush — a meticulous job now prevents a repeat job later.
Step 1: Draining the Transmission Fluid
Position a large drain pan beneath the transmission pan. If your pan has a drain plug, remove it first to allow the bulk of the fluid to drain — this is cleaner and faster than dropping the pan with fluid inside. If there’s no drain plug, you’ll need to loosen the pan bolts gradually, starting from the rear and working forward, allowing fluid to drip into the pan. Once the fluid flow slows, remove all but two bolts (one at each end), then carefully lower the pan while supporting it with one hand. Tilt the pan to pour remaining fluid into your drain pan. Be prepared for a significant amount of fluid — typically 4–8 quarts depending on your vehicle. Dispose of used transmission fluid at a recycling center or auto parts store; never pour it down drains or onto the ground.
Step 2: Removing the Pan and Old Gasket
With the pan removed, inspect the old gasket to identify the failure mode — this can provide clues about installation issues. Look for signs of over-compression (flattened areas), hardening (brittle, cracked sections), or extrusion. Remove the old gasket using a plastic scraper or razor blade, being careful not to gouge the aluminum or steel sealing surfaces. If the gasket is stuck, apply a penetrating oil and let it sit for a few minutes. Never use a wire brush or abrasive pad on the sealing surfaces, as scratches can create leak paths. After removing the gasket, clean both the pan flange and the transmission case surface thoroughly with brake cleaner or degreaser. Wipe with a lint-free cloth until both surfaces are completely clean and dry. Inspect the pan for dents, warping, or cracks — a damaged pan should be replaced rather than reused.
Step 3: Replacing the Transmission Filter
While the pan is off, replace the transmission filter. The filter is typically held in place by one or two bolts or a retaining clip. Remove the old filter and its O-ring seal. Clean the filter mounting area on the valve body. Install the new filter, ensuring the O-ring is properly seated and lubricated with fresh transmission fluid. Tighten the retaining bolt to the manufacturer’s specification — typically 5–10 ft-lbs. Do not overtighten, as this can distort the filter neck or damage the O-ring. If your vehicle uses a spin-on filter (less common), follow the same procedure as an oil filter replacement.
Step 4: Installing the New Gasket and Reinstalling the Pan
Place the new gasket onto the pan, aligning the bolt holes. Some gaskets have locating tabs or adhesive backing to hold them in place — use these if available. If your gasket doesn’t have adhesive, you can apply a thin layer of petroleum jelly or transmission assembly lube to hold it in position. Do not use RTV sealant unless your vehicle specifically requires it; using both a gasket and RTV can create a gap and cause leaks. Carefully lift the pan into position, aligning the bolt holes with the case. Install all bolts by hand, then tighten them in a crisscross or spiral pattern, starting from the center and working outward. Use a torque wrench to tighten each bolt to the manufacturer’s specification — typically 8–15 ft-lbs. Never exceed the spec, as over-tightening will crush the gasket and cause leaks.
Step 5: Refilling and Checking Fluid Level
Step 5: Details
Lower the vehicle and locate the transmission dipstick or fill plug. Using a funnel and hose, add the specified amount of fresh transmission fluid — typically 4–5 quarts for a pan-only drain. Start the engine and let it idle for 2–3 minutes, then shift through all gears (P, R, N, D, L) pausing 2–3 seconds in each, then return to Park. With the engine running, check the fluid level on the dipstick. Add fluid as needed to reach the “cold” mark. Then drive the vehicle for 10–15 minutes to bring the transmission to operating temperature, and recheck the level — it should now be at the “hot” mark. Never overfill, as excess fluid can cause foaming and transmission damage. Check for leaks around the pan perimeter after the test drive.
Torque Specifications and Bolt Patterns: Getting It Right
Proper torque is the single most critical factor in preventing gasket leaks. Too little torque and the gasket won’t seal; too much and you’ll crush or extrude the gasket, causing immediate or premature failure.
Why Torque Specs Matter for Gasket Longevity
Transmission pan bolts are typically small (6mm or 8mm) and thread into aluminum or cast iron. The torque specification is calculated to provide the optimal clamping force for the gasket material while staying within the safe limits of the bolt and the threaded hole. Exceeding the spec can strip threads in the case — a costly repair that requires helicoil installation.
You might also like: rebuild vs replace engine, best brake upgrade for track, brake cooling guide for track
Related: driveshaft balancing
Related: transmission cooler installation
Related: shifter linkage adjustment